I was thinking of doing the same. I believe the fitting needs a 1-5/8” hole, and the hole on the fermentor is a little smaller. #7 stopper. I’m just going off of this sizing chart for stoppers. https://www.sciencecompany.com/Black-Rubber-Stoppers-Size-Chart.aspxDoes anyone know the inside diameter of the stopper hole? I'm thinking about putting a 1.5" TC weldless fitting up there but not sure if it'll fit.
You are using an out of date browser. It may not display this or other websites correctly.
You should upgrade or use an alternative browser.
You should upgrade or use an alternative browser.
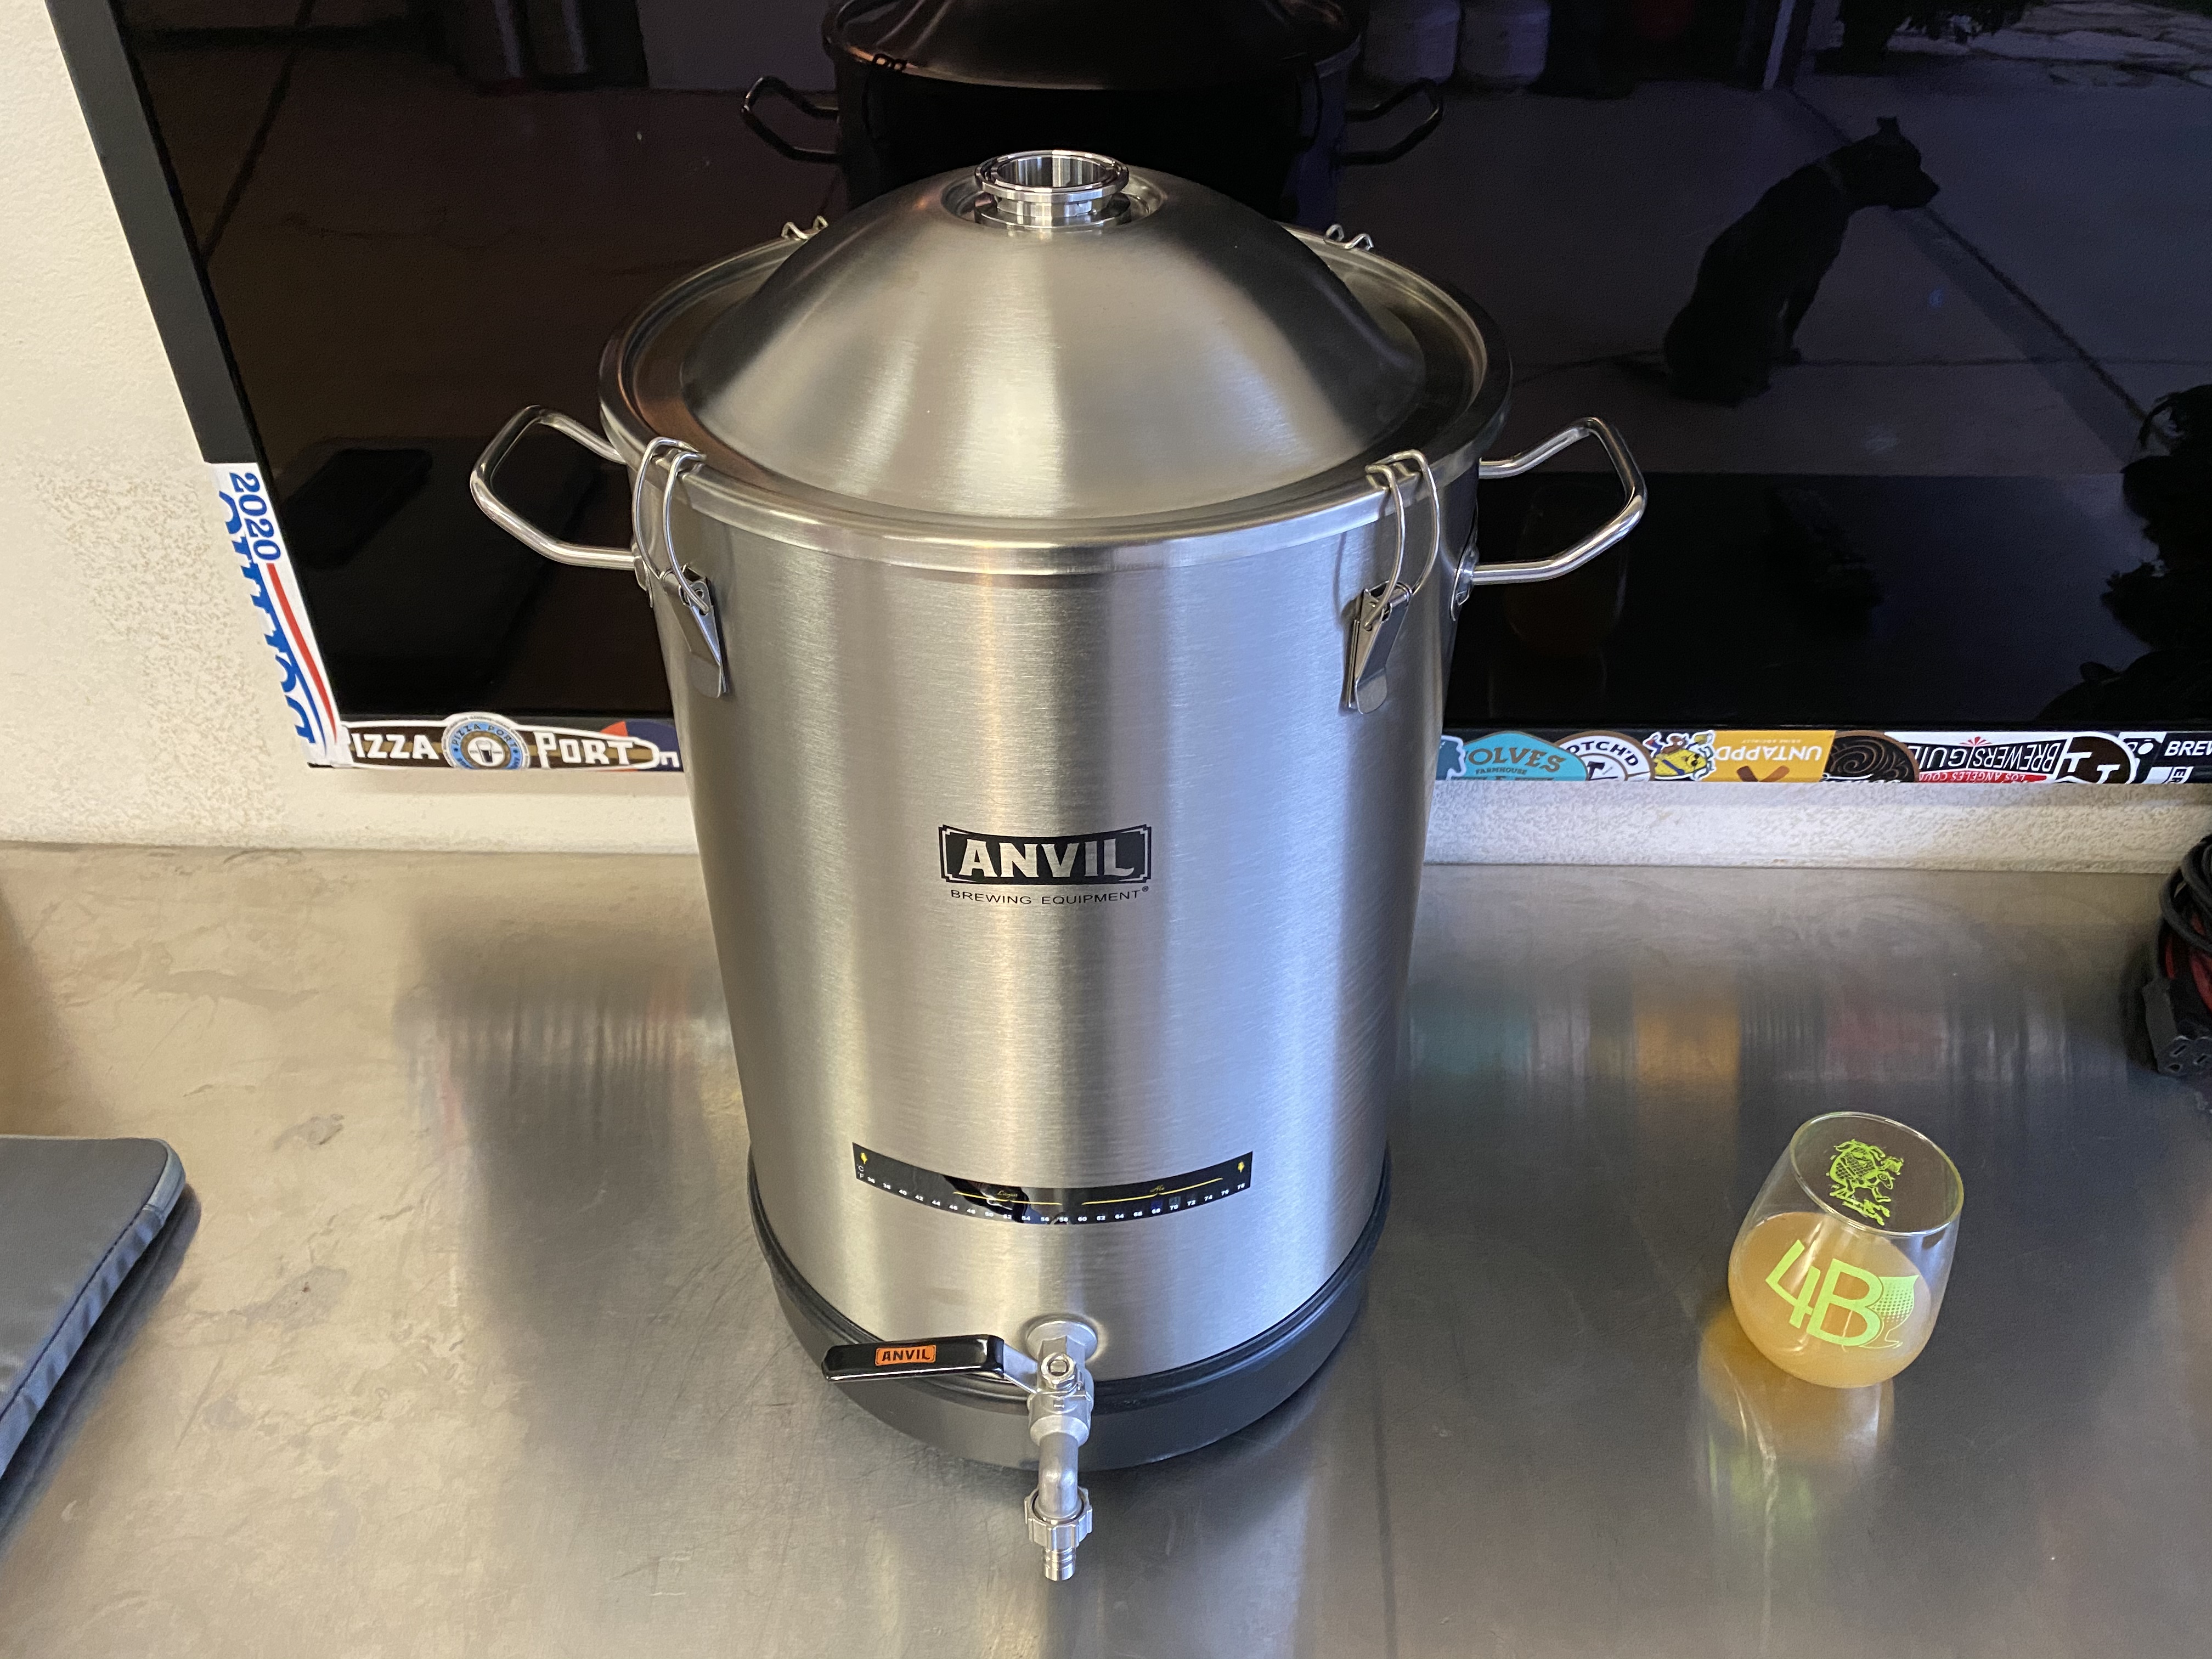
New Anvil Bucket Fermentors
- Thread starter ZmannR2
- Start date

Help Support Homebrew Talk:
This site may earn a commission from merchant affiliate
links, including eBay, Amazon, and others.
Does anyone know the inside diameter of the stopper hole? I'm thinking about putting a 1.5" TC weldless fitting up there but not sure if it'll fit.
I believe it’s a #8 stopper
I’d like to get one of these but I’d want to enlarge the hole in the lid to fit a #10 stopper so i could fit my cooling coil in it.
has anyone else done this? It should be pretty easy with a step bit right? I’ve used a stepbit one other time to add a hole to my electric kettle... but should be similar process increase lid hole size with this, right?
has anyone else done this? It should be pretty easy with a step bit right? I’ve used a stepbit one other time to add a hole to my electric kettle... but should be similar process increase lid hole size with this, right?
i use the same stoppers on my Anvil buckets as i do with my standard 5 gallon glass carboys - either a size 7, 7.5, or a universal stopper.I believe it’s a #8 stopper
^I just did this with both of my chapman fermenters. If the hole is too small just use a bastard file to open it up until it fits perfectly.
I wonder if i could enlarge the hole a rotary file?
like this:
Ginode 6mm Rotary File Burr Cutter, 6Pcs Tungsten Steel Rotary File Cutter, 1/4" Shank Engraving Grinding Drill Bit, For Metal Plastic Wood Grinding https://www.amazon.com/dp/B07G9X46Q4/ref=cm_sw_r_cp_api_i_fZEkEb399W63D
I’m going to be boring out my lid to accommodate a 1.625” weldless 1.5” TC with a Dremel this afternoon. I’ll post the results. I don’t think it will be too difficult—the stainless isn’t very thick.I’d like to get one of these but I’d want to enlarge the hole in the lid to fit a #10 stopper so i could fit my cooling coil in it.
has anyone else done this? It should be pretty easy with a step bit right? I’ve used a stepbit one other time to add a hole to my electric kettle... but should be similar process increase lid hole size with this, right?


$76.92 ($2,179.04 / Ounce)
Brewing accessories 1.5" Tri Clamp to Ball Lock Post Liquid Gas Homebrew Kegging Fermentation Parts Brewer Hardware SUS304 Brewing accessories(Gas Hose Barb)
chuhanhandianzishangwu


$33.99 ($17.00 / Count)
$41.99 ($21.00 / Count)
2 Pack 1 Gallon Large Fermentation Jars with 3 Airlocks and 2 SCREW Lids(100% Airtight Heavy Duty Lid w Silicone) - Wide Mouth Glass Jars w Scale Mark - Pickle Jars for Sauerkraut, Sourdough Starter
Qianfenie Direct

$7.79 ($7.79 / Count)
Craft A Brew - LalBrew Voss™ - Kveik Ale Yeast - For Craft Lagers - Ingredients for Home Brewing - Beer Making Supplies - (1 Pack)
Craft a Brew


$10.99 ($31.16 / Ounce)
Hornindal Kveik Yeast for Homebrewing - Mead, Cider, Wine, Beer - 10g Packet - Saccharomyces Cerevisiae - Sold by Shadowhive.com
Shadowhive


$53.24
1pc Hose Barb/MFL 1.5" Tri Clamp to Ball Lock Post Liquid Gas Homebrew Kegging Fermentation Parts Brewer Hardware SUS304(Liquid Hose Barb)
yunchengshiyanhuqucuichendianzishangwuyouxiangongsi


$28.98
Five Star - 6022b_ - Star San - 32 Ounce - High Foaming Sanitizer
Great Fermentations of Indiana


$479.00
$559.00
EdgeStar KC1000SS Craft Brew Kegerator for 1/6 Barrel and Cornelius Kegs
Amazon.com


$53.24
1pc Hose Barb/MFL 1.5" Tri Clamp to Ball Lock Post Liquid Gas Homebrew Kegging Fermentation Parts Brewer Hardware SUS304(Gas MFL)
Guangshui Weilu You Trading Co., Ltd


$176.97
1pc Commercial Keg Manifold 2" Tri Clamp,Ball Lock Tapping Head,Pressure Gauge/Adjustable PRV for Kegging,Fermentation Control
hanhanbaihuoxiaoshoudian
![Craft A Brew - Safale S-04 Dry Yeast - Fermentis - English Ale Dry Yeast - For English and American Ales and Hard Apple Ciders - Ingredients for Home Brewing - Beer Making Supplies - [1 Pack]](https://m.media-amazon.com/images/I/41fVGNh6JfL._SL500_.jpg)
$6.95 ($17.38 / Ounce)
$7.47 ($18.68 / Ounce)
Craft A Brew - Safale S-04 Dry Yeast - Fermentis - English Ale Dry Yeast - For English and American Ales and Hard Apple Ciders - Ingredients for Home Brewing - Beer Making Supplies - [1 Pack]
Hobby Homebrew


$719.00
$799.00
EdgeStar KC2000TWIN Full Size Dual Tap Kegerator & Draft Beer Dispenser - Black
Amazon.com


$44.99
$49.95
Craft A Brew - Mead Making Kit – Reusable Make Your Own Mead Kit – Yields 1 Gallon of Mead
Craft a Brew

$159.99 ($26.66 / Count)
3M High Flow Series System BREW120-MS, 5616001, For Brewed Coffee and Hot Tea, Valve-in-Head Design
SpaceCityProviders


$20.94
$29.99
The Brew Your Own Big Book of Clone Recipes: Featuring 300 Homebrew Recipes from Your Favorite Breweries
Amazon.com

$22.00 ($623.23 / Ounce)
AMZLMPKNTW Ball Lock Sample Faucet 30cm Reinforced Silicone Hose Secondary Fermentation Homebrew Kegging joyful
无为中南商贸有限公司


$58.16
HUIZHUGS Brewing Equipment Keg Ball Lock Faucet 30cm Reinforced Silicone Hose Secondary Fermentation Homebrew Kegging Brewing Equipment
xiangshuizhenzhanglingfengshop


I’d like to get one of these but I’d want to enlarge the hole in the lid to fit a #10 stopper so i could fit my cooling coil in it.
has anyone else done this? It should be pretty easy with a step bit right? I’ve used a stepbit one other time to add a hole to my electric kettle... but should be similar process increase lid hole size with this, right?
The step bit is usually the way to go when enlarging a hole in something, however in this case I think I’d opt for a small, quality hole saw. Your problem with enlarging an existing hole in this fermenter lid will be holding it tight enough to make sure your bit stays true and does not catch, while not holding it so tightly that you deform the area you are clamped too-all the while not pushing so hard as to deform the lid as you drill. It’ll be a delicate dance for sure.
The hole saw idea should allow just lightly holding the lid and not putting excessive force into the drilling so as to not deform the lid.
That’s probably why the others seem to be filing or using Dremel style rotary tools to grind the opening bigger. It doesn’t present the same risks or challenges as drilling does with this thin lid.
Here’s
Edit: the weldless TC fitting wasn’t tall enough to accept a Tri-Clamp, so I added a 1.5” TC gasket to the top side and reassembled. Clears fine now, and adds another seal to the top side.
Edit 2: Spike Brewing CIP ball works great. Stoked I made this mod.
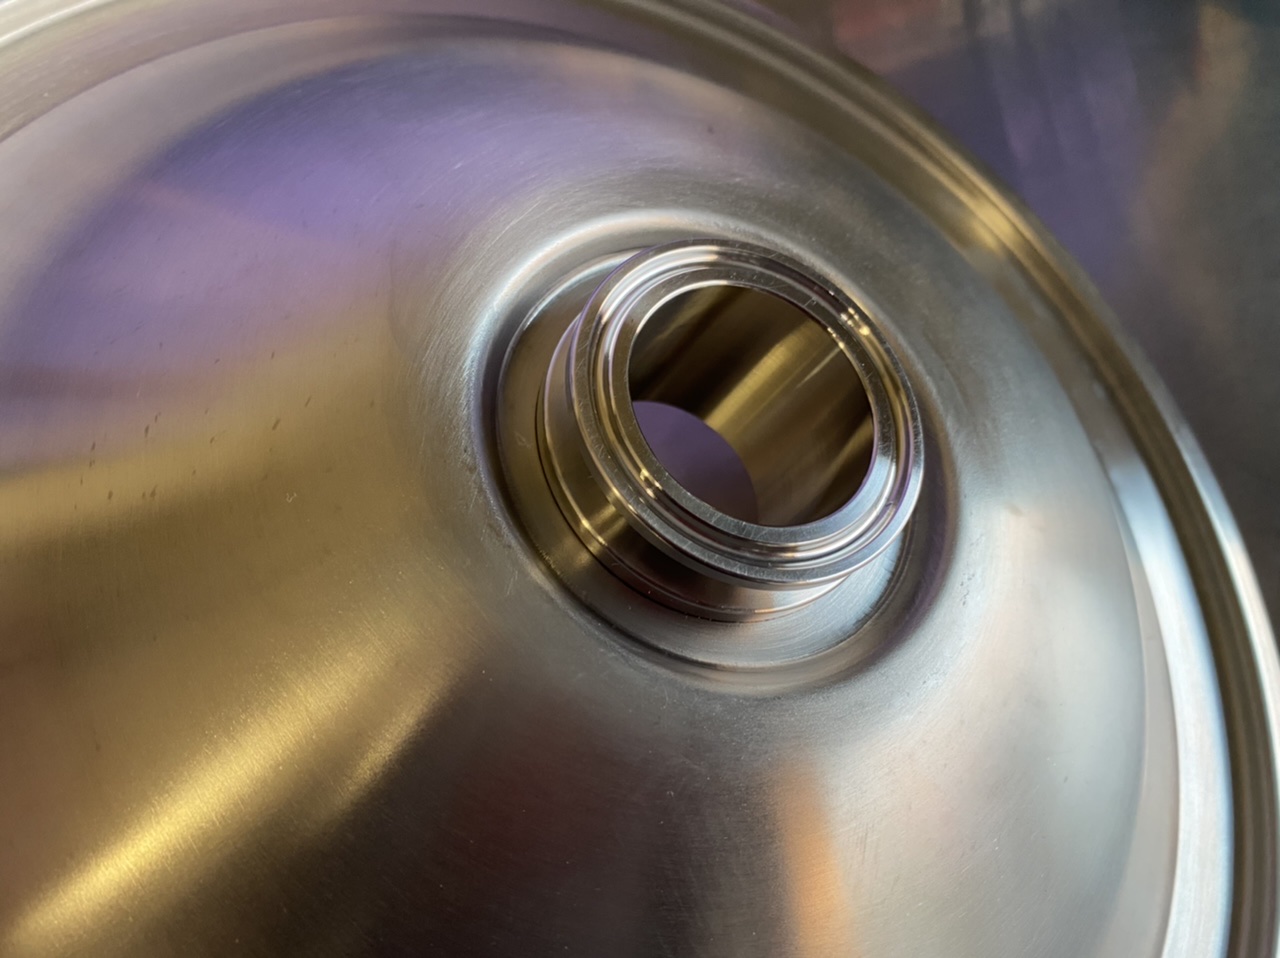
Here’s the TC weldless fitting on the Anvil lid. Hole was a bit difficult to cut evenly with the Dremel, but the gasket seals fine. Took 30 mins or so. Easy to take apart to sanitize and clean. Cool thing is the TC fitting now works with my Spike conical accessories (CIP ball, blow off, etc).I’m going to be boring out my lid to accommodate a 1.625” weldless 1.5” TC with a Dremel this afternoon. I’ll post the results. I don’t think it will be too difficult—the stainless isn’t very thick.
Edit: the weldless TC fitting wasn’t tall enough to accept a Tri-Clamp, so I added a 1.5” TC gasket to the top side and reassembled. Clears fine now, and adds another seal to the top side.
Edit 2: Spike Brewing CIP ball works great. Stoked I made this mod.
Attachments


Last edited:
Here’s
Here’s the TC weldless fitting on the Anvil lid. Hole was a bit difficult to cut evenly with the Dremel, but the gasket seals fine. Took 30 mins or so. Easy to take apart to sanitize and clean. Cool thing is the TC fitting now works with my Spike conical accessories (CIP ball, blow off, etc).
Edit: the weldless TC fitting wasn’t tall enough to accept a Tri-Clamp, so I added a 1.5” TC gasket to the top side and reassembled. Clears fine now, and adds another seal to the top side.
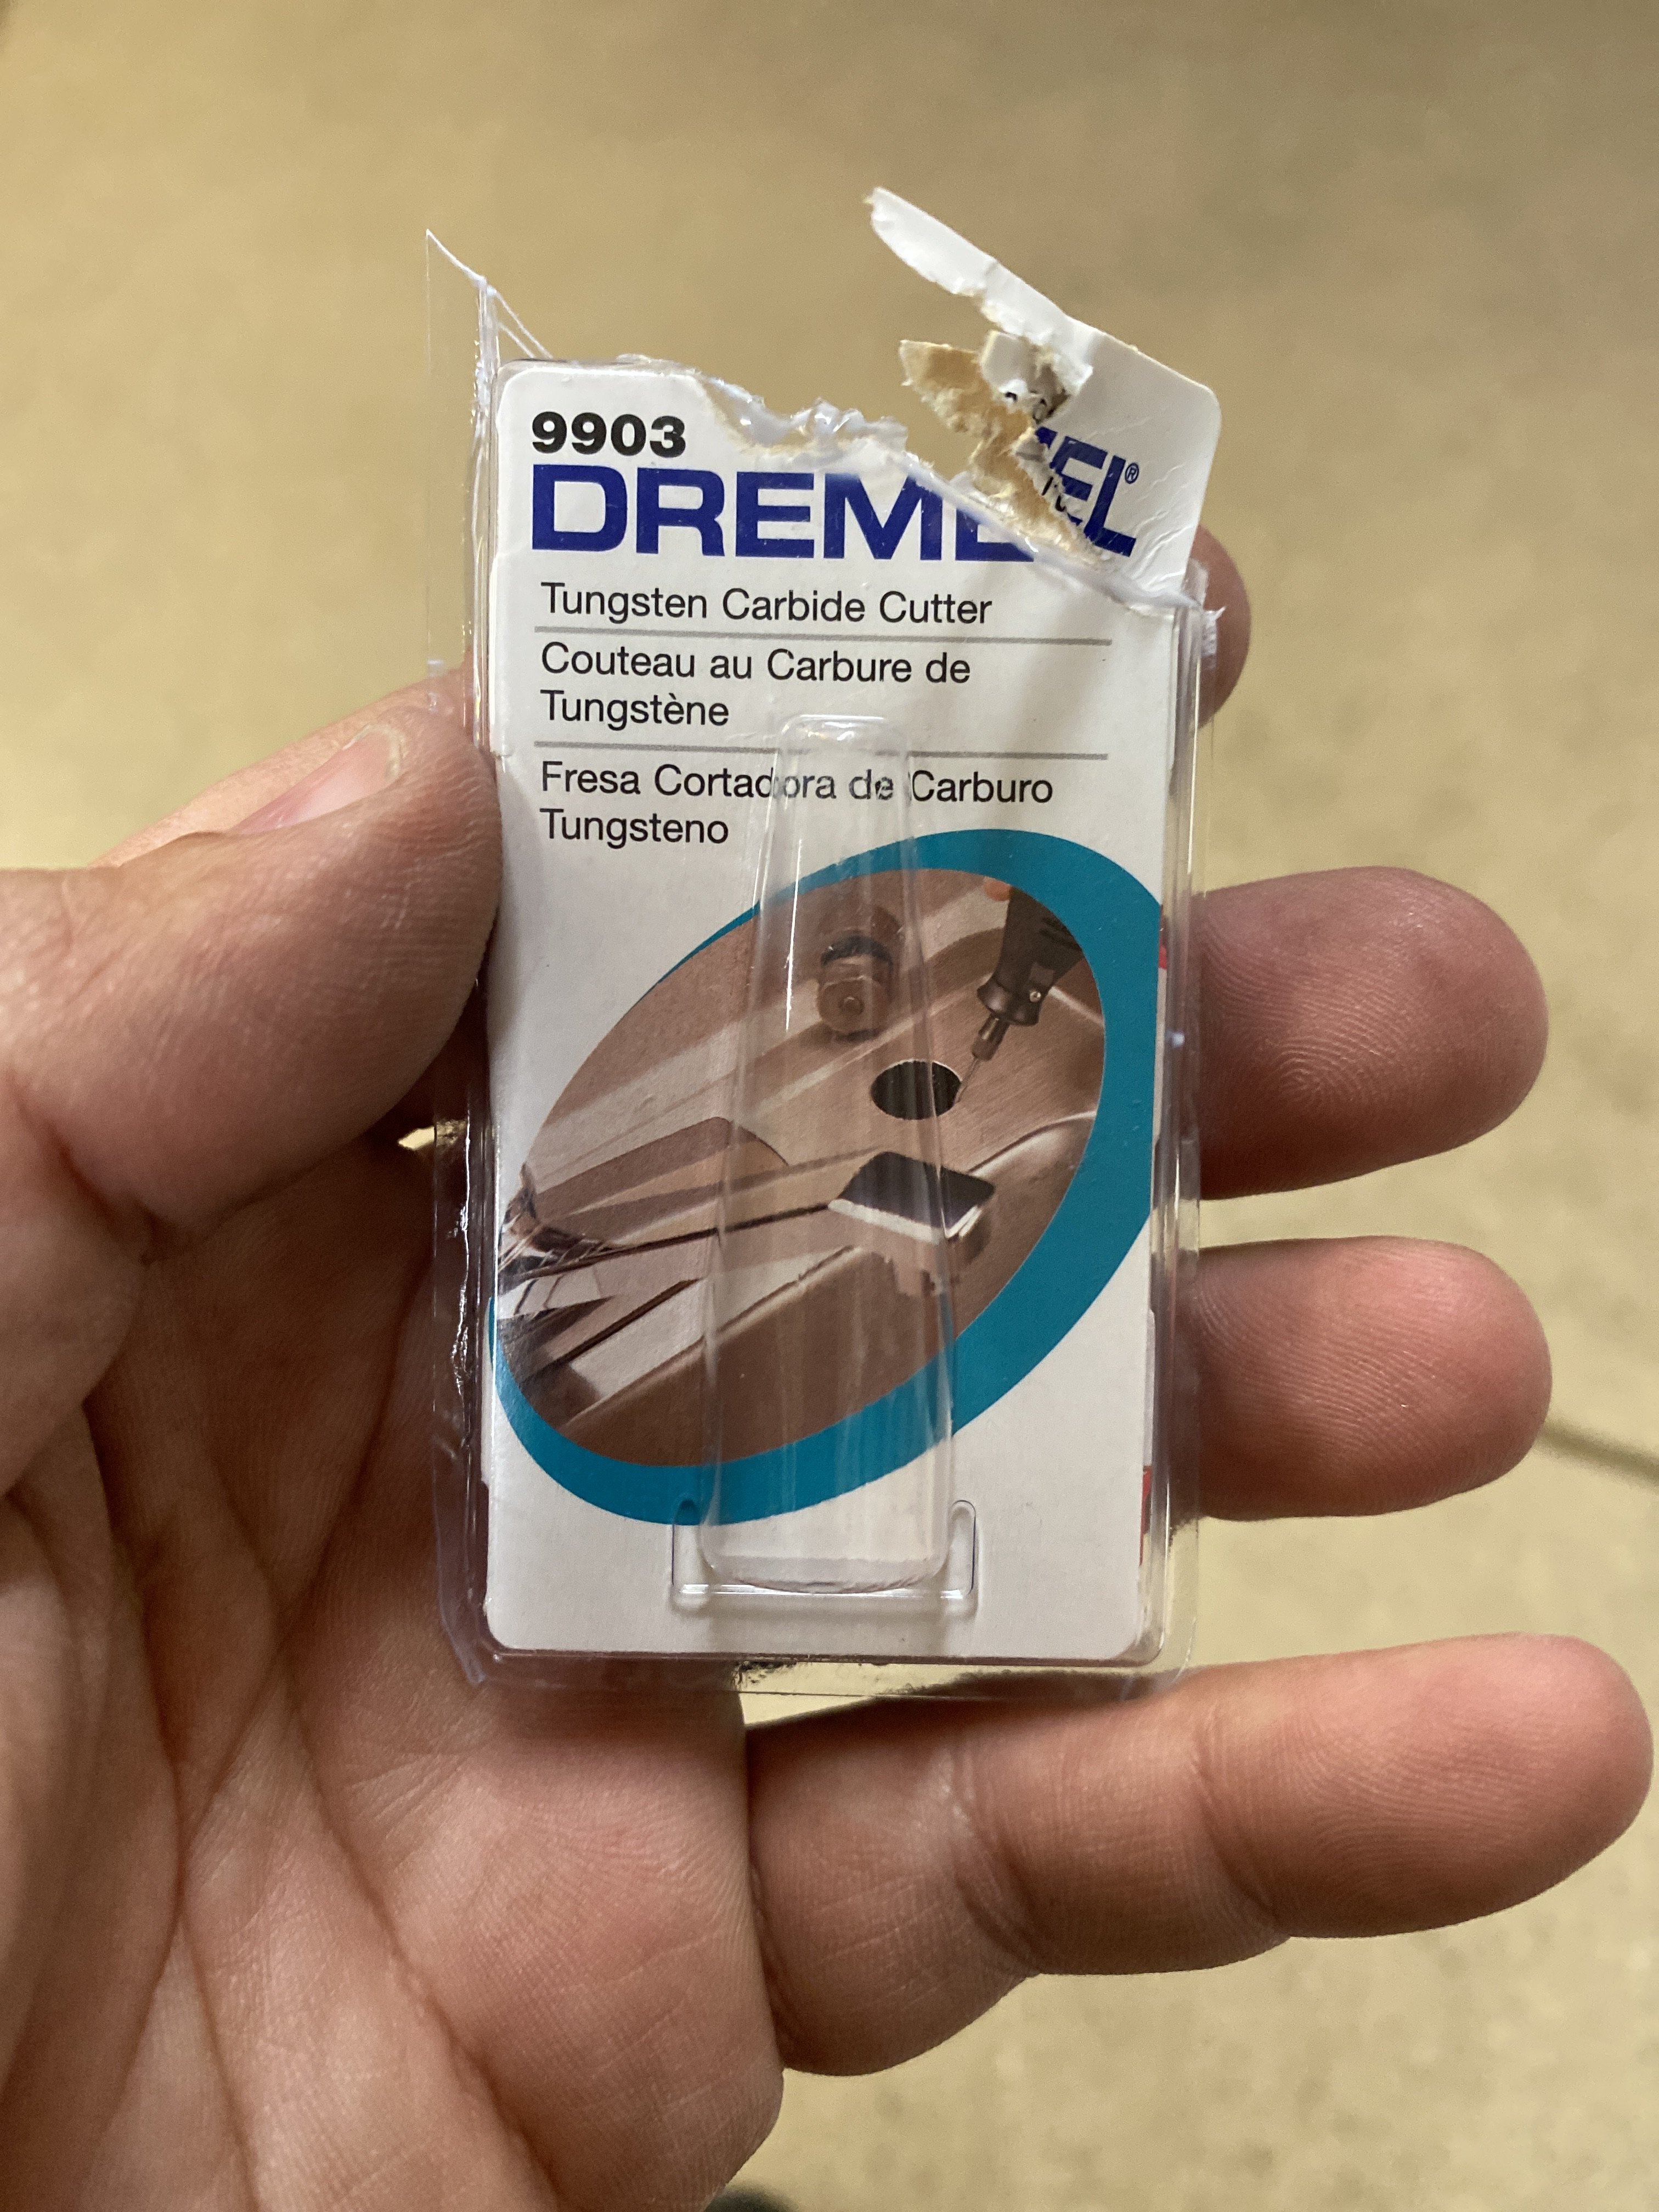
what kind of dremel tip did you use?
9903 - Tungsten Carbide Cutter.what kind of dremel tip did you use?
Attachments
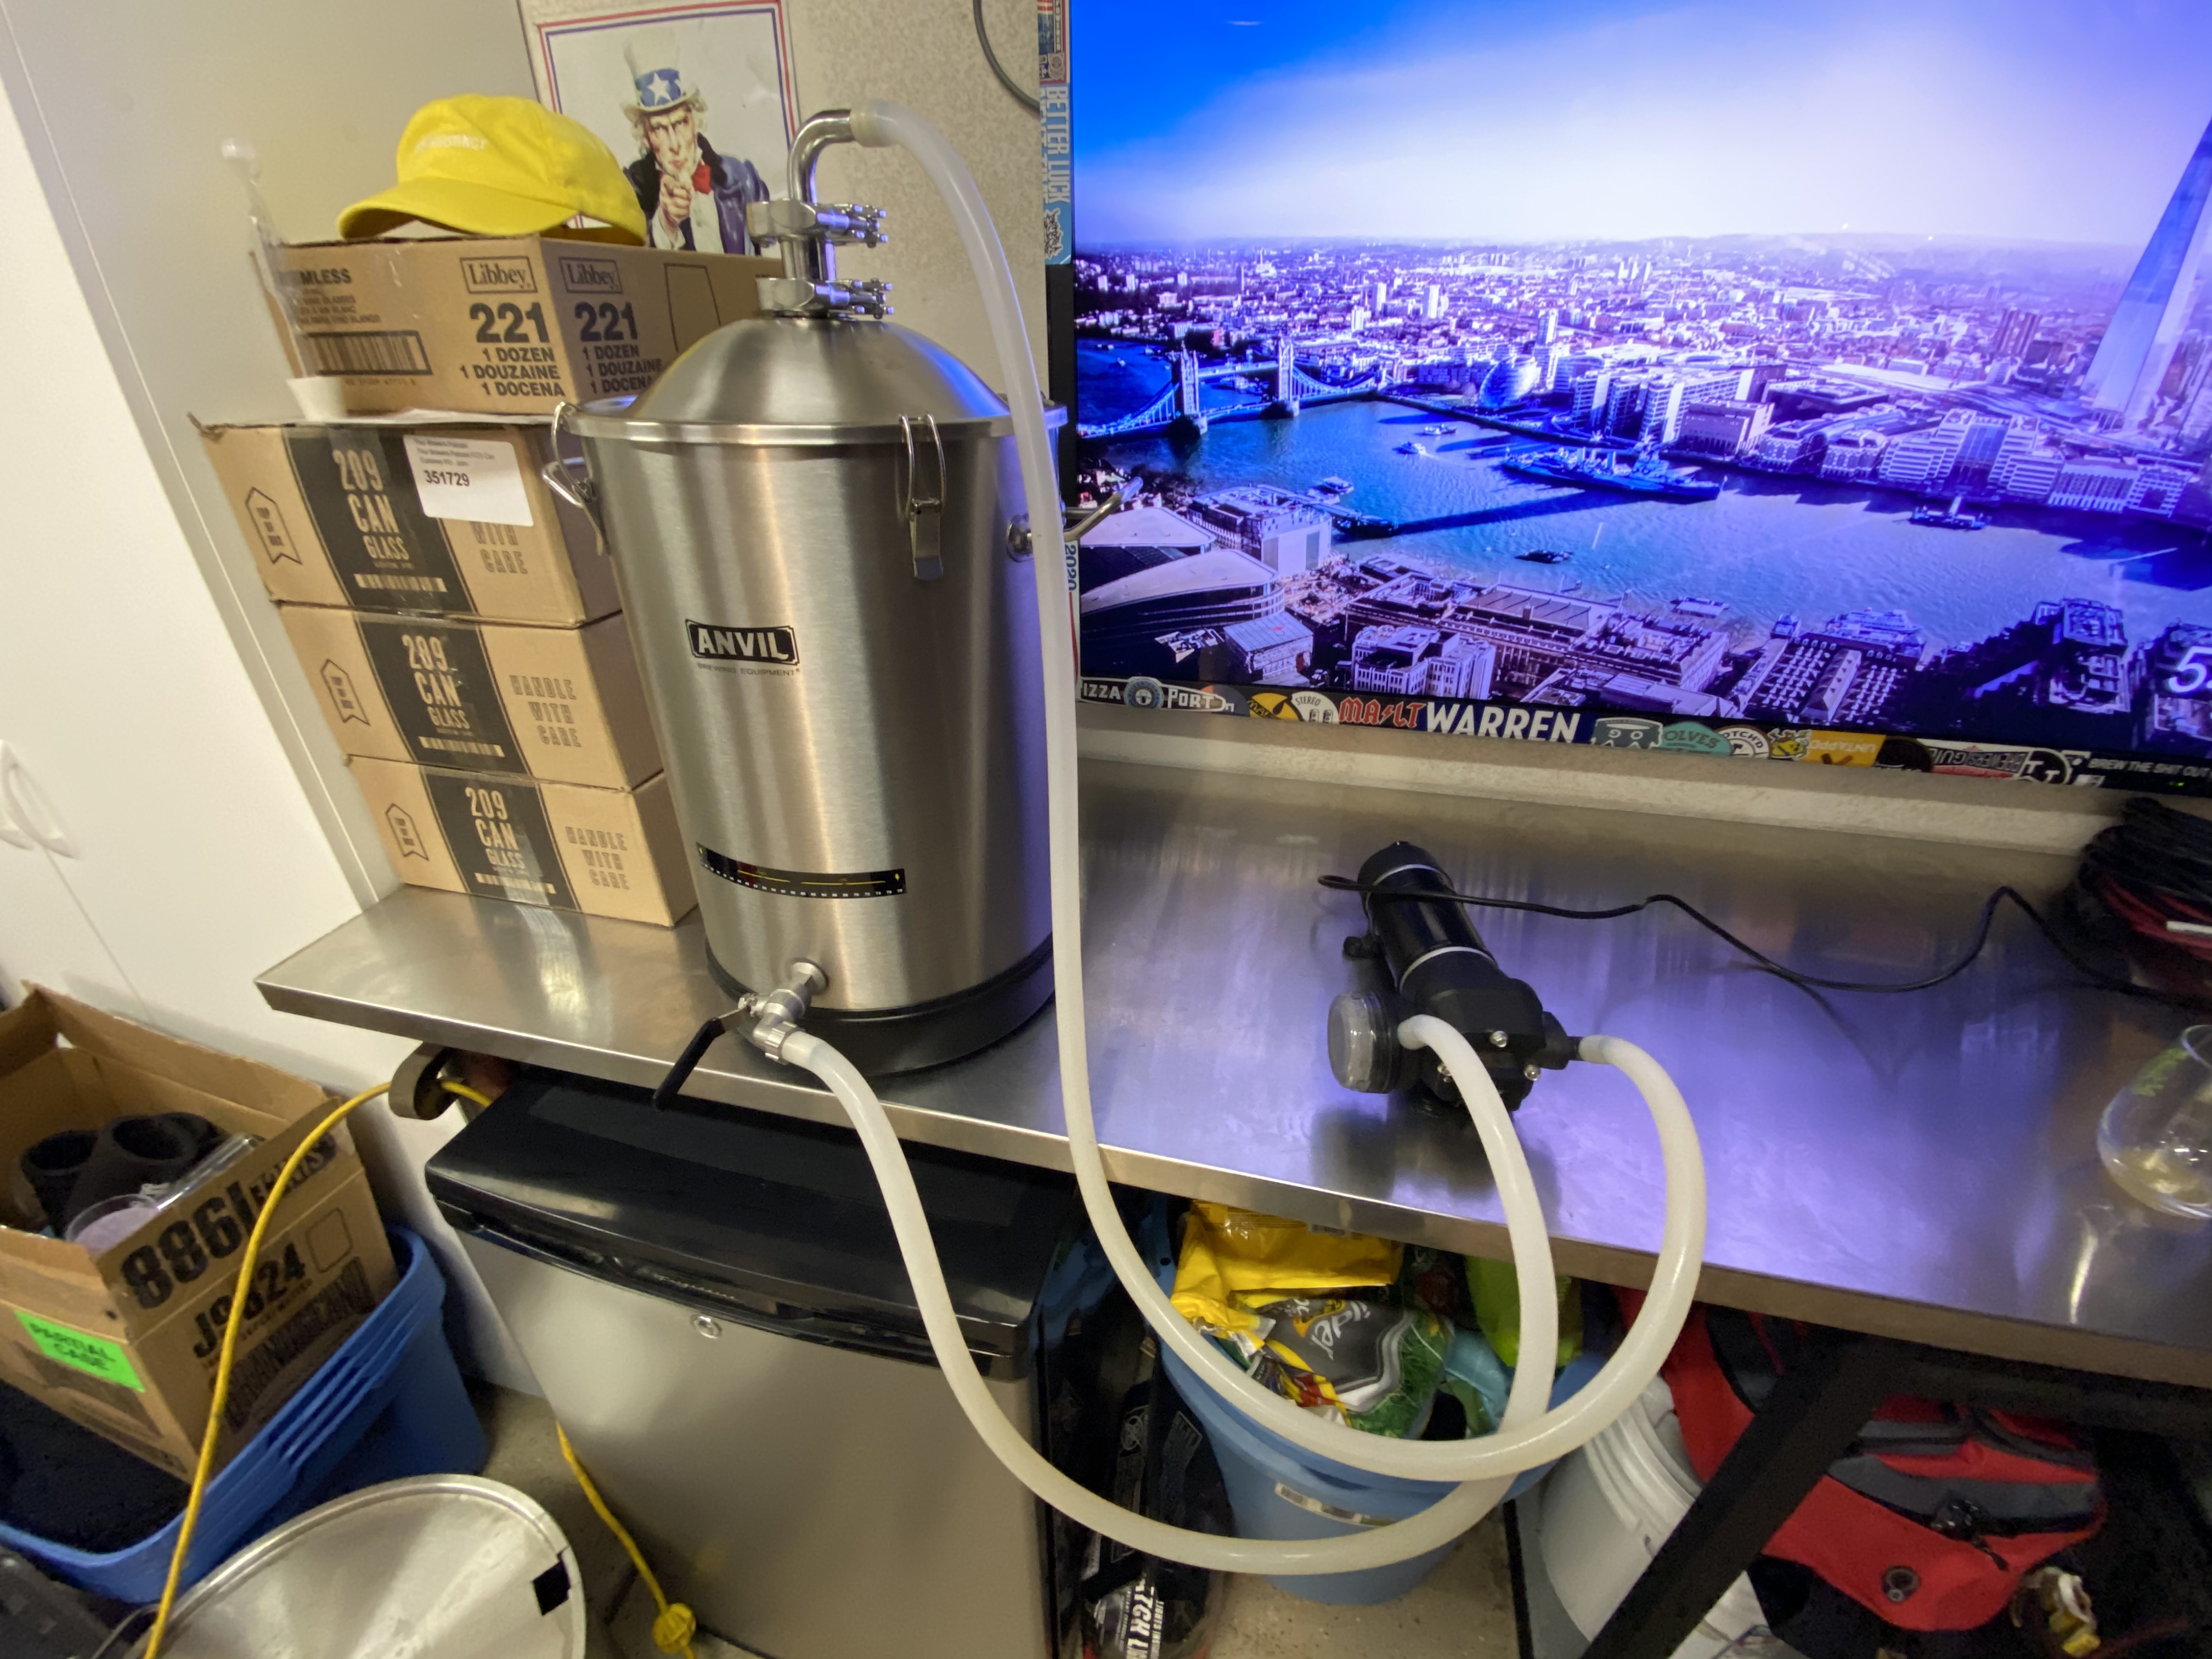
Completed my first closed transfer with my Anvil. Everything went pretty well. Got stuck about half way through, I think I got a little over-zealous with turning the dip tube and got a little too much trub that clogged it up. I quickly blew the valve out with co2 and it started flowing again. The gas post I drilled into my lid needs some work. When pressure was building due to the clog it was definitely leaking around the seal.
A few questions for those who do closed transfers regularly:
When purging your keg (I filled with star-san then pushed it all out with c02) How much pressure are you doing that with? and do you leave the tank on the whole time or do you shut off and on as needed? and if different than above, how much pressure would you say you have in the keg when it's time to transfer beer?
Using the method above, is it still necessary to purge the headspace in the keg after filling? I don't really see why it would be but I'm no expert.
View attachment 582432
Why don’t more people do closed transfers like this? This is the first way that popped into my head on how to do it. Why bother with doing co2 pressure transfers?

Ended up using a stepbit. I also had the dremel bit and went back and fourth about it. Ended up feeling like I’d have a higher chance of getting a perfectly round hole (good enough to seal) with the stepbit. Got the stepbit on amazon for $30. Dremel certainly would have been a cheaper route.
For anyone else that goes this route: Standard stepbit technique applies. Go slow, using cutting oil or WD40, don’t let the bit get hot. Had the lid on the ground and kept it still with the sides of me knees as i drilled. Took me 30 mins or so (took a few min breaks). I really didn’t have to apply any pressure. The stepbit is like 5 lbs by itself. It drilled a pretty clean hole. It would cut up the stopper if you were removing it often. I think I’ll just keep my stopper in.
View attachment 663863
Ended up using a stepbit. I also had the dremel bit and went back and fourth about it. Ended up feeling like I’d have a higher chance of getting a perfectly round hole (good enough to seal) with the stepbit. Got the stepbit on amazon for $30. Dremel certainly would have been a cheaper route.
For anyone else that goes this route: Standard stepbit technique applies. Go slow, using cutting oil or WD40, don’t let the bit get hot. Had the lid on the ground and kept it still with the sides of me knees as i drilled. Took me 30 mins or so (took a few min breaks). I really didn’t have to apply any pressure. The stepbit is like 5 lbs by itself. It drilled a pretty clean hole. It would cut up the stopper if you were removing it often. I think I’ll just keep my stopper in.
you should be able to ease the edges of that hole so they’re not so sharp with some light filing, a little sandpaper on a dowel, etc.
I’d hate to have sharp edges like that in something-I’d cut myself for sure cleaning it, etc.
you should be able to ease the edges of that hole so they’re not so sharp with some light filing, a little sandpaper on a dowel, etc.
I’d hate to have sharp edges like that in something-I’d cut myself for sure cleaning it, etc.
yeah, maybe I’ll see if i have a dremel attachment for that Otherwise I have a metal file.
Here’s
Here’s the TC weldless fitting on the Anvil lid. Hole was a bit difficult to cut evenly with the Dremel, but the gasket seals fine. Took 30 mins or so. Easy to take apart to sanitize and clean. Cool thing is the TC fitting now works with my Spike conical accessories (CIP ball, blow off, etc).
Edit: the weldless TC fitting wasn’t tall enough to accept a Tri-Clamp, so I added a 1.5” TC gasket to the top side and reassembled. Clears fine now, and adds another seal to the top side.
Edit 2: Spike Brewing CIP ball works great. Stoked I made this mod.
Ordered a T and thermowell so I can it’s temp control with my fermentation chamber. Coming together!


ihavenonickname
Well-Known Member
My closed transfer takes annoyingly long... about an hour. Anybody able to do a transfer like this in the 5-10 minutes I think it should take?
Gas from tank is at 3-4 psi. Valve is wide open. no clogs, no dry hops. to me it seems like the gas qd to water valve is the tightest diameter, its using beer line, but that should be plenty. Increasing the pressure at the top doesn't make a difference.
https://imgur.com/a/II6TIuB
Gas from tank is at 3-4 psi. Valve is wide open. no clogs, no dry hops. to me it seems like the gas qd to water valve is the tightest diameter, its using beer line, but that should be plenty. Increasing the pressure at the top doesn't make a difference.
https://imgur.com/a/II6TIuB
treacheroustexan
Well-Known Member
Hey I got drunk and ordered one of these last night. Should be here Friday! Finally replacing glass carboys before I hurt myself.
that's effed up, AKA not normal. i use gravity to move beer from bucket to keg (with a gas/CO2 return from gas-out to top of fermenter, see here) and it takes me about 15 minutes to transfer 5 gallons. not a huge drop between bucket and fermenter either.My closed transfer takes annoyingly long... about an hour. Anybody able to do a transfer like this in the 5-10 minutes I think it should take?
Gas from tank is at 3-4 psi. Valve is wide open. no clogs, no dry hops. to me it seems like the gas qd to water valve is the tightest diameter, its using beer line, but that should be plenty. Increasing the pressure at the top doesn't make a difference.
https://imgur.com/a/II6TIuB
a thought: debug your system using water. fill bucket with water and start by ensuring that you can get flow out of the valve using just gravity. then use CO2 to get same flow. then add the hose to the spigot and make sure you can get through that. add the keg and make sure you can push water in through the liquid out post. then finally seal up and see if you can push at the same speed with the blow-off jar. this process should allow you to figure out where the bottle-neck is.
^ addendum: after you put some water in the bucket, dunk the lid in star san, strap it on and put your 3-4 PSI of pressure on. check to see if you have any leaks along the rim (perhaps spray some star san to really get some along the bucket/gasket interface). if you have a few gallons of star san sitting around, fill the bucket with that for this test then slosh it around, to fully coat the insides then add CO2.
i seem to remember folks stating that the bucket can't take more than a few PSI, so some of those 3-4 PSIs might be leaking out the top... thus reducing how much is available to push the liquid out through the spigot.
i seem to remember folks stating that the bucket can't take more than a few PSI, so some of those 3-4 PSIs might be leaking out the top... thus reducing how much is available to push the liquid out through the spigot.
Last edited:
Here’s
Here’s the TC weldless fitting on the Anvil lid. Hole was a bit difficult to cut evenly with the Dremel, but the gasket seals fine. Took 30 mins or so. Easy to take apart to sanitize and clean. Cool thing is the TC fitting now works with my Spike conical accessories (CIP ball, blow off, etc).
Edit: the weldless TC fitting wasn’t tall enough to accept a Tri-Clamp, so I added a 1.5” TC gasket to the top side and reassembled. Clears fine now, and adds another seal to the top side.
Edit 2: Spike Brewing CIP ball works great. Stoked I made this mod.
Looks great...which bulkhead did you use? Would this one work: https://www.brewhardware.com/ProductDetails.asp?ProductCode=TC15WLF&CartID=1
rmr9
Well-Known Member
Has anyone used gelatin finings with one of these? I’m considering getting one but I’d like to be able to cold crash and use gelatin. Will this cause issues with the rotating racking arm?
i don't use gelatin, but i don't see how this could cause a problem... perhaps if the pickup tube is pointing straight up, the gelatin might fall into the tube and clog it? if this could be a problem, simple solution would be to not point the pickup tube straight up when adding gelatinHas anyone used gelatin finings with one of these? I’m considering getting one but I’d like to be able to cold crash and use gelatin. Will this cause issues with the rotating racking arm?

i honestly can't see how the gelatin could affect the racking arm/pickup itself.
do you have a specific concern?
Last edited:
rmr9
Well-Known Member
Haha yeah I bet pointing the tube straight up would be a problem! I meant more along the lines of increasing the thickness of trub maybe thereby preventing it from being rotated...I guess it’s time for full disclosure: I’ve never used gelatin before but I’d like to in the future. I’m moving towards upgrading my system and and investigating several options for stainless fermentors and this one seems great for the money.
McKnuckle
Well-Known Member
Gelatin does not make the trub behave like jelly from a jar. Its effect on trub thickness, as it were, is not perceptible.
If I were fining with gelatin in my Anvil, I'd twist the pickup tube maybe 45 degrees from straight down before racking off the settled trub. It should work well. Just be patient and let the gelatin really do its job over 2-3 days.
If I were fining with gelatin in my Anvil, I'd twist the pickup tube maybe 45 degrees from straight down before racking off the settled trub. It should work well. Just be patient and let the gelatin really do its job over 2-3 days.
You don’t need to Transfer with co2. Thats the whole point of a bucket fermenter with a spigot. Just use gravity: spigot to liquid post in and gas out list to blow off tube. Keep bucket fermenter elevated above keg and tie golden.My closed transfer takes annoyingly long... about an hour. Anybody able to do a transfer like this in the 5-10 minutes I think it should take?
Gas from tank is at 3-4 psi. Valve is wide open. no clogs, no dry hops. to me it seems like the gas qd to water valve is the tightest diameter, its using beer line, but that should be plenty. Increasing the pressure at the top doesn't make a difference.
https://imgur.com/a/II6TIuB
Has anyone used gelatin finings with one of these? I’m considering getting one but I’d like to be able to cold crash and use gelatin. Will this cause issues with the rotating racking arm?
gelatin finings can be used with it like they can be with Any other fermenter. It has a rotating racking arm so you can transfer off the trub.
did anyone ever figure out by how much the volume markings are off on the 7.5 gal version of this bucket? Seems to be off by about 1/2 gallon.
Some of the first production ones were off yes, not exactly sure how much. Since Anvil recognized it they corrected it apparently.
They must have sent me an old one. DarnSome of the first production ones were off yes, not exactly sure how much. Since Anvil recognized it they corrected it apparently.
Right from Anvil or from another vendor? Recently?They must have sent me an old one. Darn
Right from Anvil January 2020. It was missing the o-ring when they mailed it to me. Maybe it was "reconditioned".Right from Anvil or from another vendor? Recently?
Brewed 3rd beer in it today and again came up about 0.5 gal short, which got me thinking. I keep forgetting to check it. But I checked to make sure my kettle was correct when I added the water pre-boil.... and it went from 5.5 gal postboil in kettle to 5 gal in fermenter after transfer.
... and it went from 5.5 gal postboil in kettle to 5 gal in fermenter after transfer.
Was this still hot? You’ll get something like 4% heat shrinkage between a boil and room temp. Also how much trub and wort did you leave in the kettle? I’ve never seen a kettle without any losses to trub, etc. Half a gallon is pretty reasonable actually for any system.
just trying to eliminate any other possible source of loss in your process, they’re usually the more likely culprit than mismarked commercially marked equipment.
I checked kettle volume after cooling and after taking immersion cooker out. I left very little trub... basically just a coating of solids on the bottom. I’ll double check the fermenter when I’m done fermenting.
WBB
Grab me another beer please!
did anyone ever figure out by how much the volume markings are off on the 7.5 gal version of this bucket? Seems to be off by about 1/2 gallon.
Mine is .25g off. So when the marking reads 5g, I have 5.25g. No biggie, still a great little fermenter.
ihavenonickname
Well-Known Member
i wonder if they were trying to account for fermenter dead space volume with those marking?
Yeah, I’m happy with fermenter otherwise. I was just trying to figure out exactly how much it was off by. 0.5 gal was an estimate by me... all these years I’ve always taken final volume in fermenter; so i only had quickly glanced at my kettle volume after cooling. 0.25 gal could be about right.Mine is .25g off. So when the marking reads 5g, I have 5.25g. No biggie, still a great little fermenter.
Yeah, I’m happy with fermenter otherwise. I was just trying to figure out exactly how much it was off by. 0.5 gal was an estimate by me... all these years I’ve always taken final volume in fermenter; so i only had quickly glanced at my kettle volume after cooling. 0.25 gal could be about right.
Markings on mine are short 0.25 gal at 5 gal. Verified today after kegging last batch.
What's the actual capacity on one of these? I know that my 7.9 gallon Speidel is actually closer to, like, 10 gallons at the top, which is helpful for slightly larger batches or ones that need a lot of head space.
The markings in mine stop at 6.5 gal with some unmarked space above. Without measuring a gallon’s worth of markings from below and transferring them up I would estimate 7.25 or more likely 7.5 right to the top of the lip of the fermenter. So right as sold, 7.5 gallons capacity but intended for ~5 gallon batches.
Similar threads
- Replies
- 2
- Views
- 257
