Need Ideas For an HLT Stirrer.

Homebrew Talk - Beer, Wine, Mead, & Cider Brewing Discussion Forum

Help Support Homebrew Talk - Beer, Wine, Mead, & Cider Brewing Discussion Forum:

This site may earn a commission from merchant affiliate links, including eBay, Amazon, and others.

slayer021175666

Well-Known Member
Joined
Sep 24, 2020
Messages
561
Reaction score
254
I just got into electric brewing and I notice I have to stir my HLT all the time to keep temps consistent from the bottom to the top of the kettle. I would like a cheap and easy solution to stir it constantly. I have seen electric motor stirrers, circulating with pumps (I DO NOT want any pumps right now) and even guys who say an aquarium air pump with the outlet tube dropped to the bottom of the HLT. The aquarium pump sounds cheap and easy but, how well will it really work? I would consider a buy it and install it option too as long as its cheap and easy. Don't want to spend much more than $30 bucks on this. Any help is appreciated. Thanks.
 
I just got into electric brewing and I notice I have to stir my HLT all the time to keep temps consistent from the bottom to the top of the kettle. I would like a cheap and easy solution to stir it constantly. I have seen electric motor stirrers, circulating with pumps (I DO NOT want any pumps right now) and even guys who say an aquarium air pump with the outlet tube dropped to the bottom of the HLT. The aquarium pump sounds cheap and easy but, how well will it really work? I would consider a buy it and install it option too as long as its cheap and easy. Don't want to spend much more than $30 bucks on this. Any help is appreciated. Thanks.
 
Just looked it up and someone left a review for brewing purposes. They’ve used it in 170 degree water successfully.

I’d considered the same for my HLT, but given that the temp probe in mine is at the bottom, where water is being drawn from, and sparse water temp isn’t nearly as critical to be exact as mash temps, I questioned the need.

Close enough seems good enough for me in HLT temps.
 
@Jtvann Are you using a HERMS in your HLT? If so, you need to verify the Temp is the almost the same in all the water volume (no a big variation between the bottom and top volume) to have a proper heat transfer to the wort or water inside the HERMS coil
 
Nope, not using herms. I use rims. Only use the HLT for heating fly sparge water.

Good point when considering herms though.
 
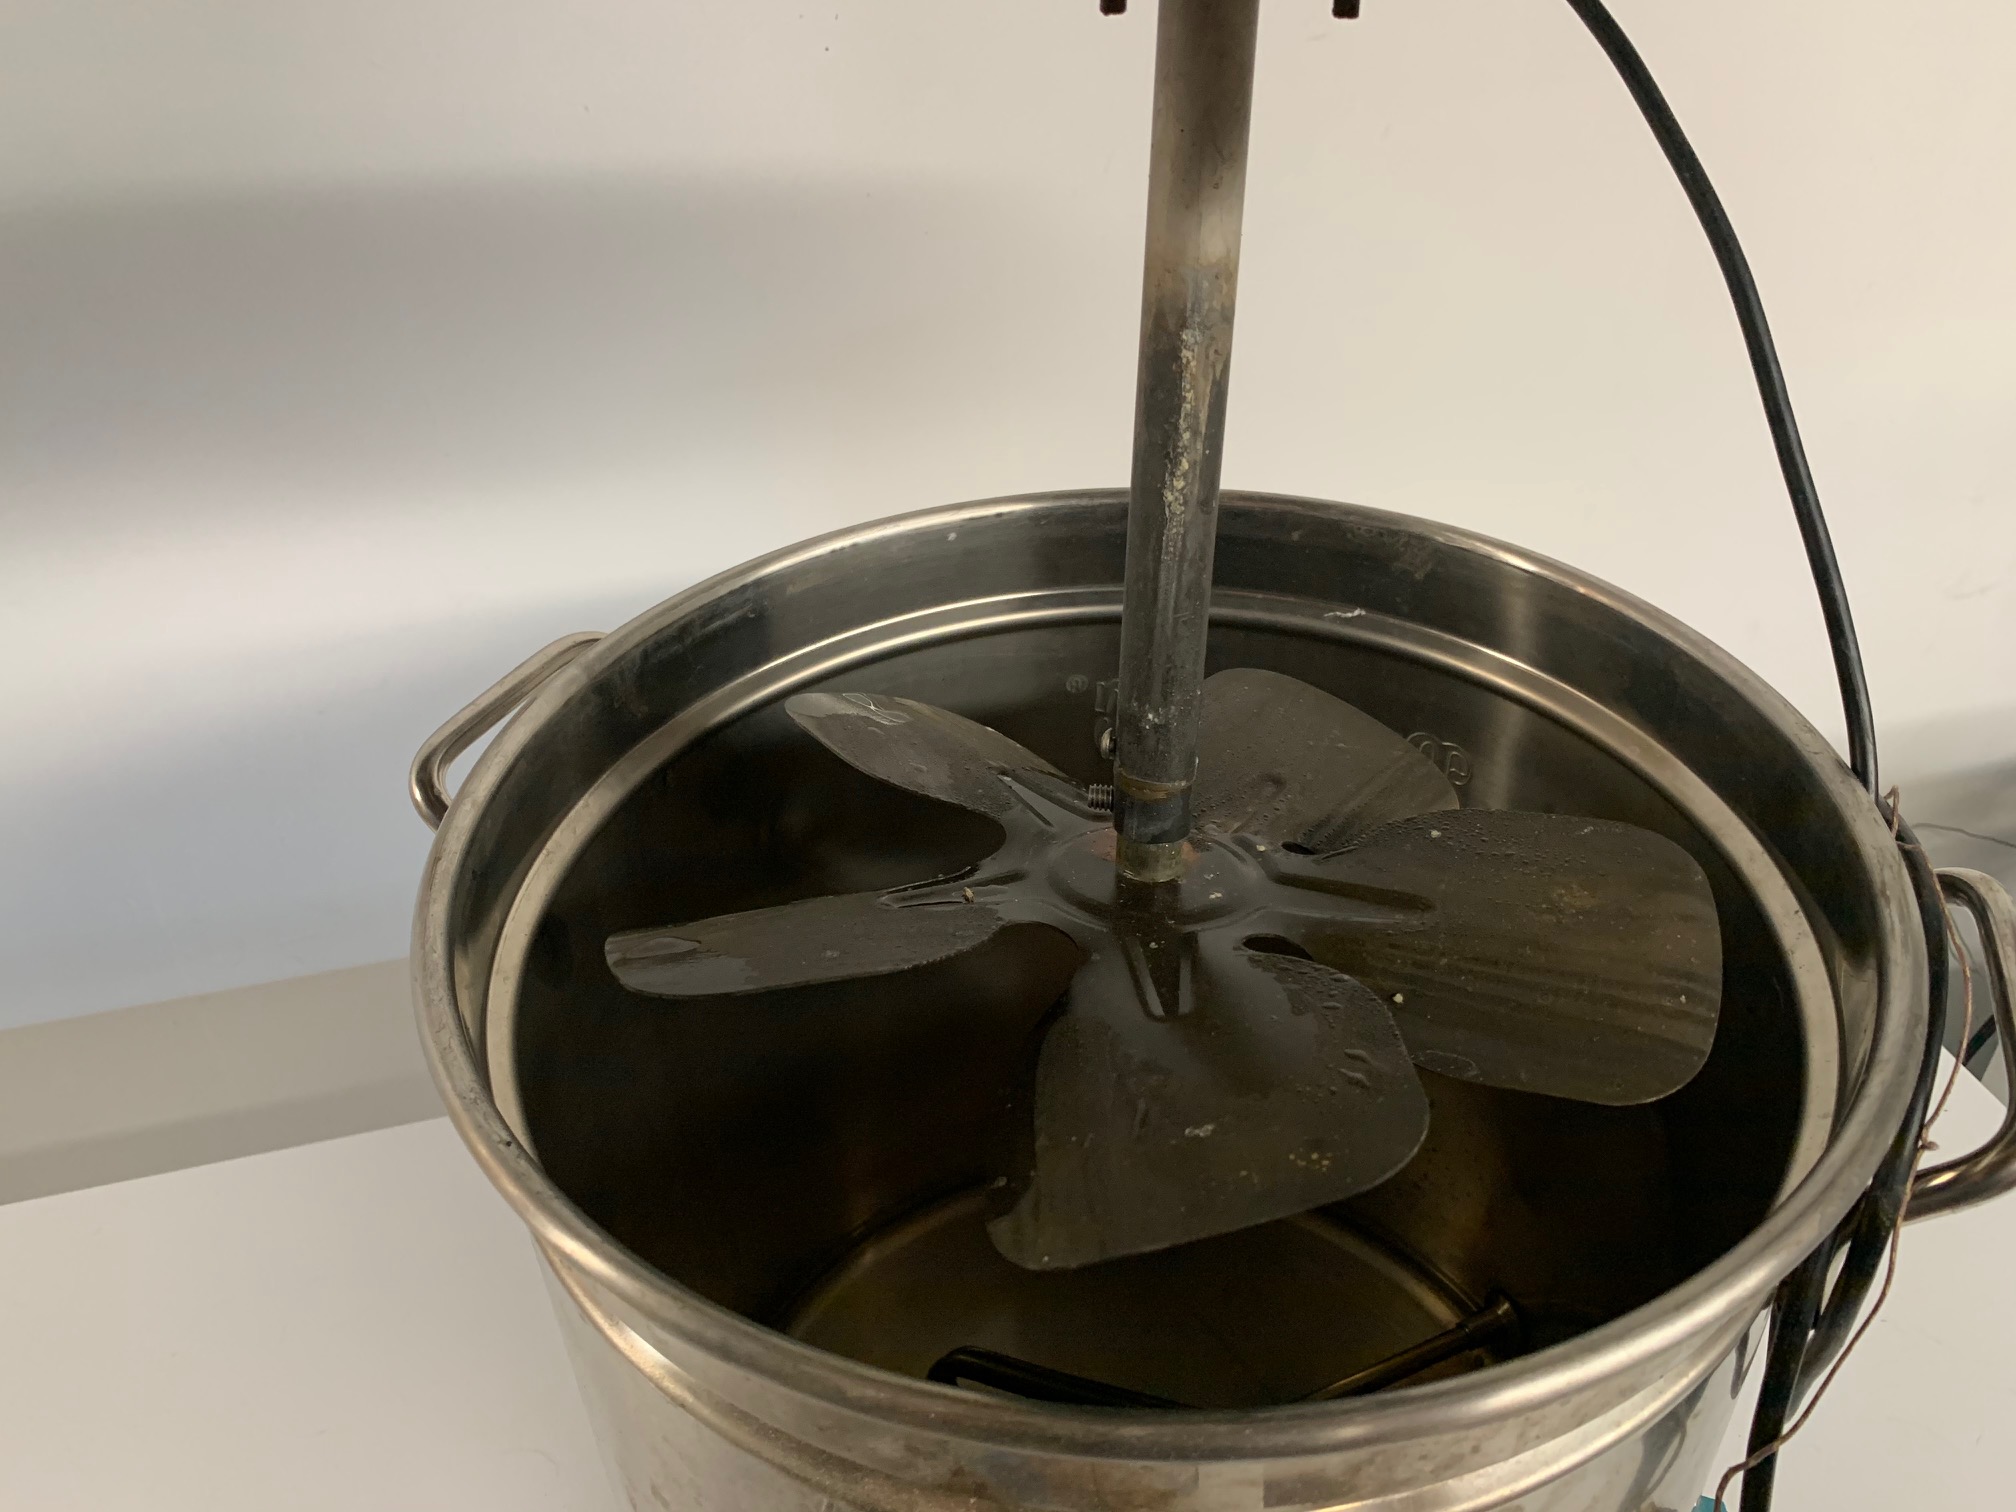
I made a stirrer for my electric HLT, it's an AC gearmotor from surplus center mounted to the lid with a propeller shaft mounted to the motor. I picked a motor with about 60rpm, something like this if I remember right:

https://www.surpluscenter.com/Elect...t-AC-1-30-HP-Shaded-Pole-Gearmotor-5-1373.axd
The motor isn't rated to run continuously so I have a switch also mounted to the lid and run the stirrer periodically for 5-10 seconds as the water is heating.

The propeller shaft is probably the hardest part depending on what you have access to, I made all the submerged parts from aluminum or stainless steel. I think I bought an aluminum fan blade from McMaster Carr. I can try to post pictures later if there is interest.
 
Yesterday, I tested the water temp at the top and at the bottom of the HTL. Without stirring by hand and just letting it heat up still and calm, it is only a 2 degree difference. Now, I'm wondering if I could just set my average temp to the middle of that 2 degree difference and forget about it. Any thoughts?
 
I'd like to see the pics. Thank You. ALso, 60rpm seems a little low. May I ask what size your HTL is?
 
HLT is probably around 8 gallons. the motor might be 80 or 100rpm or so.
IMG_5477.jpg
IMG_5478.jpg
 
The temperature in mine also stratifies. I use a long spoon and stir it twice when my temp controller shows the set point. After the second stir it’s at/nearly at the set point

💪 🥄
 
Thank You, CanAm.
I tested it and found, its only a 2 or 2.5 degree difference from bottom to top. I was wondering if I can just assume after its all in the MLT, it would be an even average and just calculate for that. Now, you just said you stir twice after the pid shows your target temp. For one thing: why stir twice? Second: My temp gauge is adjustable in height because its just a probe on a wire. I set it right at the level of the weldless thermometer which is about 3 inches from the bottom. What if the hotter temp at the top mixes into the cooler temp at the bottom and overshoots the target temp?
Or, should I move the probe up to measure the hotter temp at the top and then stir so the element will kick on and bring it all up to the target temp?
 
The hot liquor tank makes my strike water and my sparge water. I guess I don't understand what you're saying.
 
I just got into electric brewing and I notice I have to stir my HLT all the time to keep temps consistent from the bottom to the top of the kettle. I would like a cheap and easy solution to stir it constantly. I have seen electric motor stirrers, circulating with pumps (I DO NOT want any pumps right now) and even guys who say an aquarium air pump with the outlet tube dropped to the bottom of the HLT. The aquarium pump sounds cheap and easy but, how well will it really work? I would consider a buy it and install it option too as long as its cheap and easy. Don't want to spend much more than $30 bucks on this. Any help is appreciated. Thanks.

Yes, it's a pump. But its 12VDC and only $26.

https://www.amazon.com/dp/B01G305PK...colid=YEOGXPFLHR9S&psc=1&ref_=lv_ov_lig_dp_it
 
Thanks passedpawn, That looks pretty good to me. Tell me how you would set it up, please.
 
Last edited:
The hot liquor tank makes my strike water and my sparge water. I guess I don't understand what you're saying.


hmm, i was saying, sparge water temp isn't THAT important. and strike water, don't you dough in when it hits strike temp immediatly? i'm not sure i understand your brew setup?
 
Thanks passedpawn, That looks pretty good to me. Tell me how you would set it up, please.

I have a control panel. I'd plug the pump's power supply into a outlet on my panel, and wire the outlet power to one of the 120V legs of the HLT element. That way, when the element is on, the pump is on.

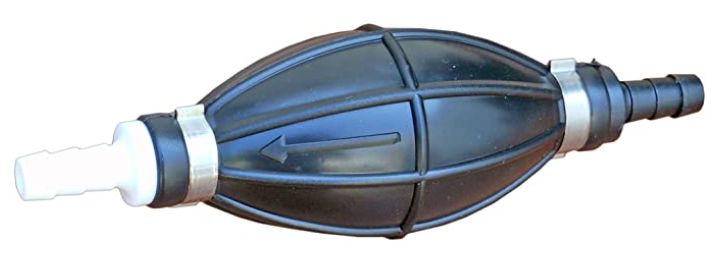
I don't have one of these pumps, but I know others here on this forum do. Maybe one of them will comment. Looks like it is difficult to prime, so you'll want it mounted at the base of the HLT (or below). Or maybe mounted directly onto the HLT output port if you have one. To help with the priming, put a small petcock on the output of it, so the output can be opened to allow gravity to pull the water through the pump. Or, you could look into a primer bulb. I don't know of any that are "food safe"/silicone. I'd probably just use the rubber one, but I know some people are funny about that.

1602696945710.png


1602696742494.png


1602696749016.png
 
I've got one of the pumps shown, oft described as a "solar" pump. I use it when heating my strike water, it seems to work well and handle ~ 165-ish temps OK. I use it to help ensure my strike water is at temp by, of course, recirculating that water in the mash tun while I heat it with an immersion heater. I was seeing > 5 degree differences in spots in the tun without it recirculating and so I considered that to be worth fixing.

For sparge water, anything in the neighborhood works for me too. I shoot for 168 but if I'm off a little, or even a lot as long as it's in the cooler direction - eh, I'm good. Mash out temp seems to be a nice thing to shoot for, but something I no longer worry about.
 
Stainless steel paint stirrer from Home Depot, low speed 12V DC motor from one of the internet suppliers and a suitable shaft coupler. You don't need high torque, so you should get one for $10-$15 dollars. Total cost should be under $30.
 
I agree, but I will say from having made my own stirrer (to cool the wort after boiling), that getting a motor mounted onto a lid, finding said coupler, and etc. are actually more work than they sound like. Lids tend to be sloped, motor mounts have to be made even if they are just wood, couplers may need to have multiple diameters on each end and still can be wobbly, and so forth. Once I set out to actually do it, there was more work than expected.
 
Would I pull from the bottom of the HLT and return it to the top? Any need to cause a whirlpool in the HLT or is the exchange of water from the bottom to the top all that is needed?
 
Would I pull from the bottom of the HLT and return it to the top? Any need to cause a whirlpool in the HLT or is the exchange of water from the bottom to the top all that is needed?

Yea, that bottom-to-top is all you need. I used to see huge (> 30 deg) differences between below and above the element. But I now use a pump and it's minimal.
 
why stir twice?

My temp probe is fixed four inches from the bottom and I don’t drain the whole volume. It’s 15 gallons on 240 volts.

Stirring the first time drops the temp 3 or 4 degrees. I stir until the temp stops dropping, about 20 seconds. It takes a couple minutes to come up to the set point. The second 10 second stir may be unnecessary but gives piece of mind that the temperature is uniform.
 
CanAm,
Ah. Well, that makes total sense. I've been gravity feeding everything for now and I'm tired of walking around the sink and bar area and climbing a step stool to stir it. It has occured to me though; If I get a pump (already ordered one today) to circulate the HLT, I may as well position the HLT at the same level as the MLT and pump the HLT water into it. Negating the need to walk around and climb to stir! Its a Catch 22. Use pump for both, I guess! ;)
 
Last edited:
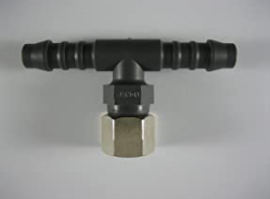
I installed a tee fitting near the bottom of my HLT and added one of those small 12V pumps to the tee. The pump output runs through a hose back to the top of the HLT, this constantly recirculates the water in the HLT. The other end of the tee has a fitting for a digital thermometer so I can see at a glance the temperature of the recirculating water. You could just as easily add the tee at the existing water outlet and install the pump there (I already had a tee there for the water outlet and the probe for the PID which is controlling the heating element, and two tees would have been a lot of weight, thus I installed the tee for the pump in a different location).
 

Attachments

  • 61627382814__8FECAB1F-05C5-4873-933F-C43EEEF2C714.JPG
    61627382814__8FECAB1F-05C5-4873-933F-C43EEEF2C714.JPG
    1.8 MB · Views: 55
Stainless steel paint stirrer from Home Depot, low speed 12V DC motor from one of the internet suppliers and a suitable shaft coupler. You don't need high torque, so you should get one for $10-$15 dollars. Total cost should be under $30.

Exactly what I'm planning, except I will use a stainless mash paddle cut to length. I know the mash paddle is completely food safe and should provide plenty of movement at 100 RPM. My plan is to use this at flameout to keep wort moving over my immersion chiller. None of my kettles are ported, so using a pump to recirculate is more difficult.

Here's the parts. I'll likely need to reduce the diameter of the mash paddle handle to fit the coupler. I also plan to build a mount that will slide over the side of the kettle so I can use it on all of my kettles.

https://www.amazon.com/gp/product/B072R57C56/ref=ox_sc_saved_title_2?smid=A18IHNL4DD28Y&psc=1https://www.amazon.com/gp/product/B07TTH283Z/ref=ox_sc_saved_title_3?smid=AGOSLUO29ZUJ2&psc=1https://www.amazon.com/gp/product/B01N25GA98/ref=ppx_yo_dt_b_search_asin_title?ie=UTF8&psc=1
I think I have a 12v power supply in stock, but if not, this is the one I'll get. It can lower the voltage, which will lower the RPM. It also has an adapter to make connecting it to the motor simple.

https://www.amazon.com/gp/product/B01N7RS0NG/ref=ox_sc_saved_title_1?smid=A2WETDVOSZN7JY&psc=1
~HopSing.
 
^^^ Looks like a reasonable setup. Double check the shaft and coupler dimensions, and plan on something (perhaps 2 x 4's and some pipe clamps) to mount the motor. And of course drill holes in your lid or whatever... But seems off to a good start.
 
Exactly what I'm planning, except I will use a stainless mash paddle cut to length. I know the mash paddle is completely food safe and should provide plenty of movement at 100 RPM. My plan is to use this at flameout to keep wort moving over my immersion chiller. None of my kettles are ported, so using a pump to recirculate is more difficult.

Here's the parts. I'll likely need to reduce the diameter of the mash paddle handle to fit the coupler. I also plan to build a mount that will slide over the side of the kettle so I can use it on all of my kettles.

https://www.amazon.com/gp/product/B072R57C56/ref=ox_sc_saved_title_2?smid=A18IHNL4DD28Y&psc=1https://www.amazon.com/gp/product/B07TTH283Z/ref=ox_sc_saved_title_3?smid=AGOSLUO29ZUJ2&psc=1https://www.amazon.com/gp/product/B01N25GA98/ref=ppx_yo_dt_b_search_asin_title?ie=UTF8&psc=1
I think I have a 12v power supply in stock, but if not, this is the one I'll get. It can lower the voltage, which will lower the RPM. It also has an adapter to make connecting it to the motor simple.

https://www.amazon.com/gp/product/B01N7RS0NG/ref=ox_sc_saved_title_1?smid=A2WETDVOSZN7JY&psc=1
~HopSing.

That'll look super-cool when it's done, but I sorta think it's a bit of overkill given the other options. I'm not trying to dissuade you - this is a hobby and if you like building stuff then it'll be fun.
For those less adventurous and without ports, I'd use the aquarium air pump output through some stainless tubing to the bottom of the HLT. I considered doing this for years, but I have an excess of pumps so no need.
 
Thanks, esdill. I'll be doing something quite similar.

passedpawn, I ordered the pump you suggested and pumping is how I'm going to do it. Everyone here had good ideas but, your pump idea was the best balance of ease, expense, time and construction.
Just my opinion but:
The aquarium air pump idea is actually the cheapest and easiest but, ambient air would cool the water as it bubbles through it. I know the element would fight that and keep it where I want it but, that fighting each other is an unwanted inefficiency.
The electro-mechanical way will work for sure but, its more expensive, harder to collect all the parts for, more time to build and has to stay attatched to the tank lid. Even if you moved the whole lid and motor to the kettle for wort chilling circulation, you'd need another paddle because of the different levels of liquid in the HLT and the BK. Too cumbersome!
The little pump, for me, is the hands down way to go! Inexpensive and easy to install. No added cooling effect from air bubbles, quieter operation, sleaker looking, doesn't impead the use of the lid, swappable to the BK for wort chilling and can be used for wort transfer or other things later if I ever want to. I'm sold! And, thank you again passedpawn! :)
 
It's a good pump for it. I go from tun to pump and back into tun.

Make sure you have the same size fitting at the tun outlet valve and whatever you plan to use to get it back in, some hose and some hose clamps, and you're good to go. I use the silicone tubing in 3/8 ID and it's perfect. Look for hose clamps with the little key things on them built in and you won't have to go hunt for a screwdriver every time.
 
Thank you, tracer.
That pump comes with everything you really need except for some tubing. Quick disconnects are my way of making things quick to switch and swap. They are expensive fittings but its buy once cry once, ya know. Extremely quick comfortable to use! :)
 
I'd use the aquarium air pump output through some stainless tubing to the bottom of the HLT. I considered doing this for years, but I have an excess of pumps so no need.

This is a really interesting idea. Surely worth a test. The cooling from the air would be beneficial in my use case and the additional O2 would help aerate for the yeast. I would definitely add some kind of in-line filter as I've seen oil slicks on aquariums from the air pumps. It's usually food safe lube, so it won't hurt the fish, but it would likely kill any head retention for a batch.

Thanks for the idea.

~HopSing.
 
If you are still talking about using the aquarium air pump in your HLT, the O2 will not be beneficial to the yeast. The O2 is lost in the boil kettle anyway. Still need to shake or otherwise aerate the wort to replenish that lost O2.
 
This is a really interesting idea. Surely worth a test. The cooling from the air would be beneficial in my use case and the additional O2 would help aerate for the yeast. I would definitely add some kind of in-line filter as I've seen oil slicks on aquariums from the air pumps. It's usually food safe lube, so it won't hurt the fish, but it would likely kill any head retention for a batch.

Thanks for the idea.

~HopSing.

My original idea was to connect the air to the top of my sight gauge, which is connected to the bottom of my HLT. But then the sight gauge wouldn't work, even when I turned the air pump off (I don't think... these air pumps are diaphram pumps that don't pass air when off). So I never did it.

But you could put a tee at the bottom where the sight gauge connects, the somehow connect the air below the sight gauge.

Anyway, my basic point is that if you already have ports (e.g., sight gauge) on your HLT, one of those ports could also be used for the air.
 
So for the pump that it looks like will be used here, connections just tun valve outlet into pump and back into tun. I ran hoseclamps to a bent piece of stainless tube in the past, but recently went w/ the "Infussion" from SS brewtech and now use the recirculation port built in.

For an aquarium pump though, I think you'd want to also put it into the tun valve, any tee relating to a sight glass would just have that air going into the sight glass and not into the tun, unless you had yet another couple valves setup. Maybe I'm just not picturing the idea correctly.

Generally speaking, I think moving water is going to create a lot more heat transfer and balancing than air from an aquarium pump trying to create the same motions.
 
For an aquarium pump though, I think you'd want to also put it into the tun valve, any tee relating to a sight glass would just have that air going into the sight glass and not into the tun, unless you had yet another couple valves setup. Maybe I'm just not picturing the idea correctly.

haha, you're right. Derp. back to the drawing board.
 
Back
Top