• Please visit and share your knowledge at our sister communities:
  • If you have not, please join our official Homebrewing Facebook Group!

    Homebrewing Facebook Group

My Latest Project - Walk-in Cooler

Homebrew Talk

Help Support Homebrew Talk:

This site may earn a commission from merchant affiliate links, including eBay, Amazon, and others.
Made some progress today but also took a step back. I hadn't put the front of the AC back on and something fell into the fan while testing - shattering it into a million pieces. Damnit. I have no idea what it was as there is no way I was putting stuff in there. I'll find out when I take it all back apart...

Does anyone know where I can get a replacement blower fan for ACs?

OK, back to the build. I framed out the final wall and installed the door. The perspective in this first photo is a little hard to follow. It was taken from outside the utility room looking through the door. The wall for the cooler is on about a 30 degree angle.

progress_14.jpg


Picture of the door frame:

progress_15.jpg


Door frame from inside. Notice I've built out the scructure to better seal the door.

progress_16.jpg


And finally, the ceiling after insulation. Once the walls are fully lined with foam board, I will line the ceiling from the inside with it as well.

progress_17.jpg
 
The insulation you have on the ceiling, if you haven't covered it up yet it looks like there are a few cracks between the bats. I'd do what I could to tighten that up, you don't want to have any crevices between the bats that air can go through. Doesn't have to be 100% perfect, but I would do what I could to make that as tight as possible. Ideal is that there is no place for the air to go.

Looks good, though. Count me among your fans!
 
I called every parts place around and couldn't find a replacement blower wheel for less than $45 plus shipping and tax... Then I thought I'd try the parts store on sears.com. They had it for $15. Shipped for $22. More than fair it seems... definitely learned my lesson about running it with the cover off.

Bird, I'll get up there and fill in the gaps with some more insulation this evening... I am down to my last pack of insulation and need to make sure I have enough for the 4th wall first.
 
What do you plan for the door in terms of insulating it? Also, I am curious to know where all that air blown into the room by the AC unit is going to go? Once you cover the walls and probably tape to seal it, the room is going to be pretty air tight. It will be nice to have a "positive" pressure in the room to keep it clean but make sure you stand clear the door when you undo the door latch.:cross:
Congrats on taking up on a major project and good luck with the rest.
 
TekelBira said:
What do you plan for the door in terms of insulating it? Also, I am curious to know where all that air blown into the room by the AC unit is going to go? Once you cover the walls and probably tape to seal it, the room is going to be pretty air tight. It will be nice to have a "positive" pressure in the room to keep it clean but make sure you stand clear the door when you undo the door latch.:cross:
Congrats on taking up on a major project and good luck with the rest.

I imagine that the AC is pulling in hot air from the room as well as putting in cold.
 
TekelBira said:
What do you plan for the door in terms of insulating it? Also, I am curious to know where all that air blown into the room by the AC unit is going to go? Once you cover the walls and probably tape to seal it, the room is going to be pretty air tight. It will be nice to have a "positive" pressure in the room to keep it clean but make sure you stand clear the door when you undo the door latch.:cross:
Congrats on taking up on a major project and good luck with the rest.

I don't think that is going to be a problem with the AC as it is recirculating the air through it...

The door will be lined with four layers of R5 3/4" insulated foam with a 15 degree angle cut down the opening side for clearance.
 
Thanks. I'm sure you have already thought about it considering obviously you've given more than adequate time to plan and execute this project through, if I may suggest to make the door jam to match the door then. Basically, securing the wedges you cut to the matching door jam.

\______/ Door

\ / Door jam (there is more space between the door jams but forum software removes them apparently)


Have fun...
 
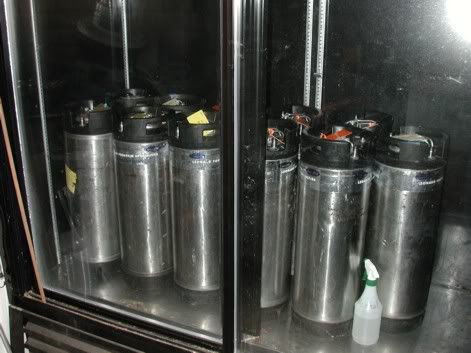
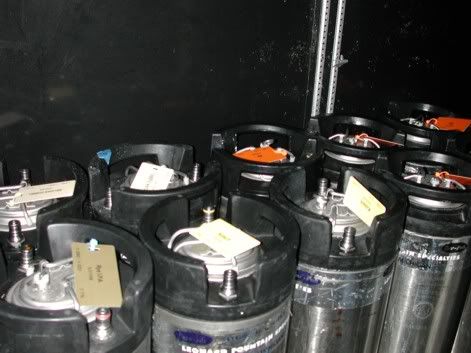
I have all of the material to build a cold room. It was given to me from a "UBrew" type shop and included all of the fully insulated paneling, door & hardware. Even SWMBO was ready for me to build it but then I came across this.....

Kegstorage3.jpg


Kegstorage2.jpg
 
I haven't had much time to work on the cooler this week but have made some progress. I was hoping by this point to be able to cool the area while I worked but no such luck since I shattered the AC's fan blade. Hopefully the replacement will be here this weekend. Anywho, I have all the framing done as well as the wall insulation wrapped up. Now its down to installing all the foam board.

Here is a photo of the cooler looking into the utility room. We'll put some trim around it to finish it off once everything else is complete. I'm hoping to make serious progress by this weekend and be ready to finish it up as soon as the replacement fan arrives.

progress_18.jpg
 
Hey Monster Mash, what is that we are looking at? Is that a Store cooler? One you would find lots of soda pop in with the shelving taken out?
 
The replacement fan came in today... was stressing about it as Sear's website didn't even show it shipped yet. It was harder to replace than expected but it's back together and working. I've got it officially mounted and one layer of insulation on all the walls. Starting to feel as if I'm on the downhill...

I will take more photos to post as progress is made.
 
Got all the walls finished today. Now it is down to the ceiling, floor, and the door... should go pretty quick over the next few evenings. Still debating what wallboard to use to finish off the inside but will have that settled in the next few days. What I really want is $30 a sheet... and I need eight sheets - whew. Regardless of the wallboard, I am in hopes to start testing later this week.

Here are two photos from this evening. First is just the AC all put back together and working. Second is a shot of the door jam to show wall thickness (6").

progress_19.jpg


progress_20.jpg
 
I can dig it very nice.
I hope thats not blood on the floor from a construction accident.
 
G. Cretin said:
I can dig it very nice.
I hope thats not blood on the floor from a construction accident.

Suprisingly, no accidents so far except stapling a 1/2" staple straight through my finger with a heavy-duty staple gun... heh. That's a mixture of rust stains and spray paint droplets on the floor.

I realized after I posted last night that the walls are actually around 1.5" thicker than I stated and showed in the photo as I did not take into account the thickness of the door itself...
 
Wow, a walk in cooler! Very cool. Just curious, do you keep so much beer on hand that a dedicated beer fridge is too small? It will be a great day when I have so much beer I need a walk in cooler at home. :drunk: My wife will never let that happen...:mad:
 
Nothing for the floor? I would be worried about the temp. being diffrent on the floor or loss of cold air due to convection.
 
Born Brewing Co., we plan to use it for more than just beer... that's actually how I sold the idea to my wife. But I hope to start lagering my beer for several months - which could eventually take up a lot of room.


G. Cretin, the floor isn't finished yet - neither is the ceiling. Just posting photos to show progress. The floor will be layered with 4 sheets of 3/4" R5 foam board with plywood on top. Looking to finish it off with a layer of Linoleum...
 
Comming along quite nicely. Giving me lots of ideas for my brew shed. I may build a 2 room cooler with fans on a controller and flap vents to keep the second room around 65* using only one A/C. It would run a bit more than your set up, but I wouldn't have to worry about the basement door getting left open and the temp getting to high.
 
D*Bo said:
Comming along quite nicely. Giving me lots of ideas for my brew shed. I may build a 2 room cooler with fans on a controller and flap vents to keep the second room around 65* using only one A/C. It would run a bit more than your set up, but I wouldn't have to worry about the basement door getting left open and the temp getting to high.

That is exactly what I originally considered and still may do to cool an external fermentation chamber. I am anxious to see how much strain the cooler puts on the AC. If I feel it can handle it, my plan would be to drill two 4" holes through one of the interior walls and create a push / pull system with two fans, vent flaps, and another temperature controller to cool an external fermentation chamber which is also properly insulated.
 
Got the ceiling finished. Its lined with three layers of foam insulation. On top of the ceiling was exactly enough room to pack the R30 insulation on its side - six pieces across. No photos as its really more the same at this point. Plan on doing the floor tomorrow night...

I tested it down to 60 degrees for about 30 minutes. I didn't pay that close of attention but the temperature dropped from 84 to 60 within 10~15 minutes and the AC never came back on until after I opened the door. Can't wait to test it once the floor and door are fully insulated.
 
A quick way to estimate yearly cost on the Name plate of the unit look at total system amps multiply by 120 givivng you watts look at your electric bill and determine what you pay per kilowatt add er up. Looks real good so far cant wait to see how she runs loaded
 
I really don't intend to be a buzzkill... but, what would happen if the temperature outside drops to sub 20's? would the air from inside the house be enough to heat it? Been watching this thread and thinking I could do that to 1/2 or 1/4 of a brew shed, but what about when the temp drops past the temps it shall be kept? In my case, unattached to the house shed, I'd have to heat, (with that much insulation NOT MUCH, but still would have to, don't want frozen beer, hehehe) but that's just a room in your house. Has there been any thought on potentially heating if needed?:) BTW, I am green with envy, hehehe :rockin:
 
I don't think it drops below freezing here more than once or twice a year and we certainly never have hard freezes - but in the rare case that happened, we have two large oil-filled heaters that have a "freeze guard" function which I believe just keeps the heated area a little above freezing.

Ranco sells dual-stage controllers which would be ideal for someone up north. You could get a window AC with built in heat and have it all rigged up through the one dual-stage controller.
 
Got the floor finished up tonight... ended up laying six layers of the foam insulation. Pretty much came out flush with the bottom of the doorway. Scroll back to post #75 for the before shot of the floor and doorjam to get a feel for how thick it turned out to be. Here is a photo of the floor now:

progress_21.jpg


Now all thats left is:

1) Insulate the door
2) Lay plywood on the floor
3) Line the inside walls with wallboard or something similar
4) Wire up a light in the ceiling
5) Mount the Ranco controller and shorten the cord
6) And finish the exterior wall
 
Very cool! No pun intended.:rockin:

Are you keeping a running tab on what this is costing so far? I'd be interested in knowing. Some time later this year I'm putting up a metal building for a gargage and storage. A small 20' x 20' corner will be devoted to the brew room complete with a garage door on on side and a walk in door on the other. I can vision a walk in fermenter to deal with this Texas heat.
 
John,

This is an awesome project! I hope that instead of documenting your progress here in a discussion thread, you will (eventually) put together a PDF file with text and pictures on your construction steps, materials, costs, and lessons learned. If you need someone to host the file, I would be more than happy to from my company website. I did this with The Great Fridge Project and it proved to be very helpful for some people.

Of particular interest, I'm wondering how you will deal with moisture?

Keep the pics coming!
 
Back
Top