• Please visit and share your knowledge at our sister communities:
  • If you have not, please join our official Homebrewing Facebook Group!

    Homebrewing Facebook Group

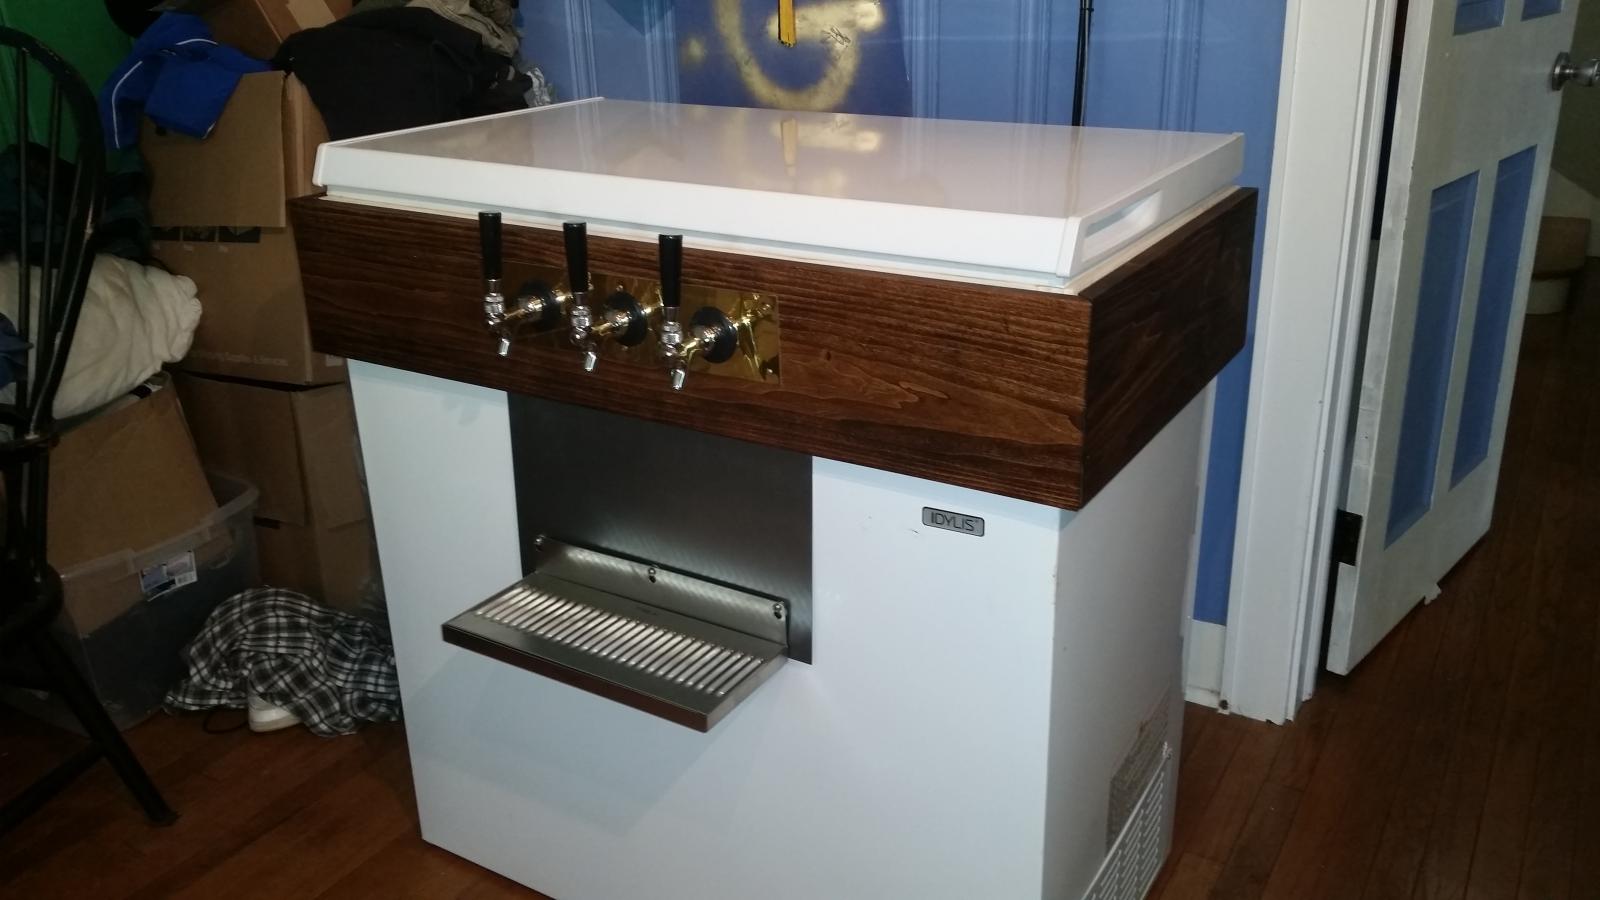
My Keezer is done!

Homebrew Talk

Help Support Homebrew Talk:

This site may earn a commission from merchant affiliate links, including eBay, Amazon, and others.
You don't have a parts list for the entire build do you? I have tight schedule for my build and I don't want to leave anything off the parts order by accident. Did you get everything from kegconnection.com? What pressure are you running your CO2? I really like the simplicity and just plain good looks of your build. I had already decided to paint the keg black and I am a huge fan of American Chestnut stain. Too bad those gorgeous trees are all gone.

Had to do some diving through old emails to compile the full parts list, whew, that should be everything. I run my primary regulator at 25psi and the secondaries at 10-14psi depending on the beer. Beer lines are 10ft long 3/16in ID.

Beverage Factory
Kegco Home Brew Beer Kegs - Ball Lock 5 Gallon Rubber Top - Bran
Model: KC SET2-5G-RBO 1 $289.06 20% $231.25

10 lb. Aluminum Co2 Tank
Model: BF C10 1 $106.24 20% $84.99
(Sold in exchange for 20lb tank)

642 - Premium Grade Double Gauge Co2 Draft Beer Regulator
Model: MM 642 1 $97.44 20% $77.95

T1694STC-01 Four Product Secondary Co2 Regulator with Check Valv
Model: TF T1694STC-01 1 $218.69 20% $174.95

Ball Lock Home Brew Keg Tap - Beer Out with 1/4" Male Flare Fitt
Model: BF BLBO-MFL 2 $9.94 20% $15.90

Ball Lock Home Brew Keg Tap - Gas In with Male Flare Fitting wit
Model: BF BLGI-MFL 2 $9.94 20% $15.90

Kegco 1 Foot Length of 3/16 Inch I.D. Clear Thermoplastic Super
Model: BF 316CBL 10 $1.25 20% $10.00

1 Foot Length of 5/16 Inch I.D. Red Air Line
Model: MM 553R 10 $3.12 20% $25.00

Wire Gauge Cage
Model: BF WGC 1 $36.19 20% $28.95
32oz. BLC Liquid Line Cleaner

133SL - Stepless Clamp for 3/16 Inch ID Tubing
Model: BF 316SLCP 12 $1.25 20% $12.00

170SL - Stepless Clamp for 5/16 Inch ID Tubing
Model: BF 516SLCP 10 $1.25 20% $10.00
CL532-BLC 1 $7.46 USD $7.46 USD

Perlick 630SS Beer Faucet Stainless Shank Combo
Model: BF 630SSCOMBO 5 $71.19 20% $284.75

Heavy Duty Faucet Wrench - Red Handle
Model: BF FWHD 1 $6.19 20% $4.95

4346F - Stainless Steel Shank Flange
Model: MM 4346F 5 $6.19 20% $24.75

Kegconnection
Drip Tray for 5 Faucets, 18" wide, with drain
DT109 1 $89.95 USD $89.95 USD

Faucet Spout Plug
FA804 5 $0.40 USD $2.00 USD

O-ring Lubricant, Food Grade
KP205 1 $3.95 USD $3.95 USD

Adventures in Homebrewing
c384-43-0006-00 Taprite Regulator Wall Mounting Bracket
Price: $3.99
Qty: 2

C384-5375-25 Taprite Brass Hex Nipple 1/4" NPT x 1-1/2" long (RHT)
Price: $4.50
Qty: 1

C384-T1661ST Taprite Secondary Regulator
Price: $44.99
Qty: 1

MoreBeer
Item Description: Cornelius Keg - NEW (2.5 gallon)
Item Number: KEG419
Qty: 2
Price: $109.99
Subtotal: $219.98

Northern Brewer
ThermoStar™ Dual-Mode Digital Temperature Controller U41264-41264 1 $79.99

BeerCapMaps
U.S. State Maps
North Carolina NC-PLY $39.00 1 $39.00

Lowe's
2x6 Pine
1x8 Red Oak
7/8" Spade bit
Wood Screws
Angled Brackets
Liquid Nails Adhesive
Loctite Silicone
Foam Weatherstrip
Minwax Pre-Stain
Minwax Polyshades American Chestnut Gloss
Reflectix 16-in x 25-ft Reflective Roll Insulation
Velcro Industrial Strength (For brackets under drip tray for extra support and thermostat)
Black Door Hinge (For thermostat)
 
What type of chalk do you use to get that super bright color? Chalkboard markers? That looks great.

I'd like to know this as well.


Excellent job on the keezer!

Thanks everyone. They're called CraftyCroc liquid chalk markers. Works great on my chalkboard which is not a traditional chalkboard at all. It's more like a non-porous plastic surface, which works better for liquid chalk.

Markers
http://www.amazon.com/gp/product/B00MI8OX3C/?tag=skimlinks_replacement-20

Chalkboard
http://www.amazon.com/gp/product/B0018N0BA2/?tag=skimlinks_replacement-20

Cheers!
 
Last edited by a moderator:
GrainToGlass...thanks for documenting your wonderful work. You have stimulated a lot of new builds, in addition to mine! Question for you, did you mount the collar on double-sided foam rubber as a seal? I see some silicone but it looks like it joins the foam to the freezer? I'll be sealing my collar on soon but not sure what approach works best. Thanks.
 
GrainToGlass...thanks for documenting your wonderful work. You have stimulated a lot of new builds, in addition to mine! Question for you, did you mount the collar on double-sided foam rubber as a seal? I see some silicone but it looks like it joins the foam to the freezer? I'll be sealing my collar on soon but not sure what approach works best. Thanks.

I didn't realize this thread had that great of an impact on keezer builds! Warms my heart. :D

To answer your question, a foam rubber strip is attached on the lip of the freezer and another strip is attached to the bottom of the collar. Then I aligned the two together and used a lot of silicone on the sides of the strips to get an air tight seal. Hope that helps!

Cheers
 
GrainToGlass- Thanks. Lowes has some single sided foam tape that's about 5/16"-3/8" thick. I'll use that to seal the imperfections and "glue" with silicone to secure it. My goal is to configure things so the freezer can be re-purposed as a freezer should that need ever arise.
 
Nice work OP! I built my keezer using that same black Kenmore freezer and a similarly colored collar but I only installed 4 Perlick 575s. I really like your multiple gas regulators, that is a great idea.

Is your top double hinged? It might be tricky getting some of the 5 gallon kegs into or out of the keezer when its full if not.

Thanks! The top is only single hinged. I agree, moving kegs in and out takes some effort with the added height. I like to place the empty keg in the keezer first before racking beer into it.
 
We seem to think ( and swing a hammer ) alike. I'm a little jealous though as I didn't go Larger:mug: Merry Christmas Excuse the debris in the corner. Fallout from a Graduatded 23 yr old son returning from Vermont. The bottle is actually mounted on the wall just out of sight

20151012_130337.jpg
 
We seem to think ( and swing a hammer ) alike. I'm a little jealous though as I didn't go Larger:mug: Merry Christmas Excuse the debris in the corner. Fallout from a Graduatded 23 yr old son returning from Vermont. The bottle is actually mounted on the wall just out of sight

My twin! Awesome keezer, we do think very alike. What about the bottle? Are you referring to a cap opener or thermostat?

Merry Christmas! :tank:
 
I'm guessing he means the co2 tank. I just got a freezer and am using this, and several others, as inspiration, I will be putting a bar on mine with casters and mounting a box to hold my co2 tank off the back of the base. Don't want it loose and have it accidentally to over if I move the unit.
Great build OP, thanks for the ideas.

Ah, the CO2 tank.. of course. :D

Thanks! I had planned on adding casters and a skirt after finishing the build. The taps would be great another 3 inches higher, but the current height hasn't been bothersome and I have no need to move the keezer around.

Have fun with your build! It really was a rewarding journey creating this. Take your time and get it how you want it the first time.
 
That's the idea. I've been planning for about 6 months, we'll see what Santa brings and I'll buy the rest myself, build should start in the next couple weeks. I'll post a picture and link my thread when it's done but it will look pretty similar to yours.
Merry Christmas
 
Trying to figure something out. When you attach the freezer lid to the wooden frame at the top which has the faucets in it, how does the frame attach to the freezer? Is it just the silicon? Seems like when you open it that the front of the frame will want to lift up? Do you have a picture of the back?

Is the frame also attached to the freezer in the back?

The entire collar is glued to the freezer with silicone. This blocks out air gaps to help control moisture and temperature, not necessarily to hold everything in place. That said, the collar still doesn't budge. The weight of the collar alone ensures that nothing moves when I open and close the lid.

The back of the collar is just 2x6 pine with the lid hinges installed and a thermostat. So the entire collar is sitting on the freezer with just silicone and weight. Did that answer your question?

Cheers
 
GrainToGlass...thanks for documenting your wonderful work. You have stimulated a lot of new builds, in addition to mine! Question for you, did you mount the collar on double-sided foam rubber as a seal? I see some silicone but it looks like it joins the foam to the freezer? I'll be sealing my collar on soon but not sure what approach works best. Thanks.

I am about 99% complete with my GrainToGlass clone keezer. Thanks to all for lot's of inspiration, answered questions and great ideas. Thought I would share some photos and what I would do different if there is a next time:

1) I wanted to plumb the two three-regulator Kegco secondaries together with a long nipple. The fittings must be assembled with loctite as they will not budge. So, I'll have to tee off the primary outlet. Don't assume these ganged regulators will come apart!
2) I screwed the 2X6 collar together on a flat surface (table saw) but due to imperfect cuts it pulled to leave a gap of 3/16" in one corner when placed on the freezer. Foam seal took up the gap but if I did it over I would assemble on the freezer and slowly torque the screws insuring it stayed flat.
3) The 1" foam polystyrene board is very soft. So as I lean into the freezer the aluminum foil tape crushes under pressure. I would cut another 1" wide X 3/4" wood strip to protect the top of the foam board, especially on sides and from where I'll be leaning over to load and unload.


Cheers!

Keezer1.jpg


Keezer2.jpg


Keezer3.jpg
 
Last edited:
Looking good rudy! I'm debating painting my white freezer black so I can do a red stain, but yours has me second guessing as the brown/white is very sharp. Decisions decisions...
 
Looking good rudy! I'm debating painting my white freezer black so I can do a red stain, but yours has me second guessing as the brown/white is very sharp. Decisions decisions...

Thanks jiMithing83. The "facade" on the keezer is 1 X 6 cedar with an espresso Polyshades Minwax stain/poly combo. Rough sawn side is exposed. I had the same concerns but did not want to paint the keezer in case I needed to convert it back.

Cheers
 
I am about 99% complete with my GrainToGlass clone keezer. Thanks to all for lot's of inspiration, answered questions and great ideas. Thought I would share some photos and what I would do different if there is a next time:

1) I wanted to plumb the two three-regulator Kegco secondaries together with a long nipple. The fittings must be assembled with loctite as they will not budge. So, I'll have to tee off the primary outlet. Don't assume these ganged regulators will come apart!
2) I screwed the 2X6 collar together on a flat surface (table saw) but due to imperfect cuts it pulled to leave a gap of 3/16" in one corner when placed on the freezer. Foam seal took up the gap but if I did it over I would assemble on the freezer and slowly torque the screws insuring it stayed flat.
3) The 1" foam polystyrene board is very soft. So as I lean into the freezer the aluminum foil tape crushes under pressure. I would cut another 1" wide X 3/4" wood strip to protect the top of the foam board, especially on sides and from where I'll be leaning over to load and unload.


Cheers!

Well done Rudy! I'm not too keen on white keezers, but that is a beauty!! The collar, drip tray, insulation, everything looks sharp and well executed. What size freezer is yours? Looks like a great size for 6 taps.
:mug:

Cheers!
 
Well done Rudy! I'm not too keen on white keezers, but that is a beauty!! The collar, drip tray, insulation, everything looks sharp and well executed. What size freezer is yours? Looks like a great size for 6 taps.
:mug:

Cheers!

Thanks GrainToGlass. The freezer is a 14 ft^3 Whirlpool (Lowes) which was a Christmas present from my wife. Her motivation was to reclaim space in our spare refrigerator that was occupied by Corny's. Easily handles six tapped with spare room for lagering. I like your black freezer and toyed with painting mine but I wanted to be able to re-purpose it as a freezer if that need hopefully never arises! Thanks again for your excellent documentation of your build.
 
Back
Top