• Please visit and share your knowledge at our sister communities:
  • If you have not, please join our official Homebrewing Facebook Group!

    Homebrewing Facebook Group

Motorized Grain Mills: Time to show them off!

Homebrew Talk

Help Support Homebrew Talk:

This site may earn a commission from merchant affiliate links, including eBay, Amazon, and others.
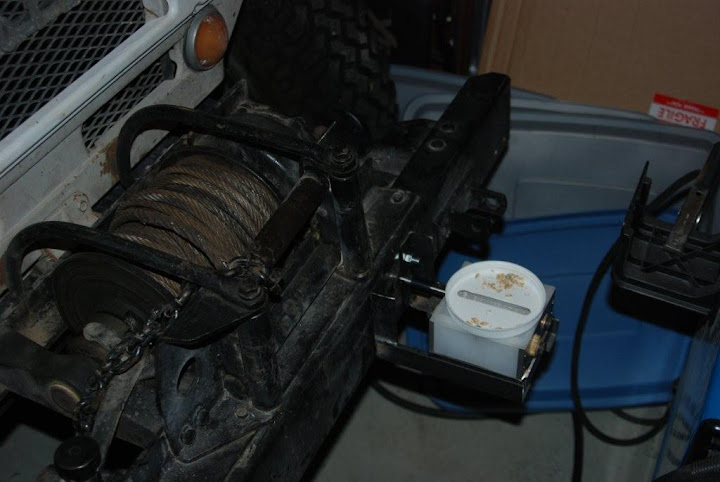
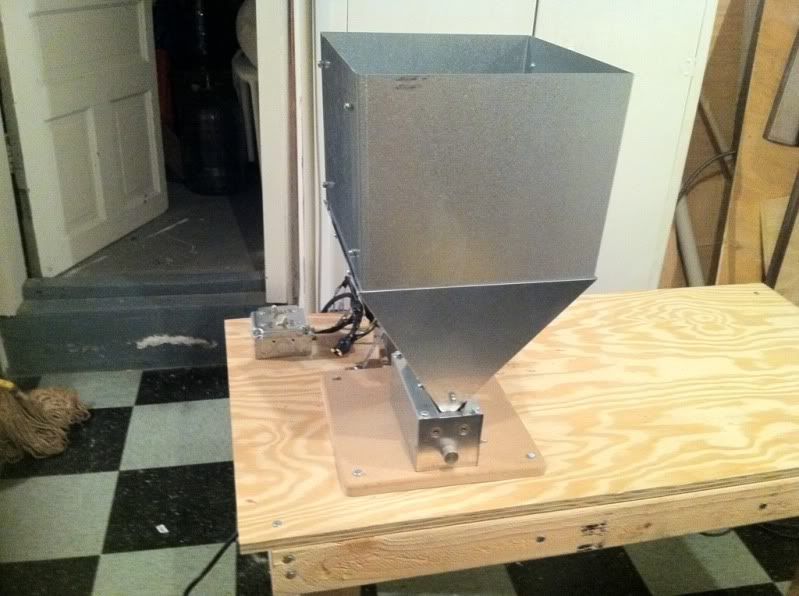
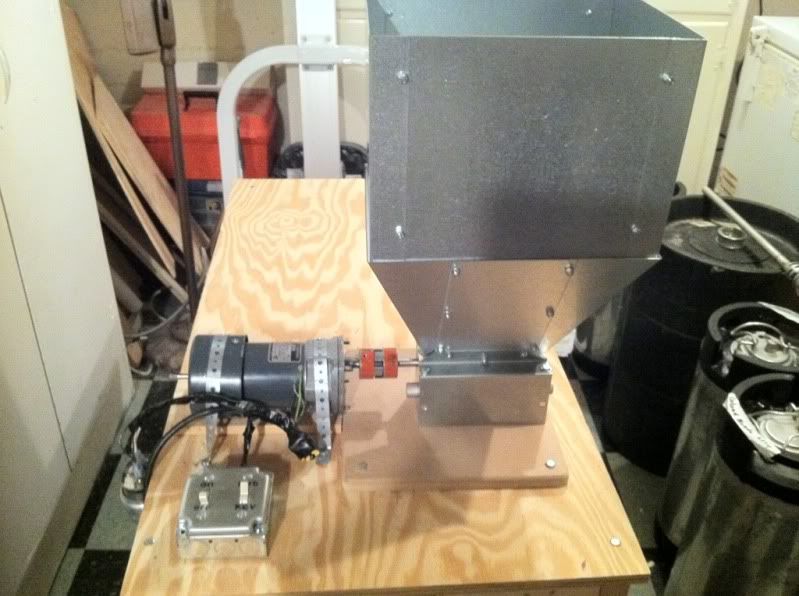
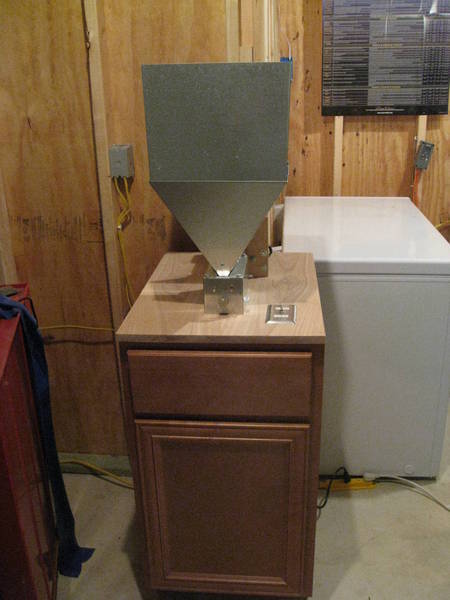
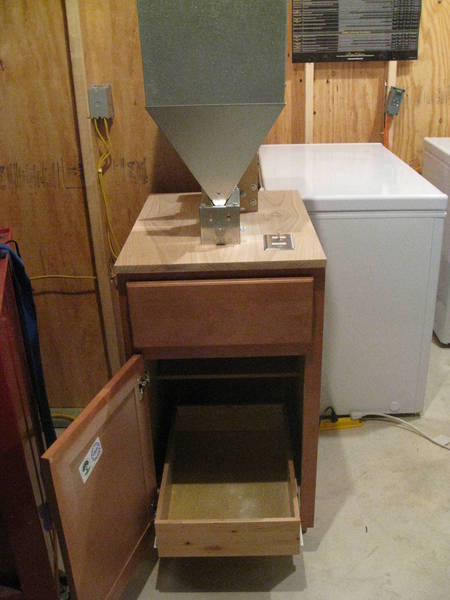
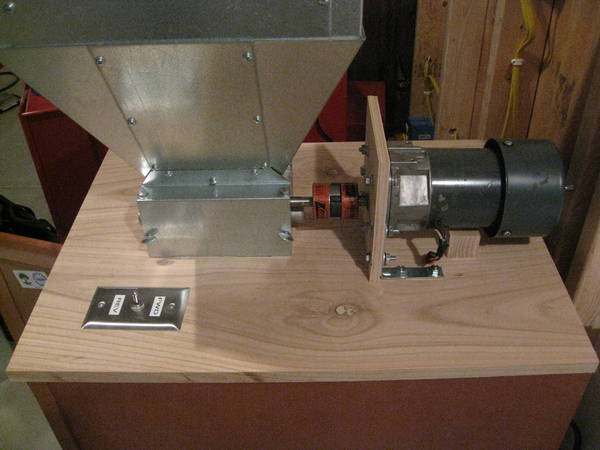
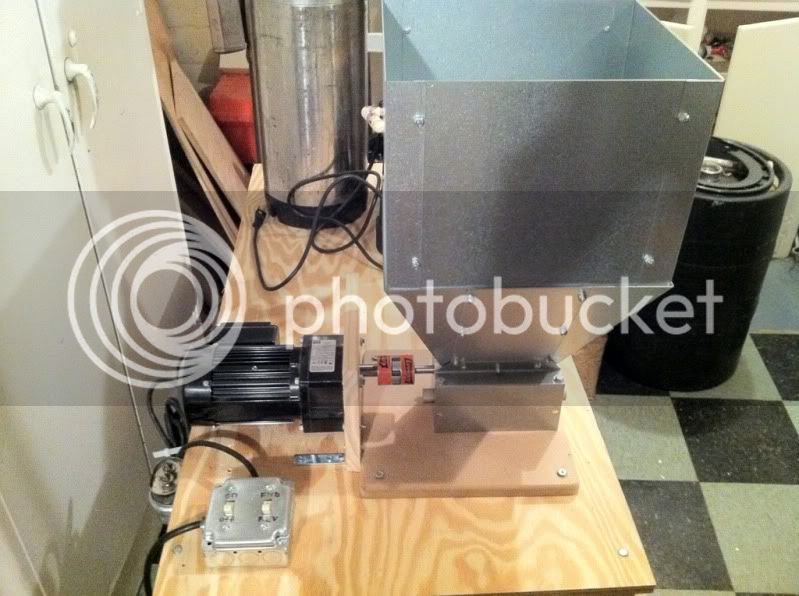
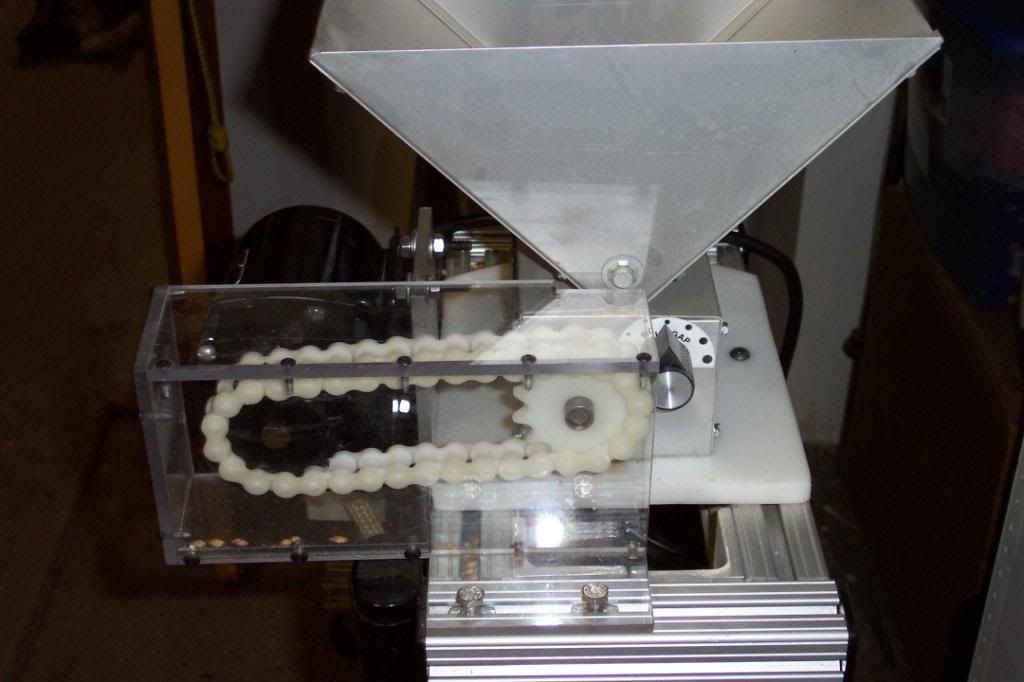
Here is picture taken during the build phase of the cobbled up malt mill hardware for the automated brewing system, hopper on right side, screw auger to gear motor driven valley mill on top, and 3" drop tube to mash tun https://picasaweb.google.com/kevin.ladue/ScrewConveyor#5188941488760211522
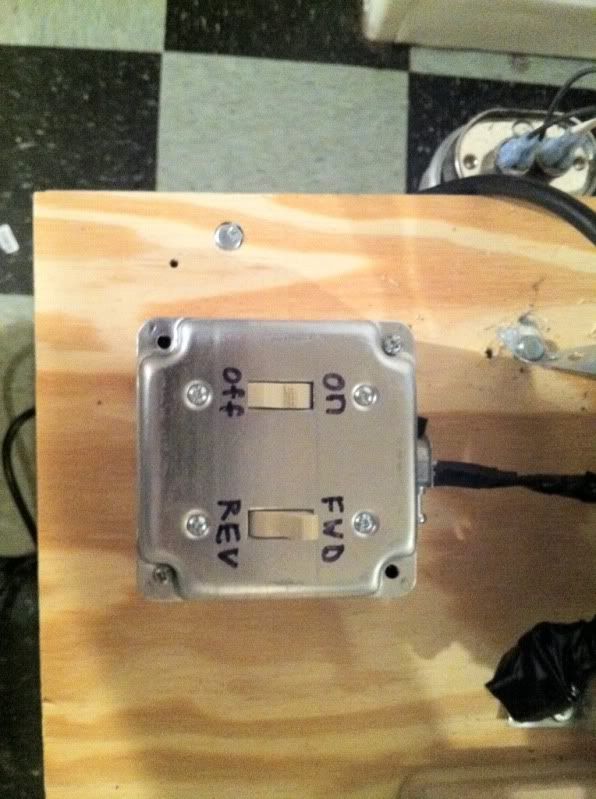
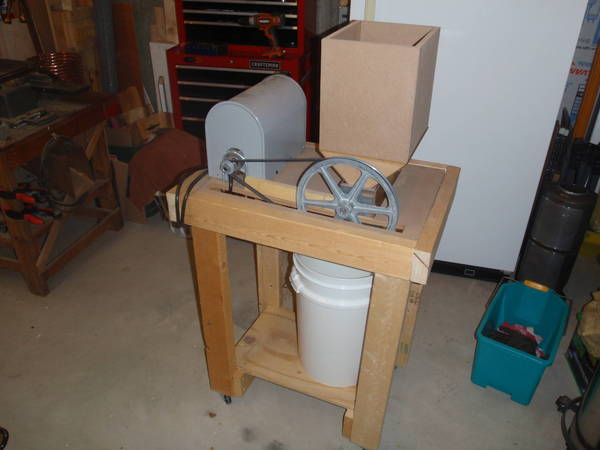
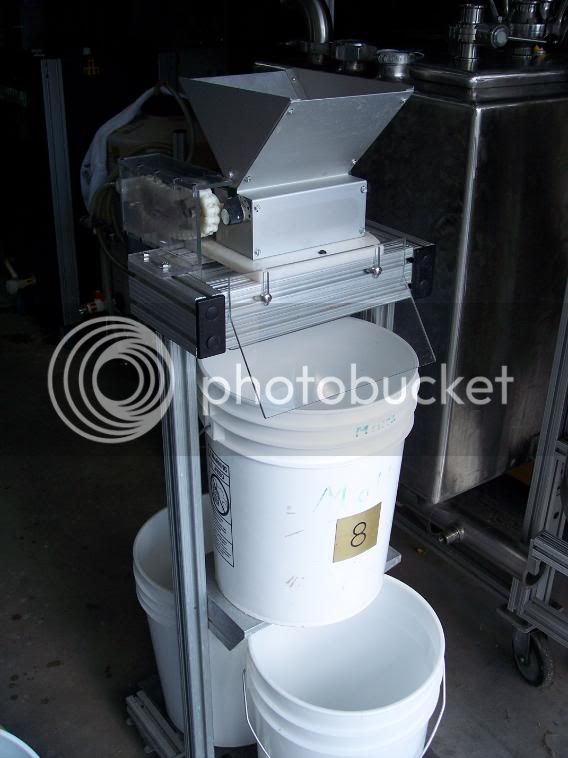
Here is a later picture of the system taken during testing https://picasaweb.google.com/kevin.ladue/Panels#5339967138764297570, insulation and tubing covering are not finished

Seriously. Dude. AWESOME! Very, very well done.
 
As I said earlier, I'm building mine to be like MrH's. One or two more coats of polyurathane and the cabinet will be finished. Still need the mill and motor to complete the whole thing, but i figured I'd show my progress so far.
Tom

IMG_20110512_230003.jpg

IMG_20110512_230027.jpg
 
TomRep great looking mill stand.

I went the easy route, used extruded aluminum.
All the great wood mill stands posted take too much talent and work.
Aluminum extrusion requires only cut and bolt together.

Grain_Mill.jpg


Mill1.jpg


Cheers,
ClaudiusB
 
Finally took a couple pics of mine to share. I got a deal on this stainless cart on CL. I drilled a 2" hole and added a SS flange and Galvanized hopper from McMaster. Decided to bolt the motor underneath so I can use the top for my scale. The hopper holds about 12# of grain. Mill is a CrankandStein 3d.

Mill10.jpg


Mill20.jpg


mill30.jpg
 
Alright ClaudiusB - I have to ask.
What is the poly chain set-up you have running there - where do I buy one?
 
This mill was set up to handle 1 bag of grain at a time. the hopper is just sitting in place so it can be removed easily. Grain runs down into a bag or a bucket. works like a champ

Will send pictures when i figure out how to change a IMG to something HBT can use
 
Will send pictures when i figure out how to change a IMG to something HBT can use

just host the pic on photobucket or the like, click the img tag provided by photobucket to copy, then at hbt, click on the 'mountain' and paste - remove the extra tags if needed (only one at each end)

there's a testing forum in the second HBT header - [U]Homebrewtalk announcements and feedback[/U] -
 
Here's mine with a JSP and a 70+ year old motor a friend found for me. All mounted on a $10 goodwill find. I think I may build a shoot and run the grain out the side next for easier access and larger grain bills. This works for now up to 5gal barely wines. :mug:

29958_1393842020445_1664019271_908223_7196822_n.jpg
 
Here's mine, just finished grain mill. Purchased table from Ikea ($59), motor from ebay ($25), monster mill ($119), pulleys and belt Ace hardware. Still need to install guard. Works great.

DSC_2526.jpg


DSC_2529.jpg
 
Ok, I finally have a post for this thread.
I tried to find a rolling cabinet to build this with, but I wound up building the cabinet myself. I think it worked out great. I'm quite happy with it. Mill and motor mount under surface, but the mill can be removed easily with wing-nuts for adjustments.


mill1.jpg


mill2.jpg


mill3.jpg
 
Last edited by a moderator:
Here's mine.

78d70497.jpg


9927f3ed.jpg


e9cfaf80.jpg


My cord management wasn't the best, but I was limited by how short the cords coming from the motor were. I might get some butt connectors and encase all of the wiring. But it seems safe for now. Everything's bolted down and not going anywhere.
 
I found a overstock cabinet for reasonable at the local HOBO's. I made the top from some leftover lumber. I wired the switch for forward and reverse. The sliding shelf I relocated to the bottom, so it can hold the bucket. I needed to make a chute to get the grain from the opening in the top closer to the bucket. I ended up cutting out the bottom of a taller Tupperware container, and attaching that to the underside (not visible in pictures). It works great.


Please excuse the messy basement in the photos. :(

IMG_42163.JPG


IMG_42174.JPG


IMG_42182.JPG

Is that an MM3? I have that same mill and motor and the 40 in/lbs of torque wasn't enough when I tested it. It would jam (motor would stop) whenever I put more than an inch of grain in the hopper.

Is that the 40 in/lb motor from surpluscenter with an MM3?
 
Is that an MM3? I have that same mill and motor and the 40 in/lbs of torque wasn't enough when I tested it. It would jam (motor would stop) whenever I put more than an inch of grain in the hopper.

Is that the 40 in/lb motor from surpluscenter with an MM3?

It is a MM3 with 1.5 inch rollers, not the 2 inch rollers, and the 177rpm 40lb gear motor from surplus center. I had no problem starting it, then dumping in 20lbs grain. Maybe it depends on how tight the crush setting is set?
 
It is a MM3 with 1.5 inch rollers, not the 2 inch rollers, and the 177rpm 40lb gear motor from surplus center. I had no problem starting it, then dumping in 20lbs grain. Maybe it depends on how tight the crush setting is set?

Is there any way you can post your wiring diagram? I'm wondering if somehow I wired it incorrectly, creating less torque?

Mine operates fine in forward and reverse, but as I said, it jammed very easily.

I was using some very old grain, but I doubt that should matter.
 
I upgraded my motor to a bodine gear motor with 120 in/lbs of torque. Cost more, about $150 on ebay. Was brand new, though. But it works fantastic. Easily started up with 20lbs in the hopper already. Milled 32 lbs of grain for today's brew day.

I'm glad the 40 in/lb motor worked for you. But I'd caution others to try that motor with a 3 roller mill anyway. My only problem was torque. I had mine wired the same as yours, so who knows what the difference was. Maybe the capacitor on mine wasn't working properly. Anyway, here's a pic of my new mill setup. :D

8bf78c68.jpg
 
Hey guys?
did anyone make there rollers? could i make some from hard wood on a lathe and use some oil? or would there be problems with that
Also are the drill driven ones enough??
Thanks guys
 
I think you'll find there was a reason why grain used to be ground by mill "stones" and not mill "logs." That stuff is going to be so abrasive that it will erode the hardest wood in short order.
 
Here is a picture of my mill.

Take a look a the picture, I have a lot of you have the same motor and I have a question.

Have you add any problems with the motor jambing because you have to much grain in the hopper. I do all the time. I wonder if I need to close up the exit portion of the hopper to limit how much grain hits the rollers at once.

91911 008.jpg
 
Here is a picture of my mill.

Take a look a the picture, I have a lot of you have the same motor and I have a question.

Have you add any problems with the motor jambing because you have to much grain in the hopper. I do all the time. I wonder if I need to close up the exit portion of the hopper to limit how much grain hits the rollers at once.
Which direction are you running the motor when milling CCW or CW?

Reason I'm asking is the Gear Motor 5-1098 is designed to run CCW (viewed from the wiring end). If run CW it has far less torque available.

And another thought. If you got this Gear Motor 5-1074 it has far less torque available in either direction as well as a much lower speed.

P-J
 
Back
Top