
wilconrad
Well-Known Member
Awesome! This looks like a good alternative to the HF low-speed drill. Would you be willing to share more details about how to hook everything up? Enjoy your vacation!
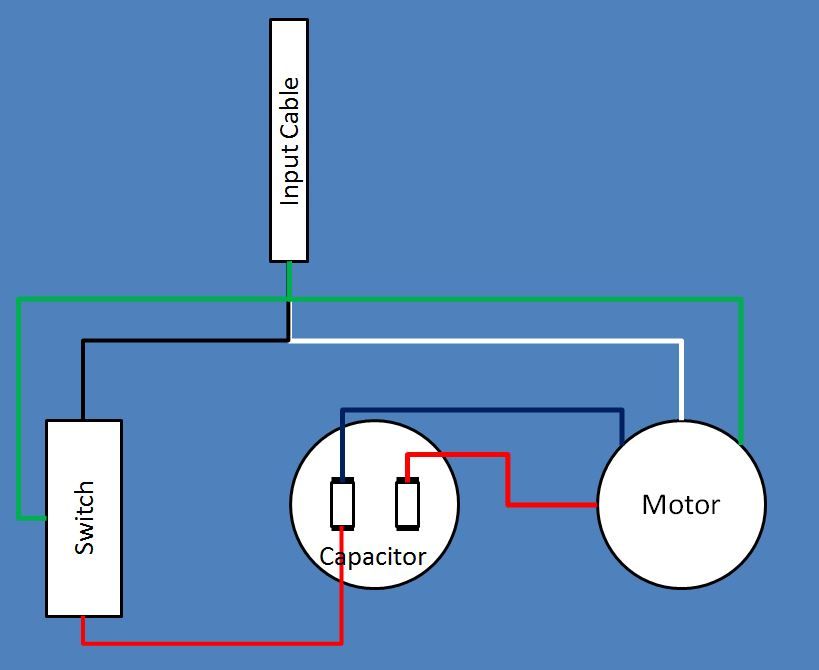
As far as wiring, the motor has 4 wires coming out of it, here's how to wire it up:
White - ground - connect directly to input from outlet
Orange - not used
Red & Blue - connect to capacitor as delivered (power to red drives CW, power to blue drives CCW)
I then connected the incoming line voltage to a switch, and connected the hot side of that to the capacitor spade that resulted in the mill turning the correct direction. If you wire it up and the mill is turning backwards, just move the hot input from the switch to the other side of the capacitor.
I also grounded the motor & switch to the ground wire on the input cable. Here's a schematic:
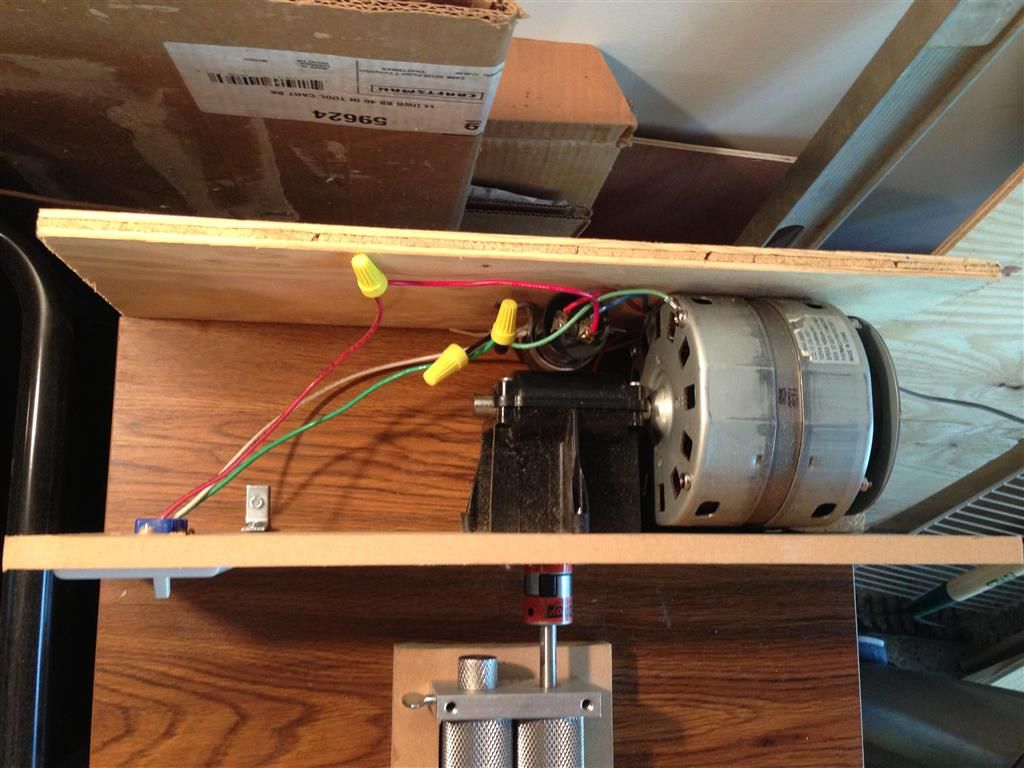
And here's what it looks like:


![Craft A Brew - Safale BE-256 Yeast - Fermentis - Belgian Ale Dry Yeast - For Belgian & Strong Ales - Ingredients for Home Brewing - Beer Making Supplies - [3 Pack]](https://m.media-amazon.com/images/I/51bcKEwQmWL._SL500_.jpg)


")


