low range CO2 regulator for fermenter?

Homebrew Talk - Beer, Wine, Mead, & Cider Brewing Discussion Forum

Help Support Homebrew Talk - Beer, Wine, Mead, & Cider Brewing Discussion Forum:

This site may earn a commission from merchant affiliate links, including eBay, Amazon, and others.

thworted

Supporting Member
HBT Supporter
Joined
Feb 3, 2020
Messages
43
Reaction score
20
I've been using a typical 0-60 psi regulator to put 1-2 psi on my SS Chronical fermenter for transfers, but the regulator is a bit twitchy at that low of a pressure. Does anyone know of a decent low range CO2 regulator that may have better control/reliability? I finally got around to finishing my latest fermentation chamber, and want to be able to leave the Chronical under a little pressure post fermentation for cold crashing.

I see that Micro Matic sells a 0-15 psi regulator, and maybe that is good enough, just not sure what other options are out there. Appreciate any input.
 
I solved this using fixed 11" WC (~0.4 psi) barbecue propane regulators as "secondary" regs. Plumbed with PTC fittings and EVAbarrier 5mm ID tubing, I insert them in the gas feeds to two of my chambers when needed...


ferm_chambers_CO2_02.jpg


ferm_chambers_CO2_03.jpg


Worth noting, 0.4 psi is typically not enough to push a manifold check valve open. I removed the check valves from two of four gas drops in each chamber to cope...

Cheers!
 
I solved this using fixed 11" WC (~0.4 psi) barbecue propane regulators as "secondary" regs. Plumbed with PTC fittings and EVAbarrier 5mm ID tubing, I insert them in the gas feeds to two of my chambers when needed...


View attachment 668606

View attachment 668607

Worth noting, 0.4 psi is typically not enough to push a manifold check valve open. I removed the check valves from two of four gas drops in each chamber to cope...

Cheers!
That is an excellent idea!!
 
I solved this using fixed 11" WC (~0.4 psi) barbecue propane regulators as "secondary" regs. Plumbed with PTC fittings and EVAbarrier 5mm ID tubing, I insert them in the gas feeds to two of my chambers when needed...


View attachment 668606

View attachment 668607

Worth noting, 0.4 psi is typically not enough to push a manifold check valve open. I removed the check valves from two of four gas drops in each chamber to cope...

Cheers!

I noticed in another thread that you mentioned you use this for glass fermenters. I was curious how do you have your EVAbarrier tubing terminated at the carboy? This is quite awesome!

Cheers!
 
When I switched my keezer to EVAbarrier throughout I also re-fitted my three fridges with it on the gas side. As everything was 1/4" mfl already I just added the 1/4" ffl - 8mm OD fittings to the manifolds and to the gas QDs along with the new tubing (I used 5mm ID for all my gas side stuff).

fridge_1.jpg


The carboy caps were used for years with the original gas systems - and before I started using the BBQ regulators as "secondary" regs, hence the balloon "pneumatic fuses" shown (and still used just on GPs) . As I related earlier, the low pressure (that can't even inflate the balloons if all is working well) wasn't enough to reliably open the spring-loaded ball style check valves in the manifold valves, so I black-marked the two disconnects on each fridge that had the corresponding checks removed to remember not to use them on kegs that might be a bit over-filled.

The carboy cap gas fitting consists of a Firestone gas post, a conversion fitting from 9/16"-18 male to 1/4" ffl, and finally a 1/4" mfl - 1/4" barb, with a 1/4" nylon flare washer in between the last two bits. Add a worm clamp and that bit is good to go.

If the balloon idea is interesting I stuffed a short length of 1/4" copper tubing into the center carboy cap nipple, pulled the balloon over the nipple, put a turn of blue masking tape around the stem then added a worm clamp. The copper keeps the nipple from simply collapsing under the clamp, and the tape keeps the clamp from cutting the balloon...

Cheers!
 
When I switched my keezer to EVAbarrier throughout I also re-fitted my three fridges with it on the gas side. As everything was 1/4" mfl already I just added the 1/4" ffl - 8mm OD fittings to the manifolds and to the gas QDs along with the new tubing (I used 5mm ID for all my gas side stuff).

View attachment 693652

The carboy caps were used for years with the original gas systems - and before I started using the BBQ regulators as "secondary" regs, hence the balloon "pneumatic fuses" shown (and still used just on GPs) . As I related earlier, the low pressure (that can't even inflate the balloons if all is working well) wasn't enough to reliably open the spring-loaded ball style check valves in the manifold valves, so I black-marked the two disconnects on each fridge that had the corresponding checks removed to remember not to use them on kegs that might be a bit over-filled.

The carboy cap gas fitting consists of a Firestone gas post, a conversion fitting from 9/16"-18 male to 1/4" ffl, and finally a 1/4" mfl - 1/4" barb, with a 1/4" nylon flare washer in between the last two bits. Add a worm clamp and that bit is good to go.

If the balloon idea is interesting I stuffed a short length of 1/4" copper tubing into the center carboy cap nipple, pulled the balloon over the nipple, put a turn of blue masking tape around the stem then added a worm clamp. The copper keeps the nipple from simply collapsing under the clamp, and the tape keeps the clamp from cutting the balloon...

Cheers!

Very cool! Thanks for the fitting list also. Do you typically still use a blowoff tube and then transition to the Carboy cap?
 
As of the last brew I have transitioned to capturing fermentation CO2 to purge the same kegs the 10 gallon batch will end up in.

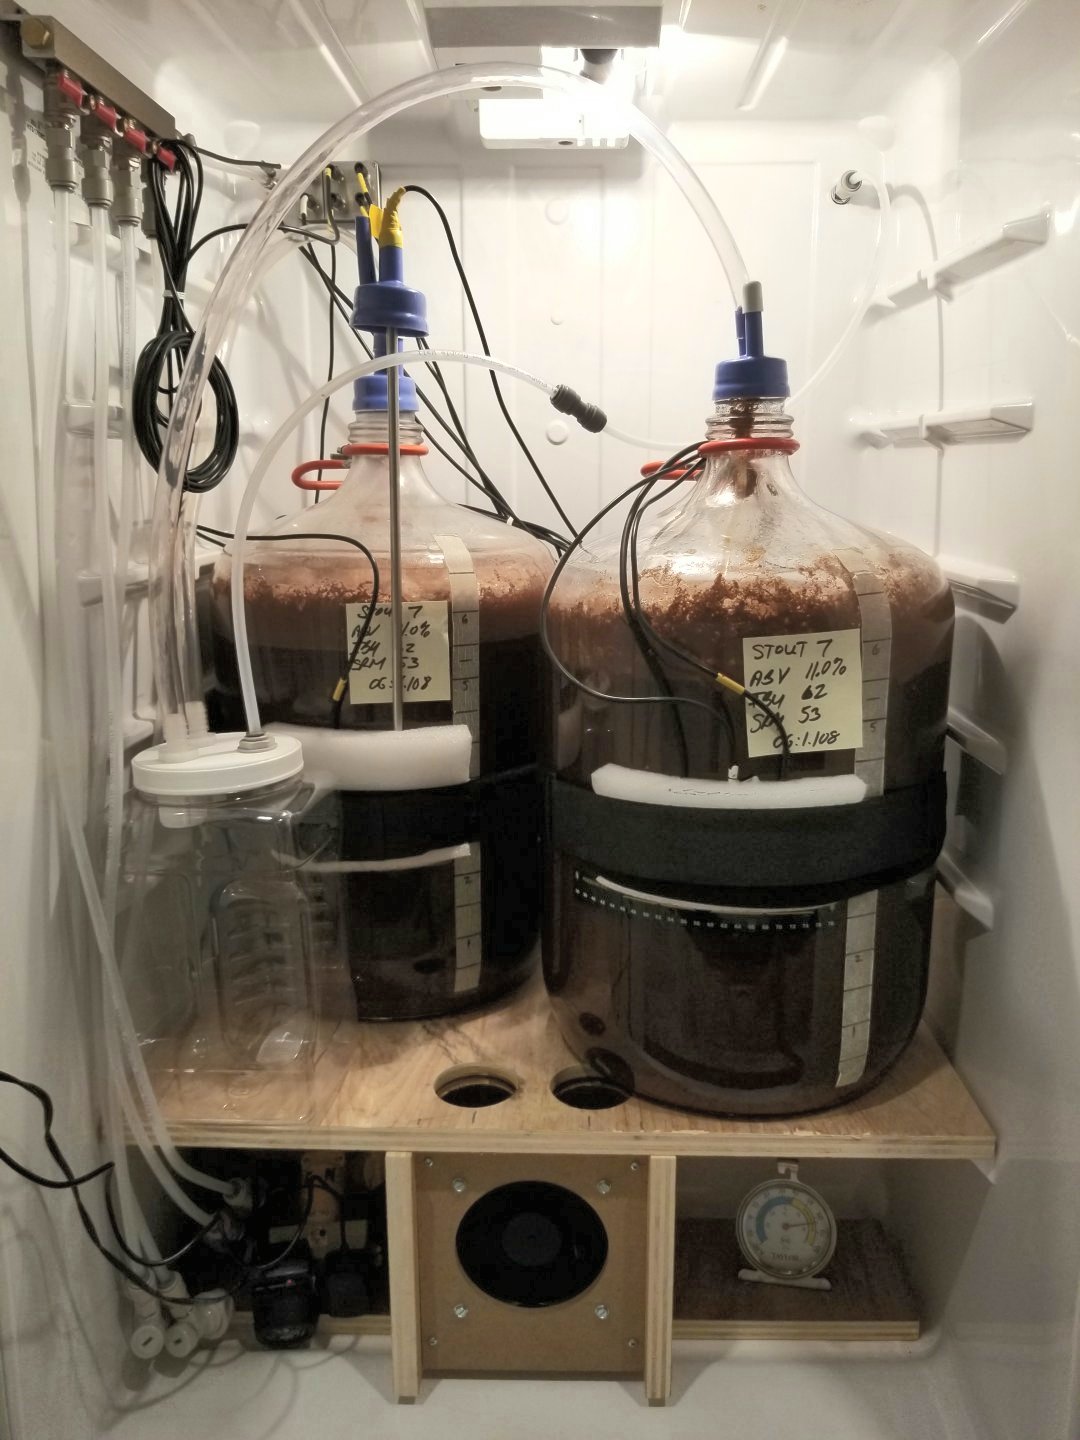
So, a bit different process. For batches that historically have been calm fermentations I am now starting off connected directly to the purging system I put together using simple universal carboy bungs with 8mm tubing stems. You can see one of those setups on the left in this pic, while the other is using a carboy cap with the 8mm OD EVAbarrier tubing simply jammed down the skinnier nipple.

stout7_30jun2020_2sm.jpg


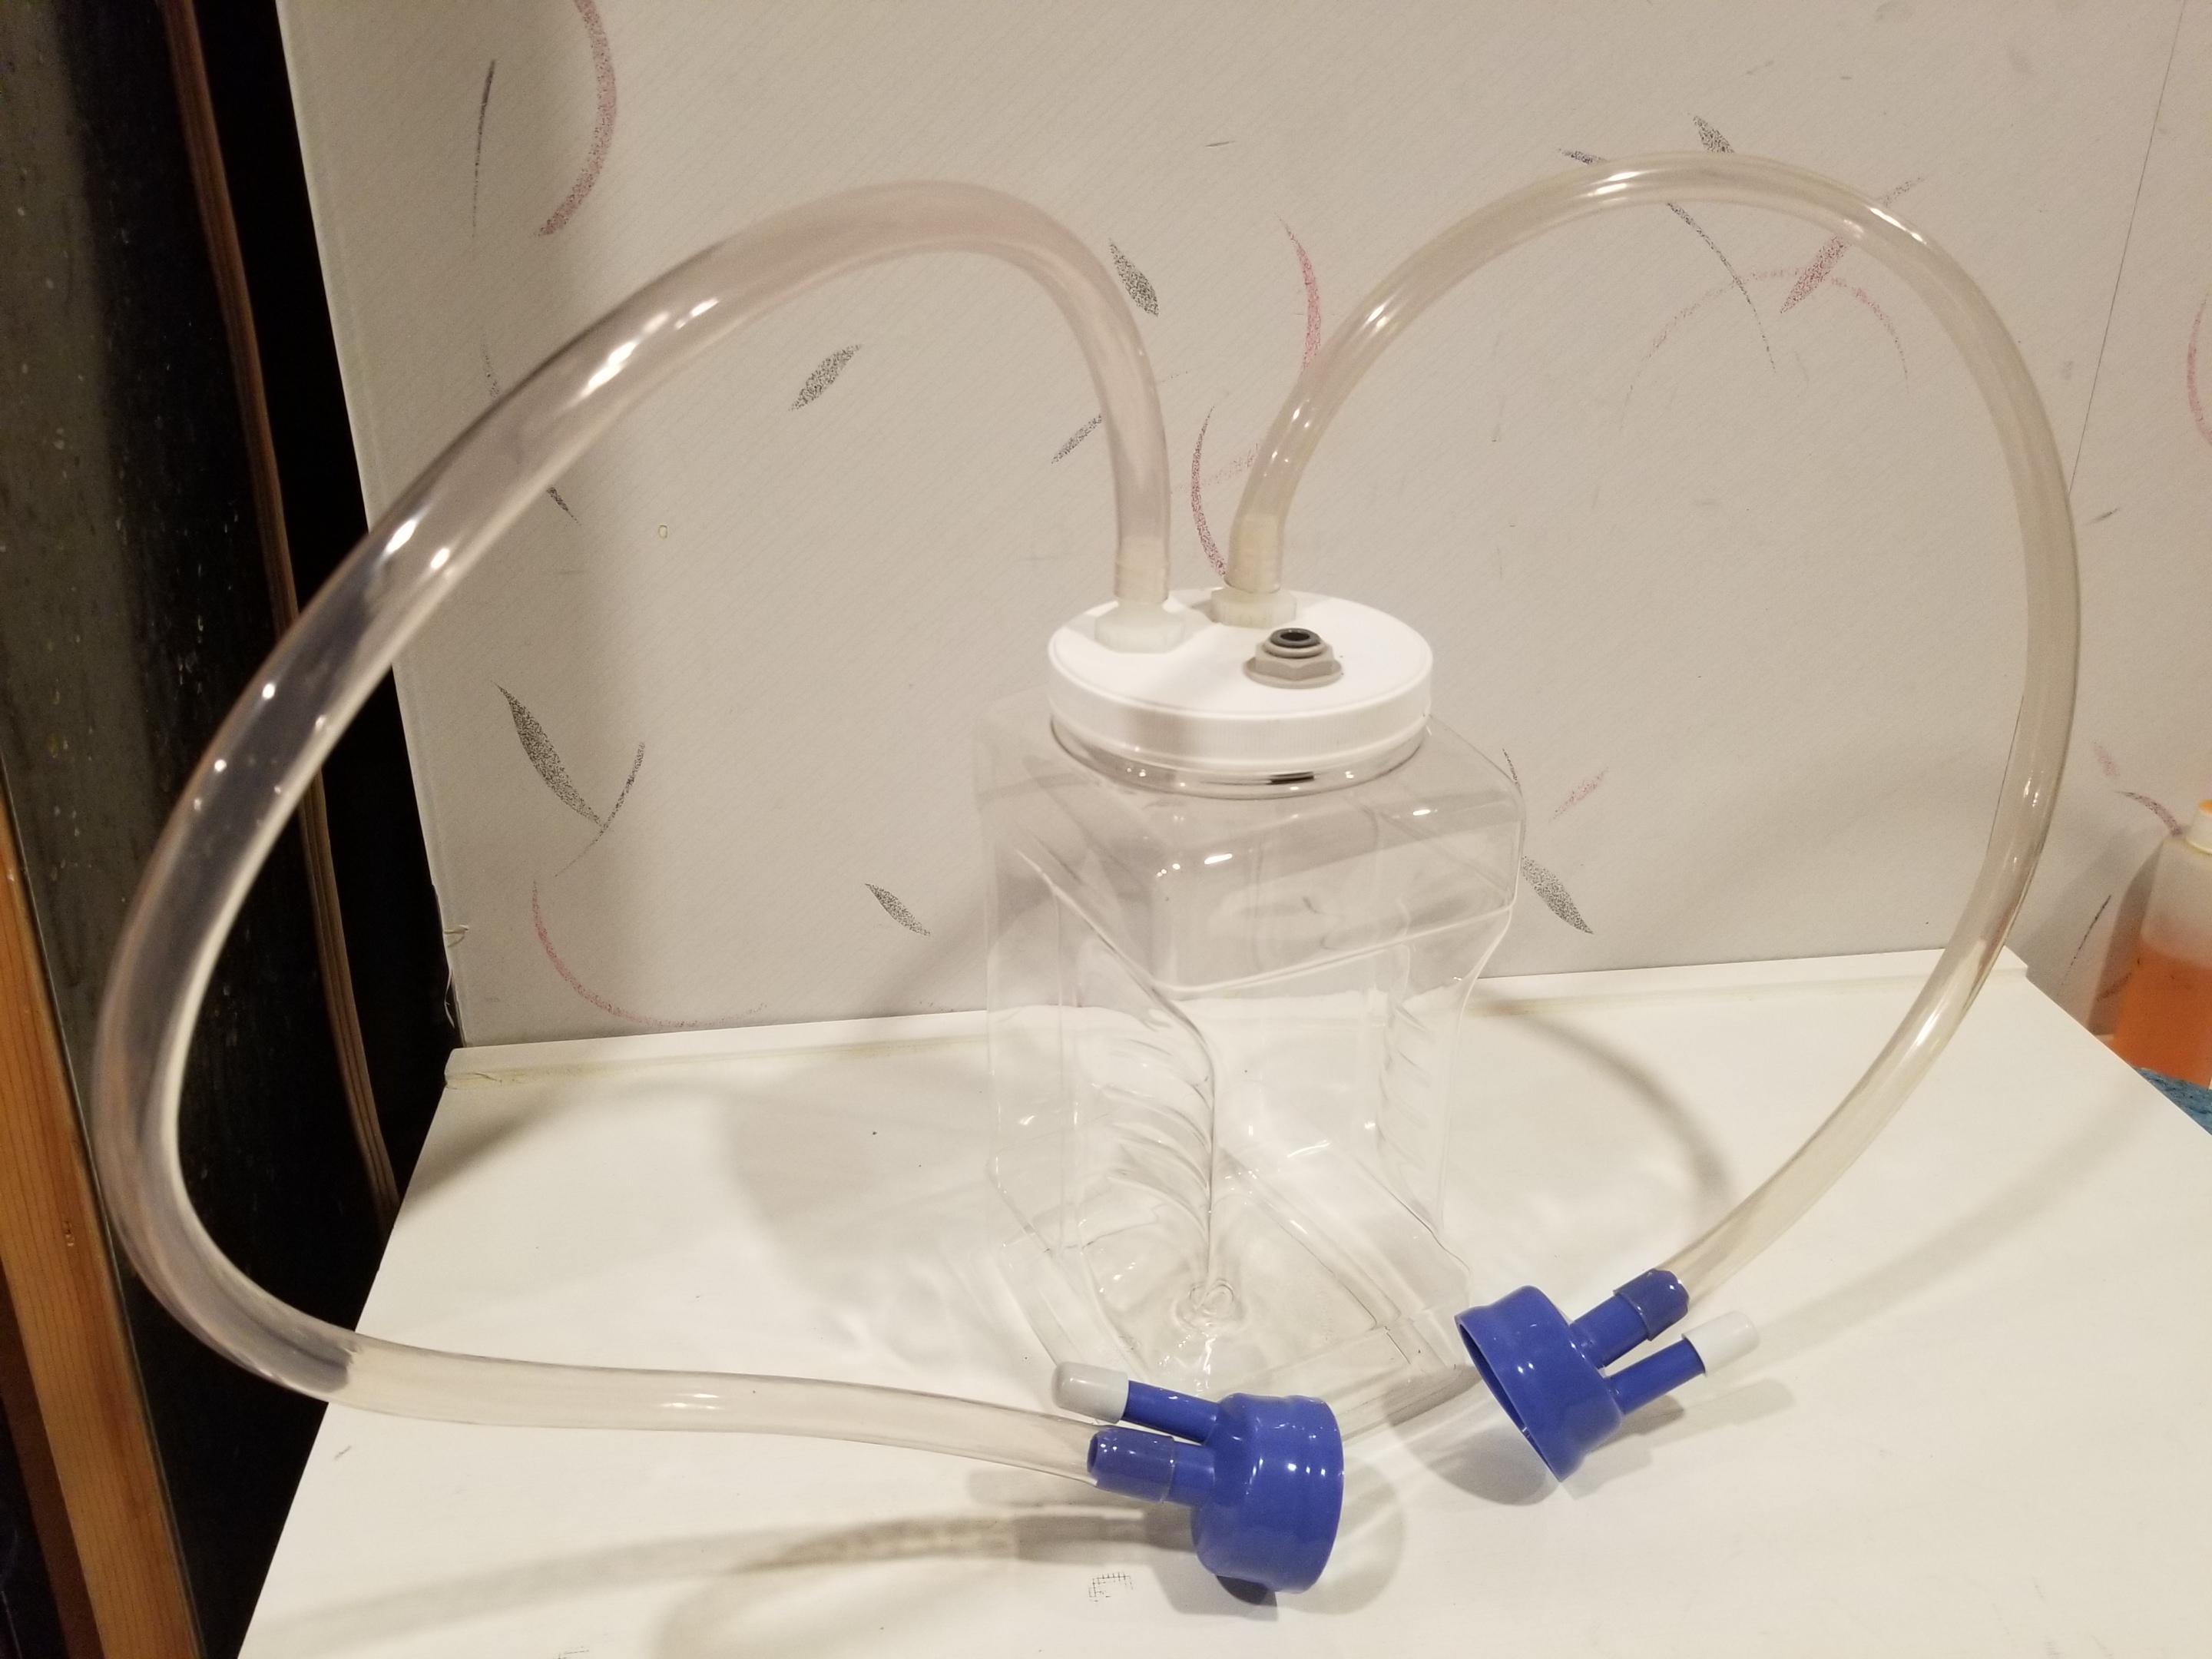
For recipes that are prone to blowing krausen I cobbled together something to provide decent diameter (1/2") blow-off hoses and capable of gathering a moderate amount of blown krausen and liquid while still routing the gas to the kegs.

That's a PET jug with a foil-lined lid, a pair of 1/2" barbs x 1/2" threads threaded into PVC half couplers (under the lid), and a John Guest 8mm OD tubing bulkhead (iirc, 1/2" threads).

keg_purge_system_11.jpg


The gas line plugs in and runs to a bulkhead in the back of the fridge. From there it tees to a similar line from my 2nd ferm fridge...

stout7_30jun2020_5sm.jpg


...then proceeds on to the pair of daisy-chained kegs, and finally a 2L bottle of water as an "air lock"...

stout7_30jun2020_3sm.jpg


From all appearances this worked quite well, though given this was an imperial stout (1.107 OG/1.025 FG, so a crapton of CO2 produced) it may not be very revealing wrt the effectivity of the CO2 purge for all cases...

Cheers!
 
day_trippr said:
From all appearances this worked quite well, though given this was an imperial stout (1.107 OG/1.025 FG, so a crapton of CO2 produced) it may not be very revealing wrt the effectivity of the CO2 purge for all cases...

Cheers!

I have a “modified for my system“ version of your set-up, and just brewed an IPA 1.060 OG-1.007 FG. I was easily able to purge a keg with produced CO2 in about 2.5-3 hours (That was after high krausen). I have a sneaky feeling I could have purged 2 maybe 3 kegs.

This first CO2 harvesting batch was an eye opener. I never had a good sense of how much CO2 was produced during fermentation, until I watched 5-gallons of StarSan get readily displaced.
 
Please don’t ever post a photo of all your fridges. I have the most majestic image in my head.:rock:

Thanks for all the info. Really cool set up. I’ll likely adapt it to my set up. Will post back when I do.
 

Latest posts

Back
Top