Icebox style kegerator and fermentation chamber build

Homebrew Talk - Beer, Wine, Mead, & Cider Brewing Discussion Forum

Help Support Homebrew Talk - Beer, Wine, Mead, & Cider Brewing Discussion Forum:

This site may earn a commission from merchant affiliate links, including eBay, Amazon, and others.

laredo7mm

Well-Known Member
Joined
Feb 4, 2016
Messages
328
Reaction score
123
After starting with making hard cider last november and then progressing to all grain brewing, I have finally gotten tired of only having half a refrigerator to use for beer and using my entire house as a fermentation chamber. Moving carboys to warmer or cooler spots (or moving them to the basement and then back upstairs) and constantly changing the thermostat got old real quick.

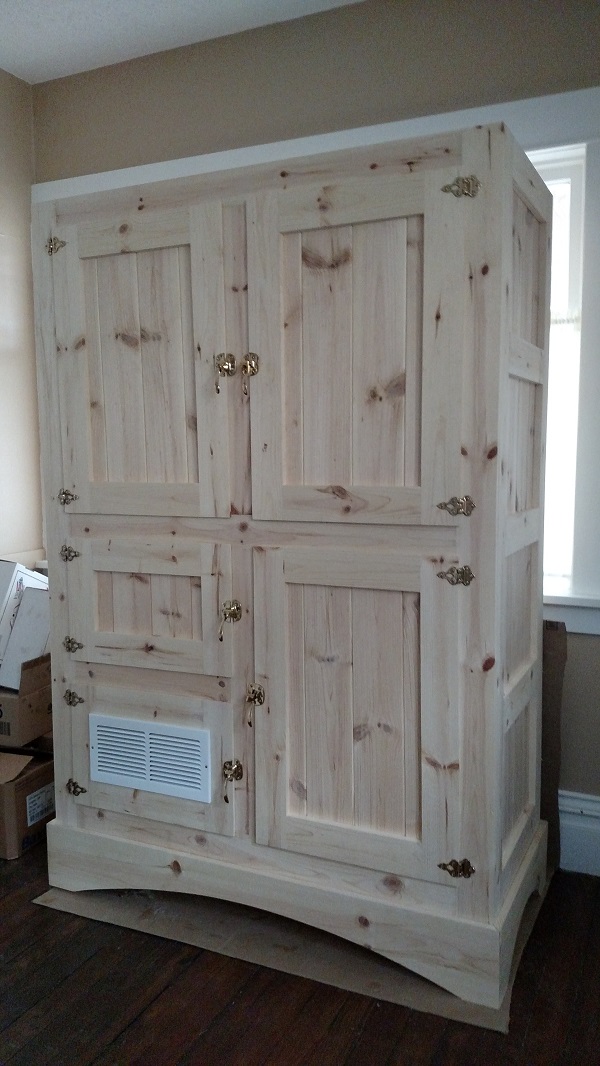
I was inspired by "The Mother of All Fermentation Chillers" from the Wort-O-Matic site and I wanted it to look like like an old style icebox since my house is on the old side (1908). One of the main driving factors of the design was to make something that I could still use as a cabinet if I ever stop brewing my own beer/cider.

So far I have the design 95% complete and sourced my raw materials. Hopefully I will be able to start putting it together soon.


The design:

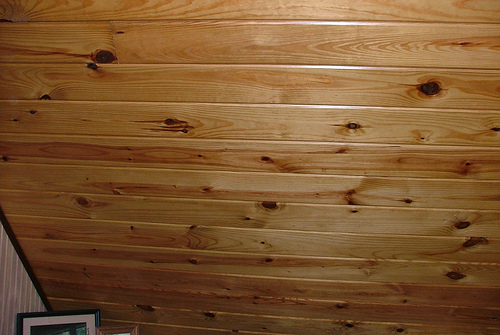
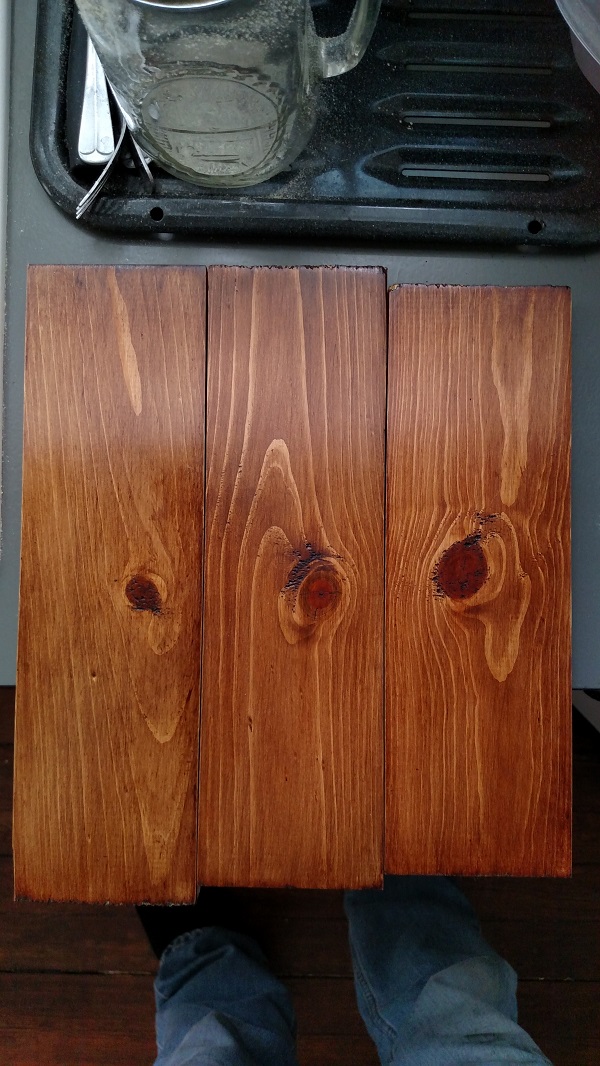
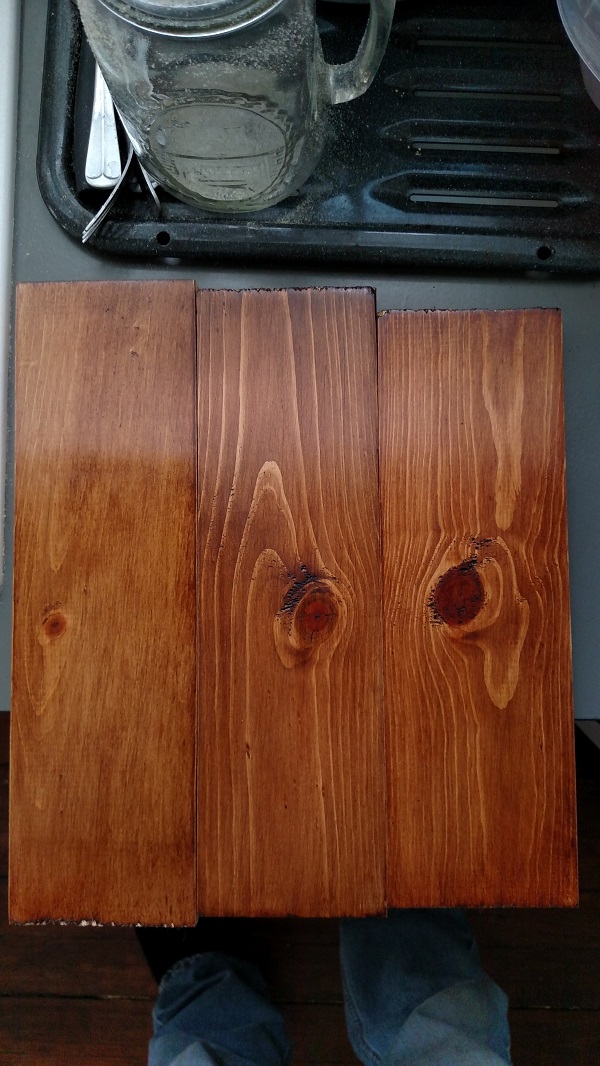
Old style icebox "look" made out of Michigan knotty red pine. I will stain it, but I haven't decided on what color to use. I don't want to go too dark and lose the character of the knotty pine. Or I may just Briwax it with one of their colored waxes.

I have the icebox hinges and latches on order. Hopefully they will be here soon.

Overall size is 51" wide, 24" deep, and 80" tall.
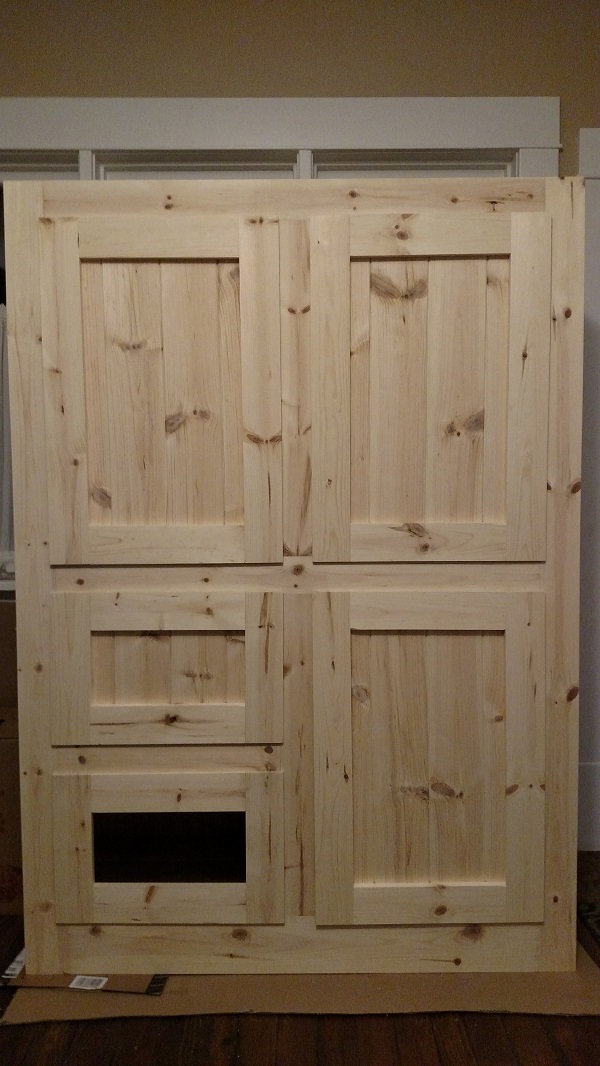
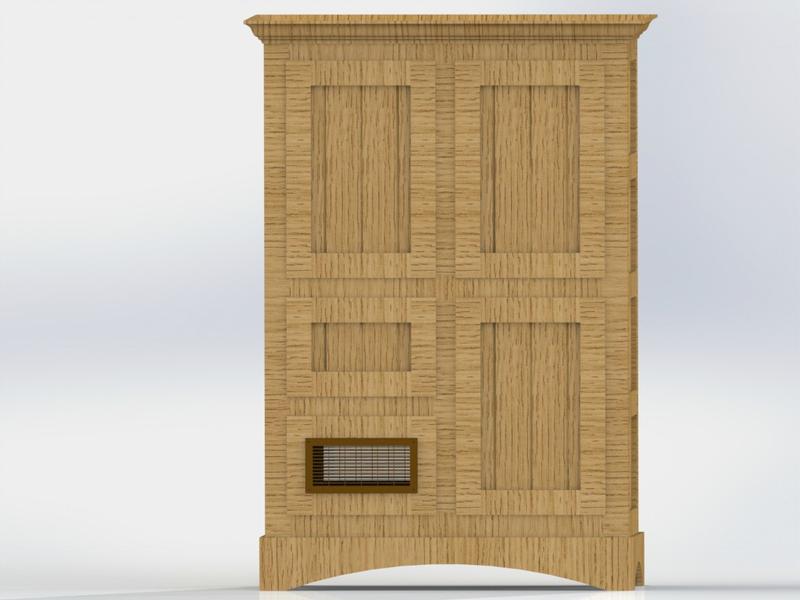
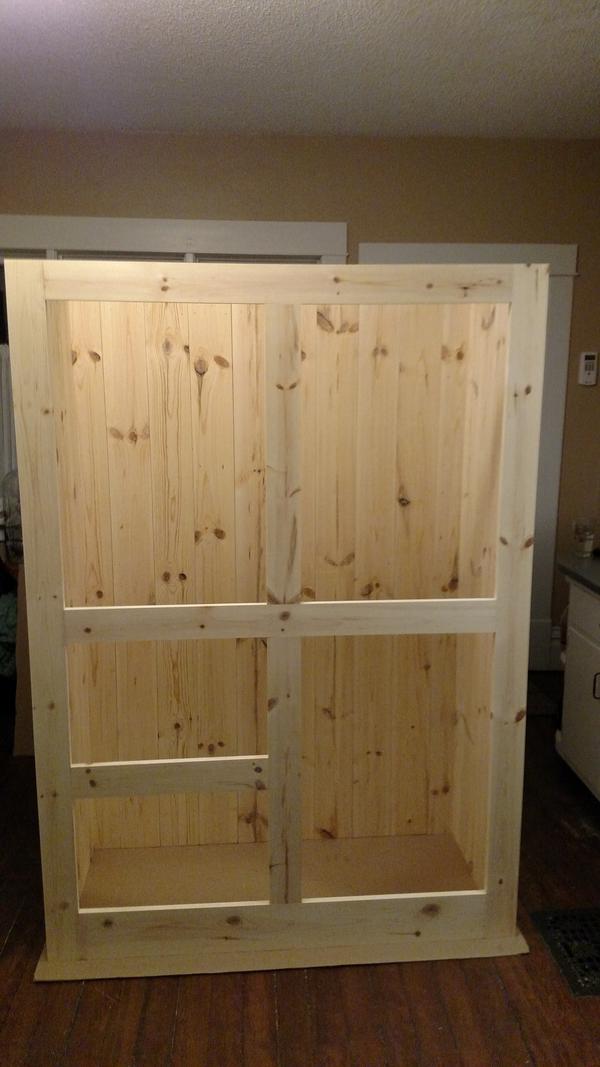
Front View:
mnRkvTt.jpg


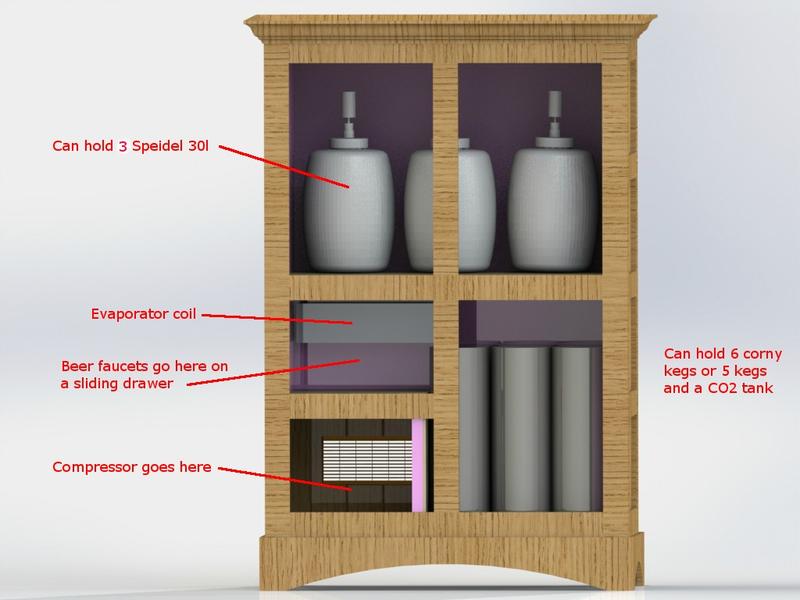
A bit of a schematic:
EWbanOn.jpg


The Components:

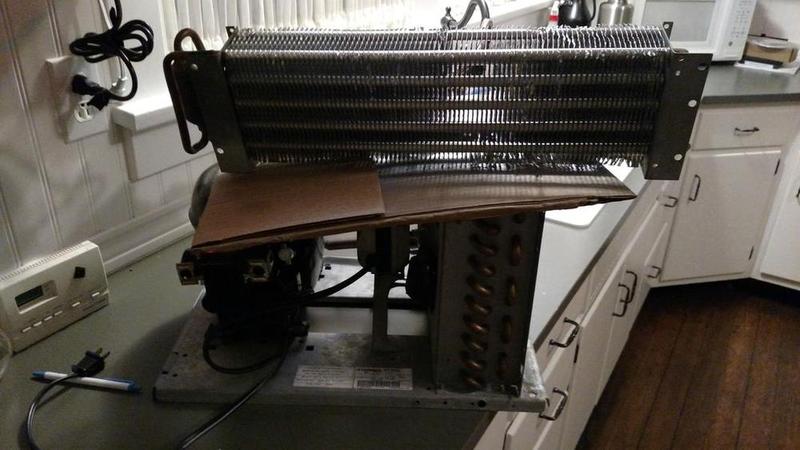
The refrigeration deck from a vending machine will be used instead of a chest freezer or mini refrigerator:
qcGMd6M.jpg


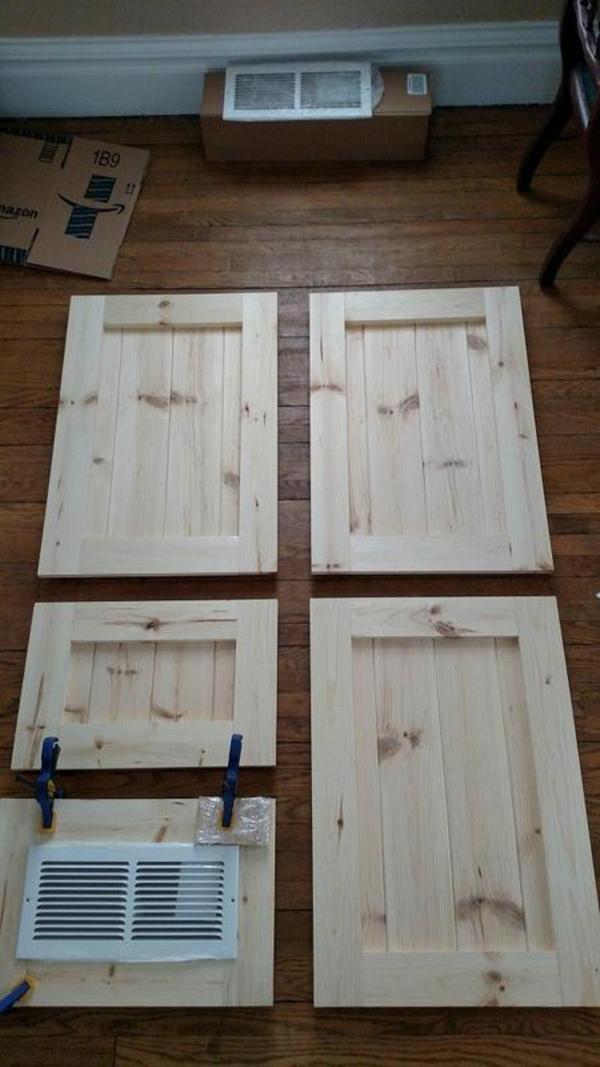
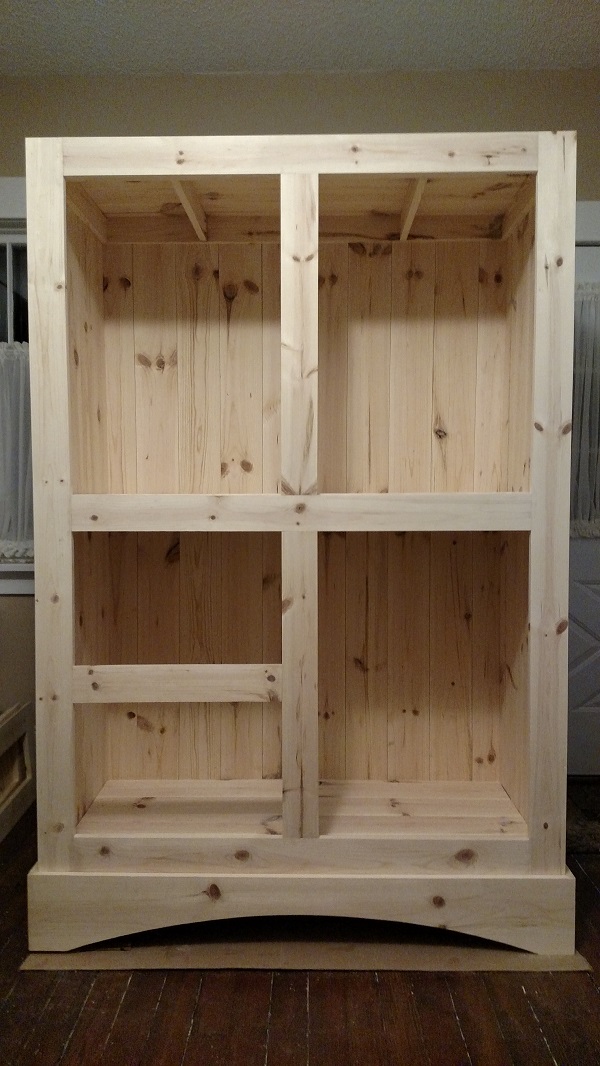
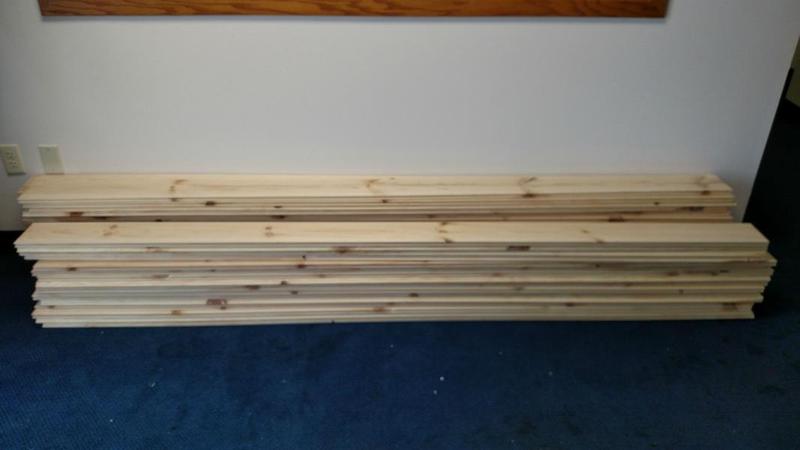
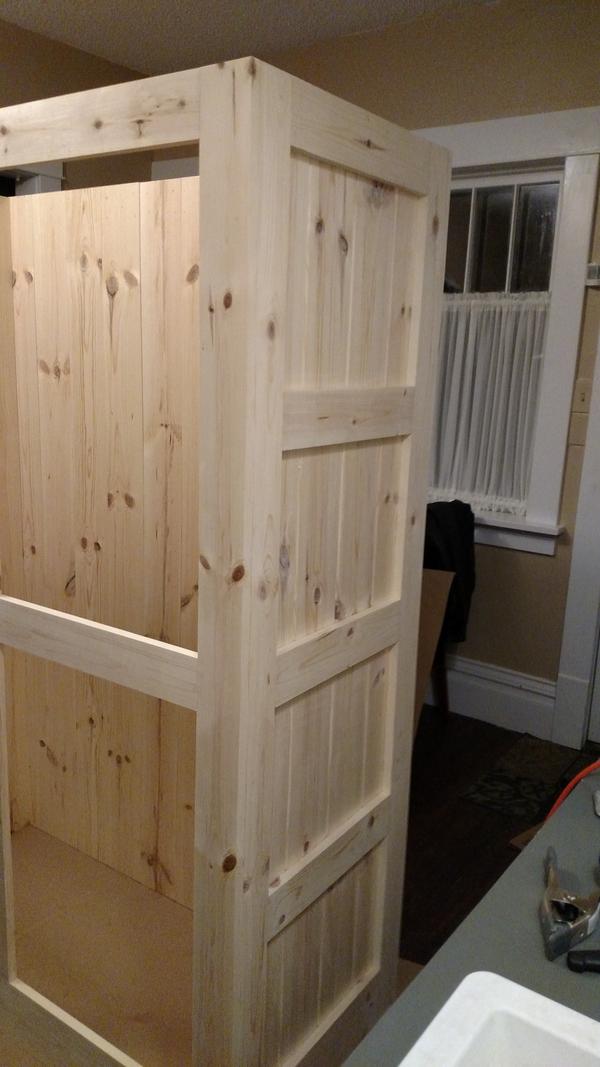
The knotty red pine lumber from WoodHaven Log & Lumber got delivered today. This is a mixture of their S4S boards and tongue and groove paneling. It is some fantastic stuff (my crappy photos don't do it justice). Milled right here in Michigan. You can't find this quality of lumber at any big box store:
Z1RLkdE.jpg
 
I'm slowly making progress. I got three of the face frames done yesterday. Nothing very exciting but everything is coming together well.

baCgCp4.jpg


Its good to be not married and able to use the entire house as your workshop. I should be able to get home tonight in time tonight to clean up before the GF comes over. I cut the 1x4 boards to length in the kitchen, but then I couldn't watch TV while I worked so I moved to the living room. :)

B7tuNcp.jpg
 
Got the main carcass finished today. Now I need to make the doors, shelves, and insulate it. At least the big stuff is done.

CkS3YKH.jpg


9BMd2gM.jpg
 
The doors are about done. Hopefully I can get the shelves done tomorrow.

W9U5lAE.jpg
 
I am still pondering on what color to stain this thing. Right now I think it looks like a shipping crate.

I am making some iron acetate (steel wool and vinegar) to try out the tea and vinegar stain, but most pictures I have seen of that looks blueish grey. I'm not sure that I want that look on this.

I don't want it too dark, but I don't want it too light either. Too many choices out there. What do you all think?

Here is a picture of a possible stain color I found online:

5yYGIQL.jpg


Here is the Briwax finish. It has more of a reddish tint to it :

img_9568.jpg


img_9565.jpg
 
My actual ice box has a redish tint. I'd go with that.

I agree, I lke the red tones. Adds some warmth/richness to it.

Here are my stain trials on some of the scrap pieces with the Briwax. The board on the right has three coats of Teak colored wax. The board in the middle has one coat of Tudor Brown and then two coats of Teak. For the board on the left I melted and mixed equal parts of the Tudor brown and Teak waxes and then applied three coats.

It is kind of hard to see in the picture, but each one looks slightly different. I am leaning to the one on the left.

urIQFDG.jpg


This next picture has the same two middle and right boards as the pic above. The left board has equal parts of the Tudor brown, Teak, and clear waxes that were melted and mixed. Three coasts applied. This is also a candidate. It is a bit lighter than the left board in the first pick. Well technically it is the left board in the first pic but the other side of it so I can't get a side by side shot.

MLFDFrj.jpg
 
Gee, wish I could make a quality mess like that inside the house!

Aha, it is nice and way better than having to lug everything to the basement and work down there in the 50F temps. :)
 
Yea, I think you mentioned you have a girlfriend--gets more difficult when you have a full time wife! I put up a pole barn for doing all of my projects. Still thinking about moving my bed out there. The one on the left looks good to me.
 
Yea, I think you mentioned you have a girlfriend--gets more difficult when you have a full time wife! I put up a pole barn for doing all of my projects. Still thinking about moving my bed out there. The one on the left looks good to me.

The one on the left seems to be the one everyone likes so far. The GF likes the one on the right, but she hasn't seen the one on the left in person yet. I'll get her input tonight.

I would love to build a garage. I had quotes done last year to build one but couldn't pull the trigger with my kid's looming college tuition approaching. It wouldn't be so bad if I didn't live in a "Historical District." I have to have a garage roof pitch that is similar to the pitch of my house so a typical pole barn garage roof is a no go. I have lived there for 18 years without one so a few more won't hurt.
 
This is great! I've had the idea for a similar project for some time now. I haven't started it because I've been intimidated/stumped by the refrigeration component. I look forward to seeing the completed project and would like to hear any details you can share about the cooling equipment.
 
This is great! I've had the idea for a similar project for some time now. I haven't started it because I've been intimidated/stumped by the refrigeration component. I look forward to seeing the completed project and would like to hear any details you can share about the cooling equipment.

The refrigeration deck is a used unit from a vending machine. I think it is about a 1/3 hp compressor. I got it from CW Cooler Repair in Alabama. If you google it you should find it pretty quick. Charles (I think he is the owner) is easy to deal with and he ships quick. The model I got is a Vendo V21.

There are also quite a few listed on eBay. Search for "compressor deck" or "refrigeration deck" and you should see them. CW Cooler repair was much cheaper than the ones on eBay. Mine was $125 plus shipping.

I bought three 115V 120mm fans off of Amazon to mount to the evaporator to move the air. The are about 100CFM each so I might be able to get away with only using two. I also bought a couple 115V 92mm fans that will be used to blow air from the refrigerator part into the fermentation chamber when cooling is needed. Right now I have a couple of STC 1000s to use for temperature control, but I am looking into using a raspberry Pi and Arduino to control the temps as talked about here: https://www.homebrewtalk.com/showthread.php?t=466106
 
I got the shelves/floors in this weekend. She is definitely sturdy and stout. Feels like it weighs about 200 pounds. I still need to finish the doors (dado the back to get my 3/8inch offset for the hinges) and get them mounted.

Then I need to build the decorative base shown in the first pictures and find some suitable molding to trim out the top. After that I can move on to getting the compressor deck and evaporator mounted and figure out my controllers and wiring.

oVD3qSV.jpg
 
I got the doors cleaned up yesterday. I have a janky little table saw so I had to clean up my miss matched saw cuts from making the offset cut on the back of the doors. Thankfully you won't be able to see them. Not the prettiest thing. :)

I also got the decorative base done yesterday too. It was awful. Miter cuts are awful to create without nice equipment. Changing the band saw over from being set up for metal to use it for wood was awful. Sanding the arches was awful. But its now done and doesn't look horrible. Noting a little wood putty and stain won't hide. ;)

Not sure if you all have noticed that most of my pictures have the cabinet looking tilted. Its the floor, not the cabinet...I think. I have about a 1/4" shim under the left side and it is almost level. Damn 108 year old house. Ahaha.

Maybe tonight I will try and get the doors mounted to the cabinet. I need to figure out something as they are a bit twisted. I was thinking off adding a diagonal brace across the back of the door to draw out the twist. Or I might just mount one and see if the latch will draw it closed "good enough" to make a seal once the weather stripping is on the door. Or I might just take the night off and drink some home brew. :mug:

ys62I9g.jpg
 
I got the hardware put on last night. I'm not sure that I am happy with it. Everything seems so small. I think I need something more substantial so it has better proportions to the door/cabinet size. Not to mention that the hinges/latches have quite a bit of slop in them so I have to go through and tweak them to try and get everything to line up well. Not sure if I can even get there from here with what I have.

I might have to go on the hardware hunt again. Or just make my own. Metal work is easier than wood work anyway.

4STBdB6.jpg
 
Fantastic Woodwork.
One small critique..Why not use a Wooden vent?
If anything will distract from the beauty it will be the White Vent on the bottom.

Can't wait to see it finished.
 
Thanks for all the compliments. She is coming together well. :)

I'm still deciding on what to do with the hardware, but I might keep what I have as it is starting to grow on me, and it is already paid for.

The vent will not stay white. I bought the vent grilles on Amazon for $4 each as an add-on item since they are a perfect fit. I will paint them or maybe even wax/stain them (if it works) to match the final stain color of the cabinet.

Even the brass will go darker if I keep this hardware. They are un-lacquered brass so I can throw some patina on them to darken them. At the moment, the doors, vent, and hardware are all in the mock up stage and need to be disassembled for final sanding and staining.
 
Personally I would inset a decorative tin piece like this...and then put a air filter behind that to keep out dust.

Nice, I might have to look into that. I have already bought some air filter media to put behind whatever grate I use. It comes in a roll so I just have to cut it to size.
 
I decided to make my own hinges after searching and not finding anything that I liked. Well, I liked quite a few of them, but I am not willing to spend $1000 for a vintage set of hardware or $1000 per door for some CNC machined recreations made out of brass. ;)

I ordered some refrigerator latches that will hopefully work after I modify them to reduce the offset of the hook. It is made for about a 1.5" offset and my doors are at 3/8" offset. They are adjustable, so I should be able to cut/mill/drill to get the correct height. We will see.

Here are the hinges on the cabinet to get an idea of the scale:
LtEIxMp.jpg


And a close up. Basically just a steel plate bolted to an existing hinge. Cheap, quick, and functional, but not very elegant.
mHEMwwT.jpg
 
Hinges made and doors hung. I like them better than the brass hardware and they shouldn't contrast so much once I get the cabinet stained/waxed.

Next up will be to get the side vents built for the fermentation chamber and floors permanently in so I can get to insulating.

S2k8bSn.jpg
 
Dang. Nice project to say the least! :)

I like your hinges. They look nice with the styling of the whole thing.
 
Progress has been a bit slow lately. Insulating this thing took forever. IDK why but it was such a chore. But it is almost done. I started waxing the doors but still have to sand and wax the cabinet.

I had to learn some refrigeration repair since I managed to snap/crack the lines when trying to get the compressor and evaporator into position. She seems to be holding pressure, but I still need to get to the correct suction pressure. I think she is still a bit low on refrigerant.

I did a temperature test last night with a poorly sealed lower chamber. The doors were just propped or taped in place and I put in a cardboard divider in the bottom next to the compressor area. She went from 66° to 37° in 10 minutes and then down to 33° in another 5 minutes. So hopefully she will be able to do the job of cooling 5 or 6 kegs.

TtR4fTG.jpg


jZMv3w1.jpg
 
I think I got the compressor dialed in last night and I changed the evaporator plenum to only use one fan (110 CFM) instead of three and increased its volume. I am getting about 22° F out of the plenum (measured at the fan) at its coldest at 18ish psi suction pressure. From the charts I looked at the evaporator should be at 19° with suction pressure of 18psi with R-134a refrigerant so I am pretty close since I am not actually measuring the evaporator temp.

When I did the temp test last night, it took the chamber down from 68° F to 28° in about 10 minutes.

I guess now I need to start working on sanding and waxing the main cabinet. I can't say that I am looking forward to that. :(
 
Got her waxed and the hinges painted. Not sure I like the color, but it is what it is. :) It looks better in person than in the pictures.

Now I have to get the vents in for the ferm chamber and put the top shelf in and insulate it. Then wire up the controllers and get the latches modified, painted, and installed.

I'm hoping to have it done by Wednesday. I have two beers that will be ready for kegging by then.

SnRupRR.jpg


1EuVjUY.jpg
 
Back
Top