I think the most important thing is that you start with a totally clean kettle free from any kind of oils, including skin oils. If you used your bare fingers to put down any masking, use rubbing alcohol to clean your masked off areas. I used nitrile gloves, but I still wiped the kettle with alcohol in case there was any glue residue. Fingerprints and smudges will lead to blotchy etching.
My setup:
-My power source was a 9v 100mA "wall wart" from an unknown source, likely a broken guitar pedal (I have a few of those). Clipped the connector off and exposed about a half inch of bare wire from both wires. Some people use 9v batteries but I couldn't get it to work on my test pieces even with a fresh battery. I think you can buy these "wall warts" at walmart or radio shack or places like that. 9v seems to be the magic voltage number for the best result.
-I always kept the ground taped to the kettle within 4 inches of where I was working, most of the time it was less than an inch away from my current etching spot. I used blue painter's tape, just because it's what I was already using to mask off the hash marks. [I'd advise against using electrical tape as it tends to leave this demonic residue behind that resists even the most powerful solvents. I always end up having to use brake cleaner to get that nasty residue off, and I'd be hesitant to use that in my kettle. That might just be the crappy el tape I have on hand though.]
-I wrapped the other wire around the head of a q-tip tightly and fully saturated the q-tip with the vinegar/salt solution. As for the solution I used you'll have to forgive me since it's been over a year and I don't remember exactly. I do seem to recall using a lot of salt in the solution. Like, there were still granules sitting on the bottom of the Dixie cup I used to mix it in. I think having a supersaturated "brine" solution is the key to this whole operation. What we're doing here is basic electroplating. You're depositing metal from the wall of the kettle onto the wire that you have wrapped around the q-tip, leaving a rough surface behind on the stainless. Lots of electrolyte - in our case sodium chloride, salt - is necessary.
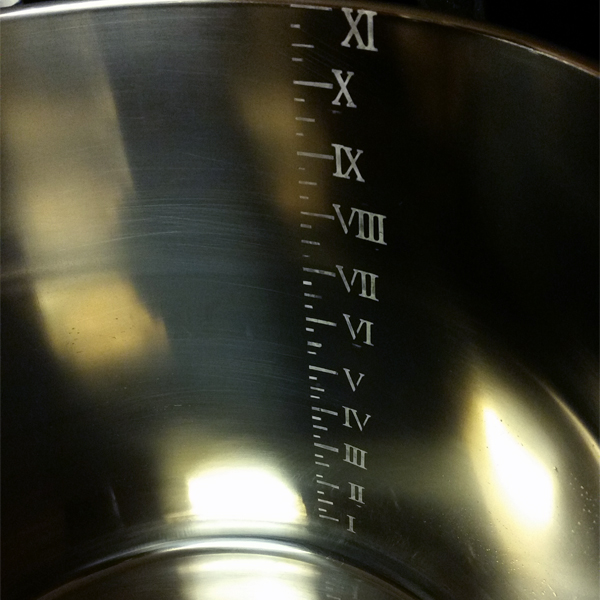
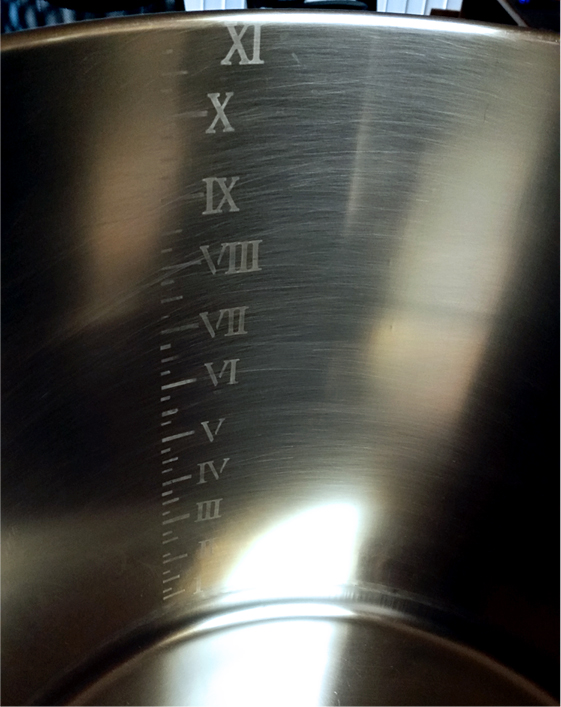
-Go over the etch a lot. I went back and forth over the same hash mark many times, and I moved the q-tip slowly. I had a dry paper towel in the other hand to wipe away the etching solution frequently to check the color/intensity. I dipped into the solution often, you want that q-tip to be really wet with the solution. When it's bubbling near the end of the q-tip and the wire wrapped around the q-tip starts getting dull brown/black, you know it's working.
Hope that helps! Good luck and report back if it worked or if you need more help and I'll do what I can to assist.


![Craft A Brew - Safale BE-256 Yeast - Fermentis - Belgian Ale Dry Yeast - For Belgian & Strong Ales - Ingredients for Home Brewing - Beer Making Supplies - [3 Pack]](https://m.media-amazon.com/images/I/51bcKEwQmWL._SL500_.jpg)


") but ok.
but ok. 


![IMG_20170119_195254_1[1].jpg](https://cdn.homebrewtalk.com/data/attach/329/329830-IMG-20170119-195254-1-1-.jpg "IMG_20170119_195254_1[1].jpg")
![IMG_20170119_195247_1[1].jpg](https://cdn.homebrewtalk.com/data/attach/329/329831-IMG-20170119-195247-1-1-.jpg "IMG_20170119_195247_1[1].jpg")
![IMG_20170119_191914_1[1].jpg](https://cdn.homebrewtalk.com/data/attach/329/329832-IMG-20170119-191914-1-1-.jpg "IMG_20170119_191914_1[1].jpg")


