Gly-Coil for Kegmenter

Homebrew Talk - Beer, Wine, Mead, & Cider Brewing Discussion Forum

Help Support Homebrew Talk - Beer, Wine, Mead, & Cider Brewing Discussion Forum:

This site may earn a commission from merchant affiliate links, including eBay, Amazon, and others.
I know the frustration of working through a build. I'm still working on a motorized grain mill. I swapped out the mill head with a larger unit that was a little different than the other one. So it's taken longer to get that back into operation. I want to brew soon so I got to get it done.
 
I know the frustration of working through a build. I'm still working on a motorized grain mill. I swapped out the mill head with a larger unit that was a little different than the other one. So it's taken longer to get that back into operation. I want to brew soon so I got to get it done.
Yeah. the struggle continues, lol. -my last keg of beer just kicked too. I've been waiting to do a 10gallon Alt. I need to find some narrow 10gallon kegs
 
It's a sad moment indeed when the last drop is poured.

I just put the last coat of stain on so I'm real close to get the mill done. The roller head, motor and control box are mounted to a piece of plywood. I can lift that piece on/off the mashtun. I mill my grain directly to the mashtun instead of to a bucket or bin. One less step.
 
I just put the last coat of stain on so I'm real close to get the mill done. The roller head, motor and control box are mounted to a piece of plywood. I can lift that piece on/off the mashtun. I mill my grain directly to the mashtun instead of to a bucket or bin. One less step.
That is getting serious on the mlling! I use a drill on 5-10 gallon batches. There is definitely a cool factor to pouring in and pushing a button. Especially if youre doing it often
 
Last edited:
And finally the 1.5 gallon diptube came. Shocker: it was too long. hits coil. I cut it down and put everything together.
 

Attachments

  • D1AB356D-0349-4D3B-A1CC-3C8393064BC8.jpeg
    D1AB356D-0349-4D3B-A1CC-3C8393064BC8.jpeg
    2.5 MB · Views: 140
  • AFEED636-D2C9-45B3-814F-37706F182213.jpeg
    AFEED636-D2C9-45B3-814F-37706F182213.jpeg
    2.1 MB · Views: 134
Last edited:
I used to ferment in sankes too (for a few batches anyways)
Are you at all concerned with the location of the thermowell being right inside the coils?
I'd think it'd read lower than the beer was actually at, no?
 
That is a great looking setup. Thanks for the pictures. The mill platform is done but I want to add an extension to the hopper. I have one sort of fab up just need to get it fitted but at least I can use it now and certainly need another batch going. With holiday time off of work I want to take advantage of that.
 
I used to ferment in sankes too (for a few batches anyways)
Are you at all concerned with the location of the thermowell being right inside the coils?
I'd think it'd read lower than the beer was actually at, no?
I think it might be a degree or two. I don’t know how fast the temperature of the beer will level out in the vessel. I might fill it with water and run a test and see if I need to make temperature adjustments. But I didn’t want to drill holes in the side of the Keg To also be able to use it as a serving vessel.
 
Honestly my only real concern is what to do if there is a heavy fermentation, not having a blow off tube. I’ll be venting CO2 with a responding Val.
 
I think it might be a degree or two. I don’t know how fast the temperature of the beer will level out in the vessel. I might fill it with water and run a test and see if I need to make temperature adjustments. But I didn’t want to drill holes in the side of the Keg To also be able to use it as a serving vessel.
If you permanently installed (welded) a thermowell in the side it wouldn't effect ita function as a serving vessel, but I do understand why you might not want to do that.
 
Honestly my only real concern is what to do if there is a heavy fermentation, not having a blow off tube. I’ll be venting CO2 with a responding Val.
I use a blichmann spunding valve with no blowoff. Set to 1-2psi
There are plenty of ball lock sounding valves you could uses
 
If you permanently installed (welded) a thermowell in the side it wouldn't effect ita function as a serving vessel, but I do understand why you might not want to do that.
This brings up a question I've thought about. What would be the net effect of using weldless bulkhead fittings, specifically on the top of a kegmenter but not the lid? You could drill and install a thermowell, carb stone fitting, PRV, even a weldless 1.5" TC port which opens up a variety of accessories.

The biggest question would be how much pressure holding capacity might be compromised. Cornelius kegs are "rated" to 130 psig, but I can't imagine anyone crazy enough to test that limit.

That said, most purpose-built kegmenters I've seen advertised seem to be rated around 2~2.5 atm, roughly 32 psig, which seems to be more than enough for the average home brewer's purposes of spunding and force carbing. Can weldless bulkhead fittings safety withstand these pressures?

Brooo Brother
 
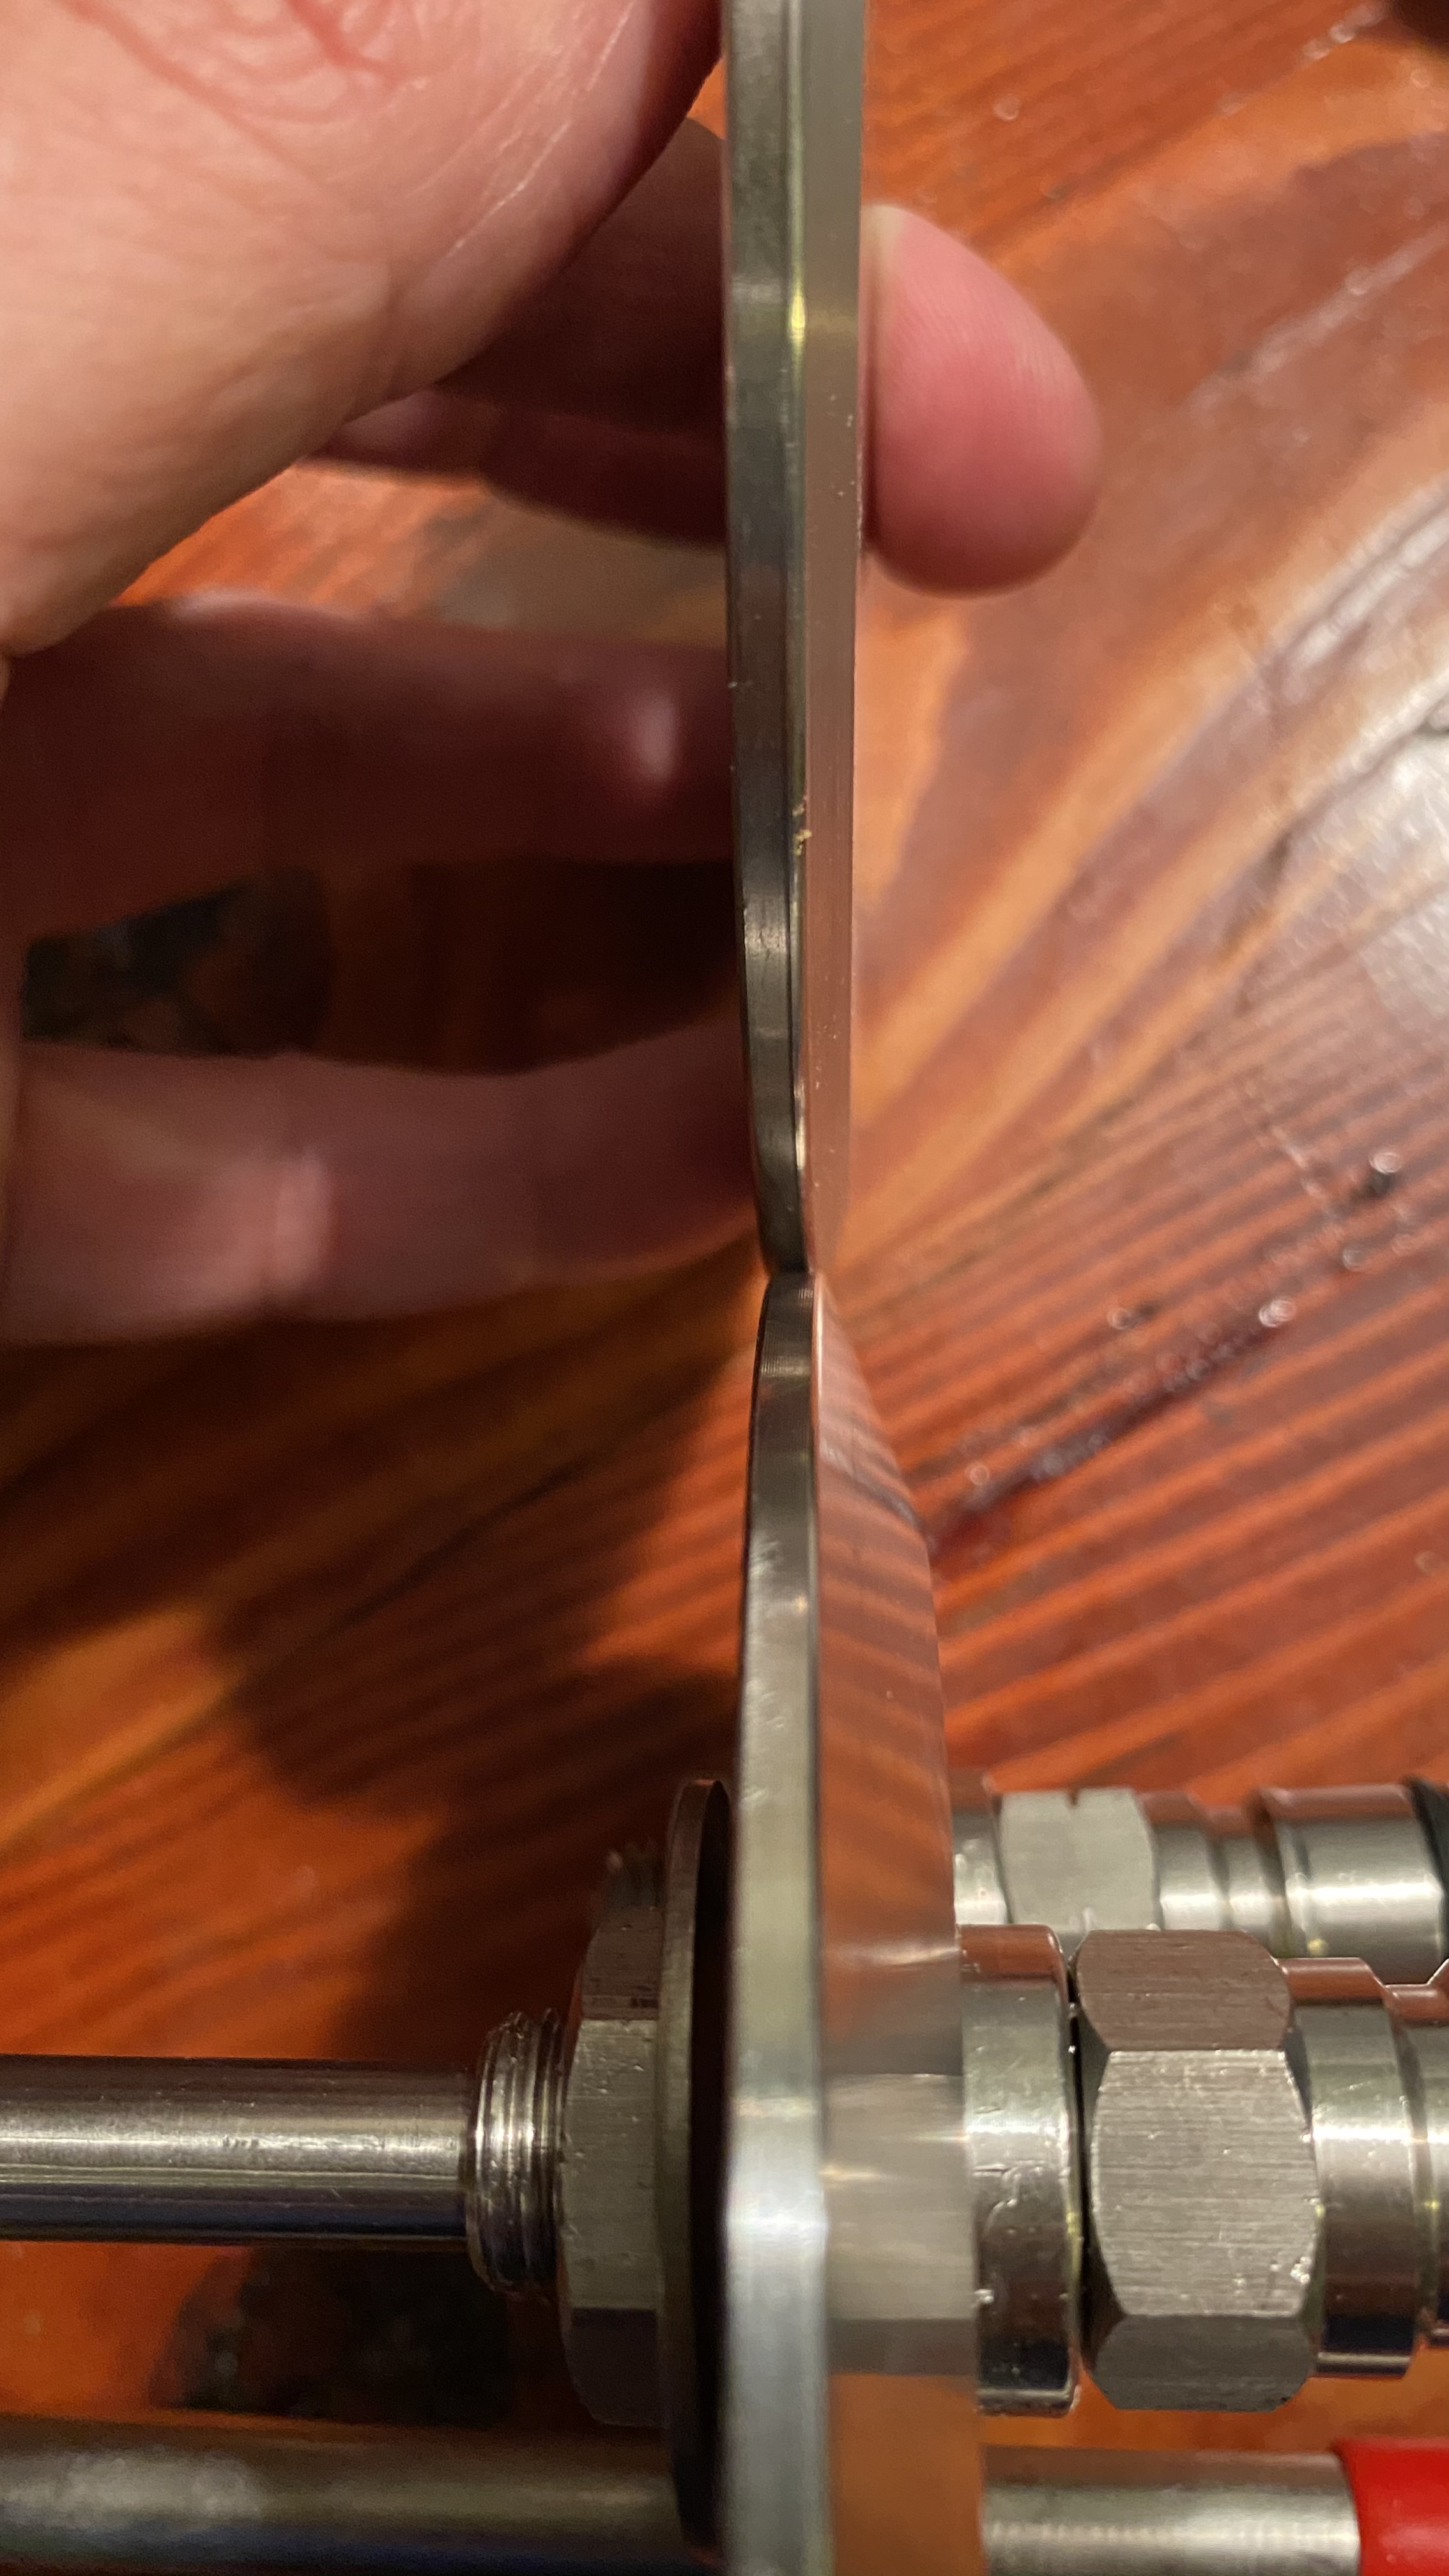
thermowell is leaking like a sieve. the flat gasket just isn't cutting it and the orange o rings I got are too thick to get it to thread on top. annoying since I called and emailed brew hardware and couldn't get an answer on weather or not this was long enough. put a note on the order form with measurements too. also tried flat washer with flat seal but it isn't long enough to thread. I think I'm left with more drilling of the top to expose more thread unless there is an assembly with a longer thread to pass through the think 3/8 TC plate & a seal.
-the thin flat seal is tearing-
 
does anyone know of a thermowell, at least 8" long that has fairly long threads? like 5/8 long or more.
 

Attachments

  • 0D5783F8-10BB-472D-BC29-2CA63E2E4365.jpeg
    0D5783F8-10BB-472D-BC29-2CA63E2E4365.jpeg
    2.5 MB · Views: 75
  • BA6679FD-313D-4C26-B05D-54ED8A828F9F.jpeg
    BA6679FD-313D-4C26-B05D-54ED8A828F9F.jpeg
    2 MB · Views: 79
  • C25780BB-BCB7-4463-9981-C632EBFC9FED.jpeg
    C25780BB-BCB7-4463-9981-C632EBFC9FED.jpeg
    2 MB · Views: 74
the first pic is the under/ coil side. thremowell is threaded on top with a weldless coupling to seal it up. goes in from the bottom. 2nd pic shows the top of tc plate w/o the thermowell installed. the last pic shows the thermowell installed with no exposed threads.
 
Last edited:
Hard to picture your thermowell issue. Any way you can incorporate a 3/8" compression fitting and use a nylon sleeve? TRUE Weldless Bulkhead - With 3/8 Compression Fitting Bore Thru

Otherwise, taping a temp probe to the sidewall and covering it with a piece of R-13 insulation (or whatever thick insulation) works fantastic and is one less thing to clean and potentially leak.
 
This coil is a spike/triclover plate. it was unexpected that the coil-tc plate was way thicker than a common 1/4" triclover plate. so I'm having to pass the thermowell threads with two o-rings through a 3/8 thick steel plate. there are no thermowell threads exposed on top, even with a chamfer, to thread a coupling to seal it up.
 
Last edited:
taping the temp probe to the side is an option, then I still have to find a bulkhead & plug the hole with. Is that accurate? if so wish I would have done that a month ago.
 
Last edited:
This may be a bit of a stretch for pressure fermentation/transfers but have you thought about trying a Uniseal? They are sort of like a bulkhead but typically used for pipes out of water vessels. They are flexible and water tight just not sure about how much gas pressure they might hold.

https://external-content.duckduckgo...cts/i/138877/uniseal_hydroflow.jpg&f=1&nofb=1
They make them pretty small, I think down to 1/4" and they are pretty inexpensive, might be worth a try.

https://www.aussieglobe.com/uniseal1.htm
I have ordered from this site in the past and they come pretty quick. My project was water related so I can't say if this will work, just trying to think outside the box. I can't think of another solution unless you can find a weldless bulkhead thermowell that will fit that thickness of stainless steel.
 
Now I see it. It appears those style of thermowells are geared toward sheet metal to allow enough tapered thread to be engaged with the lock nut. A TC lid is more welcome to drilling and tapping to size (like the thread of the locknut itself). I think it will be tricky to salvage that thermowell/TC lid combination. I think the ideal way would be to have it TIG welded in place from the inside.

A last ditch effort could be to epoxy it in place and pray.
 
Last edited:
I agree with apache_brew, welding may be the best way to salvage what you have and guarantee no leaks. I have tried epoxy in a similar manner and it held for a while but always failed eventually.

I had some welding done last year and think I paid $75/hr. I also think based off that experience that your project would be about 15-30 minutes of prep and welding.

Let us know what direction you end up going. I planned on buying a kegmenter to use as a brite tank and maybe for pressure fermentation. I was trying to figure out how to connect to my glycol chiller when I stumbled on this thread.
 
thanks for taking a look. I'll see if I can find someone to do this kind of work. if I'm having the thermowell welded, maybe I should have the keg posts welded as well-eliminate all of the extra pieces inside the fermentor- heres a pic of a blank next to the spike
.
F7F22D1F-E760-4167-BDBD-D664BBB9A8D1.jpeg
 
Last edited:
thanks for taking a look. I'll see if I can find someone to do this kind of work. if I'm having the thermowell welded, maybe I should have the keg posts welded as well-eliminate all of the extra pieces inside the fermentor.

Welding the corny posts would be ideal but not necessary since they're more so designed for the application to hold pressure. I'd say leave them if they work and allow for easy cleaning/sanitation. Depending on how you have the existing ones welded in, it could be a non-sanitary connection that may be difficult to ensure cleanliness and sanitation.

If you do so however, consider these Weld or Solder On Keg Post Adapter 19/32'' -18 or these if you're not in a hurry US $1.68 6% OFF|Keg Post Adapter 19/32 Make sure to get the keg post thread that matches your existing keg posts. That way you can use normal keg posts and not the ones that need a gasket and adapter. Make sure to have them welded from the inside, ideally with little to no filler rod, so that the bead lays flat without protrusions or boogers so bacteria isn't easily harbored. The outside weld can be a nice and fat fillet given the material thickness and not requiring sanitary finishing. Given the TC lid thickness, getting a weld on the inside of the keg post inserts I suggested will require some aggressive countersinking in order to fill all crevices between the insert and the TC lid.
 
Finally found someone to do this. Had to drive. Was $75 but looks good. Nice and flat. Didnt interfere with orings or washers for keg posts. Holds pressure overnight. Ready to roll finally !
 

Attachments

  • EE4BF89C-7F68-4897-A5E1-B8BD92D0E7F3.jpeg
    EE4BF89C-7F68-4897-A5E1-B8BD92D0E7F3.jpeg
    2.5 MB · Views: 117
  • A670274A-4E0A-452E-9451-4A96D2756ADC.jpeg
    A670274A-4E0A-452E-9451-4A96D2756ADC.jpeg
    229.6 KB · Views: 118
No, I'm using a spunding valve, it was cut off in the above picture.

Pressure vessels typically having their own dedicated pressure relief device. My guess is the kegmenter PRV is probably similar to a corny keg PRV (50~55psi). One concern is the spunding valve or even ball lock post can fail closed if it gets clogged from something like high krausen. You could potentially drill and tap some 1/4" threads into the lid and add one of these Adjustable Stainless Gas Pressure Relief - 1/4 in. MPT | MoreBeer Consider though that it's likely to get clogged in the same manner. In the mean time, closely monitor it when in use, as well as only pressurize it full of liquid.
 
this one is for low to no pressure fermenting. the keg posts are for sampling and transfer only >5psi . I have another lid with a relief valve if I want to pressure ferment or something like a Kviek yeast that doesn't need temp control.
if clogging becomes an issue, I can always add a 4" connector and raise the lid a bit. I can't stomach drilling another hole.
 
Got it full of Alt Friday, brewed a stout today to get those kegs filled
 

Attachments

  • 72806DFF-1631-478B-87BB-4CF00EA01339.jpeg
    72806DFF-1631-478B-87BB-4CF00EA01339.jpeg
    2.2 MB · Views: 64
  • 5DFD826E-87B9-4B55-B060-6821FC3C0022.jpeg
    5DFD826E-87B9-4B55-B060-6821FC3C0022.jpeg
    2.7 MB · Views: 70
  • B66B516B-0697-4703-BA0F-36FA91DF9345.jpeg
    B66B516B-0697-4703-BA0F-36FA91DF9345.jpeg
    2.7 MB · Views: 66
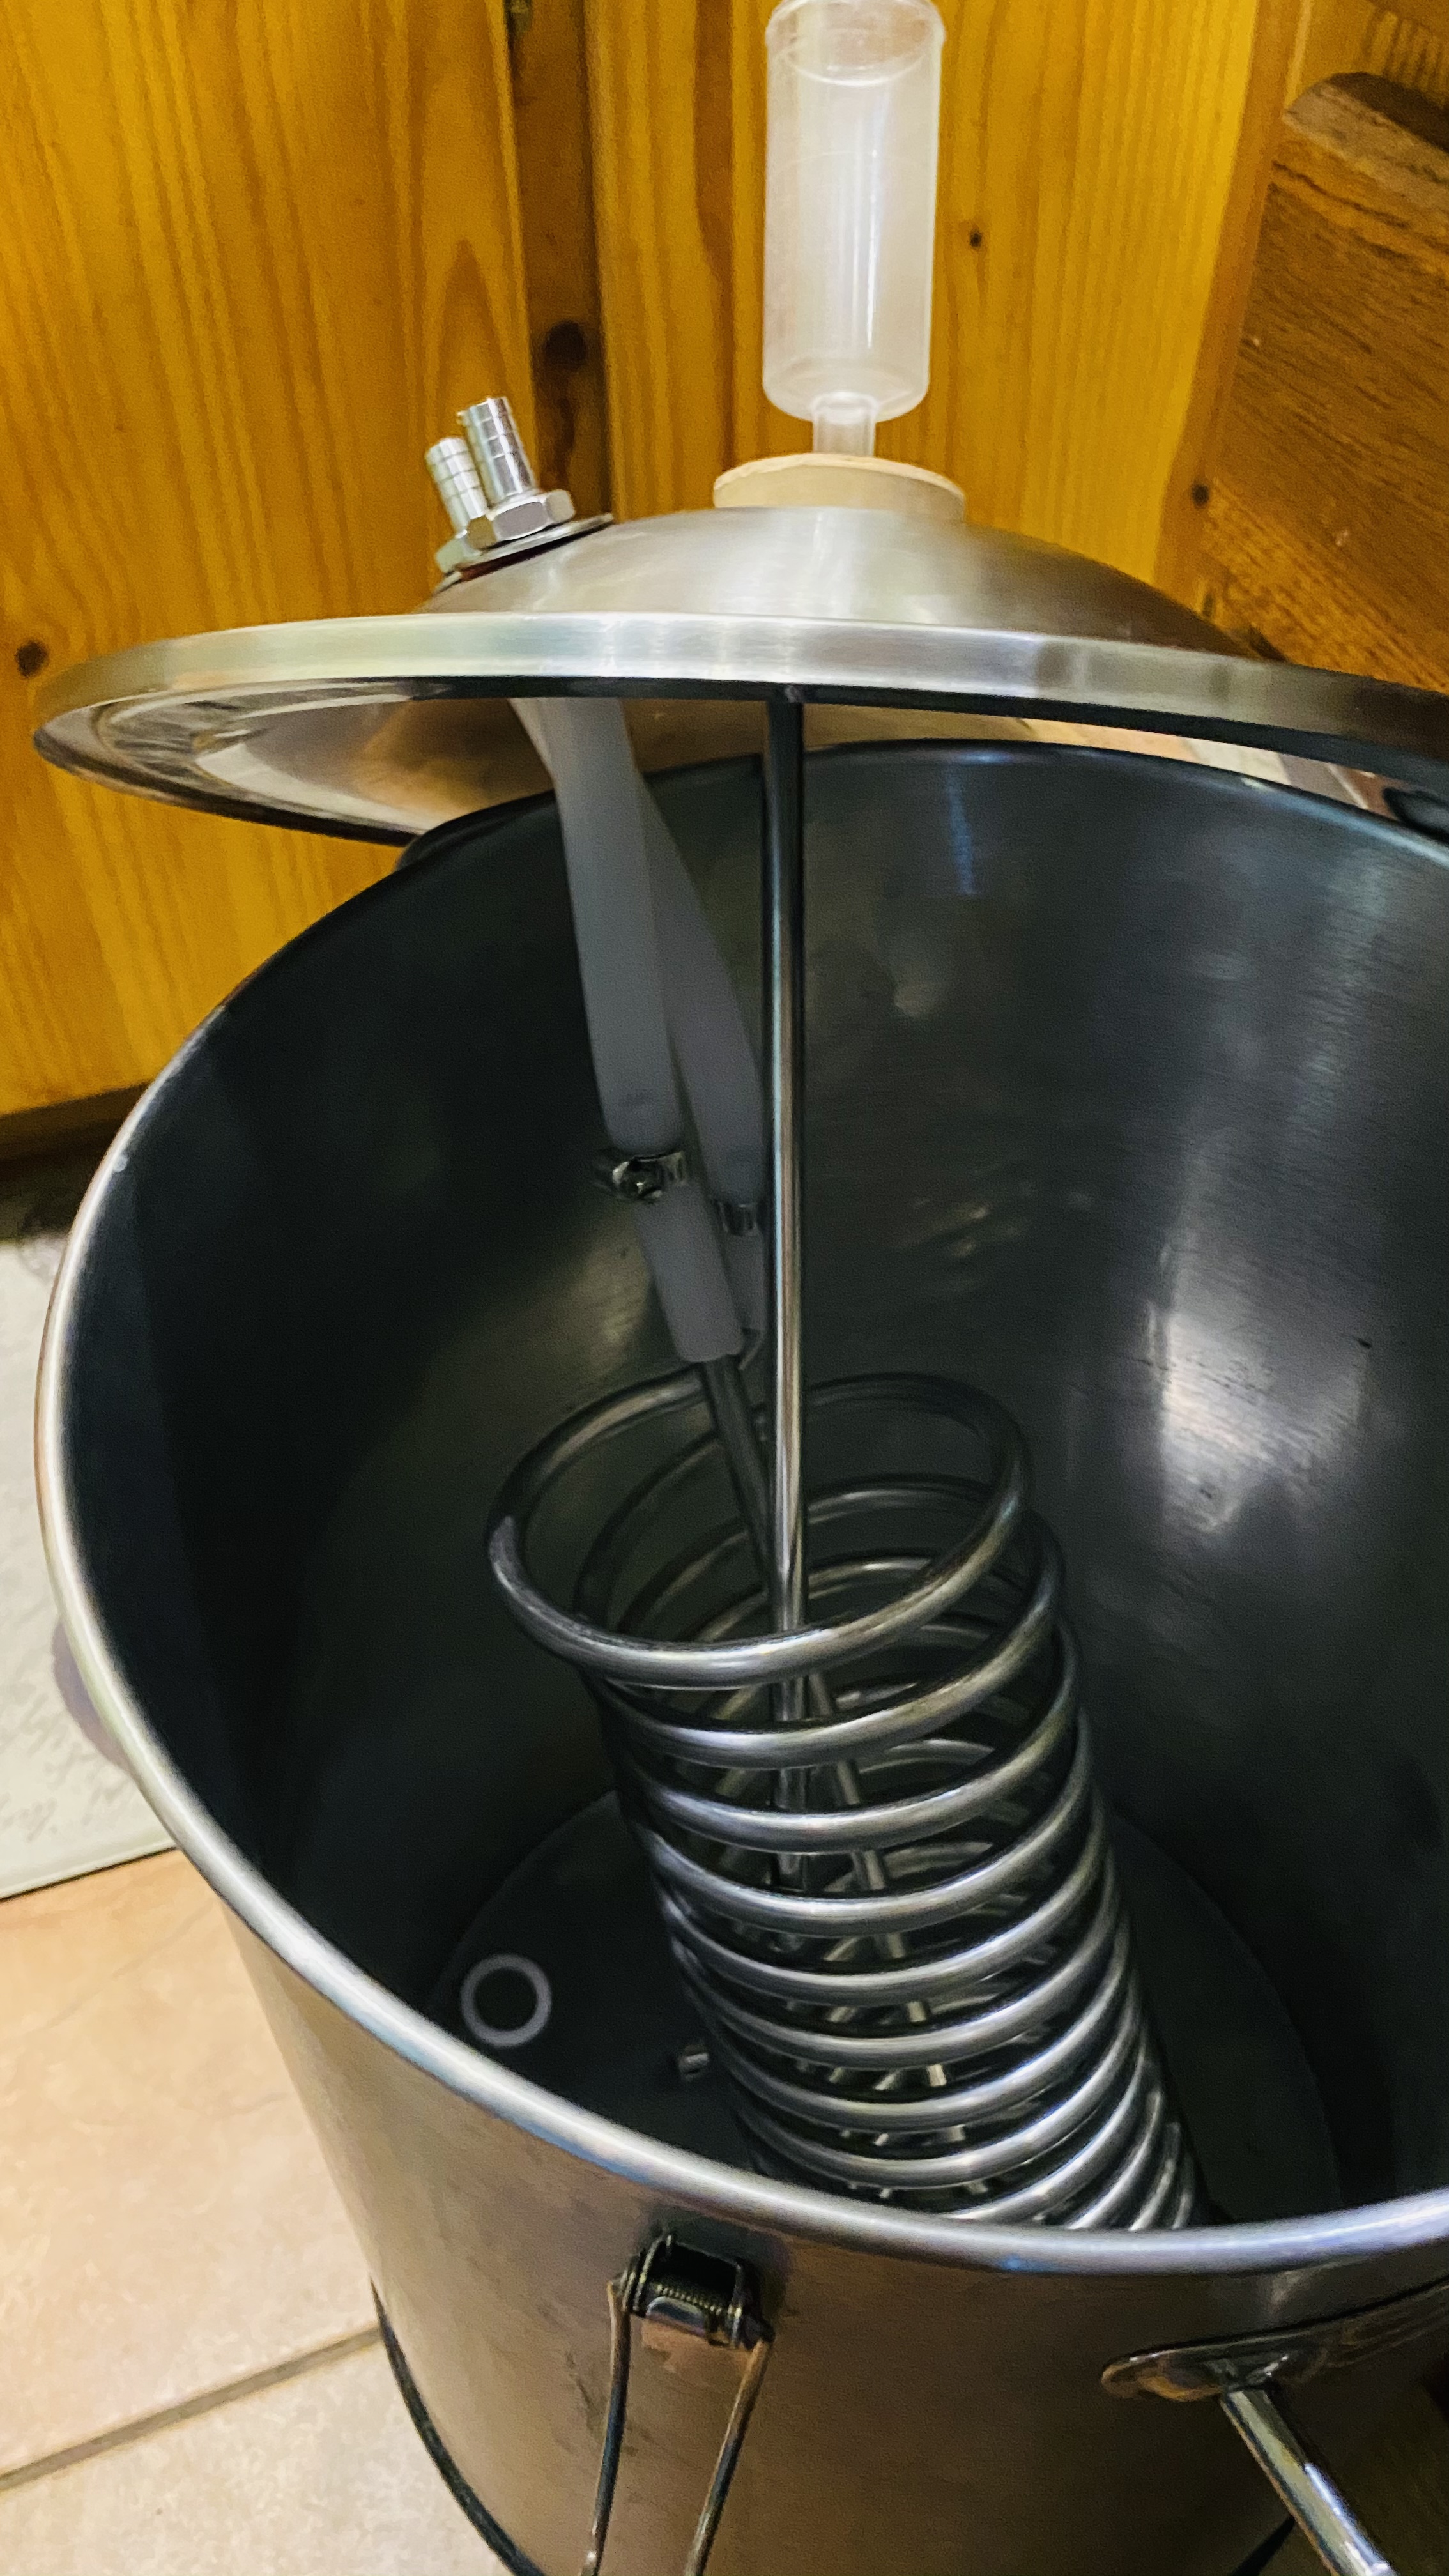
I searched high and low for my parts until I found exactly what I wanted - I hope this helps someone else.

Here's my setup:
  • 7.6 gal Kegmenter - (Link)
  • Temp Twister (ordered in April 2021 - I believe this must be the newer version, as it easily fits through the 4" hole. - (Link)
  • 4" x 1.5" TC Endcap w/ 1/4" FNPT - (Link)
  • FermZilla Thermowell - (Link)
I wanted the ability to dry hop without oxidation, I wanted temp control and I wanted a thermowell - so I arrived at the 4"x1.5" TC endcap. This endcap connected to the existing 4" hole and reduced my TC fittings down to a more manageable (cost wise $$$) 1.5". On this endcap, I attached a 1.5" butterfly valve, then into the 1/4" FNPT - I threaded the Fermzilla thermowell (which fit perfectly - I did not cut it, I left it long up top), and then finally on each side of the 1/4" FNPT fitting I very carefully drilled two 7/8" holes (this took forever) and installed the Temp Twister (the coil did need to be compressed downward slightly to fit the entire coil inside - I just carefully sat it on a level surface and pushed downward until it was the right height). Pretty happy with this setup and it works really well. Not a cheap solution, but much, much cheaper than other custom builds I've seen.

I also built out a dry hopping rig in the last pic, but that's a whole other story and ridiculous part list - if interested I can link out the parts for this as well.
 

Attachments

  • 20210421_124119.jpg
    20210421_124119.jpg
    517.3 KB · Views: 57
  • 20210504_091201.jpg
    20210504_091201.jpg
    1.9 MB · Views: 63
  • 20210510_092452.jpg
    20210510_092452.jpg
    606.3 KB · Views: 65
Nice job. It’s a lot of work but worth it to get it the way you want it.
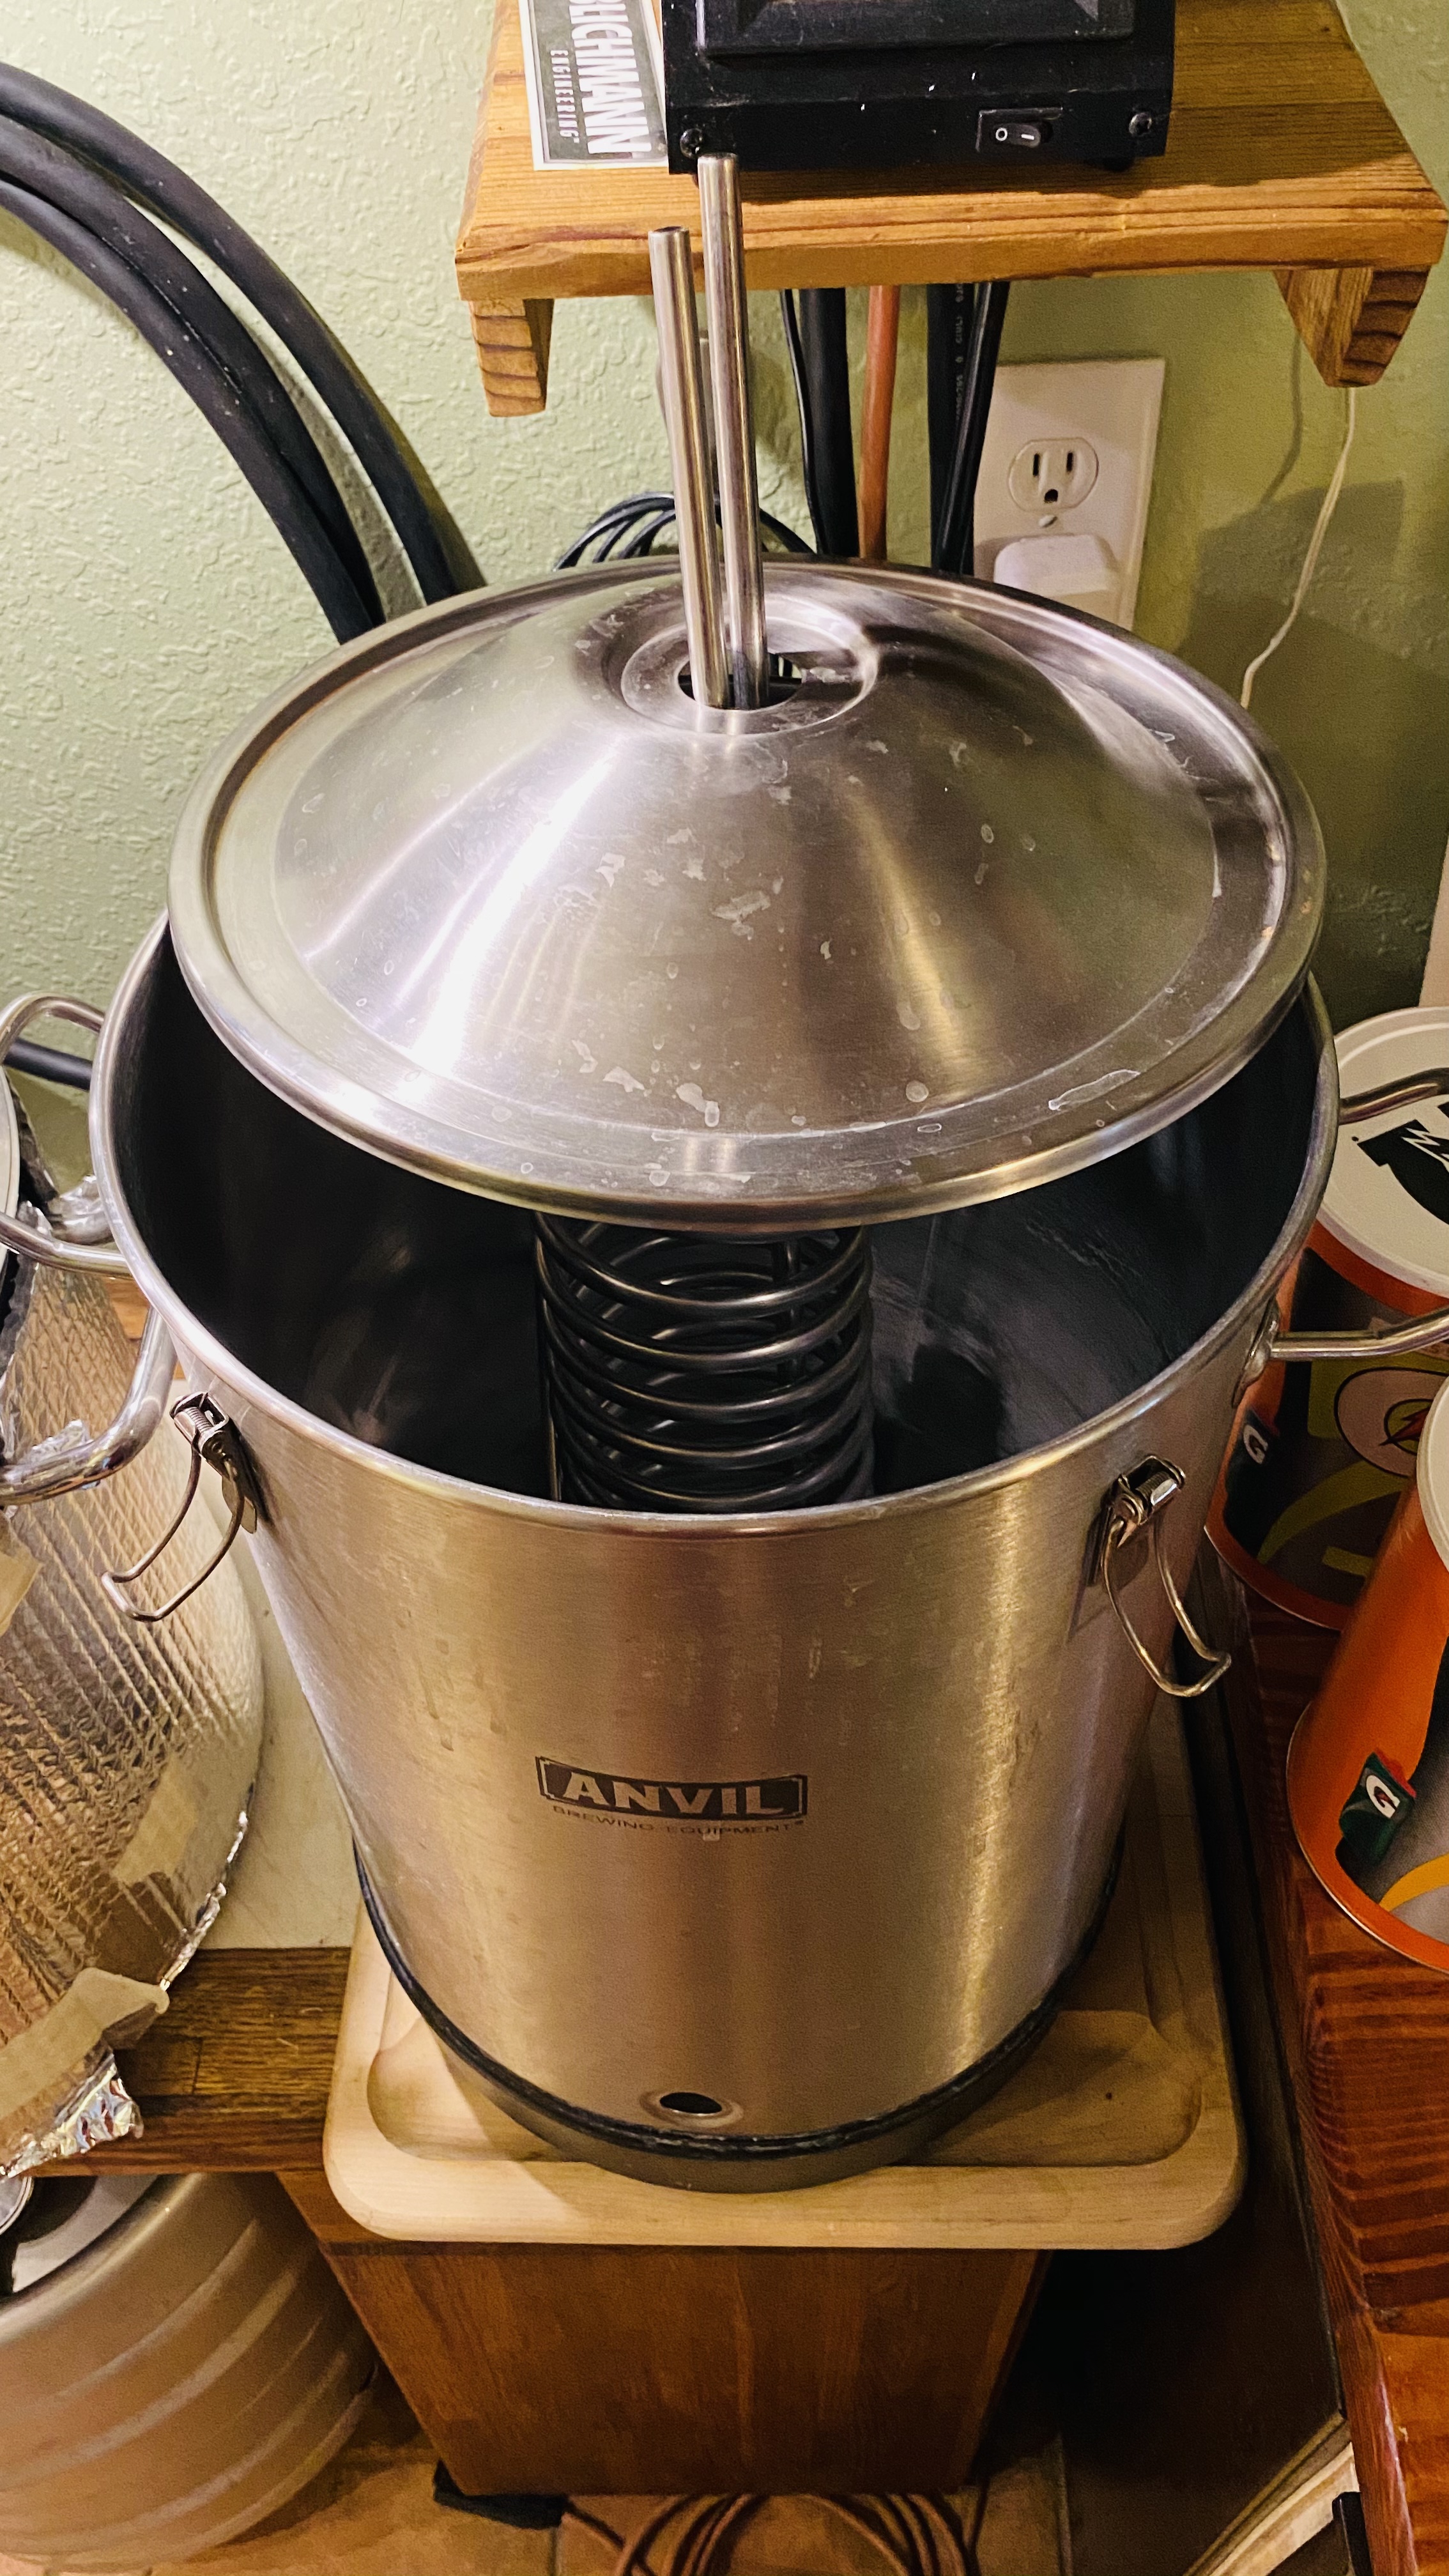
I’m trying to figure out how to get my older version temp twister to work in this anvil bucket fermenter. I’d like to not have to force this into the rubber stopper
D5E5E997-45F1-46B8-8EA0-498982653A83.jpeg
 
What about cutting the straight sections down to fit and run soft lines out of the Anvil?

I just picked up the Anvil cooling coil and thermowell. With the diameter and lack of coils I'm wondering if it's going to be capable of keeping a fermentation temp of ~55 degs. I have a stainless coil that came with my Robobrew that I might cut down if the smaller coil doesn't do the job.
 
Cutting the straight sections down is a pretty good solution. If the coiled part is too tall, you can carefully press down on them to compress them.
 

Latest posts

Back
Top