• Please visit and share your knowledge at our sister communities:
  • If you have not, please join our official Homebrewing Facebook Group!

    Homebrewing Facebook Group

GE 7 CF (FCM7SUWW) keezer conversion

Homebrew Talk

Help Support Homebrew Talk:

This site may earn a commission from merchant affiliate links, including eBay, Amazon, and others.
Thanks for the Love build idea and some tips on the keezer I gleaned from reading on here.

Hopefully I will take the time soon and get a build thread going for my whole bar.

What I am really hung up on and waiting for is mrbowenz to reply to a PM with the specs of his coffin box build that I want to duplicate.

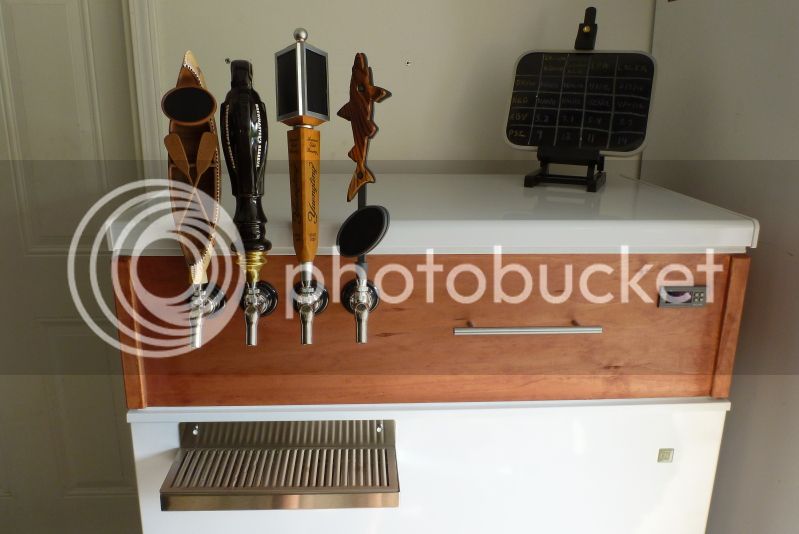
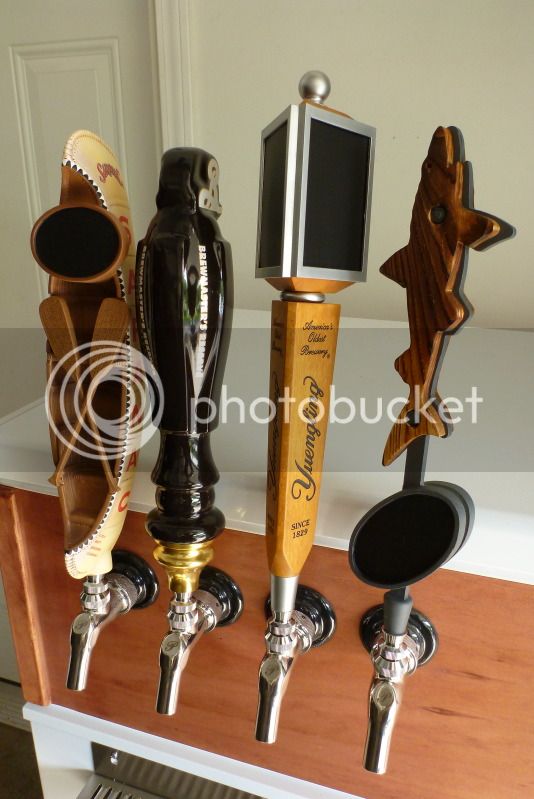
Anyone out there have suggestions they can give me, height to tap? depth of coffin box? space between taps?
 
Finally finished mine off with tap handles and drip tray. I painted over the tap handle labels with chalkboard paint:

P1000586.jpg

P1000592.jpg
 
Finally finished mine off with tap handles and drip tray. I painted over the tap handle labels with chalkboard paint:

P1000586.jpg

P1000592.jpg
Nice work! Did you screw the drip tray directly into the wall as it looks like or did you use magnets? Is it sturdy enough to hold a glass while you fill it up? I want to do a drip tray myself but using magnets just doesn't work for me as it doesn't seem strong enough. I would like to use screws but do not want to screw up my finished project! Any advice?

Also...judging by your pics, did you leave the weather stripping on the lid and then just find some new stripping to apply to the collar? I wish I would have done this. I am finding now that the lid, which is only held on with the standard white silicon used for sealing bathrooms and such, is not holding up well in the extreme heat found in Texas. The garage can get up to 100's and I notice that the lid separated from the collar. I am trying to seal again with silicon but now I am tempted to go and get some liquid nails instead. Any suggestions?

Love this thread!!! and my keezer!
 
ButcherBrew said:
Nice work! Did you screw the drip tray directly into the wall as it looks like or did you use magnets? Is it sturdy enough to hold a glass while you fill it up? I want to do a drip tray myself but using magnets just doesn't work for me as it doesn't seem strong enough. I would like to use screws but do not want to screw up my finished project! Any advice?

Also...judging by your pics, did you leave the weather stripping on the lid and then just find some new stripping to apply to the collar? I wish I would have done this. I am finding now that the lid, which is only held on with the standard white silicon used for sealing bathrooms and such, is not holding up well in the extreme heat found in Texas. The garage can get up t 100's and I notice that the lid separated from the collar. I am trying to seal again with silicon but now I am tempted to go and get some liquid nails instead. Any suggestions?

Love this thread!!! and my keezer!

For the drip tray I did just use screws and it's sturdy, no concerns with it coming off. I got the tray from More Beer and it came with the screws. The screws are up high at the top of the freezer so I don't think there is a concern with the cooling lines. I did however drill pilot holes very carefully just in case.

The lid and collar are hinged, so I did use new weather stripping on the collar. It's self adhesive and I haven't had any issues with it yet, although my garage gets no where as warm as yours.
 
ButcherBrew -
any 100% silicone caulk should hold up in temps up to 400F - so your garage temps aren't what is causing the caulk failure.

You want 100% silicone caulk - if it says "paintable" - you don't want it.
Run a bead under the collar, set it in place, apply a little pressure to spread, and walk away.

166471_300.jpg
 
Thanks for the response guys. I checked and as the pic shows it is 100% silicon. I have had an outdoor fan on for over a week and I just ran my finger along the bead and it left some on my finger... It seems a bit dryer... But still wet. In full disclosure, this is an older tube that I used for the first time maybe 6 months ago but I kept the cap on it. Maybe I need to just start over... Take the lid off... Clean off old silicon, open a new tube and reapply. Scrathin my head on this one.


ForumRunner_20120607_215559.jpg
 
a week and it's not dry??? wow. should be 'skinned over' in 3 or so, solid in 24.
Yep, start with a fresh one.

Yea - hard to believe really....I wonder if it also has to do with the fact that my garage is in the 90's these days....never really drops below 80 at night. I guess I will attempt a re-do.
 
Hi

Silicone does indeed have a "use by" date. Once it gets past that, it's not going to cure very fast (if at all). Most silicone cures when in contact with water vapor. If you put it between two metal plates and squish is thin - no guarantee about the cure.

Bob
 
This is available for $168 after $10 coupon from Home Depot. Free shipping!

Just ordered mine for Saturday delivery! And with that, I leave the realm of bottles and move into kegging!
 
This is available for $168 after $10 coupon from Home Depot. Free shipping!

Just ordered mine for Saturday delivery! And with that, I leave the realm of bottles and move into kegging!

Hi

There really aren't any cheaper options (new) out there that will hold several corny's than the 7 cubic foot freezers.

Bob
 
now that i have looked through this thread, I agree it appears to have the hump, even though the dude said it did not. There was no floor model for me to check.
 
How did you guys wire up the STC-1000? Wondering where the keezer plugs in if the controller is in the collar.
 
How did you guys wire up the STC-1000? Wondering where the keezer plugs in if the controller is in the collar.

I put my controller in the collar then wired the electrical through the rear of the collar and used a plastic electrical box with two plugs for switching. Then I just plugged my keezer into that electrical plug so I don't have to risk messing up the wiring of the keezer itself.
 
I put my controller in the collar then wired the electrical through the rear of the collar and used a plastic electrical box with two plugs for switching. Then I just plugged my keezer into that electrical plug so I don't have to risk messing up the wiring of the keezer itself.

How did you cut the square hole in the collar for the temp controller?
 
I just bought this since its an excellent deal, and I had a question.

I would like to put a tap tower on top of the freezer instead of making a collar. Would I be able to fit 4 ball lock kegs on the floor, and have a 5lb co2 tank on the ledge without adding a collar? I wasn't sure if there was enough room on that shelf for a co2 tank without the added room from the collar.


I did pretty much what you're describing. It's a tight fit, but it is possible. Check out page 2 on the link i just posted to see 4 kegs and a 5lb CO2 tank fitting in a 7.0CF freezer.

https://www.homebrewtalk.com/f51/another-keezer-build-209288/
 
lion1750 said:
I just bought this since its an excellent deal, and I had a question.

I would like to put a tap tower on top of the freezer instead of making a collar. Would I be able to fit 4 ball lock kegs on the floor, and have a 5lb co2 tank on the ledge without adding a collar? I wasn't sure if there was enough room on that shelf for a co2 tank without the added room from the collar.

Don't think so. I've got 3 kegs on the floor and the tank on the ledge, but have to have the tank leaning to make it fit without a collar. You definitely won't be able to have the tank standing up. And I don't believe you can get 4 on the floor.

EDIT: I stand corrected. Definitely a tight squeeze though.
 
gx1400 said:
I put my controller in the collar then wired the electrical through the rear of the collar and used a plastic electrical box with two plugs for switching. Then I just plugged my keezer into that electrical plug so I don't have to risk messing up the wiring of the keezer itself.

I did the same:

ForumRunner_20120622_205113.jpg
 
I don't think so (at least not on the floor). 4 ball locks are a TIGHT squeeze. Since pin locks are shorter and fatter, I think it won't work. You could (I think) get the fourth one in if you build a collar and put it on the hump area?

You can do that, if you use an tall enough collar. I have 4 pin locks and did it with a 2x6 collar which ended up being about 1/4" too short, and added a 1x2 to the top of the 2x6's. Works great. I leave my tank outside to keezer with a hole for the gas line drilled / sealed through the collar. I put quick disconnects on the gas line so I can more / replace the tank quickly and easily.
 
Back
Top