• Please visit and share your knowledge at our sister communities:
  • If you have not, please join our official Homebrewing Facebook Group!

    Homebrewing Facebook Group

Frigidaire Model FRC445GB Mini-Fridge Kegerator Conversion

Homebrew Talk

Help Support Homebrew Talk:

This site may earn a commission from merchant affiliate links, including eBay, Amazon, and others.
That one would work.

You must have quoted the wrong response. I didn't mod my fridge, I built an external unit, and in fact avoided doing anything to my fridge that wasn't reversible. But good luck with doing the mod, I'd be interested to see how it goes.
 
I got the temp controller today. Cut a hole put it in fridge, wired it according to previously posted diagram, and nothing not a light. However compressor kicks on. Here is the diagram that comes with it. Please help have a hole in fridge, and I need this to work. ImageUploadedByHome Brew1400897166.527358.jpgImageUploadedByHome Brew1400897079.190001.jpg


Sent from my iPhone using Home Brew
 
I found a dude that put these instructions up, but they use a extension cord not the compressor.

Disclaimer: I am posting this as a guide for anyone else like me that has 0 electrical experience but might have played with other crafts in the past. Not responsible for electrocution. This is my interpretation of many other blogs, pictures, and with the supervision of family electricians. My device is working and is safe.

Materials
a chest freezer, preferably a 5-ish cubic ft one. (will not suffer any damage)
3 prong extension cord, preferably a short 6 or 9 ft
thermostat from Amazon- remove the back cover to work by taking out the screw
wire strippers
electrical tape
awesome scissors
tiny flathead screw driver

1. Pull the thermometer wire in 2 about a half inch (came with thermostat)
2. put one end of each of the split wires into ports 5 and 6
3. Use the tiny screw driver to clamp down on the wires

4. CUT THE EXTENSION CORD IN HALF (yes, it's scary and weird)
5. Place the pronged end to your right and the female (receptor of a plug) end to the left
6. strip the outer extension cord off about 6 inches from the cut on both sides, exposing 3 wires on each side

(working with only that 3 inch piece you just cut)
7. cut about 3 inches of black wire from the right side.
8. use the wire stripper tool or scissors to expose the copper wire right in the middle
9. work the black wire apart on both sides so that about 1/4 inch of wire is exposed in the middle
10. strip off 1/4 inch of black rubber, exposing the wire on either side
11. twist the ends tight and clamp them into ports 1 and 3

at this point you have the thermostat with 3 wires in the ports and 3 ports free

12. pick up the pronged side of the extension cord
13. strip off about 3/4 inch of the rubber from the black cord
14. wrap the exposed copper of the black wire from pronged extension cord around the exposed middle of the 3 inch strip that is secured into the thermostat. twist it around itself
15. use electrical tape to cover any of the exposed wire on the black (now y-shaped) wire that is attached from the pronged side to the thermostat
16. strip off 1/4 inch of the only free black wire left (the one on the female side of the extension chord)
17. twist, insert, and secure the free black wire into port 2
18. Strip off 3 inches of each white wire from both sides of the cut extension chord
19. twist together the 3 inches of exposed wire creating a Y facing away from you
20. wrap the exposed wire with electrical tape except for the last 1/4 inch of this joined wire.
21. insert the tip of the exposed /wrapped white wire into port 4 and secure.

At this point you have two cut green wires, and all of the ports have been filled. You are wondering what to do with the last wires.

22. strip off an inch from both sides of the green wire.
23. twist the green wires together to "rejoin" them in a strait line.
24. Cover the twisted and exposed green wire with electrical tape.
25. cover anything copper that's still exposed with more electrical tape.
26. make absolutely sure NONE of the copper wire from black/white/green is exposed or touching any other color of wire other than it's own color. NO CROSSING STREAMS (ghostbusters)

You're done assembling!

Plug the pronged end of your extension cord into the wall
Insert the thermometer into the chest freezer.
Plug the freezer into the female end of your extension cord.

Play with the settings till its on "cool" instead of "heat"
Use electrical tape to keep that sucker on the lid.
put it at a temp you want.

Watch significant other be in awe of you!


Sent from my iPhone using Home Brew
 
I got the temp controller today. Cut a hole put it in fridge, wired it according to previously posted diagram, and nothing not a light. However compressor kicks on. Here is the diagram that comes with it. Please help have a hole in fridge, and I need this to work. View attachment 201325View attachment 201323


Sent from my iPhone using Home Brew
First thing I would do, connect the black and white wire to terminals 3& 4 as per your diagram.
The controller has to powerup.
After controller powers up connect a black wire to terminal 1 from the previous connected black wire terminal.
Connect the compressor wire to terminal 2
Connect the thermistor wires.
 
I got a new one and it works. Black wire in fridge went to 1 and 3 on temp control, and white wire went to 4; while blue went to 2. It's working now, perfect beer temp.

ImageUploadedByHome Brew1402021559.797644.jpg


Sent from my iPhone using Home Brew
 
Two months ago, the kegerator turned off and wouldn't start. Left it unplugged for a while, and it started up and ran until yesterday. Today it won't start, even after being unplugged all night. Plugging in triggers a "click" every 30s (irregular), but no motor start. It's a spring 2009 buildup, if I recall correctly.

Some quick searches revealed it's one of the two small electronic relays on the back: one is a motor protection circuit (B77-120); the other is a motor start relay, (QP2-4.7).

Has anyone with the same problem fixed it with one of said parts? If not, I'll buy both and return the one that doesn't need replacement.

After finding out how to test the PTC relay (QP2-4.7), I bought a replacement from AppliancePartsPros. Came within a day and I've got a cold fridge again.
 
Hi. I'm in Australia. I can't get hold of this particular fridge, but want to find something similar.

Dies this look the goods?

2e1a3956028ae69291573ca4bf2610cb.jpg

8511e4c806a14f435763eb25a3d1c6a1.jpg


Similar freezer setup
 
Looks good, but can't say anything without dimensions.

If you can see it in person, make trace the bottom of your kegs/fermenter on cardboard and cut out the circles. Bring them with you to see if you can fit what you want in the fridge. Also try doing some searching online and in this site for people who have used the same make/model fridge before to see what they were able to fit in it.

Good luck!
 
Is there an updated model that still works since lowes doesn't sell this frigidaire model any longer?
 
Is there an updated model that still works since lowes doesn't sell this frigidaire model any longer?
Just saw an ad in a Lowes flyer today for a Frigidaire 4.5 cu ft model FFPE45L2QM for $149. IF and only if you can easily remove the freezer box by unscrewing it (no refrigerant) and the inside dimensions, particularly the bottom, will allow for kegs, you're in luck.
From the limited photos I've seen, it does look very similar to the one in this project, which I have. Let us know after you go look.
 
I built this Frigidaire Keggerator and it lasted about a year and a half. I unplugged it for three weeks and it failed to cool when I plugged it back in. The compressor is running and I can hear freon moving through the coils. However, the output from the compressor is not cold.

Has anyone experienced this trouble or have some advice?
 
Just saw an ad in a Lowes flyer today for a Frigidaire 4.5 cu ft model FFPE45L2QM for $149. IF and only if you can easily remove the freezer box by unscrewing it (no refrigerant) and the inside dimensions, particularly the bottom, will allow for kegs, you're in luck.
From the limited photos I've seen, it does look very similar to the one in this project, which I have. Let us know after you go look.

I am in the middle of converting the Frigidaire FFPE45l2QM and it has it's pros and cons:

PROS
There are no freezer coils under the freezer shelf, so you can cut it right out without cutting cooling lines.

CONS
There is no removable lid so you need to build and attach a custom countertop to mount the faucet tower to.
 
"There are no freezer coils under the freezer shelf, so you can cut it right out without cutting cooling lines"

Someone reviewed this exact mini fridge (Frigidaire FFPE45L2QM) on the Lowes website and said as follows:
"The freezer is not removable. The inside is a single cast unit and the cooling mechanism is in the bottom section of the freezer".

Seems to be a disconnect between what you and he are saying. I'd like to use this fridge as a Fermentation Chamber and I would certainly need to remove the freezer to fit my fermenter. Can you clarify a little? Will I be able to remove it so that my fermenter fits?

Thanks, Bill
 
After working with this model, I think I would much rather have bought the model that has the removable plastic top, which would have been a cleaner installation. This model has one large piece of sheet metal that wraps around the sides and top of the fridge. I have to make a wood countertop to cover the exploratory hole I cut and to mount the faucet hardware.
 
After working with this model, I think I would much rather have bought the model that has the removable plastic top, which would have been a cleaner installation. This model has one large piece of sheet metal that wraps around the sides and top of the fridge. I have to make a wood countertop to cover the exploratory hole I cut and to mount the faucet hardware.

Wouldn't the tower assembly cover whatever exploratory hole you made?
 
Wouldn't the tower assembly cover whatever exploratory hole you made?

It wouldn't be very stable because the exploratory hole was bigger than the tower mounting area. Im going to make a wood top for the kegerator and mount the tower to it.
 
I have a kegerator I built based on this fridge model a little over a year ago. The compressor runs now, but doesn't cool anymore.

I had a previous kegerator build based on this fridge and it died the same way. Has anyone else had the same problems? Any ideas of whether there is an easy repair?
 
So I did this fridge build years ago (I have the original one) but never put in any faucets. Thinking about doing through the door faucets. But I want to get shanks long enough to be able to one day switch over to a keezer. What do you guys suggest?
 
I built my version of this fridge with thru the door faucets and have been very pleased. I have 5 1/8" shanks and they are great. Future comparability will of course require on how you eventually build your keezer. I don't believe short shanks (3") will work with this fridge without hacking up the molding on the inside of the door.

Typically keezers can get away with shorter shanks because you're only going through a collar of 1xSomething and maybe some insulation. Shorter shanks can give you the advantage of it being easier to get kegs in/out of the keezer, but longer ones will transfer more cold to your beer.

Thanks for the info
 
After finding out how to test the PTC relay (QP2-4.7), I bought a replacement from AppliancePartsPros. Came within a day and I've got a cold fridge again.
I think i am running into the same problem with my fridge, did you get a one prong, two prong or three prong replacement relay? Cant seem to find a three prong online, but found the one and two prong type..... Is this as simple as an unplug the old one and plug in the new one? Thanks!
 
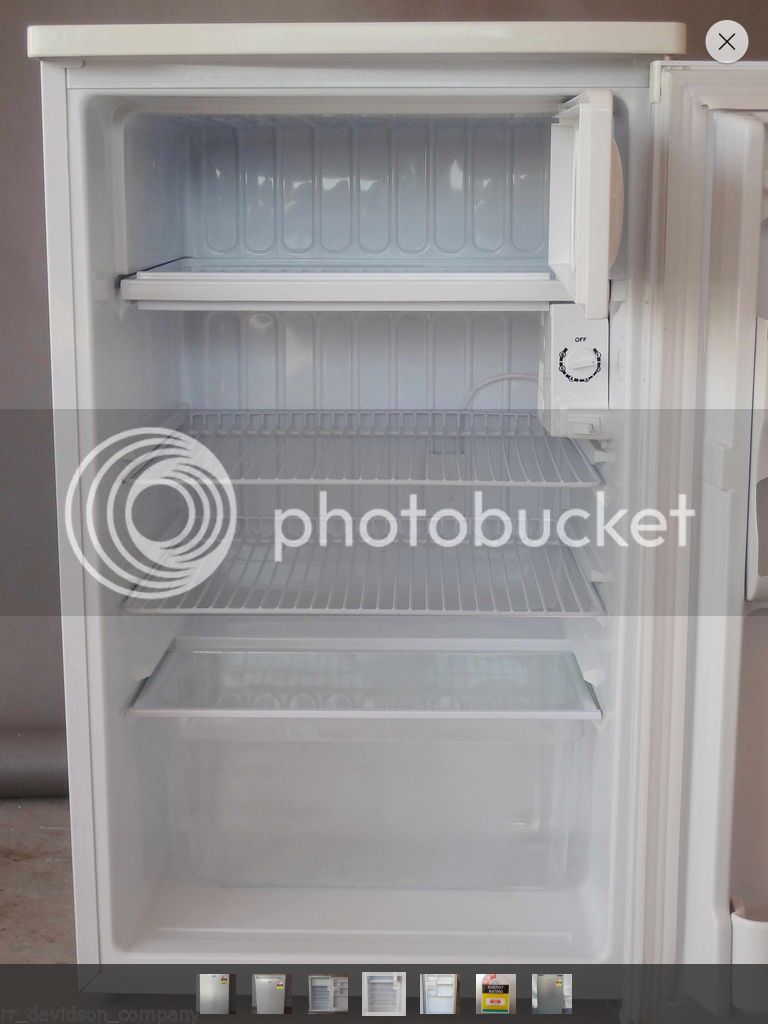
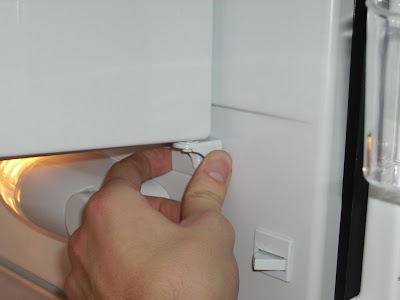
Remove two screws and the bracket comes out freeing the freezer door.
IMGP1063.JPG


With the bracket and door out, 1 shelf remains on the bottom and will just slide out.
IMGP1064.JPG


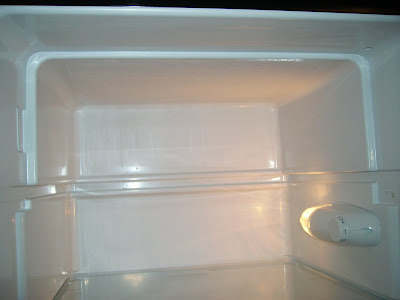
The freezer shelf pulled out. It is obvious to see where the cooling lines run (thicker area in the top)
IMGP1065.JPG


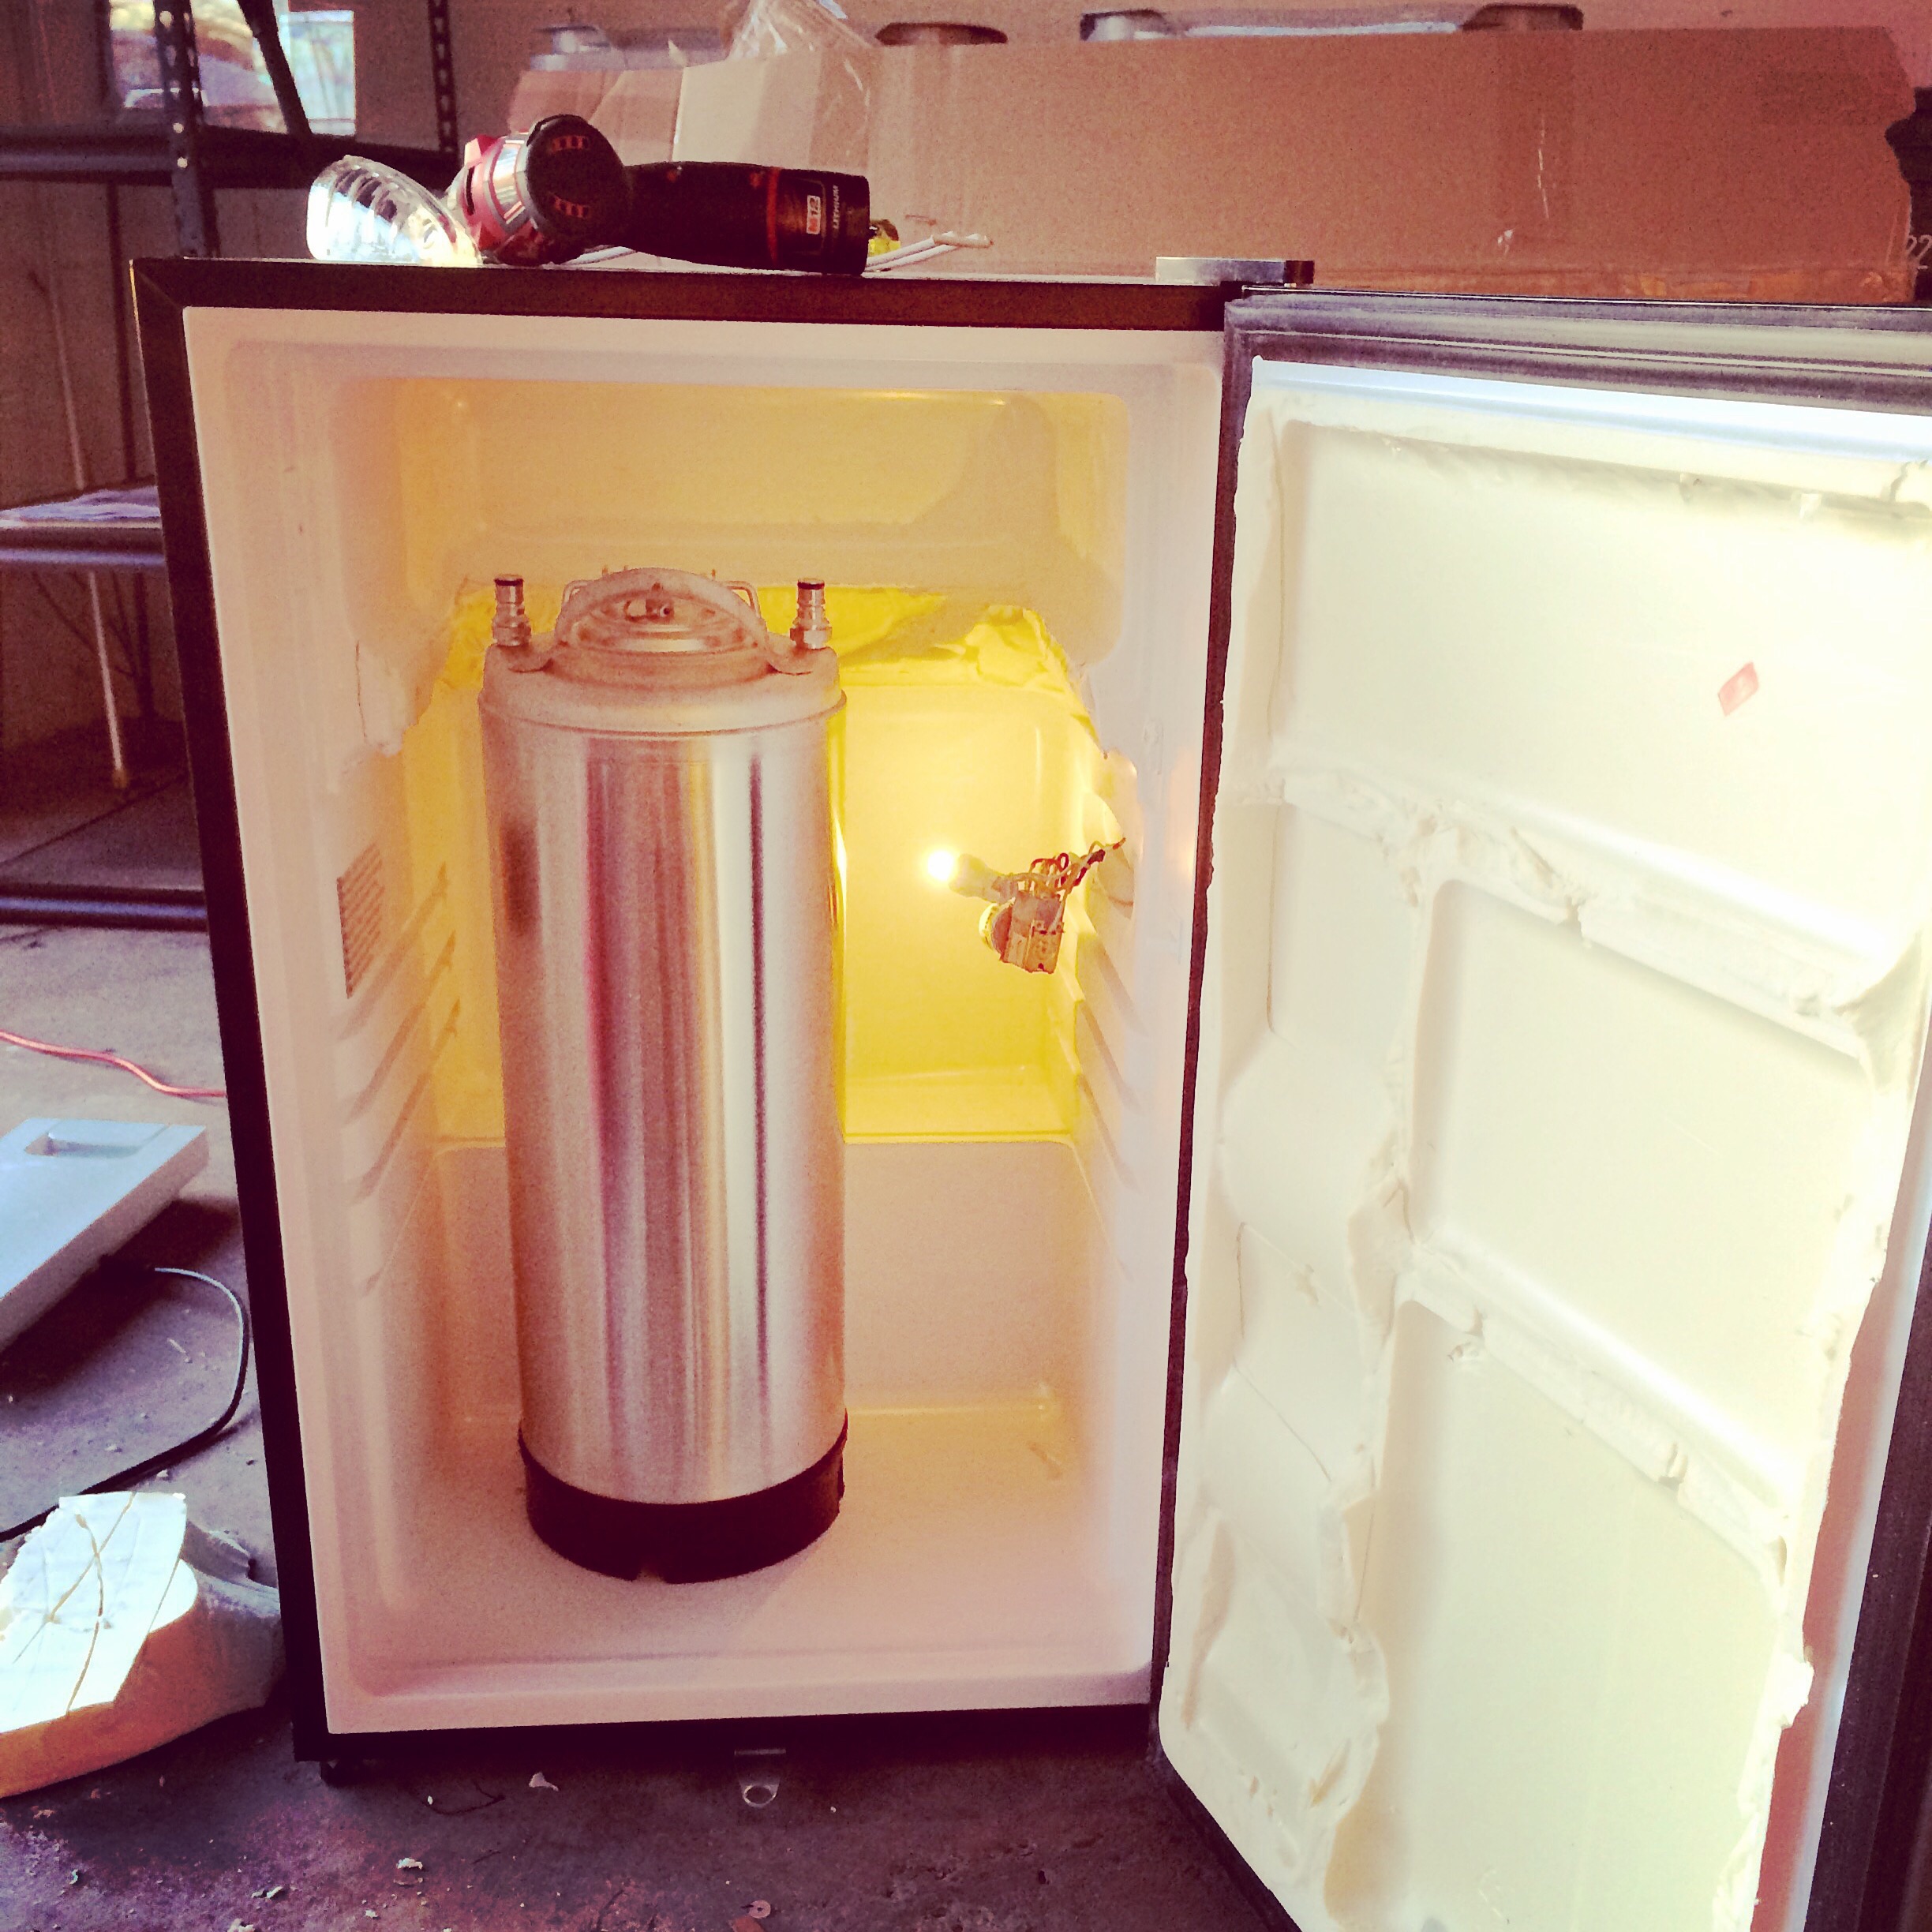
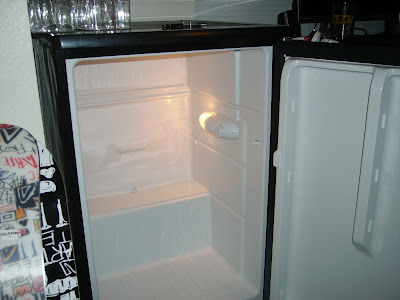
Stripped down you can see plenty of room for some keg action. In the middle of the compressor hump there is a plastic plug that fills a drainage hole. I will be using this to route the gas hose so I can externally mount the co2 canister. I will then be able to add a 3 gallon corny keg.
IMGP1066.JPG
Do you by any chance still have the freezer door for this fridge that I can buy from you or do you know anyone else that has done this conversion that has the door that I can have. Trying to just use it as a fridge and I need the door. Please let me know. Thanks.
 
Not at all. I built a kegerator I just didn't use this fridge. I wanna now use this fridge to hold the other sprits I wanna keep cold. If you or if you know anyone that has one for me to buy off them I would appreciate it.
 
I am interested in doing a build like this but can't find this model of fridge for sale anywhere. Does anyone have any solid alternatives? I'm interested in this model since you could conceivably do 2 5 gallons and 1 3 gallon corny and it seems to be a simple build.
 
I am interested in doing a build like this but can't find this model of fridge for sale anywhere. Does anyone have any solid alternatives? I'm interested in this model since you could conceivably do 2 5 gallons and 1 3 gallon corny and it seems to be a simple build.

I was at Lowes the other day and it looks like their version of it has changed where the freezer shelf we used to remove is molded in now. Not a deal breaker because there still aren't refrigerant lines in there but makes it more of a PITA to convert.

Have you checked Craigslist? I found one today for $100 while looking for something else

This is the one I'm seeing online. Thanks for confirming that the freezer shelf is molded in there. How would one go about removing that? Just taking a saw to it?

Want to move up to kegging sooner than later and was hoping to go the minifridge route. Don't have enough space in the house for a true keezer, unless I start getting rid of furniture. Which, you know, we could do, but still.
 
Back
Top