First all-grain. Please critique.

Homebrew Talk - Beer, Wine, Mead, & Cider Brewing Discussion Forum

Help Support Homebrew Talk - Beer, Wine, Mead, & Cider Brewing Discussion Forum:

This site may earn a commission from merchant affiliate links, including eBay, Amazon, and others.

ernestmyname

Well-Known Member
Joined
Mar 31, 2009
Messages
53
Reaction score
0
Location
Clemson, SC
So I made a post on a motorcycle forum about my first brew day. I tried to explain the basics while showing pics of equipment. I would really appreciate it if you guys would glance and see if I am doing any of this stuff completely wrong. First off, next time I brew outside and elevate my cooker enough to allow the draining and cooling to take place outdoors. Unfortunately it rained all weekend and the grain was already ground. So I did it indoors/under the carport.

Pics as promised. Post 1 of 2

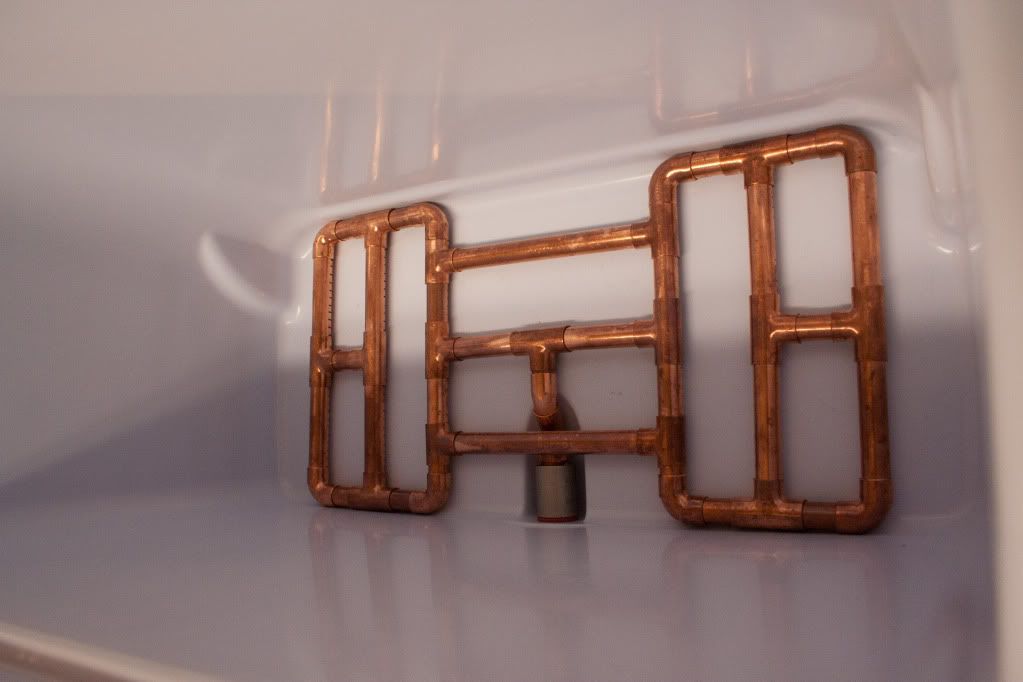
This is the manifold I made.. Majorly overdone but works great. I was able to drain the grain as quickly as I desired. I was also able to get clear runnings after a couple pints of recirculation.
manifold.jpg


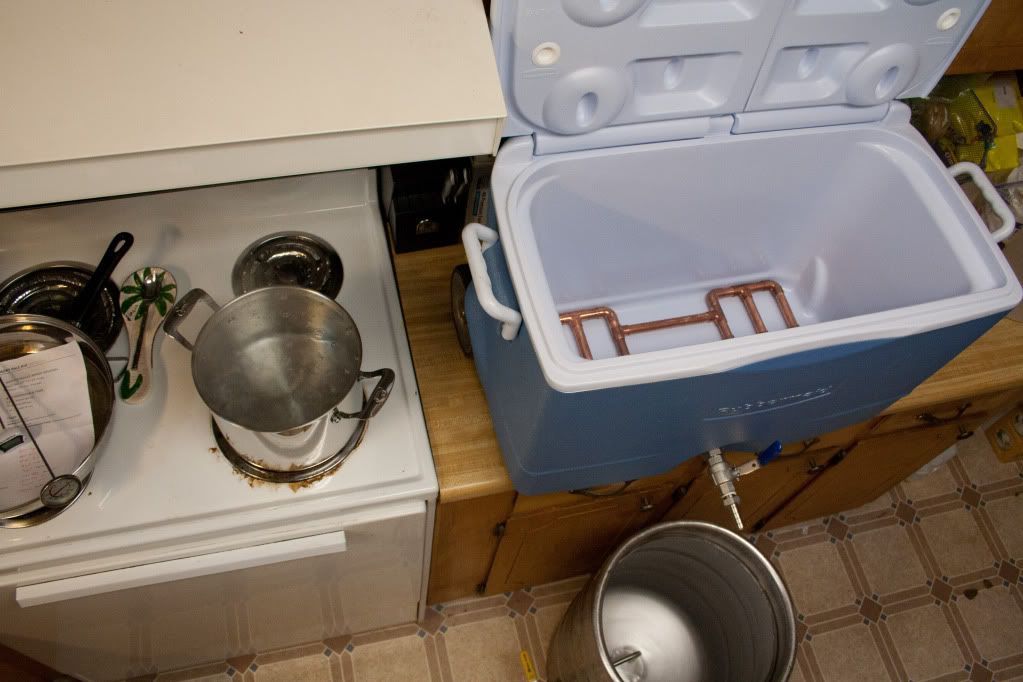
Waiting on water to boil to preheat the tun.
equipbefore.jpg


Draining off the pre-heat water.
drainboilingwater.jpg


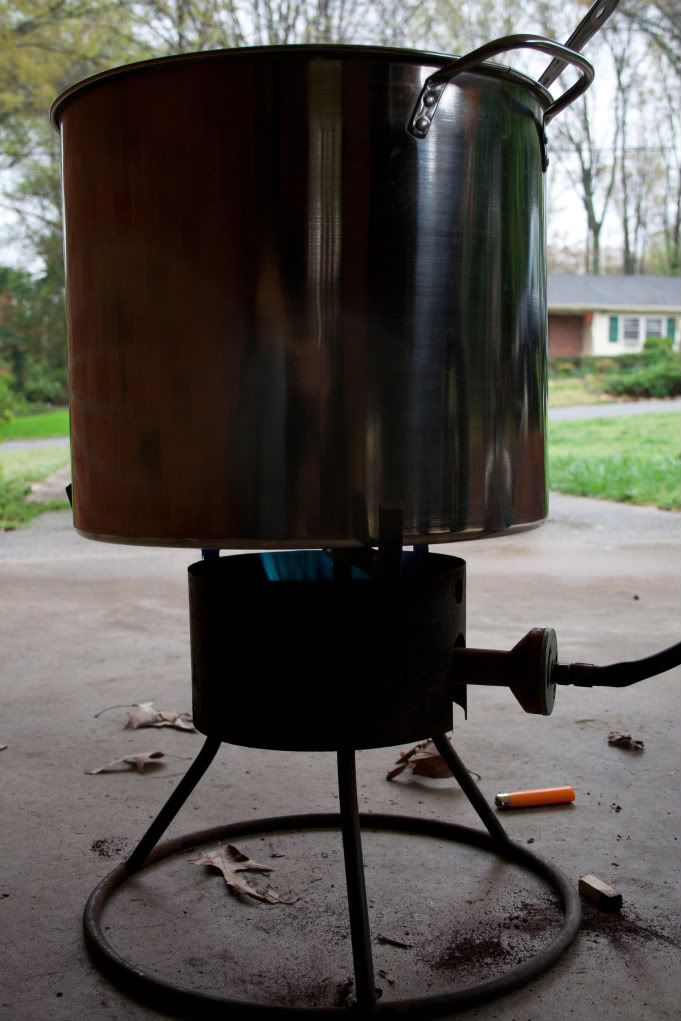
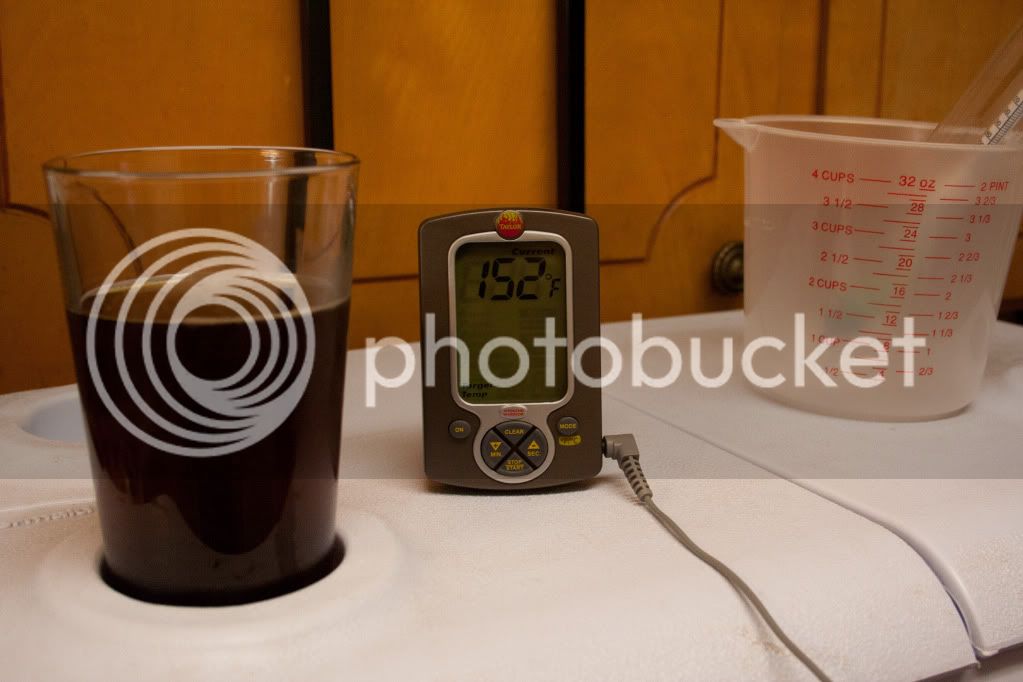
The preheating was done while this was outside bringing the strike water up to a calculated 164 degrees. When mixed with the room temperature grain the final temp came out to the desired 152F within a degree.
outsidecooker.jpg


I used a digital temp probe stuck in the tun to give an idea of the inside temp. This eliminated the need to open and close the cooler.
saccrest.jpg


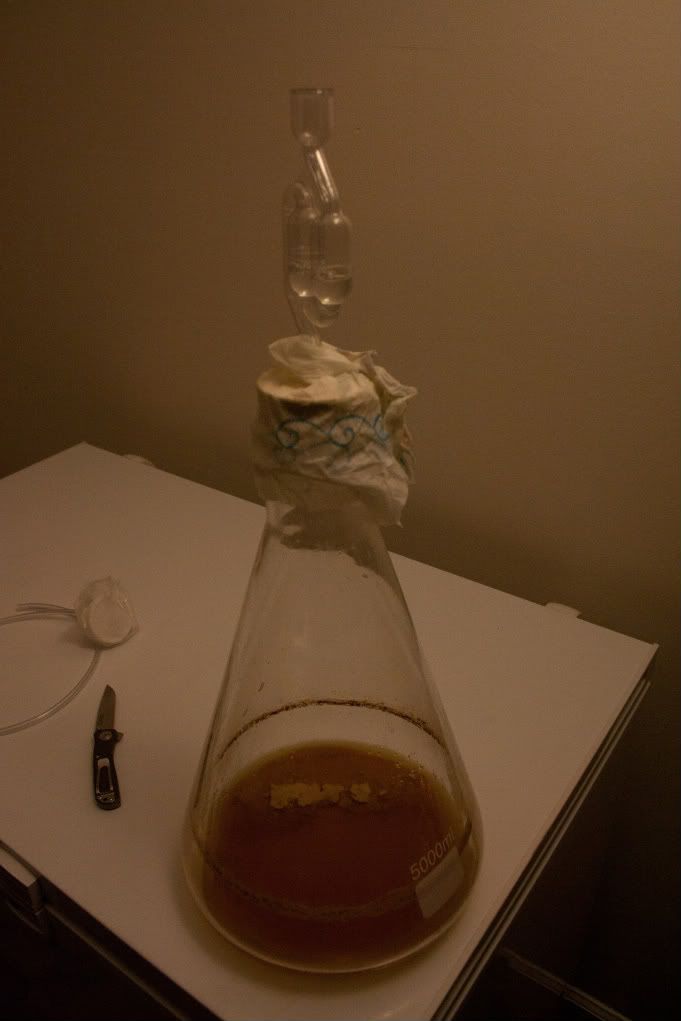
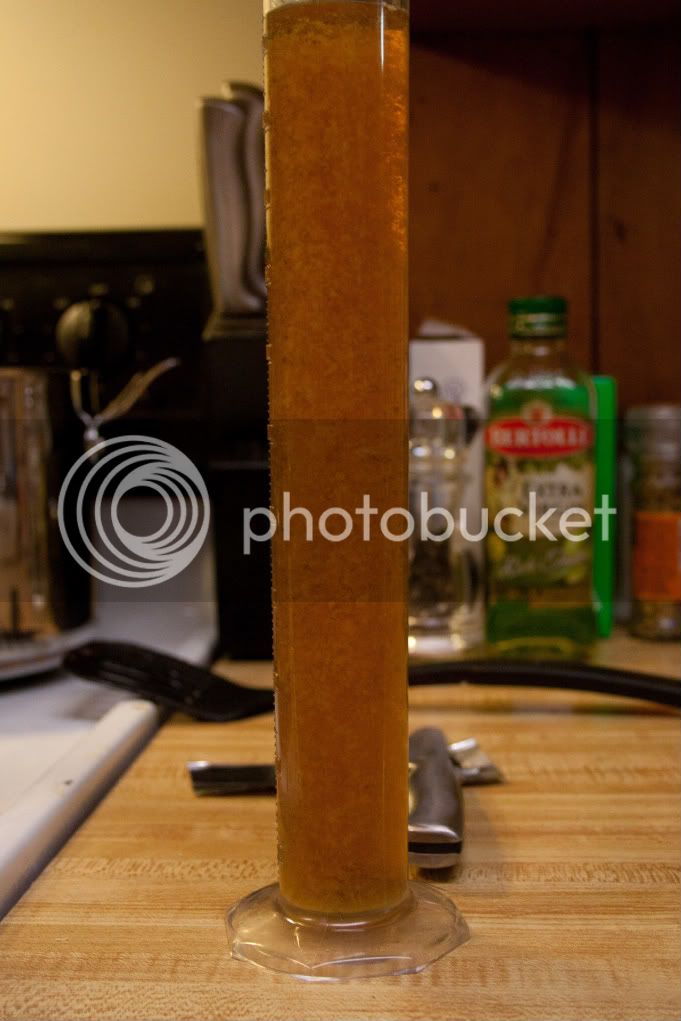
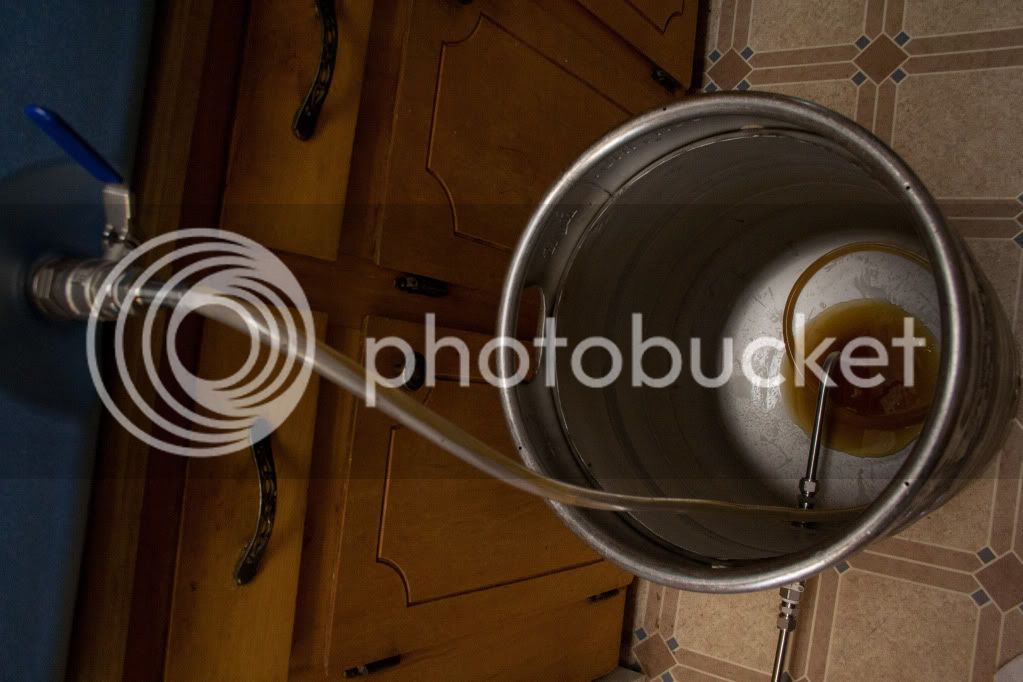
60 minutes later, I drained the grain bed. At this point the product is wort, or unfermented beer. Next brew I'm going to upgrade my tubing to eliminate splashing in the tube. Splashing the beer at this stage introduces oxygen to the wort which is bad.
IMG_8881.jpg


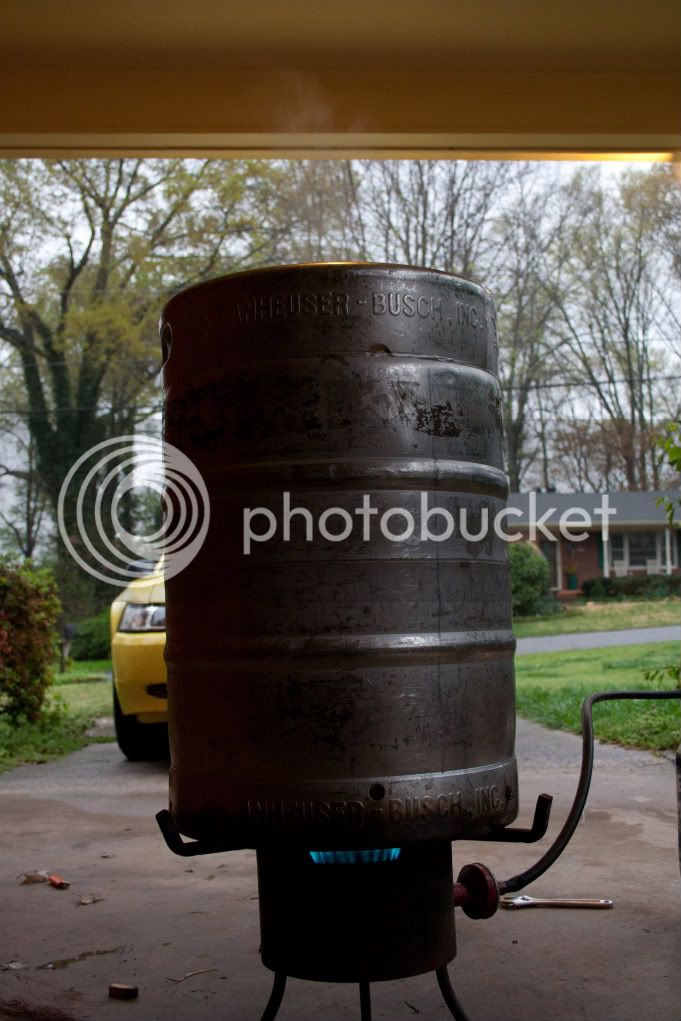
The mashout step is to bring the grains to a higher temp which helps efficiency and causes the wort to flow easier. This water was heated outside and added to the grain bed. After 10 minutes the grain bed was drained again. Next is to cook the wort.
IMG_8884.jpg


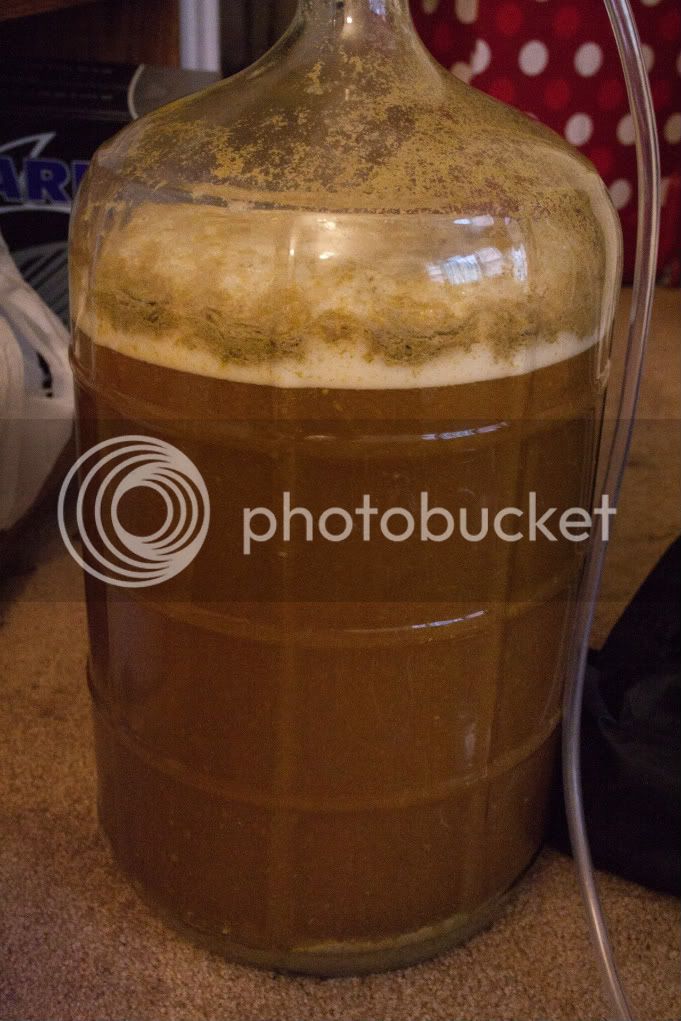
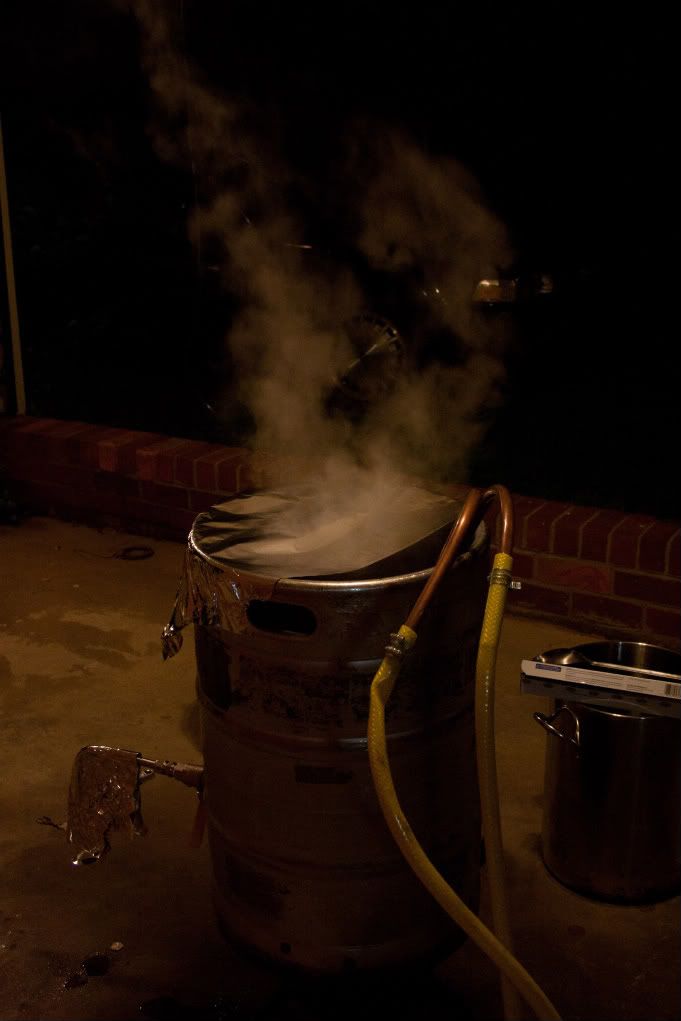
Hop additions are made at differing time intervals and the chiller is added to the pot 10-15 minutes before the end of the boil to sanitize it. I also add irish moss at the end of the boil to help with clarification.
wortcooking.jpg


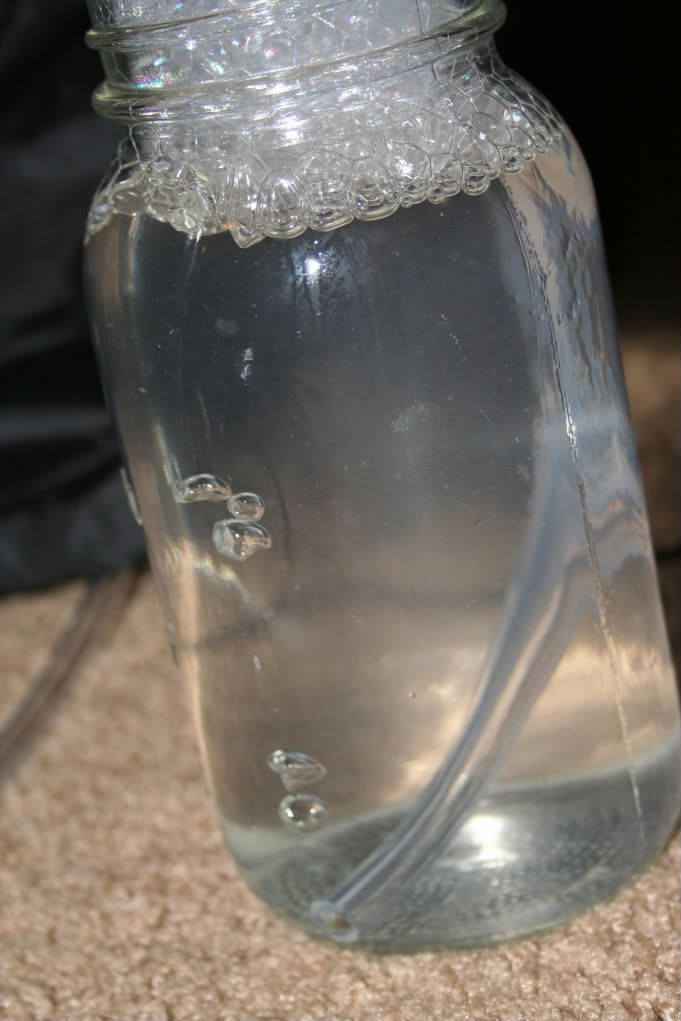
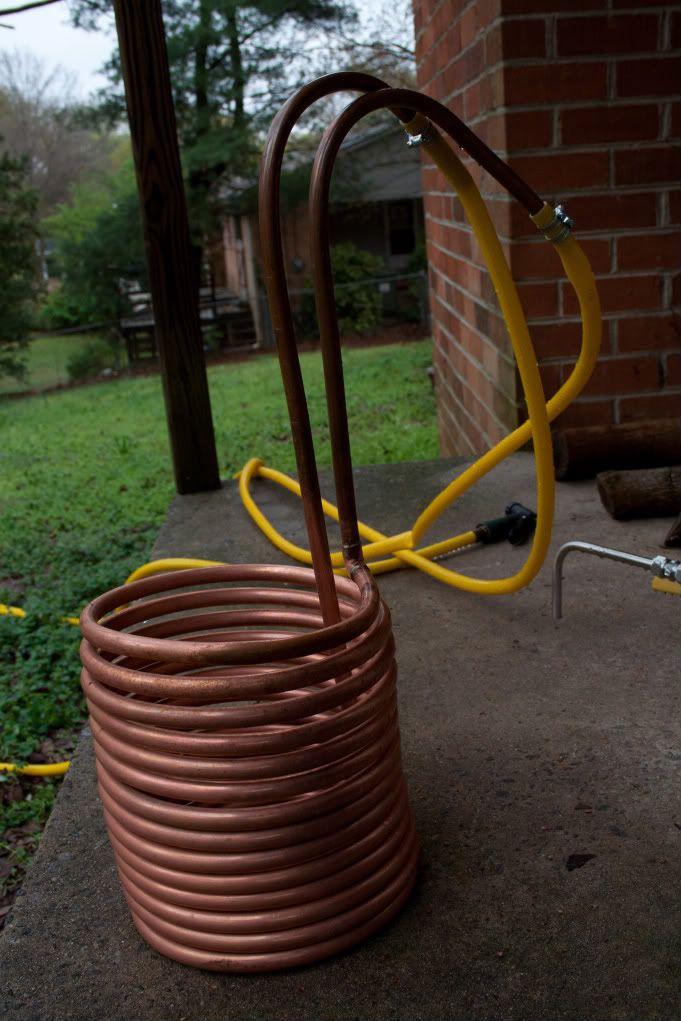
Next is to bring the wort down to room temp as quickly as possible. Not cooling it quickly enough causes issues with long-term beer stability. When the beer is chilled, proteins precipitate out. If it is not chilled quickly enough, the proteins will not precipitate effectively and cause the finished product to be hazy. Cold water is pumped through the chiller to remove heat from the wort. The inlet and outlet is bent downward so that any leaking water would drip out of the sanitized wort.
IMG_8899.jpg
 
After the beer is cooled, or below 80 degrees, it is important to get it aerated and get the yeast in there. You want to introduce your good yeast before any wild yeast that may be floating around gets in your wort and causes off-flavors. The more yeast you pitch, the better. I always do a yeast starter although it is not required. The whole point of the yeast starter is to make a mini-batch of beer so your yeast can multiply.
starter.jpg


I didn't get any pics of the hops getting strained out of the wort as it was drained out the kettle. Probably good I didn't.. My straining method I was trying out didn't work well at all.. I will come up with something different next brew. I aerated using an aquarium pump and a stainless steel aeration "stone". The filter is in-line and used to prevent blowing bacteria into the vulnerable wort.
IMG_8891.jpg


After the wort is aerated, I put a blow-off tube on the carboy and called it a night. The next morning, I had this:
bubble.jpg


I left a lot of hops in there unintentionally..
nextday.jpg


For those interested, I took some hydrometer readings while I was cooking the wort to see if I needed to lengthen the boil. This pic illustrates the proteins that precipitate out of the beer when it is cooled.
hydrotest.jpg
 
Nice pics. How big is your starter? Doesn't look like much in that flask, but I could be fooled as it is labeled a 5L flask. I'd be making a 2-3L starter at a minimum.
 
Since I am obviously doing everything properly.. :ban:

On a more serious note, I did have some questions about the mash out. I was scared to heat the sparge water higher than 170 so I literally hit 169 and poured it in the mash tun. But my final temp wasn't even 160. The grain was 151F when I started the mash out step.

Is it better to go with my method and avoid tannin extraction by not exposing the grain to temps over 170 and mash out at more like 160F? Or use sparge water that is ~180F for a final mashout temp of 170?

Also, am I good using that nylon tubing for my mash tun drain?

Thanks in advance! I am looking for as much advice/constructive criticism as you guys can dish out. :D
 
I use that same cooler for my mash tun as well. It holds temps real well and i like the drain on the front.
 
What's that foil looking thing on the BK? Maybe during the chilling?

The foil is just tin foil. I always cover it the last few minutes of the boil to keep any undesirables out of the wort. I add some foil about 5 minutes before the end of the boil and another piece right as I'm cutting the burner off to take care of the remaining opening. I just like having something sanitized over the wort before and after chilling it. The pot lid, because of the chiller inlet and outlet, leaves a moon-shaped opening. And the keggle doesn't have a lit at all.. I also stuck some on the siphon tube since I had been taking samples from it. I didn't want any wild yeast or bacteria to get on it while I was chilling, either. I probably take more precautions than is required. But, I don't worry much about losing a batch to a sanitation mistake.
 
Nice job! I really dig the pictures...very thorough.

My only critique would be about this statement...

At this point the product is wort, or unfermented beer. Next brew I'm going to upgrade my tubing to eliminate splashing in the tube. Splashing the beer at this stage introduces oxygen to the wort which is bad.

Oxygen won't have an adverse affect on your wort until after you pitch and the yeast start eating. After collecting your runnings you will be boiling the wort for 60-90 min and then aerating it prior to pitching so you don't need to worry about splashing it at that point.

Just my 2 cents :mug:
 
Is it better to go with my method and avoid tannin extraction by not exposing the grain to temps over 170 and mash out at more like 160F? Or use sparge water that is ~180F for a final mashout temp of 170?

:D

Sparge water can and likely should exceed 170 degrees. The reference point of 170 to avoid tannin extraction refers to the actual temp of the grain bed, ususally sparging around 180 - 185 result in a grain bed temp close to 170. Additionally something you could try, rather than preheating the MT w/ boiling water which can shock the cooler and warp the liner, I find it easier to simply overheat the strike water by 10 or 15 degrees and let it preheat the cooler, you can then temper down to strike temp. with practice it is easy and saves a step.
 
nice pics! im about to be doing my first all grain soon. this is def going to help! that beer looks great too! cool pic of wort in hydrometer tube. i think im goin to use a plate chiller im not sure yet. any reason in particular why u went with the chiller your using?
 
I'm impressed by your equipment for a first all grain. you definately were prepared
 
Oxygen won't have an adverse affect on your wort until after you pitch and the yeast start eating. After collecting your runnings you will be boiling the wort for 60-90 min and then aerating it prior to pitching so you don't need to worry about splashing it at that point.

He is referring to Hot Side Aeration, the introduction of oxygen (in the form of air) into your hot wort. George Fix says "The presence of excess O2 in your hot wort leads to the oxidation of melanoidins in your wort. These oxidized molecules contribute to staling in your beer post packaging. The more of these there are the sooner your beer will become stale."

The theory is debateable, but I aways at least try to minimize splashing at this stage.

Matt.

Interesting, I had never heard that theory.

I don't generally allow my runnings to splash in the pot either but I wouldn't have thought twice about it.

I will try and control that a little better on my next brew and see if it makes a difference!
 
Nice write up and pics, although some of the process isn't what i'd call sop. Normally the mashout is performed before the first runnings are drained, this is done with a small infusion of near boiling water, wait 10 minutes, vorlauf/drain , then sparge.

And the whole hot side aeration issue has been debunked over and over again.
_
 
Normally the mashout is performed before the first runnings are drained, this is done with a small infusion of near boiling water, wait 10 minutes, vorlauf/drain , then sparge.

I was really confused about the mashout step. I read around and really didn't see anything that described the "proper" way to perform it. I finally decided to drain and then introduce the 169 degree water and allow it to sit for 10 minutes. Next brew I'll introduce the hot water for mashout before I drain the first runnings.

As for equipment.. I am quite the equipment whore. I also have a kegerator along with several soda kegs for my brew. I also have 5 gallon soda kegs dedicated to secondary fermenting. Not to mention the 15.5 gal keg shell that is converted to a primary fermenter. I'll start using it when I go to 10 gallon batches in the near future. I brewed with minimal equipment while I was in college. Now that I can afford better stuff (all used off craigslist) I have no reservations. :D I got a killer deal on some stuff a couple weeks back.. I got a keggle with all SS hardware including the SS siphon tube on inside and out for 50 bucks. Also got the converted fermenter with the same SS hardware for 50 bucks. Same guy sold me 7 ball lock soda kegs with fittings for $15 a piece. :rockin: Next on my list of equipment will be a grain mill.

As for the hot-side aeration, I will do some research before I alter any of my steps. I had read about it in "How to brew". I took it quite seriously.

If you guys like the pics and the walk-through I will definitely be willing to do it again. But, with better quality pics and more of them. :mug:

[edit] Also: Wildwest.. Other than taking measures for hot-side aeration and having to move my equipment around during the brewing process, what can I change that would make my process more like SOP? Thanks!
 
[edit] Also: Wildwest.. Other than taking measures for hot-side aeration and having to move my equipment around during the brewing process, what can I change that would make my process more like SOP? Thanks!

I really don't care to slop my wort around if it isn't necessary, it's just been proven over and over it won't cause problems later on. I believe in some commercial operations they actually pump hot wort into the boil kettle causing all kinds of aeration.

Everything else looks good, most people choose NOT to use an airlock on their starters, especially if you use a stir plate. i just fold a piece of aluminum foil over the top, as it allows oxygen to be pulled into the wort, which is a good thing.

_
 
And the whole hot side aeration issue has been debunked over and over again.
_

While I agree that the issue of HSA is definitely up for debate, I do not agree with your conclusion that it has been "debunked". If you have a beer that you would like to store for an extended period of time, it certainly could not hurt to try to minimize splashing. I have not experienced the "wet carbboard" effect first hand (my ber would never last long enough), but I have heard and read more than one homebrewer attest to it.
 
While I agree that the issue of HSA is definitely up for debate, I do not agree with your conclusion that it has been "debunked". If you have a beer that you would like to store for an extended period of time, it certainly could not hurt to try to minimize splashing. I have not experienced the "wet carbboard" effect first hand (my ber would never last long enough), but I have heard and read more than one homebrewer attest to it.

I agree- it's not a myth. However, at the homebrew level I wouldn't be greatly concerned. I still try not to splash or pour hot wort, but I do use whirlpool hops. I gently whirlpool until the wort is chiled, then I splash like crazy to aerate.

As far as a mash out, they aren't normally done for batch sparges. They are used mostly for fly spargers, so that the enzymes can denature at 168 degrees to maintain the mash profile. It takes about 45-60 minutes to fly sparge, so you want to mash out for that. But for a batch sparge, you drain quickly and start those first runnings onto boil and then dump in sparge water and stir like crazy, and try to it 168 degrees with the water addition. That takes the place of a mash out just fine!
 
your outdoor burner looks scarey as ****... but thanks for the illustrated journey.

should help with my 1st all grain
 
Heres a good video of Allagash brewery throwing Hot Side Aeration to the wind. They obviously don't worry about it
 
Last edited by a moderator:
any reason in particular why u went with the chiller your using?

I missed this earlier - I went with that chiller design because the copper was free. I was interning at a place and helped them clean out some of their shop floorspace and they told me I could have it. It is 1/2". The bends at the bottom have 90's since the bend would have kinked with a pipe bender.

I haven't researched much on chillers but I am really happy with mine. I can't imagine using a thinner diameter copper tube with any more length than mine has. It takes very little time for my chiller to completely cool the water touching it. I usually end up agitating it in the wort every couple seconds because the return pipe feels the same temperature as the inlet after a couple seconds.

My theory is that there is no point in pumping water that has heated nearly as hot as the wort through a bunch of coils. Or, in short, I wouldn't trade the same amount of surface area of copper for a thinner diameter but longer length.
 
A couple questions for you guys.. I let the sierra nevada clone sit in the primary for two weeks. It was completely done fermenting and had apparently lost its CO2 content. I racked it to the secondary and popped an air lock on it and I have equal pressure in and out the carboy.

Would it be best to go ahead and rack it to a keg and get it off the oxygen headspace or reap the benefits of secondary fermentation? I only have time to allow 24 hours before racking OR almost two weeks. I won't have time to do it in between.

Secondly, I finally brewed my 1.09 OG double IPA. I was a little disappointed in my extraction. How much does using old grains effect efficiency? The grains for that batch had been cracked and stored for a month before I had time to brew.
 
Back
Top