Finally Using My Half Barrel BME Chronical

Homebrew Talk - Beer, Wine, Mead, & Cider Brewing Discussion Forum

Help Support Homebrew Talk - Beer, Wine, Mead, & Cider Brewing Discussion Forum:

This site may earn a commission from merchant affiliate links, including eBay, Amazon, and others.

Nagorg

If a frog had wings...
HBT Supporter
Joined
Dec 19, 2011
Messages
2,230
Reaction score
1,282
Location
DFW
Hello HBT! I was lucky enough to win the Grand Prize in Ss Brewtech’s Biggest Baddest Holiday Giveaway Ever on 12/18/2015 and of course I had to pick the Half Barrel BME Chronical. I can never again say that I never win anything...

First, a HUGE Thanks to Ss Brewtech for the generous giveaway and to HBT for hosting these things!

For the HBT folks that might be considering a Chronical I wanted to post my experiences with it. I have photos and some commentary but please understand that this is only about my journey and inst meant to imply anything about what might be right or wrong for others.

So, here we go...
 
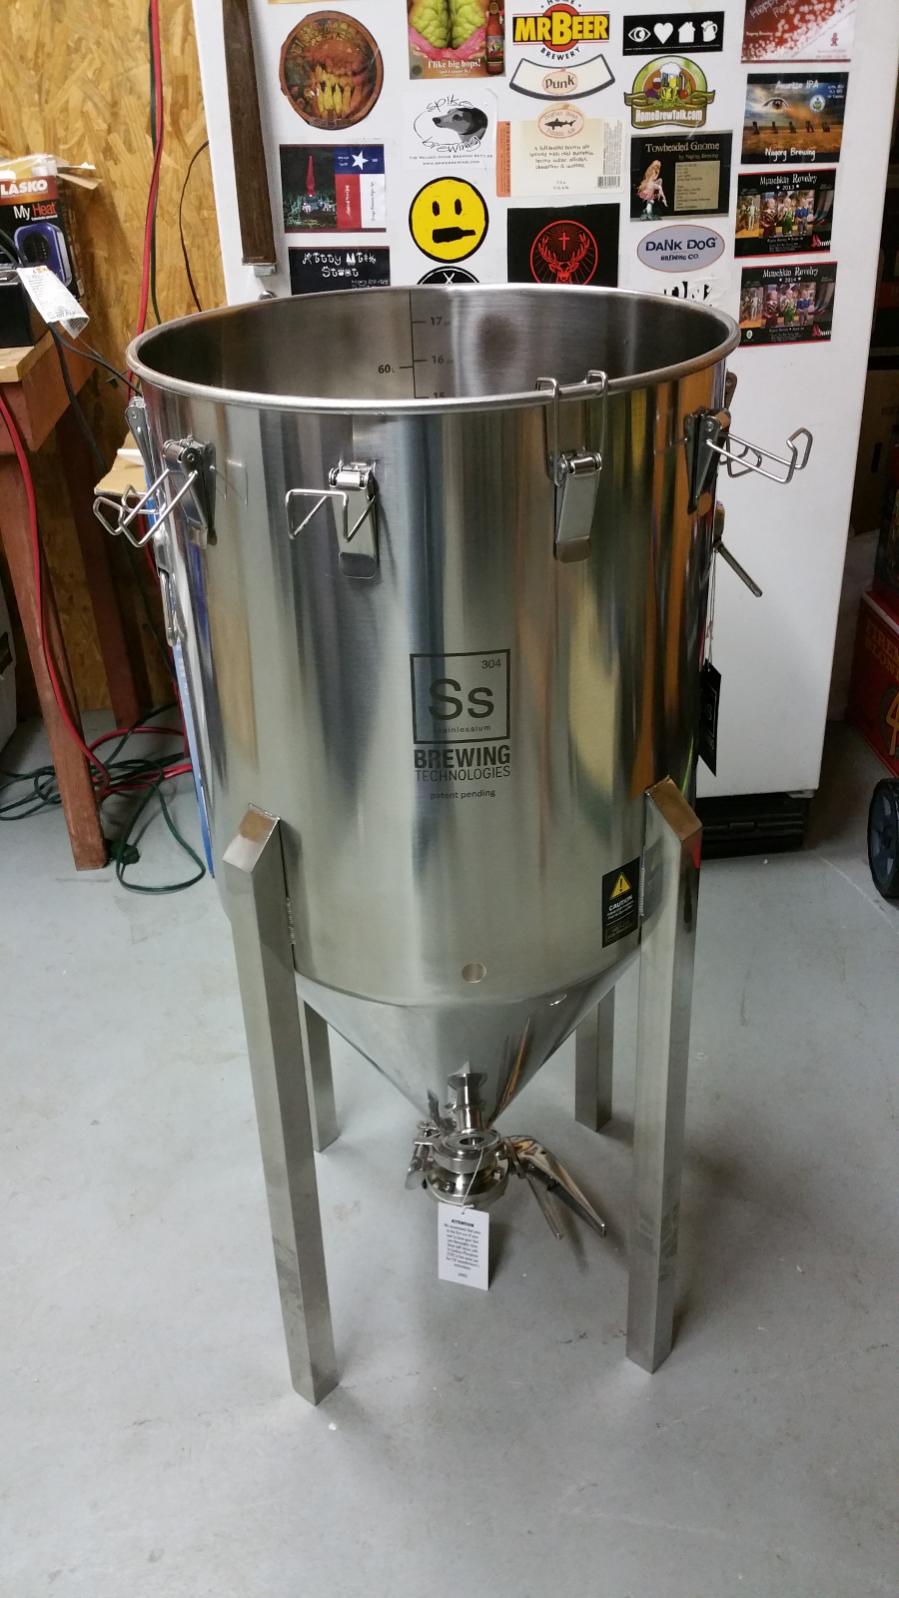
SsBrewtech shipped my Chronical shortly after the new year and I received it on 01/12/2016. It was packaged very well and given the thickness of the cardboard and the box in a box approach, a freight company would have to try to damage this thing! FWIW, SsBrewtech pricing includes freight so thats a real value add for anyone considering a purchase. Of course your LHBS would be a good source too!

1-It-Arrived.jpg


2-NicePackaging.jpg
 
Okay, some may wonder why it's taken me almost 3 months to use this Chronical. Well, I had to first figure out a few things like temp control and wort transfer.

On Cooling:
The Brew Masters Edition Chronical comes with an internal chiller coil which is an awesome feature. For me however, it presented a challenge for figuring out how to best use this plus trying to understand if it would really keep my fermenting wort temps under control. In my case I ferment in a non-climate controlled "outbuilding" (A.K.A. my Brew Barn!) and the Texas summers can really get things cooking in there with ambient temps easily over 110. Couple that with it being winter where even our mild temps are well below fermentation levels; I have some wild swings to think about... If I did use the chiller coil, I'd need to be able to dynamically heat and cool with whatever system I came up with!

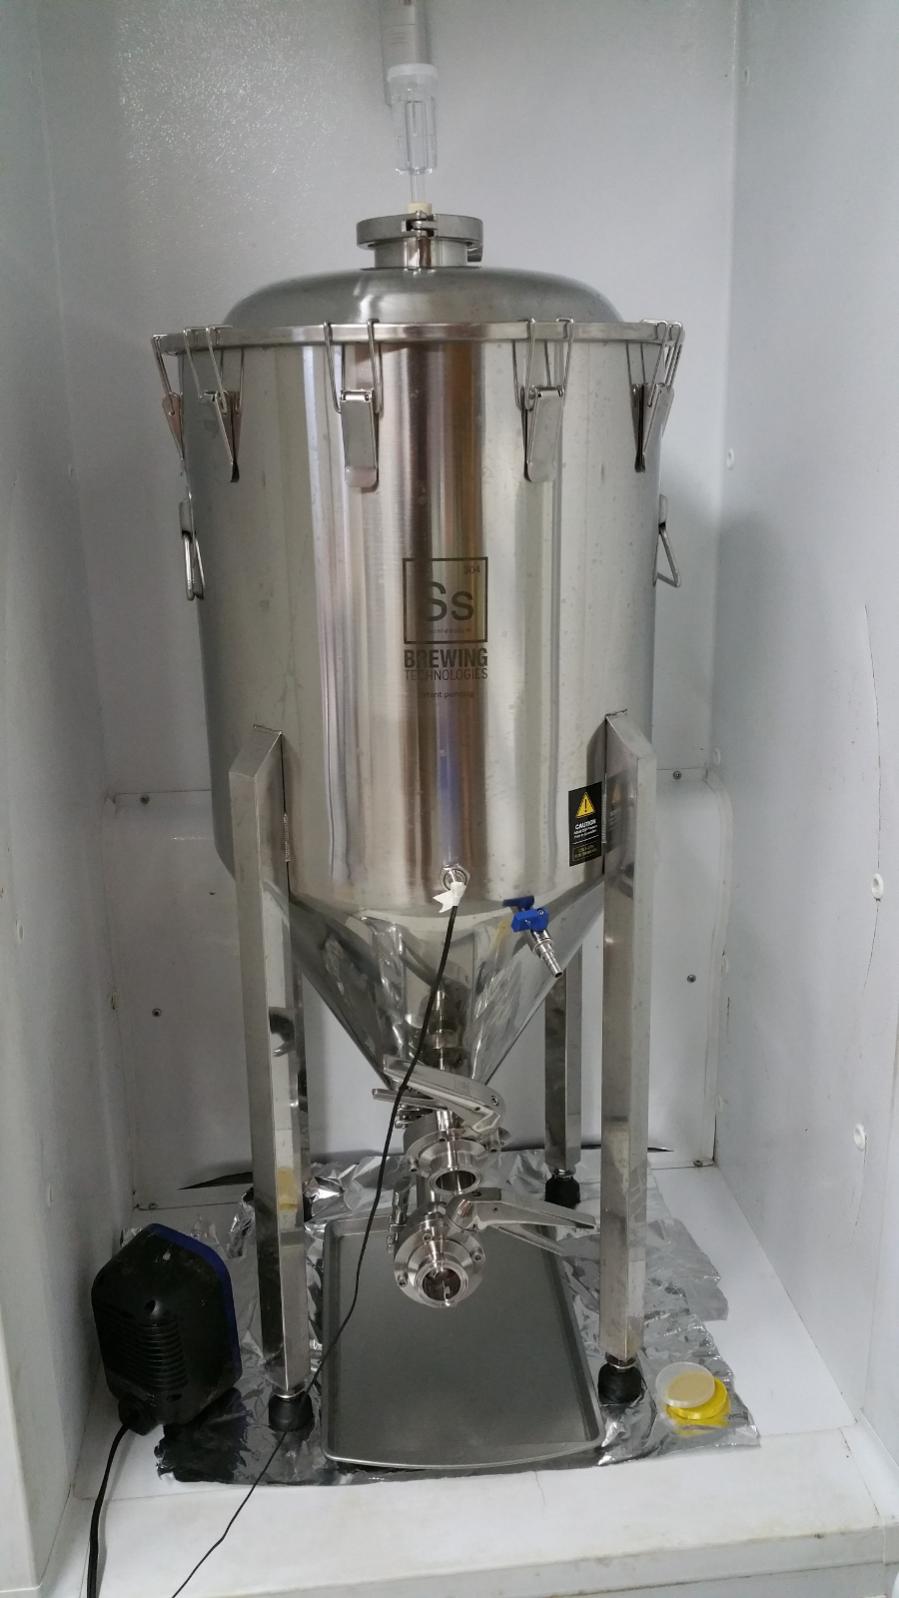
After reading a lot and asking questions about DIY and commercially available glycol systems, I came to the conclusion that I'd be better off (less cost and complexity) sticking with a fermchamber.

With this decision being made, I now needed to figure out how to plug the holes meant for the chiller and acquire an upright freezer big enough to house this thing. My 16 cubic foot Craigslist special simply wasn't able to take this on.

For the chiller holes, Ss Brewtech sells plugs for this so I bought two of them. (@SsBrewTech: It might be a nice option to have the chiller coil as an optional accessory!)

For the fermchamber, I didn't want to buy a new upright freezer so after a few weeks of searching I finally got a decent deal on a used one form an auction site. (Not eBay...)
....Yes, the freezer looks nasty inside but it cleaned up nicely as you will see in some other pics!

Chiller-Plugs.png


7-ANewOldFermChamber.jpg
 
I cant forget to clean the Chronical before use. Since its brand new, it has some light oil on it that needs to be removed unless your recipe calls for it. SsBrewtech recommends using TSP for this so that's exactly what I did.

After being cleaned with TSP and rinsed and sprayed with StarSan, its time to dry...

8-AllCleanedUp.jpg
 
On wort transfer:

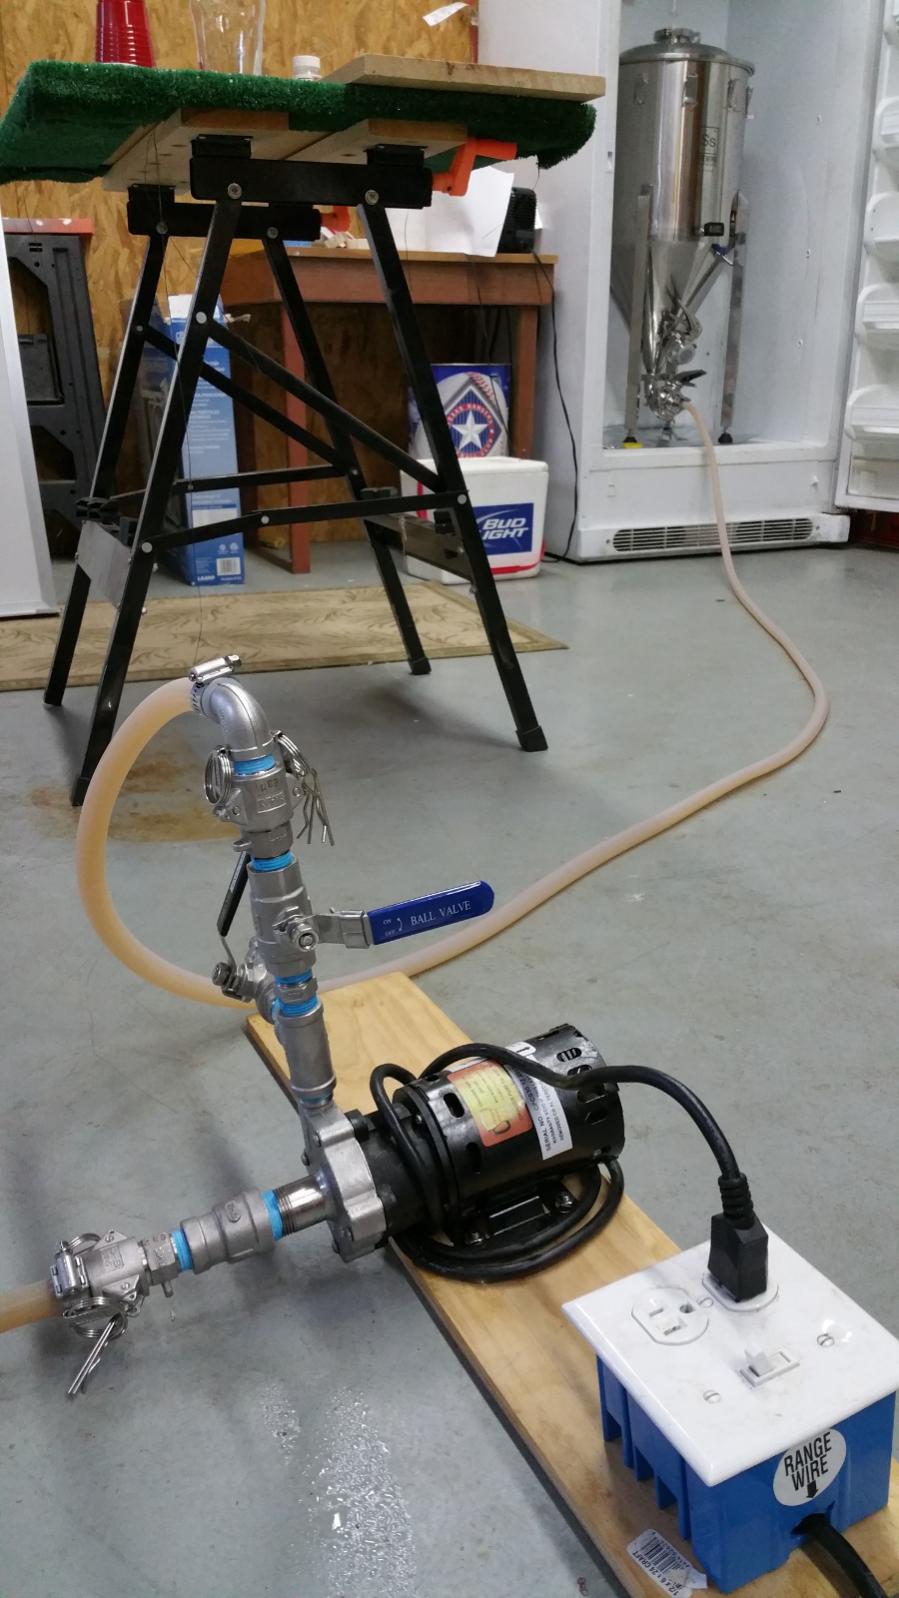
With this BME Chronical I've entered the world of sanitary Triclover fittings. I have to say that I really like this style but up to now I had invested in 1/2" camlock for use with all my ball-valve's including my chugger pump.
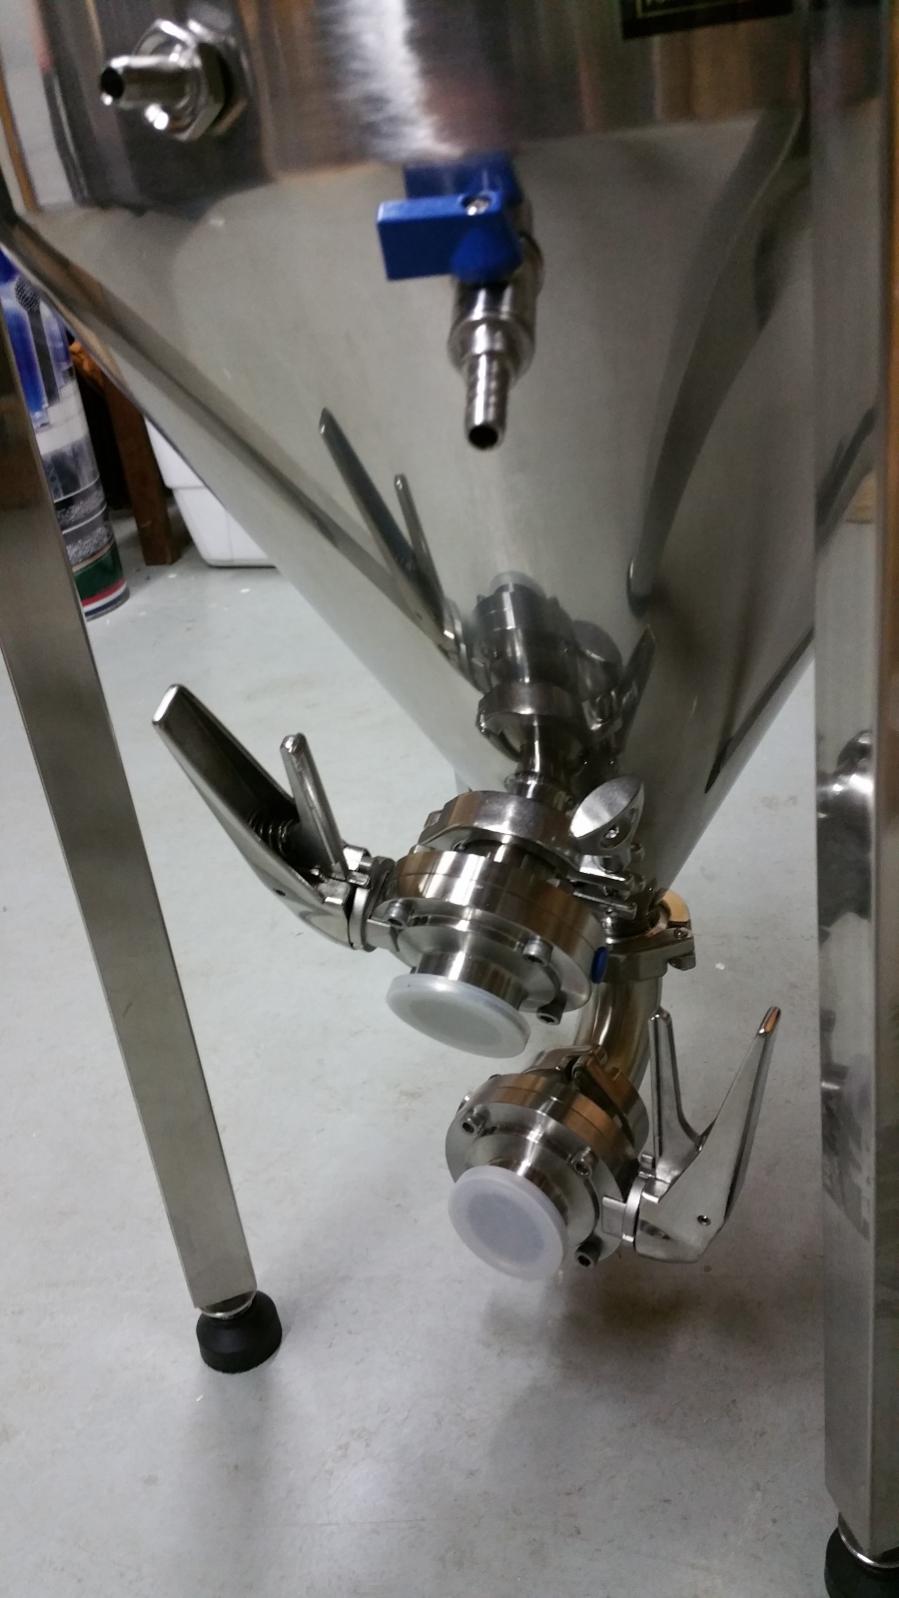
As luck would have it, I'm not the first person to have this delima and I was happy to find several solutions. But the magic for me was a simple "Camlock Male to 1.5" Triclover" adapter. Using this adapter on the bottom butterfly valve allowed me attach a hose from my chugger pump.
A loonnngggg hose btw! Since I now could have ~15G in a single fermentor, it's not really practical to move it when full. So I also had to make an extra long hose which worked like a champ!

CamlockMaleTo1.5InchTriClover.png


9-HoseOnBottomValve.jpg


10-LongPumpHose.jpg
 
I've been dealing with a new temp control issue due to the use of the thermowell. To put it simply, the temp near the center of the conical doesn't respond very quick to ambient temp changes. I have my STC-1000 set to keep temps within a 1 degree Celsius of my set temp of 168. During a cooling cycle, the ambient temps are in the low 20's by the time the controller turns off the freezer. Because of the low ambient temps, cooling continues until the heat stage is triggered. I know that this overshoot scenario will eventually balance out but I didn't anticipate this dramatic of a swing.

This has me considering a couple of things:
1) Investing in a smarter temp controller, like an OhmBrew Fermostat, that can learn and compensate cycles to minimize overshoot. (Not sure I'm smart enough for a BrewPi...)
2) Possibly using the chiller coil that I removed to run liquid (affected by ambient temps) during the cooling and heating cycles. I think this might improve response time.

Option #2 above would add more complexity so I'm leaning towards the smarter controller at the moment...
 
In for the journey. I have my 14g chronical in an upright freezer just like your setup. My freezer is on casters though so it wheels over to my brew stand easily eliminating the need for long transfer hoses.
 
My freezer is on casters though so it wheels over to my brew stand easily eliminating the need for long transfer hoses.

I could have put casters on my Chronical but I'd still have to lift it into the upright freezer. While not impossible, it just didn't seem like a great idea so I made the long hose. It was easy and worked great!
 
While I wait for the time to dump the yeast, I thought I'd mention how much I love the sample valve on this Chronical. It's really awesome to have the ability to take a quick small sample for a refractometer brix measurement. While I can see that the airlock activity has slowed down, its really nice to know I can monitor for when I hit terminal gravity and it's stopped dropping. All of this with out introducing potential contamination! :rockin:
 
^ive heard refractometer readings lose accuracy after fermentation starts? regardless - that sample port def looks sweet; good position for a clear sample pulled above the trub line

I could have put casters on my Chronical but I'd still have to lift it into the upright freezer. While tot impossible, it just didn't seem like a great idea so I made the long hose. It was easy and worked great!

the casters are on the freezer so the whole unit wheels over to the brew stand.

29vco69.jpg
 
If you build a cheap A/C glycol chiller to use with the internal cooling coil the shed temperatures will not be a problem.

Using the coil inside the fridge will not help much as the cooling water bucket will have the same temp swings as the beer.
 
^ive heard refractometer readings lose accuracy after fermentation starts?

I'm only checking to see when the brix value stops dropping and flat-lines over a few days; that tells me that fermentation is finished. And regardless of accuracy for FG, I can still calculate what should be terminal gravity to help determine if things have stalled or not. (Personally I've had great success using the various brix to FG calculators out there!)

The sample valve is great because I can take a tiny sample for the refractometer.

And since I checked today and am several points below starting brix measurement I can see that fermentation seems happy despite the ambient temp swings in the fermchamber! :)
 
Checked another sample last night and brix had dropped from the prior reading; yep fermentation is still happening! Really liking the sample valve for this.

Reading more on dumping yeast I think I'll wait a while longer. I'll likely dump a small amount tonight or tomorrow for clearing what should mostly be settled trub. For the "yeast dump" I'll wait until I'm ready to dry hop which will be in about another 9-10 days.
 
Extra Things..... :)

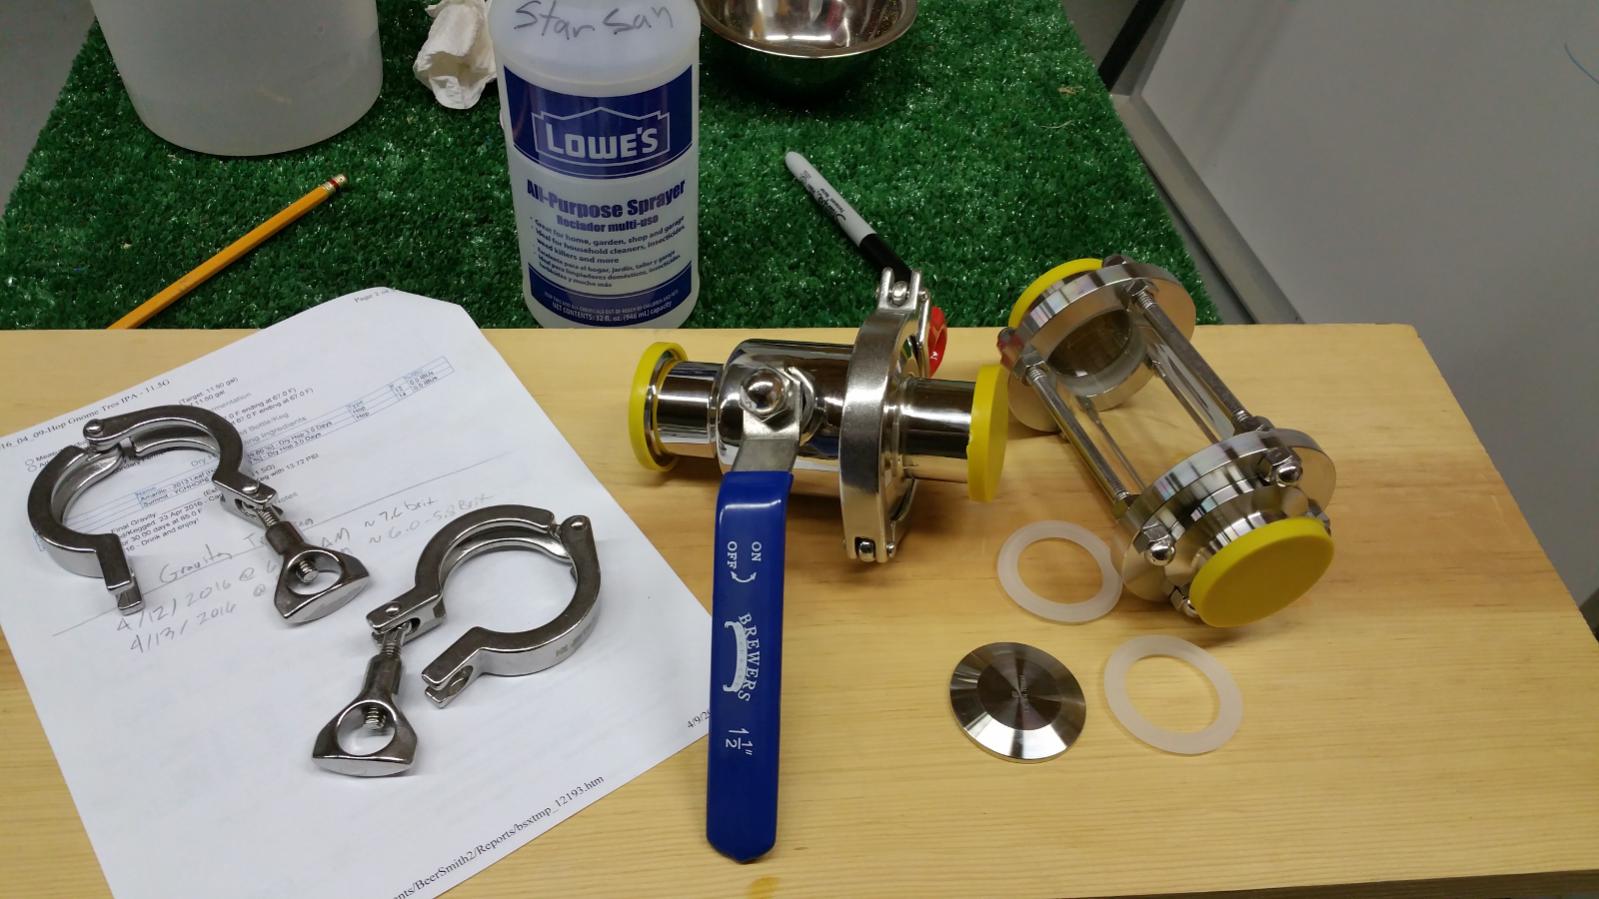
There were a couple of things I obtained that I haven't mentioned until now. I didnt know if these would really be needed or not but they seemed like a good idea at the time so I bought them.
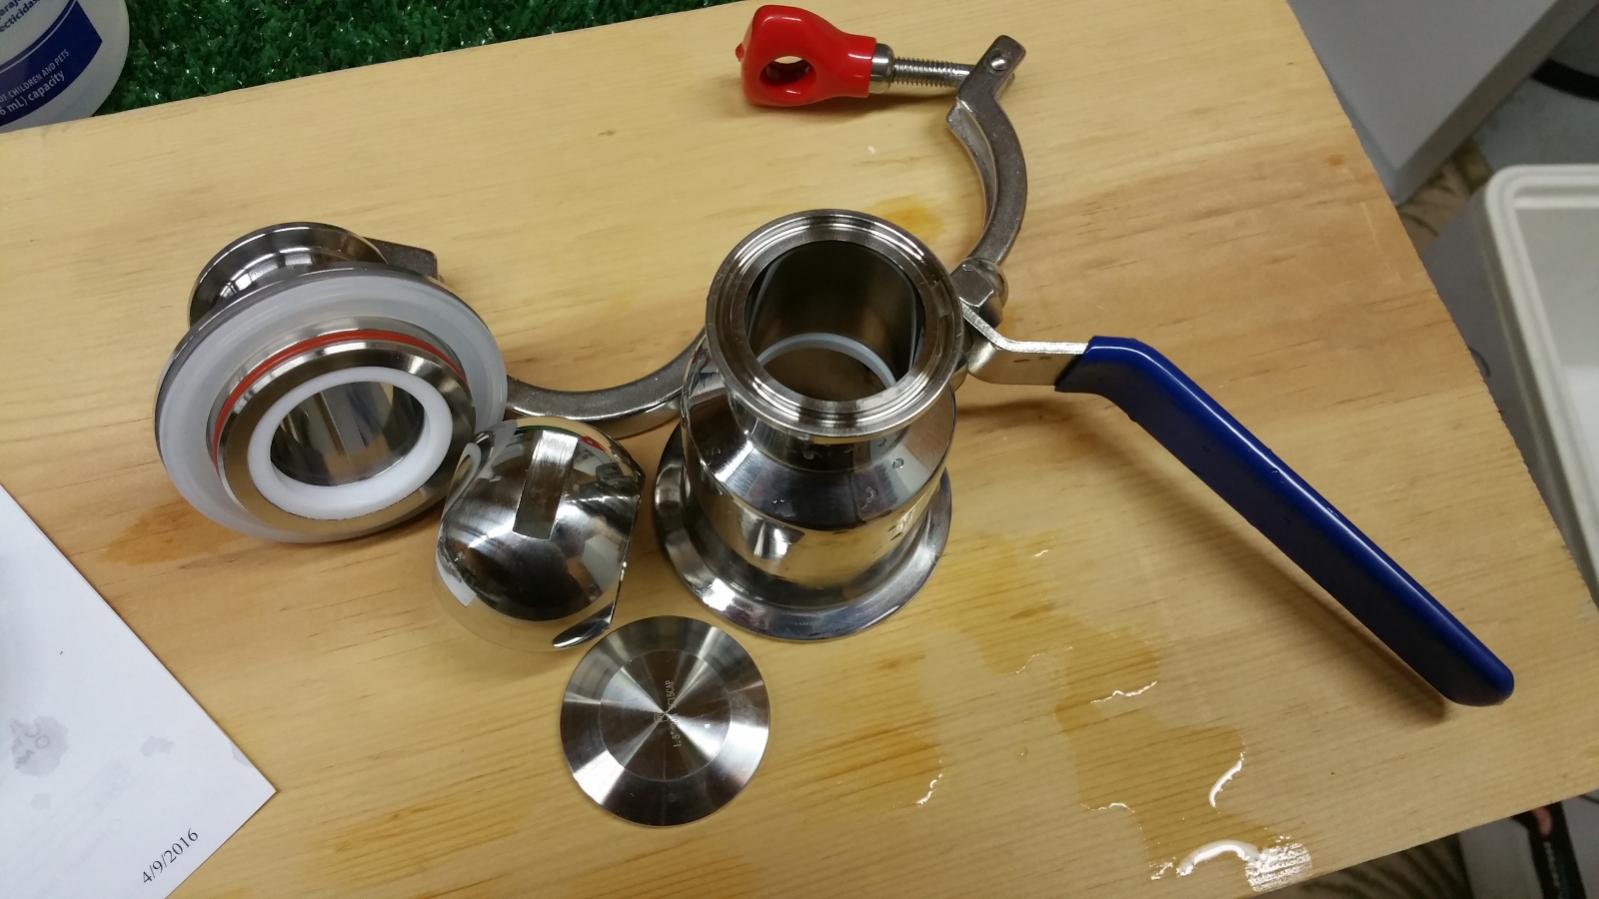
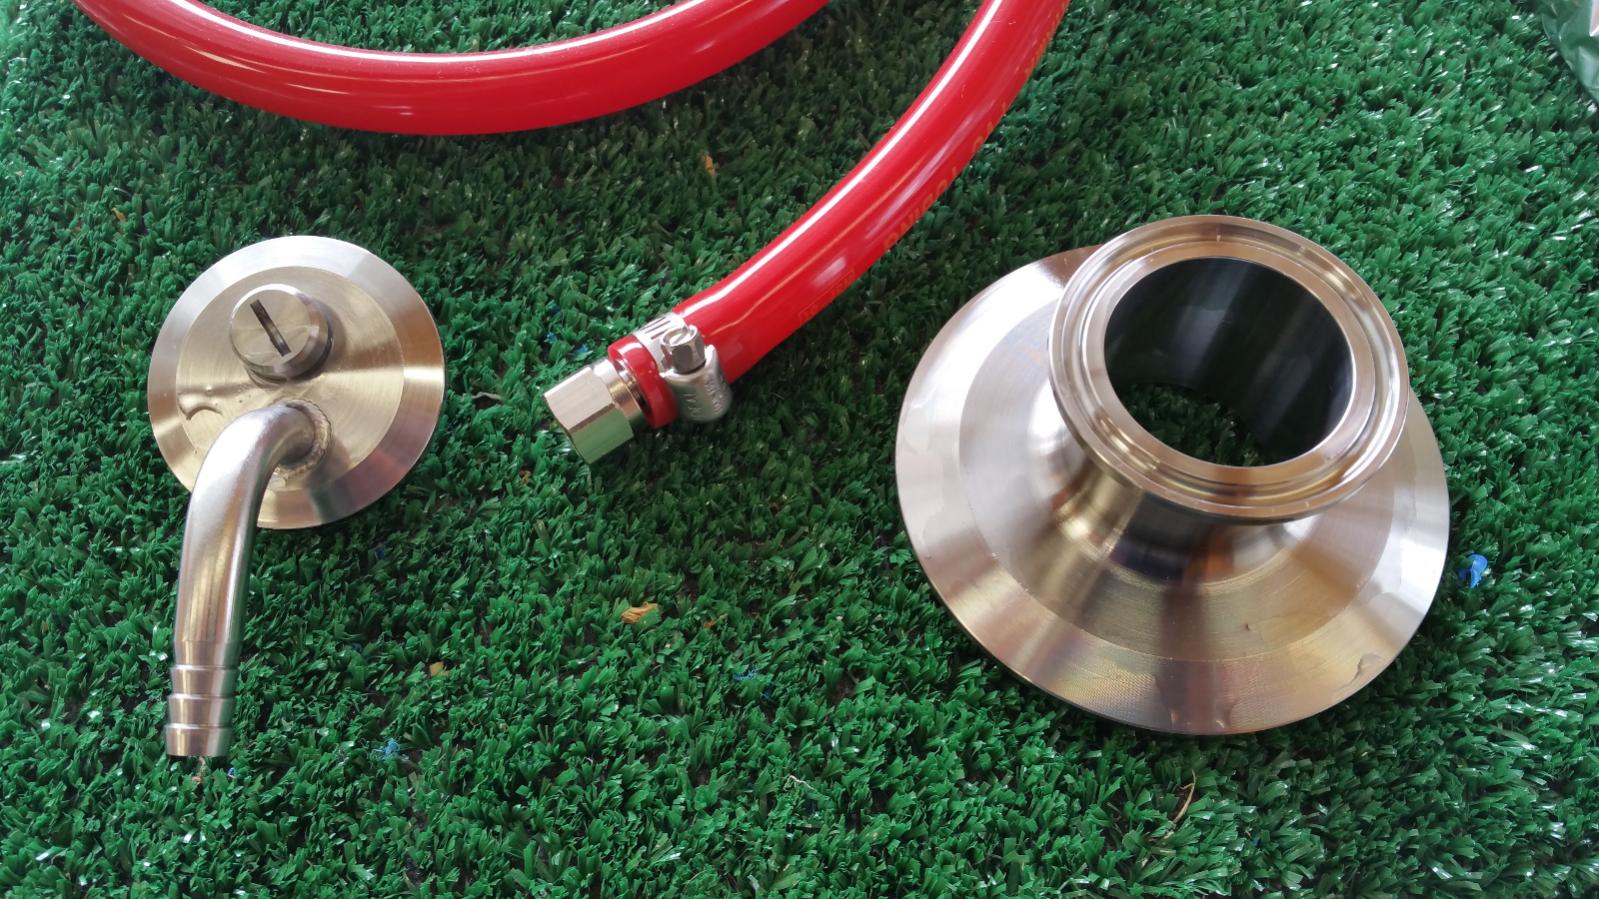
The things are a 1.5" TC Quick-Clean ball valve and a 1.5: TC sight glass. Cool stuff regardless of practicality...

12-A-Couple-TC-Extras.jpg


13-Easy-Clean-Ball-Valve.jpg
 
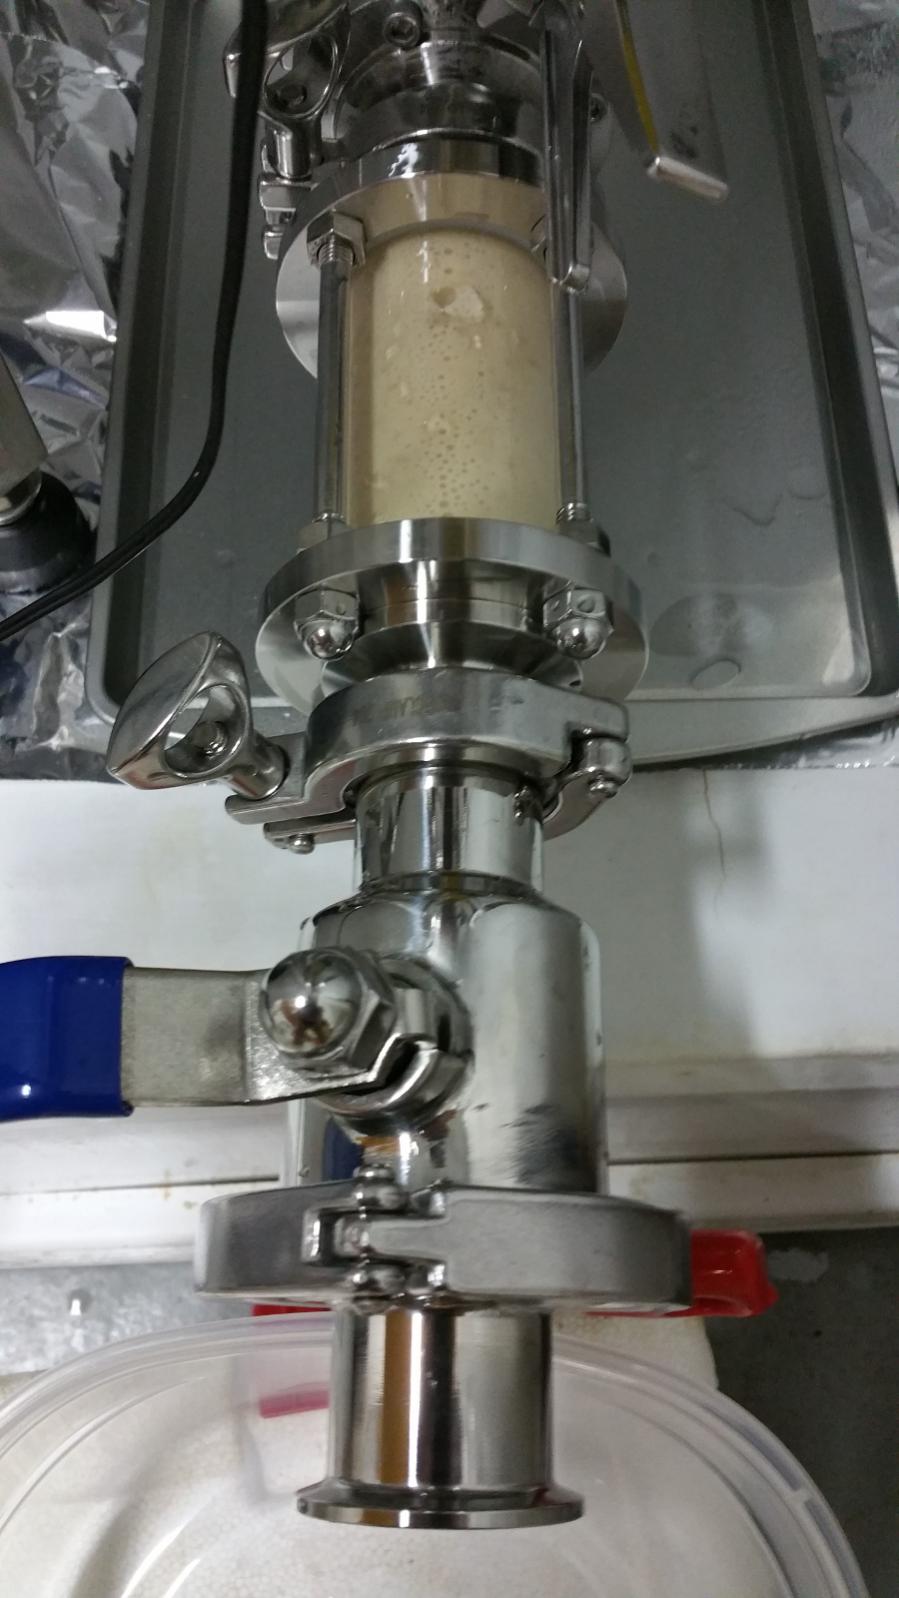
I was happy to find that the "Extra Things" I bought actually were very useful. Having the ball valve allowed me better flow control after first opening the butterfly valve wide open. This coupled with the sight glass allowed be to ease the trub from the bottom of the conical without a lot of beer loss. However, in my case, I actually dumped more yeast than expected although there was clearly some trub in the mix as well.
I'm figuring there's still plenty of yeast left in there to finish things out and clean stuff up too. It's been ~5 days since pitch and active fermentation had slowed tremendously and is most likely close to finished.

Some good news; I didn't waste a lot of beer in the process! :mug:
Have I mentioned yet how much I'm really liking Tri-Clover? :D

14-DumpControlAssemblyAttached.jpg


15-MoreYeastThanExpected.jpg


16-SightGlassYeastCloseUp.jpg


17-Yeah_MoreThanExpected.jpg
 
I have their 7 gallon and 14 gallon fermenter and I have a question for you: When you go to dump your yeast, do you remove your airlock? If you don't, it will suck in whatever is in that air lock and if you do, won't is suck in O2? I've been trying to figure out the best way to do this without ever opening the fermenter and allowing it to suck in O2.
 
I have their 7 gallon and 14 gallon fermenter and I have a question for you: When you go to dump your yeast, do you remove your airlock? If you don't, it will suck in whatever is in that air lock and if you do, won't is suck in O2? I've been trying to figure out the best way to do this without ever opening the fermenter and allowing it to suck in O2.
From what Ive read theres a couple ways to do this... Some use light co2 pressure to displace the yeast/trub... I just remove the airlock on some of my conicals and use a really long blowoff hose on the others so when I take a sample I can let the hose suck some water from the blowoff bucket up the hose a bit and displace the co2 in the fermenter temporarily unitl it makes more and repressurizes the hose with c02. the water never reaches the top of the fermenter.

When dumping trub I remove the hose or airlock and have seen no negative effect from it yet... many believe the c02 forms a protective blanket over the wort but thats not really true as the gases start mixing into each other immediately... I saw a demonstration video where they somhow colored the two gases different colors and did this in a glass chamber. At first the c02 was on the bottom but within minutes the gases had mixed to the same color.

I have long blow off tubes coming off my fermenters as well. I started putting a small amount of Co2 pressure through the blow off (take it out of the starsan, insert the nozzle of C02 into tube) and then opening up the trub valve. But it's a pain.
 
I have their 7 gallon and 14 gallon fermenter and I have a question for you: When you go to dump your yeast, do you remove your airlock? If you don't, it will suck in whatever is in that air lock and if you do, won't is suck in O2? I've been trying to figure out the best way to do this without ever opening the fermenter and allowing it to suck in O2.

While I do realize that dumping trub or yeast will or could cause suck-back, I haven't really been too concerned about it yet.

For starters, this is my first time dumping anything from a conical and my airlock has vodka in it. When I was easing the trub\yeast out via the ball valve, I was focusing on the sight glass and not the airlock. I did look at the airlock afterwards but I couldn't tell that anything had changed; I still had about the same amount of vodka in it as I did on brew day.

When I do get around to trying to dump all of the yeast prior to dryhop, I'm assuming that there will be more volume loss and as such more of a chance for O2 to be introduced. Since I'm dryhopping anyway, I will likely be introducing O2 regardless. Even so, I believe that this has to be way less risky than transferring into another carboy for a dry hop in secondary.

Maybe I'm wrong but at this point I'm not sure I need to be that concerned about O2 coming from me dumping trub or yeast. I may change my mind someday and if so I'd likely try to solve with CO2 injection somehow. But for now I think I'll RDWAHAHB!
 
I've been dealing with a new temp control issue due to the use of the thermowell. To put it simply, the temp near the center of the conical doesn't respond very quick to ambient temp changes. I have my STC-1000 set to keep temps within a 1 degree Celsius of my set temp of 168. During a cooling cycle, the ambient temps are in the low 20's by the time the controller turns off the freezer. Because of the low ambient temps, cooling continues until the heat stage is triggered. I know that this overshoot scenario will eventually balance out but I didn't anticipate this dramatic of a swing.

This has me considering a couple of things:
1) Investing in a smarter temp controller, like an OhmBrew Fermostat, that can learn and compensate cycles to minimize overshoot. (Not sure I'm smart enough for a BrewPi...)
2) Possibly using the chiller coil that I removed to run liquid (affected by ambient temps) during the cooling and heating cycles. I think this might improve response time.

Option #2 above would add more complexity so I'm leaning towards the smarter controller at the moment...


Increase the value of temperature differential higher than 1. If it is causing you're heating to come on due to chamber getting too cold as probe doesn't react fast enough. I'd try increasing it by 1 or 2 and see how that helps your temp swings. Keep increasing it until you find a temp swing more stable. By increasing the value it will stop heating and or cooling sooner as your set point covers a larger range which should give the probe more time to catch a more accurate reading and stop over shooting your set points.
 
Thanks for the tip GilSwillBasementBrews. I'm also thinking that I'll add a fan to keep air circulating in the chamber.
 
So more time has passed and my beer is now being dry-hopped. I did dump more yeast prior. It wasn't as thick this time but it was clear when I started getting more beer than yeast so that was my signal to stop.

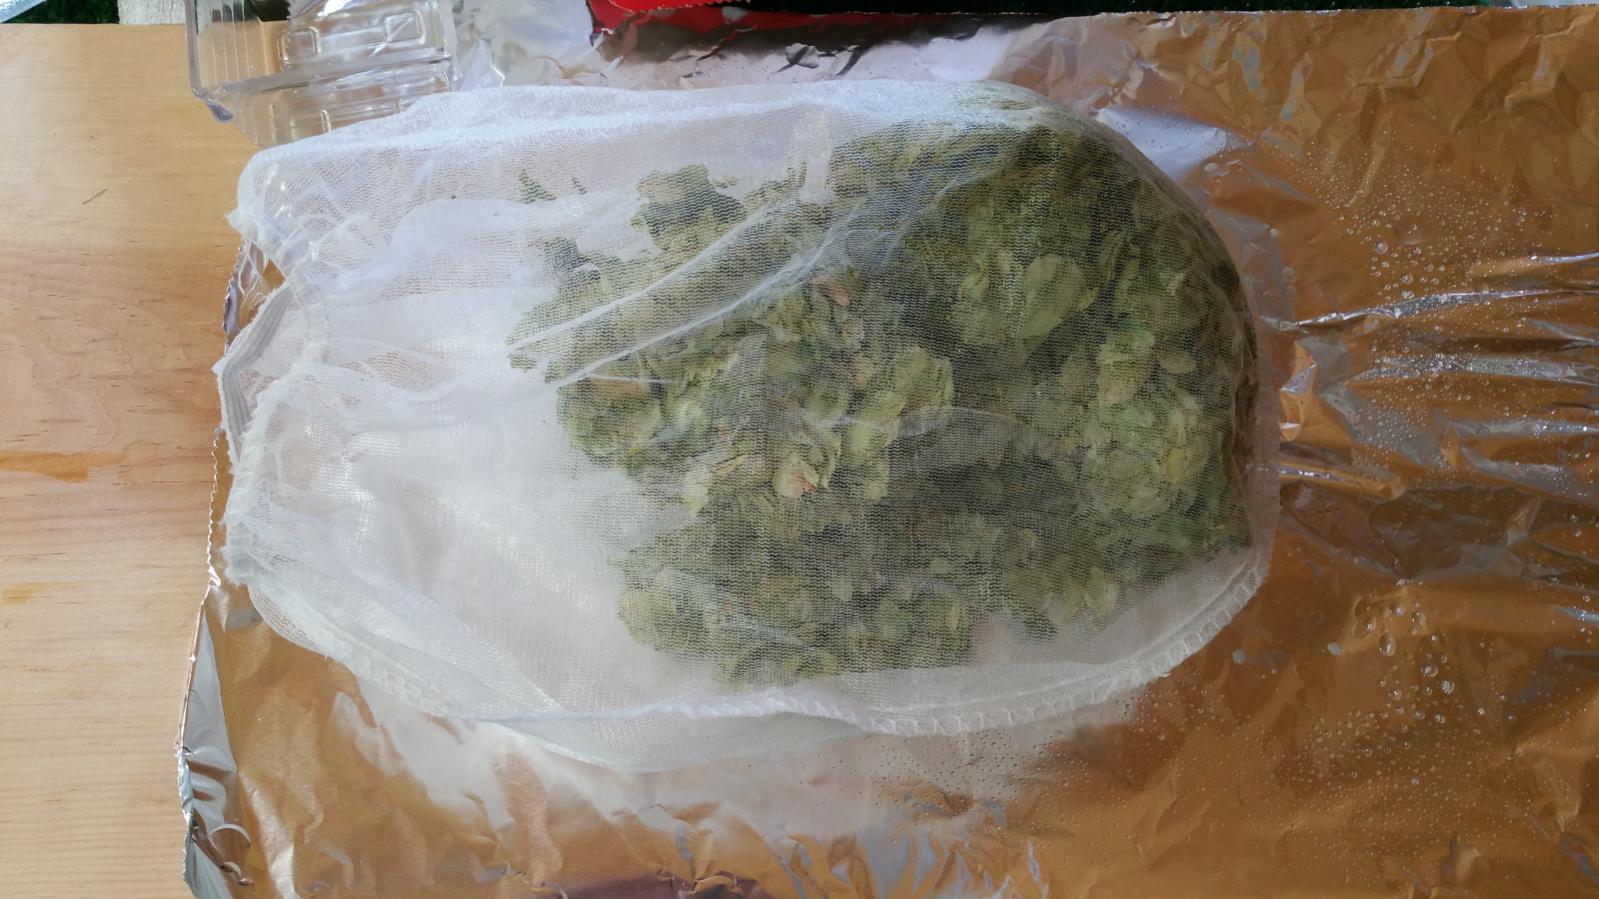
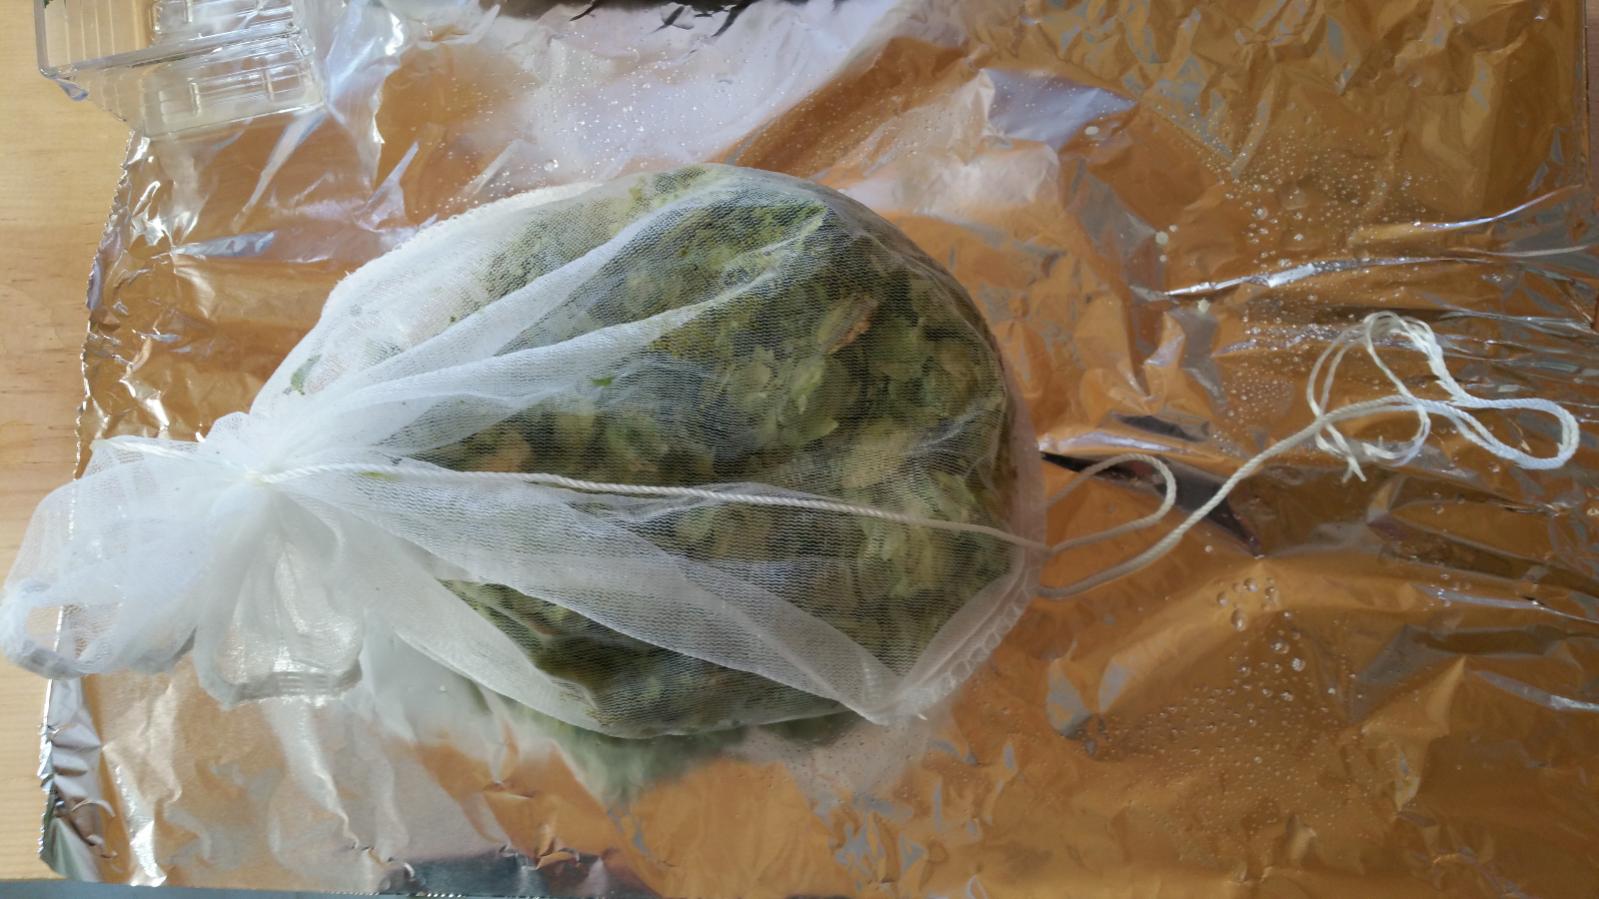
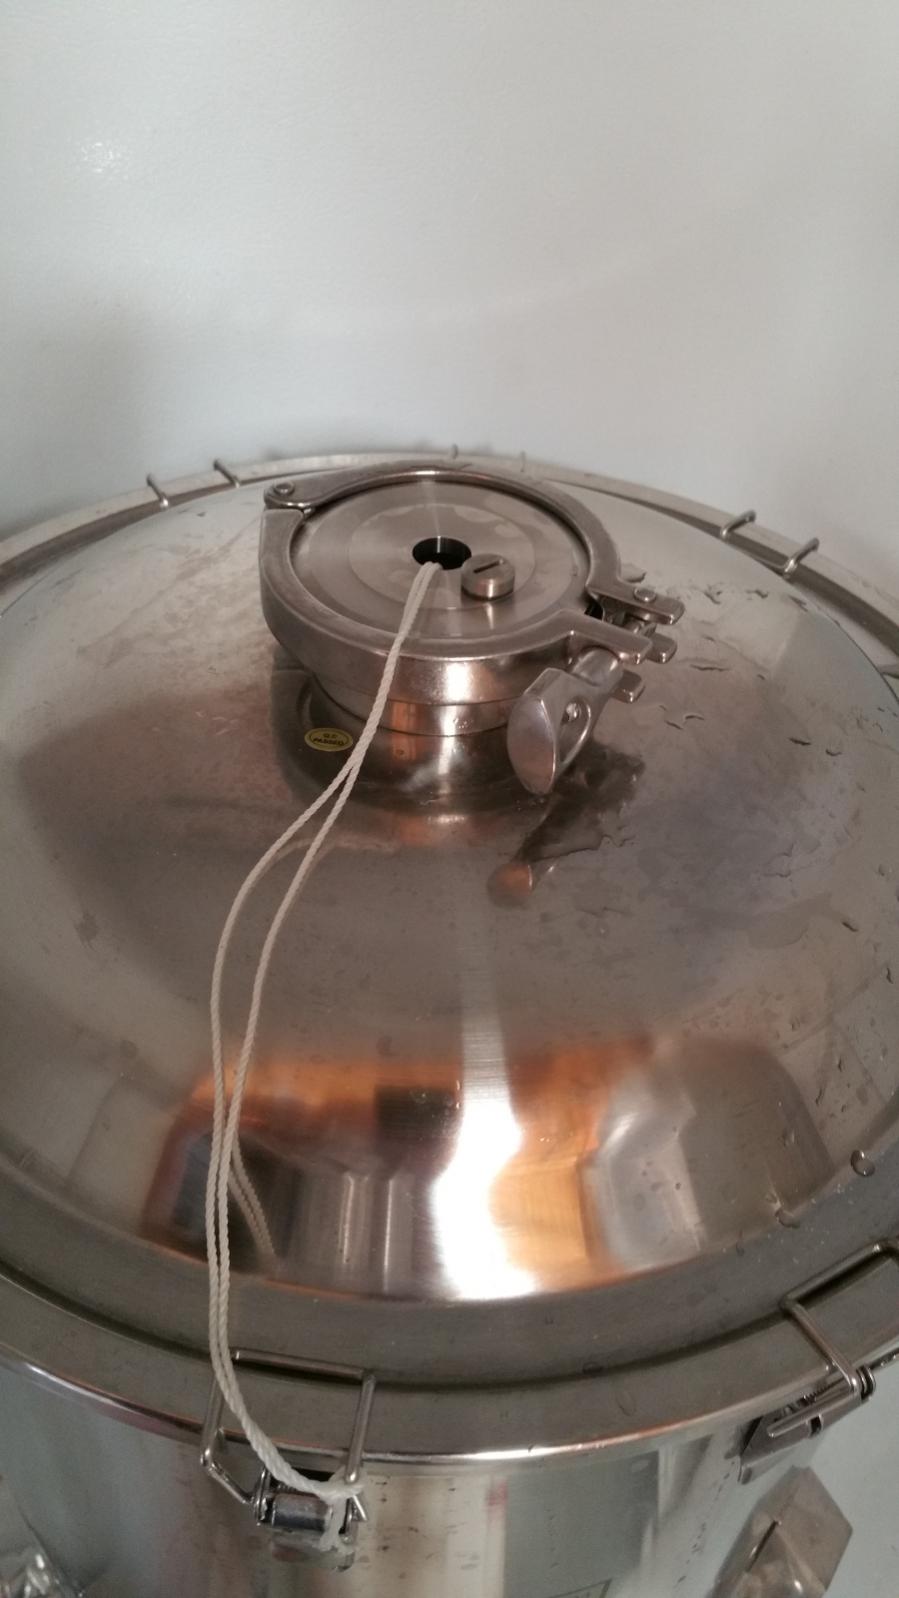
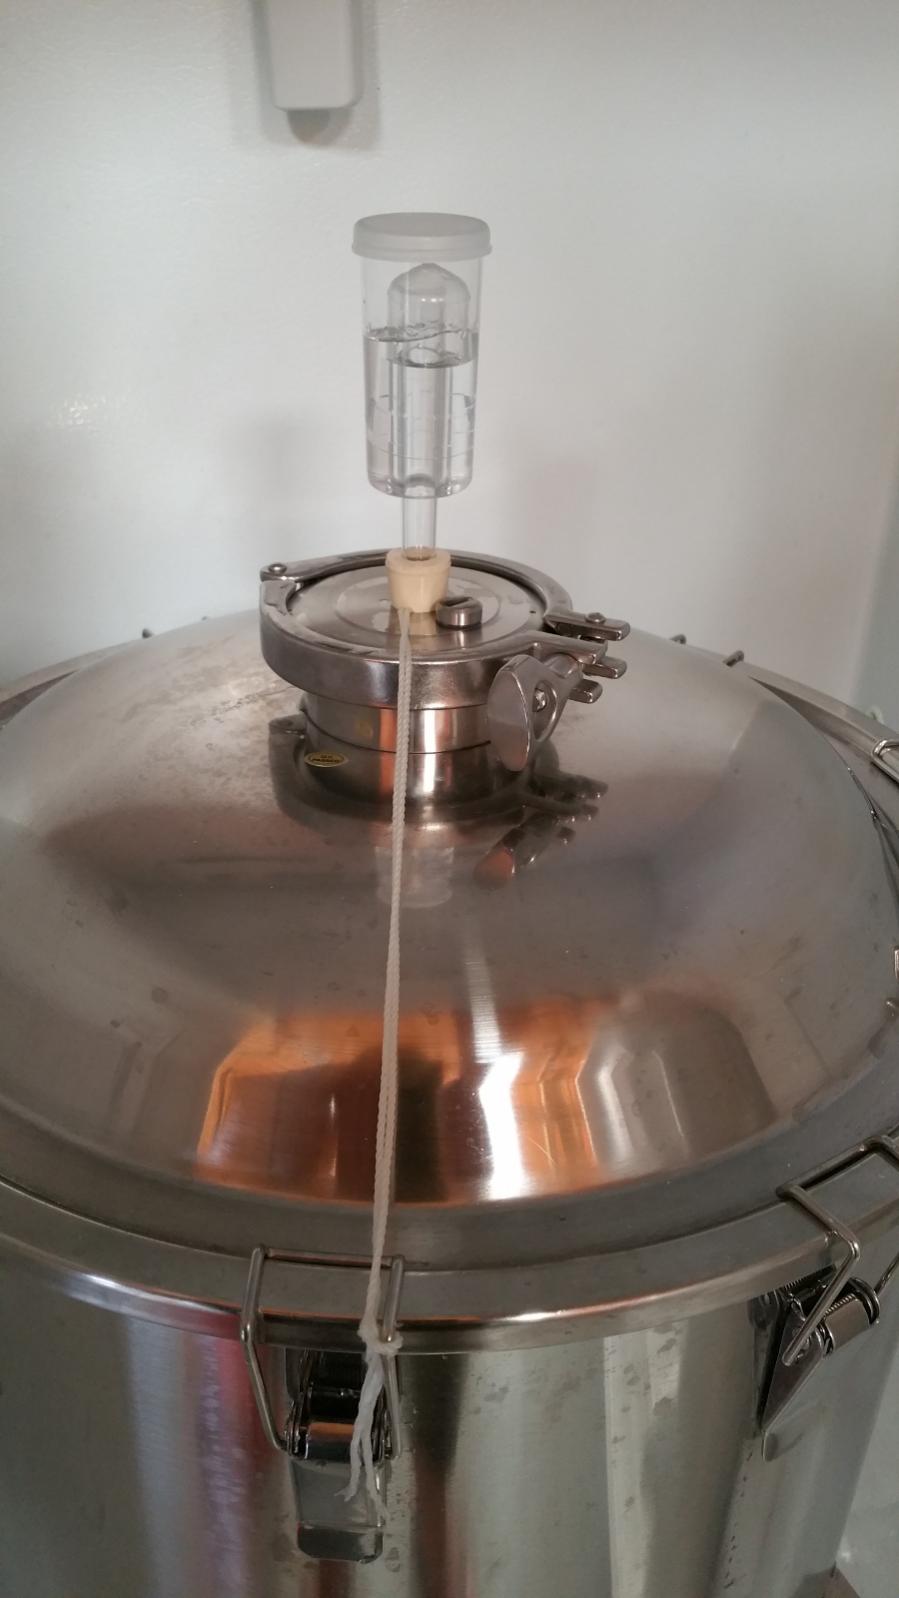
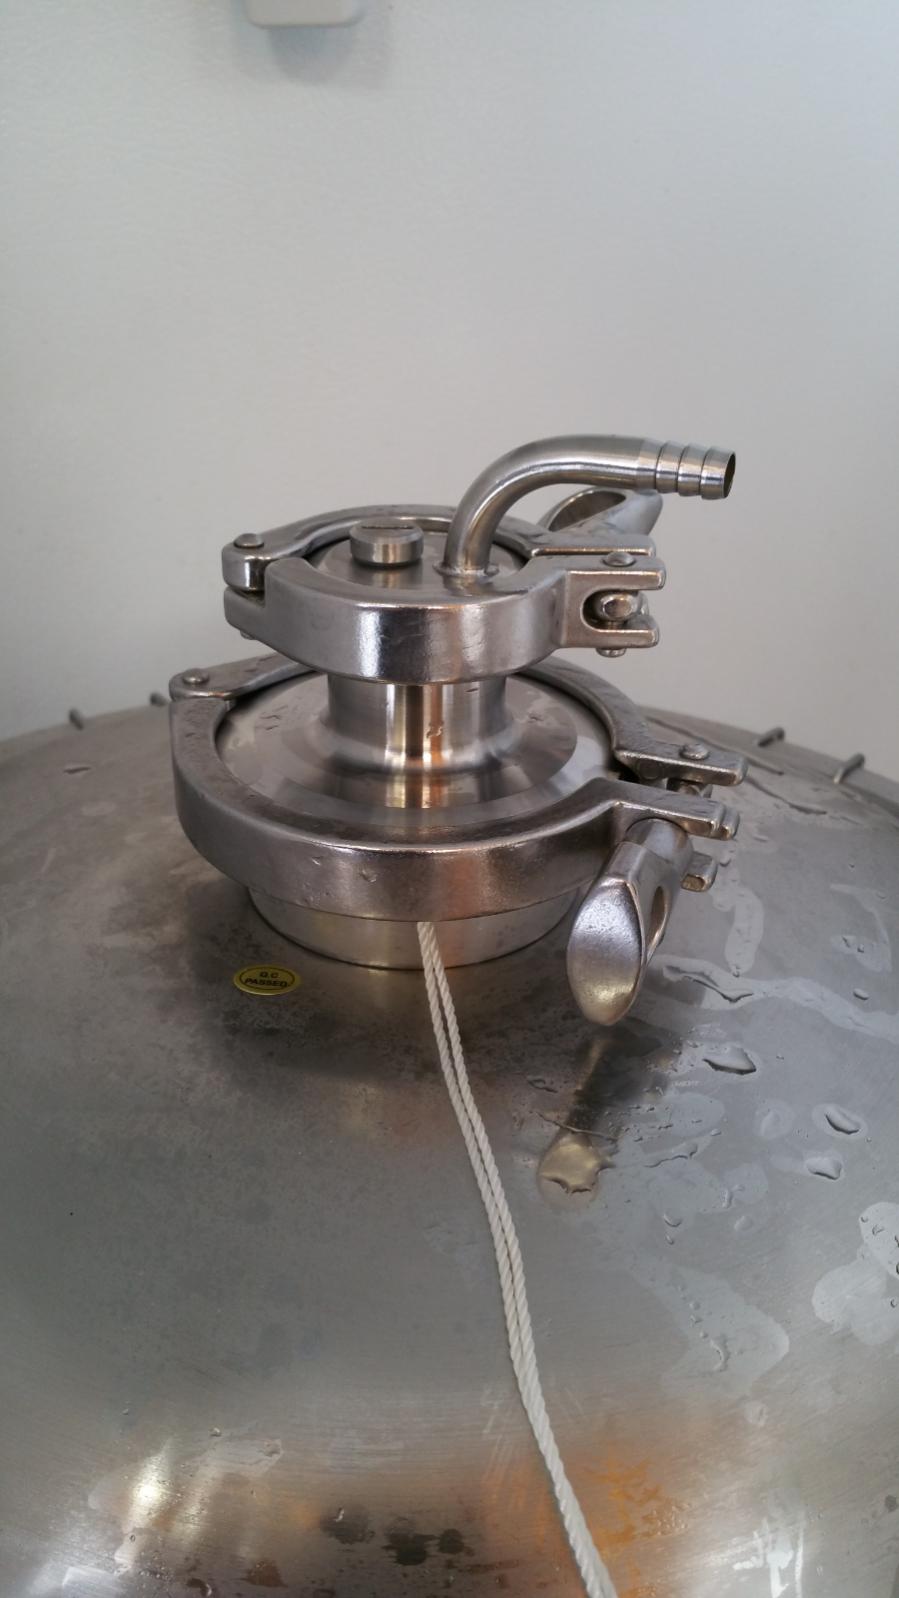
For the dry-hop, I didn't want to just toss'em in and wanted to use a bag. I'm sure that a lot of folks would say that a cold crash would drop the hops to the bottom and that may be true. My personal experience in carboys on this hasn't been exactly that way and wanted to avoid any chance of hops clogging the racking arm so bags it is.. I also didn't want the bags to sink to the bottom (I put a SS weight in the bags) so I used sanitized string to anchor them through the hole in the lid. I've seen some conical s that have a loop on the underside for this and I think that would be a great feature! (Any chance SSBrewTech is reading? :) )

So, having not done this before but knowing my end goal this is what I did. I'm sure there may be better ways and I'd love to hear them. Again, this isnt about whats "right" or "wrong" but about how I've tried to do things in my new conical for the first time. So far, so good!

I've been dry-hopping for ~2-3 days and have started a cold crash. I'll be kegging this weekend with a low pressure transfer so stay tuned...

18-HopsInStrainerBag.jpg


19-HopsInStrainerBagTied.jpg


20-HopsGoingIn.jpg


21-HopsTiedOff.jpg


22-DryHoppingGoing.jpg
 
On deck for today:
1) Kegging from the Chronical with low pressure (~2 psi) CO2.
2) Cleaning the Chronical with the CIP spray ball.
 
Kegging from the Chronical:

Today was awesome in that I didn't need my auto-spihon which is a first since I stopped using the LBK. Filling my kegs was the easiest its ever been. I wondered if the CO2 transfer would be required and it was since my Chronical and its beer weren't higher than my kegs.

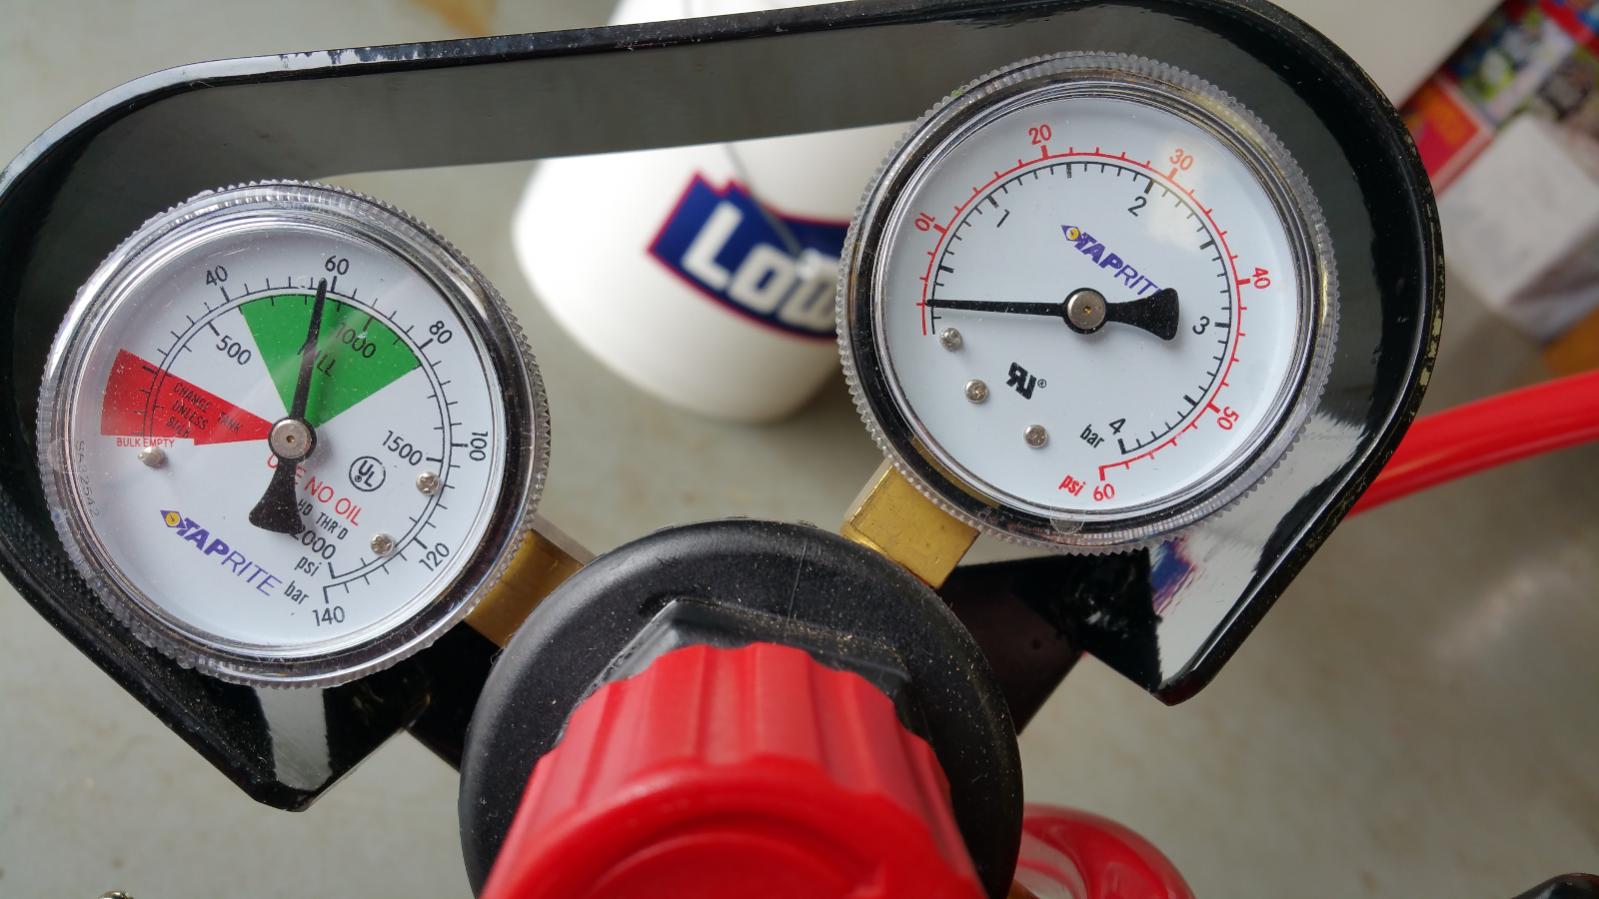
I read a lot about how this (and others) conical aren't designed for pressurized transfers though it can be done if you stay below ~2 psi. SSBrewTech has PRV.s both in the BME edition lid as well as the add-on for pressure transfers. There is info out there abut how to use a special low psi regulator/gauge for this but I didnt have one of those. I figured I could dial my Taprite regulator down that low so I'd gove that a shot. The PRV's are designed to release @ 2.5 psi so I figured this was my safety net,

Turns out I was right and I had no issues with the pressure transfer at such a low psi. It worked GREAT!

23-LowPressureTransfer-Gear.jpg


24-LowPressureTransfer-Attached.jpg


25-LowPressureTransfer-CO2.jpg


26-LowPressureTransfer-PSI.jpg
 
I'd like to comment on some of the extra gear I used during the transfer to keg. That being my TC Ball Valve and TC sight-glass. I thought it would be good to see the beer as I transferred it and I figured I'd need more flow control so I hooked it all up as you may have noticed already.

I was dead wrong about the flow control. In fact, even with the valve wide open I really needed to assist the flow by allowing CO2 into the Chronical; so my take away is that the ball valve isn't needed for this and the butterfly valve should be good enough for stopping the flow.

And while it was sorta cool to see the beer as it flowed out, I think I actually created a potential problem by having the sight-glass attached. Since the neutral pressure affected the outflow it also prevented the sight-glass from completely filling up. As such, I was left with air in the sight-glass and this produced a lot of bubbles with the flow. I'd like to think that things are okay and those bubbles were mostly CO2 coming out of suspension but I'm guessing there was a bit of O2 in there as well. If so, I may have unintentionally oxygenated my beer during transfer. Guess I'll find out after it carbs up.

With this experience, I'll reserve this extra gear for trub/yeast dumping in the future.

27-TransferGearNotNeeded.jpg


28-O2InjectedPossibly.jpg
 
Chronical and DIY CIP:
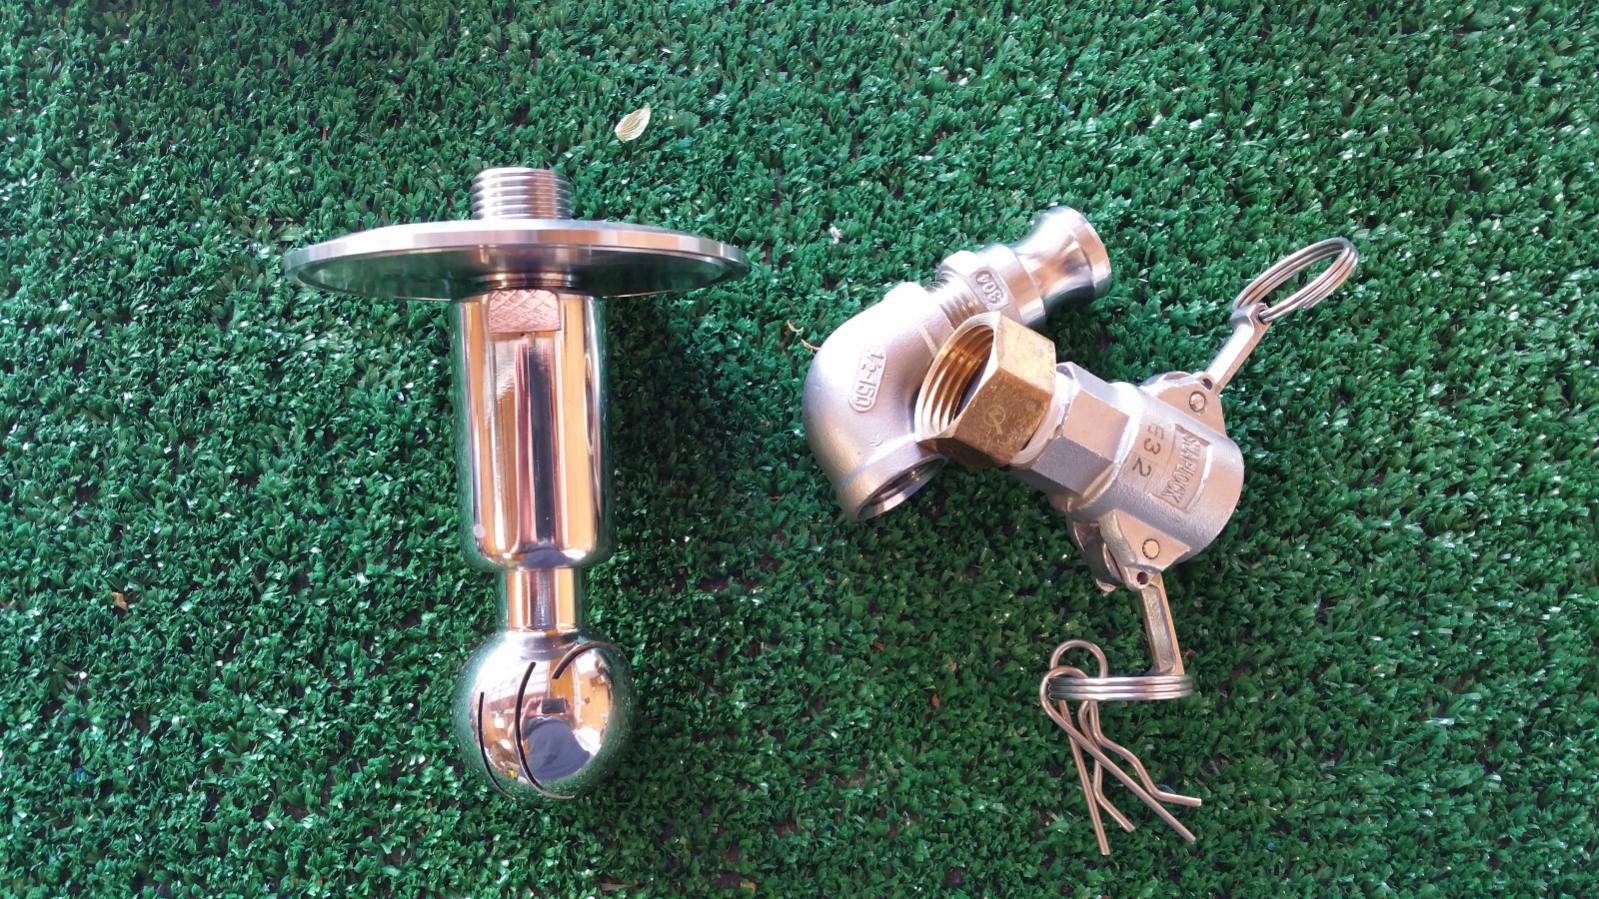
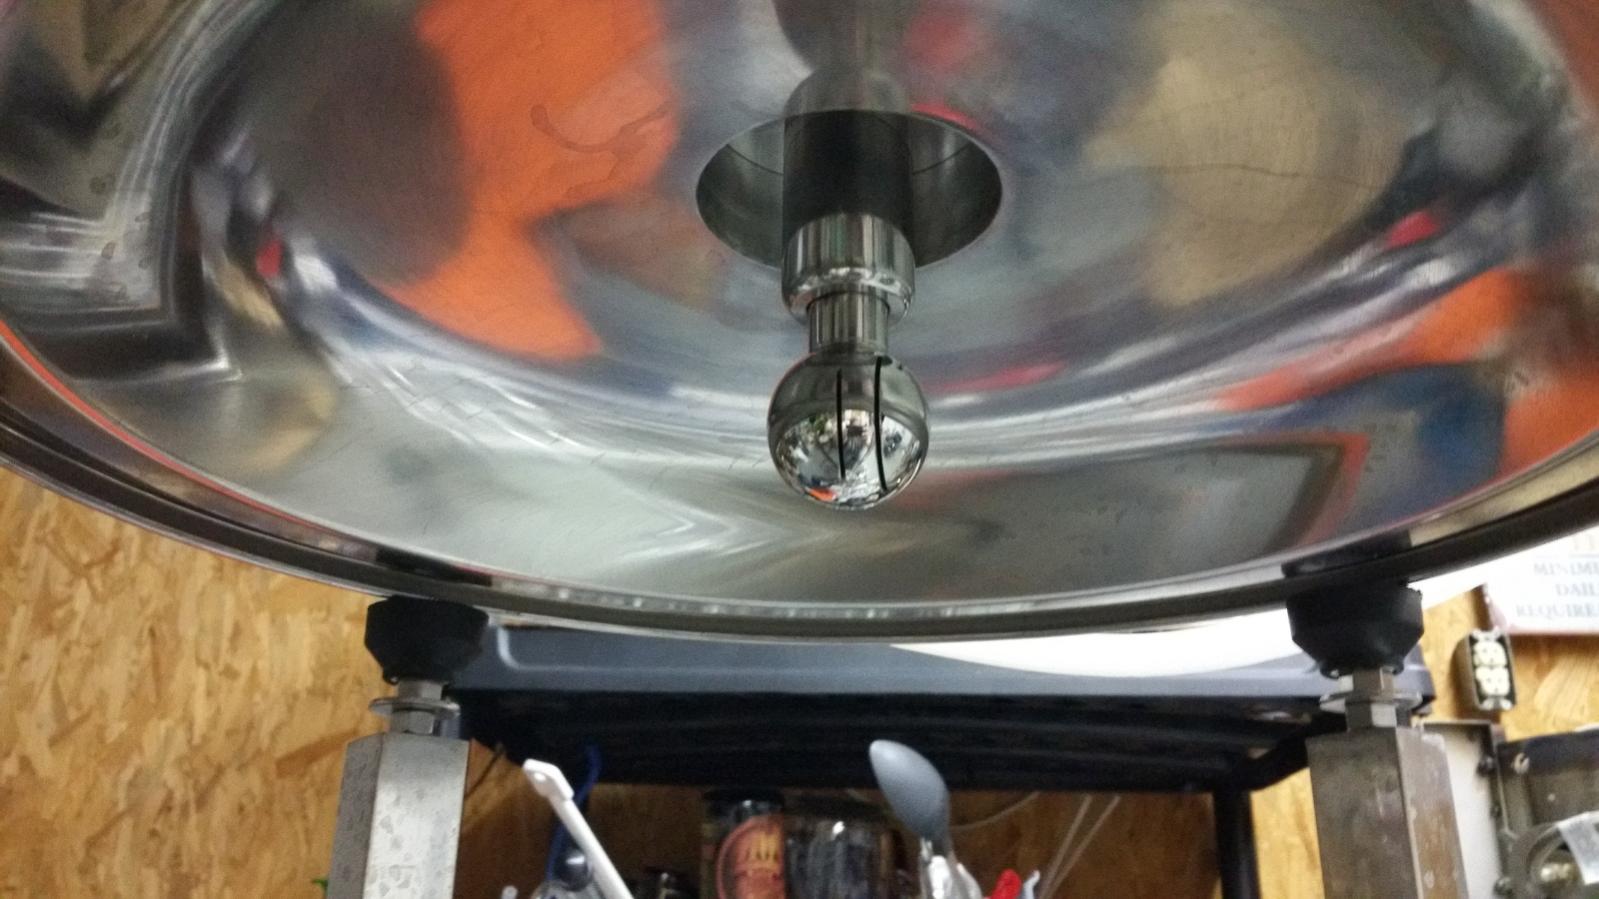
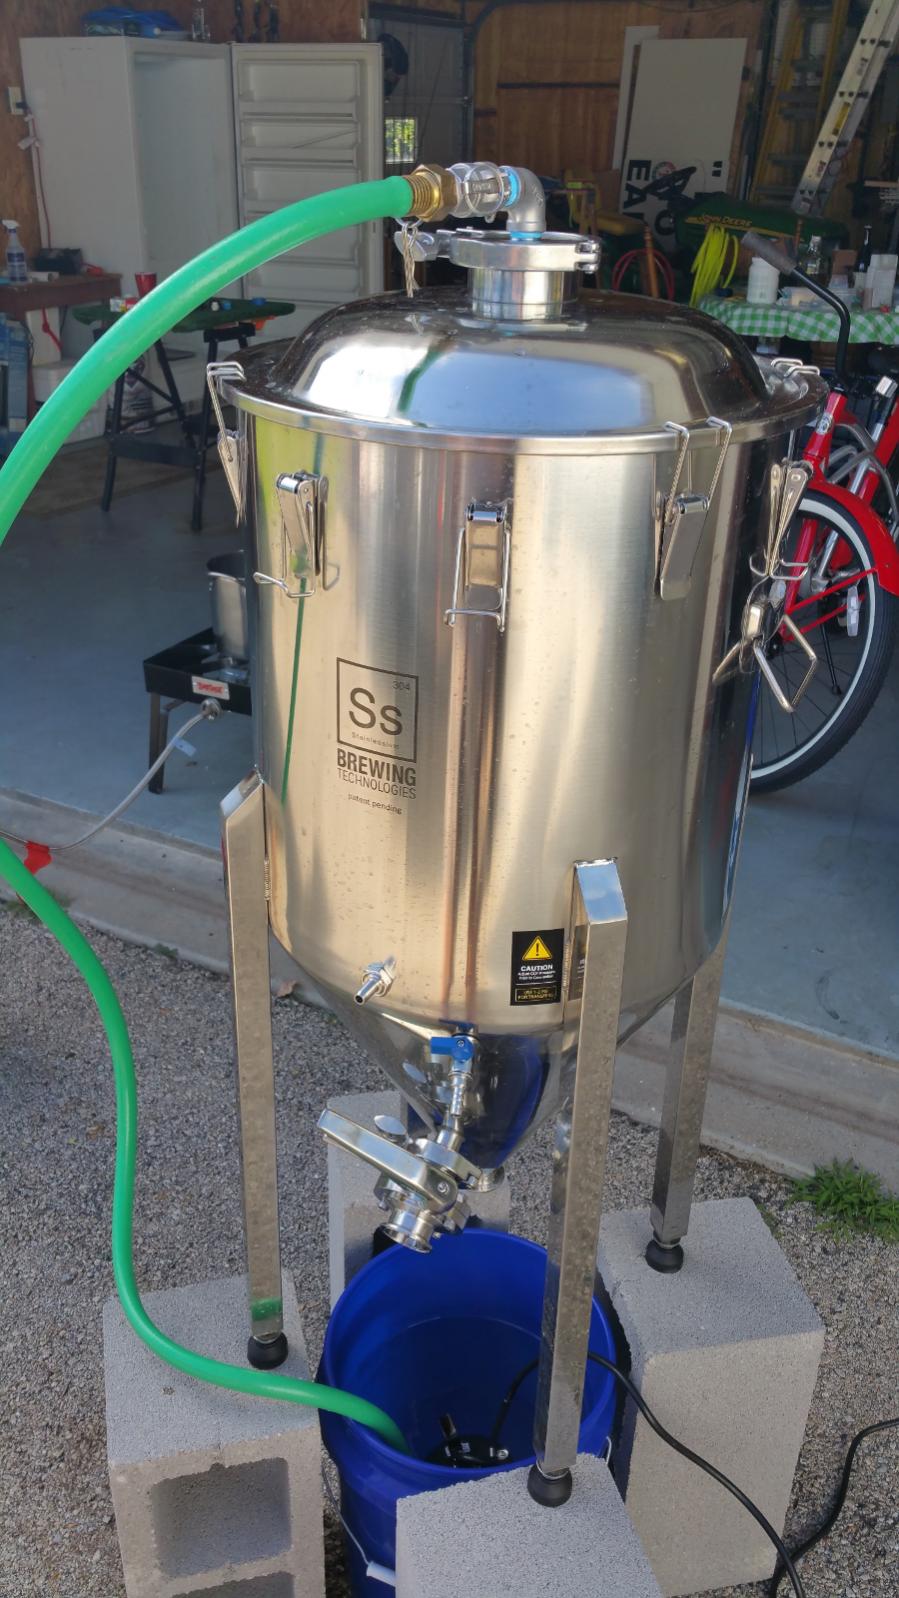
For cleaning the Chronical, I bought the CIP Spray Ball from SSBrewTech plus some other parts for attaching a sump pump to it via garden hose and a camlock fitting. I also needed to position the Chronical over the bucket of hot PBW solution so I came up with a no-frills solution; four CMU blocks! Worked great!

29-CIPSprayBallParts.jpg


30-CIPSprayBallUnderView.jpg


31-CIPStandSolution.jpg
 
Chronical and DIY CIP Results:
I took before, during and after pics of the dirty Chronical and the results of a CIP session. There's also a video link that shows the action of the DIY CIP system.
I'll say that overall the system did a great job though there was still a light kraussen ring near the top that required some sponge action. Still, it was an easy clean up.

Video: https://youtu.be/3I-kI6bMc-Y

32-ChronicalBeforeCIP.jpg


33-ChronicalAttachedToCIP.jpg


34-ChronicalAfterCIP.jpg
 
So you removed the cooling coil before cleaning? Edit: I read the whole thread and noticed that you don't use the coil. I have both a standard and a BME, both 14gal. The standard takes me about 5 minutes or less to clean by hand (after removing the valves). The BME with the coil in place takes a bit longer. I use a hand brush to scrub the coil.
 
I think if I did use the coil, the CIP would probably clean it right up. I may use the coil someday but for now it's not needed.
 
Summary:

My first brew with my new Chronical was both a success and a learning experience. The biggest lessons learned were how I need to tune the temp control a little and that I really only need a hose barb attached to the butterfly valve(With tubing too of course...) at kegging time. Being able to ferment a larger volume in the same vessel and the perks of dumping trub and easy sampling for gravity checks were great process improvements for me. Overall it was a great experience and one I highly recommend to anyone considering a conical.

The Chronical itself works well. I cant complain about any part of it especially since it was a prize. I dont really have anything negative to say about this conical from SSBrewTech as it worked perfectly and I had no issues with it.

That said, I do think it would be nice if:
1) There were no weldless fittings. Having the main ports TC is awesome but the weldless fittings seem like they may have been an afterthought. And they were my only point of concern while using the Chronical since I worried that leaks might develop after transferring my wort. That didn't happen BTW but it was still a thought. TC fittings are far superior and I may switch to all TC for my other gear after this experience.
2) The internal chiller coil is a great feature if you can take advantage of it. While I might see if I can adapt it's use someday, it wasn't practical for me given my extreme ambient temp scenario. It would be awesome if the chiller were optional accessory. But thanks for making plugs available though! I'd "feel better" about plugging those holes with a TC end cap though.
3) Since I felt the need to use bags during the dry-hop, it would be nice to have a simple loop welded to the underside of the 3" TC cap. This would be great for tying off the hop bags to prevent them from sinking to the bottom. Just a thought...

So, all 3 of those comments above are really just feature requests. None of the scenarios were real problems. I am very happy having this awesome piece of equipment in my brewery and look forward to many future batches being made in it.

Thanks again to HBT and SSBrewTech!!! Y'all ROCK!! :rockin:
 
A year later and the Chronical BME is still rocking. I haven't had a single issue so far (knock on wood) with the weld-less fittings either. I am leery of leaks every time I fill this thing up but so far its held. I also did my first lager in it and it came out awesomely.

The big advantages I've really enjoyed are:
1) Not needing a blow off for all 10G batches and some 15G even.
2) Dumping yeast before crashing and/or dry-hopping.
3) The sample valve.
4) Easy transfers into my kegs!

I definitely dont miss my plastic carboys!
 
Just to add a little info on this. I have a upright freezer used for a ferm chamber and what I found works really well to move it about is using a moving dolly from Harbor Freight with a piece of plywood on it to support the freezer. A simple and cheap fix that works out really well. Here is a link to the dolly.

hxxps://www.harborfreight.com/material-handling/dollies/movers-dolly-39757.html
 
Back
Top