• Please visit and share your knowledge at our sister communities:
  • If you have not, please join our official Homebrewing Facebook Group!

    Homebrewing Facebook Group

Fiberglass Mold for Keg Cooler

Homebrew Talk

Help Support Homebrew Talk:

This site may earn a commission from merchant affiliate links, including eBay, Amazon, and others.

Sc0ttyt^

Active Member
Joined
Sep 7, 2021
Messages
25
Reaction score
15
Location
Williamsport, PA
I am looking to make a "portable" keezer/cooler hybrid. My goal is to keep two kegs cold for 2-5 days w/o electricity. Without going into all the details, I am trying to figure the best way to make a receptacle for the corny kegs. They need to have okay thermal transfer and be able to support their own shape while being empty with the pressure of ice up the sides.

I could use thin sheet metal, but I'm not sure what thickness would be right. Too thick would be hard to work with, expensive and heavy. Too thin would collapse in on itself. Plan would be rivets and epoxy or RTV to make water tight.

I thought about plexiglass, but unsure how easy it would be to form around a keg with just a heat gun...

Anyone think fiberglass and epoxy could work well? I have never worked with it before, but think that maybe wrapping the keg in 1 or 2 layers of fabric, like old t-shirts, and then plastic as a base before the fiberglass and epoxy might make for an easy release once cured.
 
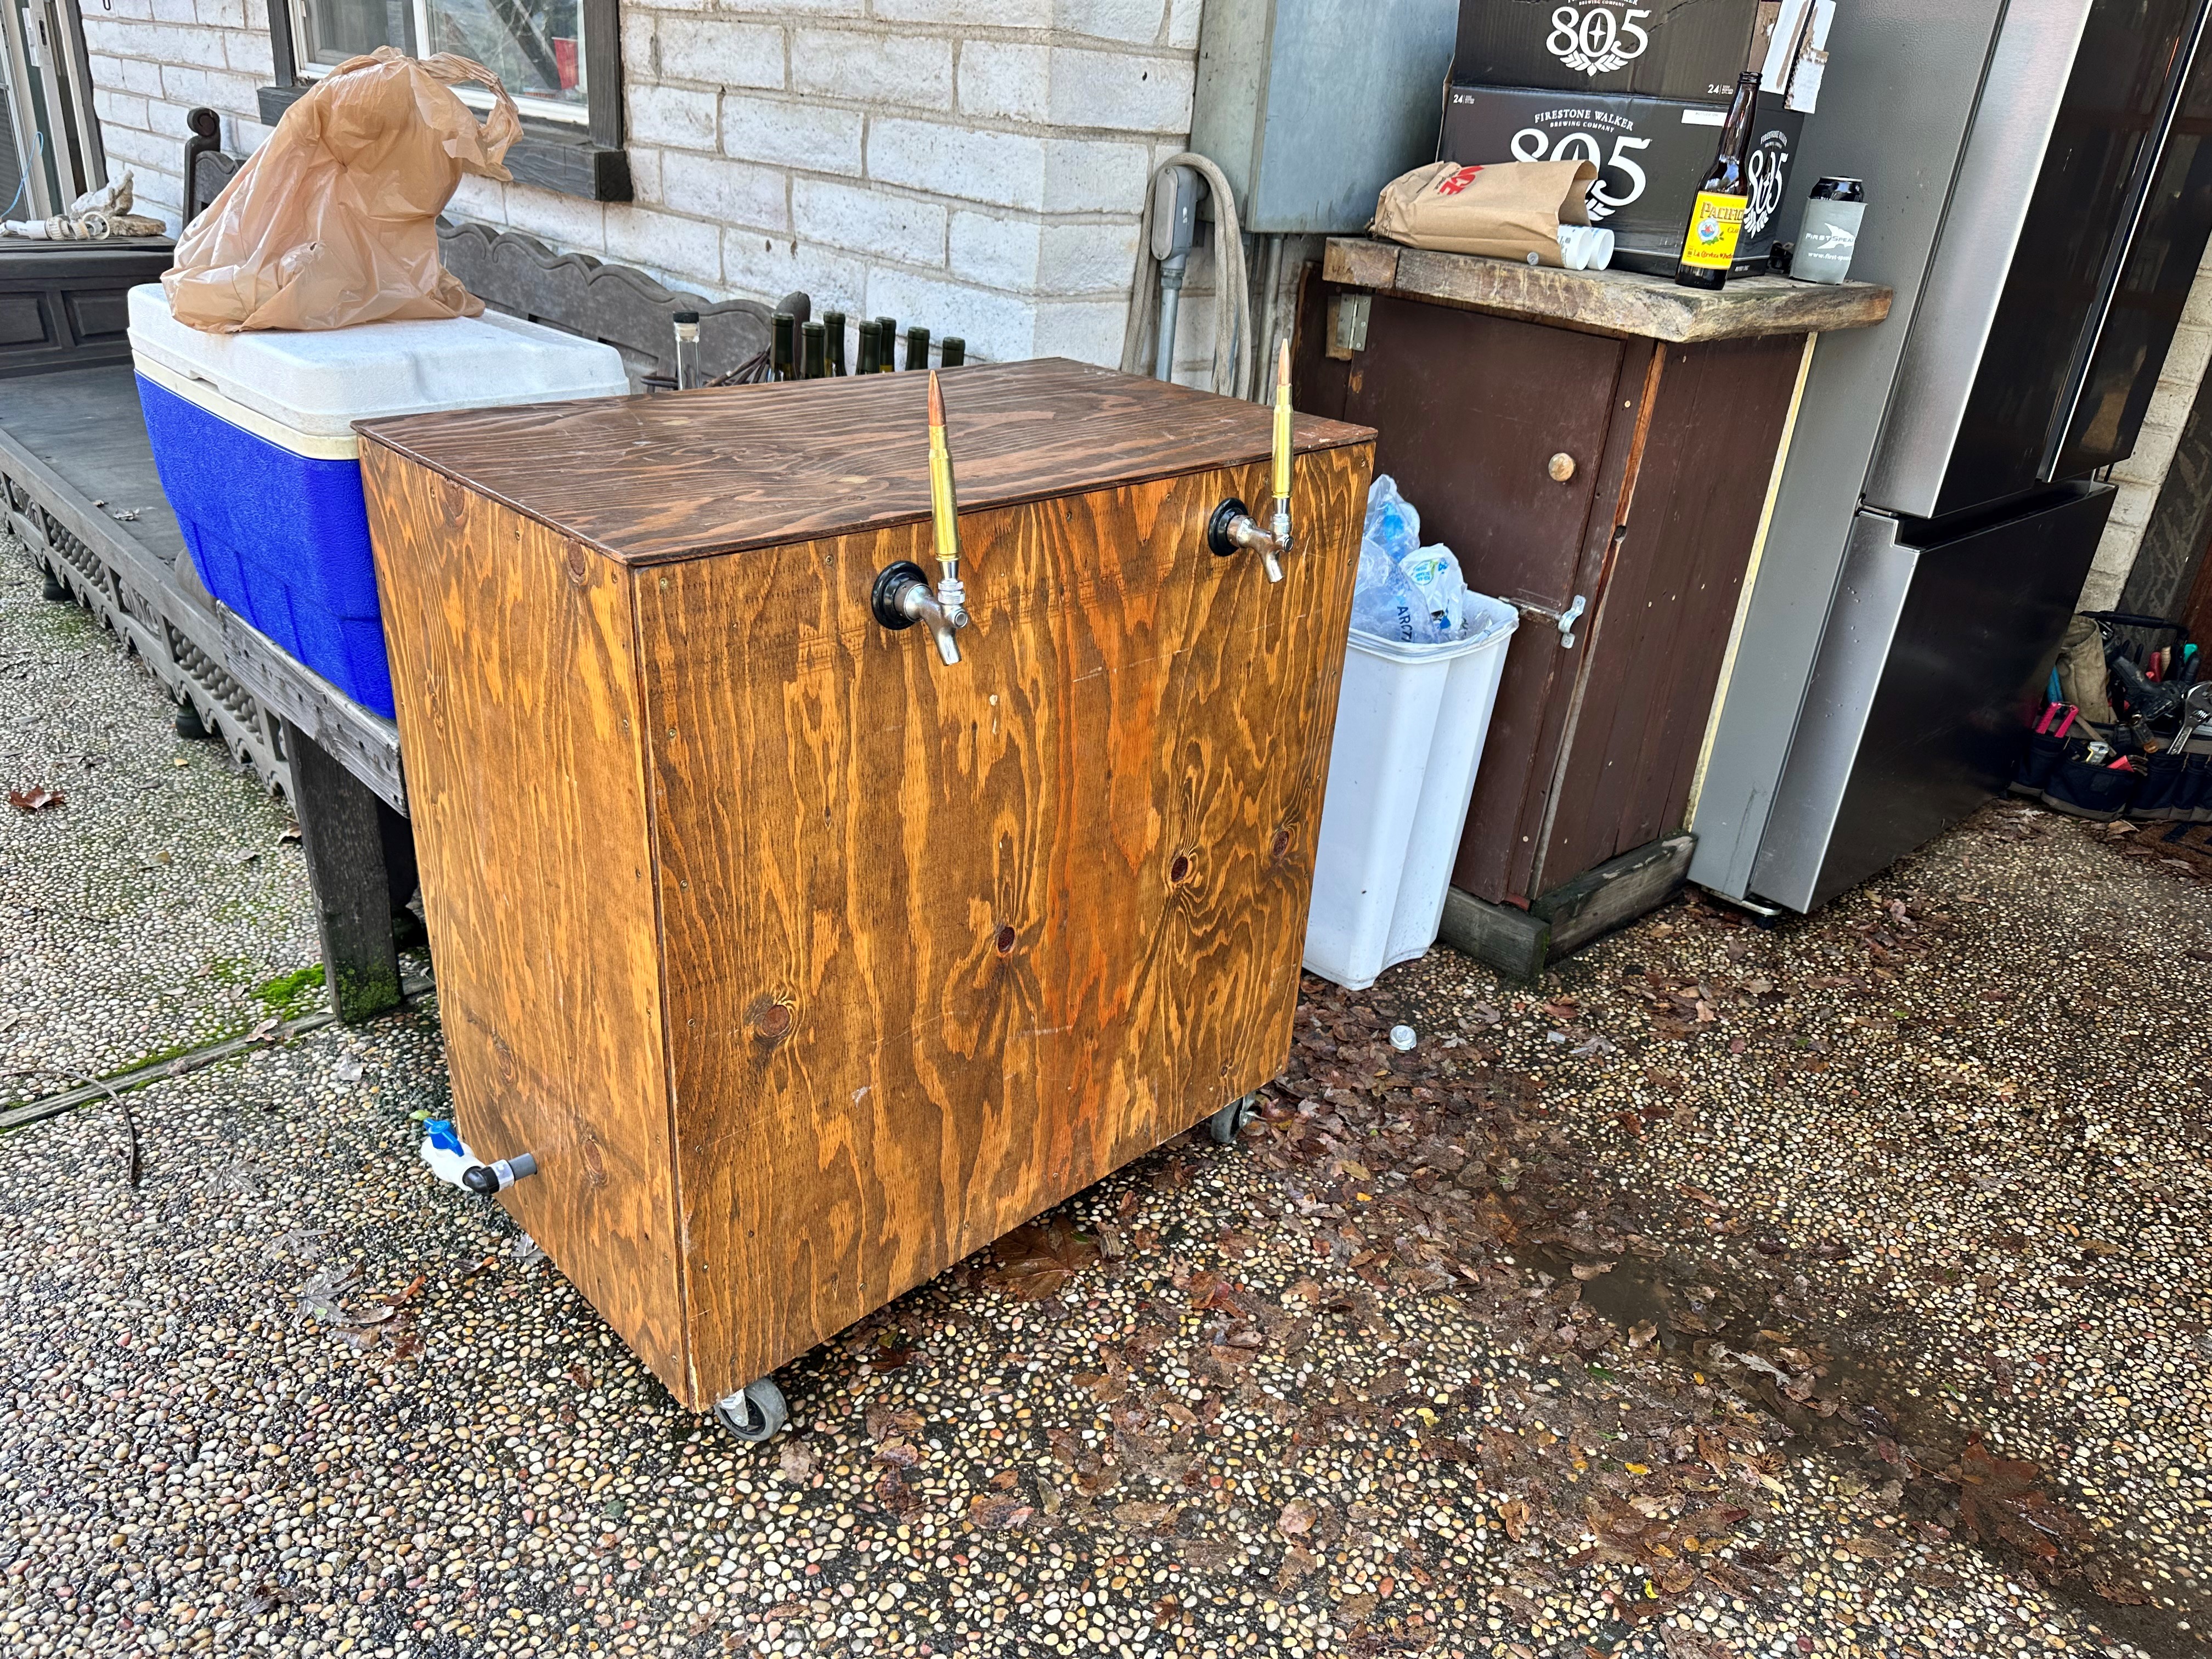
I dont think the fabric will be as good of an insulator as you might think. I made a mobile kegerator our of 2x2's and plywood, lined the inside of the box with rigid insulation, and set two Rubbermaid trash cans inside, set the corny keg in and surround with ice in the trash cans. I can fit the CO2 tank inside as well. To bougey it up a bit I added PVC drain lines to the trashcans to drain off the melted ice. Ive found that I can fill both cans (+kegs) with about 2 bags of ice (20lbs each) and that will usually last me a 3-4 day weekend in cooler temps without a need to replace the ice. In a hotter climate I usually add an additional 10lbs of ice over the weekend, but all in all it works well for the couple bucks of wood and insulation.
Kegerator.jpg
 
I dont think the fabric will be as good of an insulator as you might think. I made a mobile kegerator our of 2x2's and plywood, lined the inside of the box with rigid insulation, and set two Rubbermaid trash cans inside, set the corny keg in and surround with ice in the trash cans. I can fit the CO2 tank inside as well. To bougey it up a bit I added PVC drain lines to the trashcans to drain off the melted ice. Ive found that I can fill both cans (+kegs) with about 2 bags of ice (20lbs each) and that will usually last me a 3-4 day weekend in cooler temps without a need to replace the ice. In a hotter climate I usually add an additional 10lbs of ice over the weekend, but all in all it works well for the couple bucks of wood and insulation. View attachment 851842
The fabric was only to act as a mold release. I want to have basically keg holders that would seperate the ice from the keg location so I could swap kegs without fussing with the ice. Possibly more effort than it's worth... however, 0.02" thick Al is fairly cheap at the big box store. I might see if it will work or not.

What you built kev211 is pretty much exactly what I was envisioning. Good idea on using pvc for the drain. I wasn't sure how to handle that yet. How did you seal to the trash cans?
 
Ah, gotcha on the fabric.

Ill snap a photo of the inside. I used a threaded pvc cap on the inside (see link below) and a threaded coupler with rubber o-rings to seal it on the outside of the can. By threading it the PVC isnt a permanent attachment so i can disassemble everything for travel. Never had any leakage issues. One other item i added was I cored out the rigid insulation on the bottom and 3D printed a little drain to allow for condensation from the trash cans to drip out.

I also sealed the inside with FRP and caulked the corners to make it fairly watertight, which is more to keep the water from getting to the insulation and wood and ruining it

Never weighed the thing, but its light enough for me to lift into my truck by myself (sans kegs of course).

Home Depot - PVC cap
Awesome, thanks. And another great idea with the FRP. That would give me the confidence to use EPS instead of XPS.
 
I would suggest going with smaller 2.5 kegs and Yeti style coolers. It would mean more kegs to carry the same beer but will hold ice for a few days.

Someone here did a water cooler hack. grafted 2 water coolers together to hold a 5 gal corny. you can store extra ice in a Yeti type to replenish.
 
I would suggest going with smaller 2.5 kegs and Yeti style coolers. It would mean more kegs to carry the same beer but will hold ice for a few days.

Someone here did a water cooler hack. grafted 2 water coolers together to hold a 5 gal corny. you can store extra ice in a Yeti type to replenish.
smaller 2.5 kegs and Yeti style coolers.

smaller kegs is always the answer.

bubba box:

1721234254225.png


id use PET its lighter/ cheaper and easier to work with and you can see when its almost gone so you never pour half a glass or foam at the end. .
 
I like the idea of keeping the legs and ice separated. Kegs are cylindrical--look for pipe or tubing in the diameter just larger than your kegs. Water pipe, duct, anything. Use that for interior liner.
 
All good input. Going for a smaller cooler style would certainly be a lot easier to travel with and move around. However, I want to be able to serve 10 gallons worth. 4 smaller kegs could have worked, but would be more upfront investment when I already have the corney kegs.

I ended up starting the build. It should be 32" tall, 31" wide, 15" deep, and have 2" thick XPS on all 6 sides. Enough room for 2 kegs, 5# C02 and ice. I plan to use frozen water bottles, cryogelular ice wraps, and vacuum seal bags for long flat ice packs. Going to try out the Nukatap mini facuets with plenty of line length to mitigate foaming.

With 2" XPS, I can't imagine a Yeti style cooler would be any better on ice retention. I will be seam sealing everything and using a gasket on the lid.
 
I ditched the keg reservoir idea for now. I could maybe add in later but it seemed to be more work than it would be worth. I will focus on avoiding using plain ice to mitigate water issues. Only sealed ice forms. Besides, I've read block ice from your freezer is colder and more efficient than the bagged ice at the minimart.
 
That is incorrect. Most of the heat ice can absorb is used in the phase change from solid to liquid. The starting temperature of the solid is not really a factor.
 
That makes sense. Colder would still be better but probably a completely insignificant amount. However, the amount of ice in a block format vs the amount of ice/air in the same volume of cubed ice is a clear benefit, as well as cost.
 
That makes sense. Colder would still be better but probably a completely insignificant amount. However, the amount of ice in a block format vs the amount of ice/air in the same volume of cubed ice is a clear benefit, as well as cost.
True, assuming the solid ice shape is very close to the cavity shape.
 
Back
Top