FastFerment conical

Homebrew Talk - Beer, Wine, Mead, & Cider Brewing Discussion Forum

Help Support Homebrew Talk - Beer, Wine, Mead, & Cider Brewing Discussion Forum:

This site may earn a commission from merchant affiliate links, including eBay, Amazon, and others.
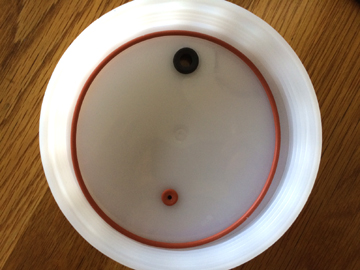
My first FastFerment had a obscene amount of flash on the top. The opening varied by an 1/8" due to lack of trimming the molding flash. I exchanged it and the second one was much better, but it still was rough. I took a board and some 120 grit sandpaper and carefully flattened the opening. The seals perfectly now with the included gasket. FastFerment should consider adding a machining step to their manufacturing process since we require an airtight seal.

Chris

+1 to that!
 
Has anyone successfully replaced their o-rings for the bottom of the union valve? If so, does anyone know the size? I know the FastFerment team is working on adding them to their website, but if I can it's just as easy for me to drive to Lowe's for as cheap as o-rings cost. I'd take the o-ring with me, but my unit is currently full of ESB.
 
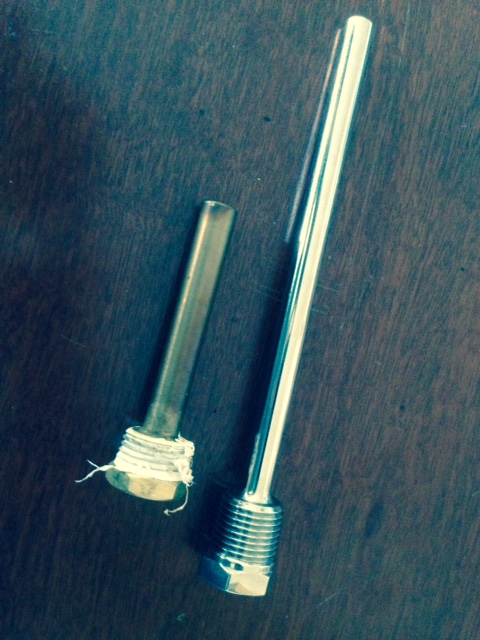
Also posted in the General Beer Section but this is what my thermowell looks like after kegging a cyser. I can't get the one side clean at all. Will be finding a stainless option immediately

 
Hey guys, I ordered this the other day and wanted to ask a question or two about others that already had this. As far as taking samples for gravity readings, what do you guys recommend using? A beer thief? I saw a couple people changed out the thermowell for a little tap, that seems kinda neat. Might end up doing that later down the road. How about adding hops to the batch? Anyone seem to have problems with the ball valve clogging up?
 
I currently use a thief for gravity samples, but I want to put a small tap on the thermowell just for the convenience of being able to keep the fermentor closed. I've dry hopped once with 2 oz of pellets, and did not have any clogging. That said you could use a mesh hop bag to keep them contained
 
OK - so I now own three of these puppies and I have to say overall the experience has been positive - both with the manufacturer and with the fermenter itself.

I'm on my fourth brew now. My first two had main O ring leaks and I took some notes from this board and others and did a trim to see if that would correct. At the same time, I wrote to the manufacturer who quickly sent me out the thicker gaskets and the next two batches have been bubbling away beautifully. They were quick to respond and prompt with their mailing.

I have the stand also and find its flippability a treat since I can use it without the ball in place with the stand's fat side up allowing me to have a lower target to pour in my wort. Once I am ready for the ball, I either pop it on the wall or have someone flip the stand while I hold the fermenter and quickly I can change it out.

I was a little skeptical about how clean the yeast would be once I started harvesting, but to my surprise, I made a quick slurry and I have the fasted ferment start yet from my harvested yeast - and I didn't do much of a wash.

And racking to a keg could not be easier.

Overall - my $300 is well spent as I can have 3 different types brewing at the same time for a fraction of the price of any other conical.

I like all of the points I have seen here and I am happy to see the appropriate response from the manufacturer.
 
My biggest problem Im having right now is figuring out where to put it. With your three, do you have them in a ferment chamber? or are you in a cold enough area to just leave them? I can have mine stick at around 68-70f in my back room, curious is that should be well enough? Or should I look into something a little more colder?

Gotta love that CA weather lol

That means when the fermentation is very active you are probably at 75+, so I would find a better spot or get a fridge.

I have a True GDM-26 (fits 2 easily, could probably fit like 6 5 gal buckets if I wanted. It's overkill but it's what I found nearby. I could probably have a 30gal in there at some point.

Find something that would fit it on Craigslist and get a temperature controller!
 
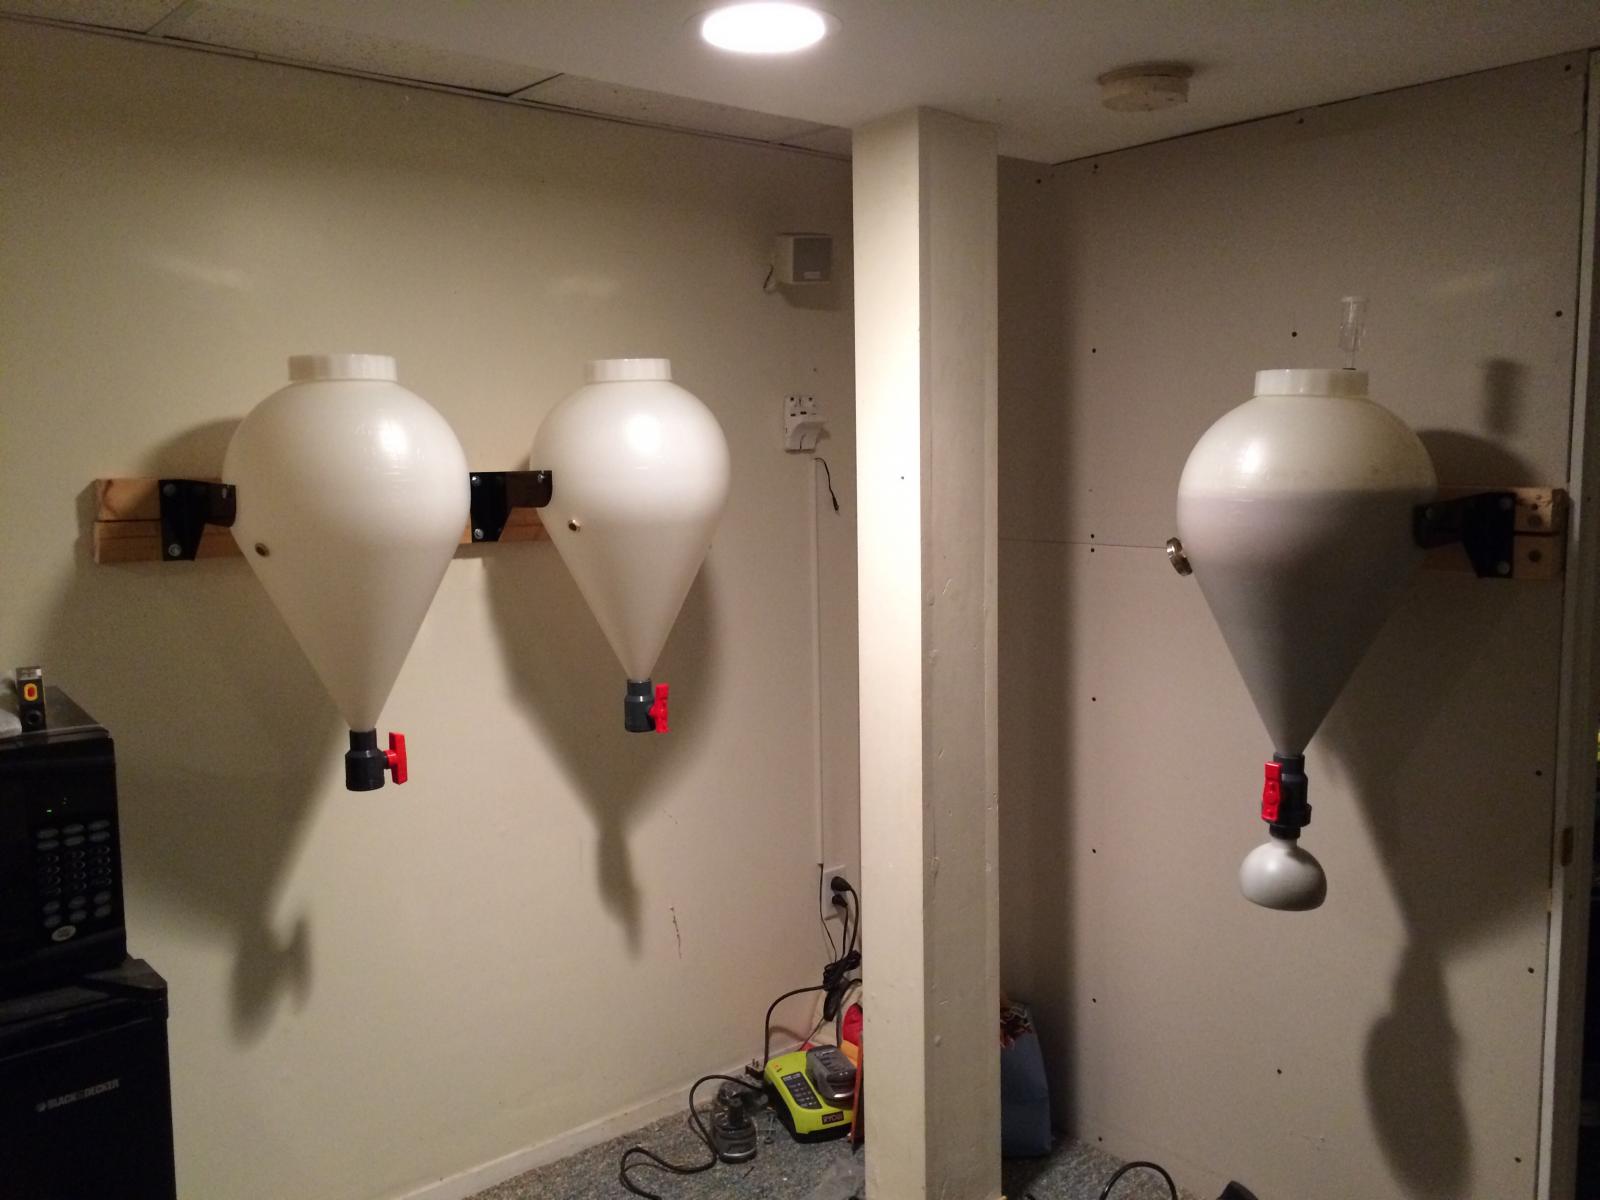
I keep mine on a wall in the basement. It typically stays cool enough year round. Right now it is actually a little too cold (in NY), but that just requires a little more time for fermentation.

image.jpg
 
Also posted in the General Beer Section but this is what my thermowell looks like after kegging a cyser. I can't get the one side clean at all. Will be finding a stainless option immediately


Got this stainless today from Brewers Hardware, $9.95

They make them in 2, 4, 6, and 8 inches, I got the 6 inch and will post the pictures from the full set up shortly.

SS therm.jpg
 
I have the stand also and find its flippability a treat since I can use it without the ball in place with the stand's fat side up allowing me to have a lower target to pour in my wort. Once I am ready for the ball, I either pop it on the wall or have someone flip the stand while I hold the fermenter and quickly I can change it out.

What is the overall height without the ball, while on the stand's fat side up (lowest height). From floor to top of lid? I'm curious if this will fit in my chest freezer.
 
I have to report about the first class customer service from this company. I mentioned in a post a while back that one of my collection balls broke at the male threads, and they asked me about what happened and volunteered to replace it. Here it is a week later, I get in the mail not only a new ball, but also a roll of teflon tape, female threaded fitting and union ring to attach to ball valve, AND the new higher quality top lid seal...that I didn't even mention or ask for! These guys are awesome! You really can't beat this fermenter for the price. 8 batches so far and it really beats the carboy for ales.
 
Hello homebrewers,

I have the Fastferment conical and I cannot seem to drain all the yeast and trub out. I did my best to filter EVERYTHING and I only wound up with about a half gallon of yeast. When I opened the valve a thick sludge of yeast came out but then a lot of beer and some yeast along with it. I tapped the edges and waited a day to let it resettle and the same thing happened. I cannot get clear beer or the rest of the yeast to fall and I already lost almost a gallon! Am I doing something wrong? Thanks in advance for any advice.

Cheers

I can't imagine your problem. Usually the first collection ball I have is full... once I clean out (or store it) I put another on and get between 1" or 2" of add'l trub in that one.

I've learned that gravity will do it's job. I usually let the fermentation process finish (or close) before adding a collection ball. I can put a C-ball on and it may appear to be clogged in the ball valve. Even after a day or two will still be empty, but give it time and like I said, Gravity will take over and the C-ball will be full of trub!

Perhaps the inside of the conical is scratched or scuffed causing the trub to stick? Either way, it can't be so much that will cause a problem with the clarity. Let us know what you learn
 
You could just have a LOT of trub/yeast. When I make wheats in BIAB, there's a boatload of trub once it's all settled. It easily fills 2 balls. Just Dump the first one, add the second, wait a day or so, tap thee sides if necessary, repeat. :mug:
 
I made a few one gallon batches and just like many others I was “bitten by the brew bug” (bbtbb).
I did a lot of research and frankly was overwhelmed by the amount of brew equipment available to home brewers. Now don’t get me wrong I love gadgets and using my hands but for some reason I decided to try and keep my brewing process as simple as possible. So I bought the FastFerment.
I’m currently fermenting my first five gallon batch. It’s a West Coast IPA, lots of yummy hops.
Last night it was time to drop the collection ball. I couldn’t get the union fitting apart with my hands only. I ended up using a large pair of channel locks on the screw while holding the valve with my other hand. That did the trick, but I wasn’t expecting that. Also like many others have written the o-ring from the top of the union valve came off. No big deal.
The collection ball was filled with sediment just like I hoped. The sediment in the collection ball was really thick with almost a peanut butter consistency.
So using warm water I got the collection ball and o-ring cleaned and then sanitized them. I have co2 so I purged the collection ball with it and reattached it to the FF. Now to turn open the valve and watch the large bubbles flow to the top. Here we go… Nothing.
I can see a line of what must be more of this thick sediment sitting in the bottom of the conical, like 4-5 inches of it. This was a serious clog. To me there’s no way any air bubble from the collection ball will penetrate that load. I tapped the bottom of the conical to see if I could get the sediment to flow into the collection ball but it didn’t budge. I ended up sanitizing a long plastic stick and from the top of the conical pushed through the sediment. Eventually the collection ball did fill.
I’ve since read on this forum that if I just leave it alone in a few days gravity will eventually pull the sediment down into the collection ball. Is that true?

I’m not going to give up on the FF yet. I can always find a work around for issues I have along the way. But like I said in the beginning I want this process to be as simple as possible and maybe buckets and racking is the way to go?

Some questions I have are:
Should I expect these types of issues each time I use the FF?

I’ve read I should leave the valve closed while transferring the wort to the FF. Then after the solids settle for a few hours purge them using the hose until you get clear wort, then attach the collection ball and pitch. If I do it this way will it prevent the clogging issue I saw?

Where does this thick sediment come from, Yeast Hops or both?

After replacing the collection ball if there is a clog will gravity eventually pull that thick sediment down into the collection ball?

When using the FF Should I only ferment certain types of beer? Less hoppy?

Maybe the FF better suited for wine making?

I’d really like to hear back from other FF brewers on if what is happening to me is normal or am I doing things incorrectly?

I usually let the wort sit in the FF for at least 4-6 hours before getting "most" of the heaviest sediment out using the hose. I make hefeweizen ( well, Kristal weizen) so there is not a lot of hop trub, but since I use whirlfloc I usually have about 3/4 of a gallon of very heavy sediment removed before I oxygenate and pitch yeast. Then I wipe the bottom of the ball valve clean and sanitize again, and attach the collection ball but leave the valves closed until about a week into fermentation depending on how fast things have gone.

2-3 days before I expect primary to be finished I open up the valve and let the ball fill. sometime this is instant, sometimes it takes up to a day, depending on how thick the trub is. If the ball fills up and has a lot of darker hop break and crap from the whirlfloc, this settles even BELOW the yeast and you will see the difference. Even with a top fermenting yeast like WY 3056, 3068, after the initial aggressive fermentation, there will be bubbles and activity coming from the trub in the bottom of the ball, so stuff IS going on down there. Many times I have thought, 'this beer is done' and removed the ball only to see LOTS of bubbles coming up from the bottom, even though they were not noticeable from the top or from the airlock. If the valve is relatively free from thick gunk, there seems to be enough of an active exchange of fluids from the ball to the conical to finish fermentation, but I can see if you were using a bottom fermenting yeast how this could be a problem with a ton of trub.

Experiment!

I don't really use the FF for its yeast collection ability, I LOVE not having to siphon and the size of the headspace on a 5.5 gallon batch, esp with a top fermenting yeast. So I prefer to keep the valve closed and have all the fermenting done 'north' of the valve until I am ready to either transfer to a keg, or, remove for a secondary.
 
Last night it was time to drop the collection ball. I couldn’t get the union fitting apart with my hands only. I ended up using a large pair of channel locks on the screw while holding the valve with my other hand. That did the trick, but I wasn’t expecting that. Also like many others have written the o-ring from the top of the union valve came off. No big deal.
The collection ball was filled with sediment just like I hoped. The sediment in the collection ball was really thick with almost a peanut butter consistency.

I’ve since read on this forum that if I just leave it alone in a few days gravity will eventually pull the sediment down into the collection ball. Is that true?


Where does this thick sediment come from, Yeast Hops or both?

After replacing the collection ball if there is a clog will gravity eventually pull that thick sediment down into the collection ball?

Yes, those problems are common to me as well. I use channel locks to gently crack the union ring open when changing the ball, and always be on the lookout for that o ring dropping out of place.
The thickness of your trub is just showing how well your conical is working, it is packing that stuff down hard and getting it out of your beer. It will indeed fall off the sides after replacing the ball, just tap the sides and give it some time.
The trub is from the fine particles of grain that don't get screened out by your BIAB/lauter tun.
If you still are having problems with your trub, remember you can always just siphon your beer out from the top into a bottling bucket, like you would have to do with a carboy or bucket fermenter anyways.
 
I'm fermenting an IPA now (i.e.; lots of hops). This time around, I did not practice good sediment management as I usually do to filter the wort when racking from the BK to the FF. I racked to the FF, opened the valve and pitched the yeast right away.

I came back the next day and could see the sediment was piled up almost as high as the thermwell. LOL... Yet the collection ball only contained wort. No sediment had dropped into the ball. I continued to check on it daily and each day the sediment pile would shrink more and more. But still, the sediment had not dropped.

On day 4 or 5, I checked on it as usual and saw the sediment had finally dropped and the collection ball was full. On day 7 (today), I'll drop in my dry hop sack, change collection ball and reopen the valve. I expect it take some time before the remaining trub will drop into the ball. Hopefully, at the end of the dry hop time (7-10 days), most if not all the trub will be contained in the collection ball. If additional trub remains in the FF, I'll repeat the ball change as needed.

We tend to intervene when not necessary and interrupt the natural process and create more work for ourselves. Let the yeast and the FF do the work for you.

I hope that helps...

:mug:
 
Here's the IPA (closest) 8 days in with 2 oz of Simcoe & 2 oz of Golding dry hopping. Also have an APA (furthest) 2 days in.

As you can see, I missed my mark on the post boil volume on the APA. It wasn't a brew day from hell or anything but just didn't hit my temps or my volume numbers for some reason. Definitely an off day...

SW IPA & APA in chamber.jpg
 
Apezz, i have the same problem with getting the union loose to take the ball off. Did you close the valve first? I noticed that when i close the valve the union wont turn so i leave the valve open and loosen the union by hand and then close the valve and remove the union and ball. I havent had to use pliers yet doing it this way.
 
Apezz, i have the same problem with getting the union loose to take the ball off. Did you close the valve first? I noticed that when i close the valve the union wont turn so i leave the valve open and loosen the union by hand and then close the valve and remove the union and ball. I havent had to use pliers yet doing it this way.

Well that's interesting. I'll have to try that. Thanks.
 
Last night I dropped the final collection ball on my first batch using the FF. All the sediment was in the collection ball and it was all beer above in the conical! But guess what? There was a steady stream of beer flowing through the union valve and the valve was turned off. I tried turning the valve slowly towards the open position then back trying to find a sweet spot where it would seal, but I couldn’t get the SOB to stop leaking. So I put a container under it and quickly sanitized my bottling bucket to collect the leaking beer. I wasn’t expecting that. When I dropped the first ball there was nothing but thick sediment below and above the valve so I didn’t get this leaking beer.
Once I was done bottling and cleaning up I inspected the union valve, I didn’t see anything wrong with it. Then with the valve closed I put my mouth on it and was able to blow air right through it!
I’m going to call FastRack and see if they will replace this valve. From what I’ve been reading they have very good customer service.
Has anyone else experienced anything like this?
 
After my first batch I was impressed by the clarity of my beer and the ease of use. I've experienced some of the minor problems that others have posted here but overall it's been a good experience. I decided to make some modifications to suit my personal preferences.

In my previous post I described adding rubber tubing to the top of the stand. It lifts the ball up another inch and grips the sides of the fermenter so it doesn't slip around.

I found that adding a size 253 silicone o-ring under the lid gasket made for a perfect seal.

I added a hole in the lid for my temperature sensor, a stainless steel probe about 18" long. The silicone grommets can be found on eBay.

I removed the thermowell and added a Liquifit valve for sampling.

I replaced the straight pipe to hose racking adapter with an elbow version to prevent my racking hose from kinking.

By the way, I highly recommend US Plastics as mentioned by Bembel in a previous post. Super fast shipping and prices that at least half what others charge. They had all of these fittings in stock. I sourced the o-ring through an industrial supplier at work but I also found them available on Amazon.

Lid Mods.jpg


Elbow Adapter.jpg


Sampling Valve.jpg
 
After my first batch I was impressed by the clarity of my beer and the ease of use. I've experienced some of the minor problems that others have posted here but overall it's been a good experience. I decided to make some modifications to suit my personal preferences.

In my previous post I described adding rubber tubing to the top of the stand. It lifts the ball up another inch and grips the sides of the fermenter so it doesn't slip around.

I found that adding a size 253 silicone o-ring under the lid gasket made for a perfect seal.

I added a hole in the lid for my temperature sensor, a stainless steel probe about 18" long. The silicone grommets can be found on eBay.

I removed the thermowell and added a Liquifit valve for sampling.

I replaced the straight pipe to hose racking adapter with an elbow version to prevent my racking hose from kinking.

By the way, I highly recommend US Plastics as mentioned by Bembel in a previous post. Super fast shipping and prices that at least half what others charge. They had all of these fittings in stock. I sourced the o-ring through an industrial supplier at work but I also found them available on Amazon.

SUPERB idea with the elbow adaptor, my hose kinks and that is a excellent solution! Plus the thermwell from the top is a lot less complicated, thanks for the great ideas!!

Can you list the part number by chance for the elbow from US Plastics and where can one get the 18" SS probes? I'm going to switch to that!

US Plastics part number is 63110.

The SS probe is a homemade one. I use an inexpensive temperature controller (you can find them on eBay, Amazon, etc., for about $20) that has a sensor with 6 feet of wire. I bought some right-sized hypodermic tubing (eBay), sealed one end and put the sensor inside the open end. I left the sensor loose in the tube so I could remove it and not have to remove the hypodermic tubing from my fermenter.
 
Has anyone else had an issue with the ball valve? I started to clean my today and the water just poured right through this. I did not notice while bottling but it might have been happening. I just put my c-ball onto it but am quite worried the next time I use it.
 
Has anyone else had an issue with the ball valve? I started to clean my today and the water just poured right through this. I did not notice while bottling but it might have been happening. I just put my c-ball onto it but am quite worried the next time I use it.

I didn't have any issues with the valve leaking on my last batch. I have an Abbey double coming out of primary this weekend so I suppose I'll find out when I go to change out the collection balls. I'll update with how it goes
 
Has anyone else had an issue with the ball valve? I started to clean my today and the water just poured right through this. I did not notice while bottling but it might have been happening. I just put my c-ball onto it but am quite worried the next time I use it.

Did you try taking the handle off and using it to tighten the inner part of the ball valve? In case you didn't know, the handle itself is a tool. Notice those two plastic nubs on it? Those fit in the under side of the valve to tighten everything up snug in there. Take a look and you will see what I mean. The handle pulls straight off with some wiggling.

When sanitizing, I take the whole thing apart using this tool. Probably don't have too, I just do it because it makes sense to me.
 
US Plastics part number is 63110.


The SS probe is a homemade one. I use an inexpensive temperature controller (you can find them on eBay, Amazon, etc., for about $20) that has a sensor with 6 feet of wire. I bought some right-sized hypodermic tubing (eBay), sealed one end and put the sensor inside the open end. I left the sensor loose in the tube so I could remove it and not have to remove the hypodermic tubing from my fermenter.


Doing the same with my new Fast Fermenter.....great idea!! So how did you seal the tubing?
 
Doing the same with my new Fast Fermenter.....great idea!! So how did you seal the tubing?

My brother-in-law is a welder so I asked him to weld one end shut. I think you could also seal it with some silicone rubber sealant and crimp it in a vise. To make the seal in the fermenter lid I bought some
silicone rubber grommets on eBay that were the right size for the tubing.
 
Once I was done bottling and cleaning up I inspected the union valve, I didn’t see anything wrong with it. Then with the valve closed I put my mouth on it and was able to blow air right through it!
I’m going to call FastRack and see if they will replace this valve. From what I’ve been reading they have very good customer service.
Has anyone else experienced anything like this?

and

In case you didn't know, the handle itself is a tool. Notice those two plastic nubs on it? Those fit in the under side of the valve to tighten everything up snug in there. Take a look and you will see what I mean. The handle pulls straight off with some wiggling.

I just got my new FF last week and this weekend did a water test. It was leaking at the union fitting with the C-ball. I learned from MrKelly's post here how to use the handle to disassemble the valve and found this o-ring inside the valve that was damaged. I've been in contact with support and we are in the process of arranging the shipment of a new valve. I've posted a picture of the valve and damaged 0-ring (lower edge is slightly malformed). When I put it back together, it holds watertight - for now, but I won't use it until I have a replacement.

2015-04-20 23.22.59.jpg
 
and

I just got my new FF last week and this weekend did a water test. It was leaking at the union fitting with the C-ball. I learned from MrKelly's post here how to use the handle to disassemble the valve and found this o-ring inside the valve that was damaged. I've been in contact with support and we are in the process of arranging the shipment of a new valve. I've posted a picture of the valve and damaged 0-ring (lower edge is slightly malformed). When I put it back together, it holds watertight - for now, but I won't use it until I have a replacement.

Good call. With a damaged/malformed seal, it's only a matter of time and the right circumstance before it leaks. And with my luck, it would be at the absolution worst time...

Keep us posted.
 
I had mine in these stands I made. I have since mounted mine on the wall in my basement. Temp down there has been holding mid to low 50's. I have a couple reptile heat pads on a controller that I use to keep them warm.

What size pipe and dimensions are these PVC stands? Were you happy with them or was there too much weight in the middle of the beam?
 

Latest posts

Back
Top