• Please visit and share your knowledge at our sister communities:
  • If you have not, please join our official Homebrewing Facebook Group!

    Homebrewing Facebook Group

Electric burners - Any builders out there?

Homebrew Talk

Help Support Homebrew Talk:

This site may earn a commission from merchant affiliate links, including eBay, Amazon, and others.
pop quiz: do you know what would have happened if you had connected the brewery receptacle's neutral to the neutral bus in your panel?

hint: nothing dangerous would have happened.

:D
 
You guys scare the **** out of me.!

Some one without a "clue" is wiring a rig and we are discussing wiring protocol??

Holy **** !

As I said, when I wire up the box there will be no lug installed in it. I am killing the service panel breaker (no current to the subpanel), then unhooking the breakers and putting in the new panel. The breaker will stay off until I have a certified electrician inspect it.

I would say that while I am no a certified eleictrician I have learned enough to do the step I plan on doing. So without a clue isn't exactly fair.

The only way to learn how to do something is to do it and have mentors to help along. I consider the help on here a mentorship of sorts, but you better believe that before I wired anything I fully understood why I was doing it, and sent my diagrams to my bro in law who isn't as computer savvy. i.e. it is very helpful for me to get the details down, then pass my diagram out to you guys, a cert electrician and my dad (mechanical engineer with good electrical knowledge) for confirmation.

By the time the diagram rolls through those checks and balances AND I get clearance from a certified electrician to flip the breaker AND I get shocked and die.... dude it was just meant to be that I get shocked.

I appreciate your concern, just think you are exaggerating the risk a bit.

Just sayin' my ego is in check and I am not taking on more than I can handle.
 
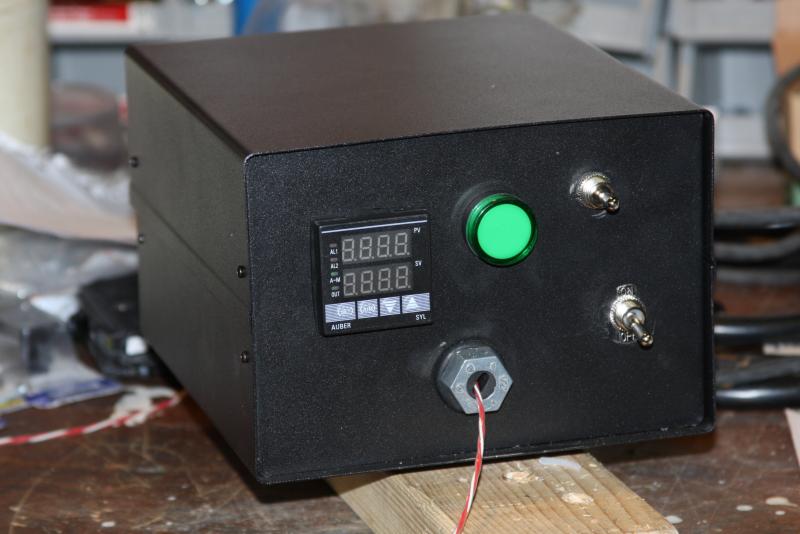
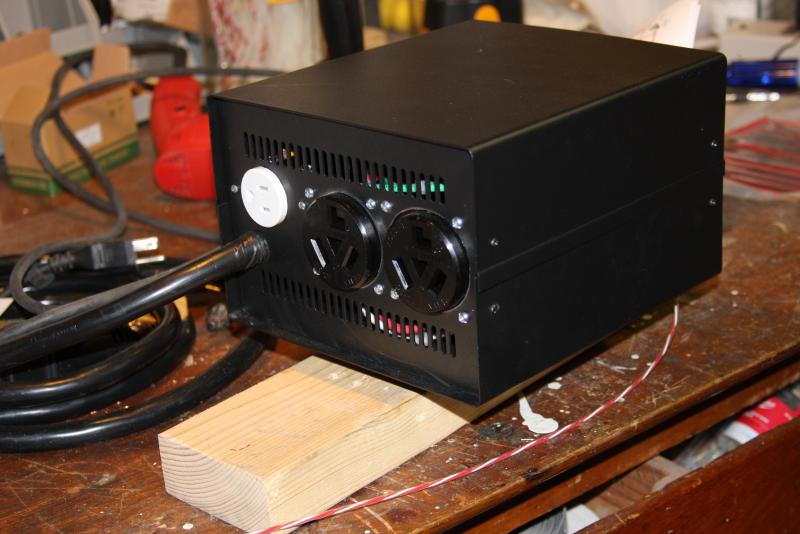
Just wanted to post a few pics of the end product. The only thing I didn't buy or add was the alarm - we will see down the road if I want it. Green light will go on with the box powered.

I plan on splicing the probe to extend it and throwing some silicone in to seal up some aspects of the box. Since the probe wire is detachable from the sensor, I plan on buying another of the same probe type if/when we get a dedicated HLT. Right now my BK will serve both functions (would be nice to have for double batches). With the detachability, I will be able to swap the line from BK to HLT as needed. Getting really anxious for my dry run.

1b.jpg


1a.jpg
 
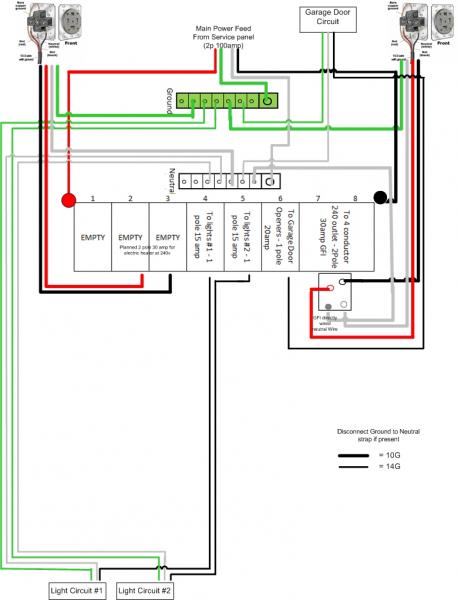
Ok. After looking at my load center, I thought I would update my drawing in relation to how I am going to lay the box out with the wiring. I looked at my GFI breaker and sure enough there was a handy little diagram indicating where the wiring should go. Mine has three screw terminals and one direct wired. Top two are for the hot loads and the fixed wire (circle with filled in gray, neutral) should be wired to the buss, and the screw terminal neutral goes to the outlet.

You can follow along with that on the diagram with my little expansion drawing of the GFI breaker connections.

Thanks for the help on this guys.

Just grabbed my step drills yesterday and once I get the box wired up in the garage and tested, it will be hole cutting time in the brew pot. Will keep you updated as I move forward.

Breaker Drawing.jpg
 
As a continuation question. If anyone is reading htis who has the same SSR with heat sink - please let me know how hot your sink is getting when it is under the most demanding load. My largest concern is when I do a dry run with this the sink will heat up significantly and I will have to move it outside of the box, cut vent holes in the top of the box, install a small fan or a combination thereof. Any advice from your personal experience would be appreciated.

Thanks!!
 
Also related - do you need the thermal grease for the SSR to sink mount? Right now I only have them directly mated, was hoping that was sufficient.
 
My heat sink (40 amp) running a 5500w element gets too hot to hold my finger on it. It is the standard heatsink that comes with the chinese SSR's. When its not WFO, it is only warm.
 
My heat sink (40 amp) running a 5500w element gets too hot to hold my finger on it. It is the standard heatsink that comes with the chinese SSR's. When its not WFO, it is only warm.

Ok so you likely have the exact SSR and sink that I do it sounds like.

Please excuse my ignorance.... what does "WFO" stand for?

Did you use thermal grease when you mated the sink to the SSR?

I assume the boil will be the hottest moments for the SSR.
 
My heat sink (40 amp) running a 5500w element gets too hot to hold my finger on it. It is the standard heatsink that comes with the chinese SSR's. When its not WFO, it is only warm.

Yup.

The whole thing got hot as hell in my panel, too (5500W element and a 40A chinese SSR w/ the chinese heatsink).

My SSR just died a couple of weeks ago, too. And I think it was because of heat stress. I had NO ventilation in my box at all. Solid steel box that sealed up completely. You at least have vent slots cut in the back. But my panel also isn't nearly as crowded as yours.

I replaced my dead SSR and then added fans to the panel.
HERMS_fans.jpg
 
you will need to use thermal grease for sure.

WFO = Wide F*cking Open

HA! good stuff!

Seeing as how I plan to use this on 10G batches.... WFO is exactly how I will be using it.

Looks like you have an "innie" and an "outty" fan. Cool idea. Looks like I might be throwing in another terminal block section or two to add a fan, or flip the SSR on its side and cut a hole in the project box.
 
Looks like you have an "innie" and an "outty" fan. Cool idea. Looks like I might be throwing in another terminal block section or two to add a fan, or flip the SSR on its side and cut a hole in the project box.

Yes, that's exactly what I did. One blows air in and the other blows it out. It stays much cooler now.

It's a little ugly the way I retro-fitted it in there, because I needed as 12V DC power supply for the fans.

Let me see if I can find a picture. You'll get a laugh out of it.
 
Nope. I don't have a pic on my phone. What I did was install a standard wall receptacle INSIDE the box. And plugged an old cordless phone wall wart into it, and then attached the wires to the fans.

The hot connection for that internal receptacle is connected to the same switch that enables my element contactor. So, when I flip the switch to enable the contactor, the fans come on, too.

It's just weird looking to see something plugged in on the inside of my panel like that.
 
Well at this point, mine is gonna get a little ugly as well. Notsure there is space for a fan "inside" the box. But necessity is the mother of invention. I am not out for a new project box just yet.
 
Nope. I don't have a pic on my phone. What I did was install a standard wall receptacle INSIDE the box. And plugged an old cordless phone wall wart into it, and then attached the wires to the fans.

The hot connection for that internal receptacle is connected to the same switch that enables my element contactor. So, when I flip the switch to enable the contactor, the fans come on, too.

It's just weird looking to see something plugged in on the inside of my panel like that.

Ha! But you know what.... It works right?!
 
Well at this point, mine is gonna get a little ugly as well. Notsure there is space for a fan "inside" the box. But necessity is the mother of invention. I am not out for a new project box just yet.

You need a power supply for the fan(s), too. :D I don't think you can find one that runs on 120V AC.
 
I used one of those big heatsinks that you can mount 4 SSR to, what Kal calls the "overkill" heatsink. Even that huge thing gets a little warm (not hot, but above ambient) when I've got an element going 100%.
 
they do have fans that run on 120VAC, but 12V is much more common because almost every PC has/needs a fan and has a 12V DC power source.
 
I still don't know a "great" way to mount this sucker to my box. Will have to buy one and look at the sizing. I knew this was going to be an issue,...

I may go ghetto fabulous and sink on the outside of the box. Then take a small fan (like one you use for a breeze in the summer) and point it at the sink. That would be a temporary thing, but would let me use it without frying my SSR prematurely.

In this pic....

22961d1301573697-electric-burners-any-builders-out-there-3.jpg


Is there room to put a 1.5" thick fan between the SSR and that far wall of the box?


Maybe rotate the SSR 90* and slide it closer to the PID? That might give space to put the fan there and get good airflow over the fins.

The vent slots at the back of the box should be sufficient for exhaust.
 
In this pic....

Is there room to put a 1.5" thick fan between the SSR and that far wall of the box?

Maybe rotate the SSR 90* and slide it closer to the PID? That might give space to put the fan there and get good airflow over the fins.

The vent slots at the back of the box should be sufficient for exhaust.

I think the relocation as you are describing it is the only way to get a fan in there. I will have to look tonight to see. The only part that is a pain is the top cover takes of half of that side wall as well. This means the fan can't mount to the top AND the bottom, just one or the other or the top cover can't come off without disconnecting it.

I had also thought, attache the SSR to the side wall, put a fan on the bottom and blow up. But you would see the mounting screws of the SSR in the side wall.
 
You're making a very good point, but to the wrong guy. My system is ugly and I don't give a rat's ass, because it works. :D
Haha! Well I would stick by my Grandfather's philosophy on this one. The best carpenter's aren't the ones who never make mistakes; there the ones make the mistakes appear to be part of the work.

i.e. perhaps that is where I will be putting a brew panel name plate haha j/k!

then again my buddy would say "you can't polish a turd"

At the end of the day, ugly working is better than a pretty failure - totally agree.
 
Alright - some freakin awesome news!

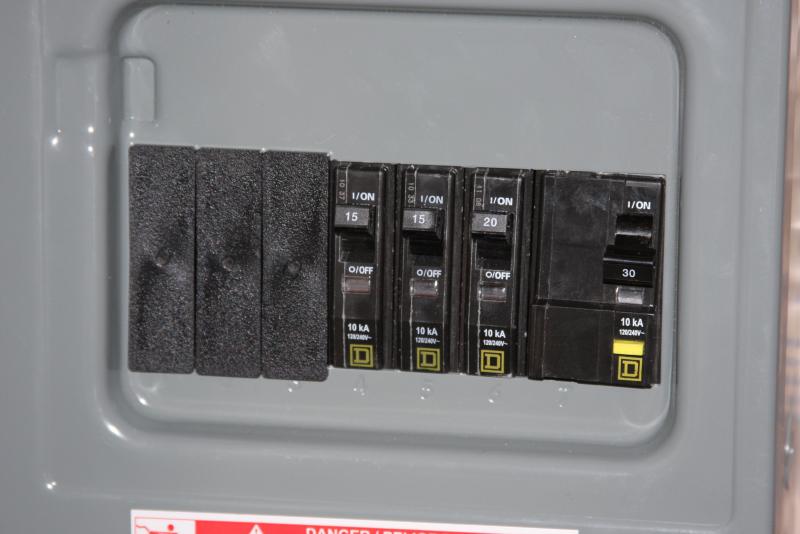
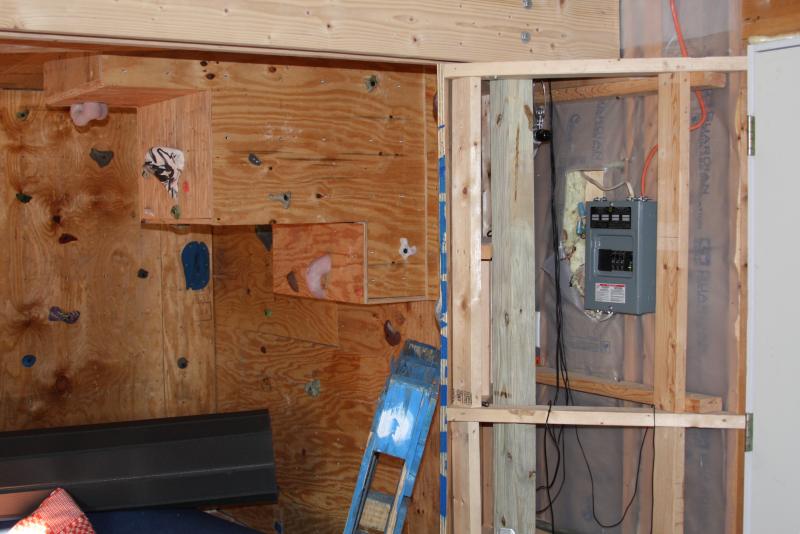
Last night I was able to remove and replace/ rewire the subpanel in my garage. I then laid in one 240 outlet and wired in the GFI box as well. After approval I switched everything on and success! Took about 1.5-2 hours to do it all, check all the connections etc.

Next, just to see if I was on the right page I plugged in my control box (no heat element hooked up though). Sure enough my green power indicator turned on as did the PID! So now I am ready to cut a hole in my brew pot, may do that tonight or tomorrow!!! I didn't think I would be at this stage in the game just yet. Who knows, maybe I will be able to brew my Rye IPA this weekend with the element!

My man card just got punched a couple of times after this effort.


Just curious, since i haven't read the PID manual yet. Do I have to program that thing at all, or can I just flip it into manual mode and go from there? i.e. is the PID user friendly? I only plan on using it to heat strike water in and boils right now.

IMG_4341.jpg


IMG_4342.jpg


IMG_4344.jpg
 
You might be able to get away with no programming to use manual mode.

1. Select proper probe type. Maybe. You don't need the probe to be giving any meaningful readings for manual mode (PID doesn't use probe input in that mode) but you might have to at least tell the PID what kind of probe it is.

2. Select proper output mode. Maybe. I don't remember what PID you have, but some can use a relay output or an SSR control output. If yours is configurable in that regard, set it to SSR.

That should be it I would think.

Your probe will eventually need to be calibrated so that it reads 212 in boiling water (and sanity checked that it reads 32 in ice water), but that won't matter for manual mode right now.
 
Back
Top