killsurfcity
Well-Known Member
- Joined
- Feb 11, 2009
- Messages
- 170
- Reaction score
- 18
A friend and I have been doing 20g batches together, and are looking for a way to make bottling easier/faster. We were looking into some kind of semi-automation, but weren't really happy with either the price-tag, or fill-method of the available solutions. After mulling it for a while, this is what I've come up with. I want to build a prototype soon, but thought I'd share to see if anyone had any comments/suggestions on how I could improve it.
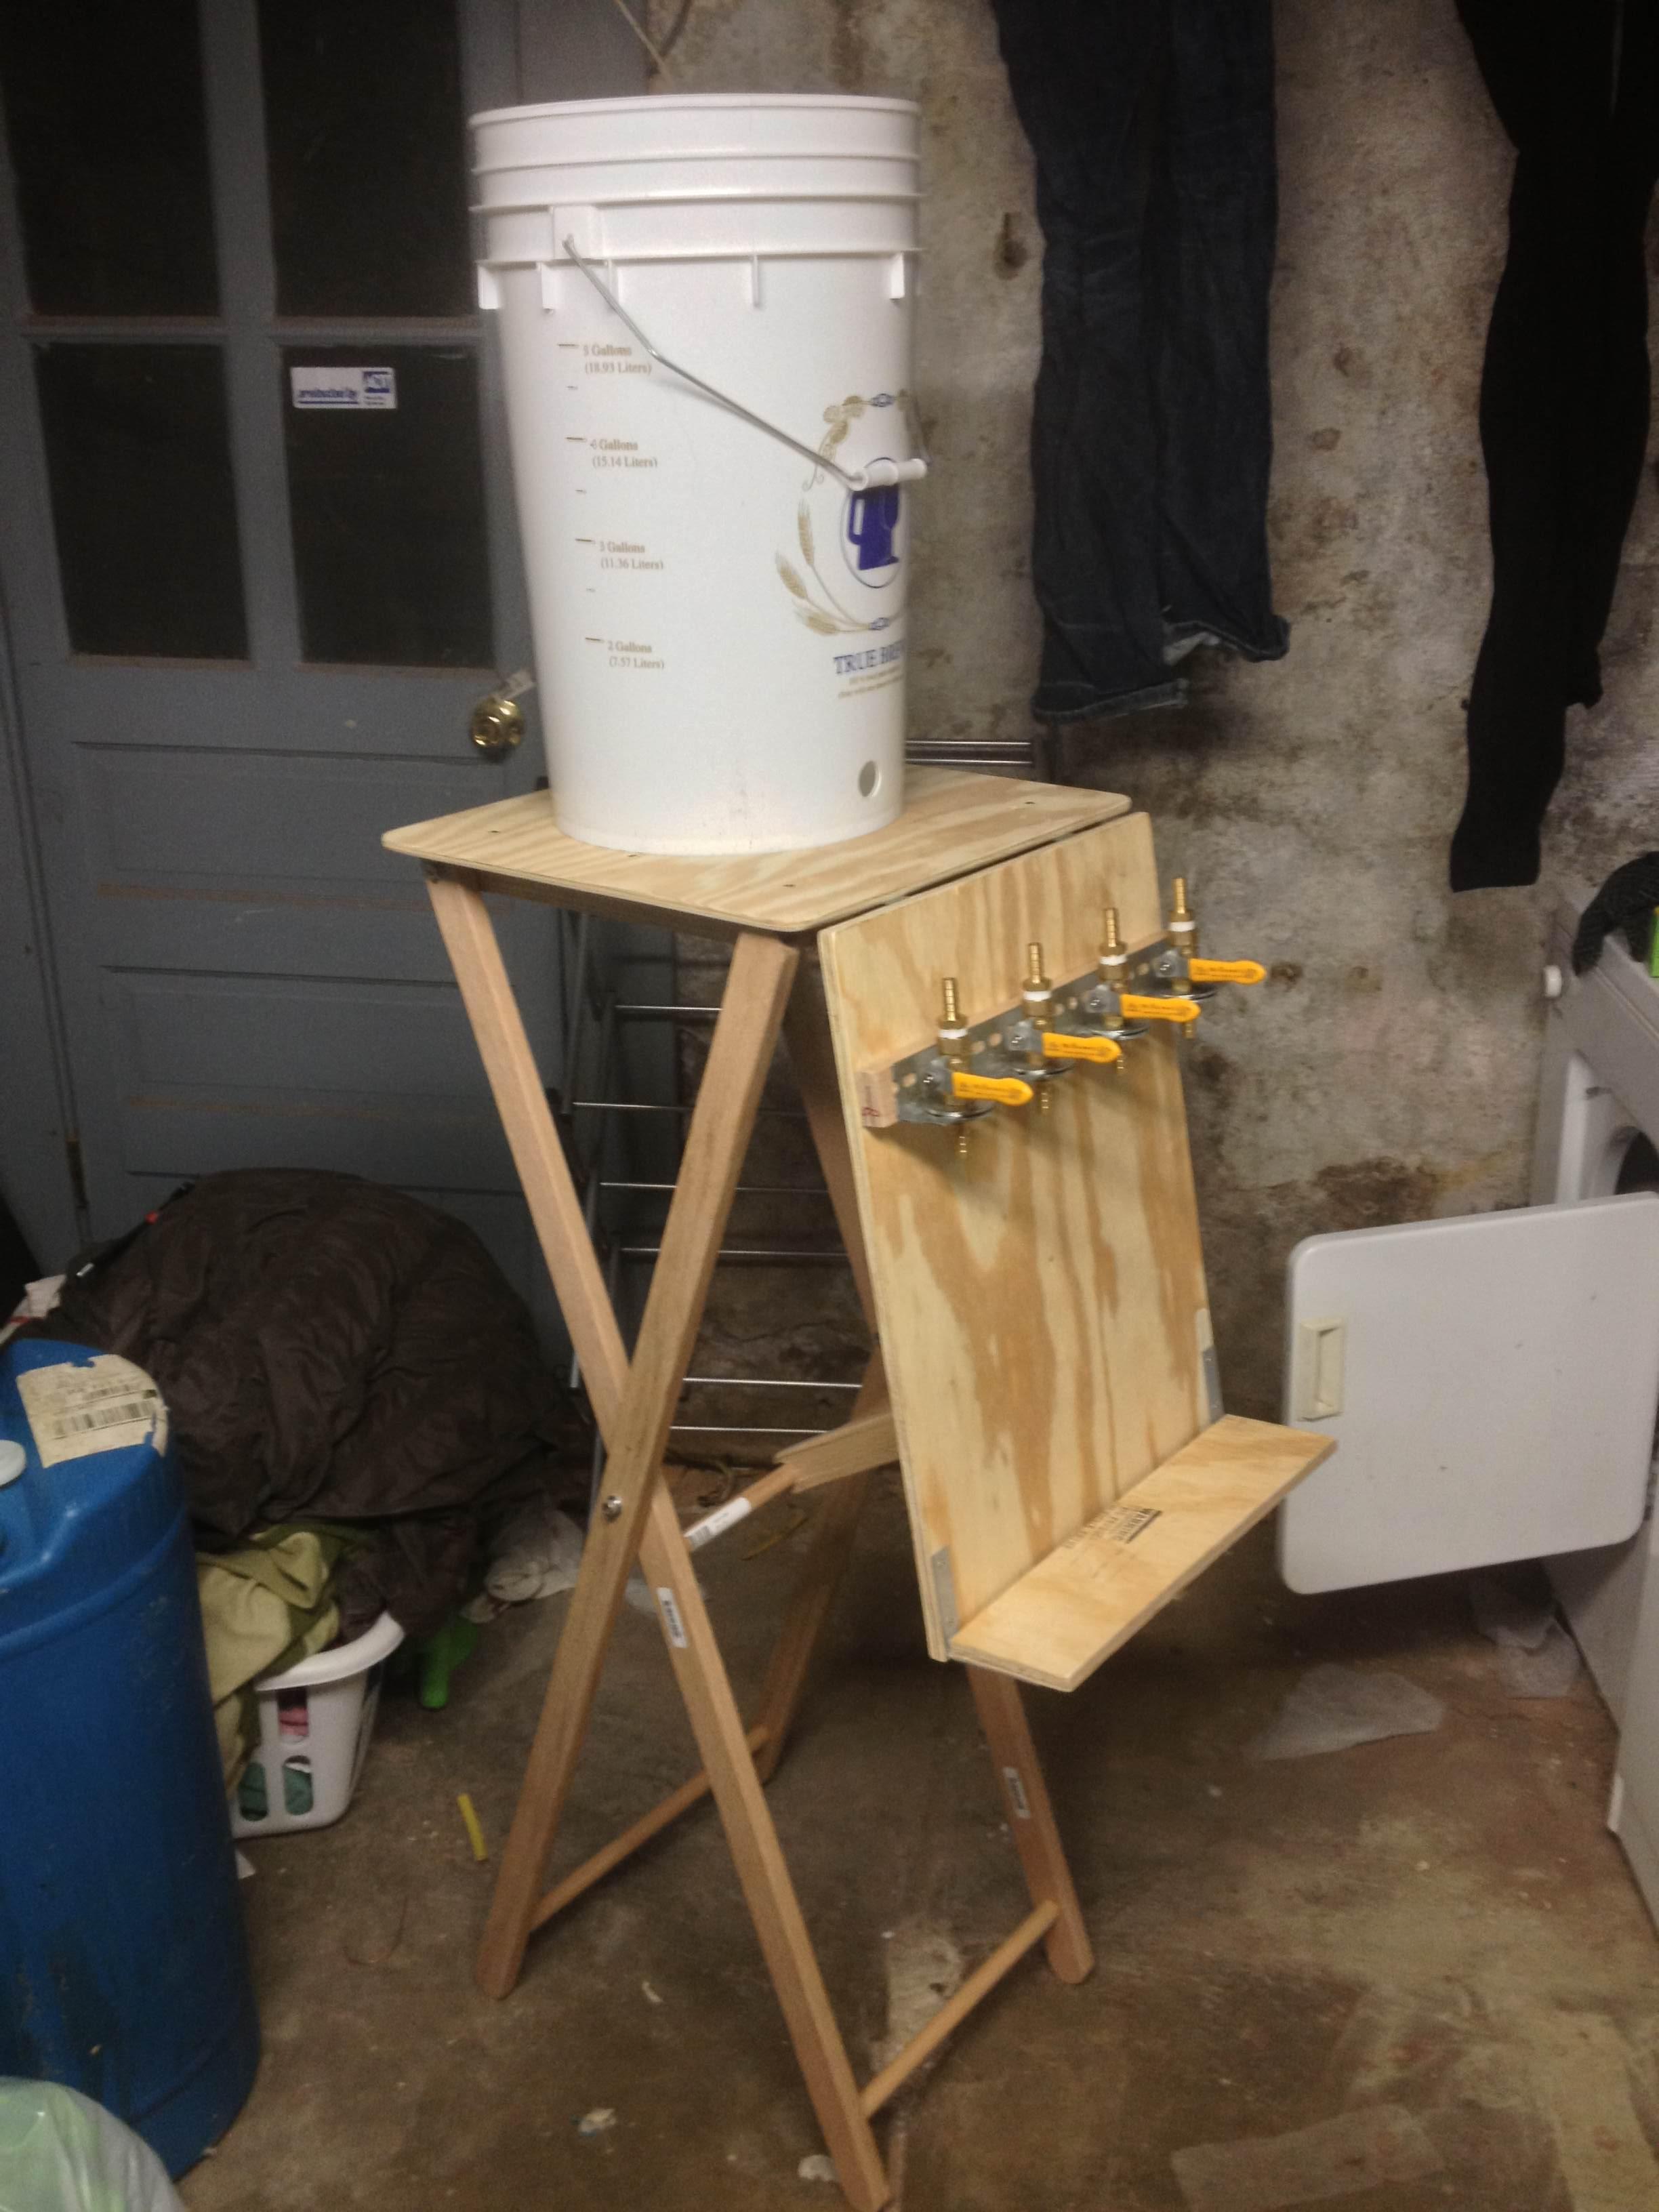
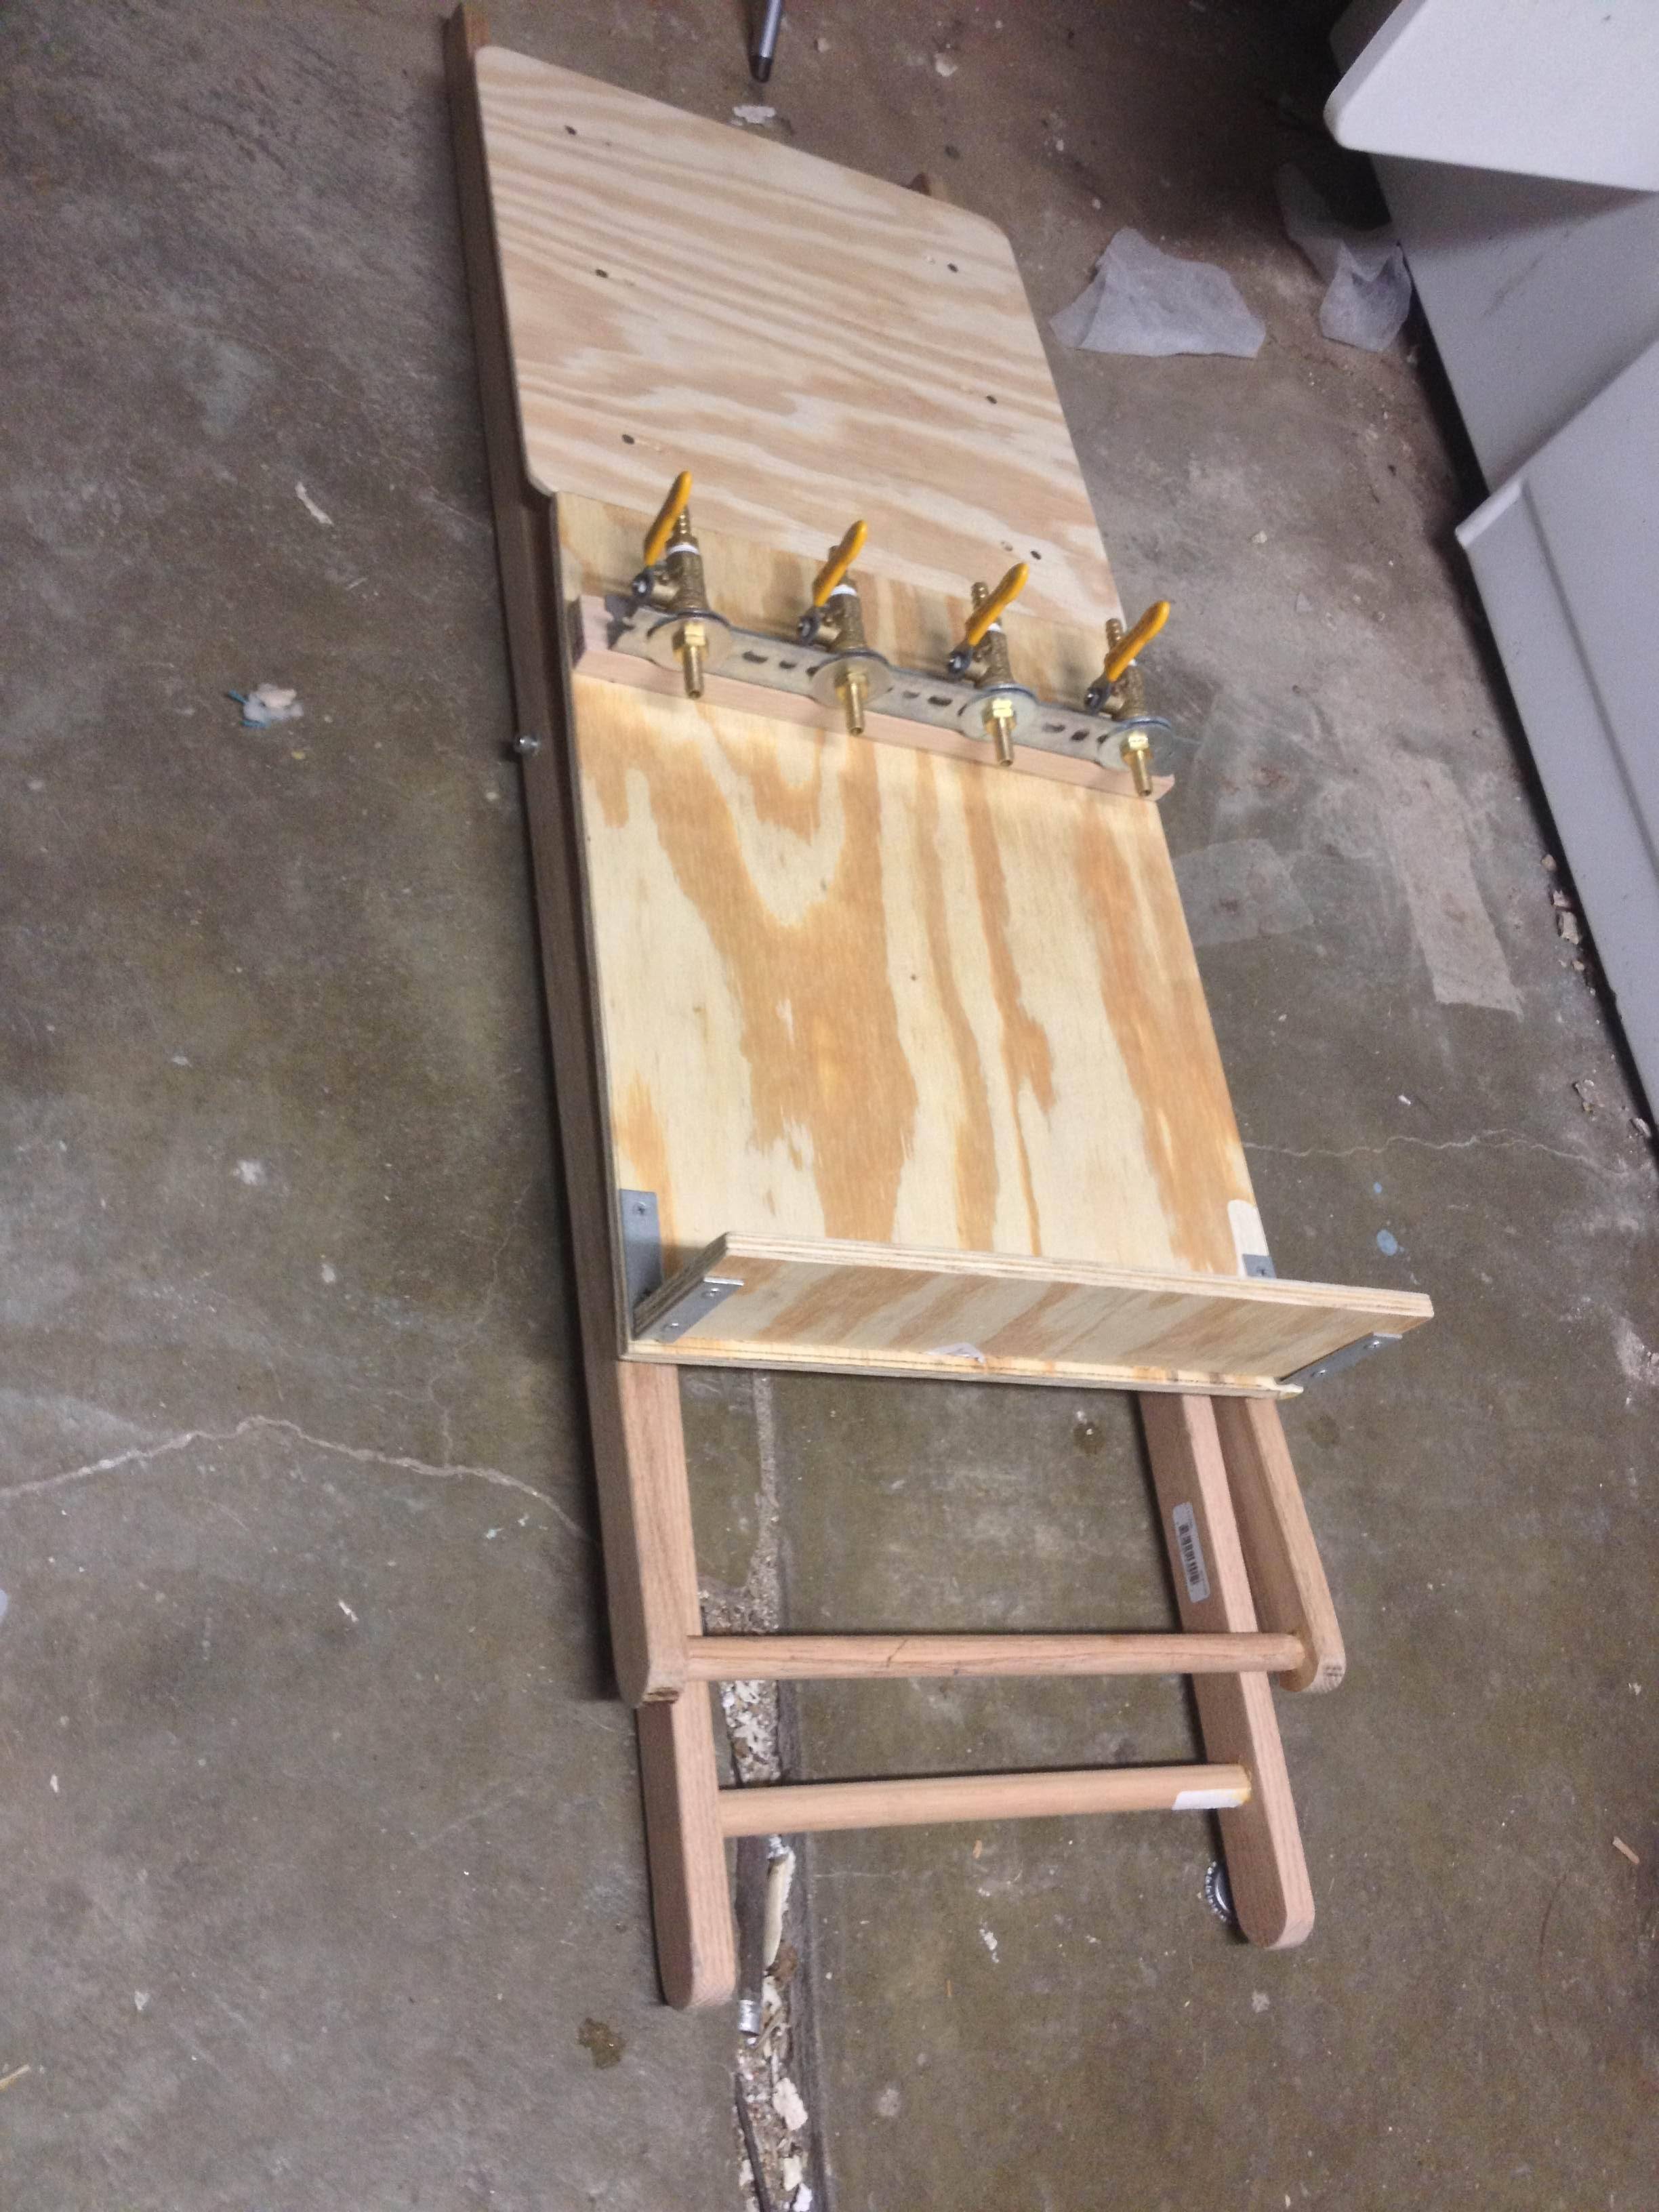
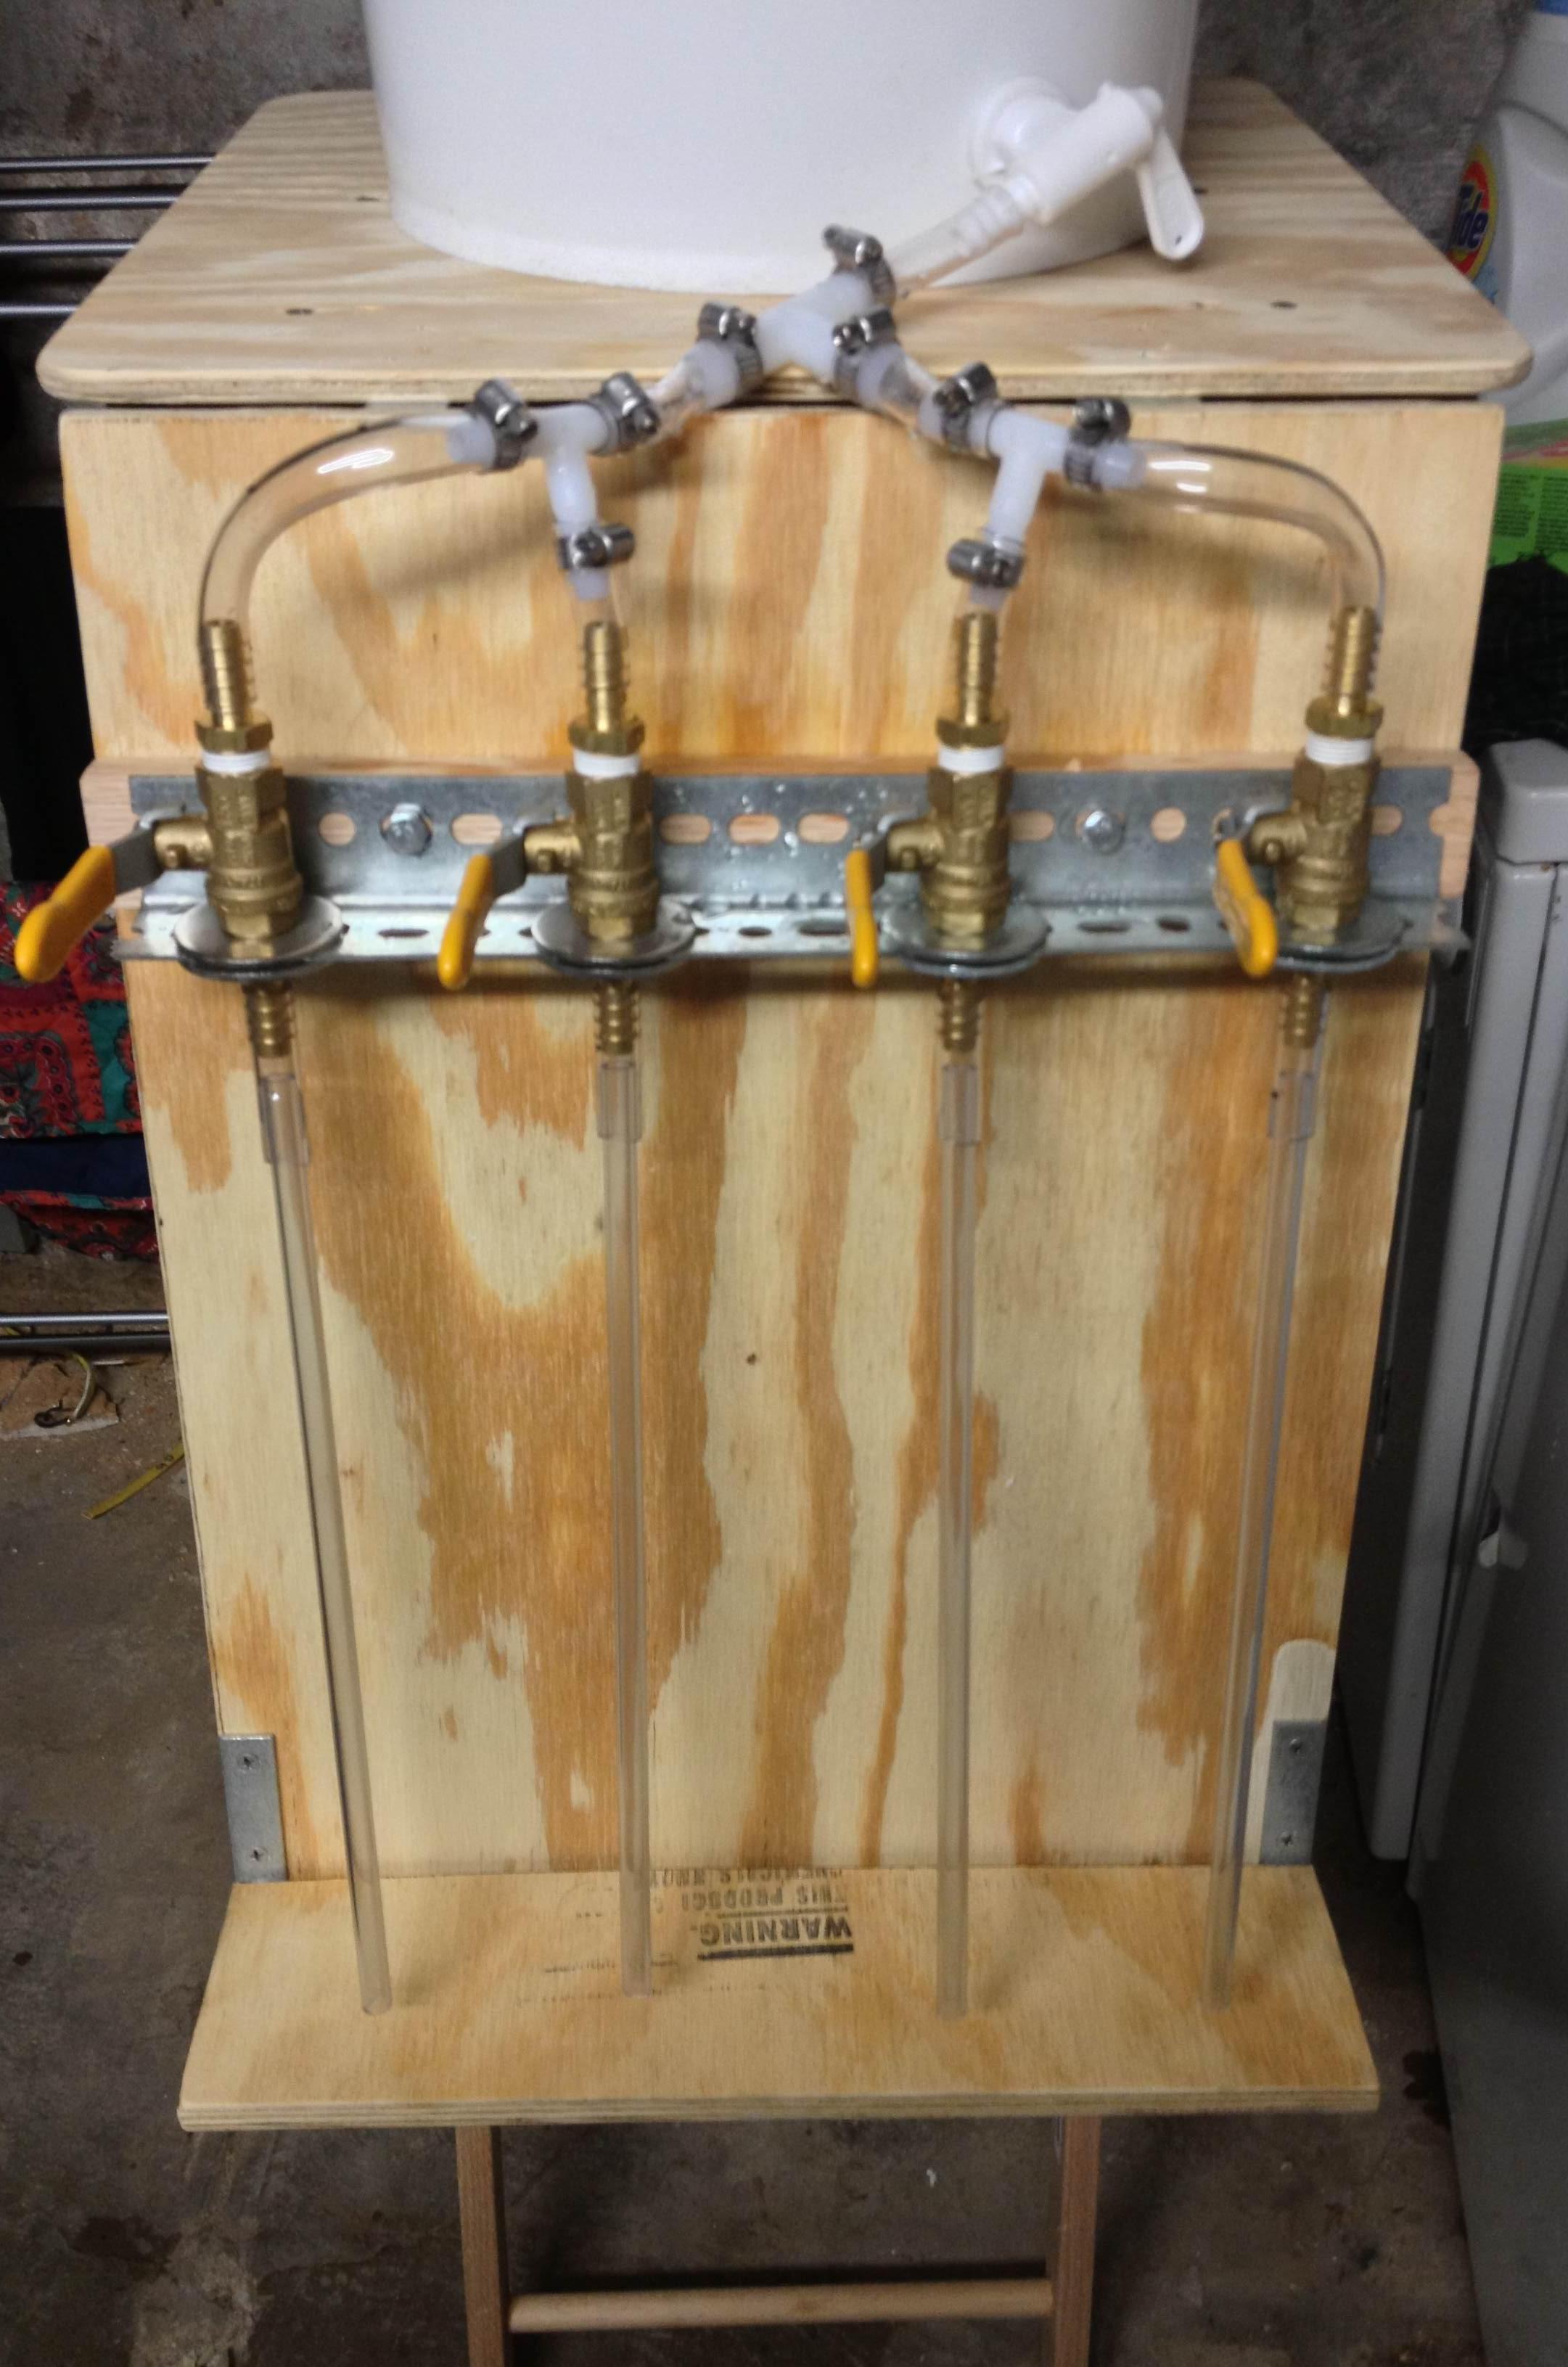
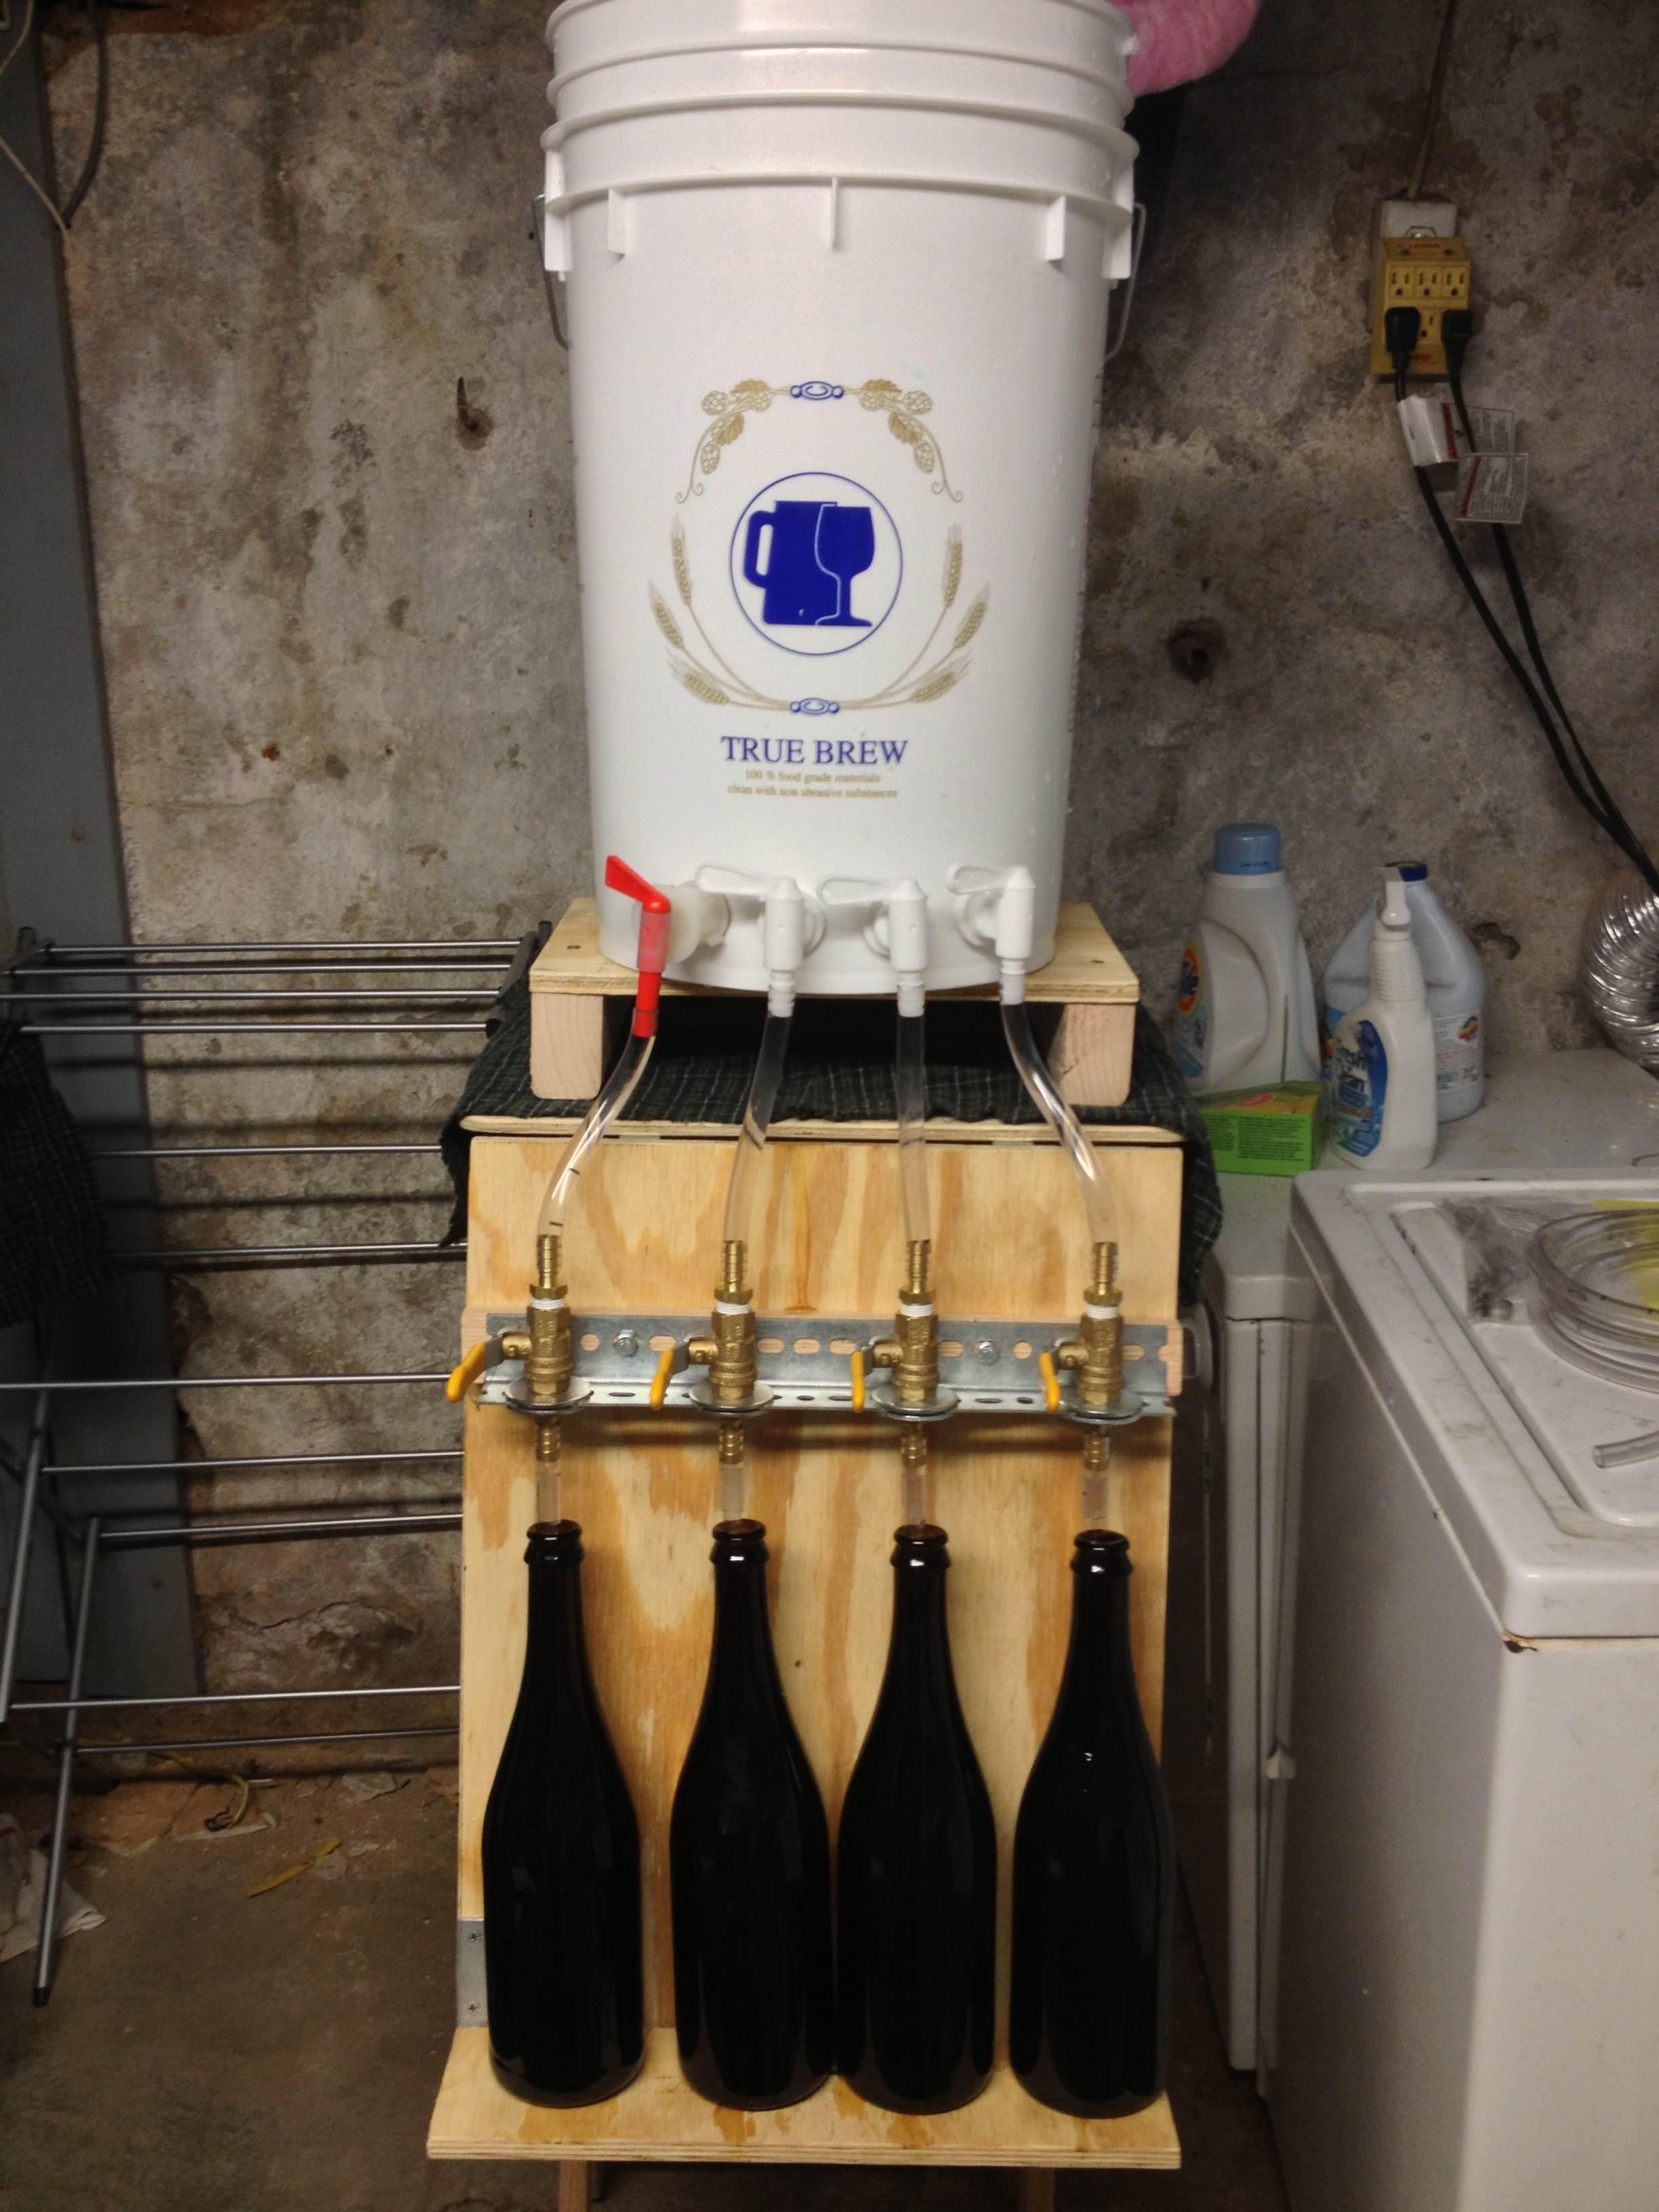
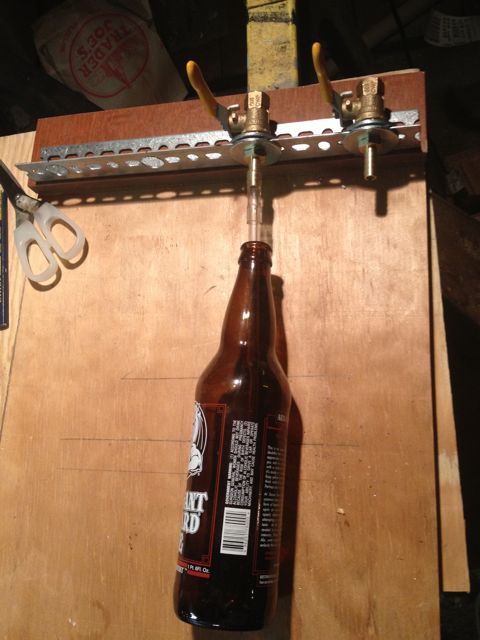
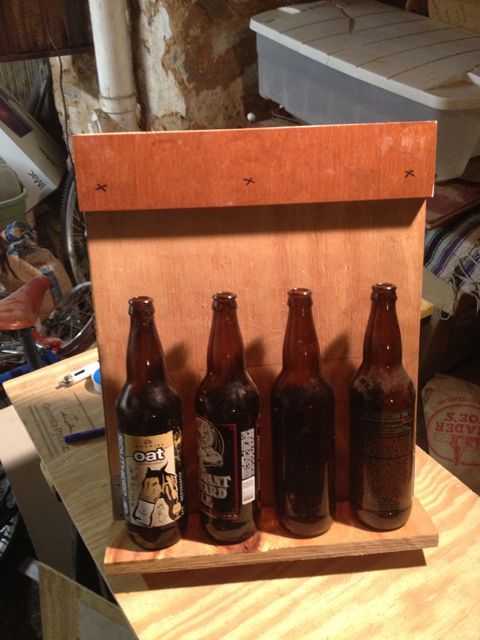
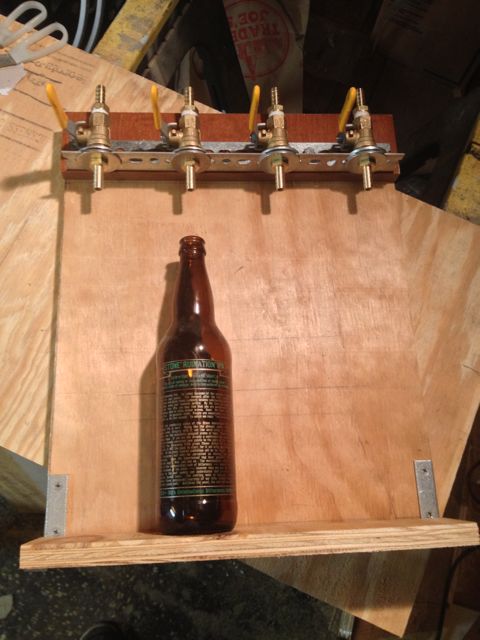
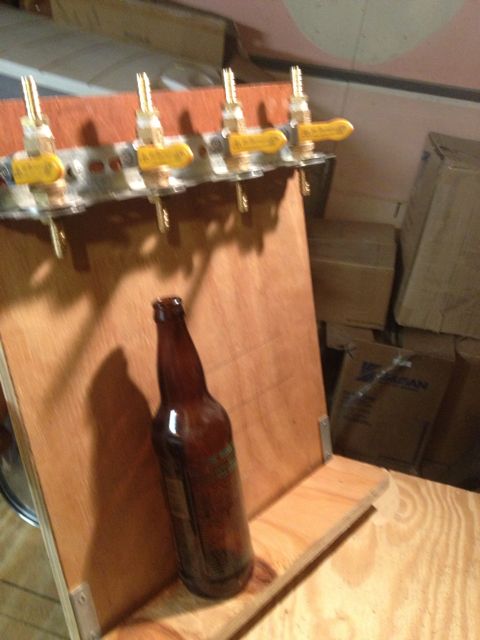
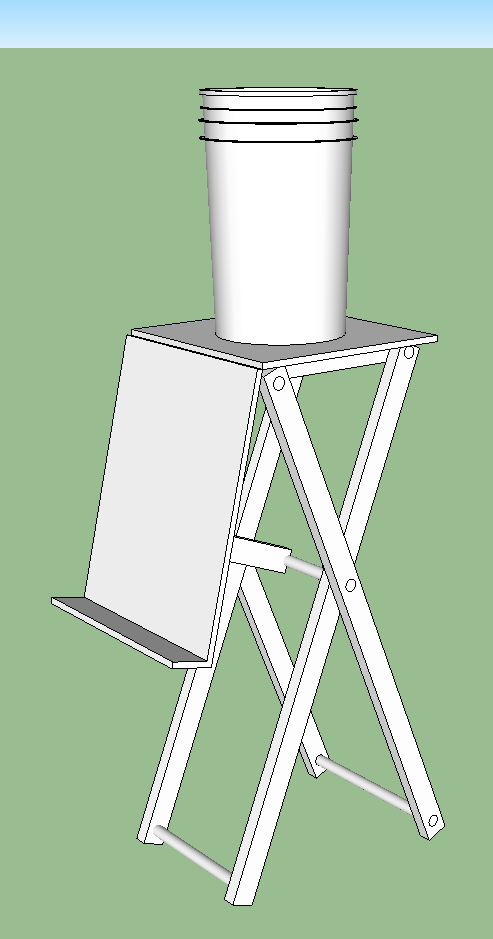
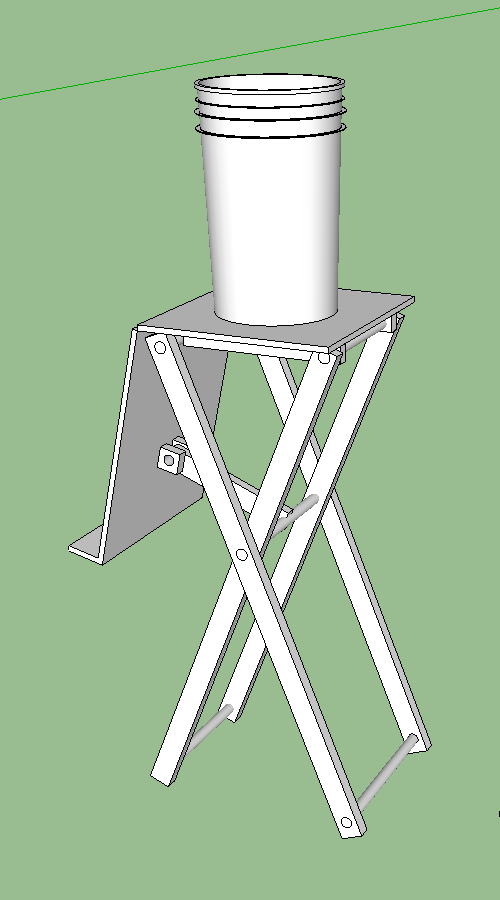
I figure bottle conditioning and gravity are both our friends at this point, so may as well design around that. So, here's the idea, we take one of those blue HDPE drums, and put 4 valves on it. Those 4 valves feed our bottling array. The bottling array is really simple. It's basically a shelf and backing, with 4 hinged bottle fillers and four valves affixed.
To bottle, we would prime the beer in the drum, hoist it (or pump the beer into it). Then we'd attach the bottling array, and open the valves on the drum, priming the filling lines. Next, we swing out each filler, and slide a bottle on, swinging it back to rest the bottle on the fixed base/shelf. As each bottle goes on, we open the valve just enough to get a fast enough flow. if timed right, we should be able to get into a rhythm, where by the time the last bottle is on, the first is ready to come off. allowing for continuous filling.
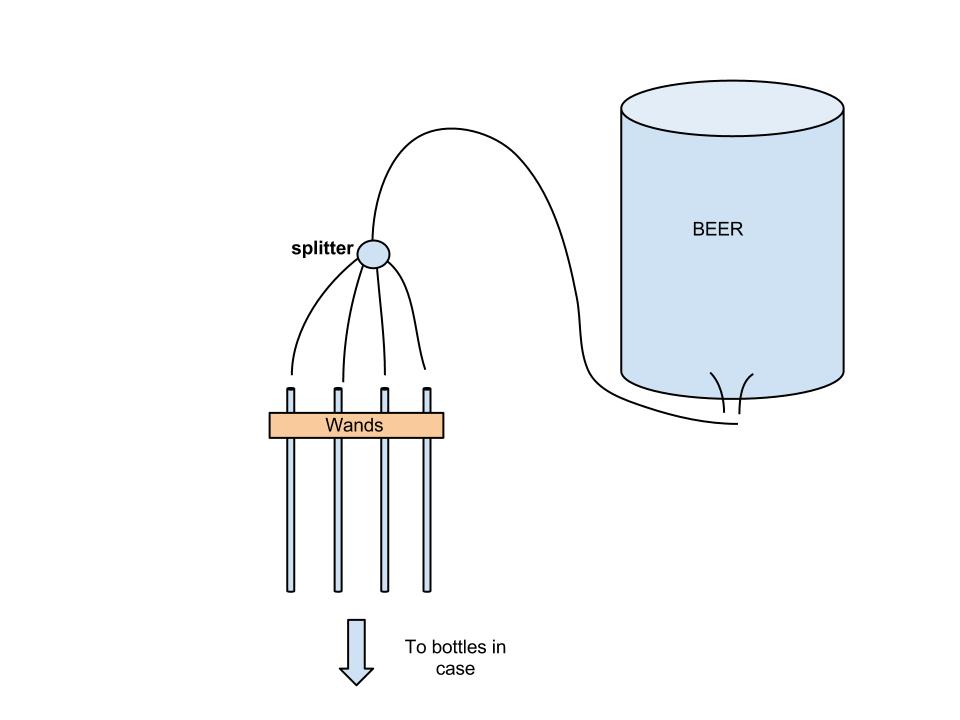
See the attached drawing for clarification. In case you can't read my scrawl, I numbered the text...
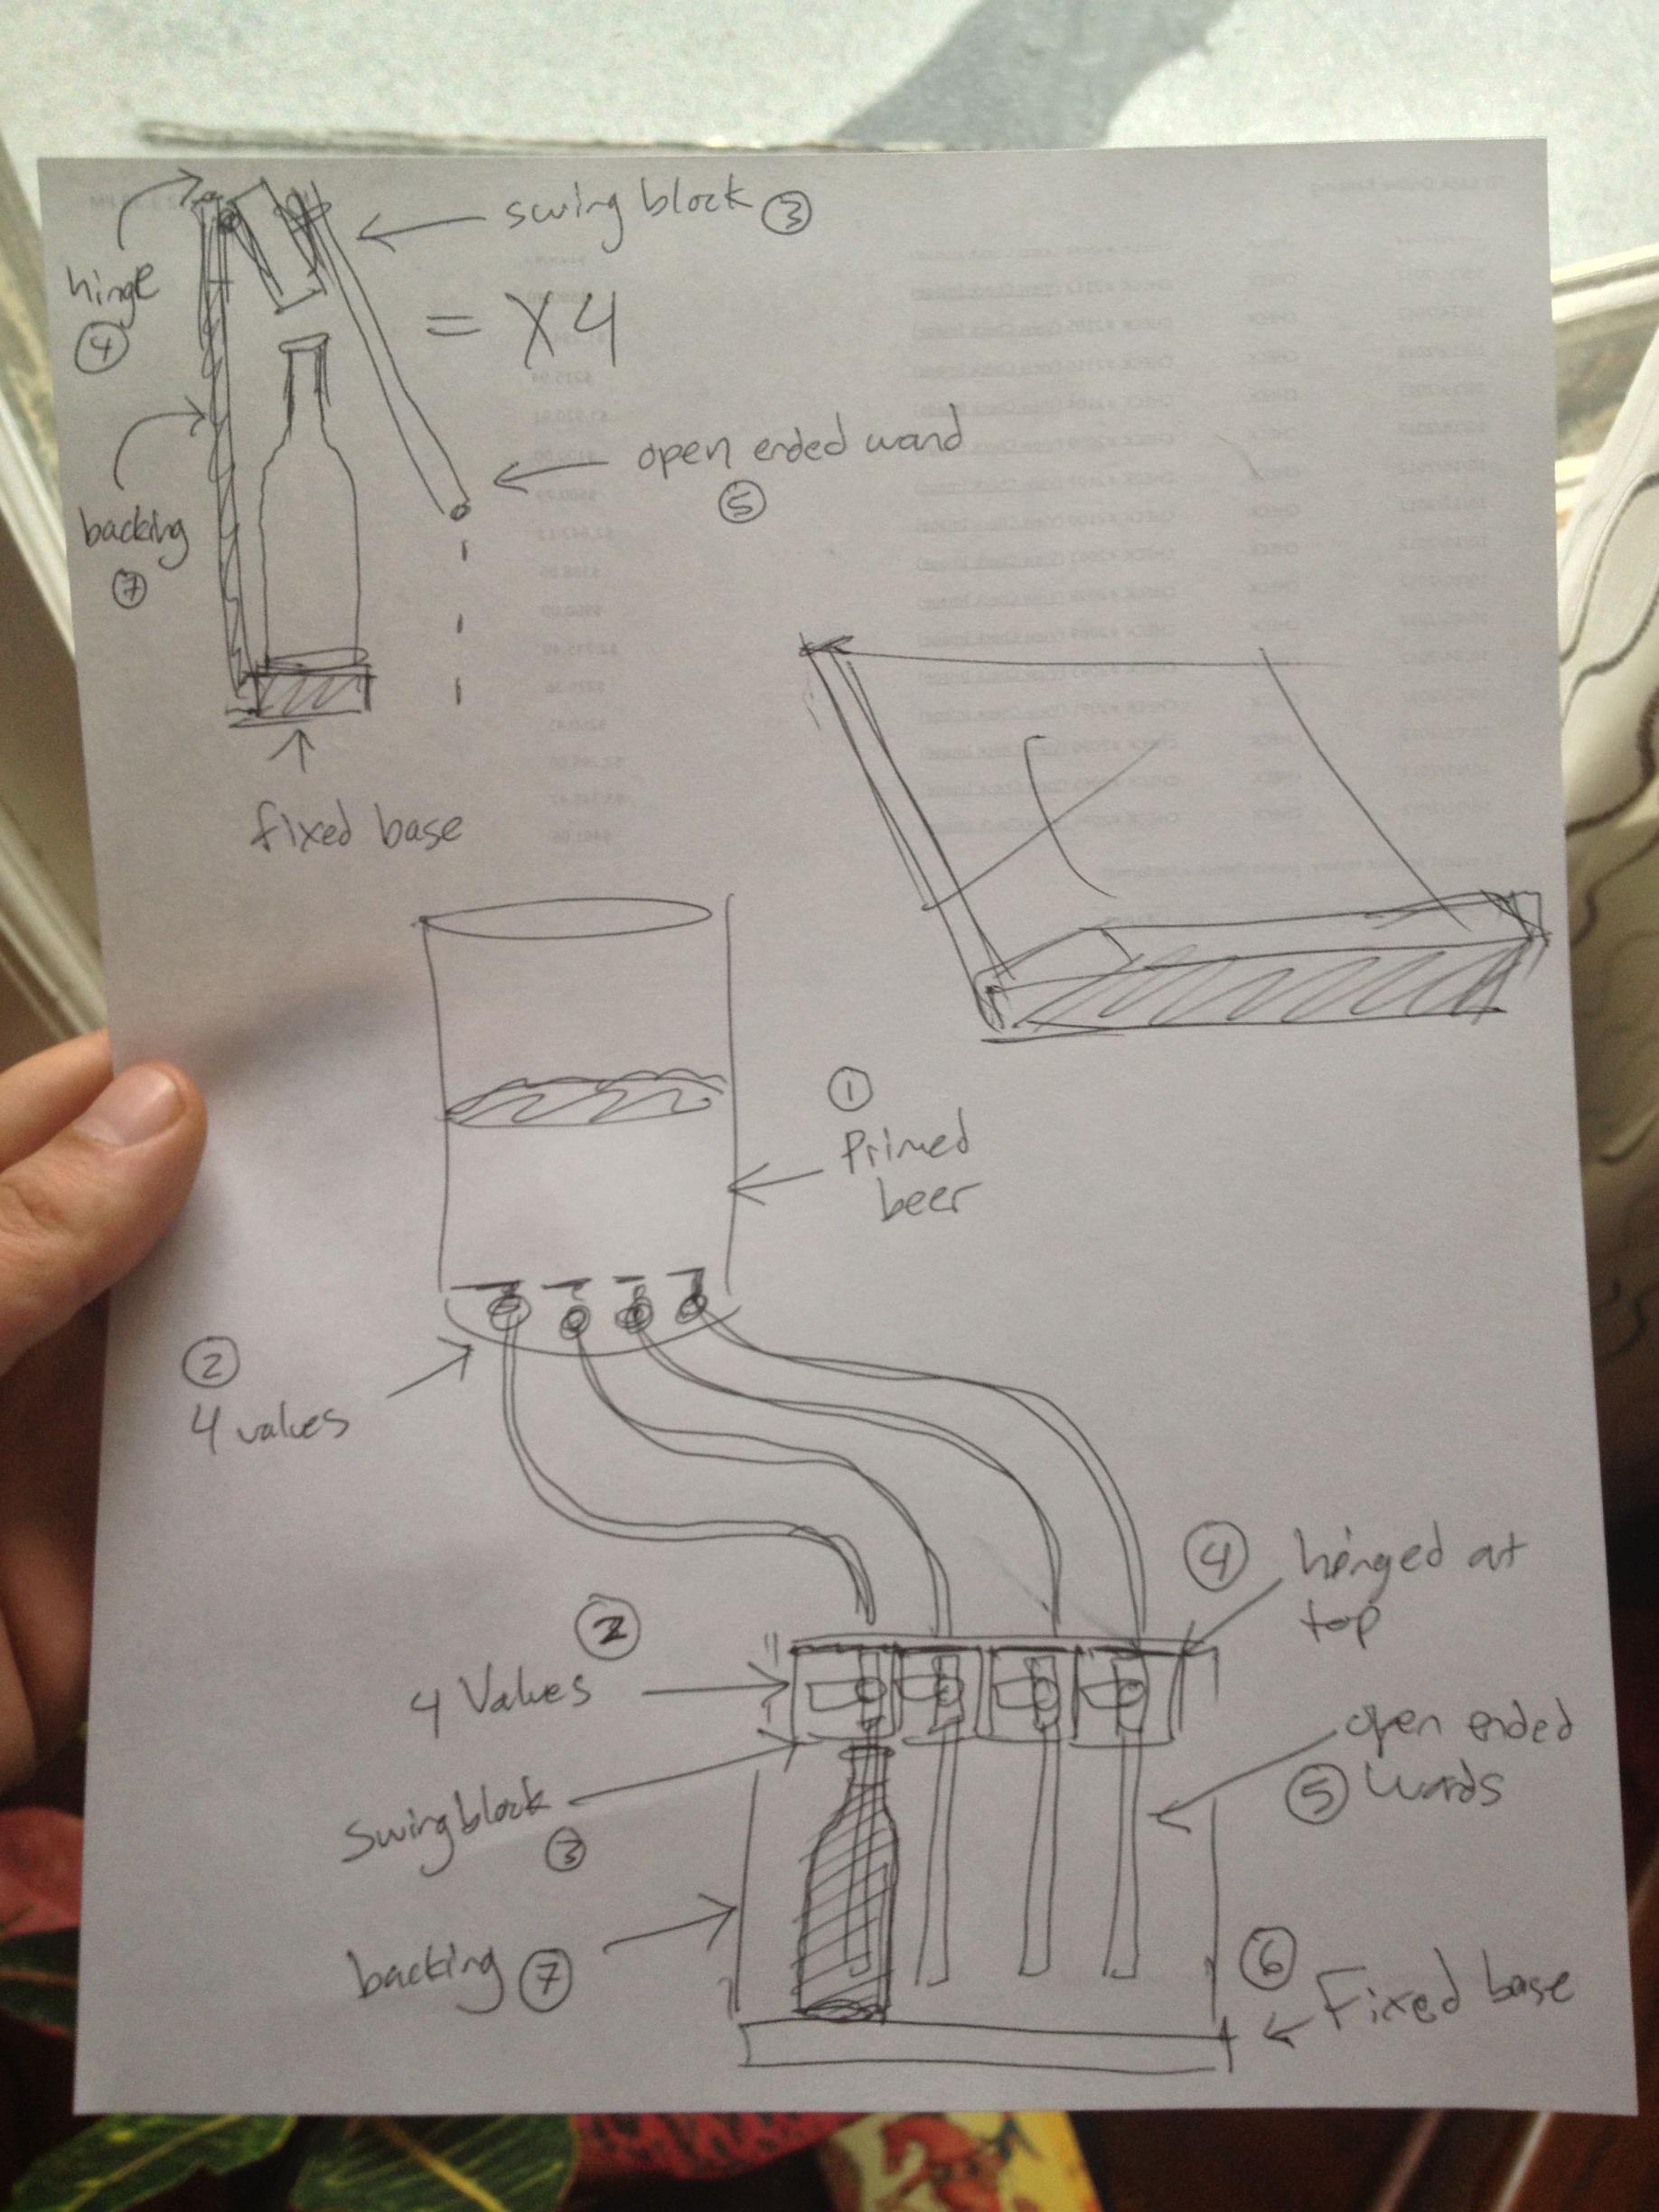
1) Primed beer
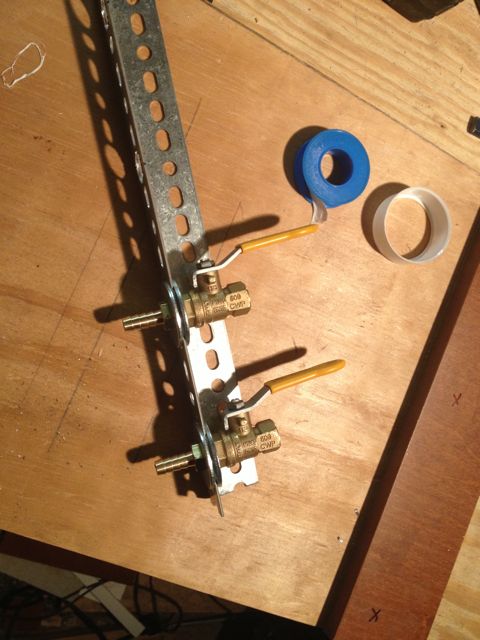
2) 4 valves
3) Swing block
4) Hinged at top
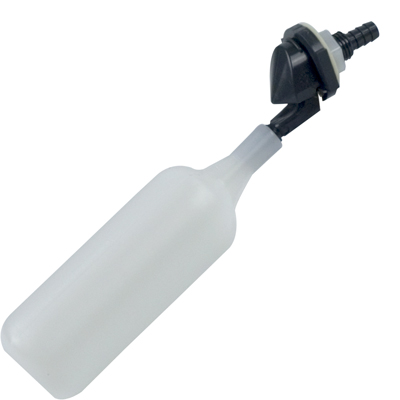
5) Open ended wands
6) Fixed base
7) Backing
Pros:
- Using bottle conditioning and gravity, means the design can be simple and cheap
- Can be built with readily available parts
- Likely cheaper than any off the shelf product
- So simple almost anyone could build it
- Easy to clean and sanitize
- Speeds up bottling roughly 4x
Cons:
- Gravity filling involves positioning a lot of liquid high in the air
- Force carbing not an option
- Less sanitary than moving liquid under pressure
- No auto-fill level
- Mistakes could be messy
- Filling the last couple bottles could be tricky
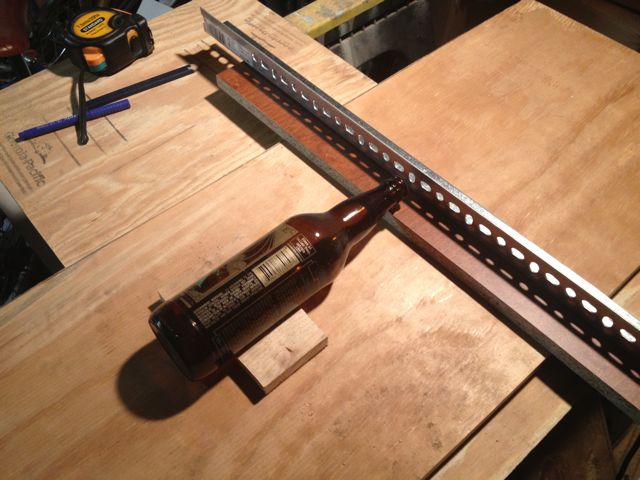
Note: Since drawing this, I've realized the hinge blocks probably aren't necessary and could be replaced with flexible tubing.
I figure bottle conditioning and gravity are both our friends at this point, so may as well design around that. So, here's the idea, we take one of those blue HDPE drums, and put 4 valves on it. Those 4 valves feed our bottling array. The bottling array is really simple. It's basically a shelf and backing, with 4 hinged bottle fillers and four valves affixed.
To bottle, we would prime the beer in the drum, hoist it (or pump the beer into it). Then we'd attach the bottling array, and open the valves on the drum, priming the filling lines. Next, we swing out each filler, and slide a bottle on, swinging it back to rest the bottle on the fixed base/shelf. As each bottle goes on, we open the valve just enough to get a fast enough flow. if timed right, we should be able to get into a rhythm, where by the time the last bottle is on, the first is ready to come off. allowing for continuous filling.
See the attached drawing for clarification. In case you can't read my scrawl, I numbered the text...
1) Primed beer
2) 4 valves
3) Swing block
4) Hinged at top
5) Open ended wands
6) Fixed base
7) Backing
Pros:
- Using bottle conditioning and gravity, means the design can be simple and cheap
- Can be built with readily available parts
- Likely cheaper than any off the shelf product
- So simple almost anyone could build it
- Easy to clean and sanitize
- Speeds up bottling roughly 4x
Cons:
- Gravity filling involves positioning a lot of liquid high in the air
- Force carbing not an option
- Less sanitary than moving liquid under pressure
- No auto-fill level
- Mistakes could be messy
- Filling the last couple bottles could be tricky
Note: Since drawing this, I've realized the hinge blocks probably aren't necessary and could be replaced with flexible tubing.


![Craft A Brew - Safale S-04 Dry Yeast - Fermentis - English Ale Dry Yeast - For English and American Ales and Hard Apple Ciders - Ingredients for Home Brewing - Beer Making Supplies - [1 Pack]](https://m.media-amazon.com/images/I/41fVGNh6JfL._SL500_.jpg)


")