• Please visit and share your knowledge at our sister communities:
  • If you have not, please join our official Homebrewing Facebook Group!

    Homebrewing Facebook Group

DIY grain mill in the works...

Homebrew Talk

Help Support Homebrew Talk:

This site may earn a commission from merchant affiliate links, including eBay, Amazon, and others.

clintopher

Well-Known Member
Joined
Aug 4, 2007
Messages
50
Reaction score
1
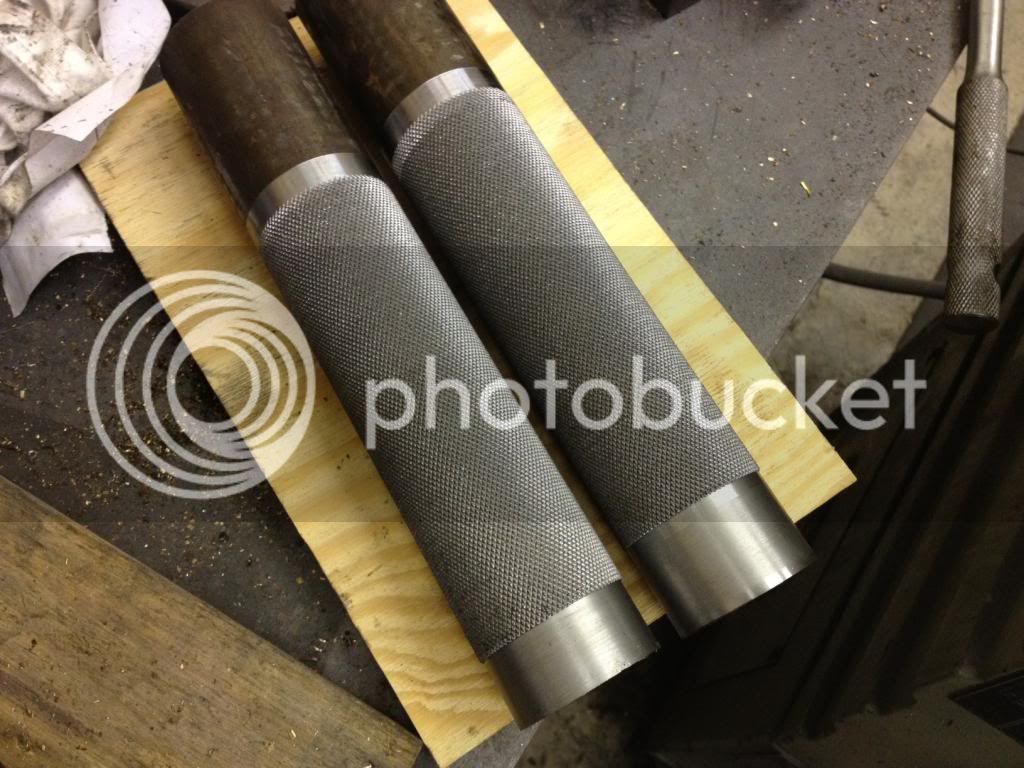
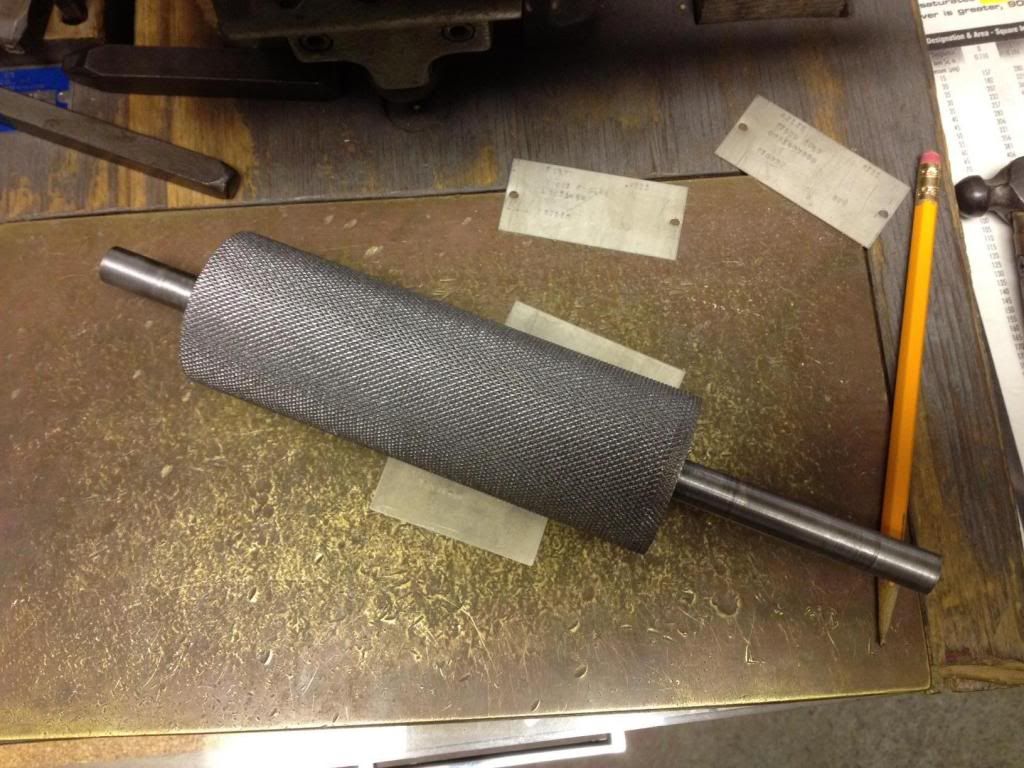
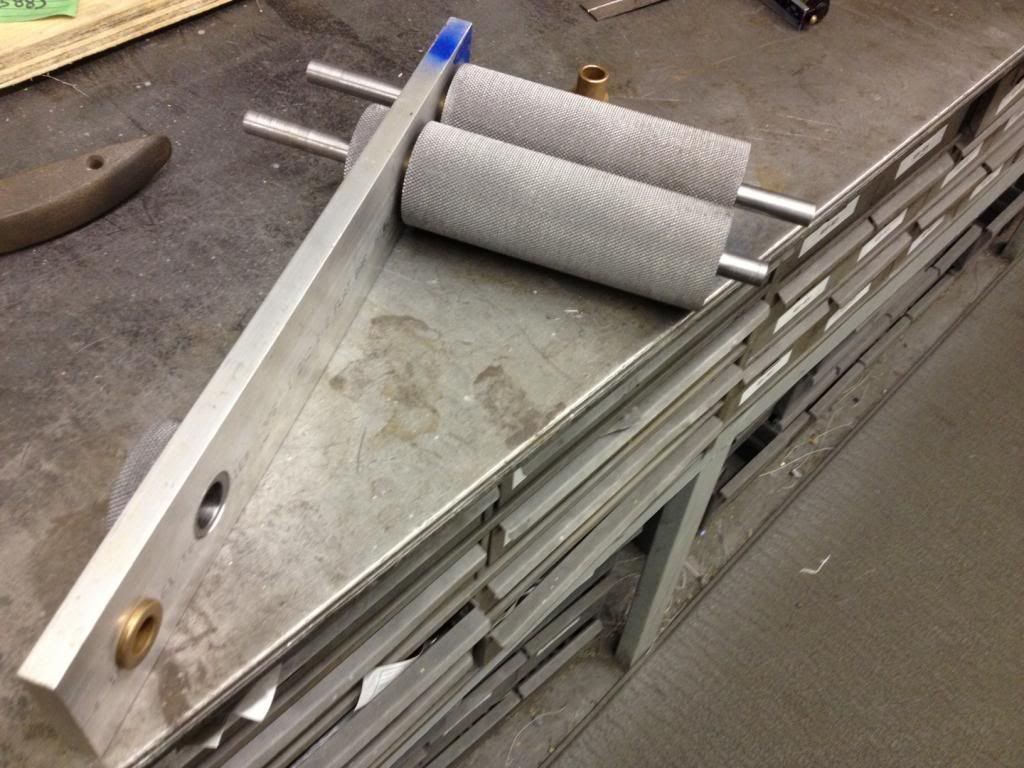
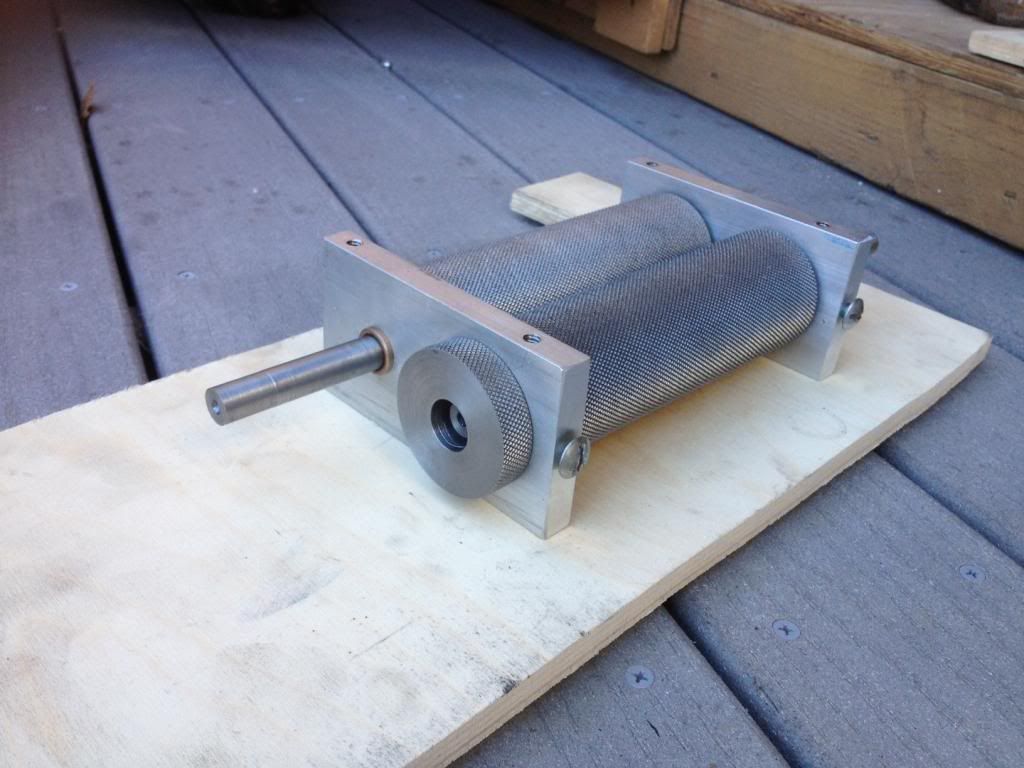
I'm doing this a little backwards. In a perfect world I would procure the bearings first, machine the rollers to dimension, and then put on the knurled finish. But the world isn't perfect and I don't know how long I'll have access to the knurling tool so I did that first. Anyway...first step in reverse is complete...knurled 2" 1018 round stock.

photo-1.jpg
 
Step two complete. I didn't take a pic of both rollers but they look the same. I got an off center hole drilled into some round stock for the adjuster knobs but haven't turned them down or knurled the yet. Will get back to work on that Monday.

photo-2.jpg
 
It's been a while since I worked on this at all but here's the latest update from yesterday. Just a little more work and I should be in business.

photo-3_zps22b331dd.jpg
 
Very similar to what I have in mind for some 1-3/4 round stock I found in the "Scrap pile" Now, I just have to furnish my machinist with enough home brew to do the work! ha!
 
Quick question... How are you locking your adjustment knob? I see what you did. Looks like you took some stock and turned it down and bored an off center hole to carry a bushing. I just don't see any lock for the adjustment.
 
Quick question... How are you locking your adjustment knob? I see what you did. Looks like you took some stock and turned it down and bored an off center hole to carry a bushing. I just don't see any lock for the adjustment.

I cut the bar stock down today. Didn't get pictures but I'll take some tomorrow. Anyway, on the adjusting side I'm going to drill and tap the end for a 1/4" 20tpi bolt and use the bolts to lock the adjusting knob down. I put some grooves in the adjusting knob for the set screws. Will take pictures of that tomorrow to and put it up here.

Clint
 
Picture tapping the set screw holes. I finished construction today but didn't get a pic. Will post one up once I get a hopper built. I must have made a bad measurement or done some bad math...my gap only opens up to .040". My adjusters are offset .030" so I was hoping to get an adjustment from .025-.055 but oh well. .040 should be fine and if it isn't I'll adjust.


tapping_zpsfdc46f36.jpg
 
Nice. Will you be able to heat treat the rollers? EDIT: I guess 1018 usually doesn't benefit from hardening....not really needed since the rollers will only crush grain.
 
I have some stainless 1.750 stock that I am thinking about building a mill out of but I do not have a knurling tool and honestly the thought of cutting all that by hand just turns me off kinda.

That and I think a instead of having a drive roller and a passive roller I would want to gear the two together. Not sure how good that would work though with .030 adjustment. Seems like you would end up with no backlash at one end of the spectrum and some really sloppy gears at the other end.

Bugger I need to think it through some more I guess
 
Here's the semi finished product. Still need to cut out and mount a piece of plywood that will serve as the bottom/sit on top of a bucket. The piece it's mounted to right now will serve as the top...still need to get it to final dimension and attach the hopper to it (a metal halide reflector that was laying around the shop w/out a fixture in it so I figured it needed a good home.)

photo-3_zps5db65ecf.jpg
 
I have some stainless 1.750 stock that I am thinking about building a mill out of but I do not have a knurling tool and honestly the thought of cutting all that by hand just turns me off kinda.

That and I think a instead of having a drive roller and a passive roller I would want to gear the two together. Not sure how good that would work though with .030 adjustment. Seems like you would end up with no backlash at one end of the spectrum and some really sloppy gears at the other end.

Bugger I need to think it through some more I guess

Knurling tools can be had on ebay for 20 or 30 bucks. Do you have a lathe or access to one? That's the hard part. I'm lucky enough to work in an industry that has all kinds of neat tools.

Regarding the gears...only way I can think of how to do that without affecting the gap on the gears would be to build a three roller mill...gear the drive roller and the fixed roller. Then run a belt/pulley system from the gear driven roller to the adjustable roller. Does that make sense?
 
The only money I have into this project is in the bushings and they were only a touch over a buck a piece. Unless you really enjoy building things, and I get that, I wouldn't bother building one when you can get one for around a hundred dollars. Granted, I'm a hack machinist if I'm even that good, but I've got 8 hours so into this thing so far. The price these things are going for really isn't a bad deal.
 
I was looking at your finished product and had a brain storm with the knurled wheel you have on the passive wheel. I am thinking two pulleys on the other side and a belt with a spring tensioner. Hehe now I am getting the fever and my wife will not see me for awhile :)

Are you going to build your hopper yourself. That is the one thing I will not be able to do I think since I do not have a brake nor the knowledge on how to use one. Lucky me though I have a brother in law who makes duct work and has one.

You sir are not a hack but I am truly a hack. I have both a mill and a lathe and can turn out some fair parts but I think I would have well over 8 hours into the mill when I am done. And while it would be faster and easier to buy one I enjoy a little shop time myself
 
You sir are not a hack but I am truly a hack. I have both a mill and a lathe and can turn out some fair parts but I think I would have well over 8 hours into the mill when I am done. And while it would be faster and easier to buy one I enjoy a little shop time myself

I think this paragraph can sum up this entire diy sub forum.:mug:
 
Would you suggest using solid bronze bushings like you did or... if I can get sealed ball bearings would they be tough enough to stand up to the abuse a mill would give it?
 
I took what I could make out from the photos and worked up a SolidWorks model of what the OP has been building.

A while ago, I picked out a piece of 1-3/4" diameter steel from the scrap bin. (yes, the boss said I could have it...) I talked to my machinist and we are going to work out a deal with homebrew and maybe some $ for the machining duties.

This is what I have come up with as far as design. The rollers are 1.75 diameter x 6". The adjustment knobs have an eccentric hole in them that mounts the bronze bearing and thus will allow the mill to be adjusted. I have some fine tuning left to do on the adjustment. It actually adjusts way too much right now.

Here it is in full view:

GRAIN%20MILL%20RENDER%20RESIZED.JPG


Here is a view sectioned longitudinally through the driven roller.

GRAIN%20MILL%20SECTION%20RENDER%20RESIZED.JPG
 
I'm sure the bearings would hold up but the bushings are much cheaper and they also don't have to be precision fit like a bearing would. Actually, I had another idea using pillow block bearings but at a dollar and change per bushing it was a no brainer.

You're drawing looks good to me. As far as adjustment goes, I'd rather have too much than not enough. Mine opens up just enough. I haven't remeasured it or recalculated where I went wrong yet, and may not if the crush is good, but I would have like more adjustment in mine.
 
Are you going to build your hopper yourself. That is the one thing I will not be able to do I think since I do not have a brake nor the knowledge on how to use one. Lucky me though I have a brother in law who makes duct work and has one.

My hopper is just a metal halide light reflector. It's huge and I'll never need it's full capacity but it was just laying around the shop without a light fixture in it so it found it's way into my truck.
 
I made a few small adjustments.
- Recessed the flange on the bearings to leave only a 0.020" gap between the side plates and the rollers.
- Adjusted the eccentrics so I get a 0.010" min gap and a 0.190" max gap.

This is still a heck of a lot of adjustment, but if i ever wanted to crack any other non-oily grain it would accommodate it.

Top view min adjustment of 0.010"
GRAIN%20MILL%20TOP%201.JPG


Top view max adjustment of 0.190"
GRAIN%20MILL%20TOP%202.JPG
 
Thanks for the answers. I pretty much came to the same conclusion about the bearings vs. bushings. I did however go with food grade oiled busing/bearings. They were like $1.90 each... not bad. I have the bearings and the aluminum side plates on order. I'm excited to get this project going.
 
wow this is getting good. Since I have access to a mill and a lath and a knurling tool. I think I will make one as well. How are you guys locking your eccentric in place?
 
wow this is getting good. Since I have access to a mill and a lath and a knurling tool. I think I will make one as well. How are you guys locking your eccentric in place?

Once I get the prints done, I can email you the PDF files... or just post them up here if you would like...

I am locking the eccentrics in with that groove cut into the boss passing through the side plate. There will be a 1/4-20 bolt that threads down into the groove and locks the adjustment in as well as locking the lateral movement of the eccentric.
 
Back
Top