DIY Counterflow Wort Chiller Build

Homebrew Talk - Beer, Wine, Mead, & Cider Brewing Discussion Forum

Help Support Homebrew Talk - Beer, Wine, Mead, & Cider Brewing Discussion Forum:

This site may earn a commission from merchant affiliate links, including eBay, Amazon, and others.

jmpreiks

Well-Known Member
Joined
Jun 23, 2015
Messages
166
Reaction score
81
Location
Tallahassee
Just wanted to share a few pics of my counterflow wort chiller build that I did this past weekend. Hopefully it will inspire some more people to make them. :) Thanks to Tiber_Brew for my inspiration! https://www.homebrewtalk.com/showthread.php?t=182236

LzZfRbU.jpg


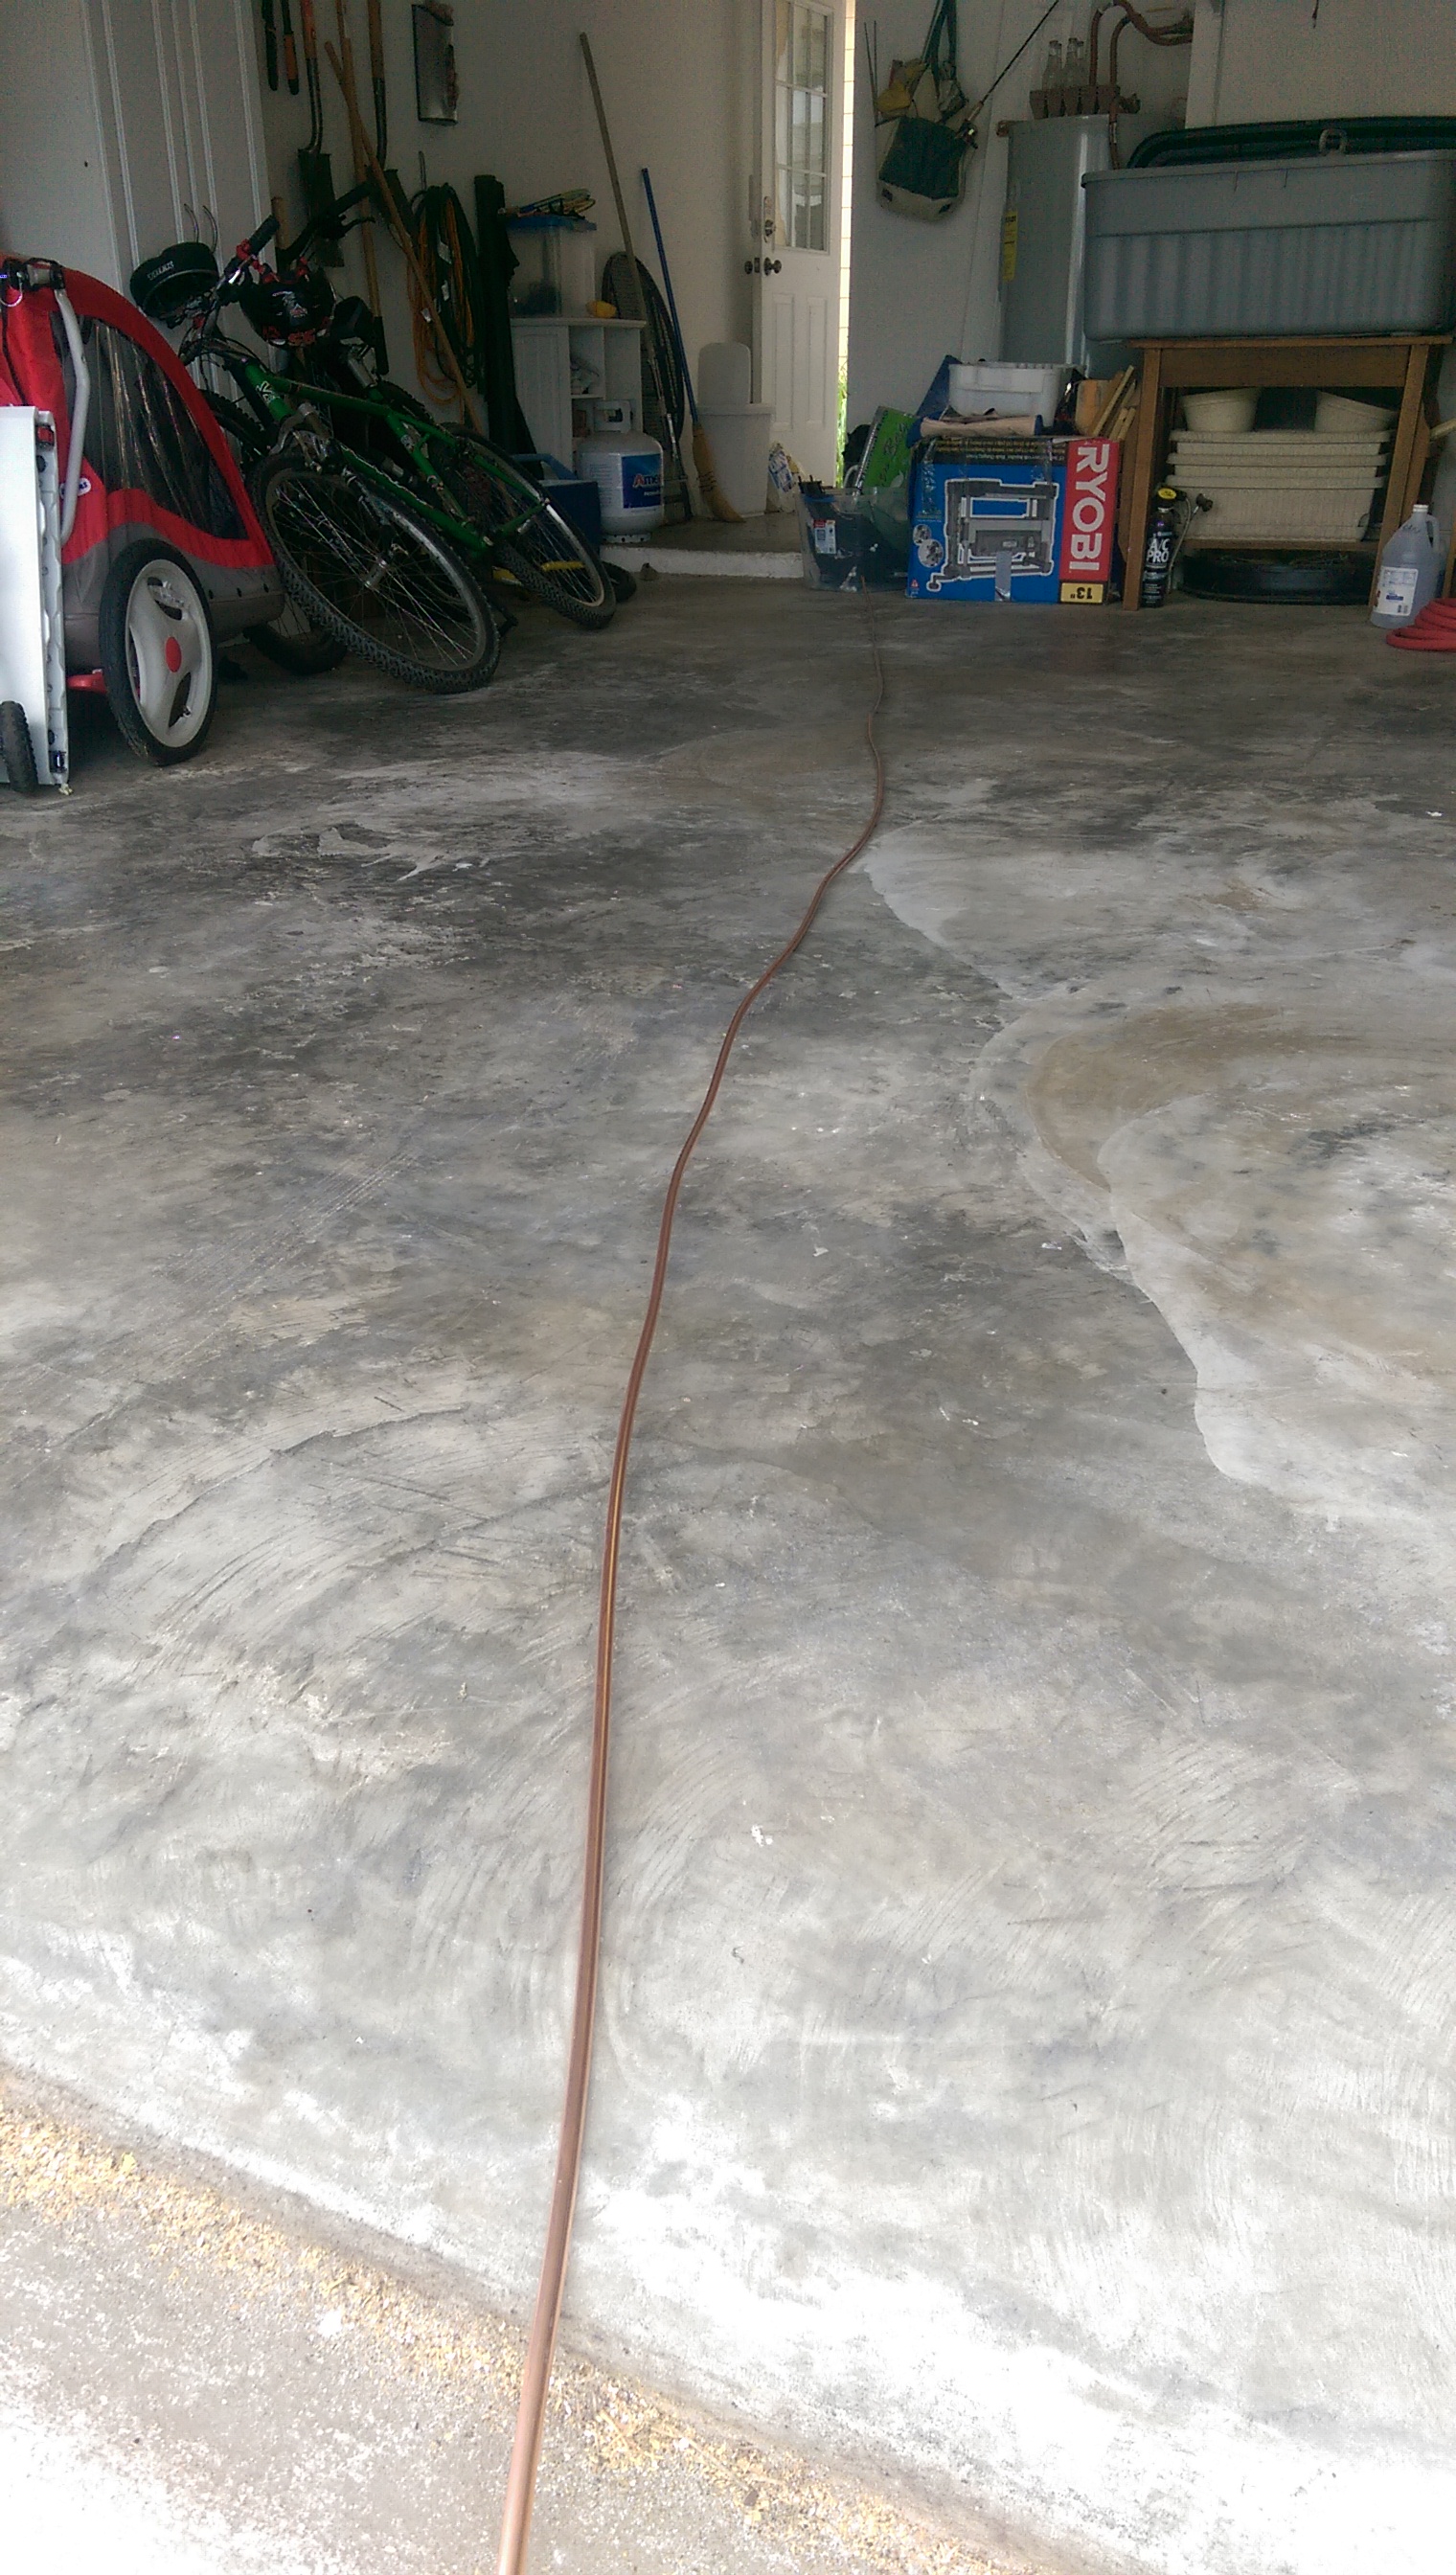
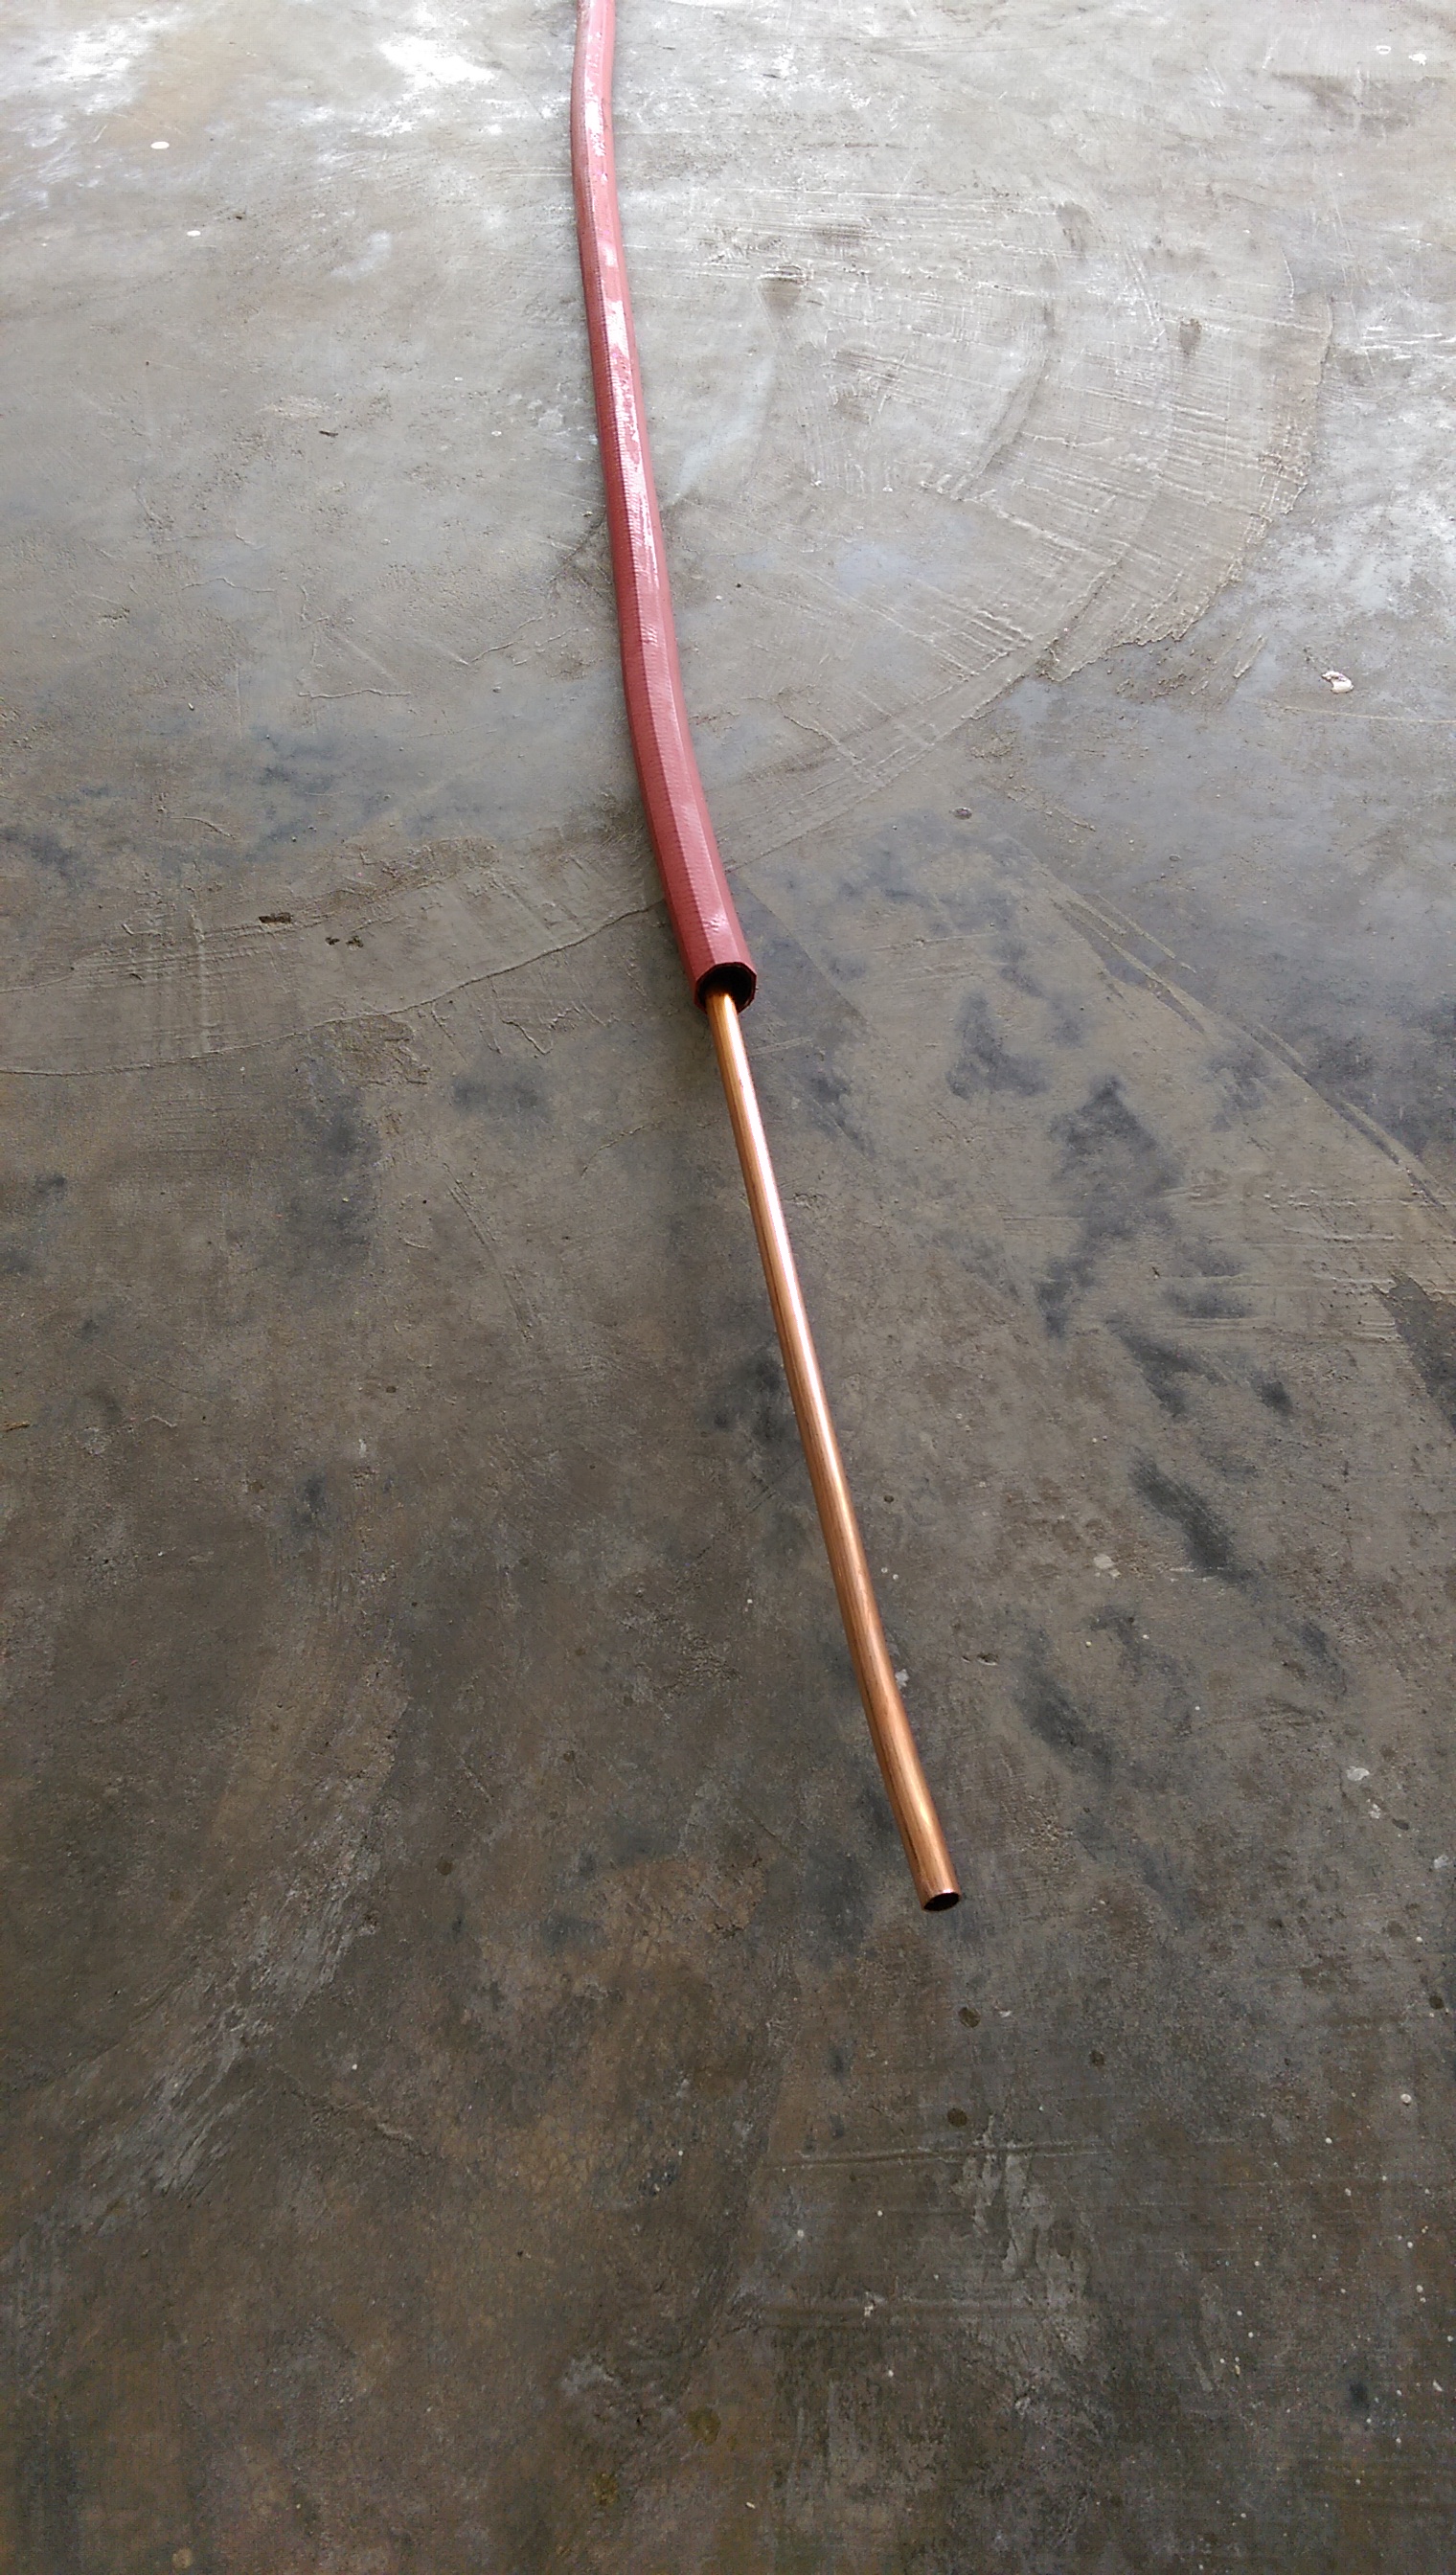
Uncoiled the 25' of 3/8" O.D. copper tubing (http://www.amazon.com/gp/product/B001AH8HDO/?tag=skimlinks_replacement-20):
Ey91KlB.jpg


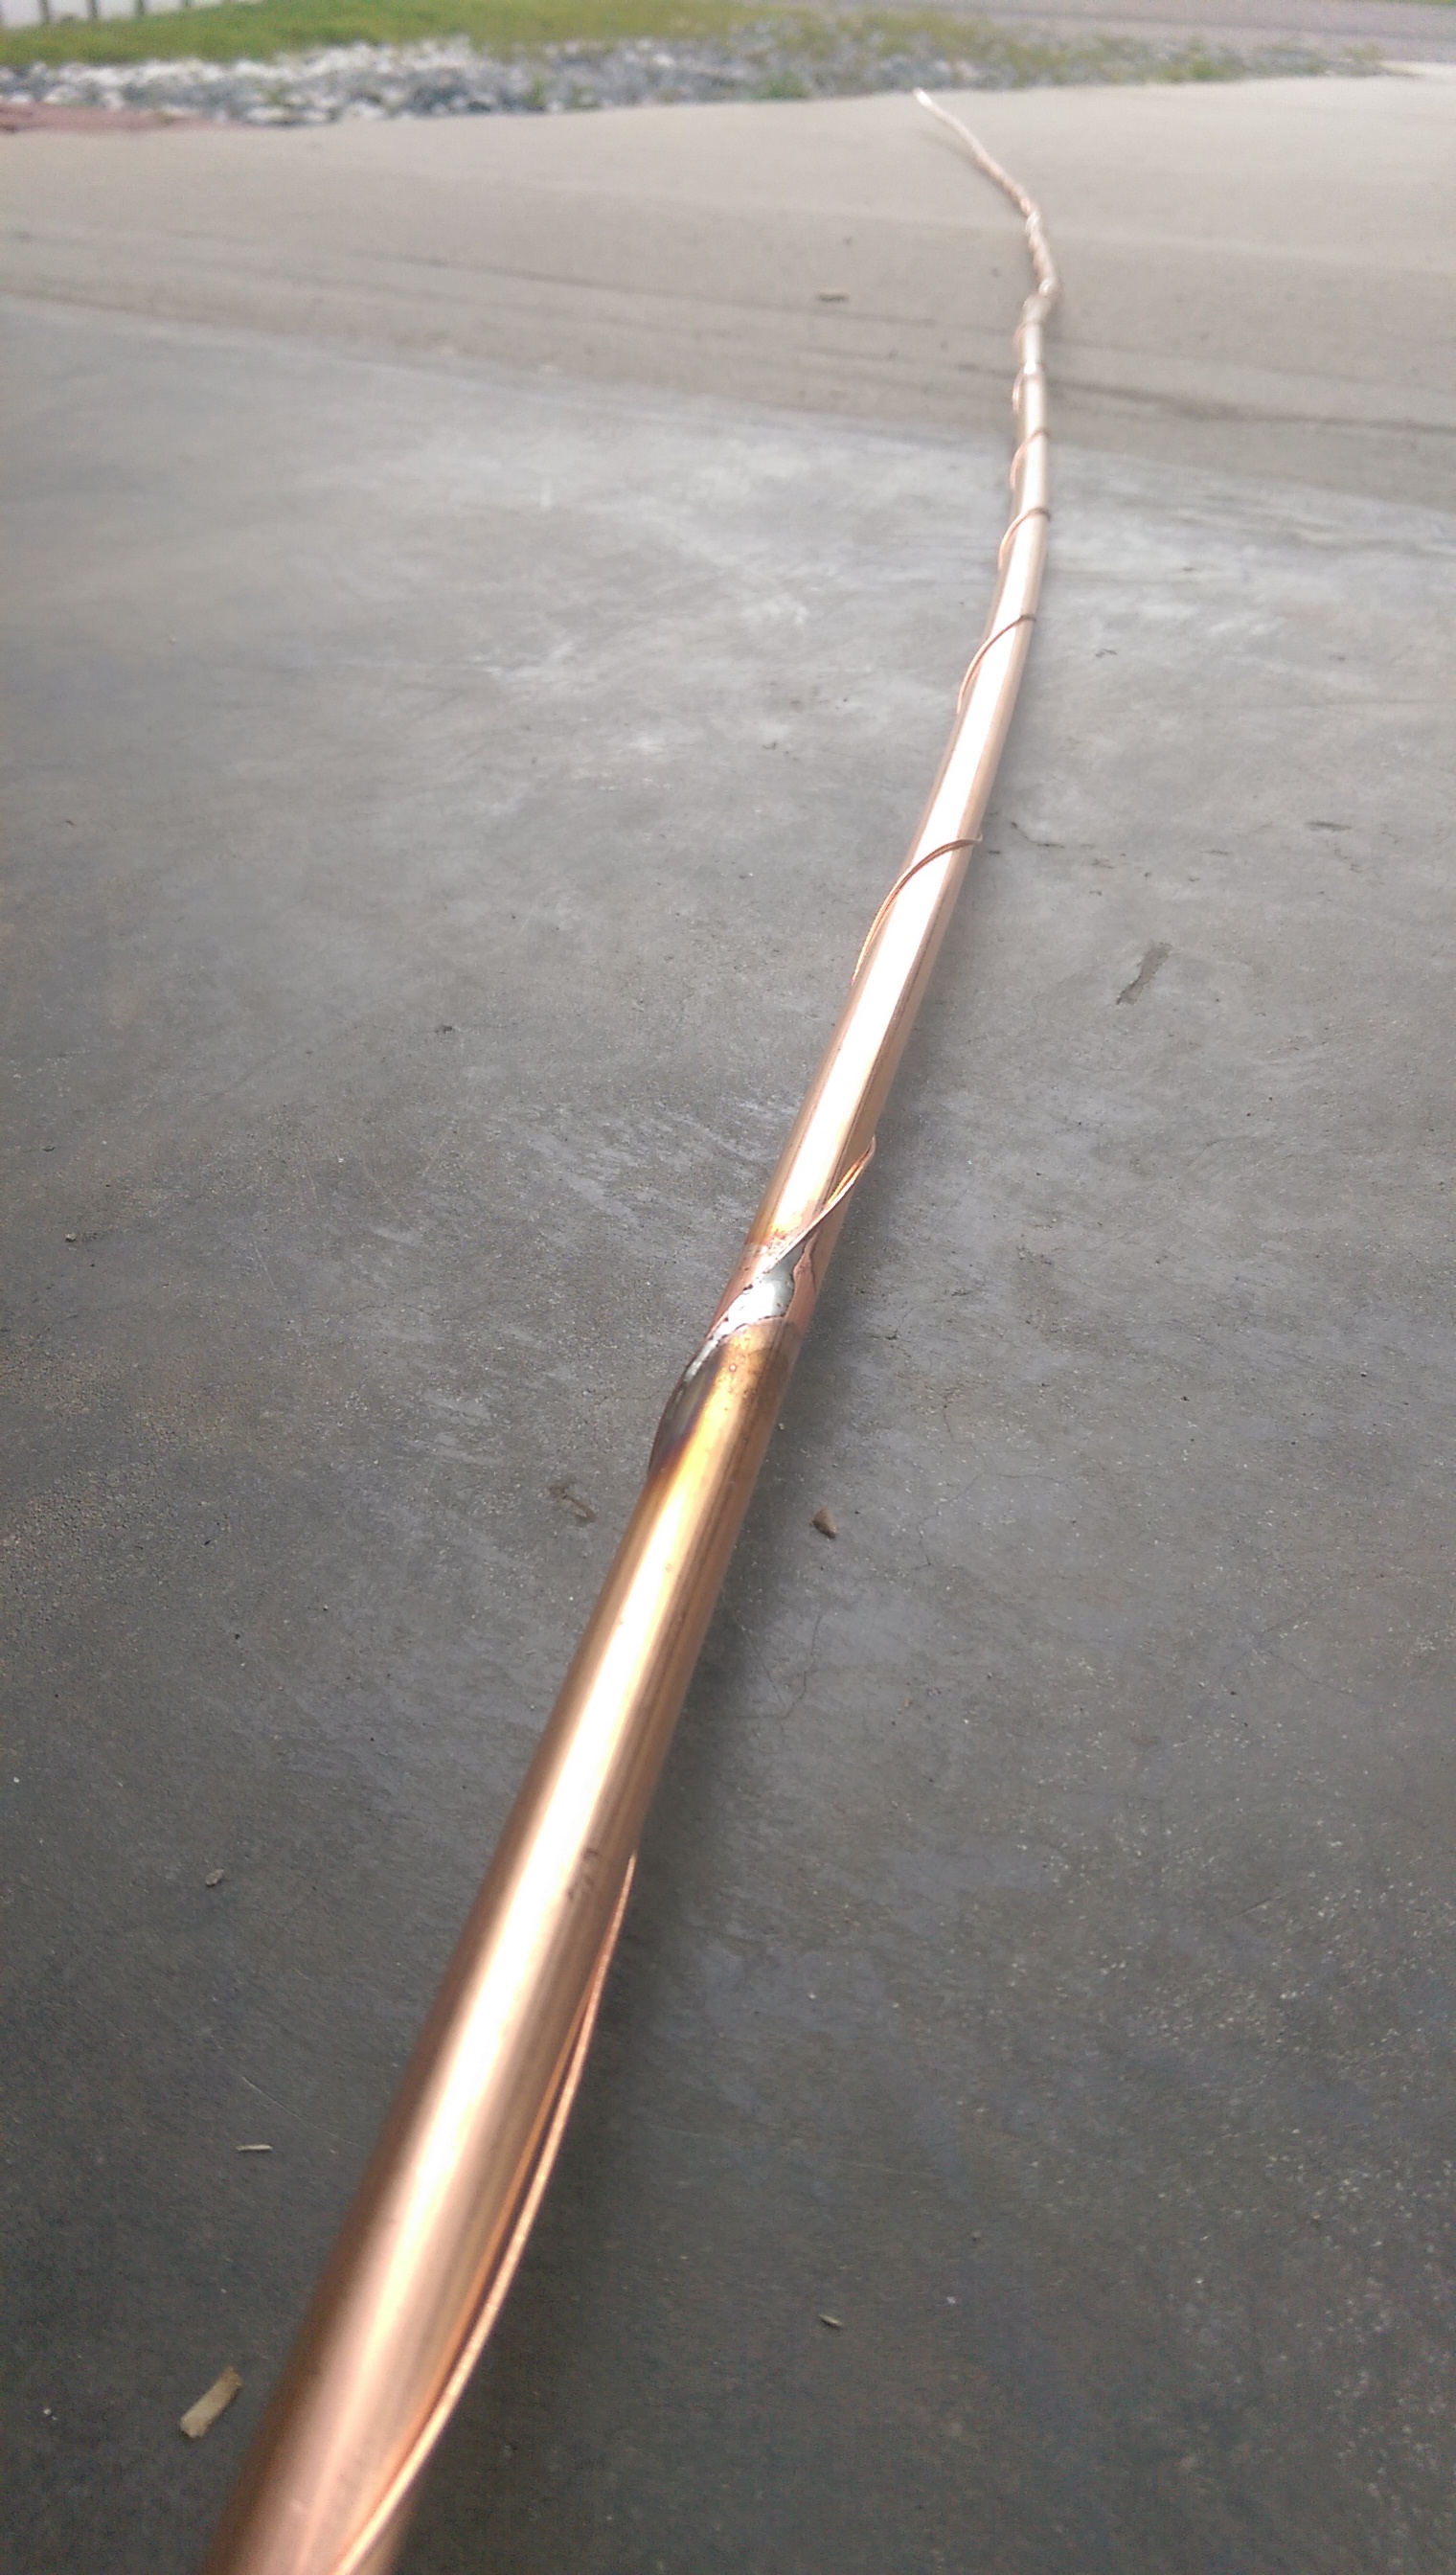
Spot soldered on a spiral of 20 gauge copper wire (http://www.amazon.com/gp/product/B000WC8ULM/?tag=skimlinks_replacement-20), this adds turbulence to the flow to increase heat transfer:
LXwxSi5.jpg


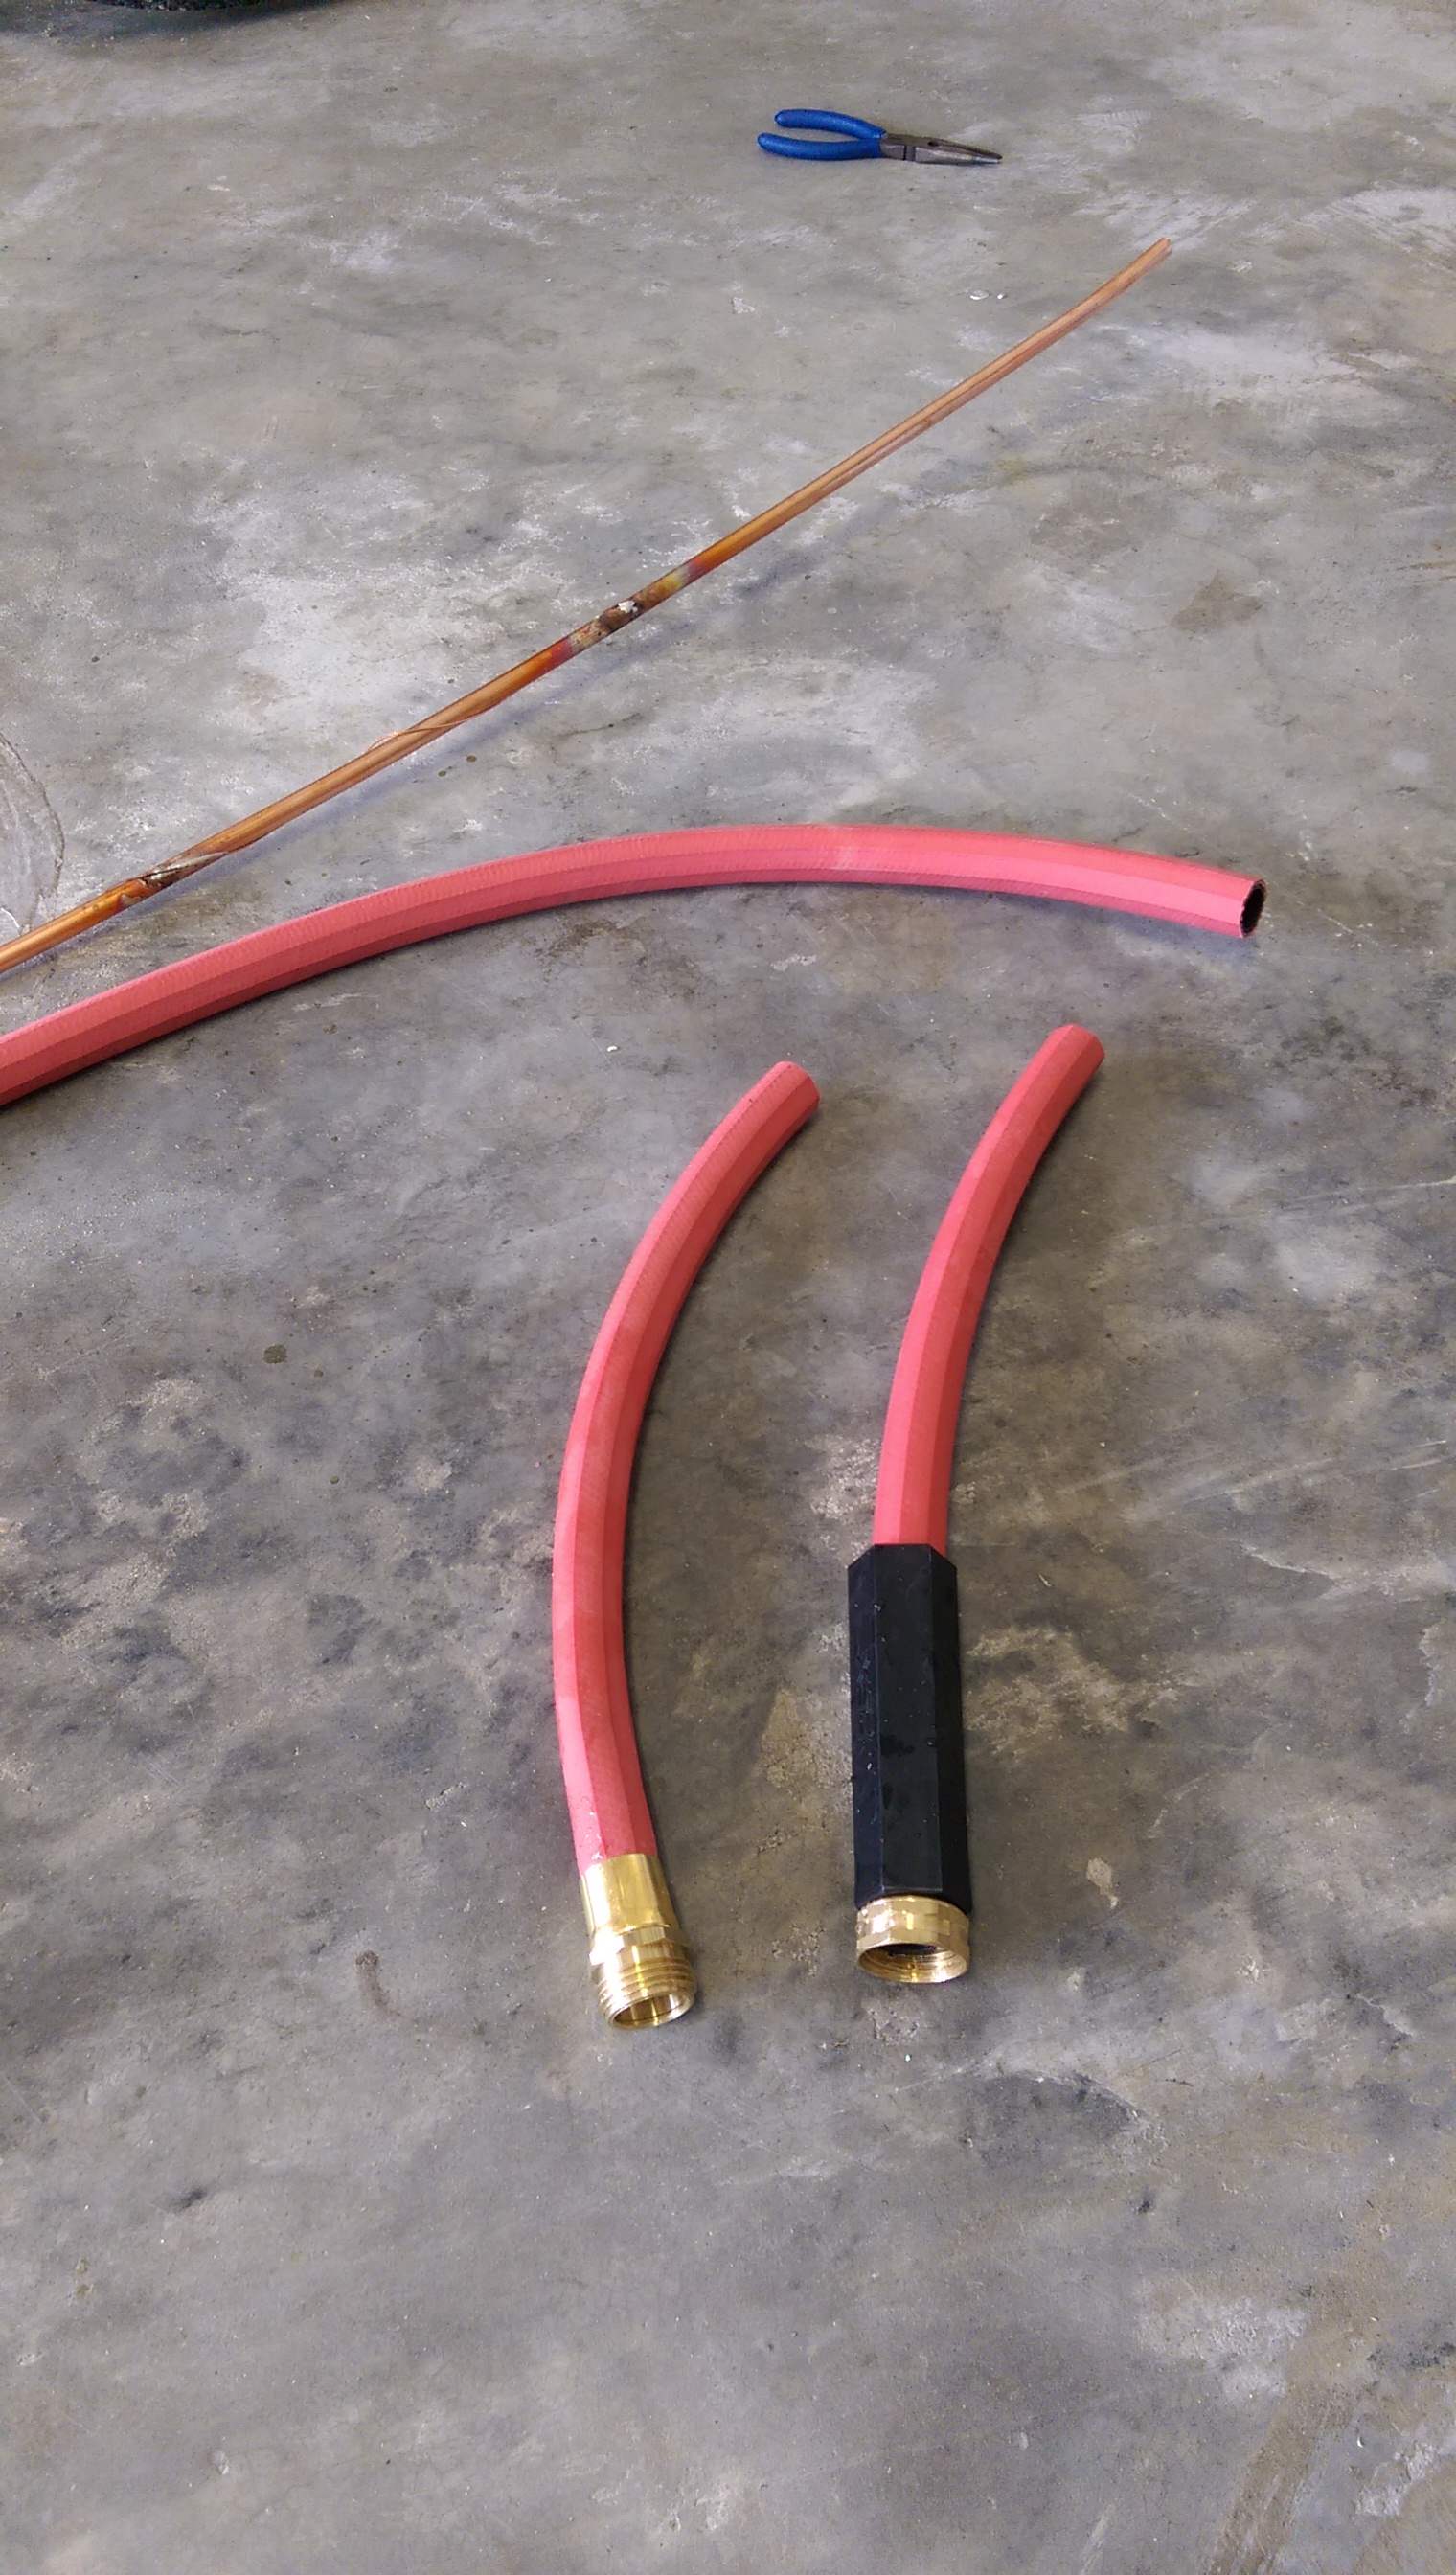
Cut off the ends of a 25' high temp rubber hose (http://www.amazon.com/gp/product/B00002N8OW/?tag=skimlinks_replacement-20):
feHgJti.jpg


Slid the tubing into the hose with a little soapy water:
Wv2rclJ.jpg


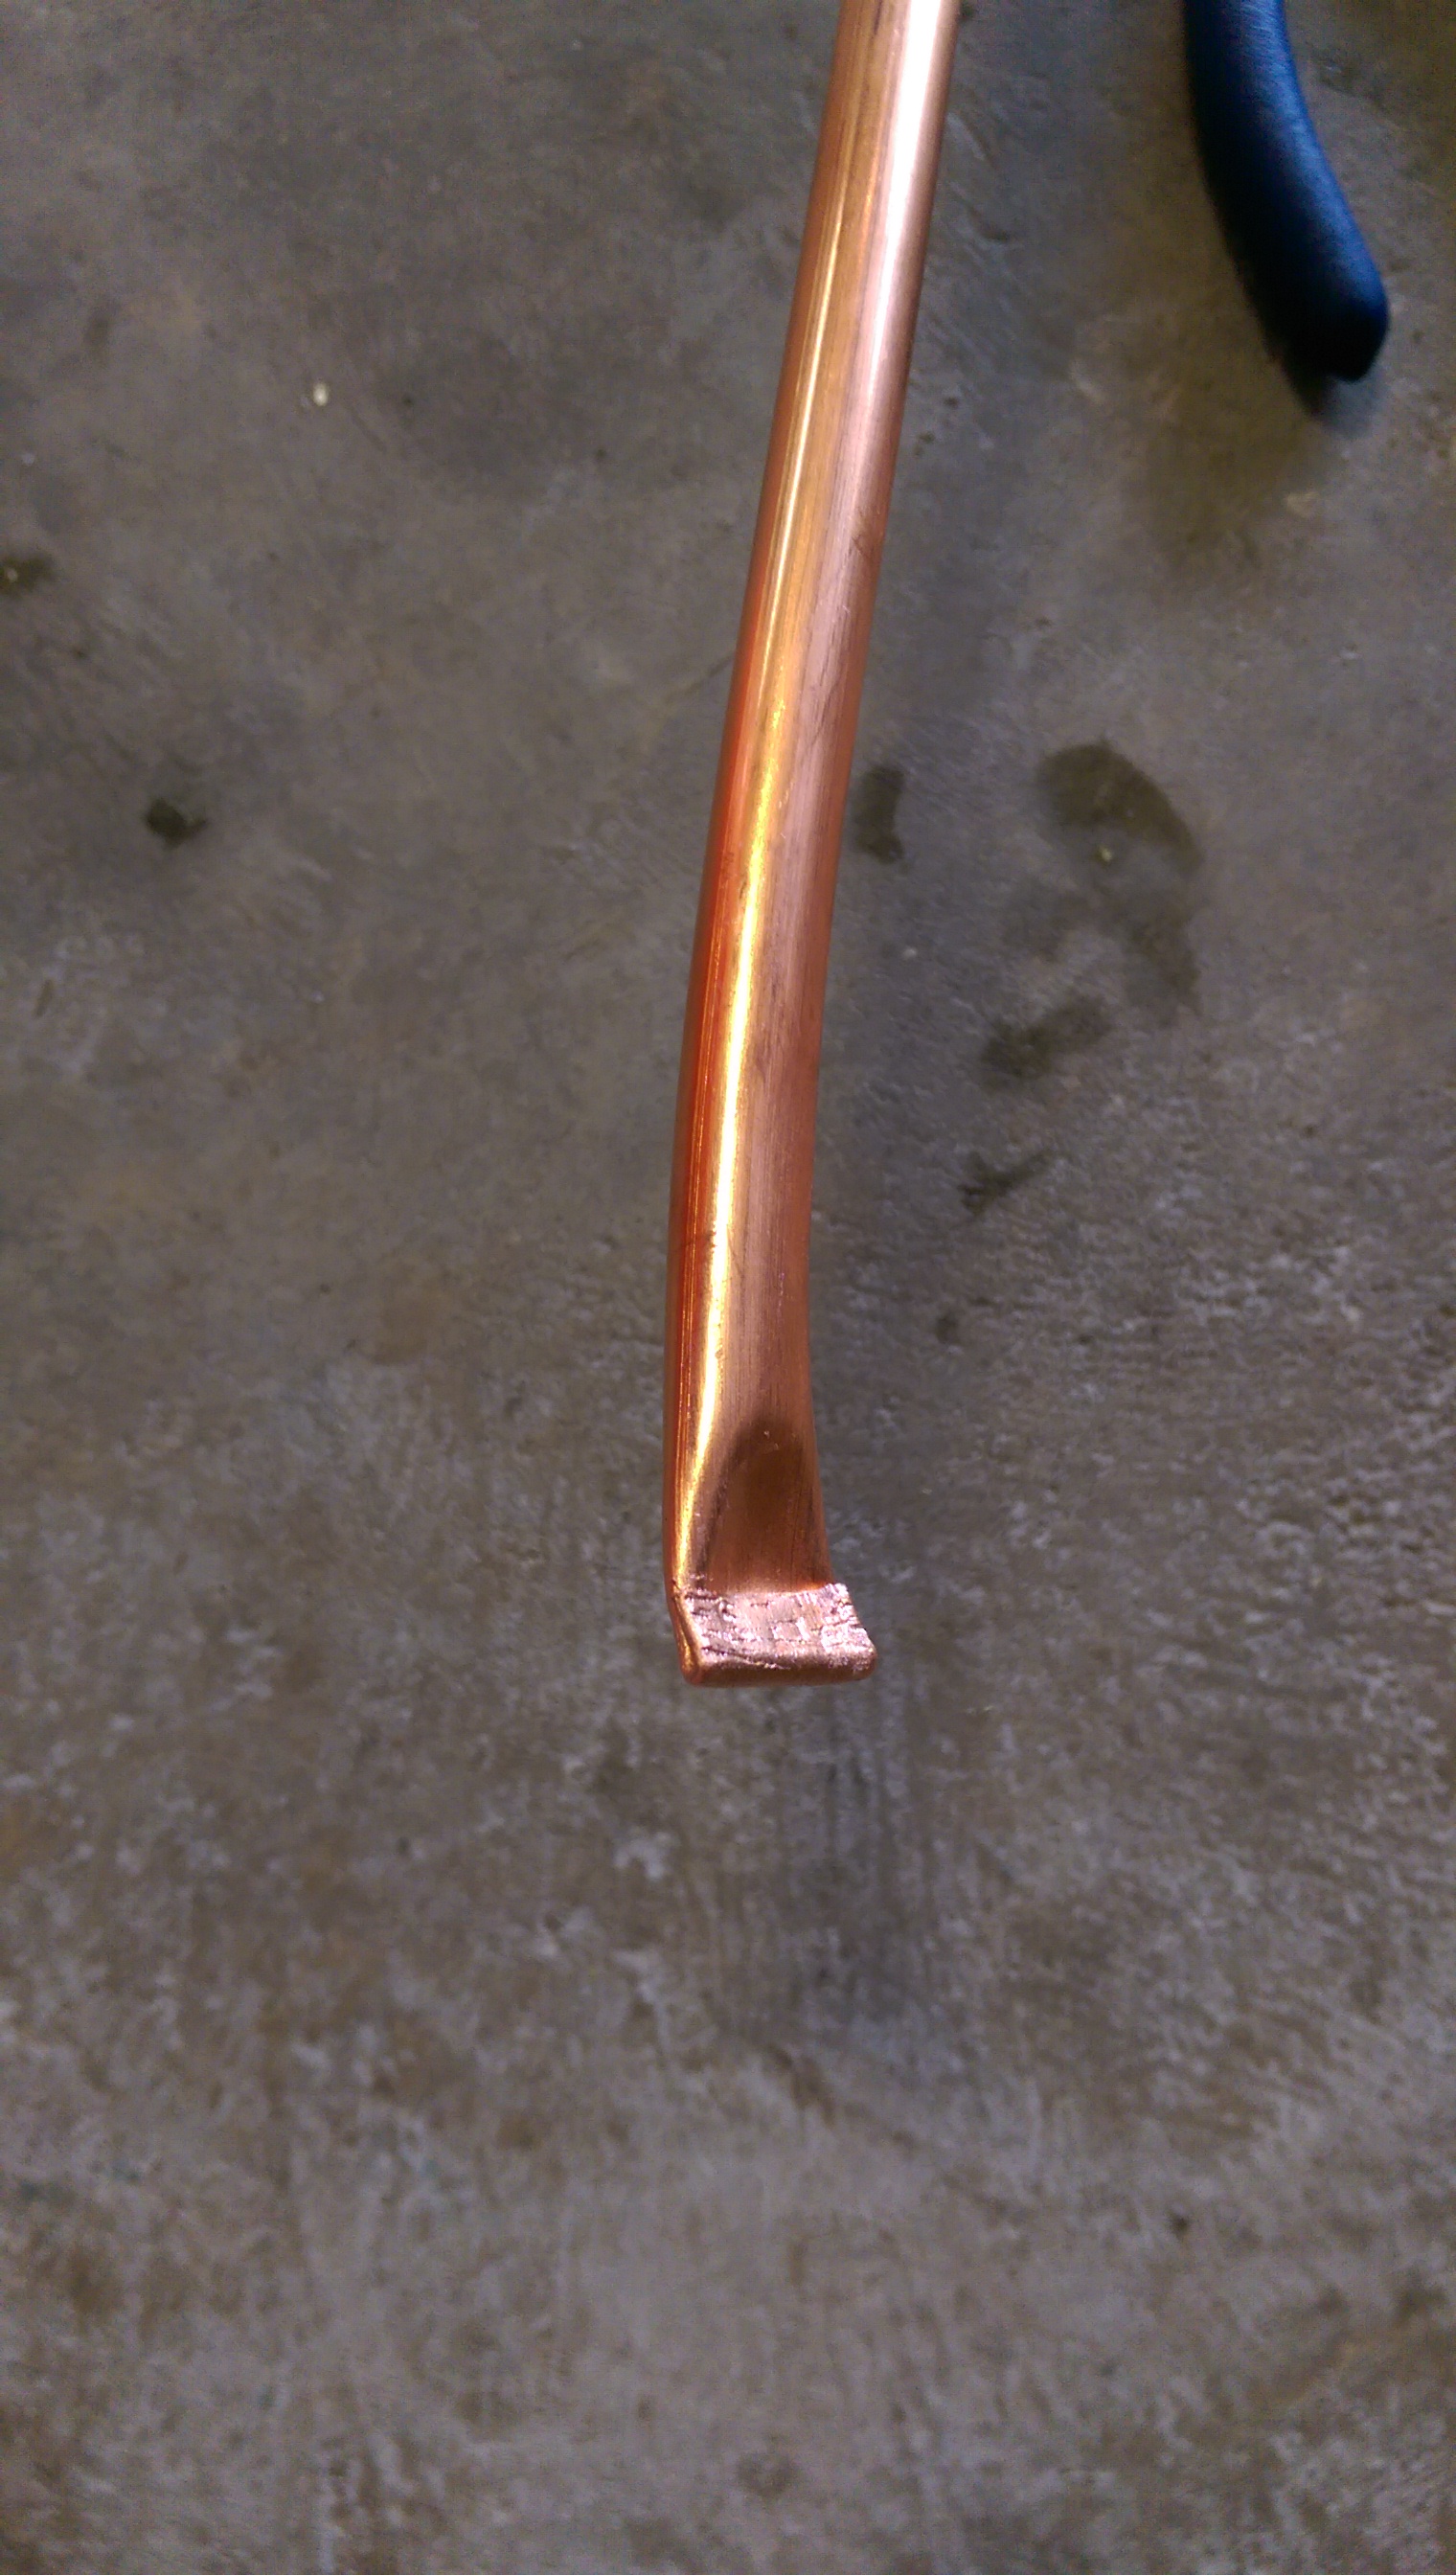
Filled the tubing with water and crimped the ends to avoid kinking the tubing:
6NVwVyU.jpg


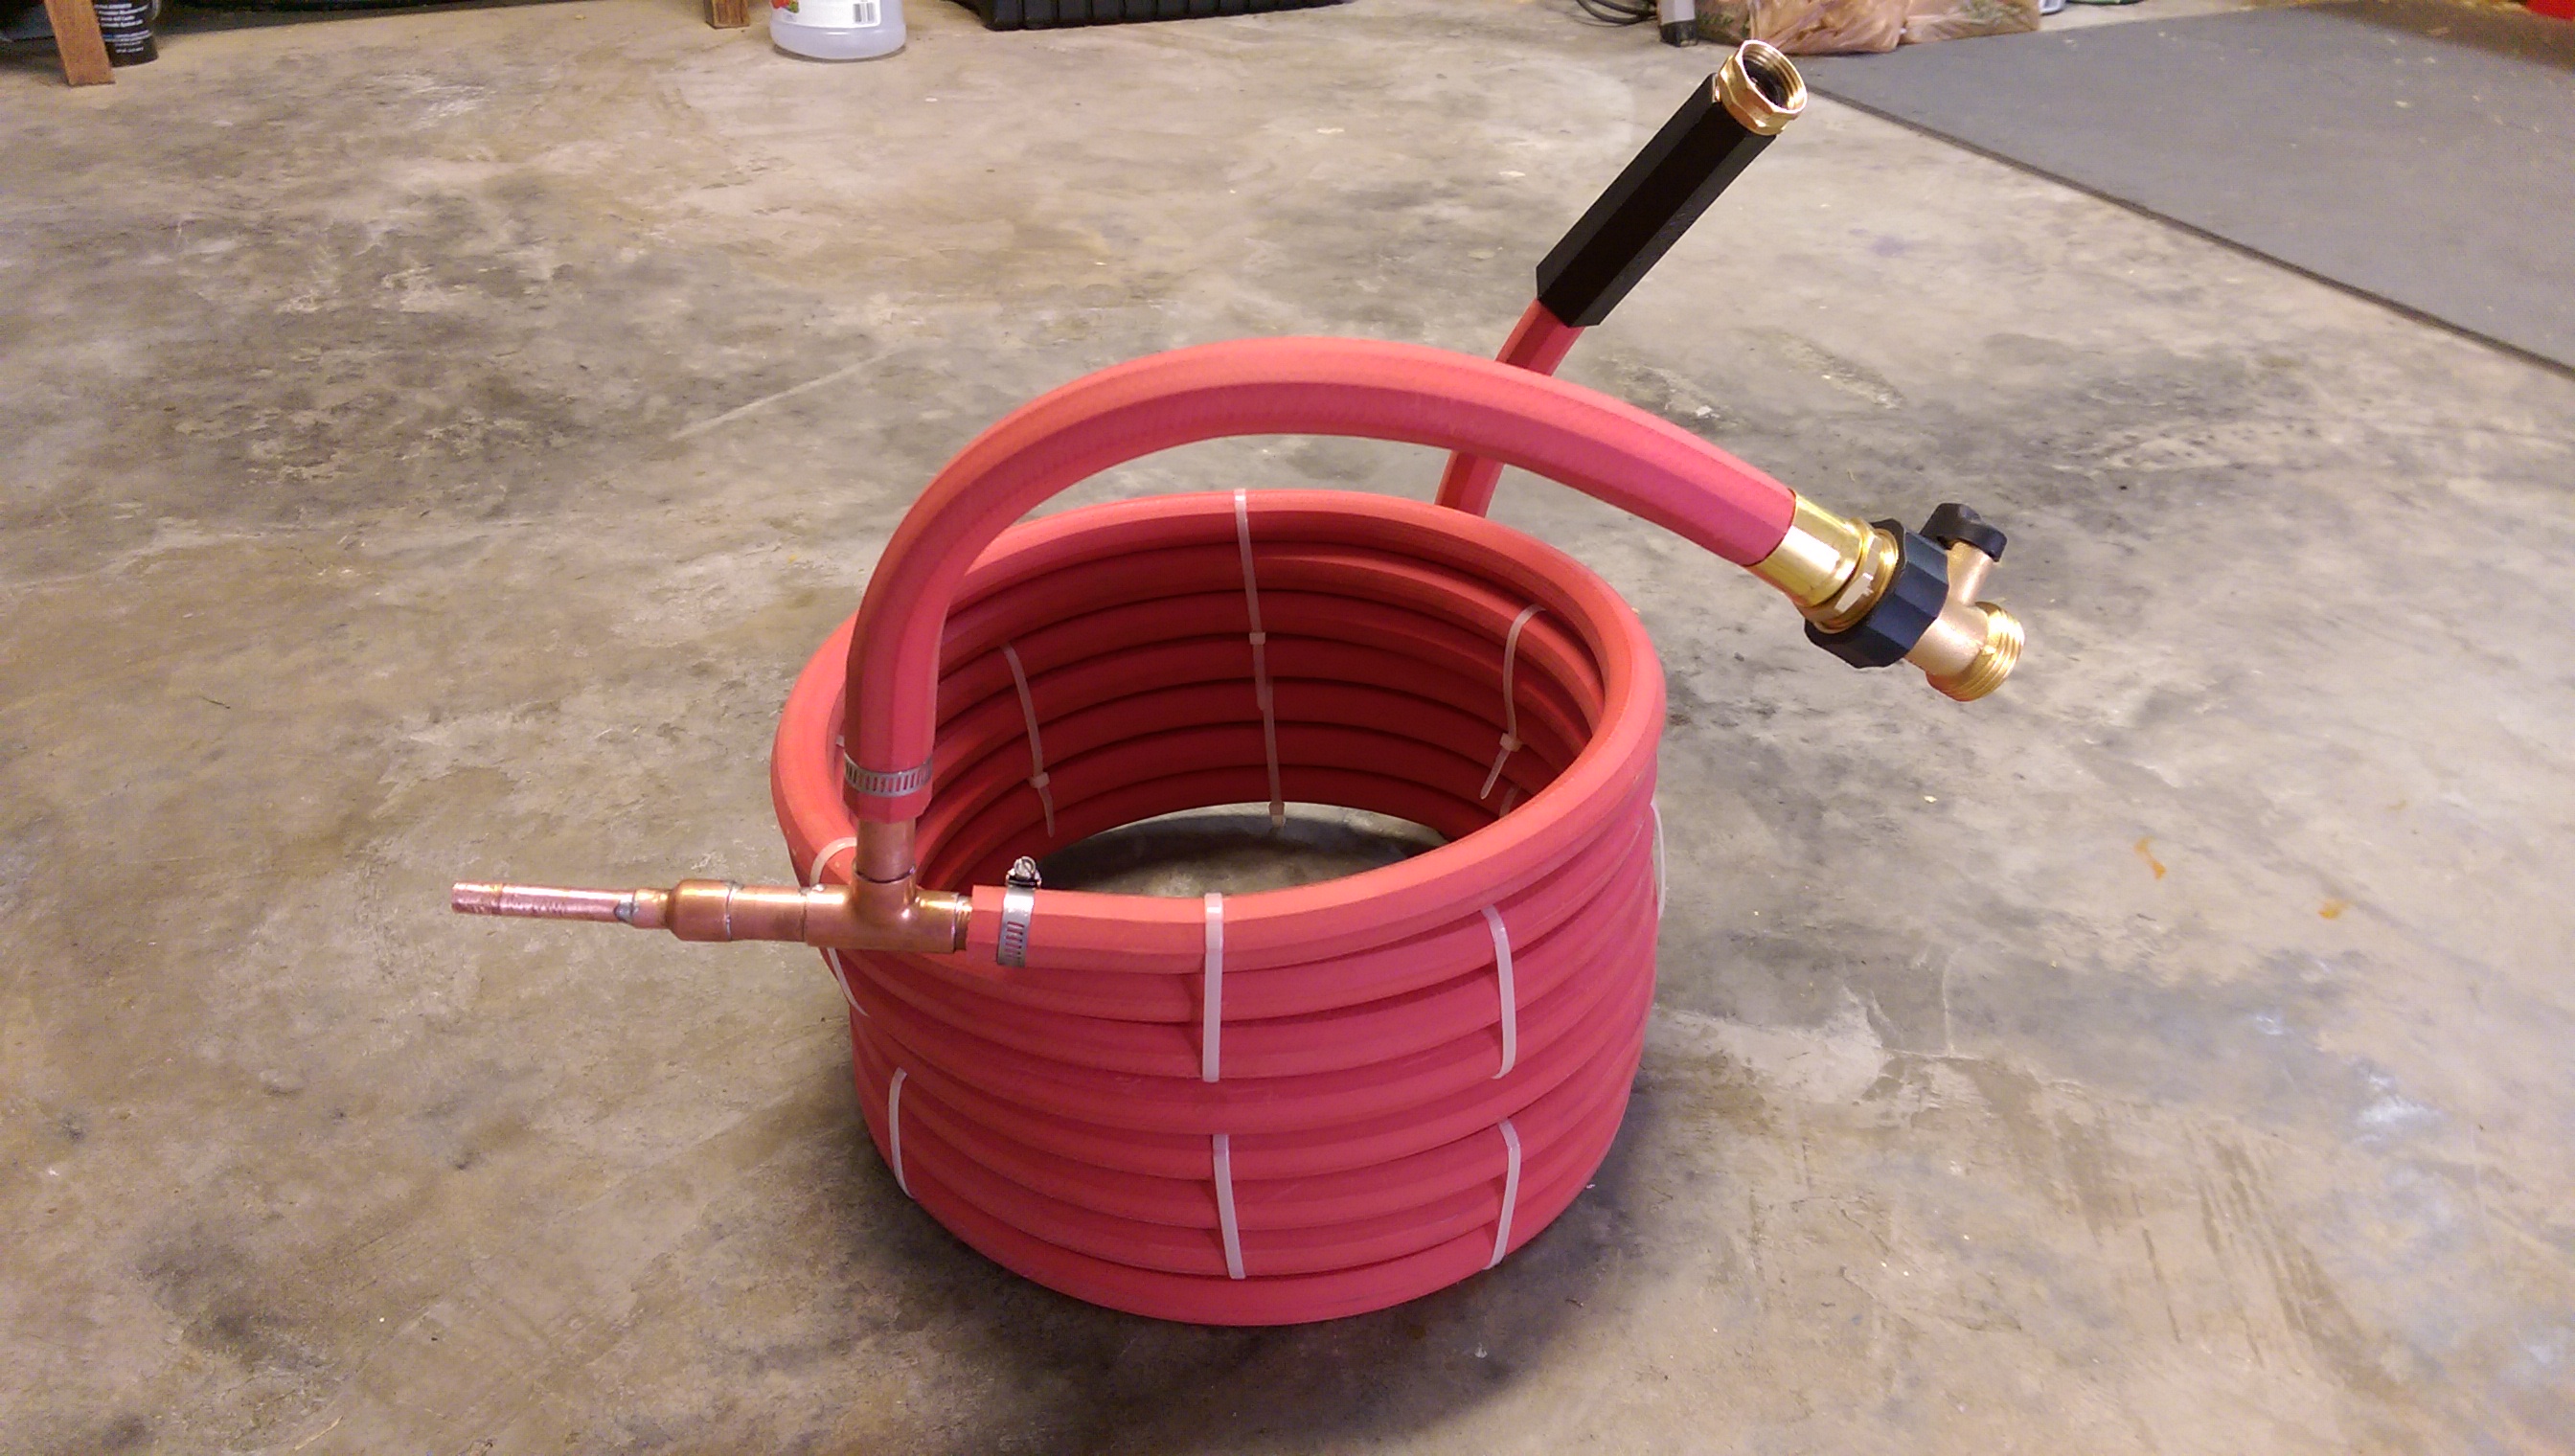
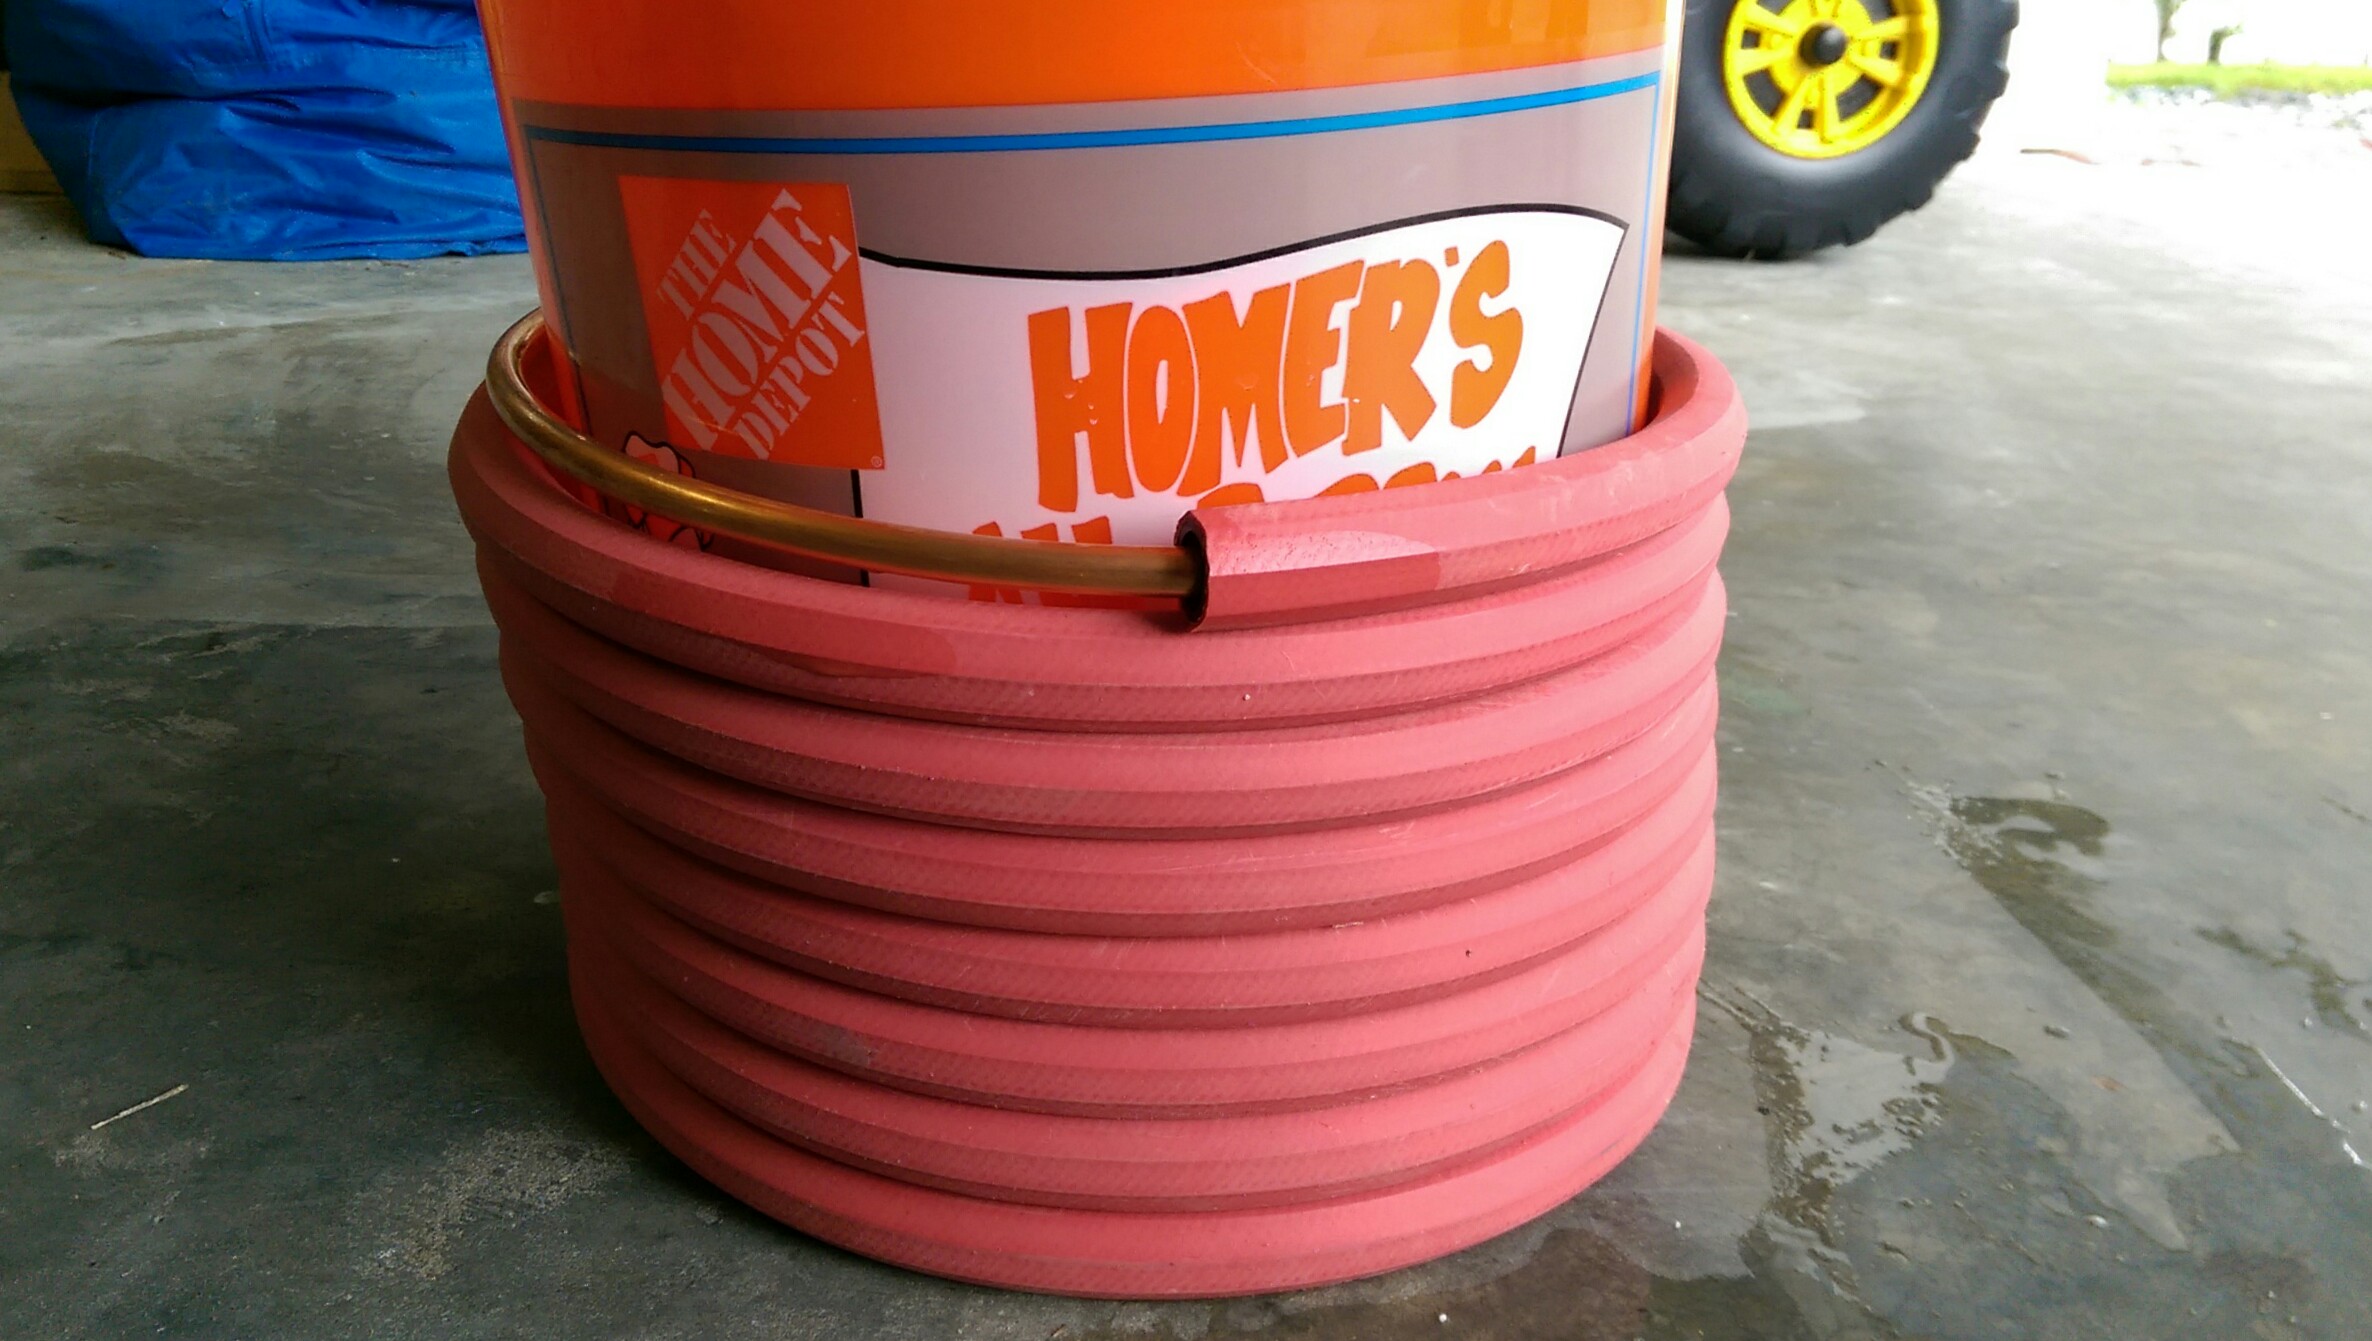
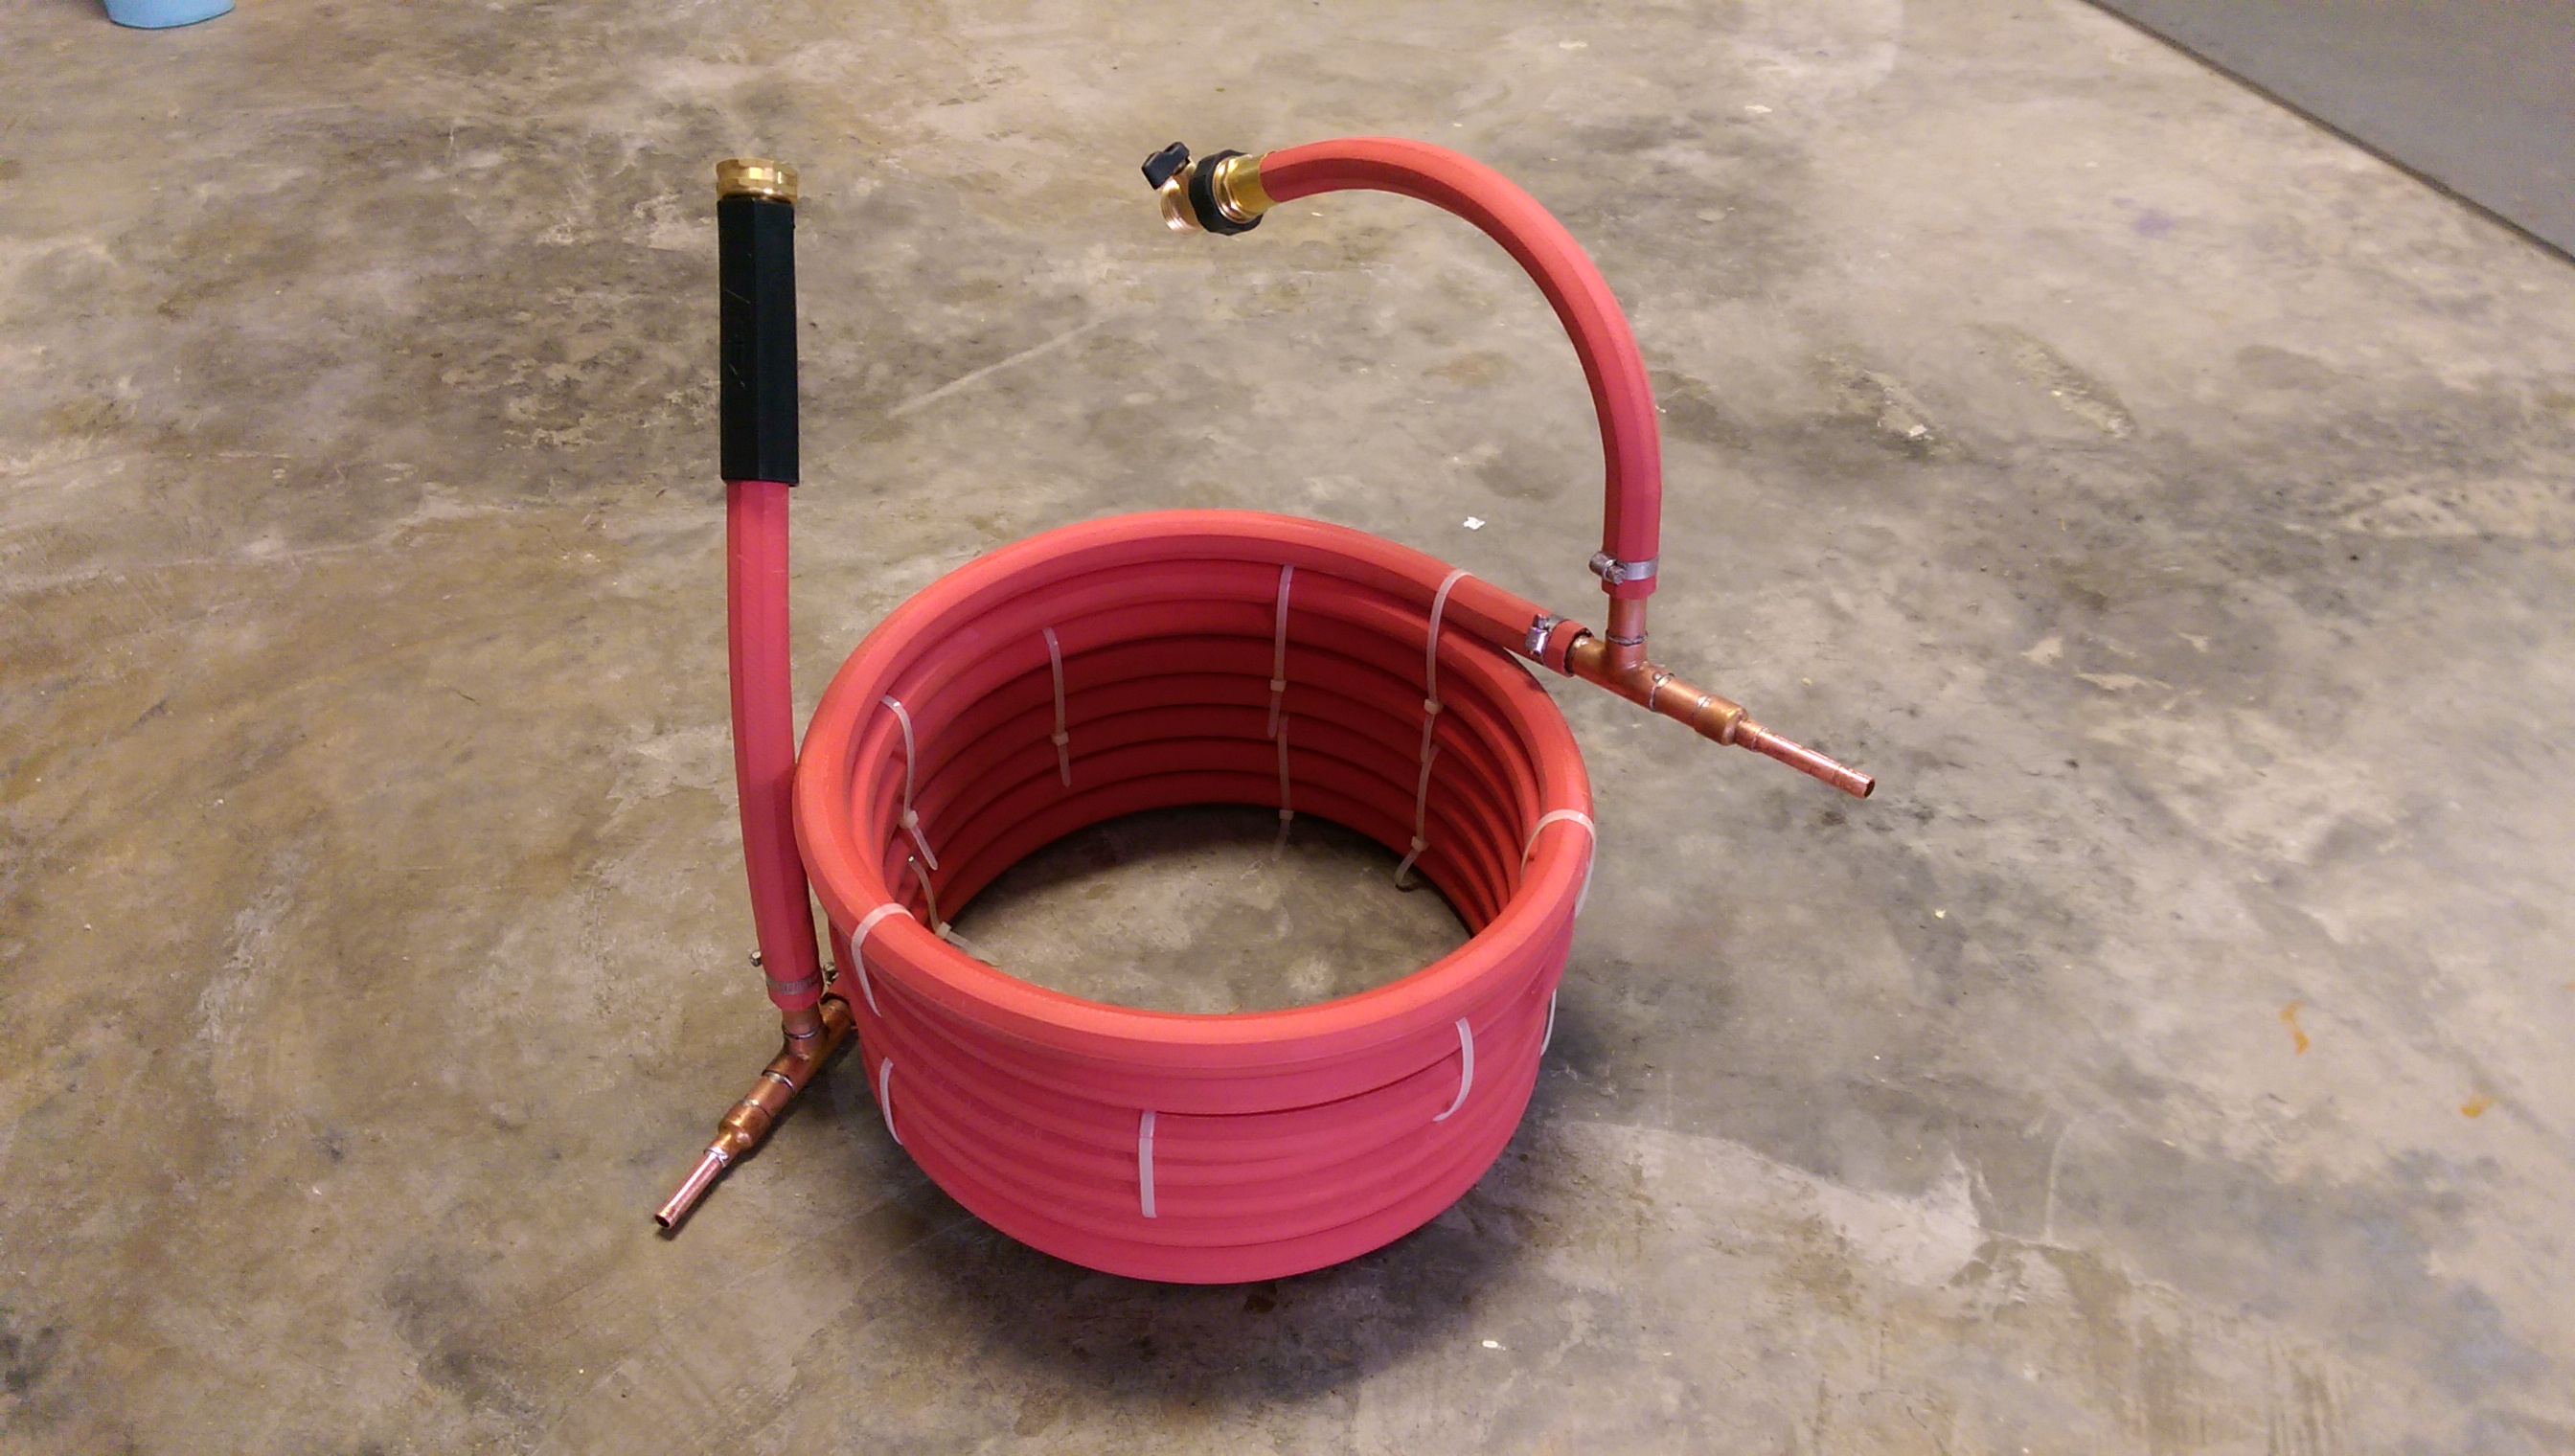
Rolled 5 gal bucket & hose along the floor to get a nice coil:
0lnznmI.jpg


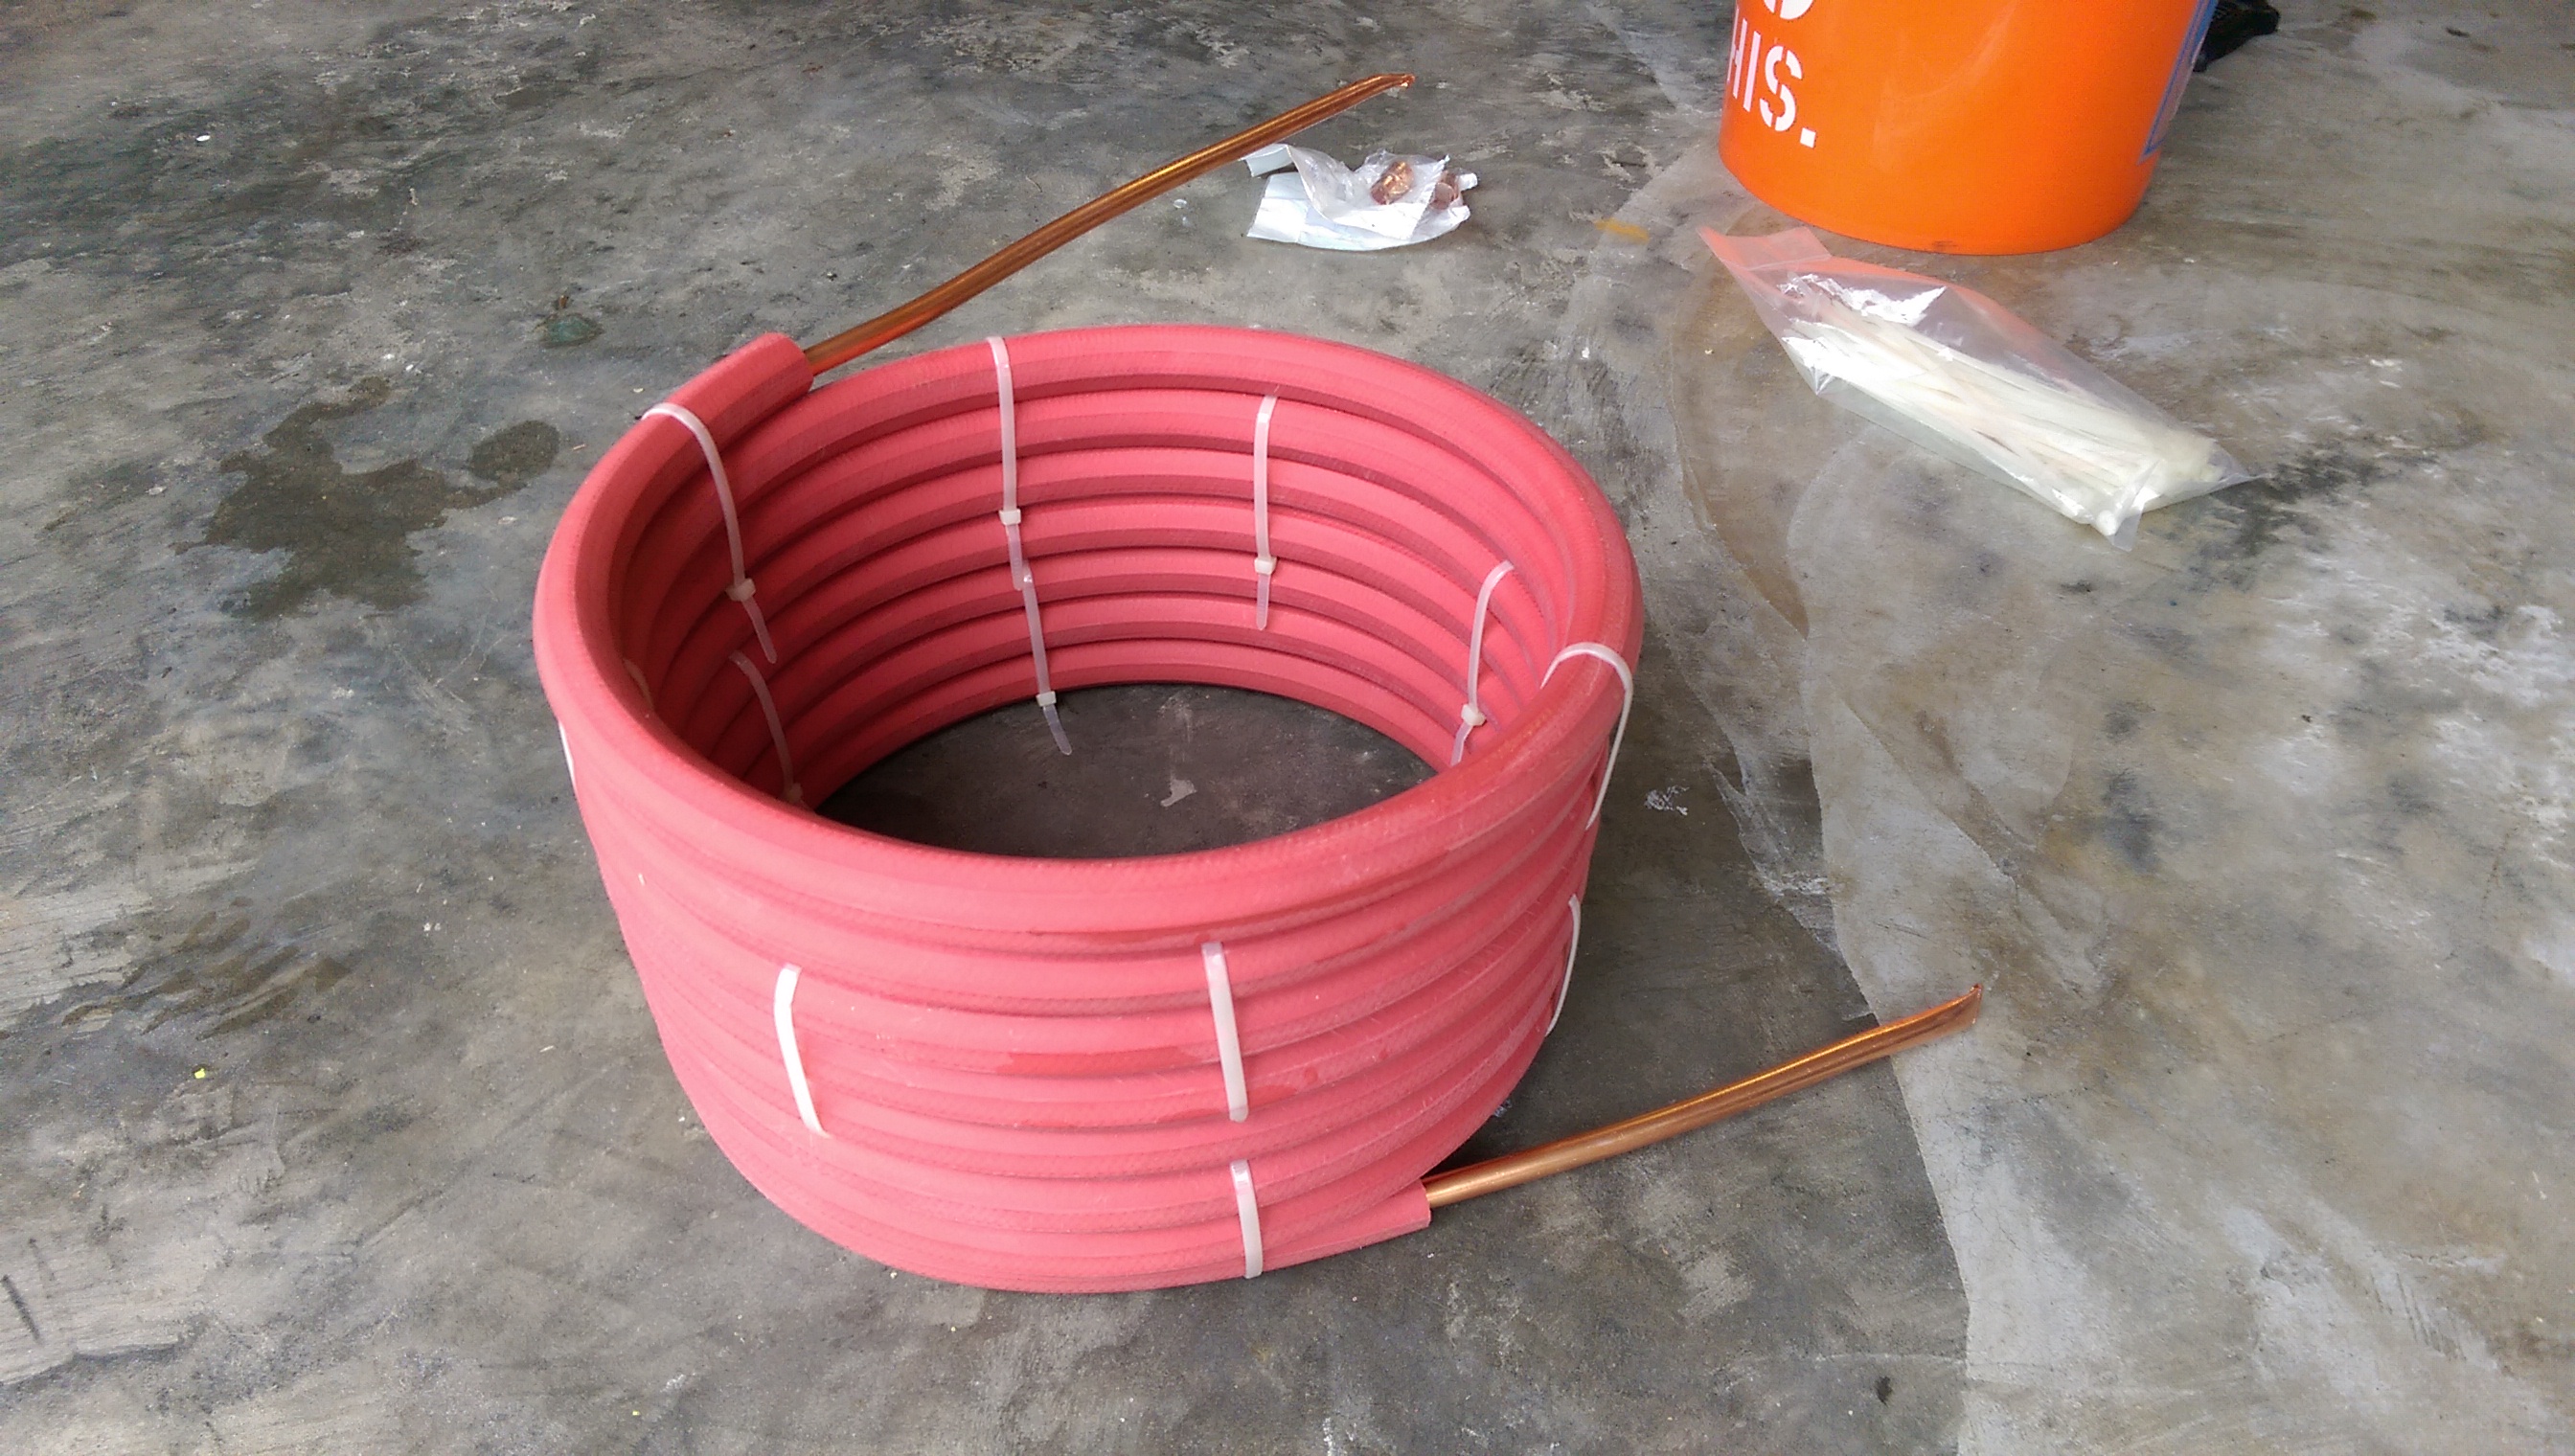
Added some zip ties (super cheap at Harbor Freight) to keep it together. I actually added more after this too:
JhXrBs4.jpg


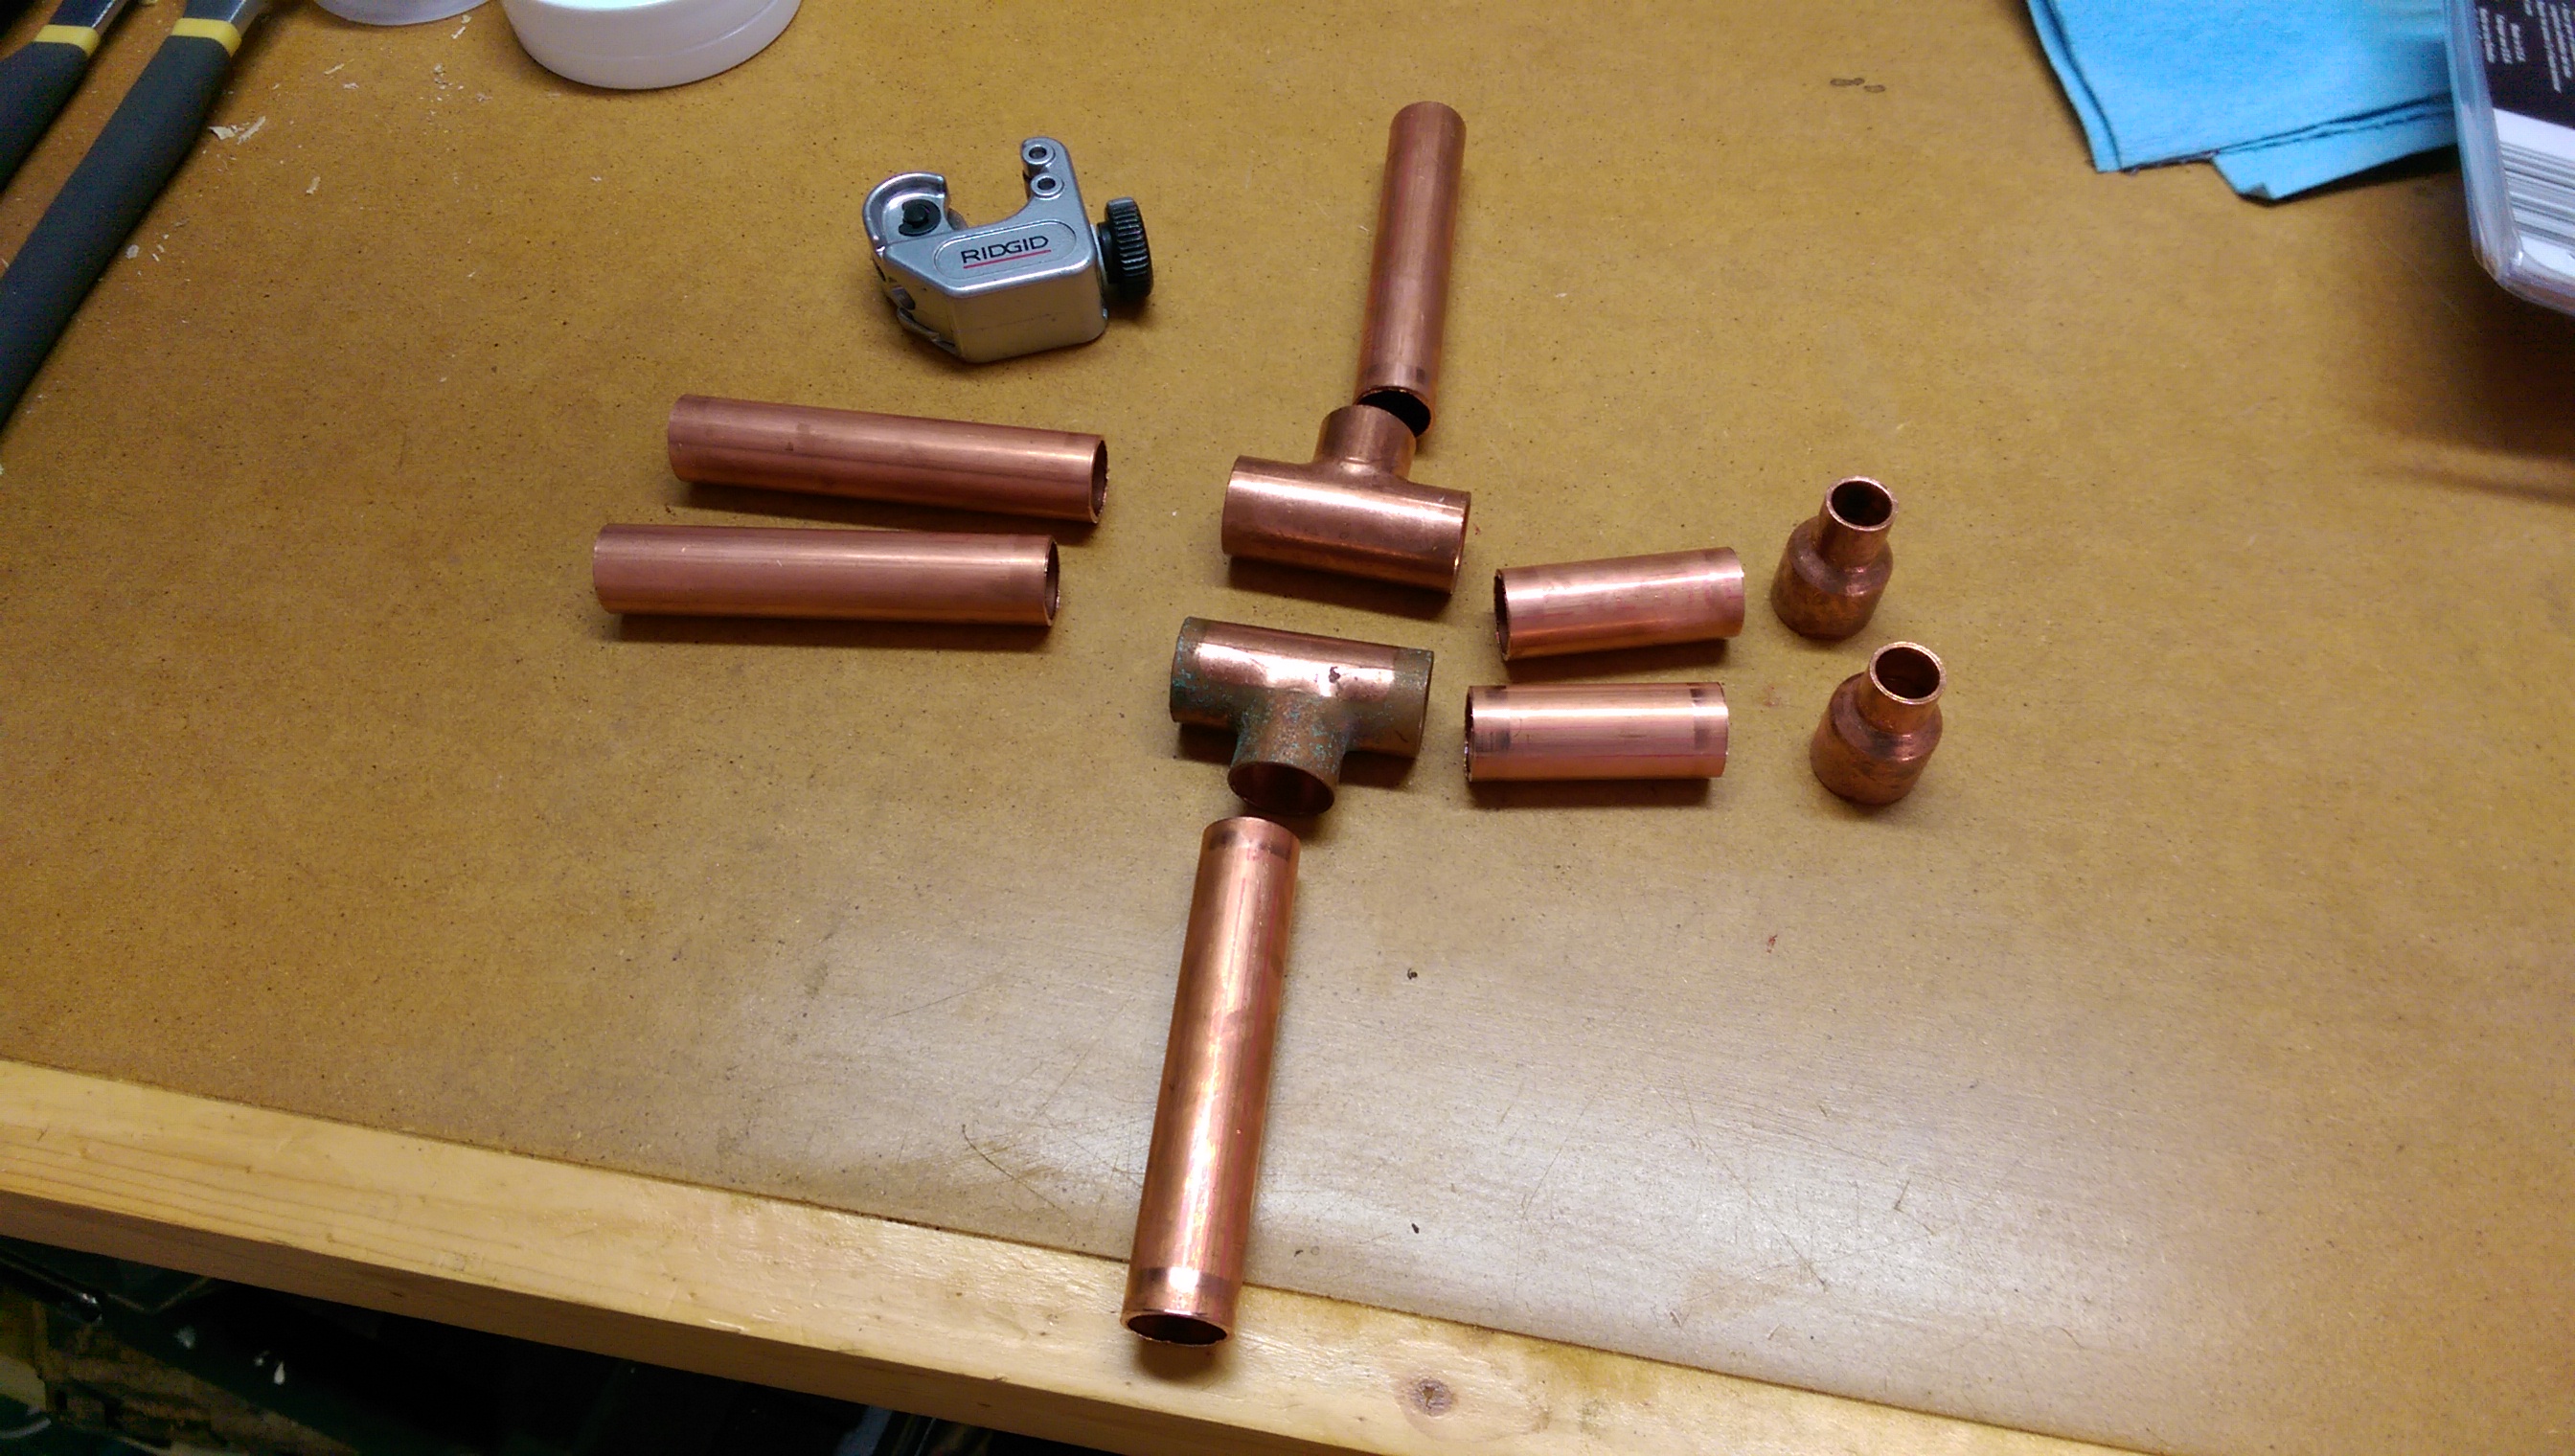
Cut some 1/2" tubing to size and laid out the parts. Note that since the copper tubing coil is 3/8" O.D. (outside diameter) while copper pipe is measured as I.D. (inside diameter), you actually need 1/2" x 1/4" reducing couplings to fit the 3/8" O.D. coil! (http://www.lowes.com/pd_22603-137-CL600_0__?productId=3514682):
7jbltf9.jpg


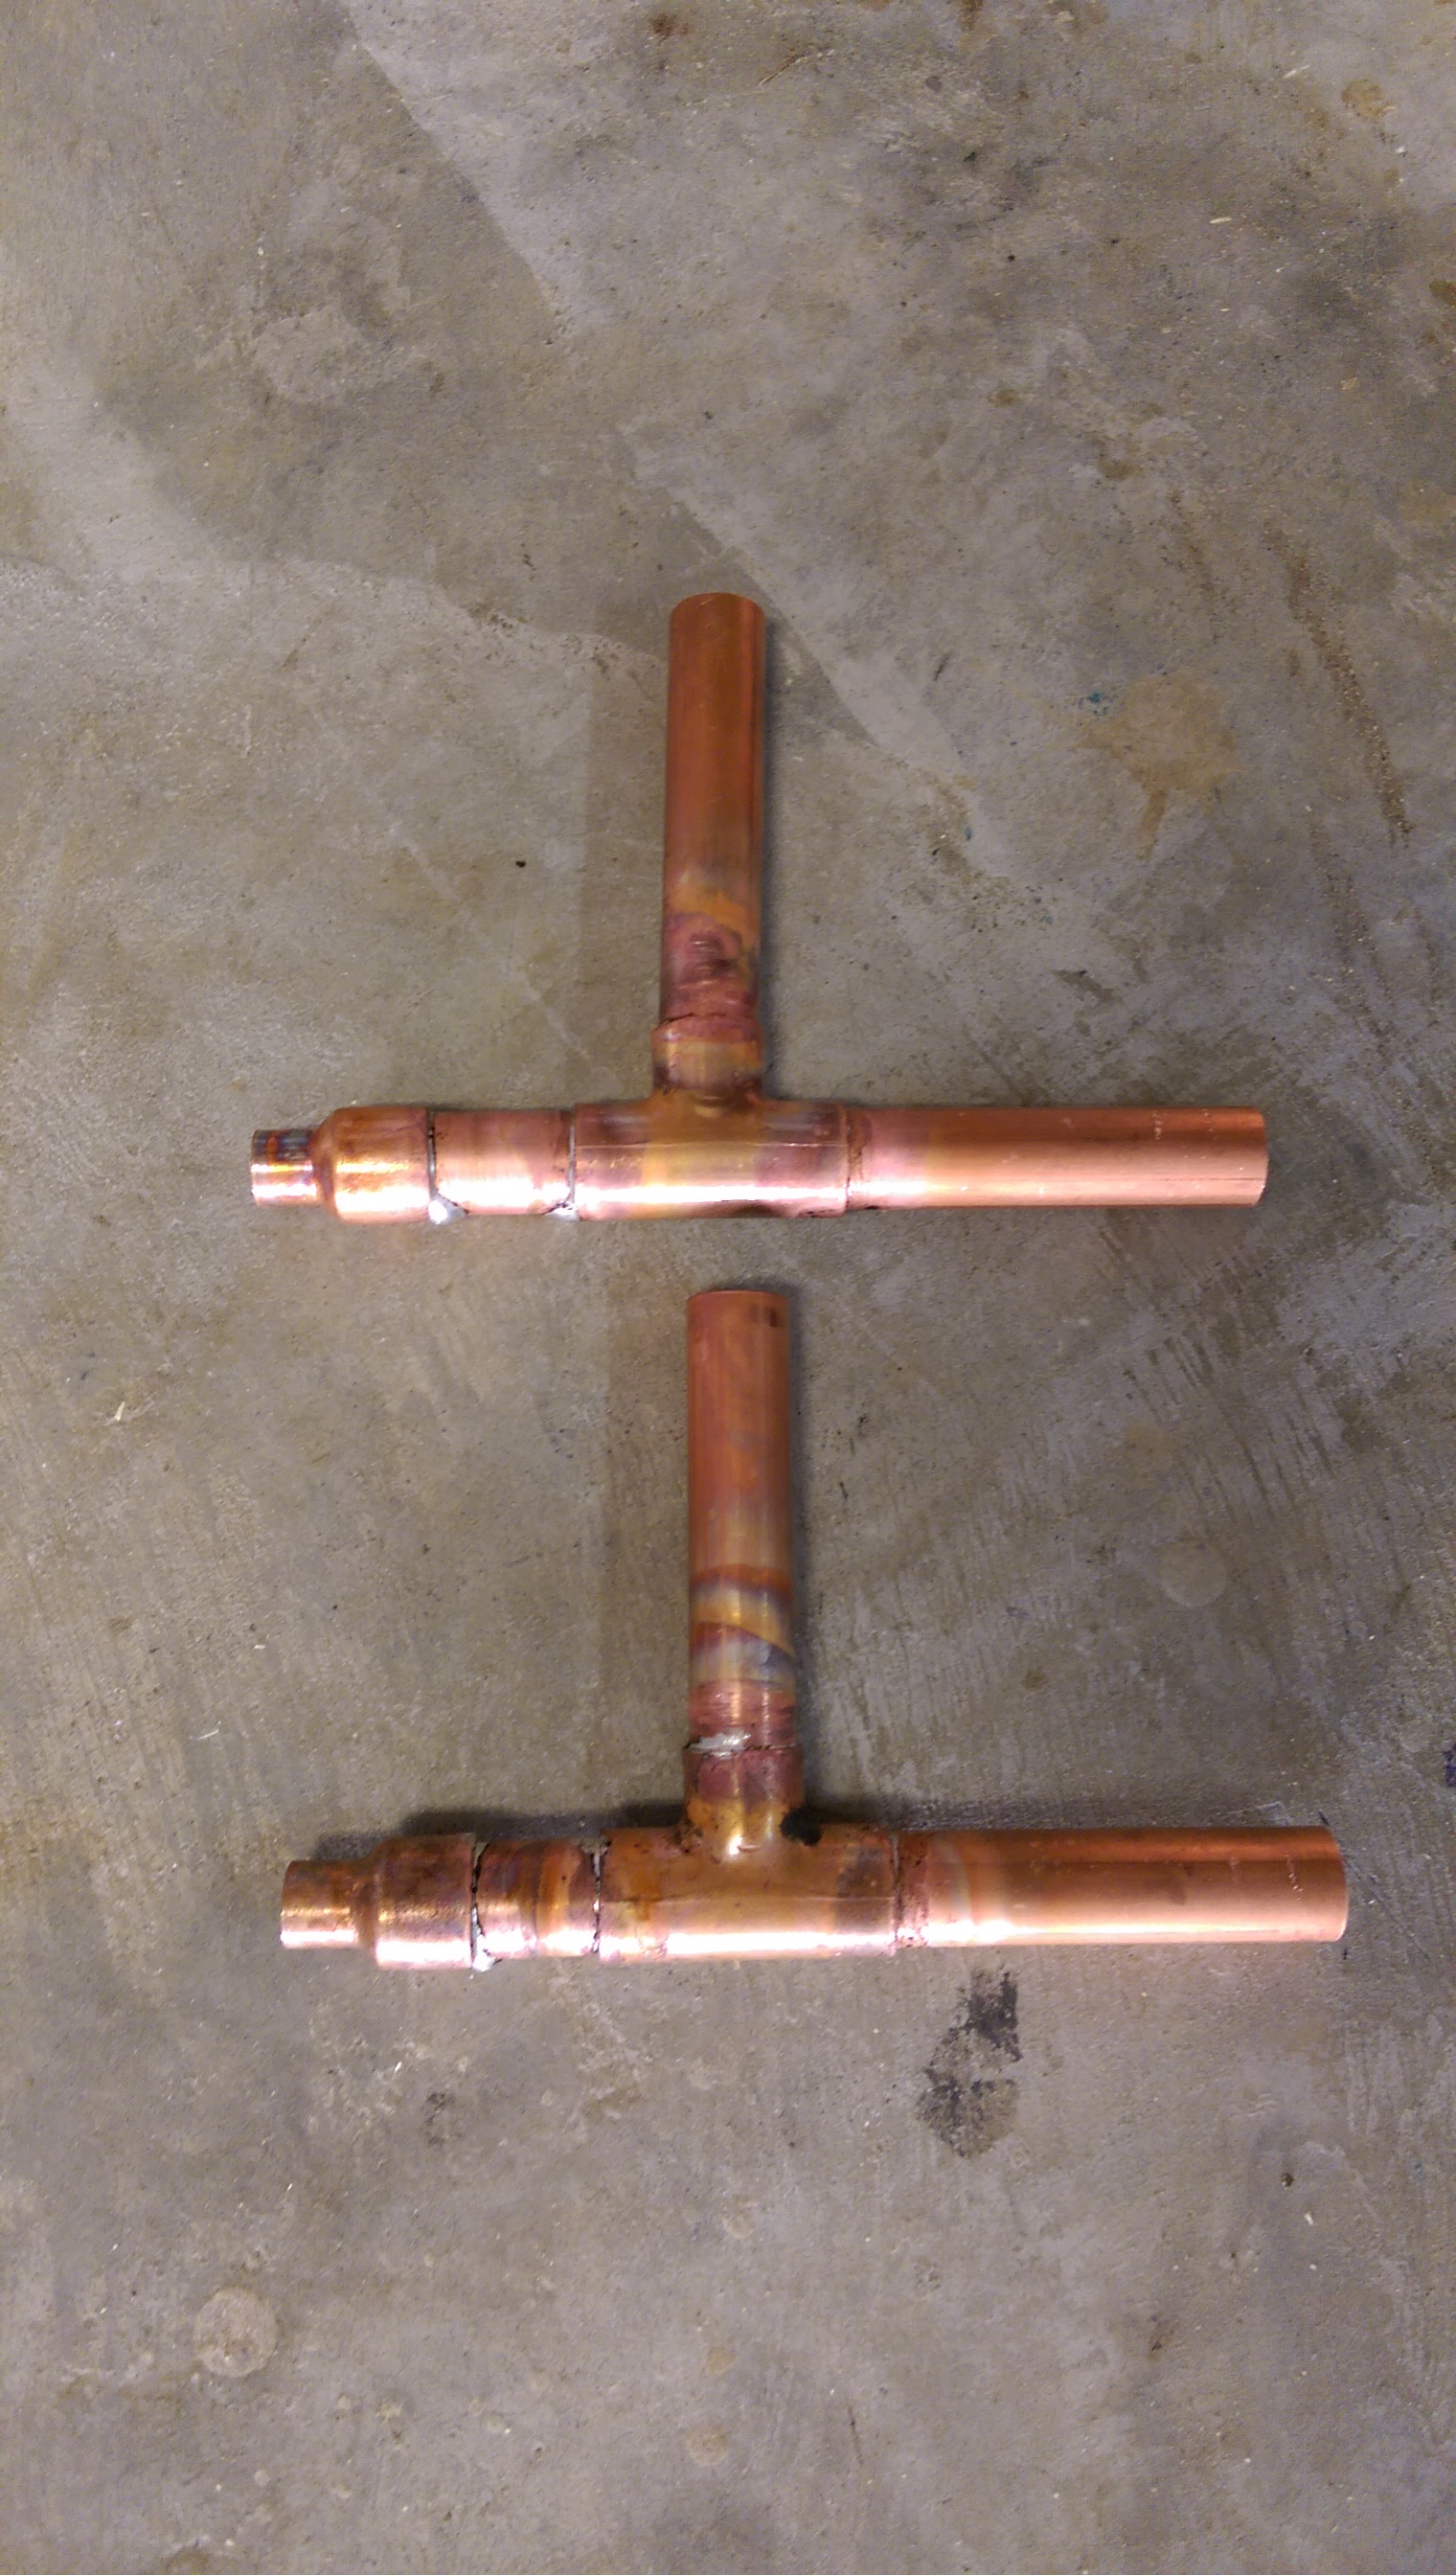
Soldered it up with a glove protecting my nice wooden vice:
JEhkNbh.jpg


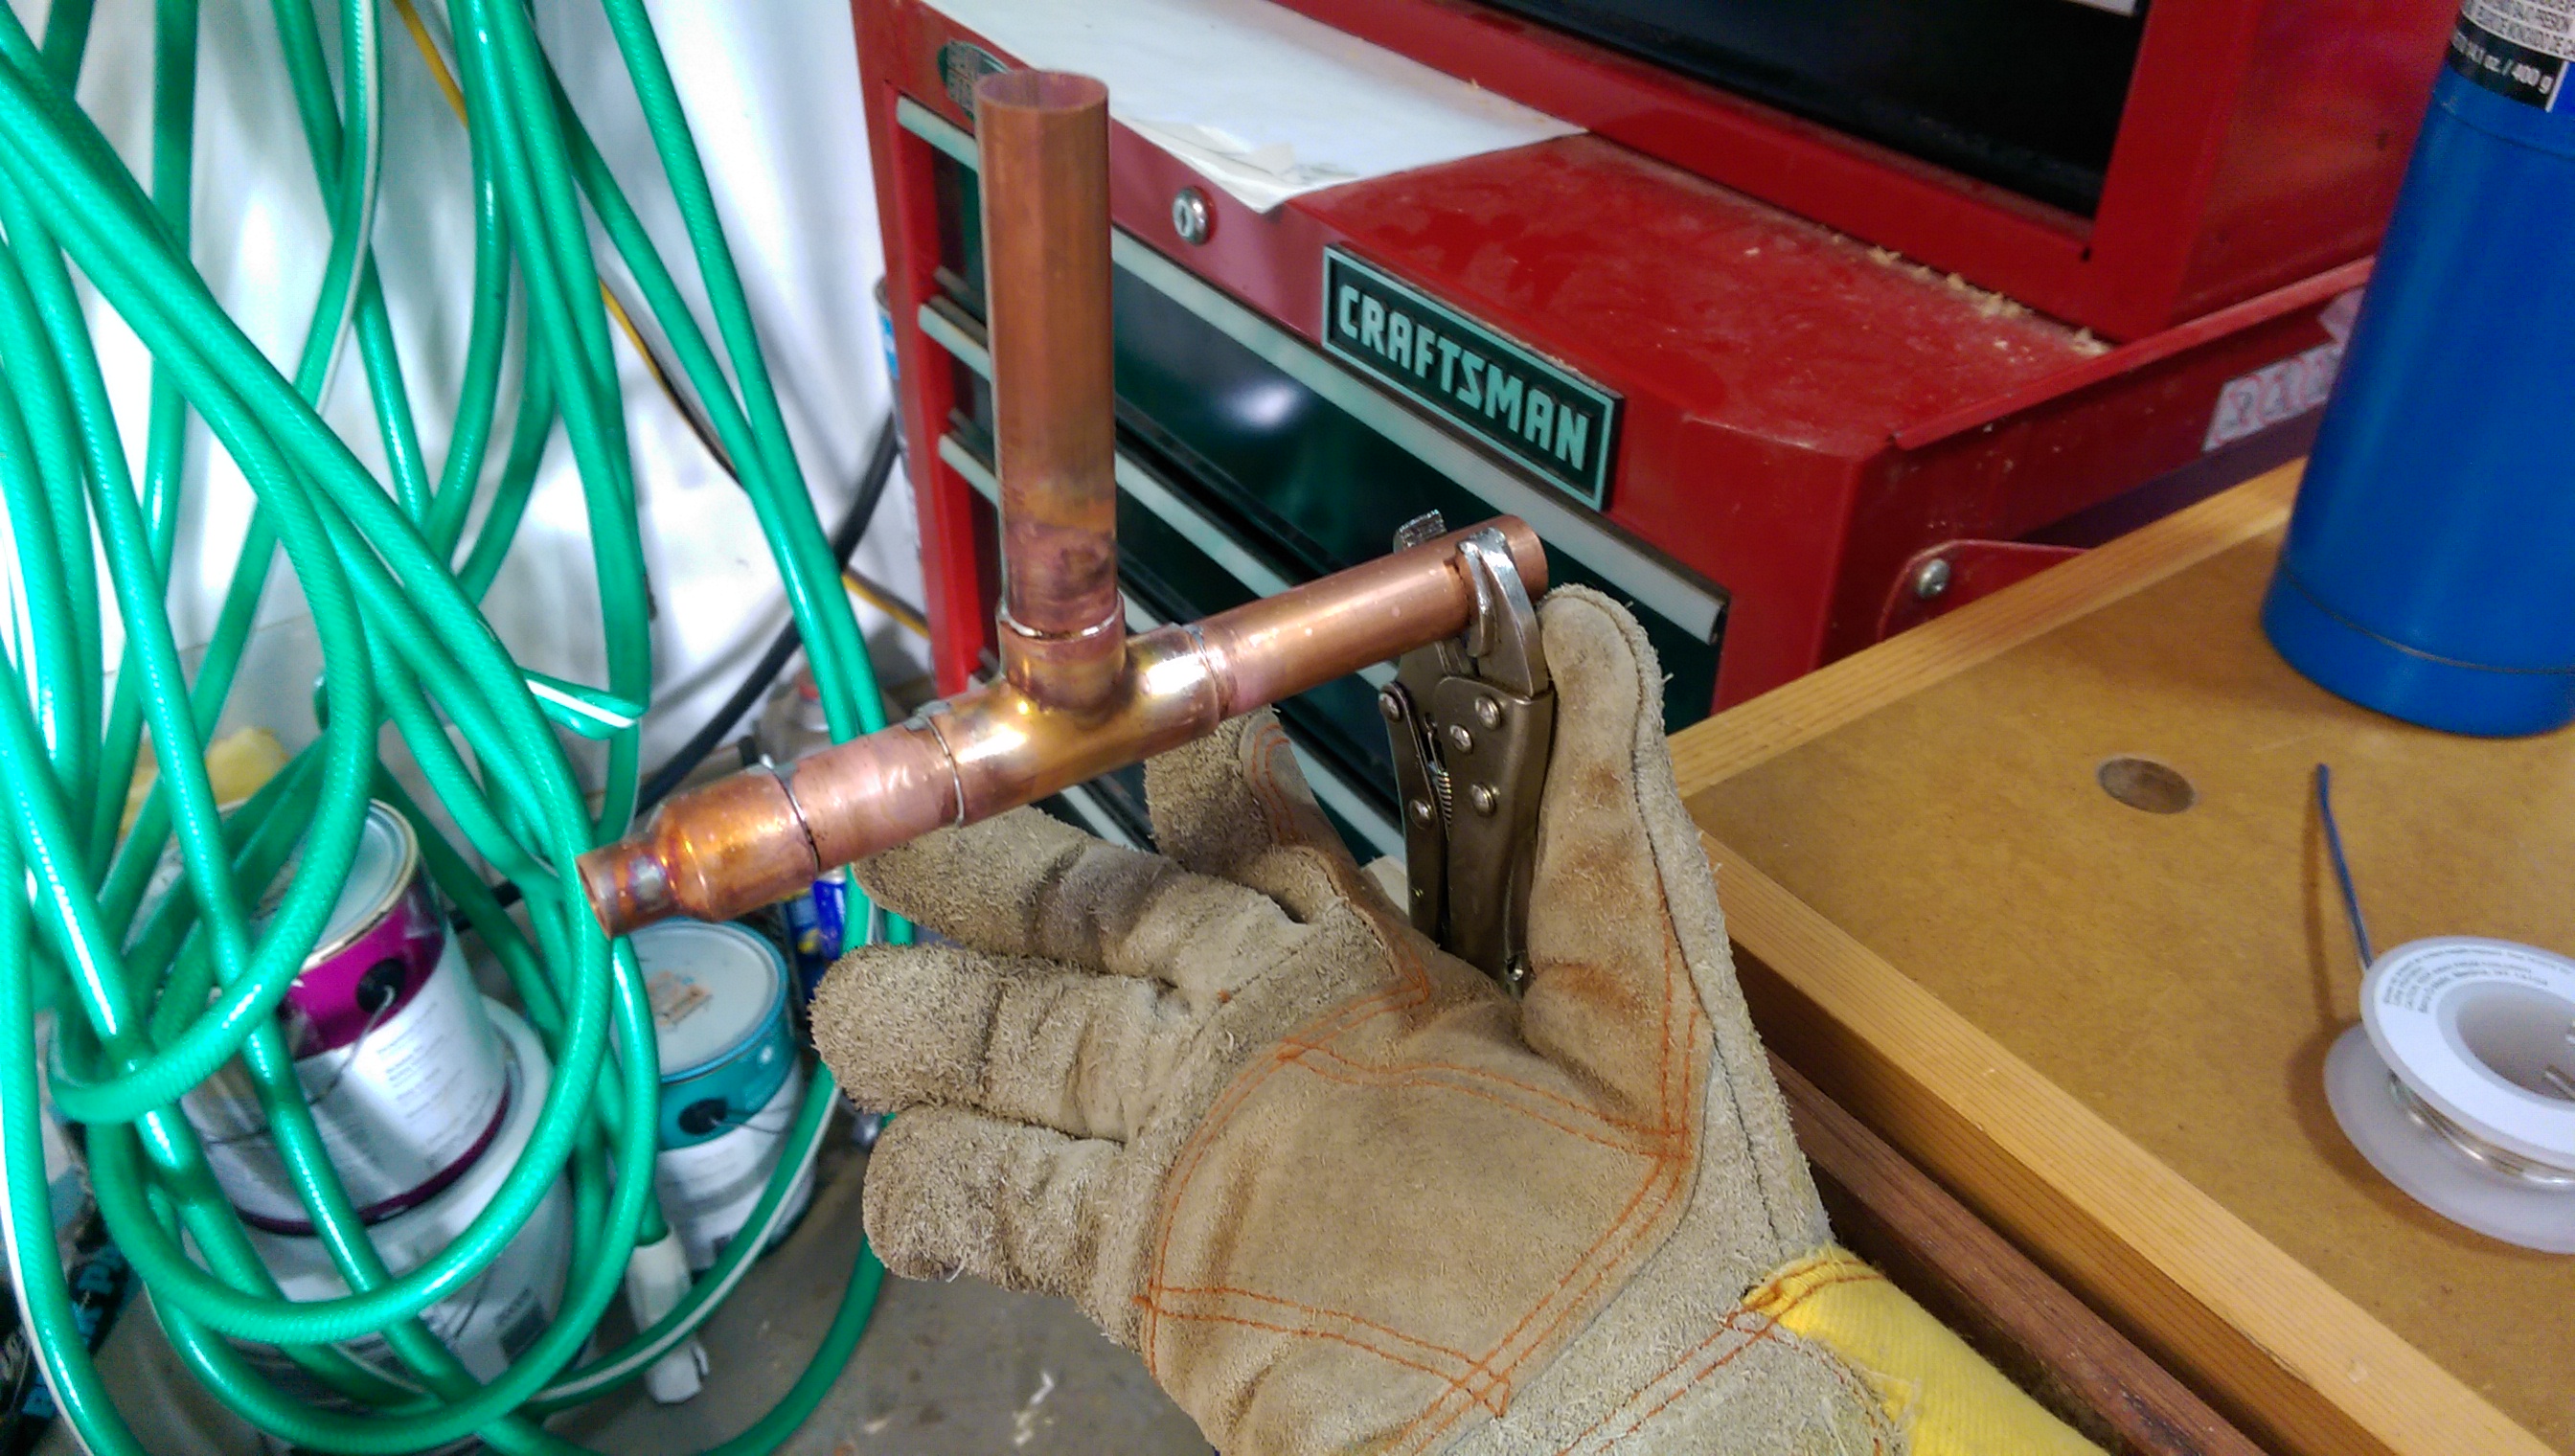
I used a bit too much solder on some of the joints, but I am a newbie at that:
L7lEw60.jpg


It was actually rather difficult to get the fittings into the hose while getting the copper tubing through it. I had to first drill out the reducers with a 3/8 bit to remove the internal stop, then file the inside a bunch more, and then sand down the outside of the tubing until it slid in smoothly. If it didn't slide really smoothly, it tended to just push the tubing inside the hose instead of through the reducer. Remember to add flux inside the reducer before sliding it on so you can get a good soldered connection.
Stainless hose clamps: http://www.amazon.com/gp/product/B001HWGMBG/?tag=skimlinks_replacement-20
Shutoff valve on the outlet side to control water flow: http://www.amazon.com/gp/product/B0006U66B6/?tag=skimlinks_replacement-20

pN0AEmo.jpg
 
Last edited by a moderator:
Very clean I like the simplicity of the build as well great job!

Thanks, it is working out great for me. I can bring the wort within a few degrees of tap water, and I only need a fairly low flow of water. The valve on the outlet is super handy for throttling or shutting it off.
 
Thanks; one of the best write-ups for a DIY counter-flow wort chiller. Great job!
 
Thanks; one of the best write-ups for a DIY counter-flow wort chiller. Great job!

Thanks, I was trying to document it with enough detail so that literally anyone could build one. I also spent a bunch of time finding the best deals on quality materials so I figured I should share that too.
 
Nice work. One thing to help make sliding the reducers over your tubing easier is to make sure your cuts and connections are true and square. If the reducer is soldered on even slightly off axis, it can really make it difficult to slide it over the inner tubing, even with the indent stop fully removed.
 
Nice work. One thing to help make sliding the reducers over your tubing easier is to make sure your cuts and connections are true and square. If the reducer is soldered on even slightly off axis, it can really make it difficult to slide it over the inner tubing, even with the indent stop fully removed.

Great point, it's hard to tell for sure but one of my reducers even looks crooked in the photo. That would explain the difficulty I had...
 
I wonder, if you'd not soldered the reducers to anything, until the very end, like after you've got your copper assembly embedded inside the hose. Then slide the reducer over the copper tubing, mate it with the copper pipe, heat up the reducer, and flow solder at both ends of the reducer.

Either way, highly jealous! Top notch work.

I bet that would work quite well. Great idea. I'd add that to the main post but I can't edit the post since its too old I guess...
 
looking into making a counterflow chiller and this seems like a good template. not too sure if it's too long or too short for my tap temp, however
 
looking into making a counterflow chiller and this seems like a good template. not too sure if it's too long or too short for my tap temp, however

Well I can promise you it won't be too short. My tap water comes out at a balmy 81°F so I can't get any colder than that, but I don't need very much water flow to bring the wort down to ~83°F. With your cool Colorado water you won't need a lot of flow to bring the wort straight to pitching temp. The valve on the water outlet is really handy to regulate the flow. I also turn the flow down to conserve water as the wort starts to slow down when the kettle is getting empty.

I couldn't be happier with my setup. The one thing I did add was a female garden hose adapter for the wort tubing so I could back-flow garden hose water all the way back through the chiller and back-flush my kettle valve at the same time.
 
The effort put into filling the tube with water is wasted. You can easily kink tubing filled with only water but the more important point is that you can pull soft copper around a form without it kinking anyway. I appreciate the purpose for the wire wrap, but you'd have an easier time pulling the tubing around a form if the wire wasn't soldered to the tubing. I'd tack it on the ends and then cut the tacked section off before forming the circle.
 
The effort put into filling the tube with water is wasted. You can easily kink tubing filled with only water but the more important point is that you can pull soft copper around a form without it kinking anyway. I appreciate the purpose for the wire wrap, but you'd have an easier time pulling the tubing around a form if the wire wasn't soldered to the tubing. I'd tack it on the ends and then cut the tacked section off before forming the circle.

I was also skeptical about the effectiveness of the water in the tube, but it is not exactly hard to do so I figured why not since that is what I saw on tiber's thread. Frankly I can't see how you could kink the tube when you are rolling a bucket on it like I did. Now that I have that experience I would probably not fill it with water if I did it again.

The wire at that guage has almost no resistance to bending, so as long as you keep the areas of solder small I can't see an issue with that.

I think he's suggesting you'll heat-harden the copper during the soldering process.
 
Can any solder and flux be used, or should I use silver solder like when soldering kettle components?
 
Just regular lead free solder with flux from the hardware store. It's made for drinking water plumbing so it's safe.
 
Not much, I just bought one of the 3 or 5 ft sections that they sell at Home Depot or Lowes. Good luck on yours!
 
Happy to see this is still active because now I can tell you, lmpreiks, that not only is this a chiller, but I'm going to steal your hose fitting on the outlet end idea for the cfc I built a few years ago, but have only used once.
 
I'm new to brewing so forgive the dumb question. I presume the hot wort goes through the 3/8" copper tube, so how do you sanitize the tube before using it to cool the wort, or otherwise keep it clean between uses?
 
that's one of the problems with counter flow chillers and one of the reasons that I stopped using one. I never had issues, but just thinking about it drove me nuts. I would run hot/boiling water through it and then sanitizer, and cap the ends to prevent spiders and such from calling it home.

I've since "moved on" to a SS immersion chiller with a cheap aquarium pump that circulates ice water through the coils. It doesn't take too much longer than the counterflow, and I never have to think about sanitation because I just drop it into the last few minutes of the boil :mug:
 
Gonna be making this tomorrow, I was about to drop $150 at the homebrew shop just to have it but since this doesn't look hard at all, I'm for a project tomorrow! Plus my IC won't stop leaking at the fittings so I can only get a couple coils into the wort without much water getting in.
 
I have mostly completed this build, love the simplicity. Any tips for the final solder connection after you have the hose installed and you attach the final reducer to the coil? I am having trouble getting it to take solder. It is properly prepped with a fresh sand and flux. It just wont take it for some reason.
 
I went to a plumbing supply company and bought 4 adapters that went from 1/2" copper pipe to 3/8" tubing. There was a shoulder that had to be drilled out but it fit tight. On the outlet I added another went to 1/2" copper pipe to a 1/2" copper male adapter then to a 1/2" female cam lock fitting.
 
I'm new to brewing so forgive the dumb question. I presume the hot wort goes through the 3/8" copper tube, so how do you sanitize the tube before using it to cool the wort, or otherwise keep it clean between uses?

Excellent question.

To start I force water through it with a garden hose. Then I use my pump. Before use I fill my HLT with 2.5 gal of starsan and recirc the system for about 10 min, then I shut the pumps off and let it sit full of star san until I'm ready to chill. Right before use I empty it, with the pump, and run off the first 1/2 quart of wort that is boiling. From here I know it's clean.

After use, I do the Same but with PB, for 20 min, and then water for 5. I drain it and ready for the next round. Never had any issues.

Today I chilled from boil to 65 in 11 minutes, never had an immersion get even close to that time. In Florida it's mid 90,s and removing heat is tough.
 
That's a little bit compulsive, I fear. This is hot side, or at least can be. There are more fun ways to pass time than oversanitizing the chiller. The beauty of these is that you can effectively sanitize them by recirculating boiling wort through them for the final several minutes of your boil. I have given away my counterflow to my daughter and son-in-law, and use a plate chiller. When I did use mine, I would rinse it well with hot water after use. Usually the hot water was collected from the discharge of the chiller water. If I felt like it I might run StarSan after that. I stored it dry.

The next liquid it saw was a rinse with water for my peace of mind before I recirculated boiling wort through it at the next brewing session. There is no need to add a separate sanitization step before that when recirculating boiling wort can do the job for you.

If you mount it vertically, the spiral is self-draining. Mounting it horizontally is just inviting trouble by creating lots of low points for liquid to pool and grow bugs, or etch copper, or dry to allow precipitants to form.

Also, I think you are better off leaving it dry than leaving the copper tubing full of acidic StarSan.
 
As a follow up to my build thread, I have finally bought a pump and wow what a difference in speed. Gravity drain works just fine, but quite slow through the narrow tubing so my water was set to just a slow trickle. But with the pump hooked up I can turn my water on full blast and get all the wort into the fermenter at pitching temp in probably 5 min. And that is with my warm Florida water...

Another benefit of the pump is that you can sanitize it simply by recirculating hot wort in it prior to hooking up the cooling water. I also did a variation of this with gravity drain though... you can just let a small amount of the hot wort go straight to the fermenter before hooking the water up. Just don't do that with a glass fermenter...

PS it is a Chugger pump that is on sale now for $65 with free shipping: https://www.chuggerpumps.com/product/cpps-in-1/
 
Thanks for this post. I am tired of how long it takes with my 25' immersion chiller, even with a strong whirpool via drill and a SS wine degasser. I am in NC where the ground water gets close to 80, so good to see this works well even at the higher inlet water temps. I don't yet have a wort pump, but see that it makes real difference.
 
Since then I have added a second chiller and pump I got for cheap on craigslist and use that to circulate pre-chilled water through the main chiller (circulates from a small cooler full of ice water). This can quickly bring the wort down to whatever temperature you want. Before in the Florida summer I could never get all the way to ideal pitching temp with just tap water alone.
 
Back
Top