njxrinzler
Active Member
- Joined
- May 29, 2013
- Messages
- 28
- Reaction score
- 3
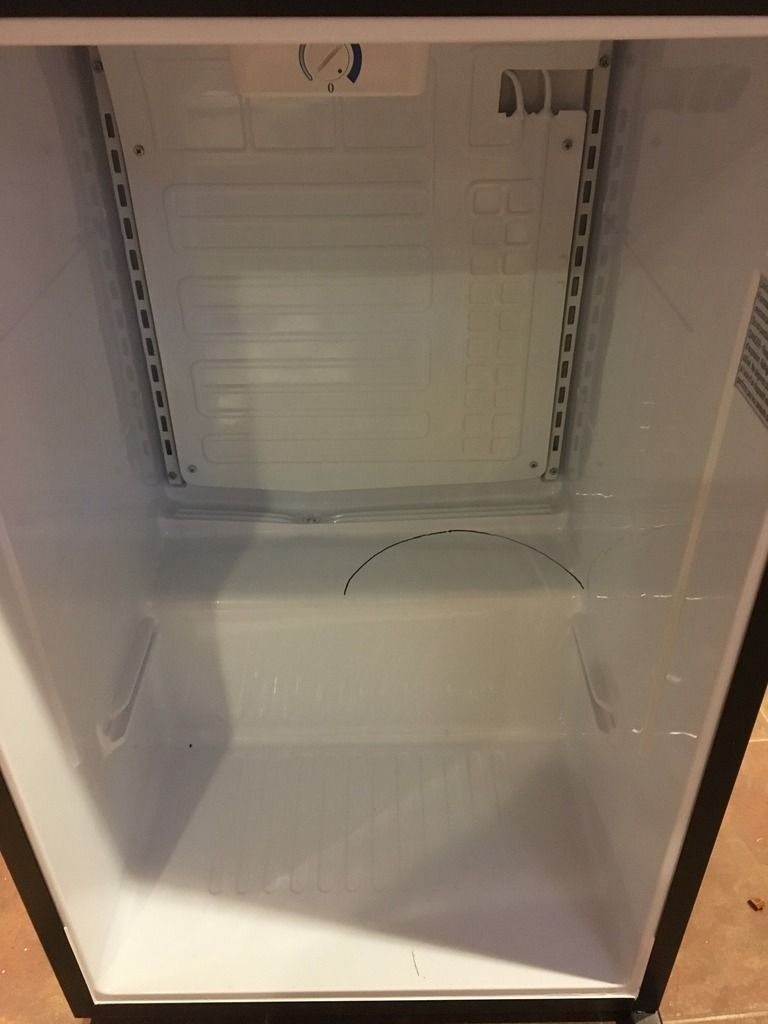
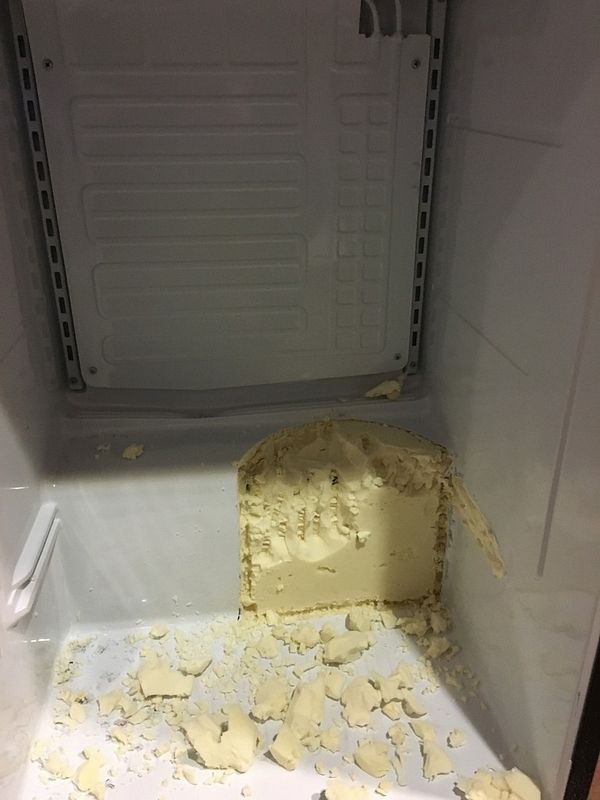
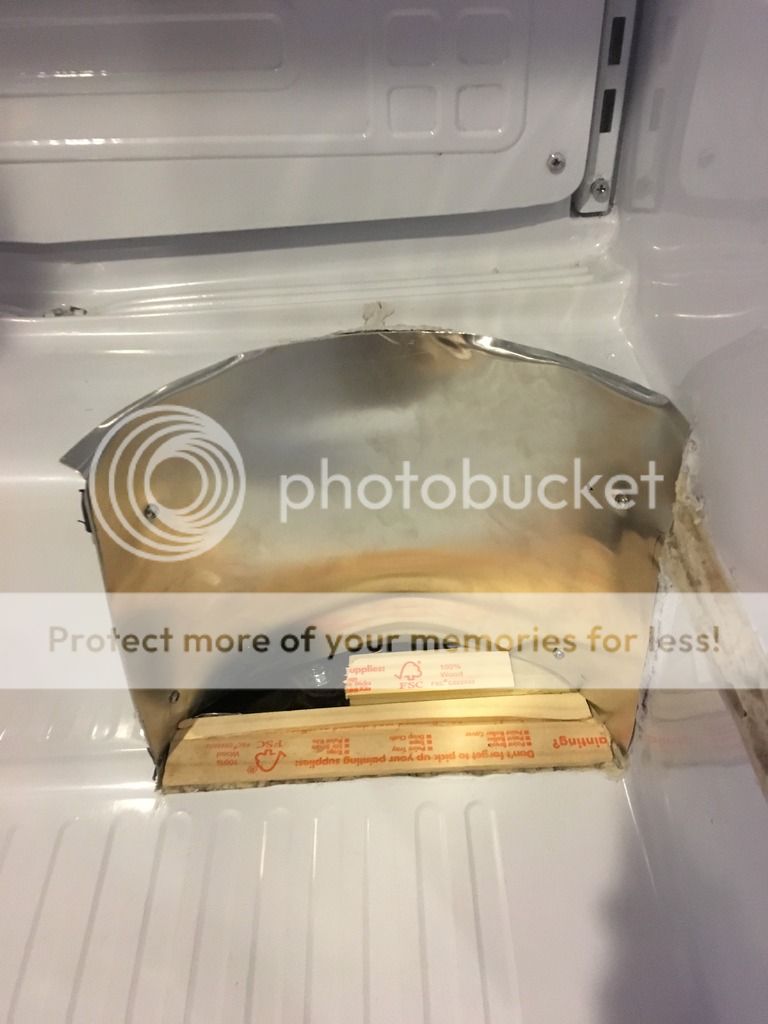
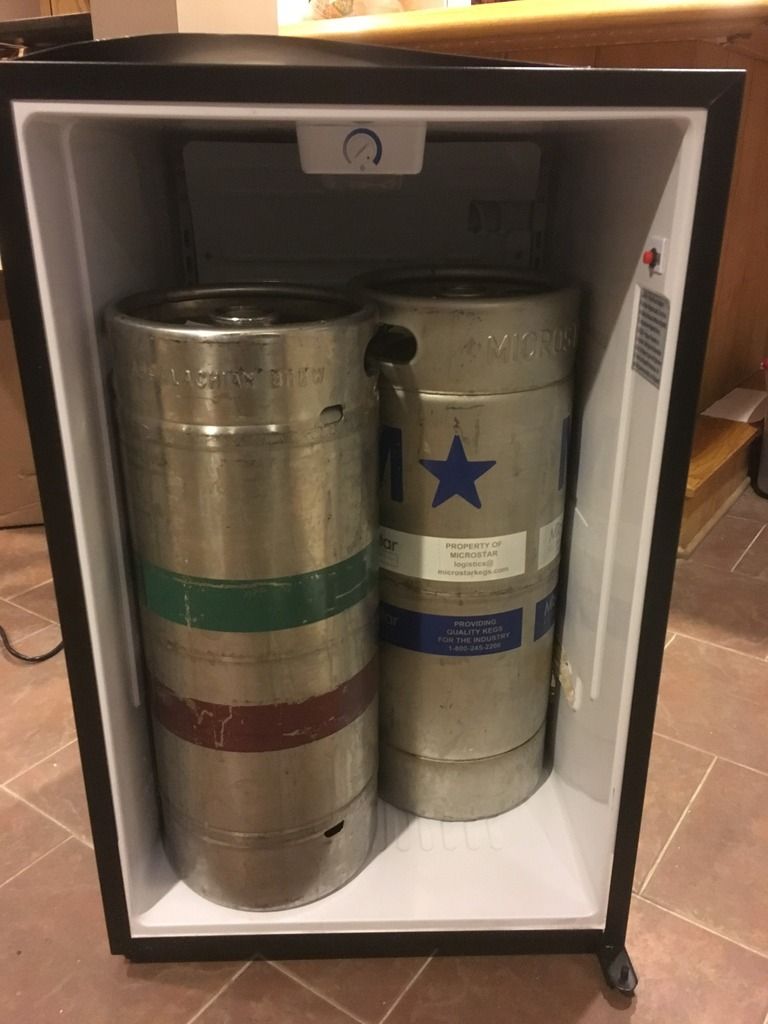
So I finally got around to building my kegerator from a Danby DAR440BL mini fridge. I, like make others on this forum, have wondered about fitting 2 commercial sixtel kegs inside. The answer is no, unless you modify the fridge, which I have done. You will need to cut into the back shelf so that way the kegs are staggered. Stencil in your cut line and using a dremel carefully cut around your mark. DO NOT go down far, only enough to cut the plastic. On my model there is a bundle of wires that runs down the side so we obviously do not want to cut into this. We will be removing the foam by hand afterwards (which is how I discovered the wires). Next remove all the foam by hand. You should also cut off the shelf grooves as well.


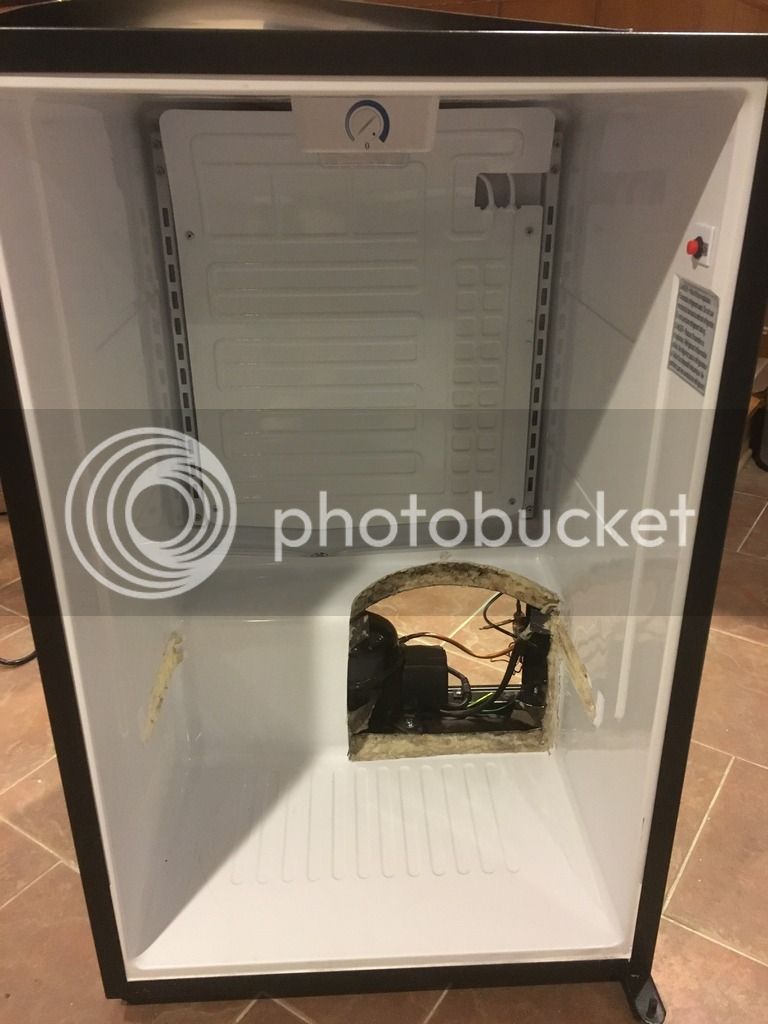
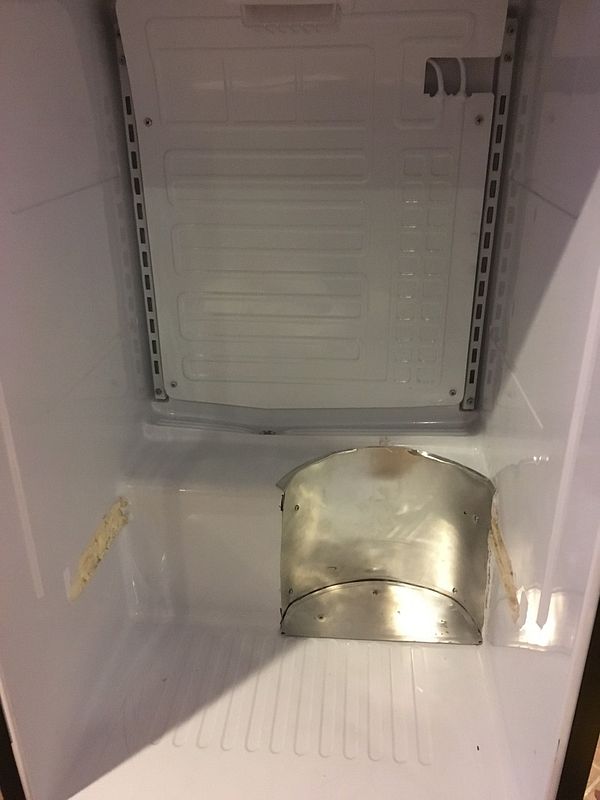
Next we will want to cut out the metal shelf. Cut all of it out except for a "tab" in each corner, we will need these to screw into later to secure our new molding. Its hard to see the tabs in the photo but hopefully you can figure out what I'm trying to explain. Be careful when trying to remove the wire from the metal shelf, you will need to cut it out.
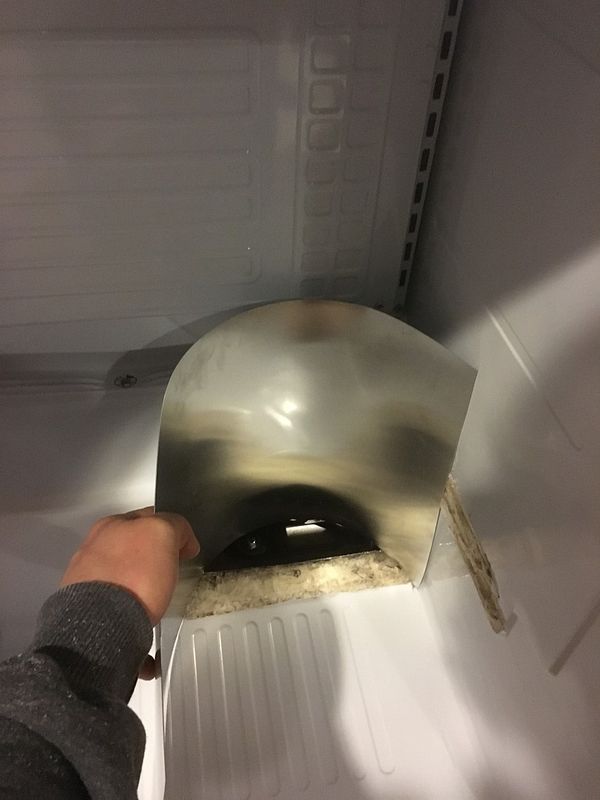
Next you will want to use a piece of aluminum sheet metal and cut it to size. When cutting this piece, I left a little bit of extra at the top, so I could use a mallet to shape it over the plastic. I also placed some wood in the area where the keg will be sitting for some more support. Using stainless steel sheet metal screws, secure the aluminum piece into the tabs and shape with the mallet carefully to bend the extra over the edges.
Cut out the floor piece out of aluminum and secure it into place using long sheet metal screws, through the wood and through the metal supports the fridge is on.
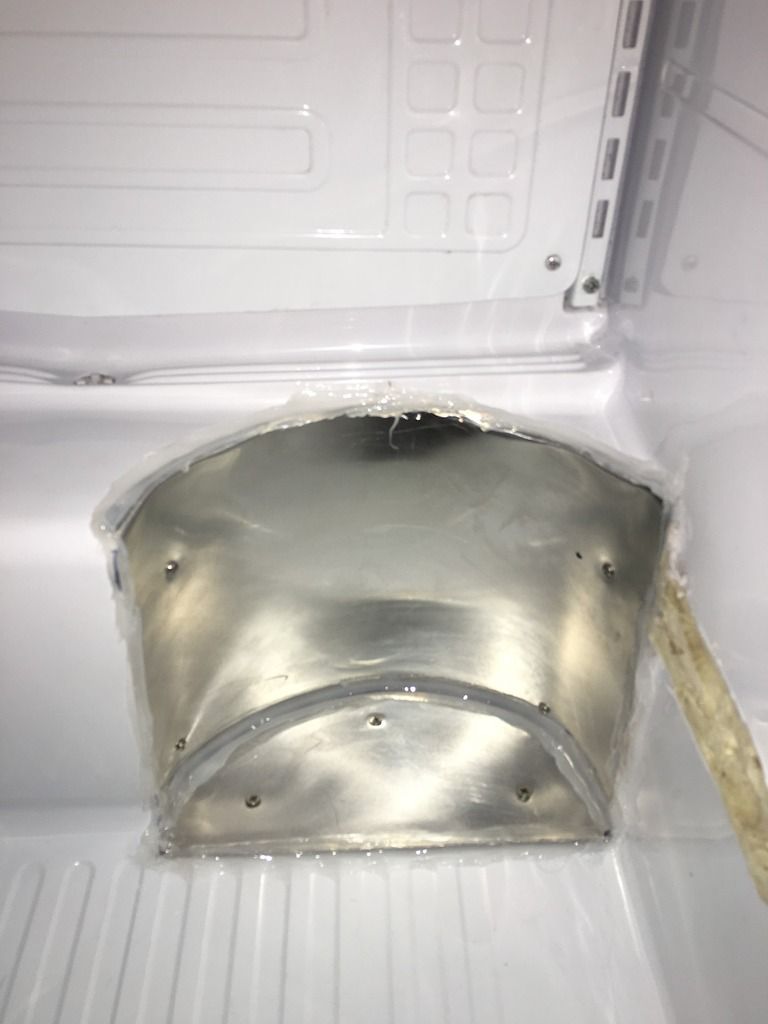
Once that is all done, use some silicone and go over all the edges to seal it up nicely. Once that is dried up and finished, you can also use spray foam insulation and hit it from the back to re-insulate. Try to avoid getting anything on the compressor, but do as much as you can.
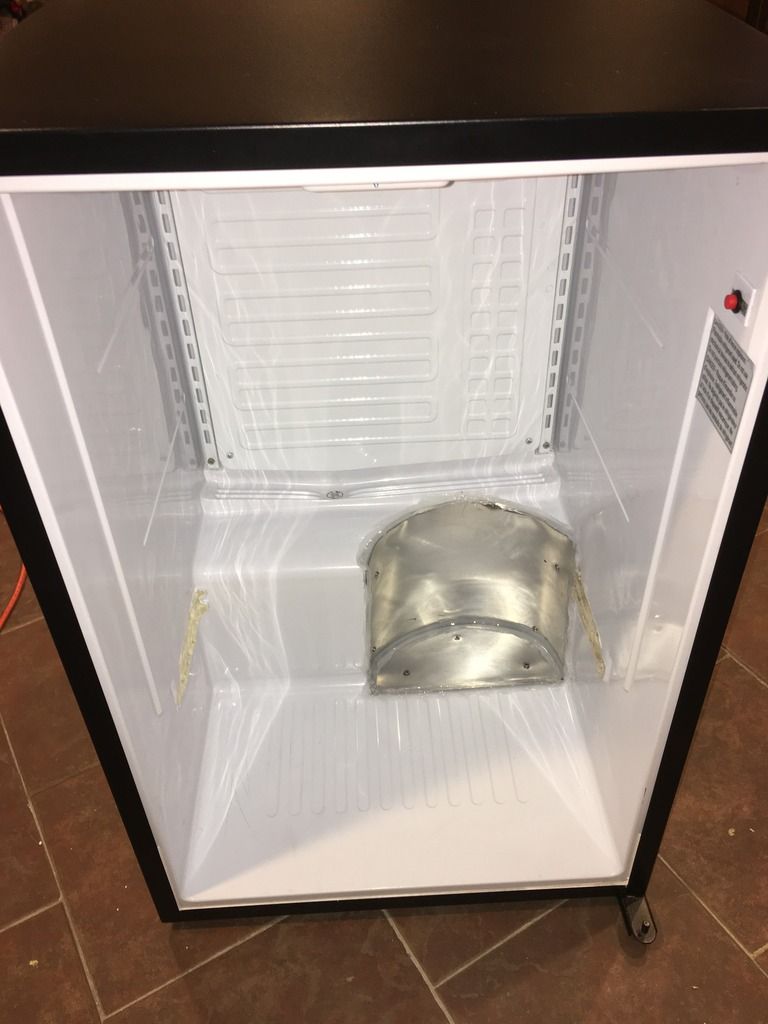
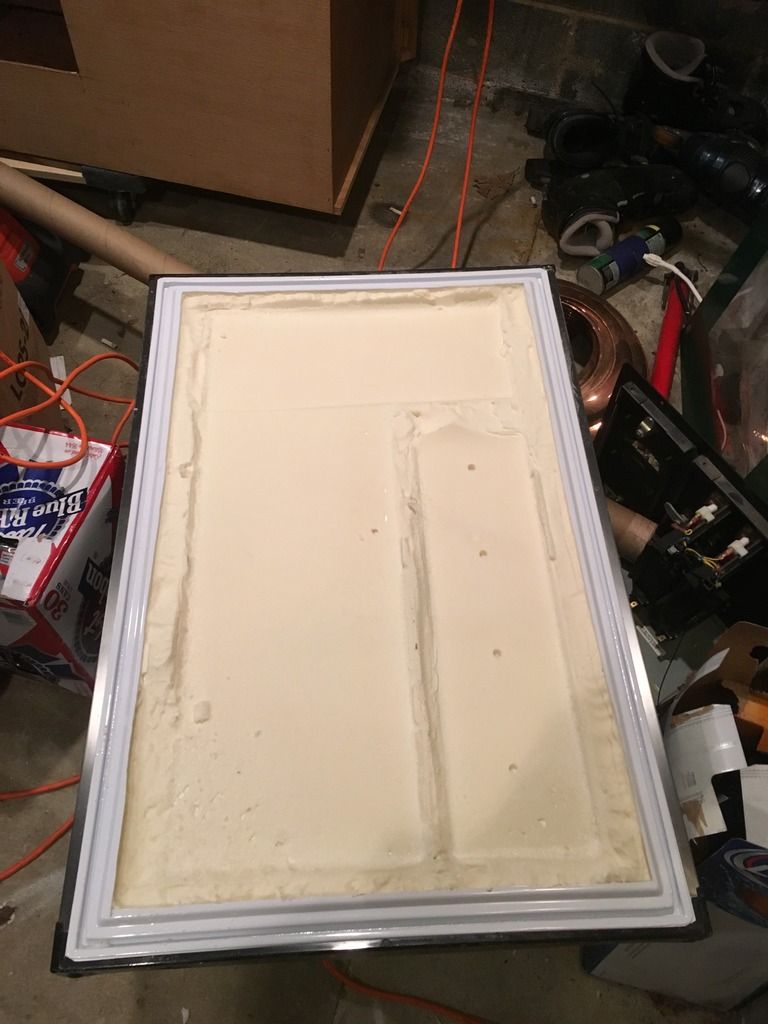
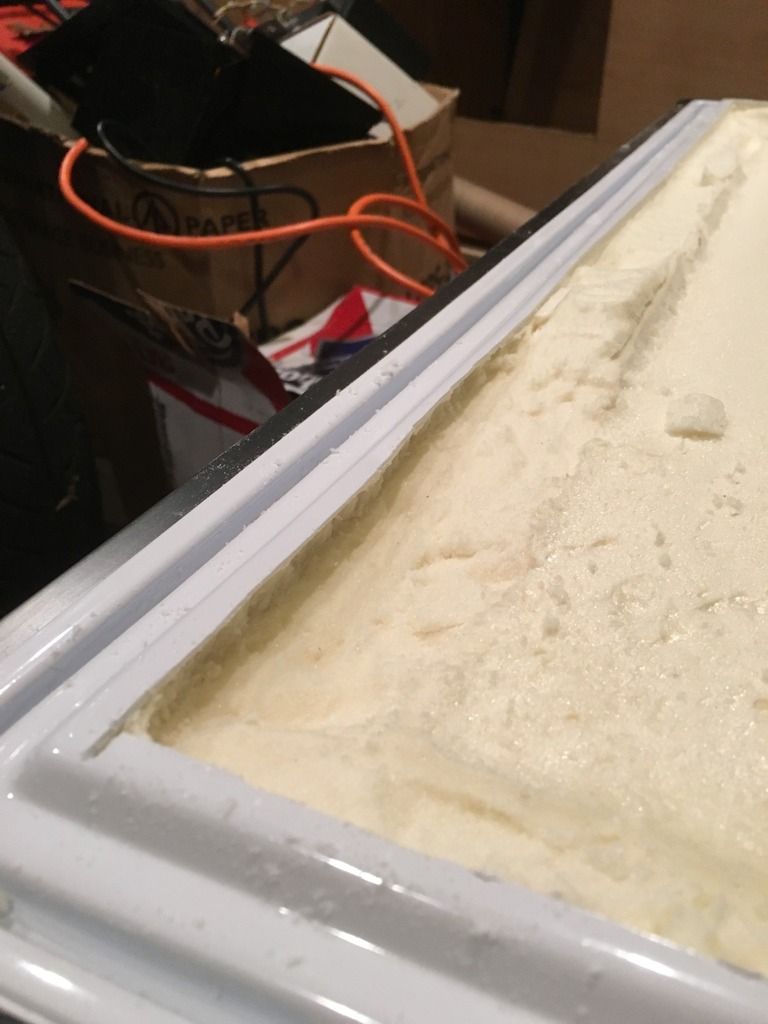
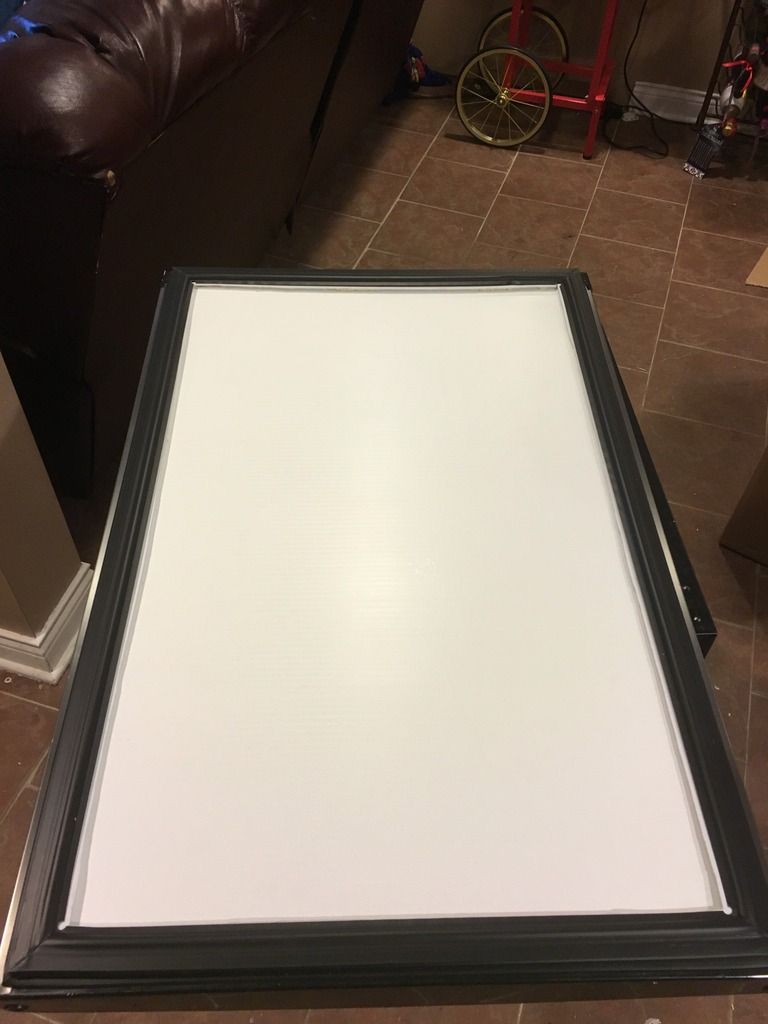
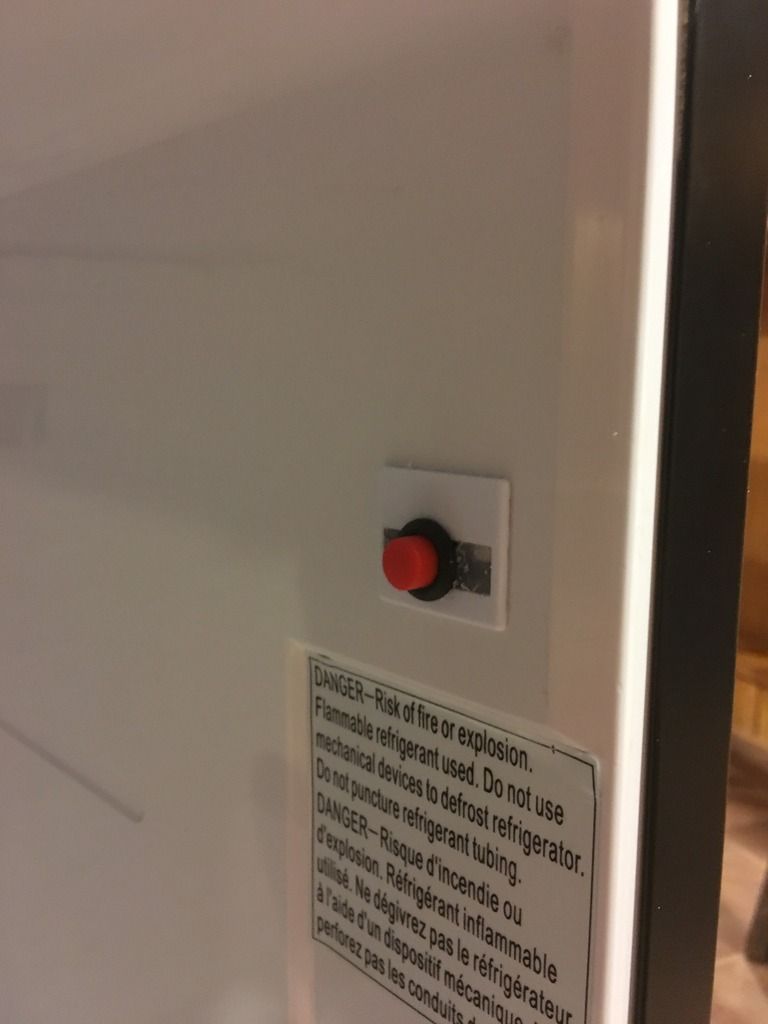
As far as the door is concerned, you will need to remove everything on it. I cut it all off and put in a nice piece of white board. Since I removed the mechanism that turns the light on, I replaced it with a pushbutton switch. Throw your kegs in and enjoy")
Next we will want to cut out the metal shelf. Cut all of it out except for a "tab" in each corner, we will need these to screw into later to secure our new molding. Its hard to see the tabs in the photo but hopefully you can figure out what I'm trying to explain. Be careful when trying to remove the wire from the metal shelf, you will need to cut it out.
Next you will want to use a piece of aluminum sheet metal and cut it to size. When cutting this piece, I left a little bit of extra at the top, so I could use a mallet to shape it over the plastic. I also placed some wood in the area where the keg will be sitting for some more support. Using stainless steel sheet metal screws, secure the aluminum piece into the tabs and shape with the mallet carefully to bend the extra over the edges.
Cut out the floor piece out of aluminum and secure it into place using long sheet metal screws, through the wood and through the metal supports the fridge is on.
Once that is all done, use some silicone and go over all the edges to seal it up nicely. Once that is dried up and finished, you can also use spray foam insulation and hit it from the back to re-insulate. Try to avoid getting anything on the compressor, but do as much as you can.
As far as the door is concerned, you will need to remove everything on it. I cut it all off and put in a nice piece of white board. Since I removed the mechanism that turns the light on, I replaced it with a pushbutton switch. Throw your kegs in and enjoy