Danby DAR044A6BSLDB Kegerator Cabinet Build

Homebrew Talk - Beer, Wine, Mead, & Cider Brewing Discussion Forum

Help Support Homebrew Talk - Beer, Wine, Mead, & Cider Brewing Discussion Forum:

This site may earn a commission from merchant affiliate links, including eBay, Amazon, and others.

Sellick

Well-Known Member
Joined
Apr 4, 2015
Messages
55
Reaction score
21
Location
Glendale
Wanted to share my most recent project. Really happy with how it turned out and hoping others will enjoy as well!

Materials to build this was what I asked for for Christmas and my wife didn't disappoint! She bought me the Danby 4.4 cu. ft. mini fridge that Costco has for sale right now. I ended up piecing everything together, to get exactly what I wanted/best prices. Kegconnection and Brew International were the two places I ended up getting all my kegging equip. from. Ended up costing around $750. That's everything: cabinet materials, mini fridge, keg equip.

Now the part anyone everyone else cares about, the pictures. (Sorry to anyone with slow internet speeds...)

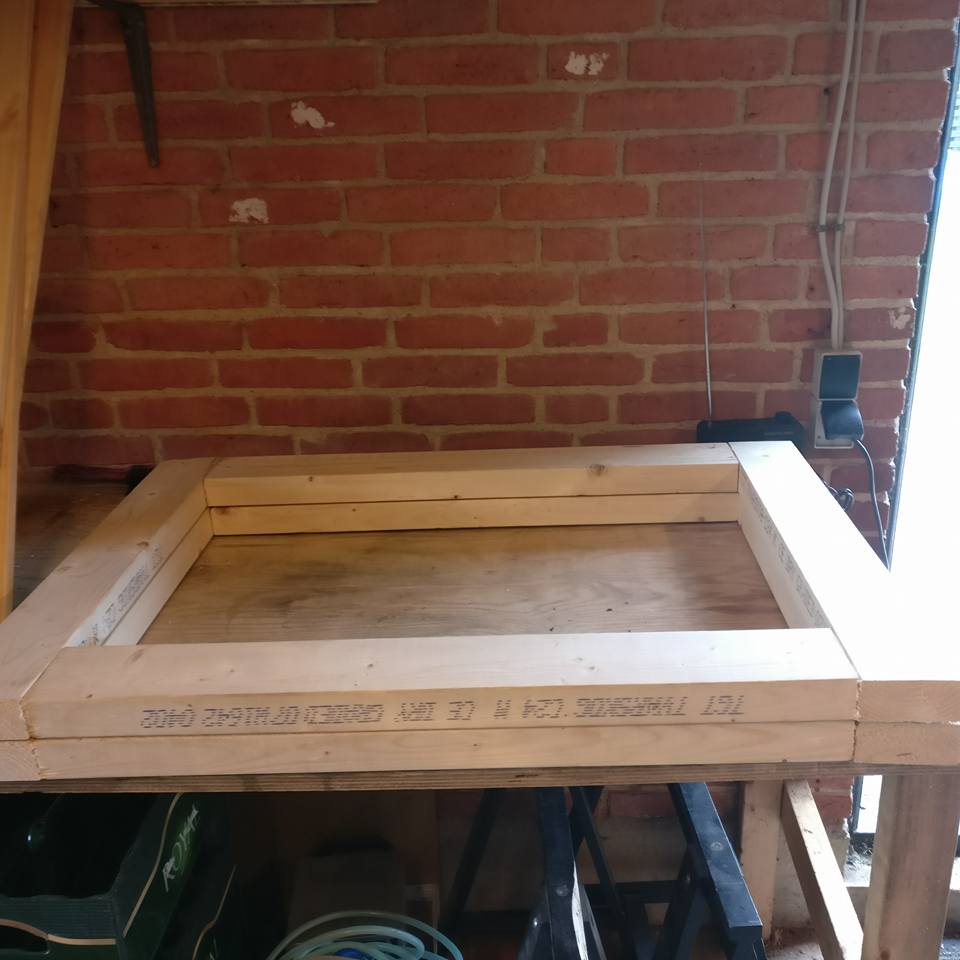
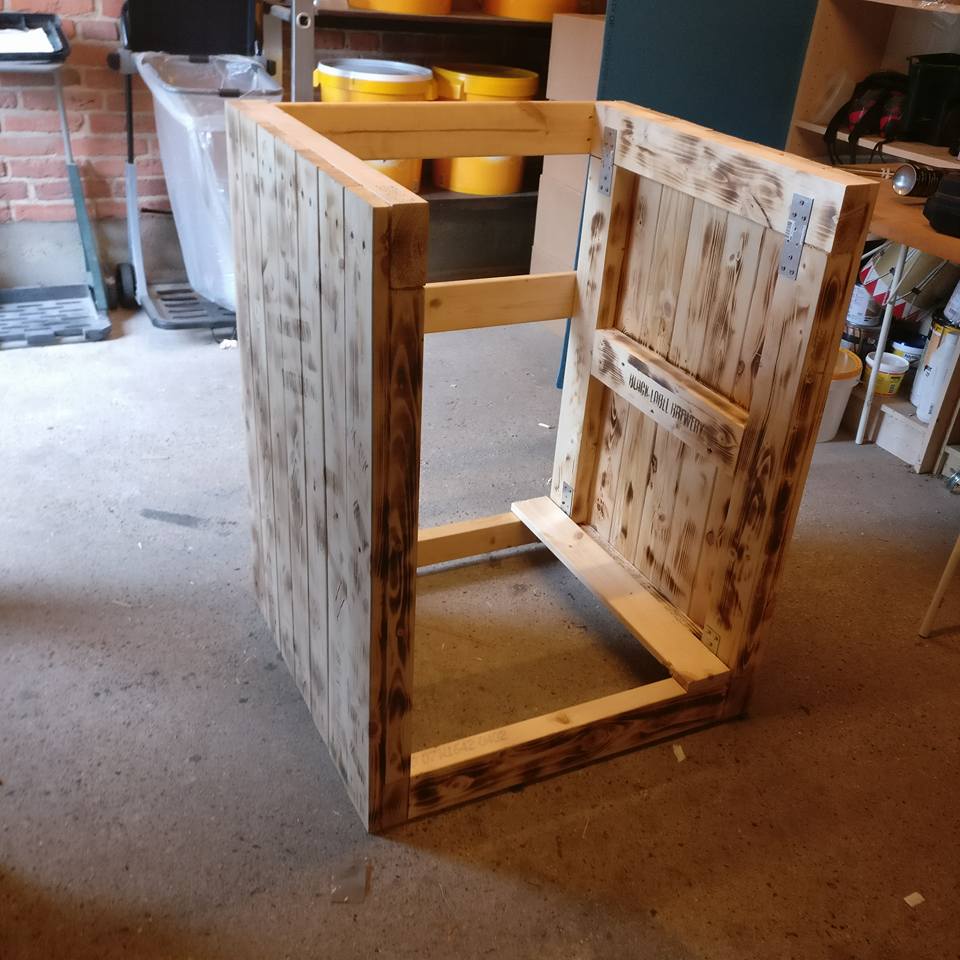
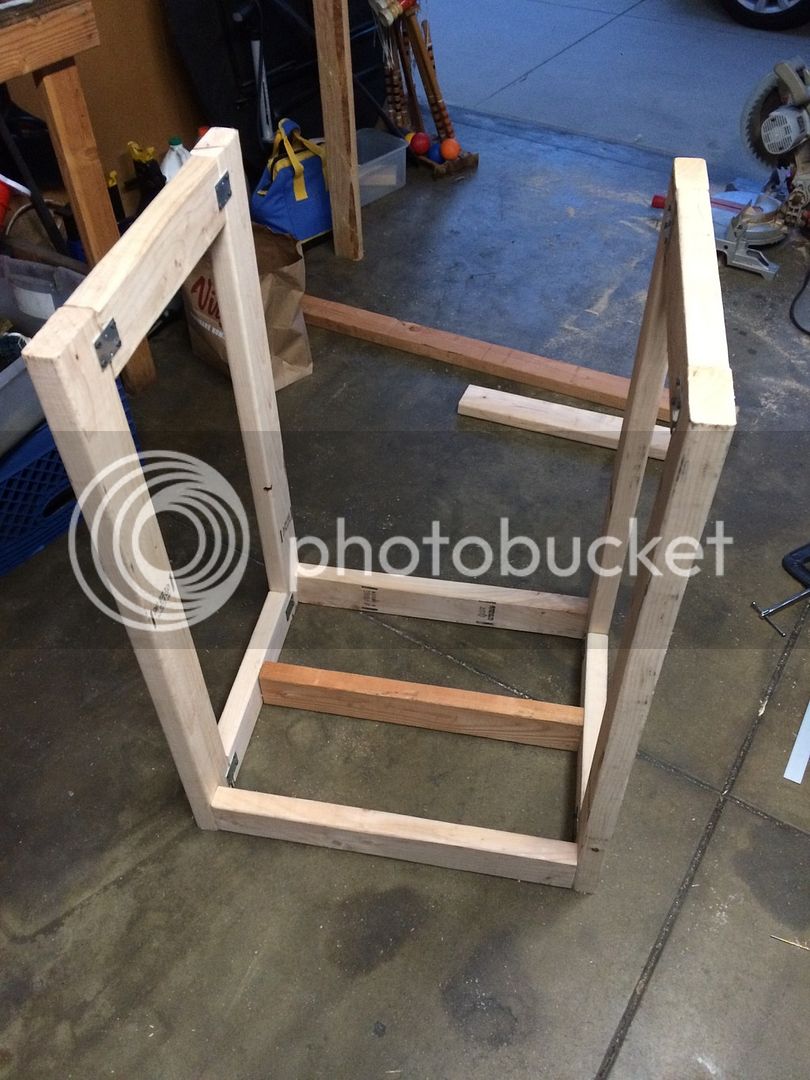
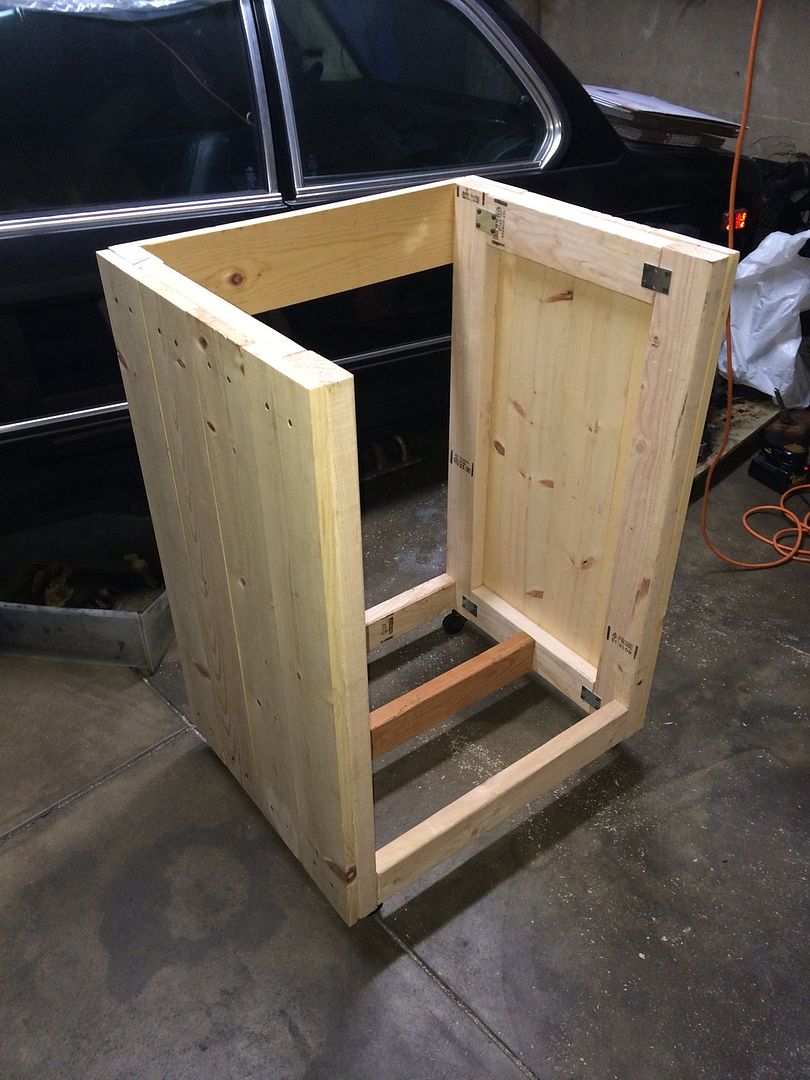
Building the cabinet frame.
IMG_4033.jpg


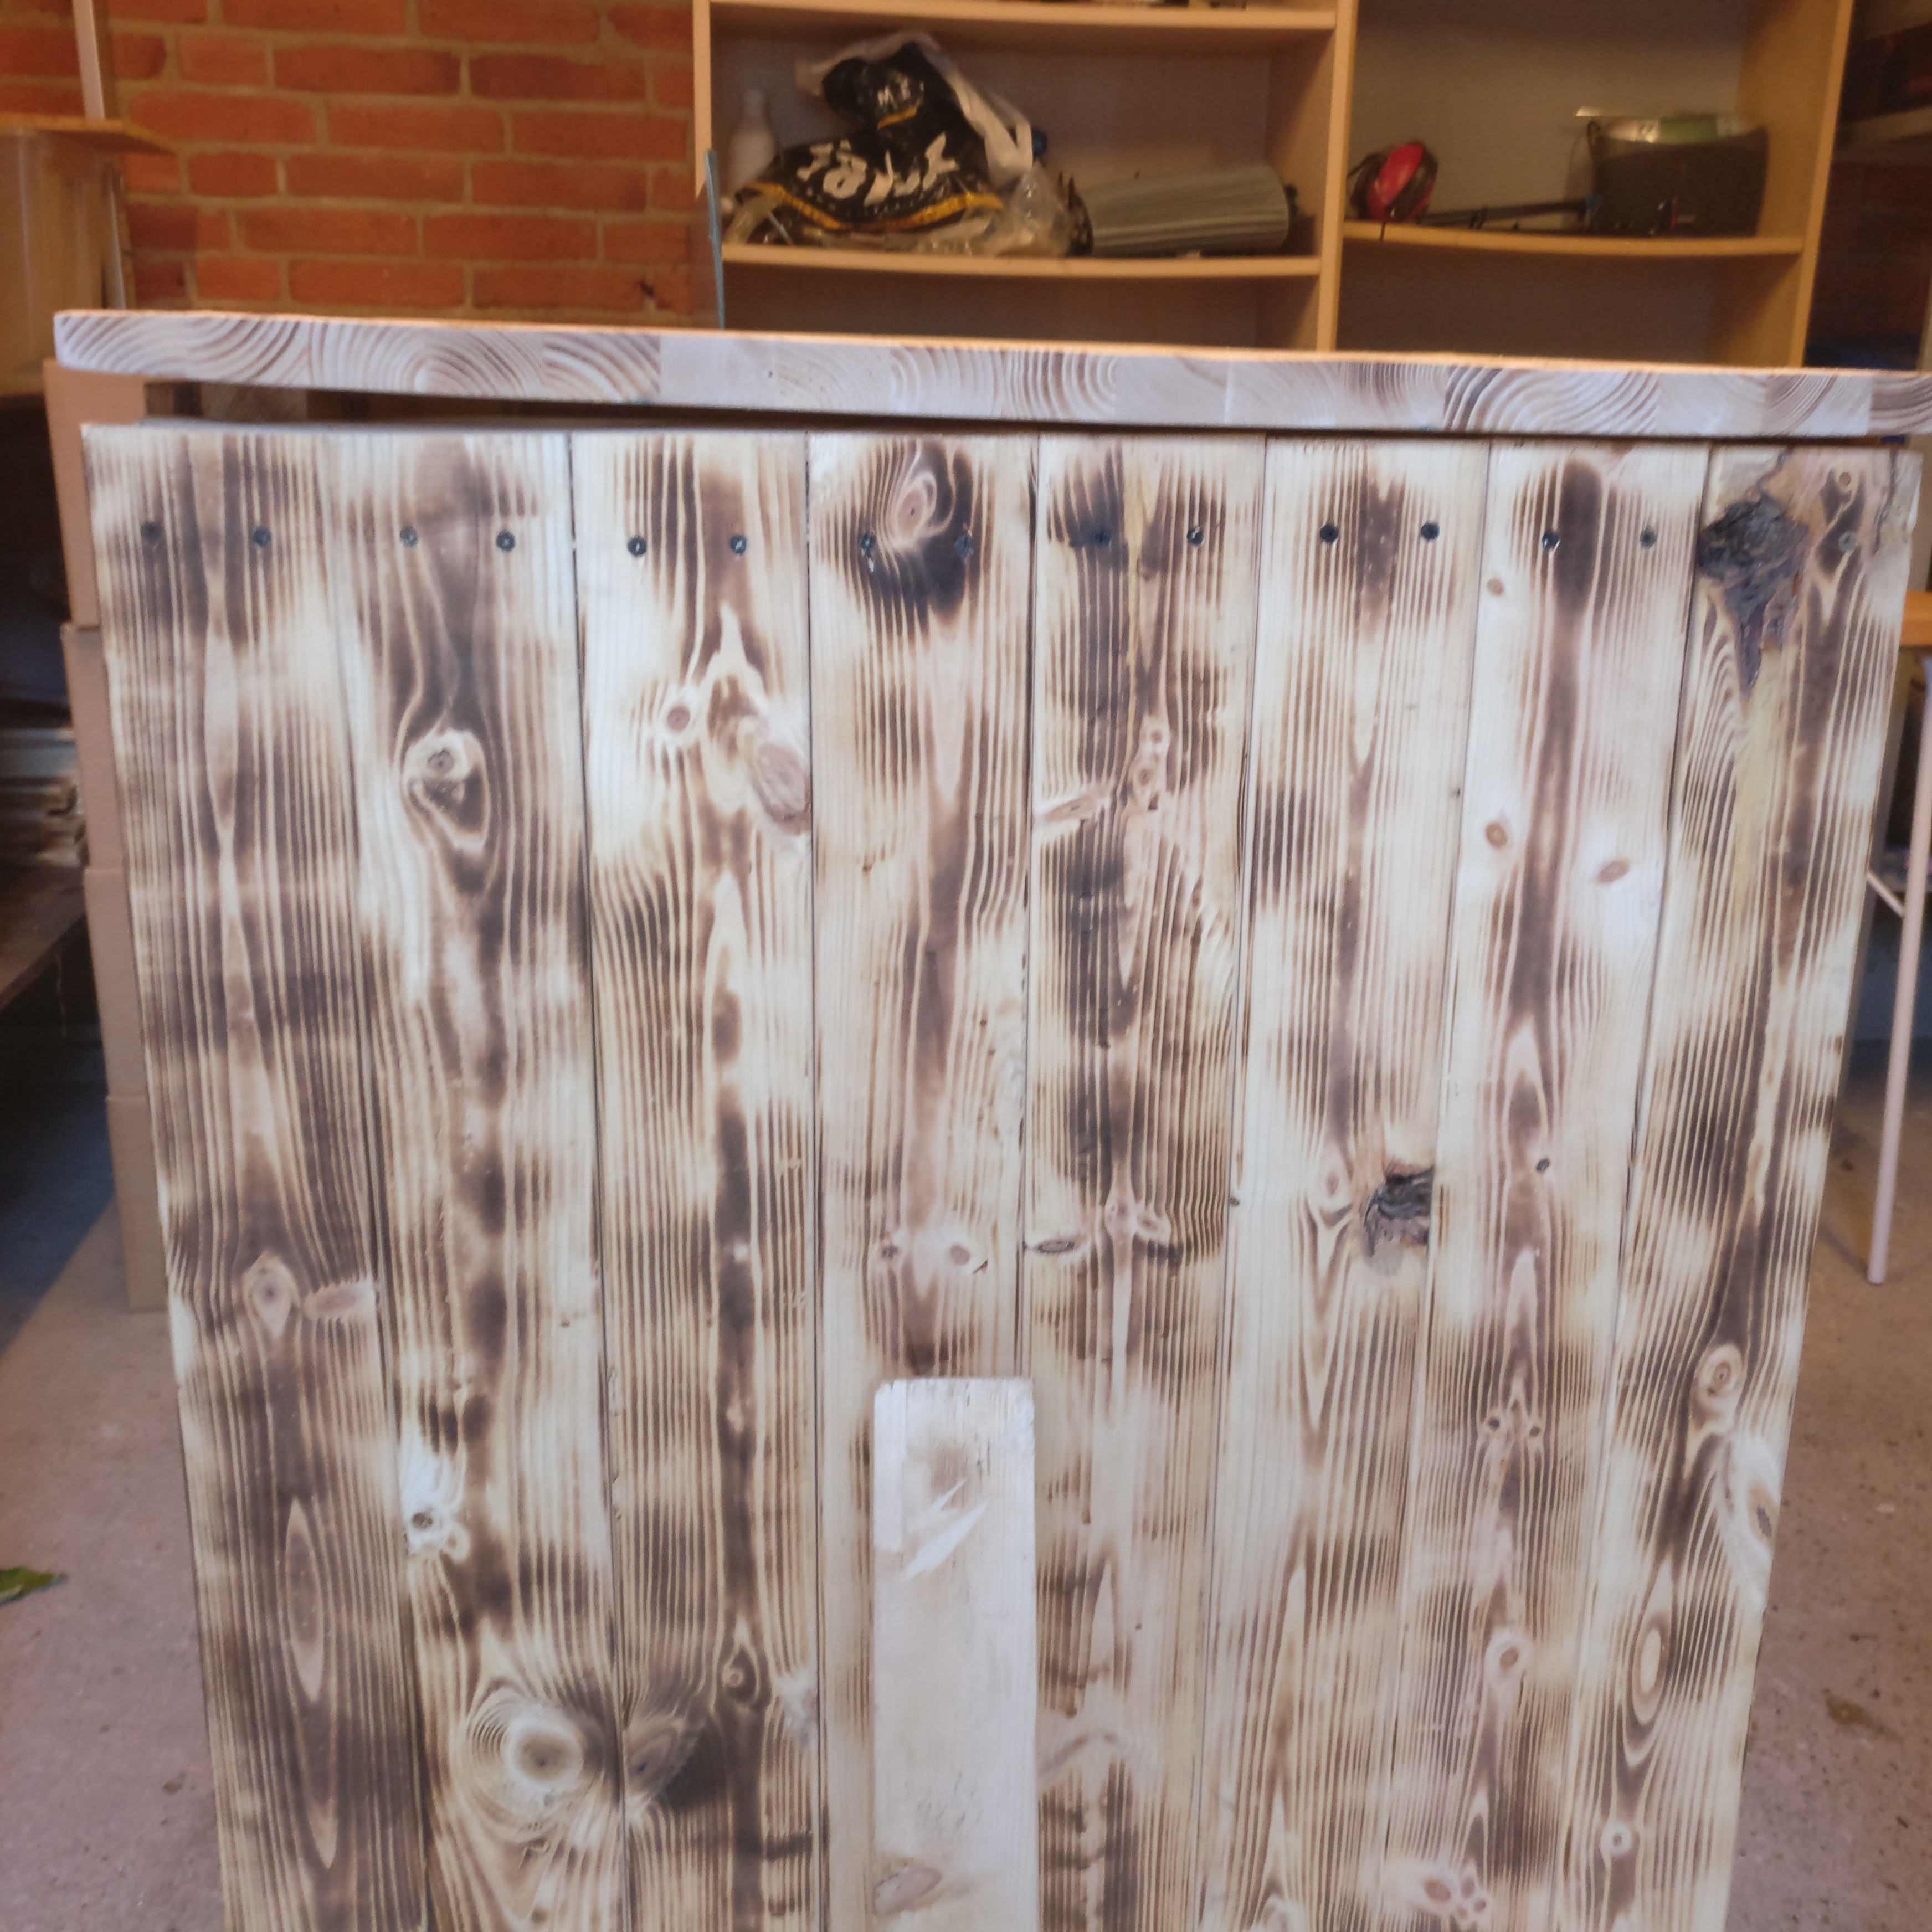
Siding and wheels attached.
IMG_4035.jpg


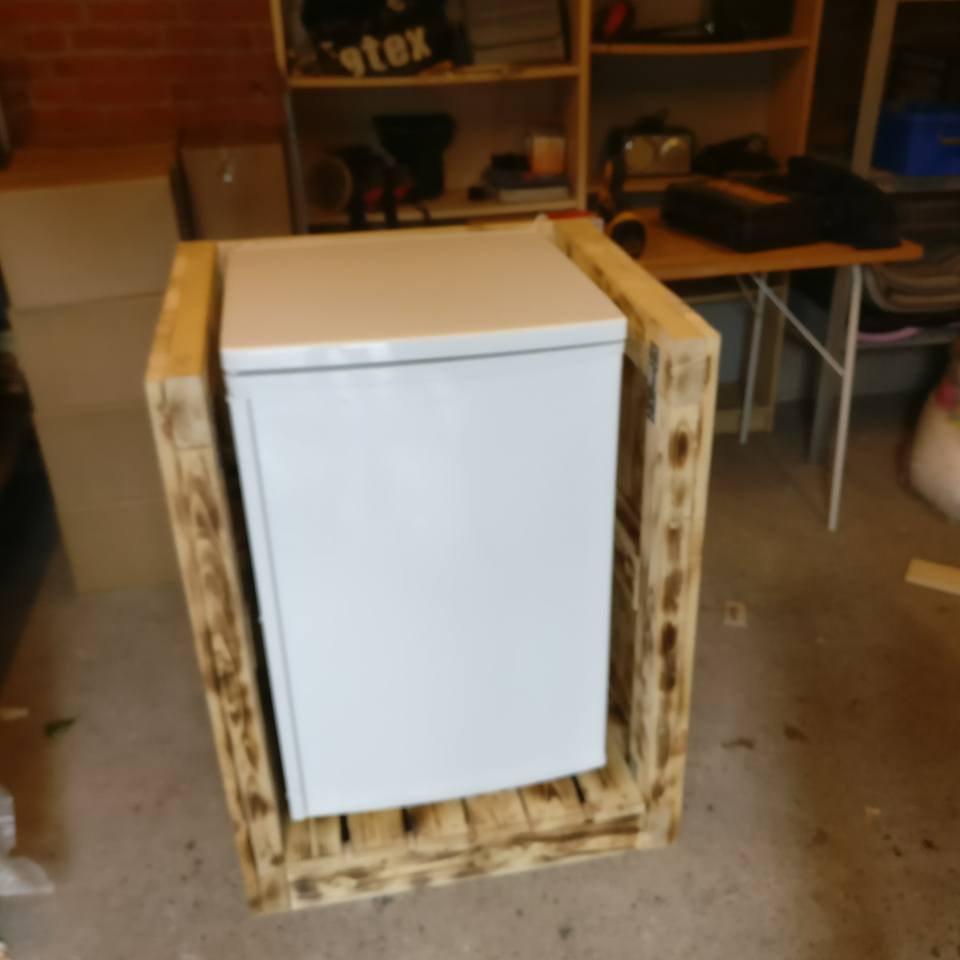
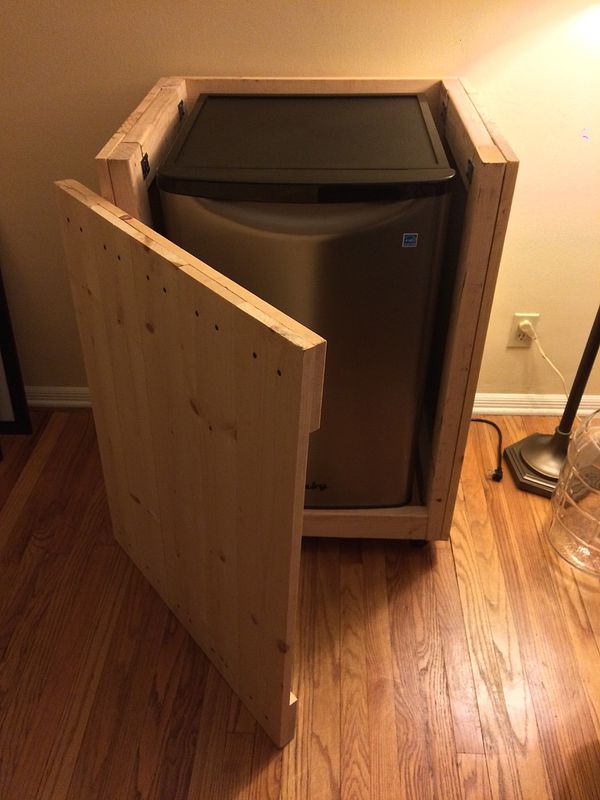
Testing how it fits.
IMG_4039.jpg


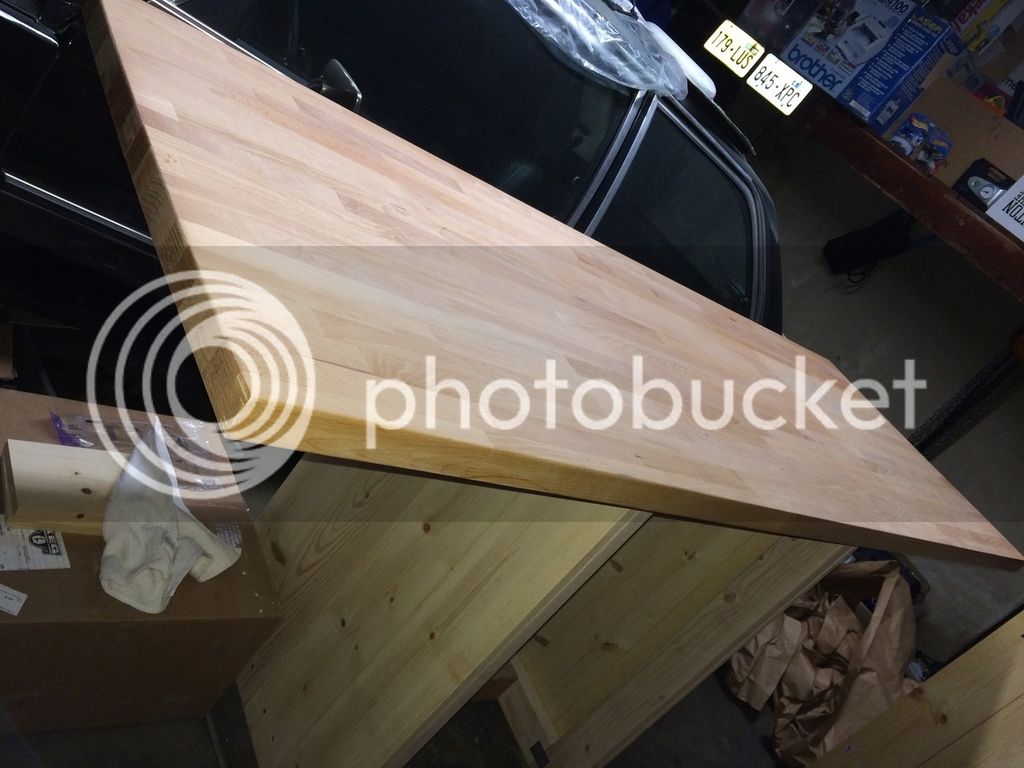
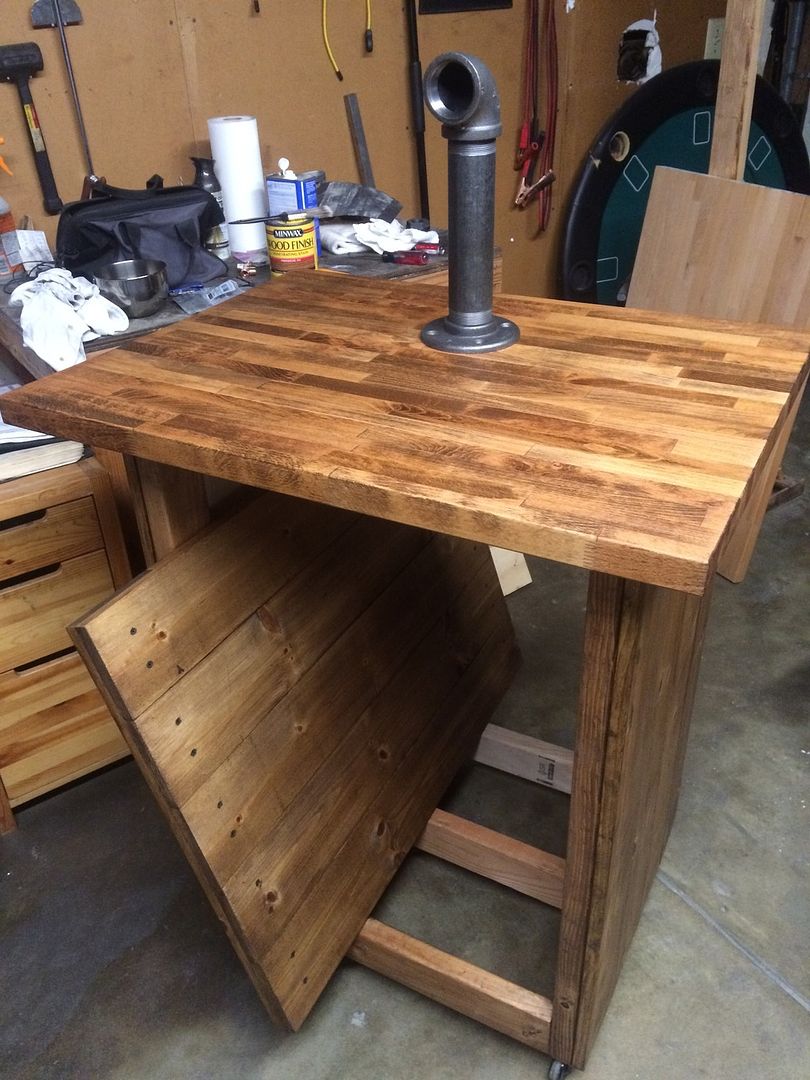
Sat like that for awhile while I tried to figure out what I wanted to do for the cabinet top. Ended up finding a 6' table top from Ikea on Craigslist for a ridiculously good deal.
2c5cafd4-b4d6-4356-ade7-47841e213844.jpg


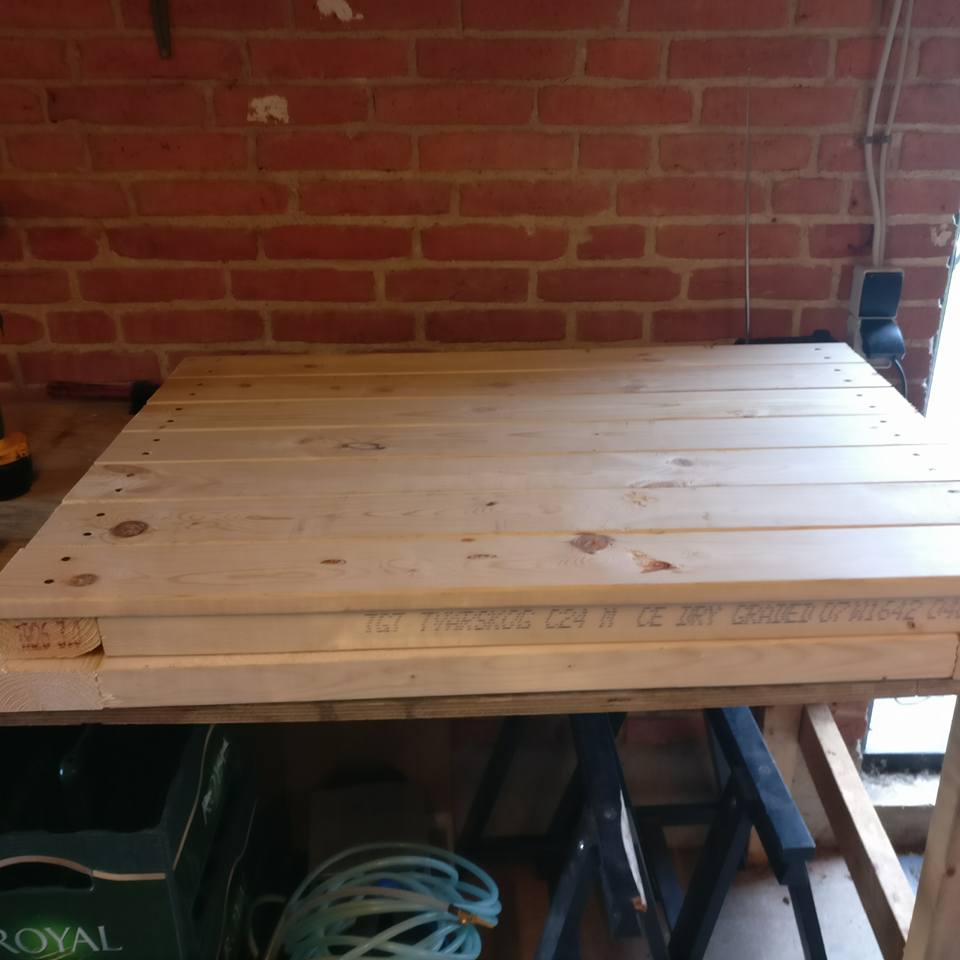
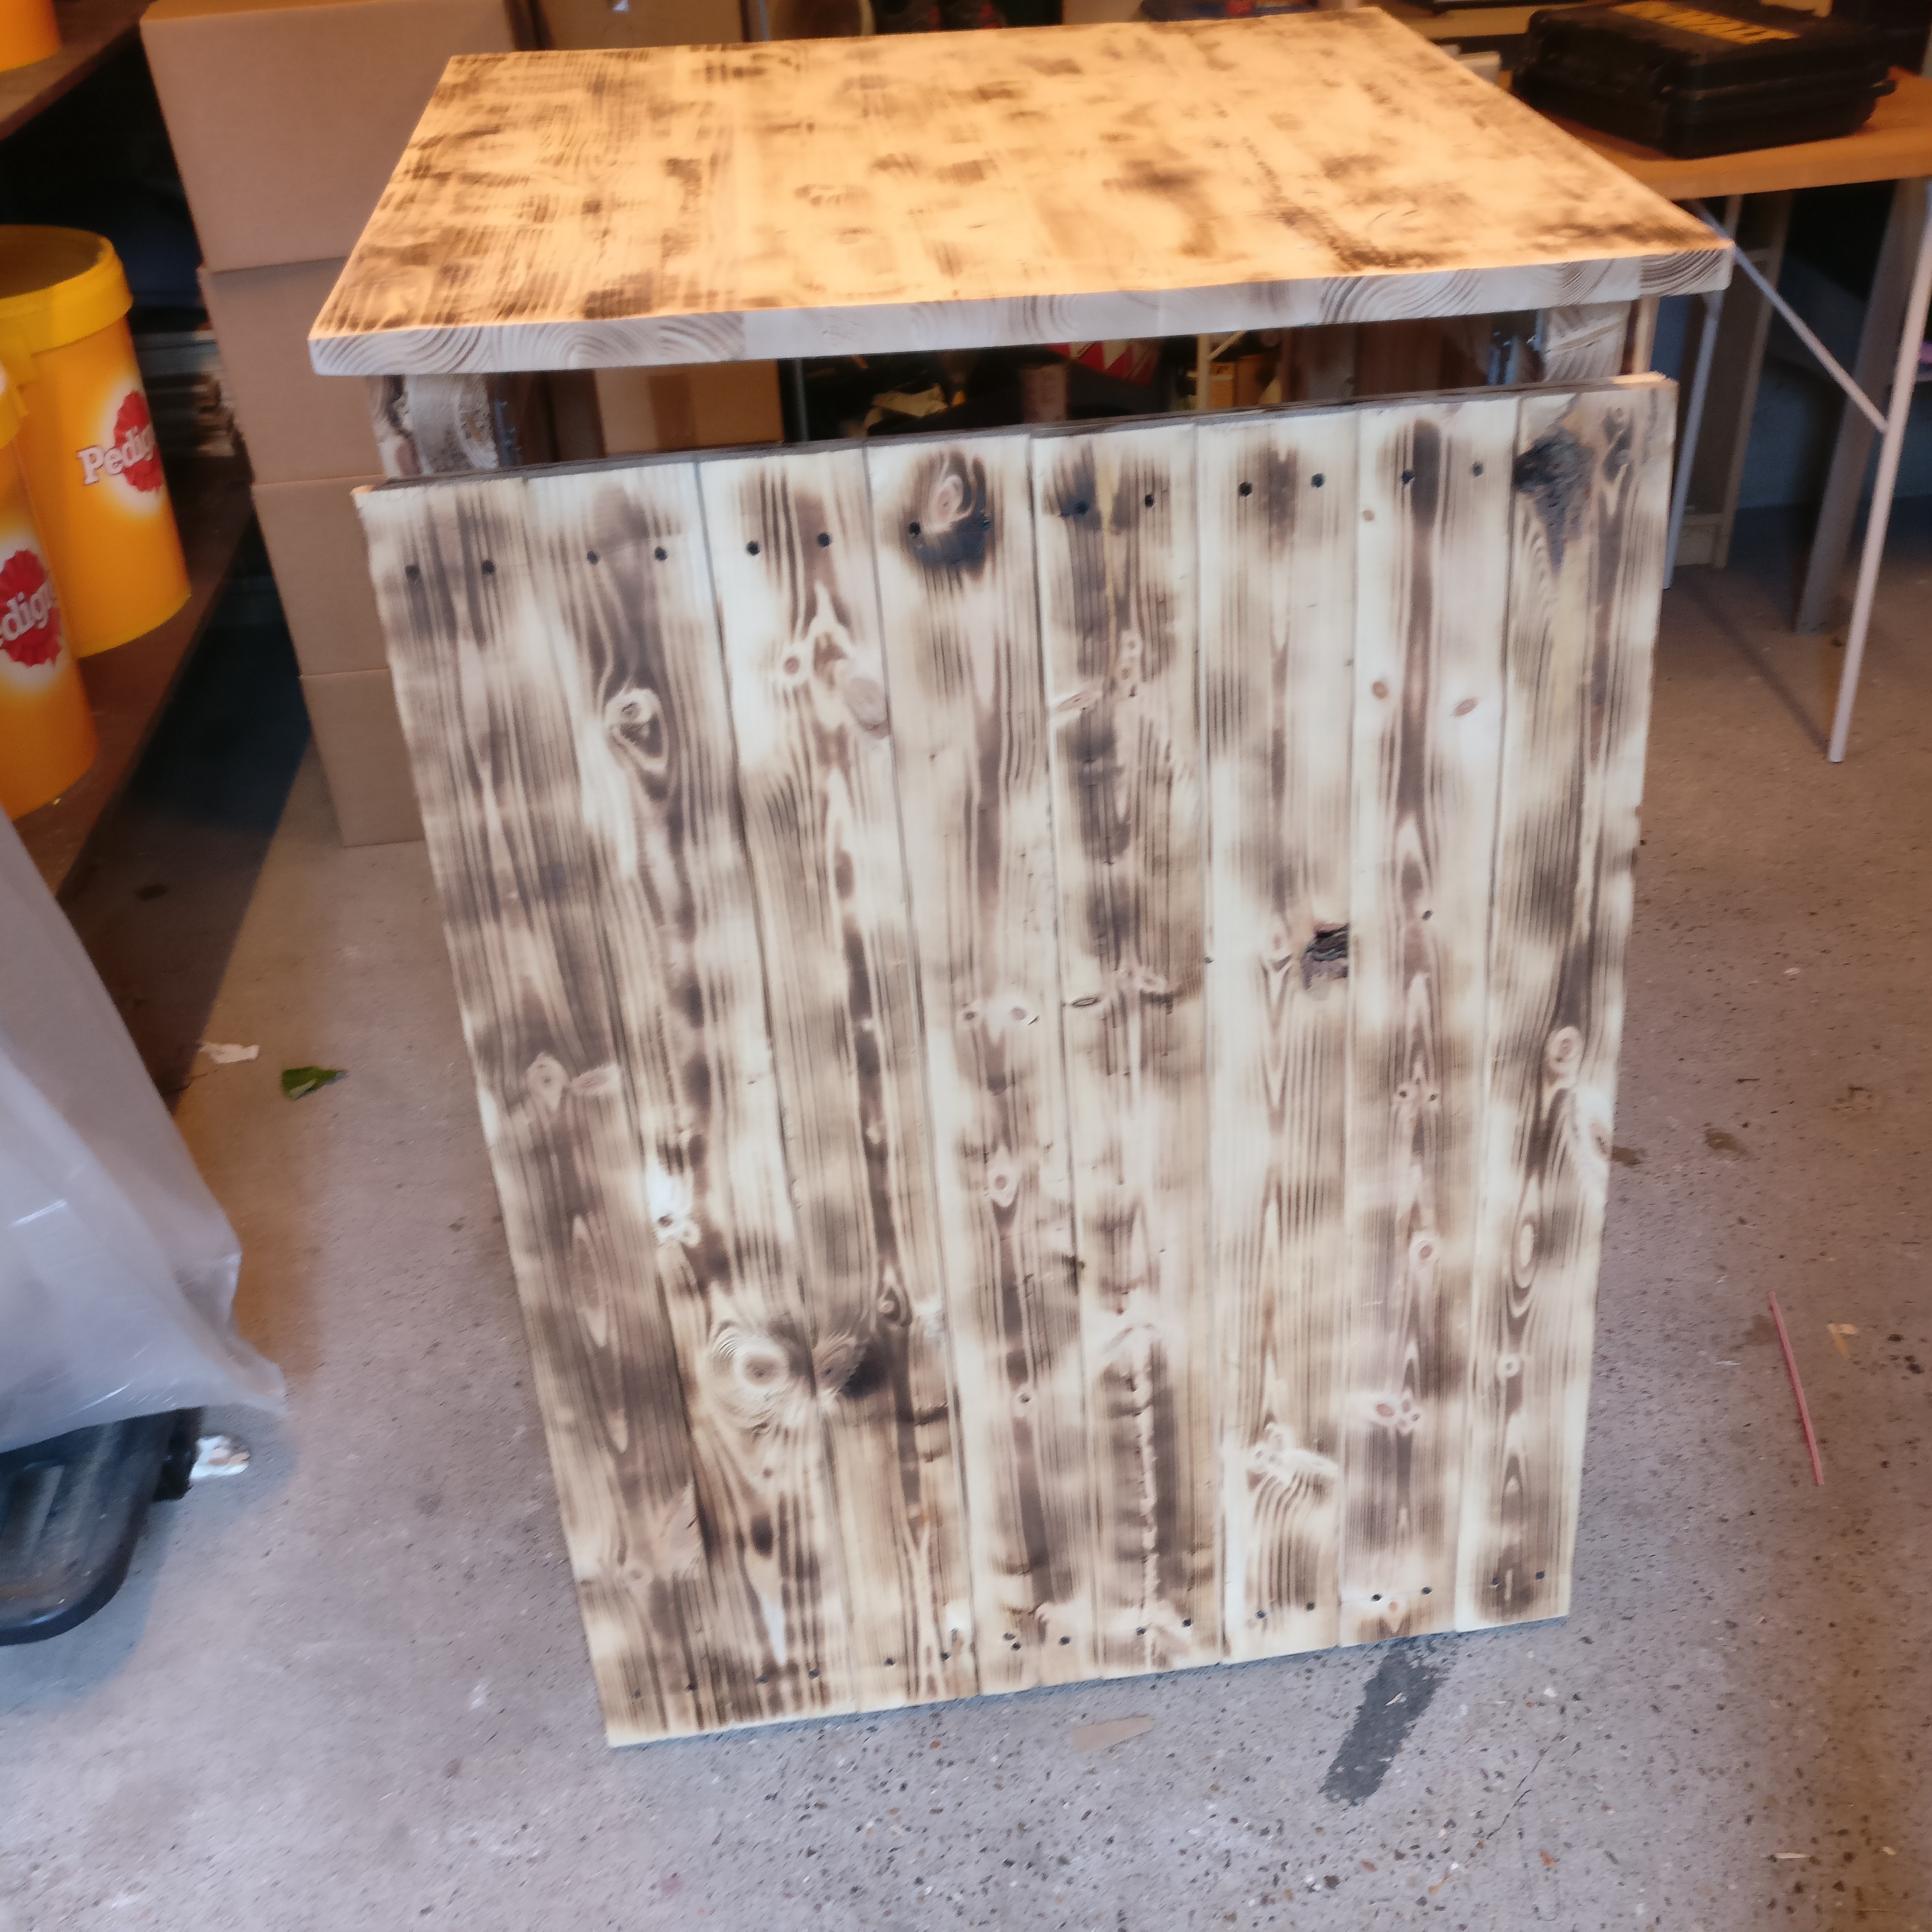
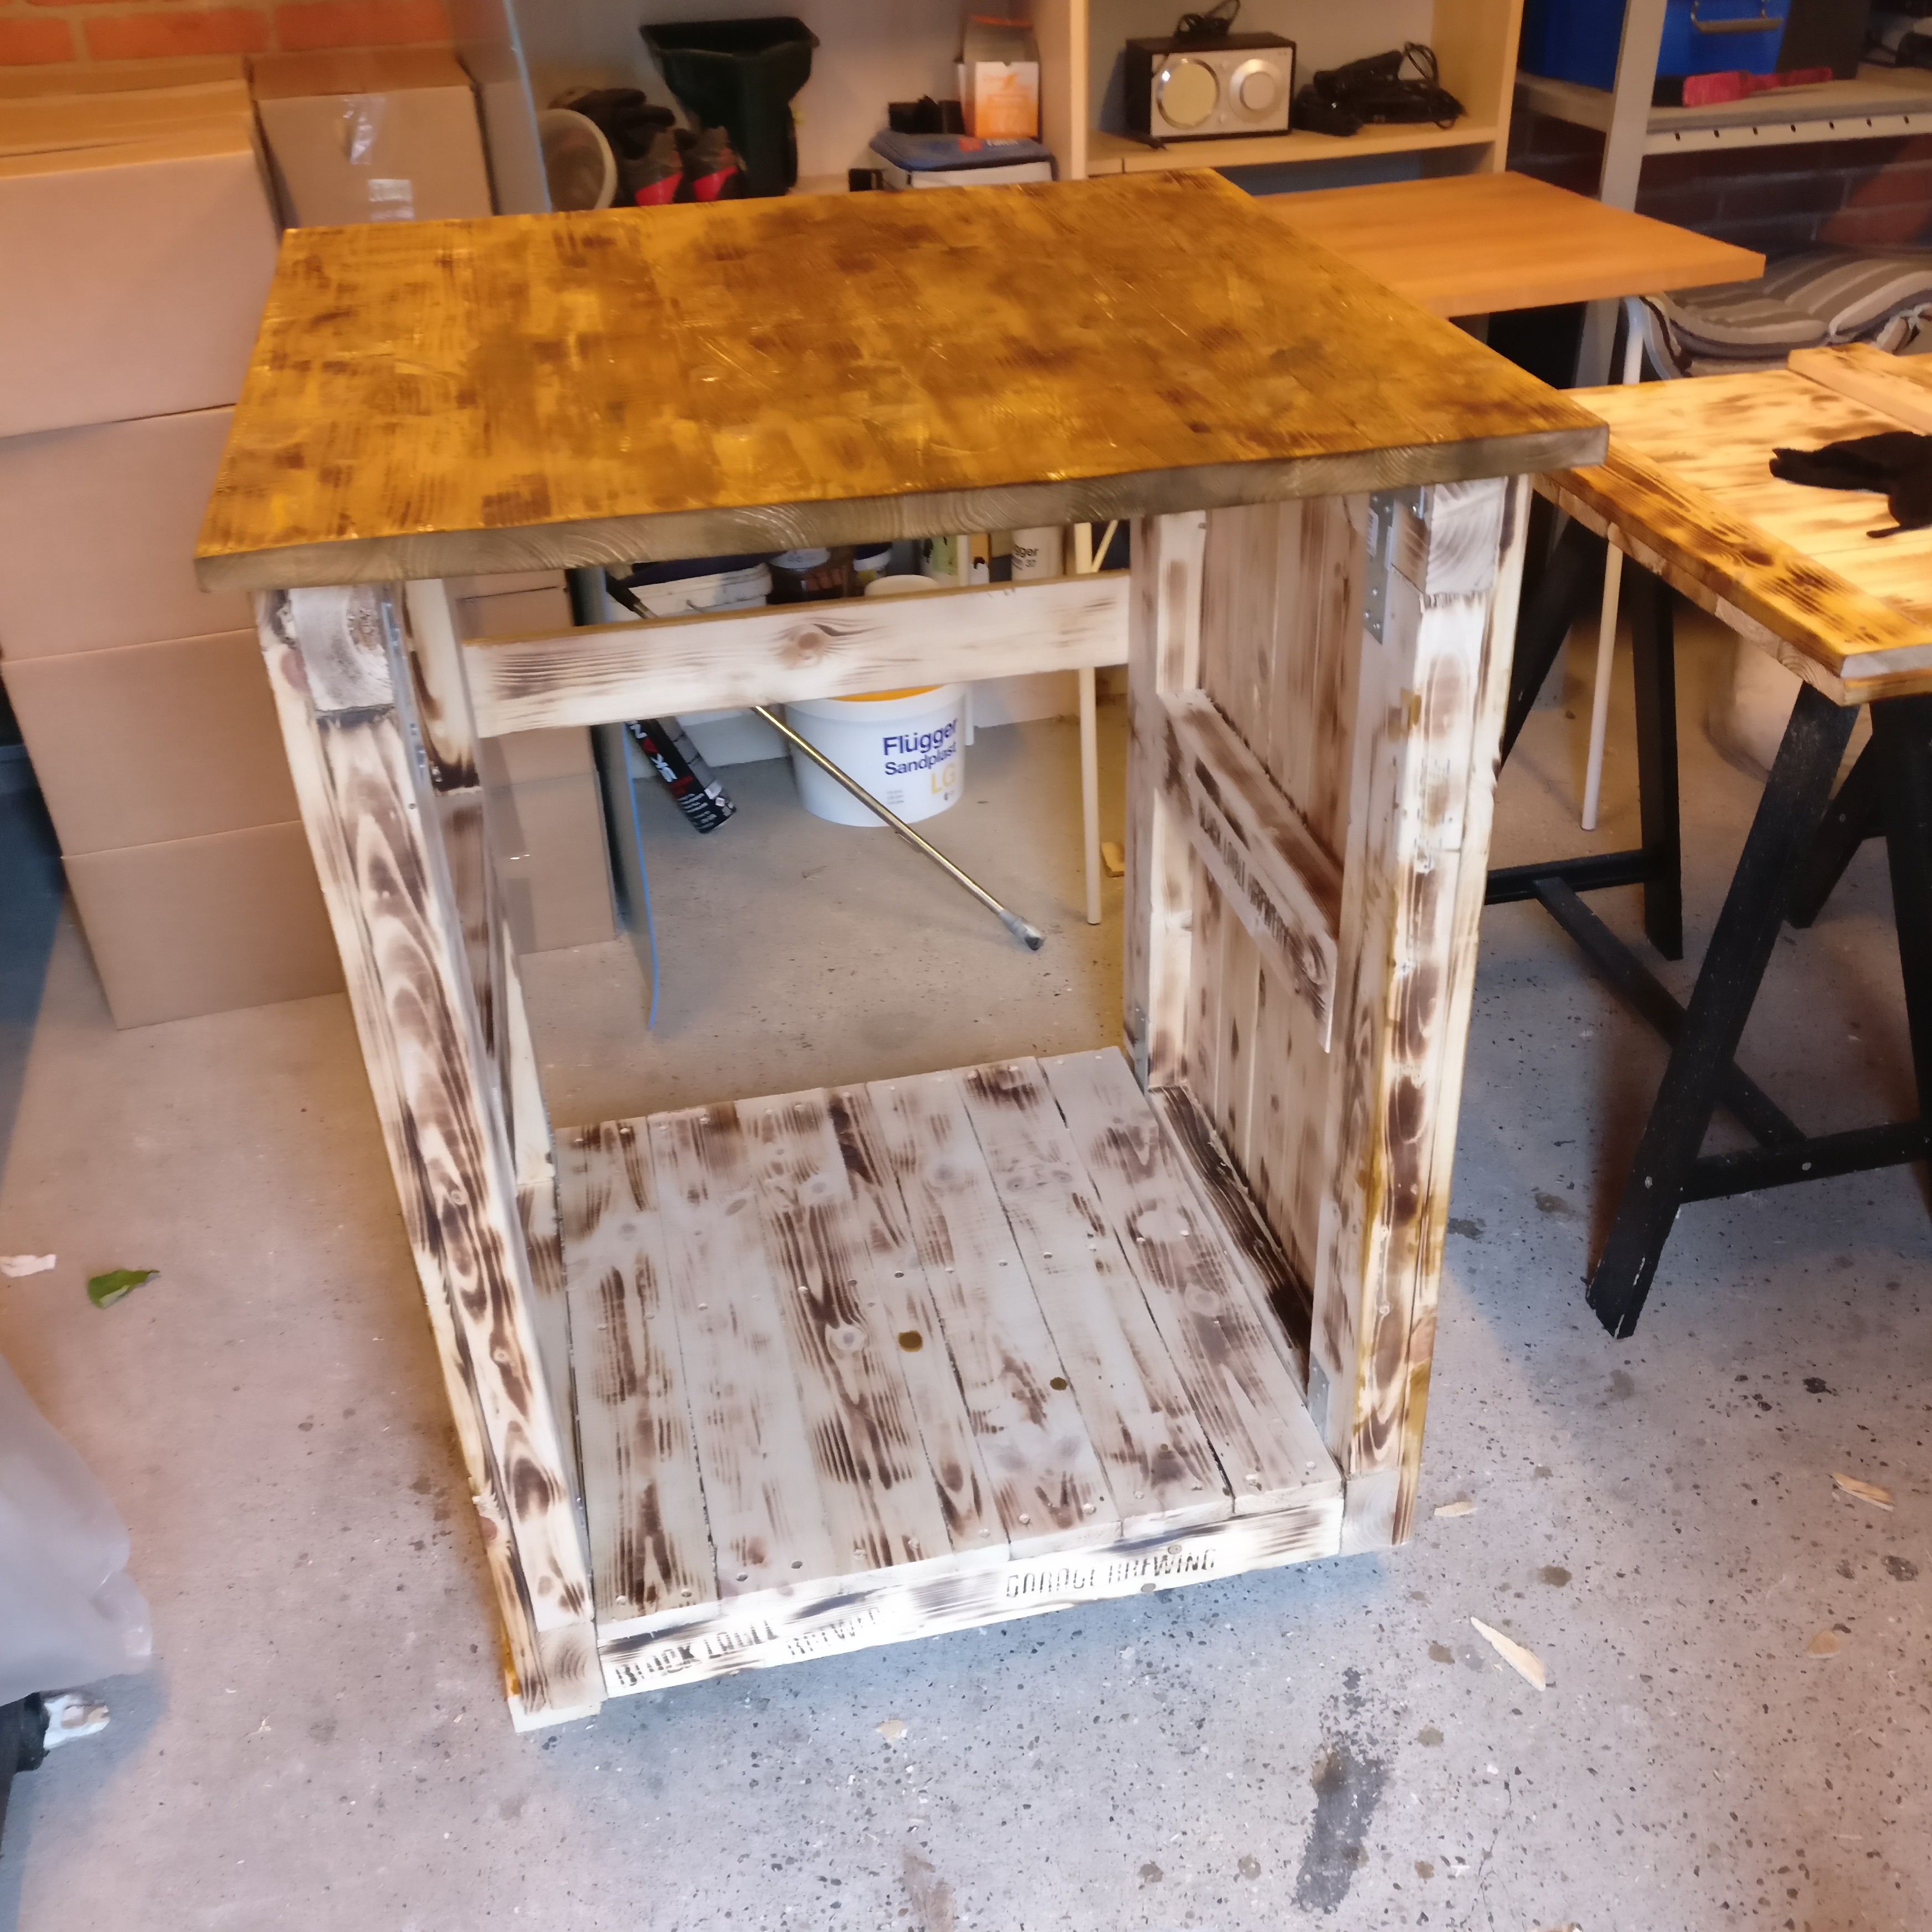
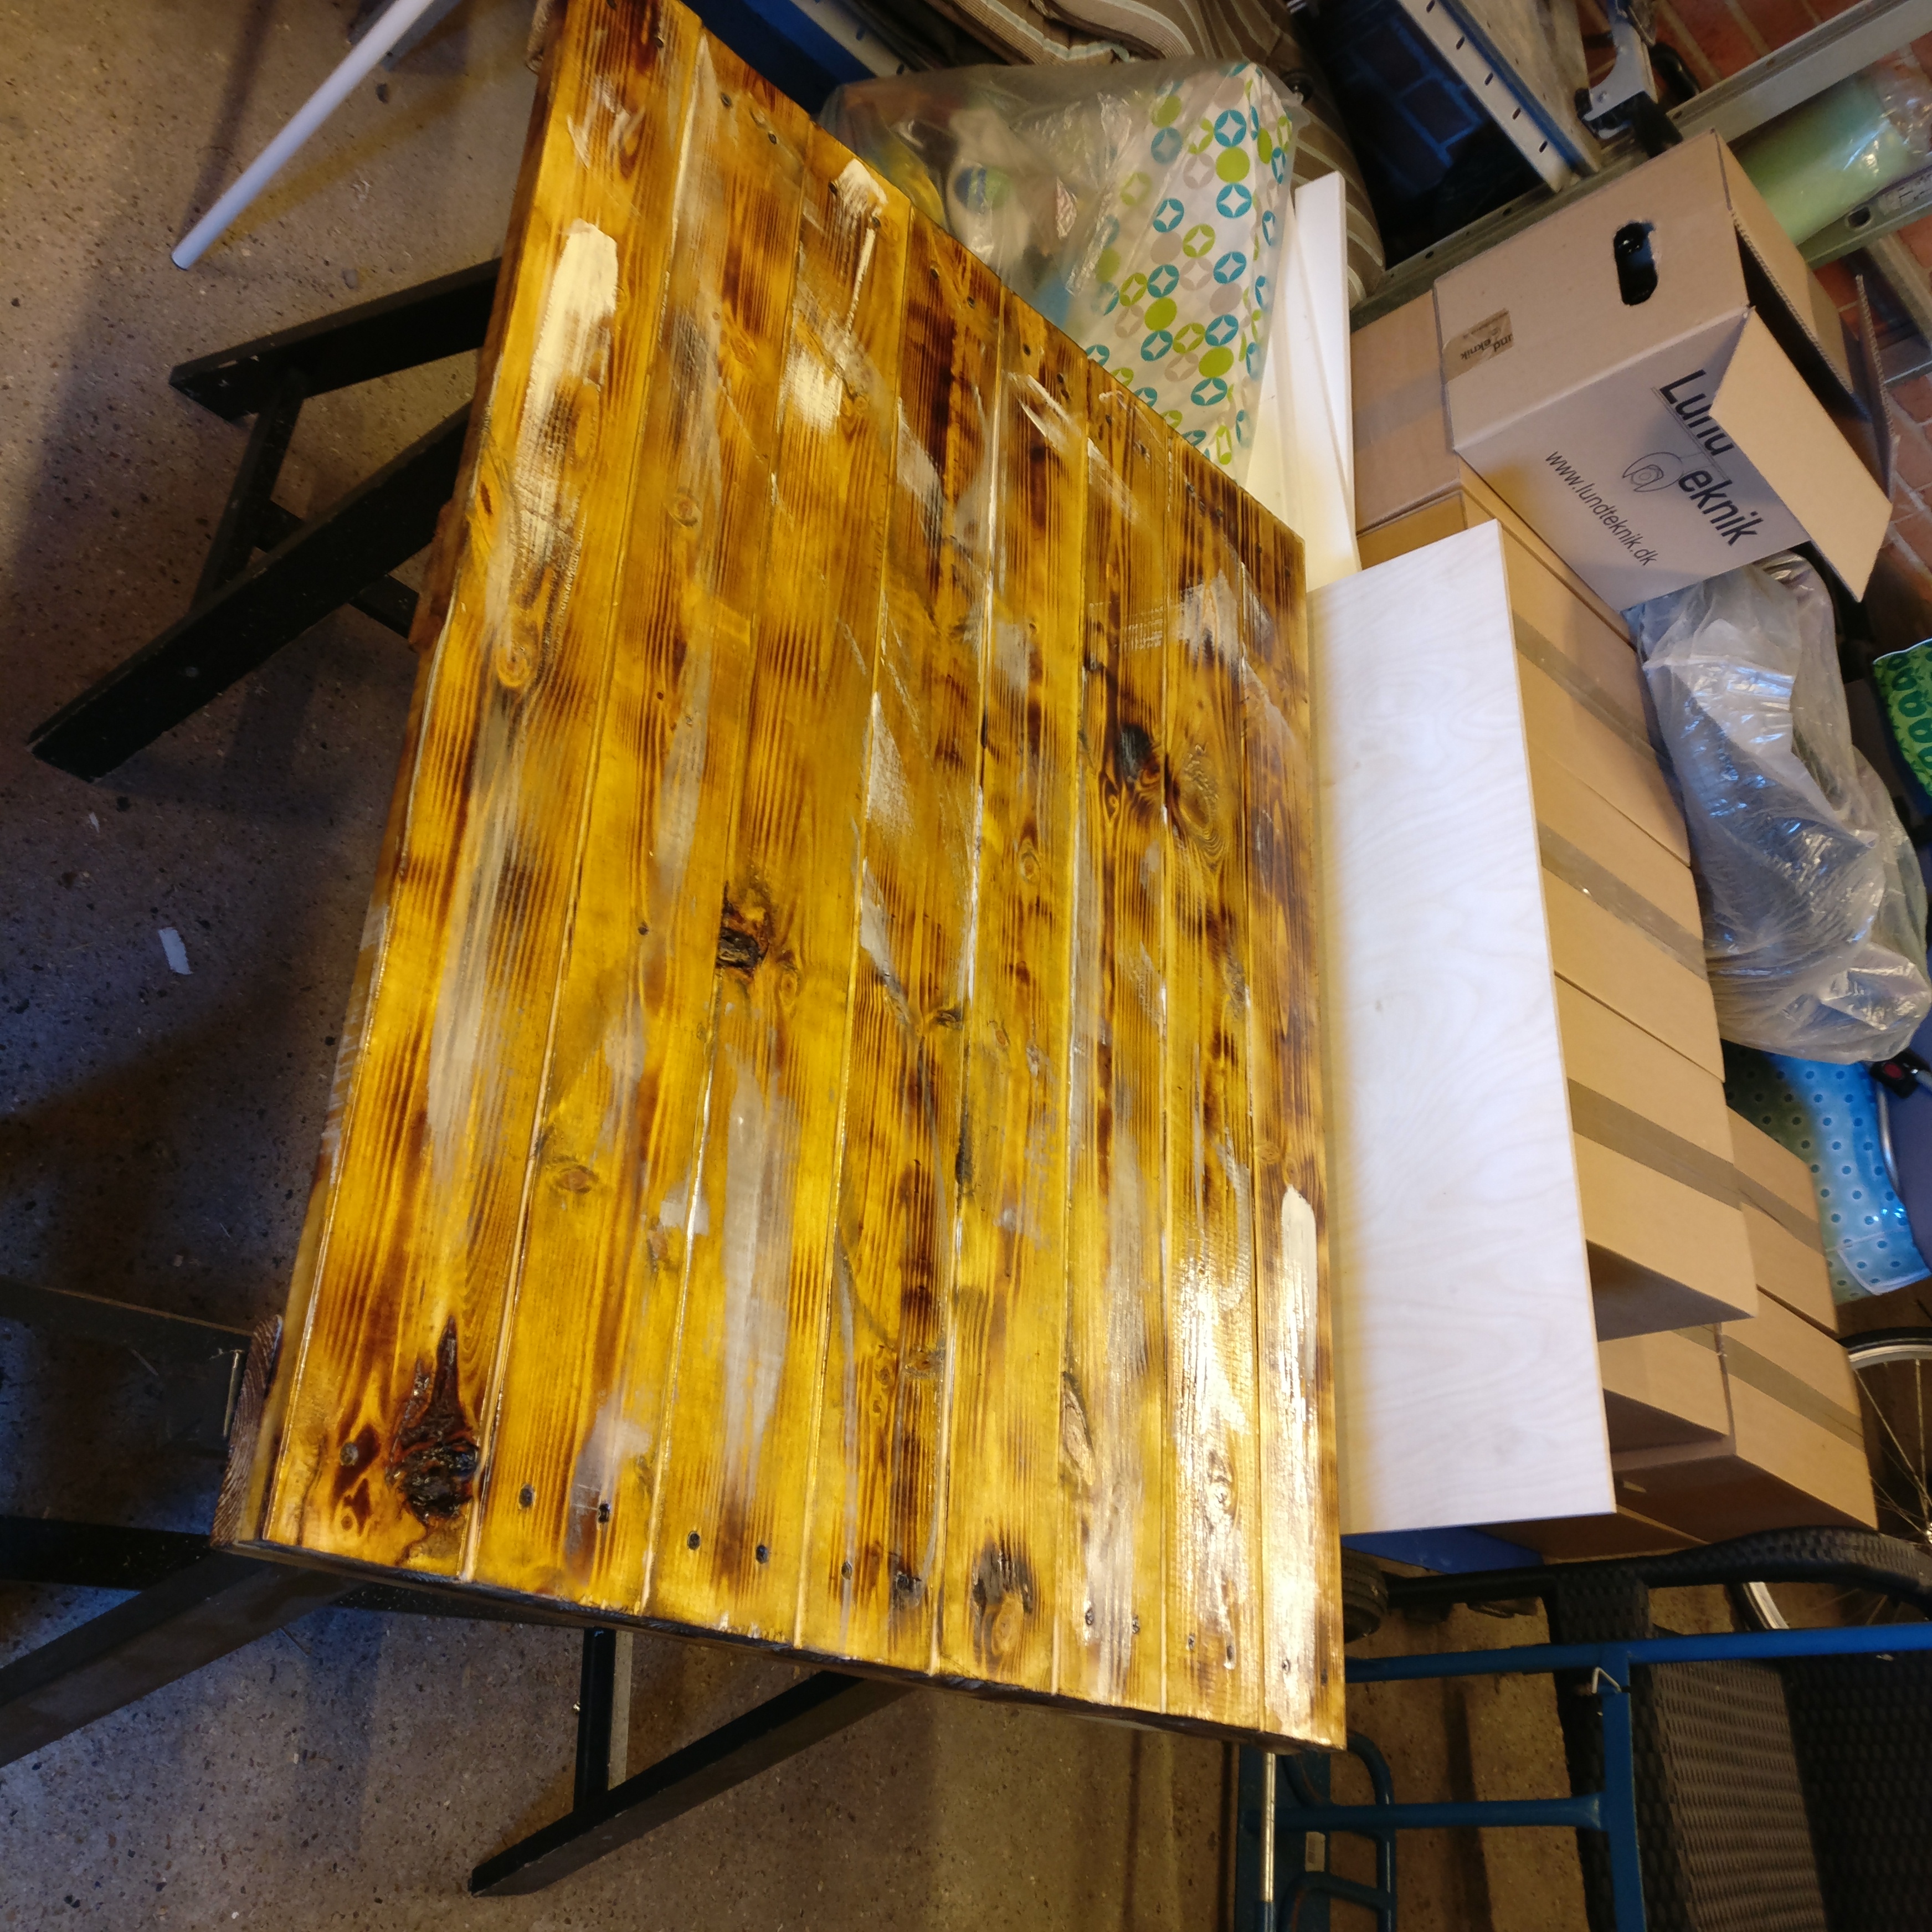
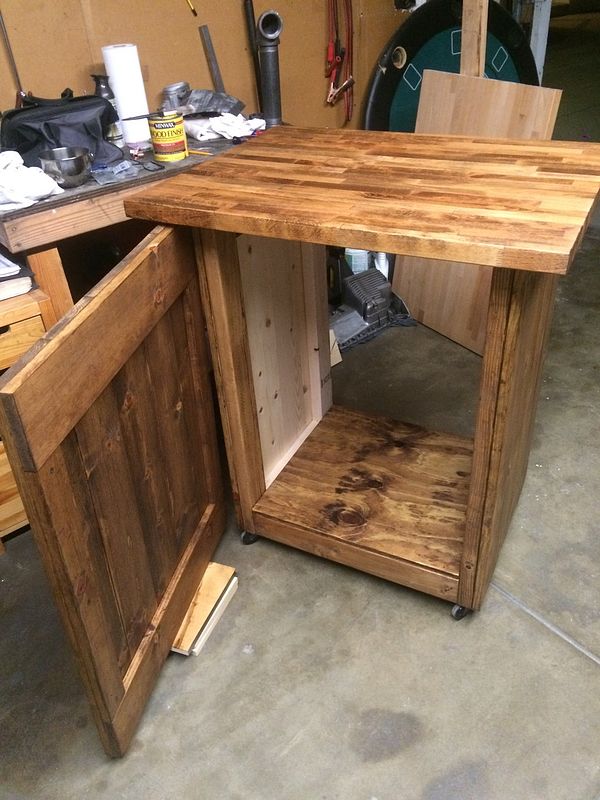
Cut the top down to size along with the floor of the cabinet.
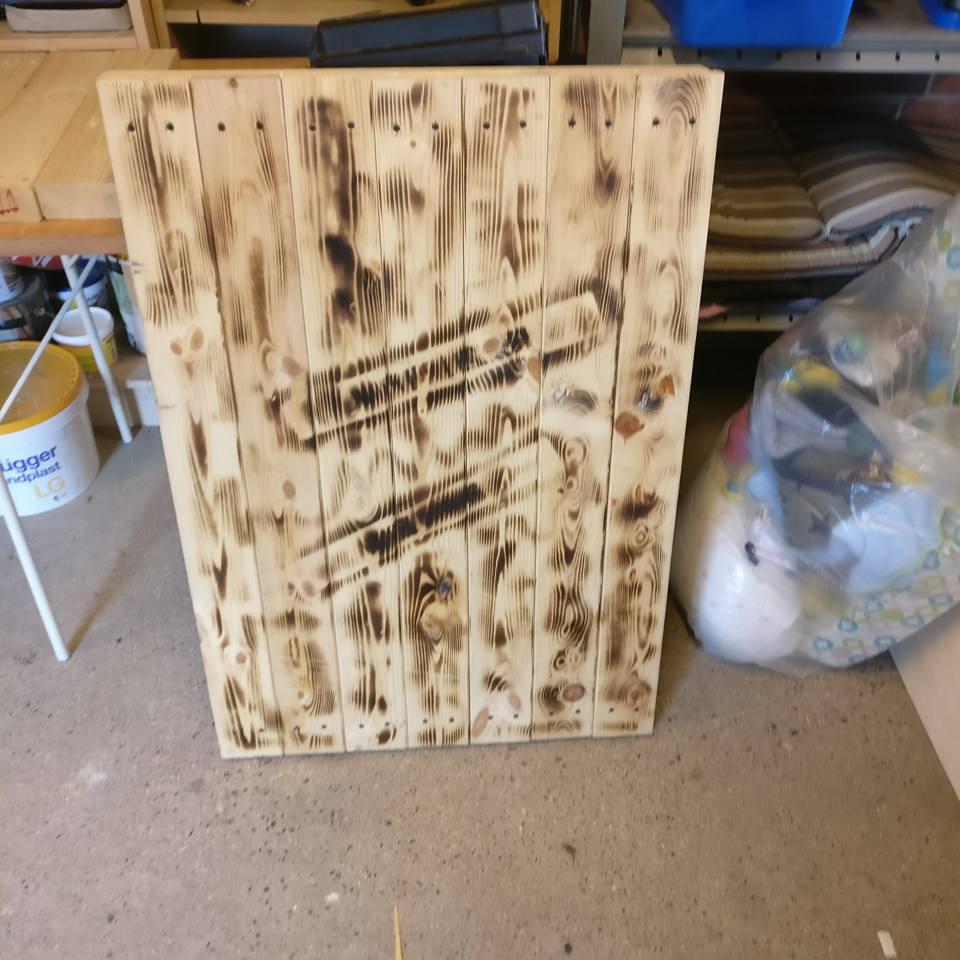
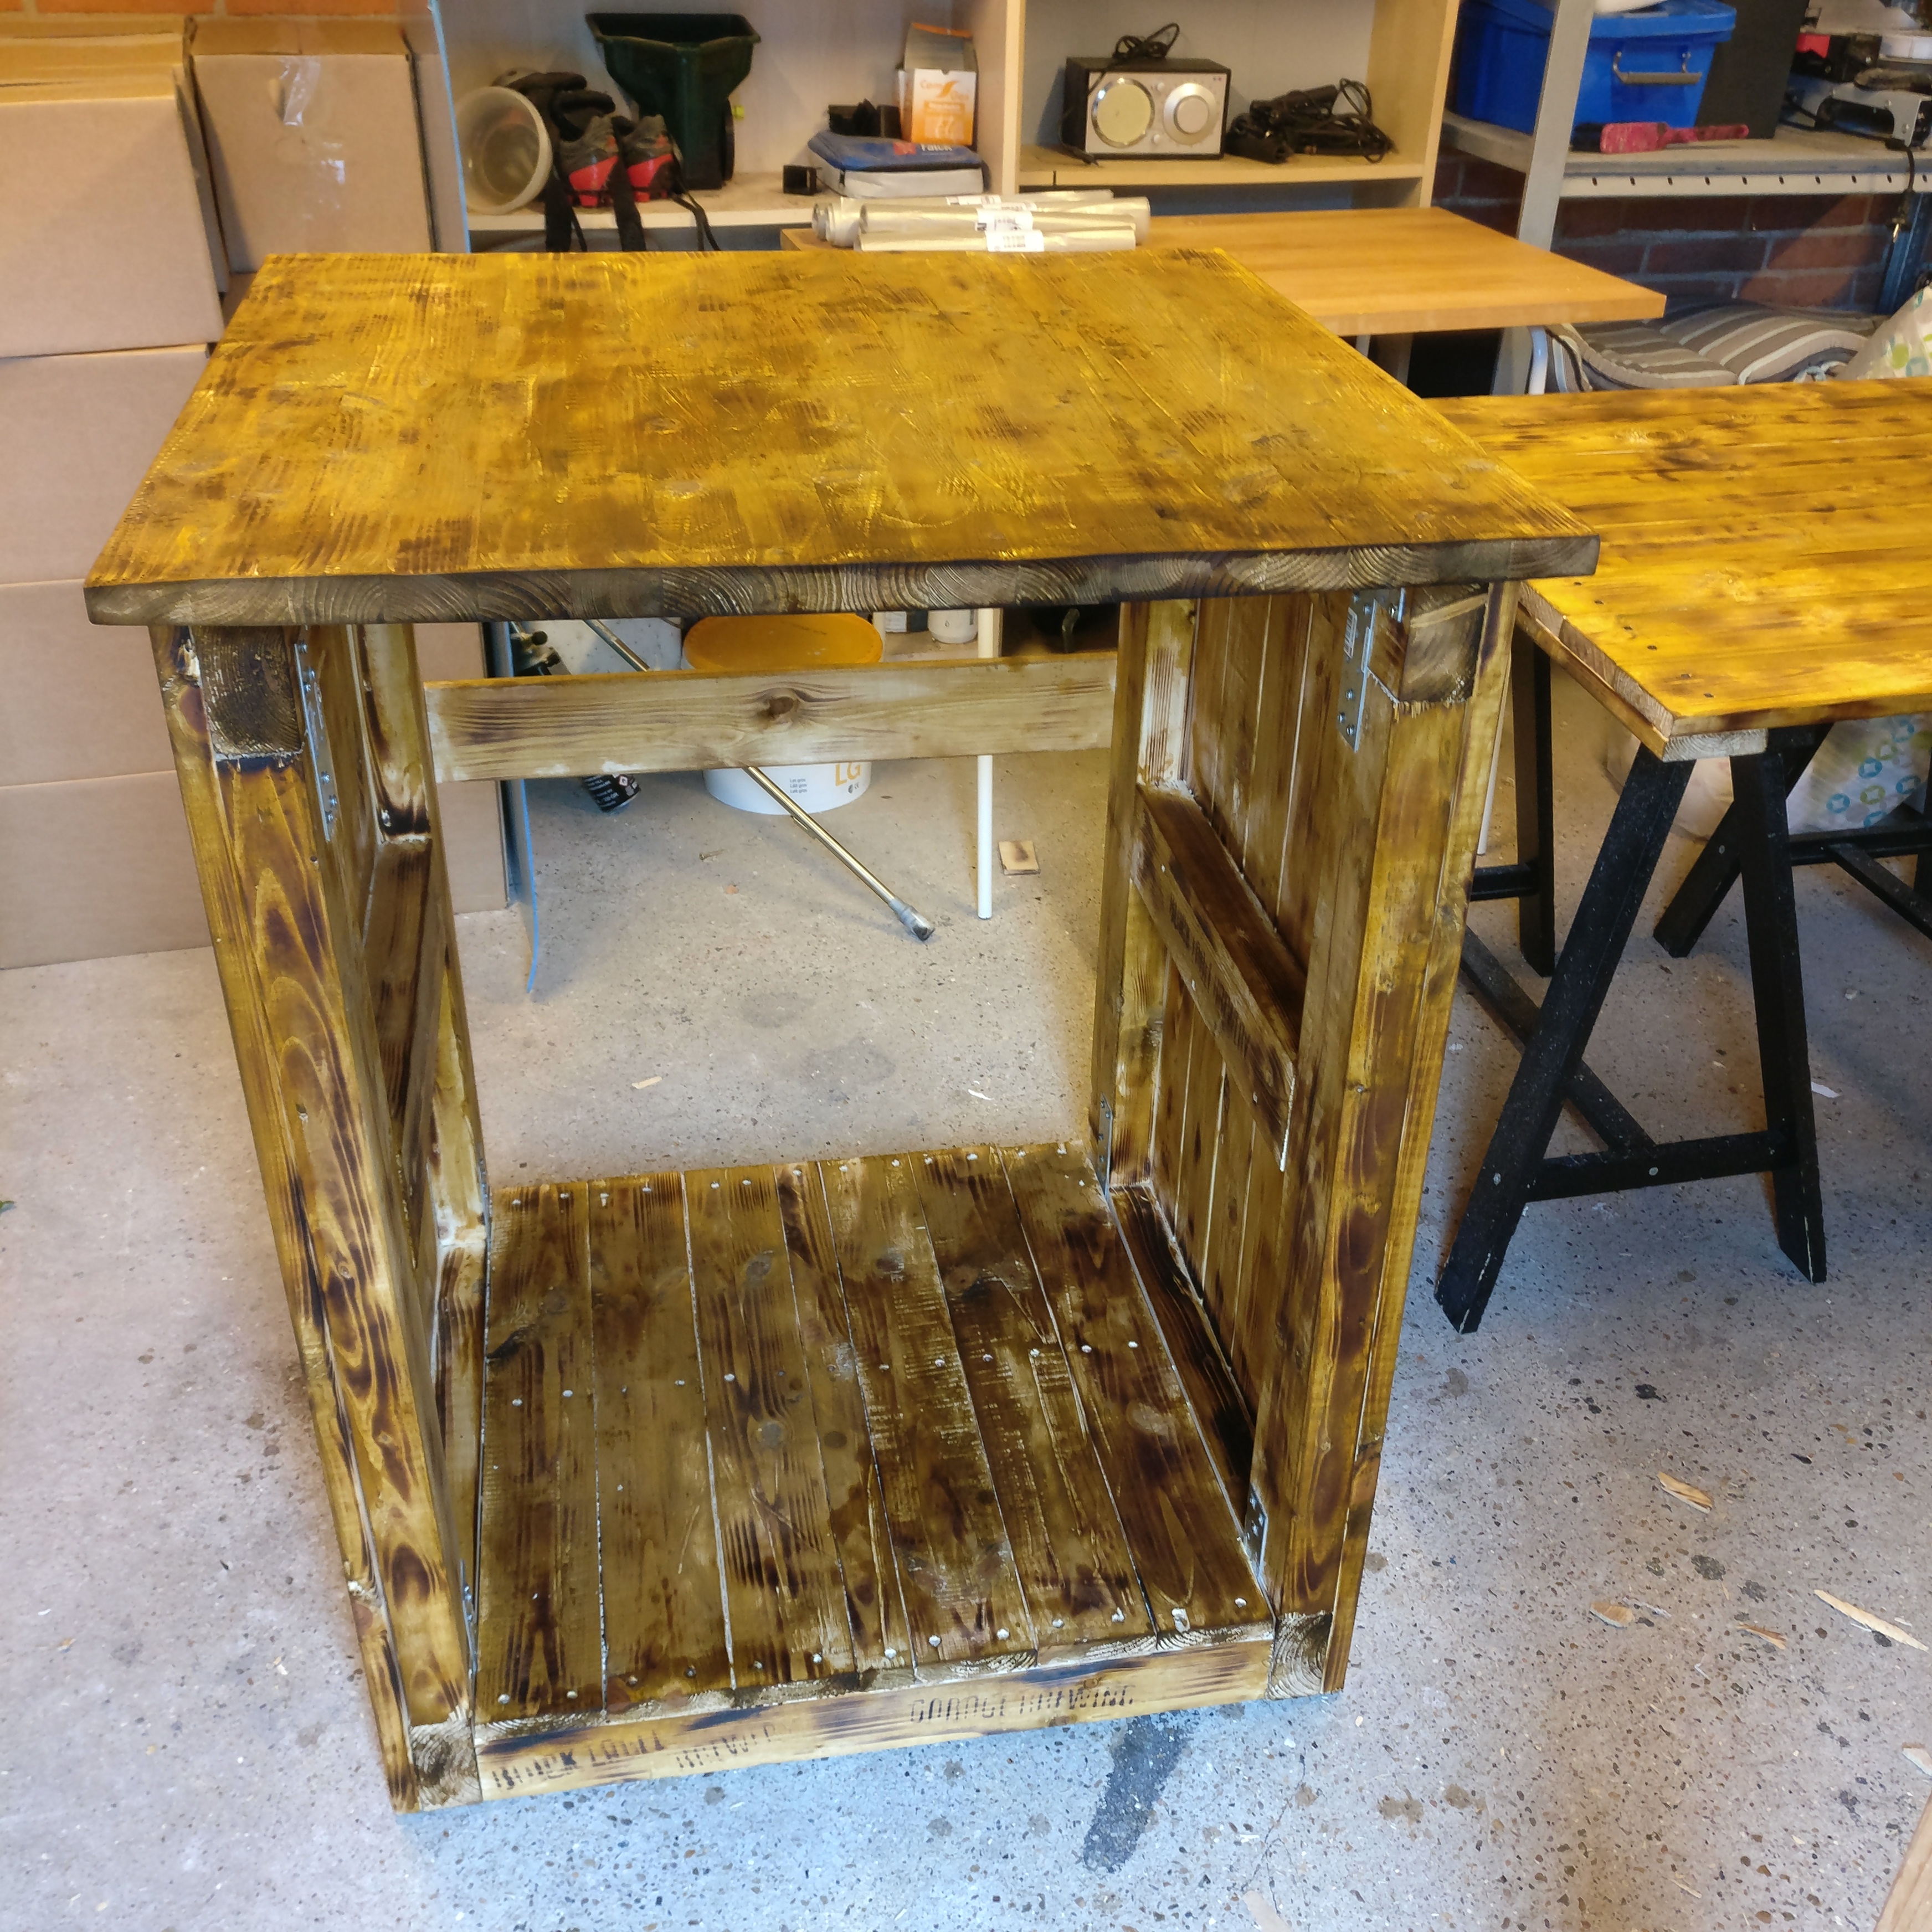
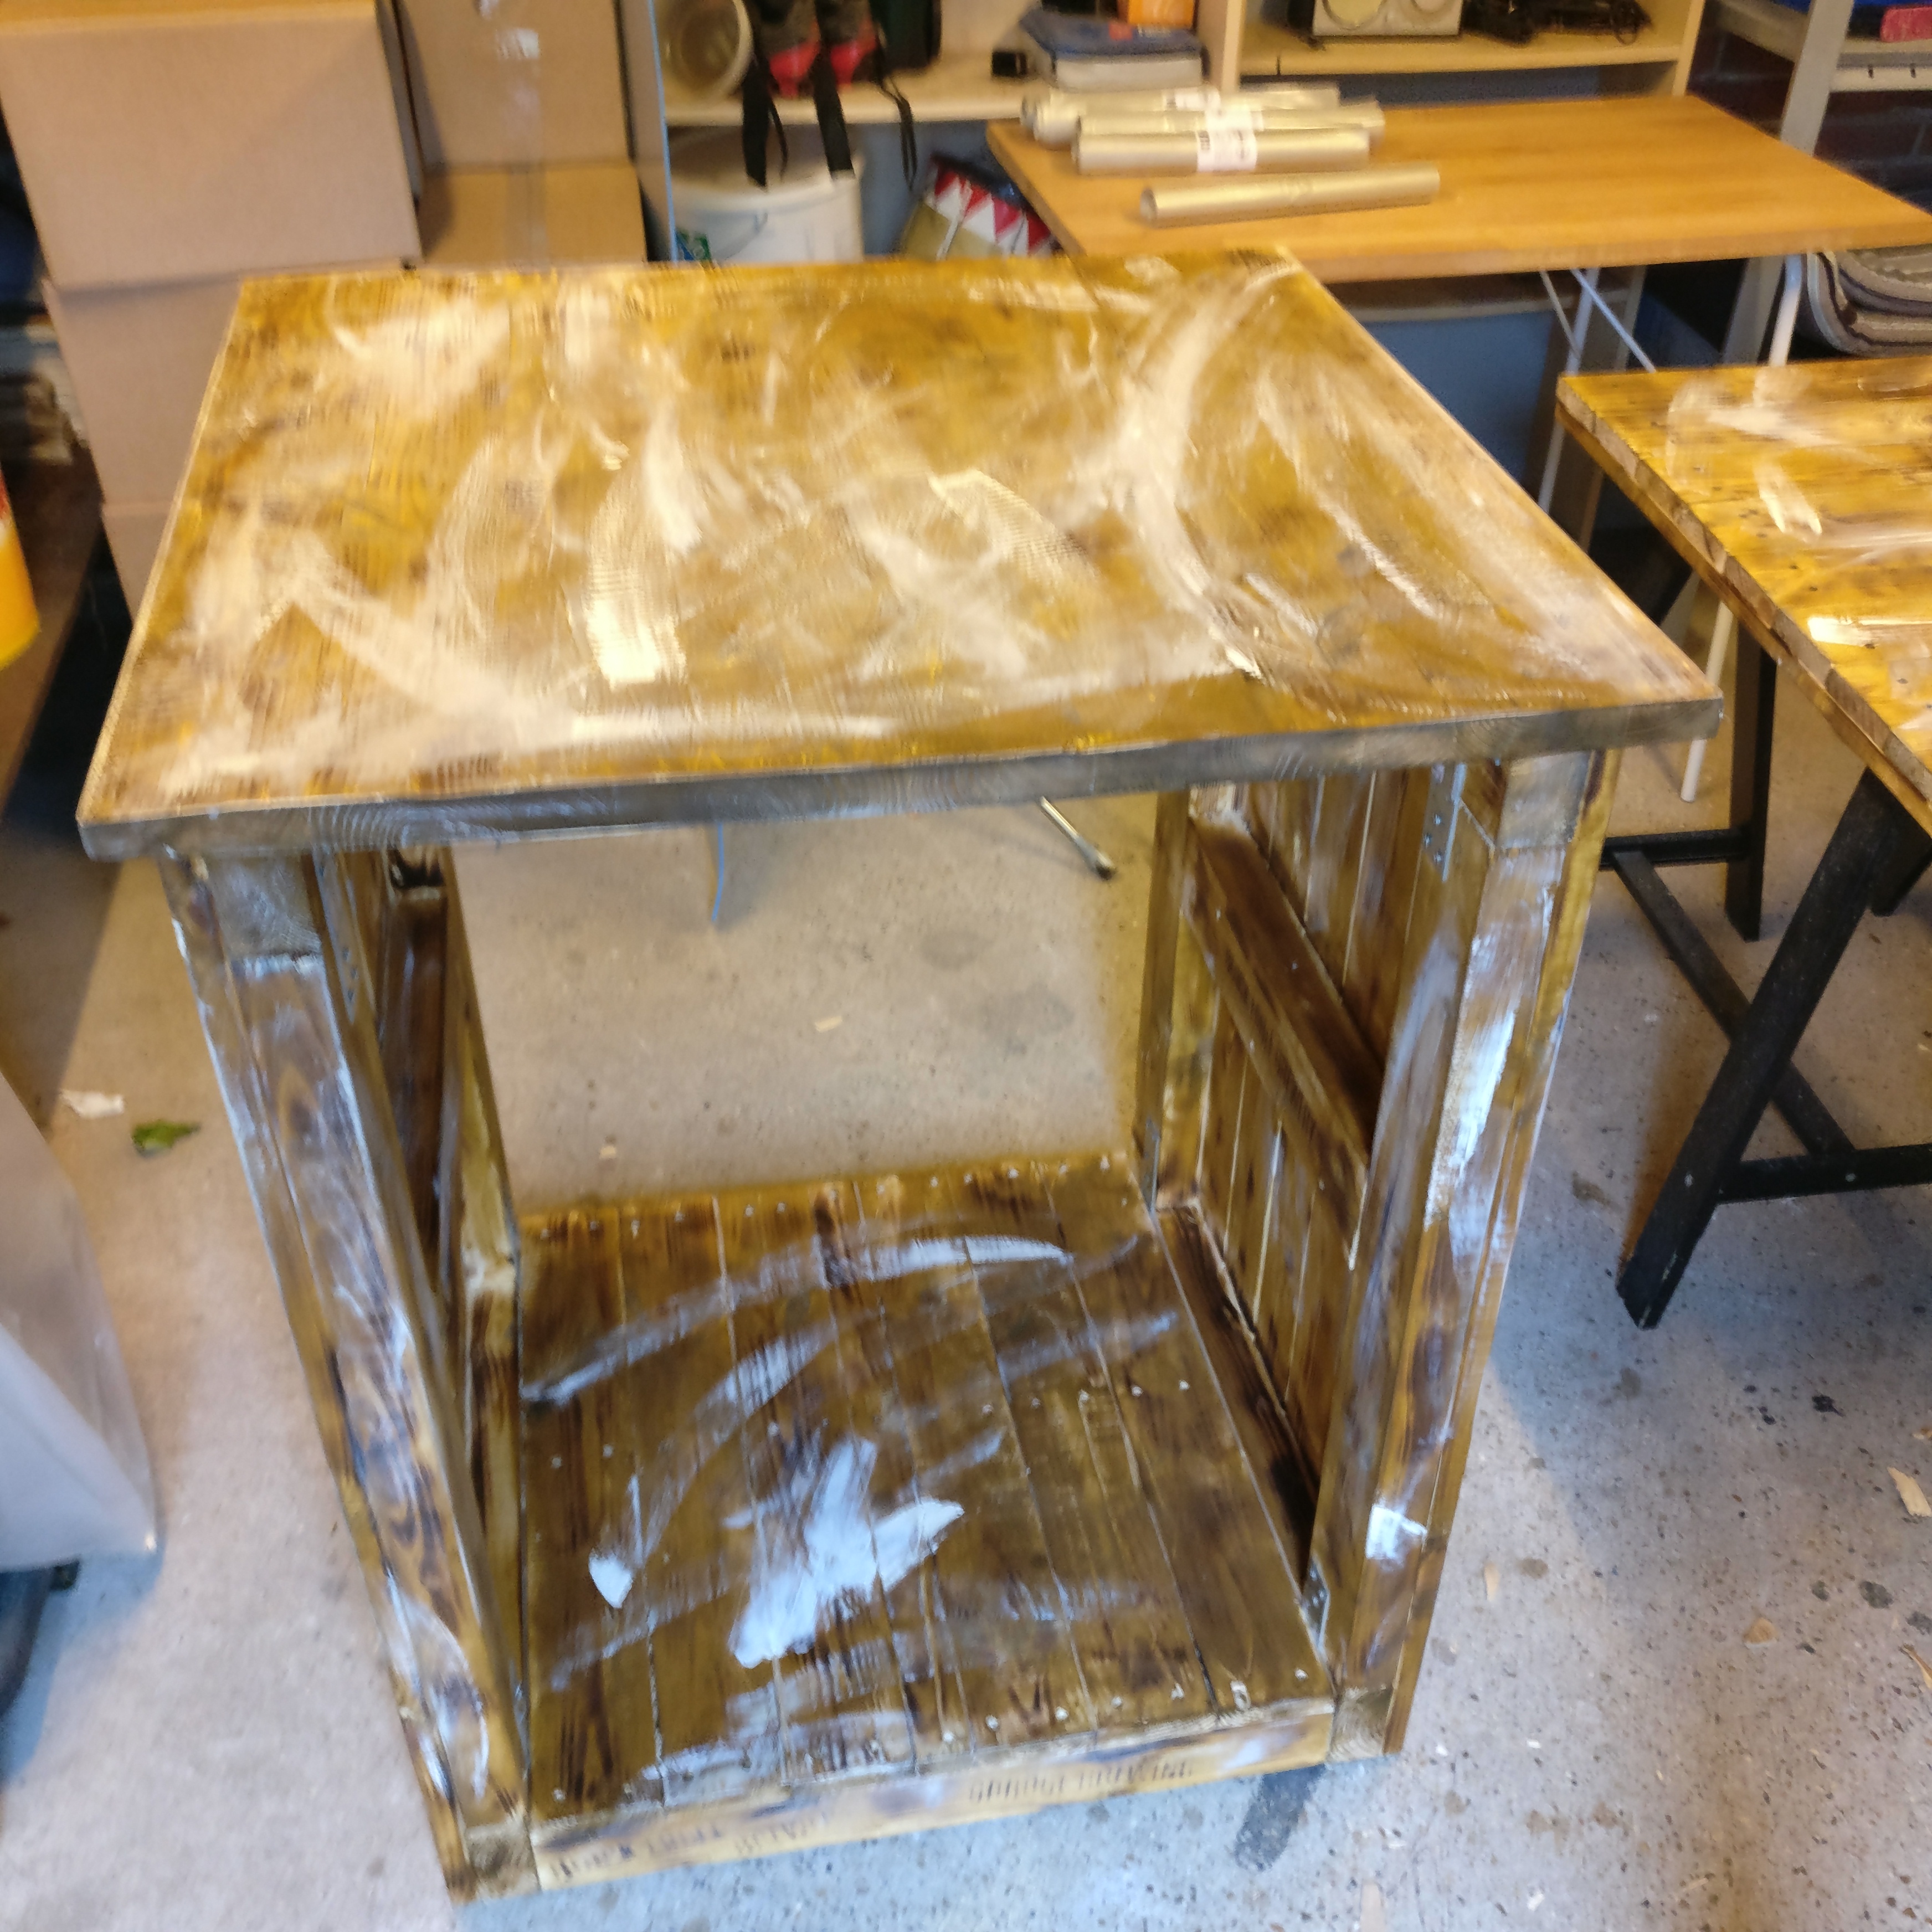
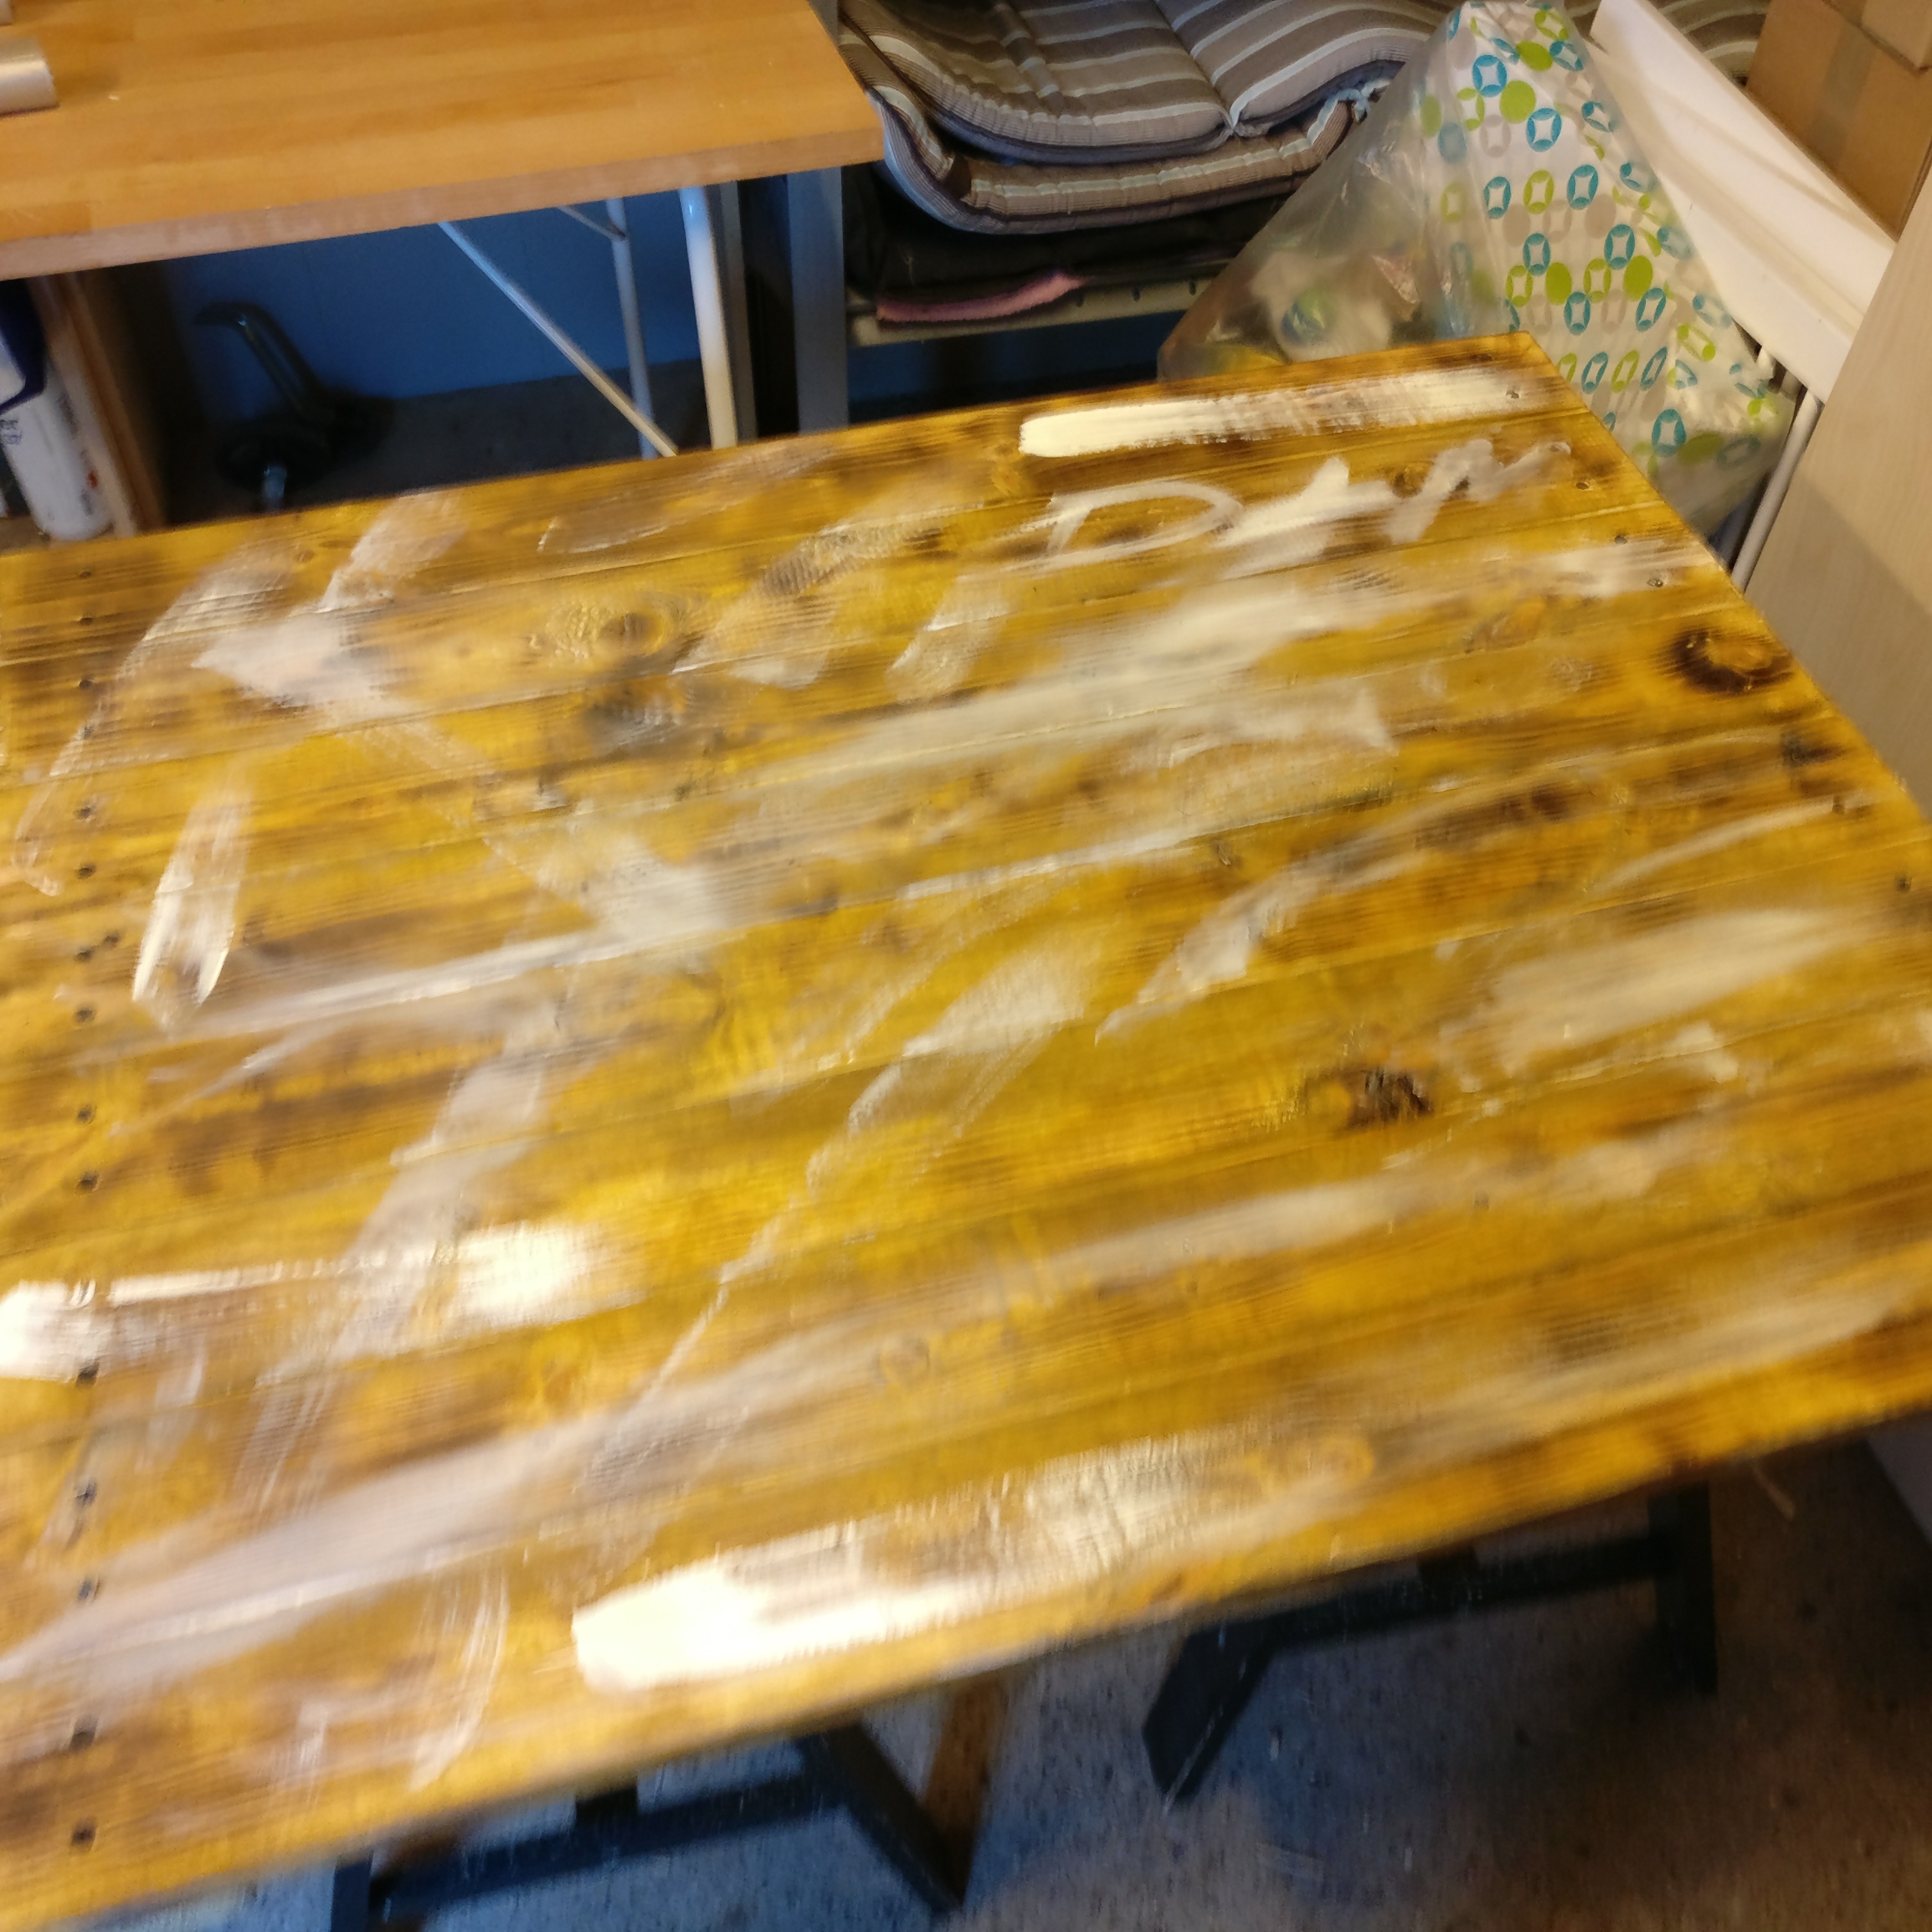
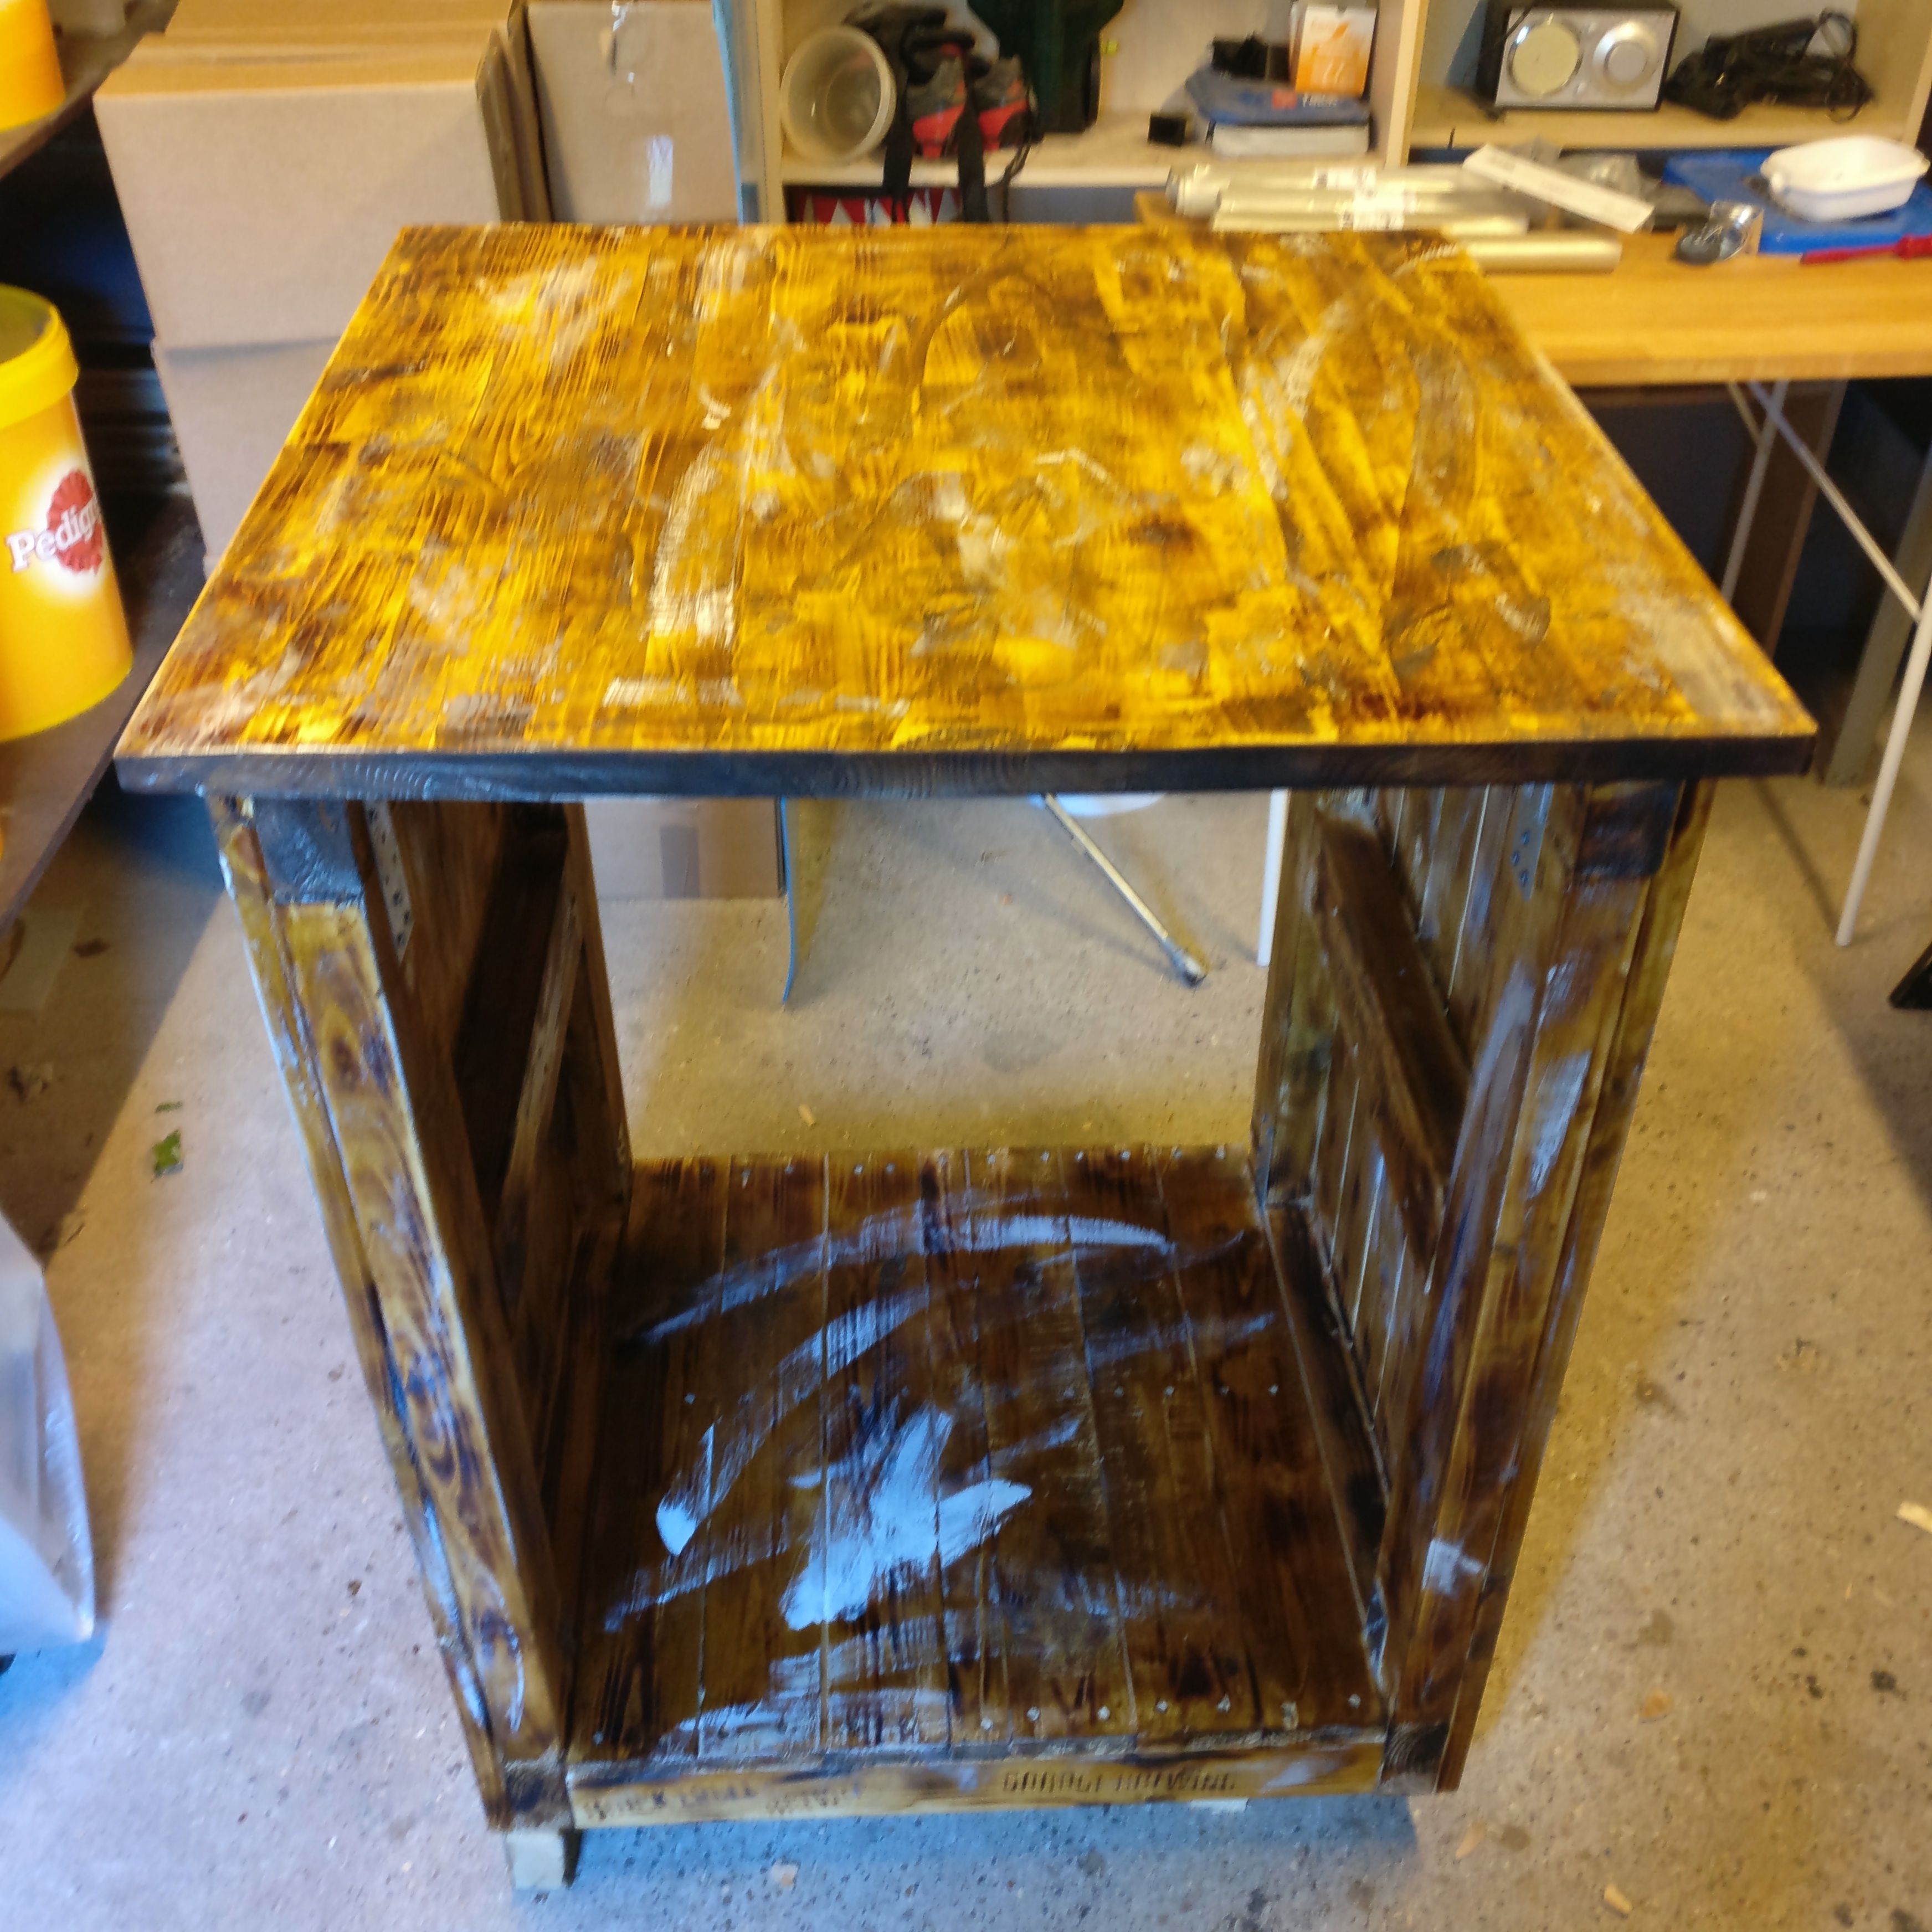
IMG_4099.jpg


Staining finished.
IMG_4104.jpg


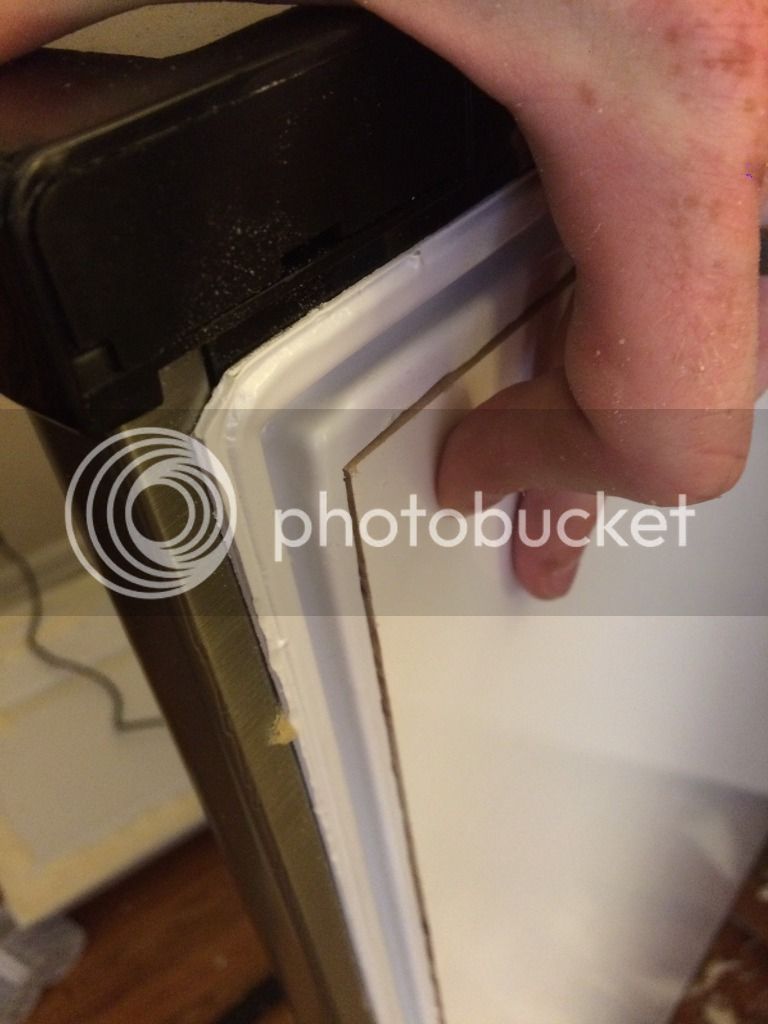
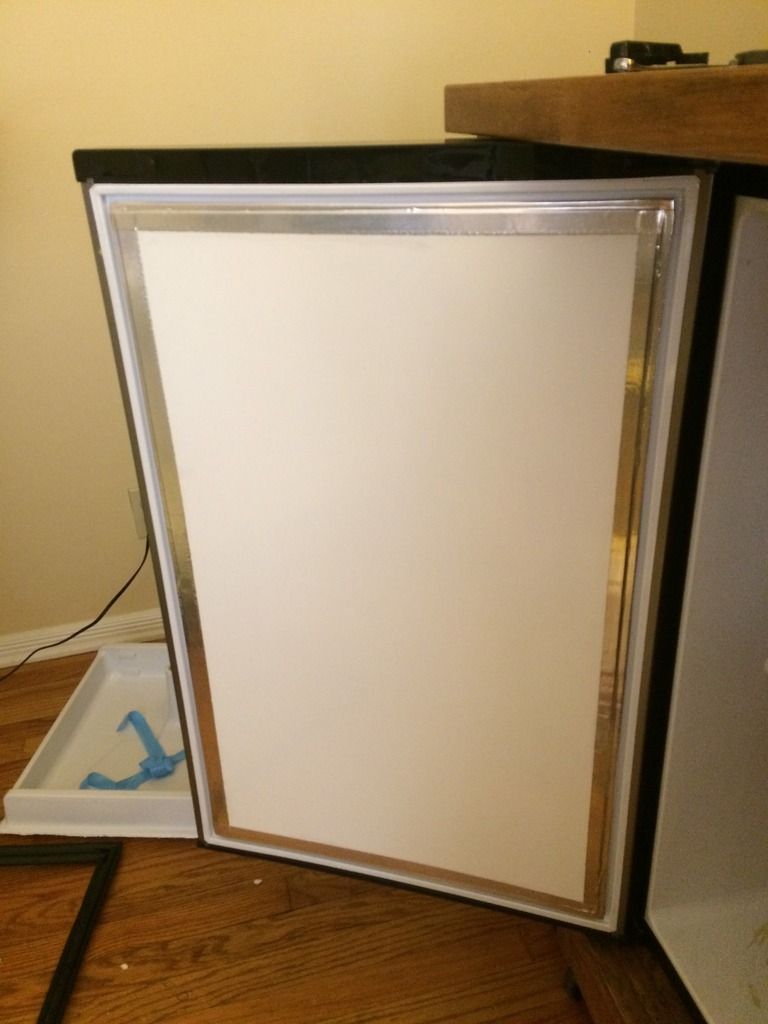
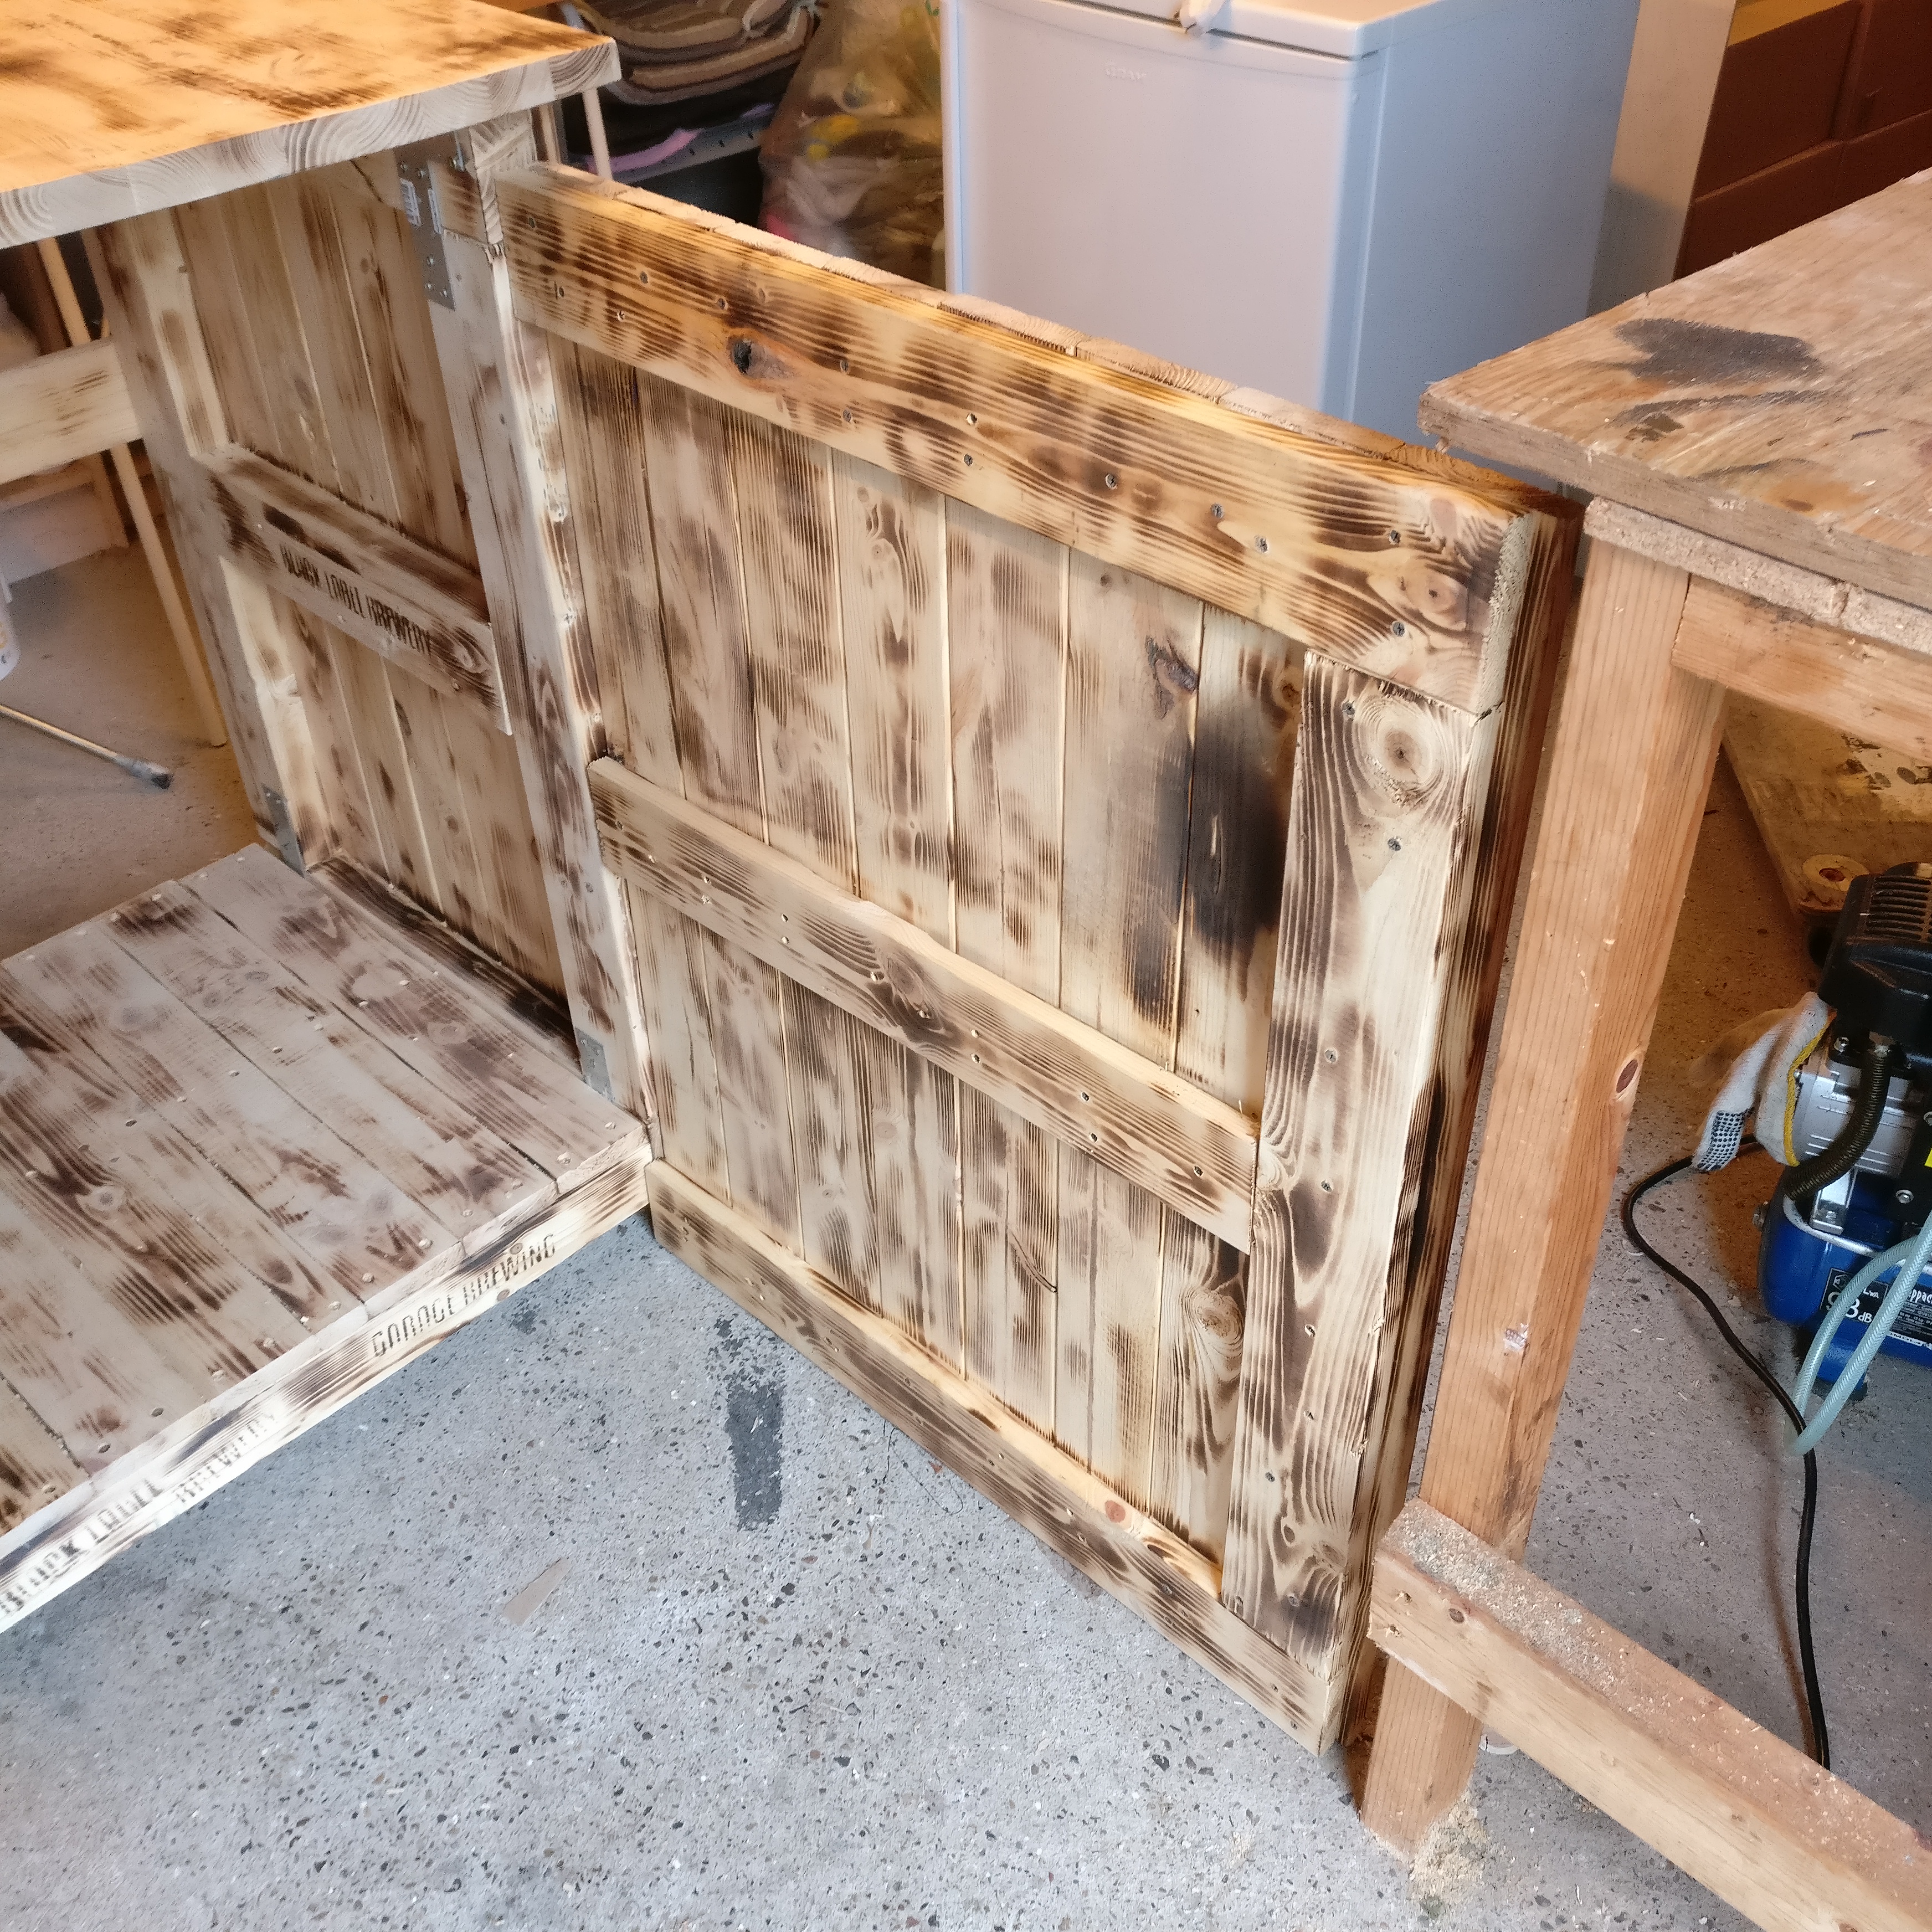
Getting door ready to be attached.
IMG_4106.jpg


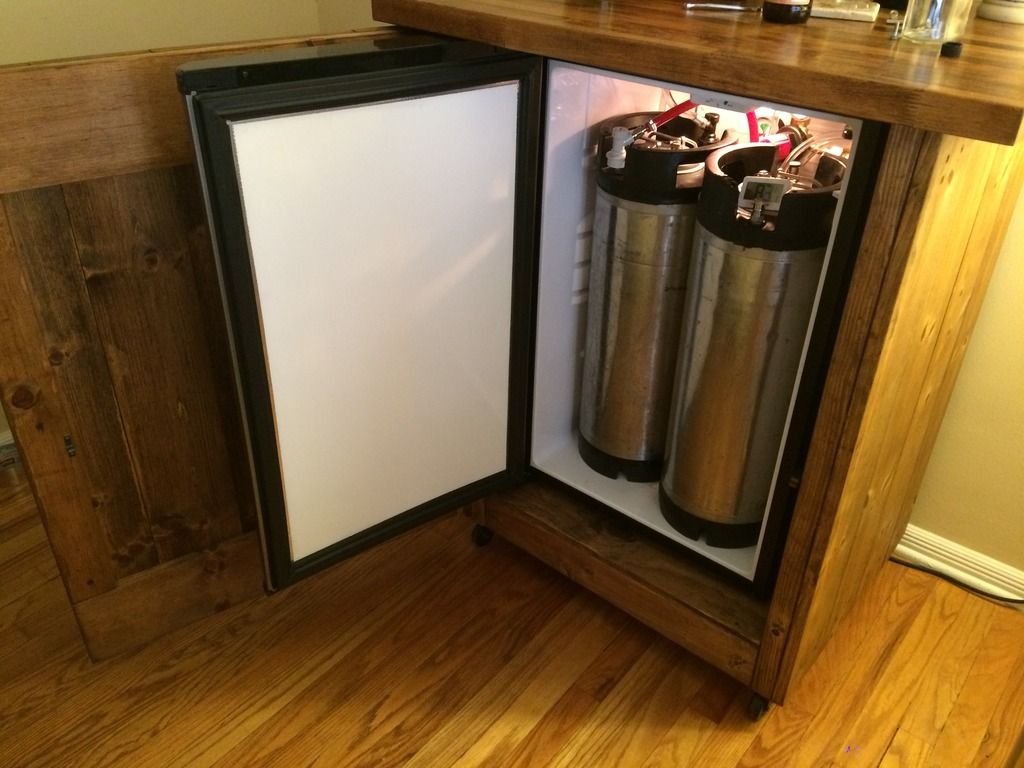
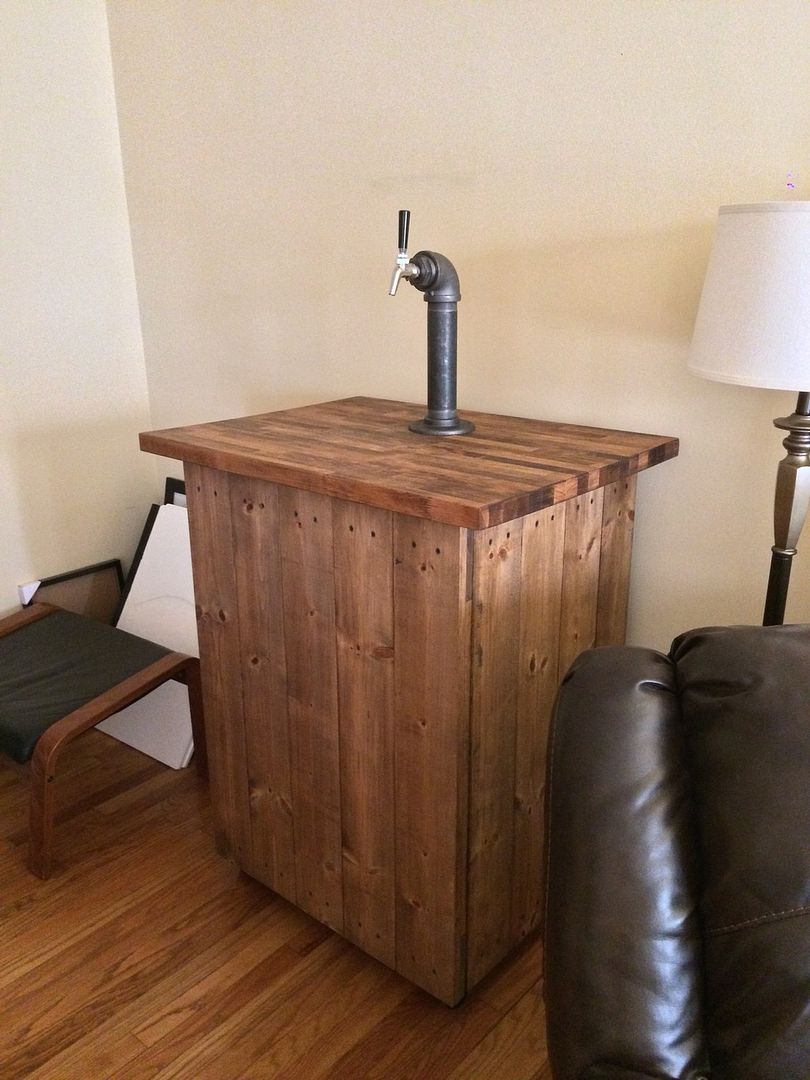
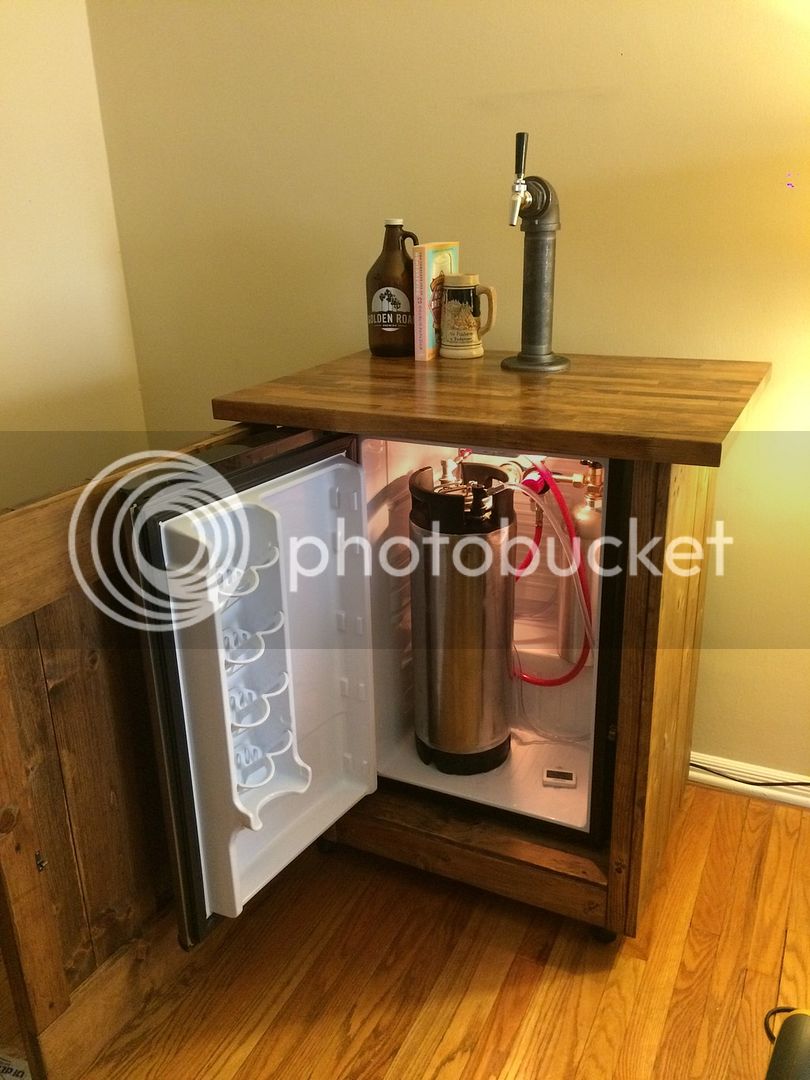
Everything put together and in living room.
IMG_4109.jpg


IMG_4110.jpg


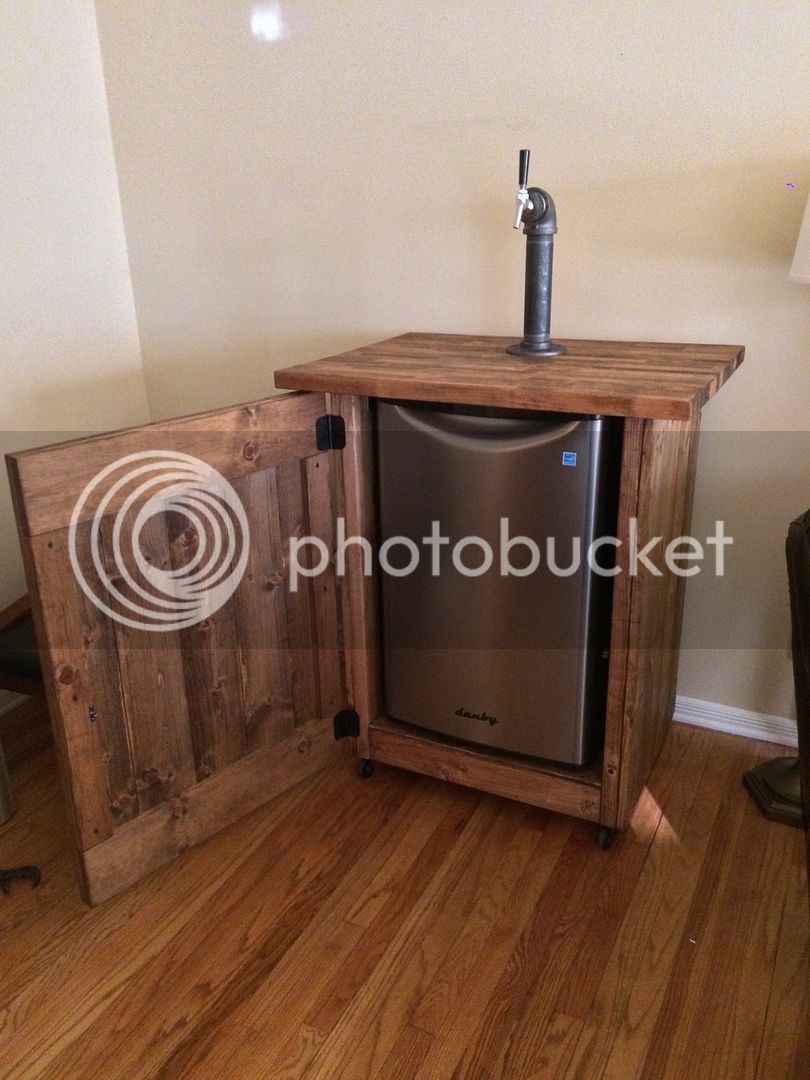
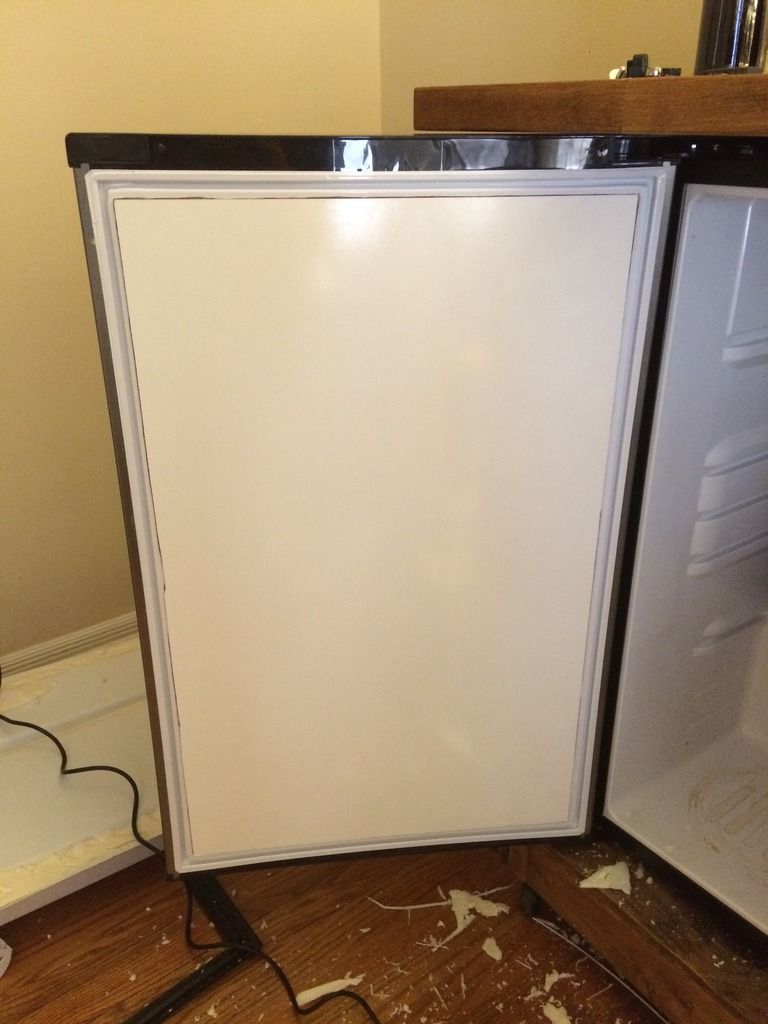
I only have one keg currently, so no need to cut into the door of fridge yet.
IMG_4116.jpg


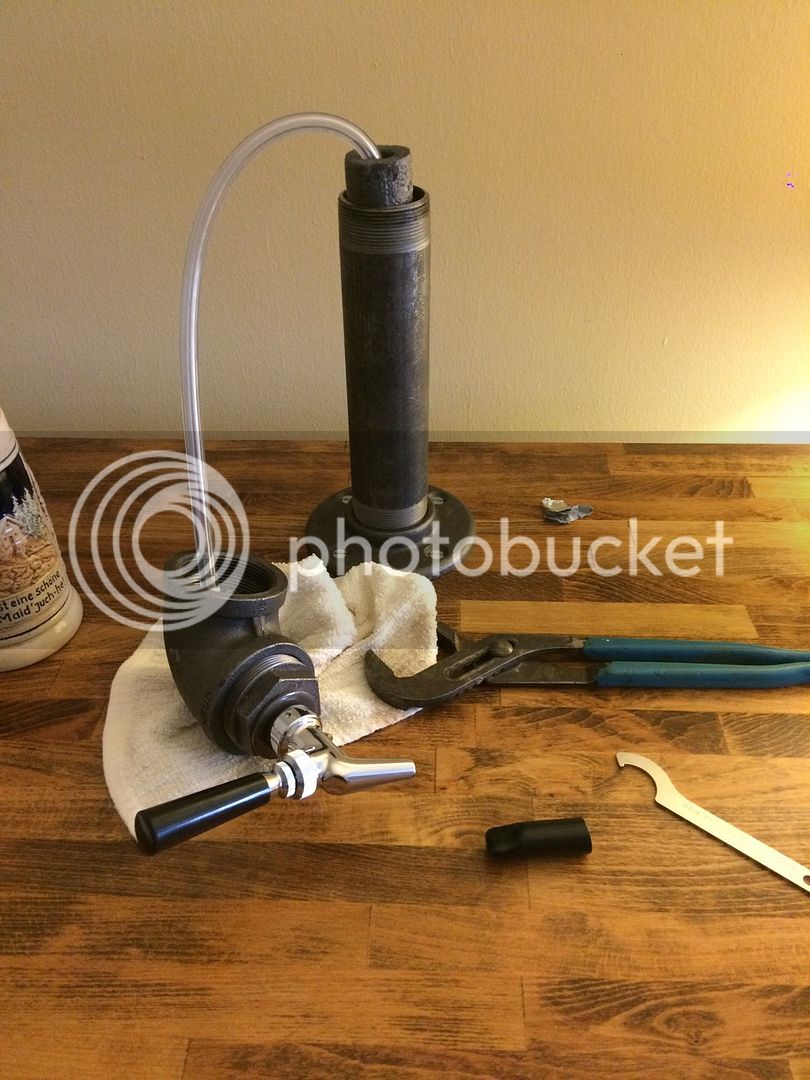
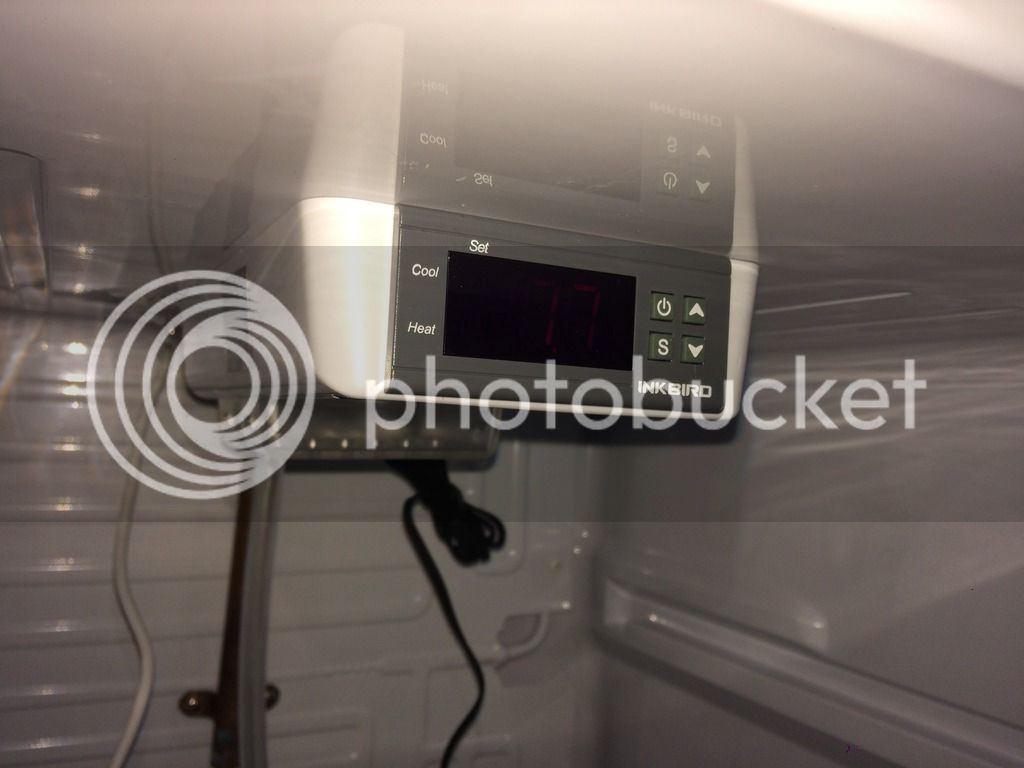
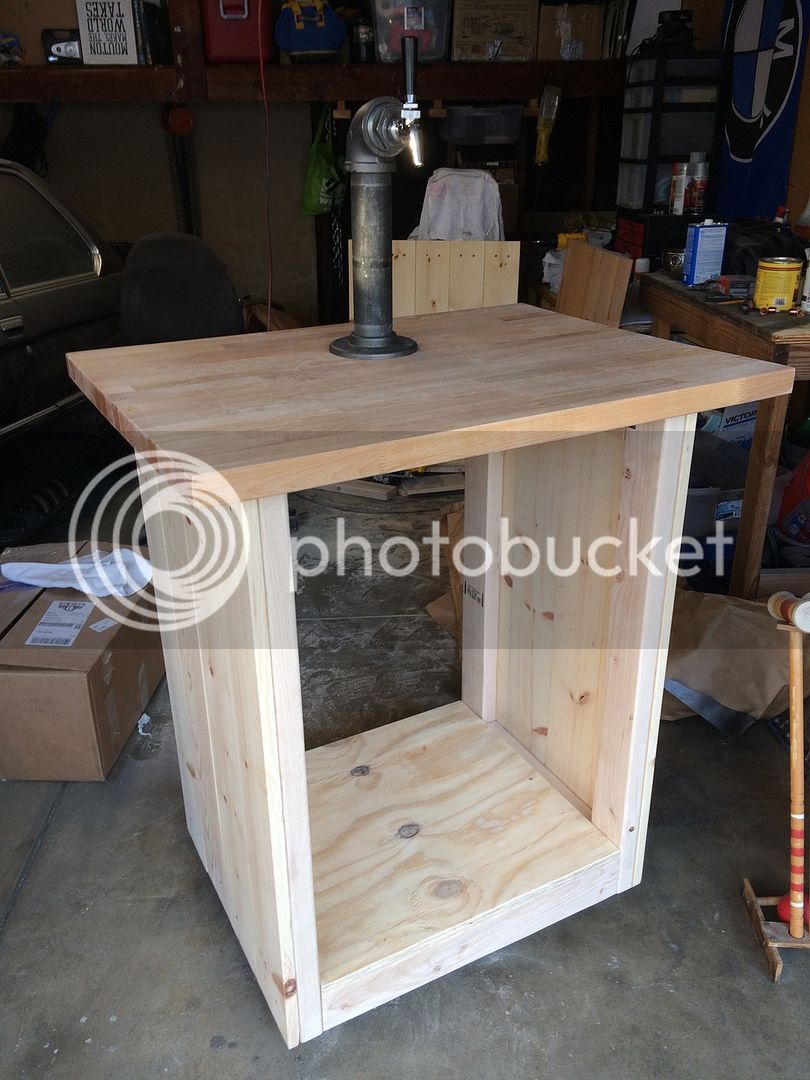
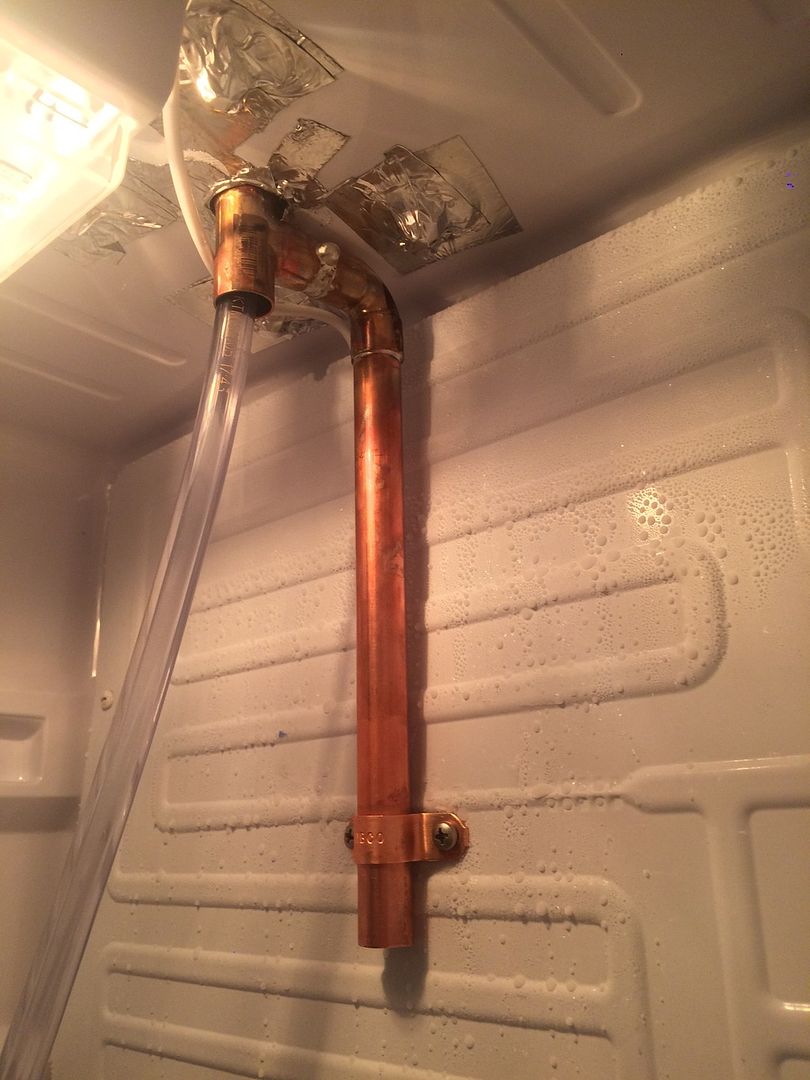
To try and keep the line cool, I have copper running up into the tower. Interior of the tower has pipe insulation between copper and the steel tower.
IMG_4136.jpg


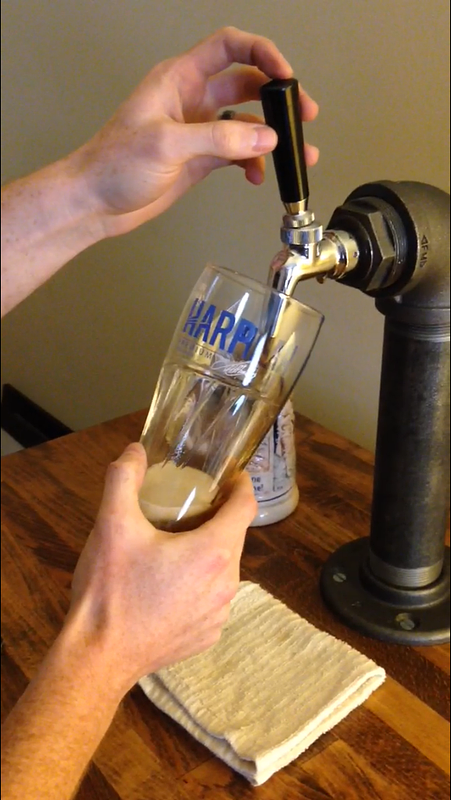
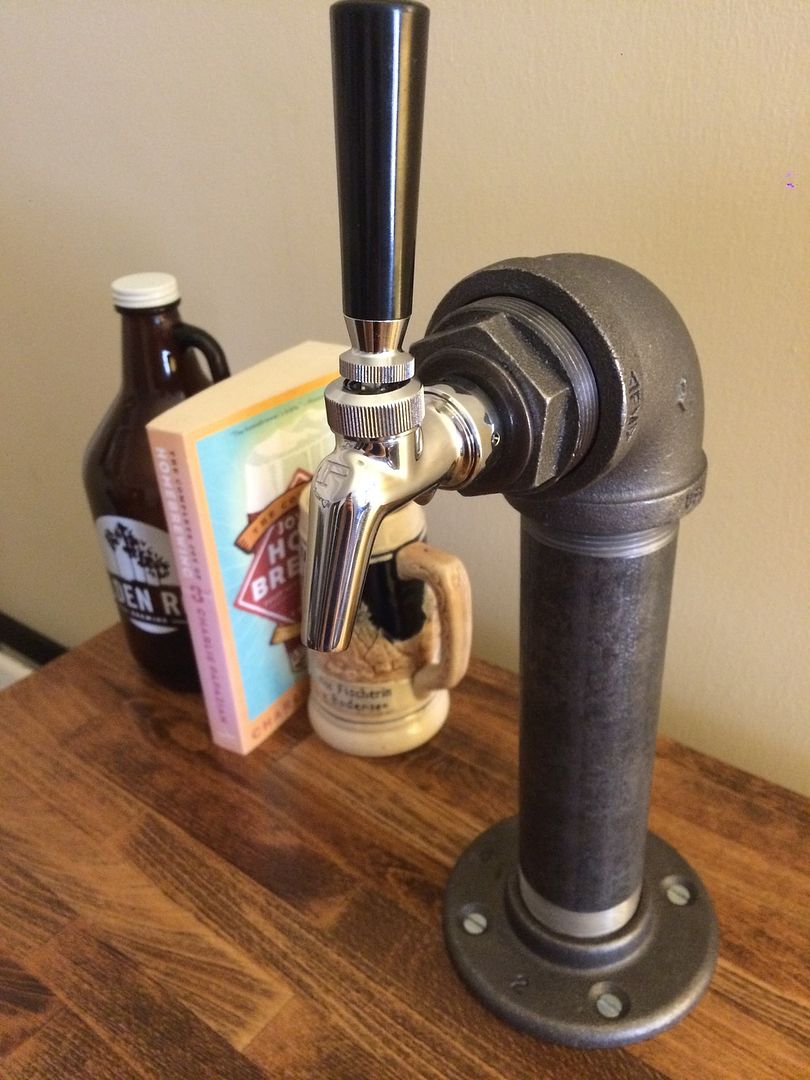
Absolutely love the tower!
IMG_4117.jpg


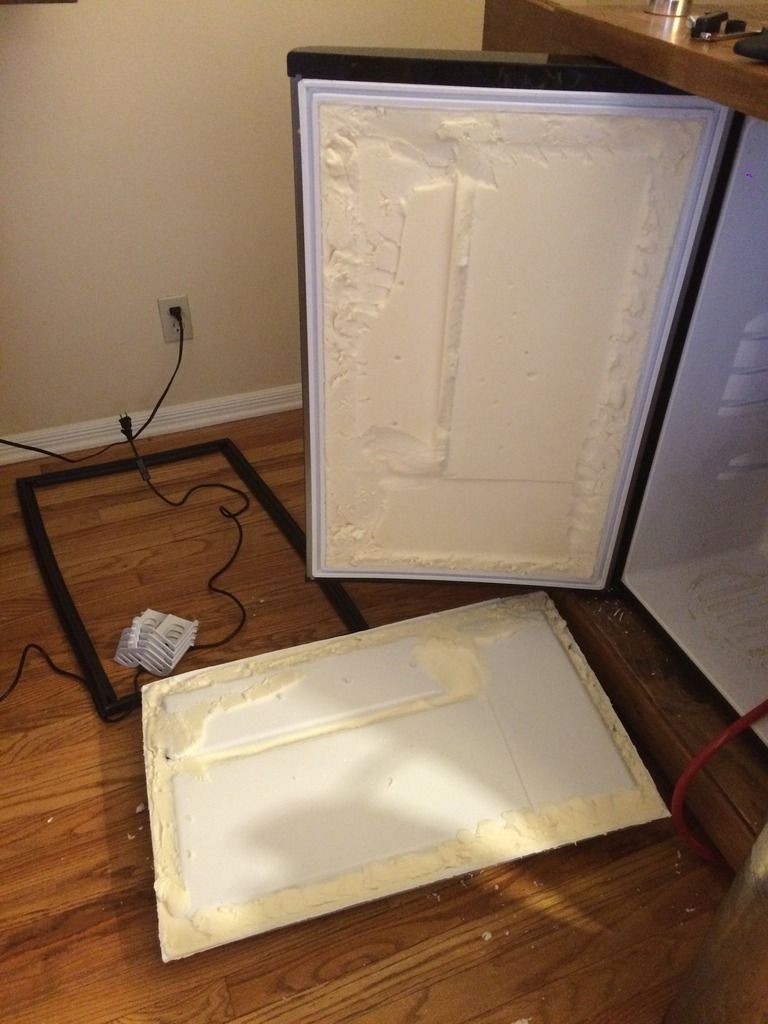
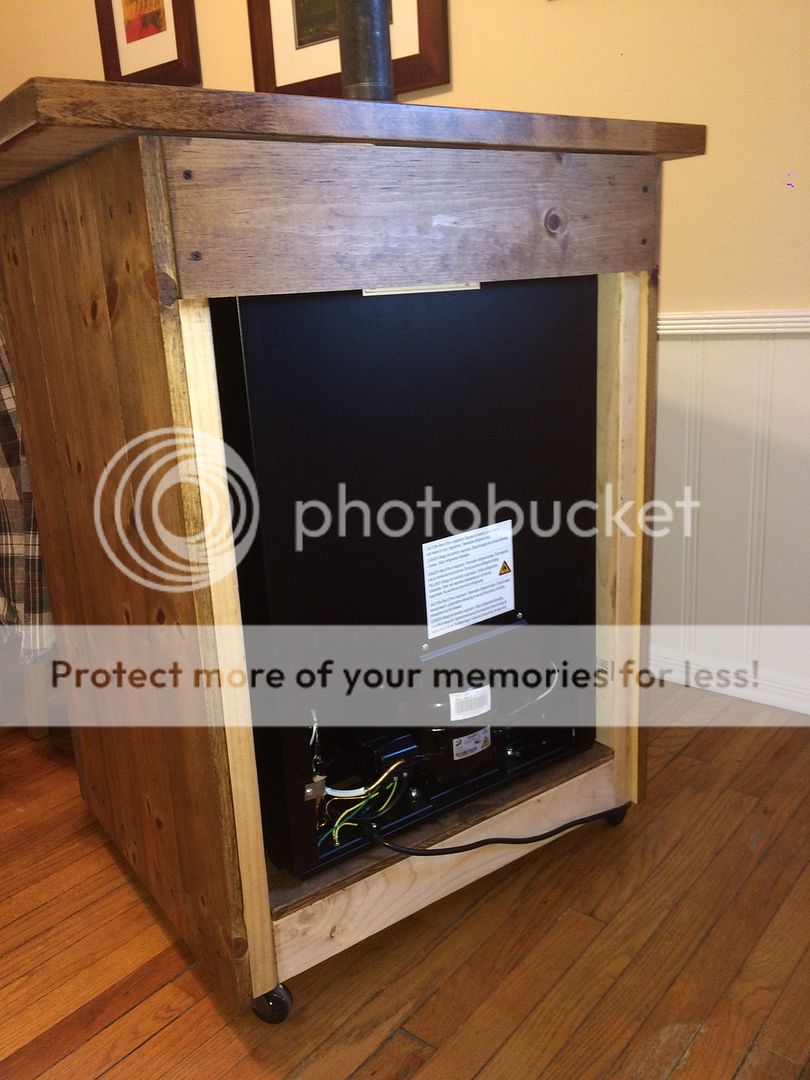
Back is open so that there are no issues with the fridge.
IMG_4129.jpg


Hope you guys enjoy! I looked through SOOOOOOOO many of the builds on this site to figure out what I wanted. Thanks everyone!
 
Thanks guys! The drip tray is coming, don't have anything brewing at the moment, so no need for it yet. Have to fix this soon... Need some beer on tap!
 
Looks great. How many kegs could you fit inside the fridge?
 
Looks great. How many kegs could you fit inside the fridge?

I know from other builds using this same fridge that I can fit two ball lock corny's. When I get another corny, I'll end up modifying the inside of the fridge door for the second to fit.

I like it. My Danby440 releases heat through the sides. It appears that yours has enough space inside the cabinet for airflow.

Interesting, I hadn't heard that. I left room on the left side so that there was room for the fridge door to swing open, then just duplicated that space on the other side cause I wanted it to be centered in the cabinet.


The one thing I'm not so happy about: The copper doesn't seem to do much to cool the beer line in the tower. I've done a few measurements with a thermometer and haven't seen any difference in room temp vs. temp of liquid in the tower. I had read some disagreement on the forum about how much the copper helps vs having a wide opening and a fan pushing air up there. Decided to go the copper route and just doesn't seem to cut it.
 
The one thing I'm not so happy about: The copper doesn't seem to do much to cool the beer line in the tower. I've done a few measurements with a thermometer and haven't seen any difference in room temp vs. temp of liquid in the tower. I had read some disagreement on the forum about how much the copper helps vs having a wide opening and a fan pushing air up there. Decided to go the copper route and just doesn't seem to cut it.

Try putting a tower cooler fan. That should help keep the copper cold.
 
Try putting a tower cooler fan. That should help keep the copper cold.

I would have to re-drill the hole. It's currently just large enough for the copper pipe. Otherwise I doubt it would get much airflow through there. I'm not opposed to doing this, just not at this point in time.

IMG_4134.jpg
 
I would have to re-drill the hole. It's currently just large enough for the copper pipe. Otherwise I doubt it would get much airflow through there. I'm not opposed to doing this, just not at this point in time.
Well, I was thinking putting the output of the tower cooler into the pipe, but I see you don't have room. Maybe just put a fan inside to help recirculate the cold air?
 
Last edited:
Also, if you do decide to make the hole bigger, don't do what I did and nick one of the cooling lines. Ended up with a dead mini-fridge. :(
 
I just finished installing my tower. I ran the beer lines inside two copper pipes. I've only drawn a couple of beers, but I'm not sure it's cold enough. I sort of blame the faucets and shanks. I also think it will be colder when I draw more than four ounces, as the beer at the top must be warmest.
 
I just finished installing my tower. I ran the beer lines inside two copper pipes. I've only drawn a couple of beers, but I'm not sure it's cold enough. I sort of blame the faucets and shanks. I also think it will be colder when I draw more than four ounces, as the beer at the top must be warmest.

At least try running a fan to circulate the air inside. That will likely help. Doesn't have to be a hurricane-force fan... just a small computer fan will work.
 
Thanks Dan. If it doesn't work as is, I'll make that addition. I have yet to draw a full beer. The pipes run right to the bottom of the fridge, near the cooling lines.
 
So I've had a problem with my Danby getting it below 40* F. I actually got to the point I was about to buy a $75 t-stat to replace it, but then by chance I pulled it out from the area where it's located. After 5 minutes, it dropped another 6 degrees to 34. After some research, I discovered that even though I had enough ventilation behind and to one side, the fact I had a top and left side so close, that's what was preventing it dropping temps. If you run into this problem, consider running some ventilation on the upper sides of the cabinet - it looks awesome!
 
So I've had a problem with my Danby getting it below 40* F. I actually got to the point I was about to buy a $75 t-stat to replace it, but then by chance I pulled it out from the area where it's located. After 5 minutes, it dropped another 6 degrees to 34. After some research, I discovered that even though I had enough ventilation behind and to one side, the fact I had a top and left side so close, that's what was preventing it dropping temps. If you run into this problem, consider running some ventilation on the upper sides of the cabinet - it looks awesome!

Interesting, didn't see anything about that during my research, but it's not an issue here. I don't think I've tested how low I could get the temp since I put it in the cabinet, but I've had it down at 33ºF. Can't see it from any of the pictures, but there is about a half inch of breathing room on the top of the fridge under the cabinet top.


I poured my first beer from it today!

AE834C64-7B00-41C5-9BDA-B961C18E8D45.png


Still need to buy a drip tray though...
 
How did you insulate around the copper pipe and the tower? If you want to remove the fridge, do you have to completely remove the tower assembly?
 
Beautiful job. Need some kind of cool drip tray to protect the good looking wood.

Thank you! I'm currently thinking about doing a small scale version of something like this, just trying to find the right tray for it, something copper or iron. Would look more interesting than a drip tray (IMO), although I wouldn't be able to rest most beer glasses on it... I think I can handle that tradeoff with some good coasters on the cabinet if needed.
0106_msl_pebbletray_xl.jpg


How did you insulate around the copper pipe and the tower? If you want to remove the fridge, do you have to completely remove the tower assembly?
The cabinet top is attached via the bolts through the tower, so I do have to remove the tower, then the whole cabinet top can come off. Or I can remove the fridge WITH the cabinet top and tower still attached. Figured that way I could easily upgrade things later on if wanted, or would make moving it all much easier.

As far as pipe insulation... just used 2" pipe insulation with a similar ID as the OD of the copper pipe.
66499253-1963-4AAE-87D7-F91455ED4B33.jpg
 
Update: Just got a Dremel, so I decided to cut the molding off the inside of the fridge door. Now I can fit two ball lock kegs in!

Was a lot more difficult than I expected getting the moulding to come off. After cutting along the entire outside with the dremel, I shoved a large serated kitchen knife behind the plastic to cut the foam insulation free.
B1D86335-02BC-4AA3-BF85-DCA412549374.jpg


I bought some marker board from Home Depot and cut it to the size I wanted. Trimmed away the insulation so that I could set the board inside the plastic. Got a pretty snug fit! Then taped it in place with some foil tape. Really happy with how it turned out!

72FB86D8-11C6-47B5-AC19-4D000E0807B5.jpg


3AA00429-523A-411E-81B4-FB1A6482CDD1.jpg


C738C179-E27B-40C0-957B-BF3E599DFE5B.jpg


42B7D455-FBC0-45BD-A839-E6F70CC8A02A.jpg
 
Got an Inkbird ITC-1000f for Christmas and finally took the time to install it!

This thread walked me through the wiring for it: https://www.homebrewtalk.com/showthread.php?t=574104 So I have those who chipped in there to thank for mine working out.

The spade end of the black wires will plug into the connected black wires from the fridge. The two ends of my black wires then went into terminals #1 and #7.

My red wire then went from terminal #8 to the red wire in the fridge.

17837222-EC7B-433D-8537-A93236E96A91.jpg


Then spliced another wire (red) off the white wire from the light to go to terminal #2.

20384237-6A25-43A1-B163-FA4DBDA2FD7D.jpg


Did quite a bit of cutting to get the new temp control to fit, but I'm really happy with how well it fits!

24AF9A1C-F1FF-4691-9E8E-059C97FAC98E.jpg

24744EE6-DE3A-412D-A665-811ABAF89CEB.jpg


Nice thing about this, I can easily unplug the entire fixture now if I need to. Green wire is no longer needed, so I've just got it tucked in there off to the side.
19B636C8-D4E6-40B0-A493-57DE6133A899.jpg


Turned it on to make sure everything worked the way it should before closing it up. Really happy with how this turned out!
21971256-4552-404E-B482-9A794F82E969.jpg


The light should still be working, but I think my bulb is dead, so I'll have to buy a new one before everything is back to working order.
 
Sellick - Thank you for your very detailed post. I was such a fan of your design that I went ahead and built my own! I am very pleased with how it turned out and really appreciate you taking the time to document your build. I plan on adding a drip tray and would like to make my tower a little taller. Other than that I am pretty much there.

The only question I have is how you handled insulating the small gap between the bottom of the hole you drilled in the butcher block and the top of your mini fridge? I have about 1.5 - 2 inches of open space and want to insulate that gap the best I can. Because I have a 2 tap tower, I drilled a 1.75" hole and ran a PVC pipe through the base of my tower and into the top of the fridge. I was planning on wrapping the outside of the PVC with some pipe insulation to insulate that portion of the lines unless anyone has a better idea. Just curious what you did.....

IMG_4542.JPG
 
Sellick - Thank you for your very detailed post. I was such a fan of your design that I went ahead and built my own! I am very pleased with how it turned out and really appreciate you taking the time to document your build. I plan on adding a drip tray and would like to make my tower a little taller. Other than that I am pretty much there.

The only question I have is how you handled insulating the small gap between the bottom of the hole you drilled in the butcher block and the top of your mini fridge? I have about 1.5 - 2 inches of open space and want to insulate that gap the best I can. Because I have a 2 tap tower, I drilled a 1.75" hole and ran a PVC pipe through the base of my tower and into the top of the fridge. I was planning on wrapping the outside of the PVC with some pipe insulation to insulate that portion of the lines unless anyone has a better idea. Just curious what you did.....

This is awesome! I love it! Granted, I am a little biased towards your design. Haha

So the small gap between the top of fridge and bottom of the butcher block... I cut a piece of pipe insulation that was only about 3/4" tall that fits in that space. So what you're thinking of doing is essentially what I did as well.

Thanks for sharing!
 
This is probably a dumb question but I am pretty new to doing work like this but basically wanted to do this exact thing to my kegerator...

First, how did you attach the top to the base?

Second, what kind of wood did you use for the frame/siding?
 
This is probably a dumb question but I am pretty new to doing work like this but basically wanted to do this exact thing to my kegerator...

First, how did you attach the top to the base?

Second, what kind of wood did you use for the frame/siding?

Second question is the easy one... Just whatever 2x4s were cheapest and common board for the siding.

As for the first question, I've got mine setup so that the top isn't actually attached to the cabinet. It's attached to the top of the fridge via the bolts through the tower/table top/fridge top. Did this so that I could remove the keggerator from the cabinet if I ever wanted to rebuild the cabinet.
 
This is probably a dumb question but I am pretty new to doing work like this but basically wanted to do this exact thing to my kegerator...

First, how did you attach the top to the base?

Second, what kind of wood did you use for the frame/siding?

I did the exact same thing as sellick for purchasing the wood. At the end of the day, you don't need anything fancy for the frame and siding. The less expensive wood gives it a nice rustic feel and helps keep the cost down.

As for attaching the top, I did attach my top to the frame using 4 L brackets. I attached the tower to the top by using bolts that I drilled through the wood top but my bolts do not go all of the way into the fridge. There is really no wrong way to do it .
 
This is just an awesome piece of job, and im gonna do one of my own. but instead of tower fan, im gonna build a water cooling system with pump, and hoses attached to the beer line. One question though. what kind of stain did you use? it looks kinda scoorched. My paint guy gave me a walnut water stain, but im not sure it will bring out the burned rucked look like yours. Whats your secret. ;)
 
This is just an awesome piece of job, and im gonna do one of my own. but instead of tower fan, im gonna build a water cooling system with pump, and hoses attached to the beer line. One question though. what kind of stain did you use? it looks kinda scoorched. My paint guy gave me a walnut water stain, but im not sure it will bring out the burned rucked look like yours. Whats your secret. ;)

Thanks, Unknown! I've been using it for almost a year and a half now and absolutely love the design still. It really blends itself into my apartment and people coming over for the first time don't realize what it is at first. It's a great conversation starter!

As far as color, I used a conditioner on all the wood first (highly recommend, otherwise the stain will come out much darker), then stained with MINWAX Provincial 211. I went fairly light with it, made sure I wasn't heavy handed because I know how quick it can get too dark on you! Then for the cabinet top, I put on a few layers of VARATHANE Semi-Gloss Clear Polyurethane, which added a bit more yellow to the top than I expected for "clear".

Heres my take on it so far.
3s9dQTY.jpg

tboG10A.jpg

qMEE9bP.jpg

L2160Ga.jpg

wWedAI9.jpg


The cooler will be a snug fit, so i'll have to take some of the floor off with some sandpaper. Only a few mm. I've scorched the wood before, im gonna stain. Im gonna use a light walnut water stain, and then finish it all of with a matt coating. The plumbing will be done in black pipe, and then with a compentsater faucet. My wife isnt too keen on the idea tbh. :p
 
Heres my take on it so far.

Looking good! For the burning, looks like you laid some pieces of wood over and burned around them. Interesting look, I'm looking forward to seeing how it looks once the stain is on. Keep me updated!

Hopefully once it's all finished, your wife will feel different. I know my wife loves ours!
 
Looking good! For the burning, looks like you laid some pieces of wood over and burned around them. Interesting look, I'm looking forward to seeing how it looks once the stain is on. Keep me updated!

Hopefully once it's all finished, your wife will feel different. I know my wife loves ours!

Almost done now.

oRvb0As.jpg

o9KqjPW.jpg


Im going for more trashy/old style look, so I cut a bit of the top door off, to give it some edge.
Ktvx4rf.jpg


Top and door burned now. And now applying the stain.

S1W63Tz.jpg

kOfMSSB.jpg


To give it some extra edge, and make it look more beaten up, ive put some paint on it, and alså taken som of the top off with a saw, so the table is a little bit uneven in the wood.

K9cbCwf.jpg

NSO7XKG.jpg

5yCs4xr.jpg


Then all I need is to grind it down a bit, and then give it some coating. When im done with the coat, im gonna some black silicone fugue (correct spelling?). Im getting more and more satisfied with the look, even though it some turns from your original idea. :)
 
oh yeah, and the edges that i burned around, is my brew name (black label brewery - garage brewing), in a metal template. the name is sligtly visible in the second last picture to right. where you can see blac :)
 
Now for the coating. Ive choosen an semi gloss ship coating. That really should highlight the burned element, and the oak stain really Nice.

ckfGMpP.jpg

9aOu66r.jpg


Im really pleased with the top especially. The rugged look, along the burning and stained elements, makes it look really cool. Its a bit darker than what i was going for, but i think it will fit nice into the living room. :)
 
Does anyone have pictures saved of the original project that they could uploaded again to this thread? Family is out of town and was going to use the time to build my own version and those pics were my baseline. Then Photobucket went and changed their ToS... Thanks.
 
Does anyone have pictures saved of the original project that they could uploaded again to this thread? Family is out of town and was going to use the time to build my own version and those pics were my baseline. Then Photobucket went and changed their ToS... Thanks.

Thanks for the heads-up! Will try and get the pictures back online.
 

Latest posts

Back
Top