CraftBeerPi - Raspberry Pi Software

Homebrew Talk - Beer, Wine, Mead, & Cider Brewing Discussion Forum

Help Support Homebrew Talk - Beer, Wine, Mead, & Cider Brewing Discussion Forum:

This site may earn a commission from merchant affiliate links, including eBay, Amazon, and others.
I finally just started to play with my Pi3 and "Craft Beer Pi" a few nights ago. Looks okay so far, but I'd like to eventually use a small display (320x480) at the boil kettle. (I currently use a TA4 PID and a SSVR for boil control in series with each other, in a Chugger pump circulated eBIAB setup). I'm uncertain if I'll be able to get the current interface to work properly with the small touchscreen. I might have to hack a non-web interface of my own in to do this. But otherwise I suppose I could just use my phone or an old tablet as a display as well.

I do have a Pi-Zero-W on the way (I got lucky apparently and managed to get one just before they vanished on the launch day) and eventually I'm going to use that to run the system.

It is actually pretty simple to hack in the PWM mod that "schrod" (David Schroeder) wrote and mentioned in post #527. I did it a tad bit differently in that I simply downloaded the pwm.py from his git hub branch (craftbeerpi/brewapp/base/automatic/) and also added the "import pwm" to the __init__.py code in that same directory. (You obviously can also just drop that init file from github in there to overwrite the existing __init__.py). I also deleted the compiled init .pyc code, and rebooted the Pi3. And the PWM code just shows up there.

Now I do suppose that if you pull updates then it might disappear on your local copy, but it takes about 2 minutes to add it back. And it does work just fine and in a manner that you would suspect. Personally I think that's easier than running a patch.

I'm looking forward to getting this hooked up to my system as I could at least automate step mashes. With the buzzer and timer, I suppose I could also pretty much automate everything except pulling the bag from the kettle at this point as well. No, I don't plan on a motorized crane or pulley to lift the bag out. ;)

I'd like to look into using this with a fermentation chamber also, but I'm not quite there yet.

Anyway.. fun stuff so far. I'm not really a Python guy but overall the code looks straightforward enough that I can easily read it. And that's good. It seems much simpler to maintain than either Elsinore or BrewPi. But we will see.
I'm initially going to hack it into my system by switching the control lines from the PID to SSR. (I'll add a DPDT switch so I can go back and forth). I left in the RTD sensor and drilled a second hole for my home made thermowell for one of those Chinese counterfeit DS18B20 stainless probes.. I stuffed a Bayou Classic weldless 1/2" adapter with cut up silicon tubing as a gasket and the probe. It worked like I planned it that way. Interface is a hacked together soldered board on a connector with an LED for the heater and the probe and pullup on it. Might get nicer at some point, but it doesn't really need to be anything fancier than that.

Fun stuff so far. At least the DS18B20 tracks the temperature really closely with what I calibrated the RTD/PID setup and a Javelin. So I have more confidence that past brews were really mashed at the right temperature now! ;)
 
Hey all, I'm having problems with my onewire sensors. After acting wacky when I turned my heater on they now no longer show up at all. Not even under devices. I tried a new sensor with no luck. Could something have fried out on me? The resistor seems fine. Checked that with the meter. I swapped raspberry pi units also, same thing. Anything else I can test to see if it could bE the culprit?
 
Well I thought something weird like a short on the pcb may have occurred so I scraped around the pi outs and that seemed to do the trick. Weird...
 
The first batch of prototypes are being shipped now. To get on the list, fill out this form.

For more information, checkout the Facebook Group.

*EDIT*
Ahh, sorry, I just saw that you were talking about the Terragady boards and not the official ones. My Bad.

Even though you didn't answer his question, thank you for posting that. I don't facebook but was interested in one of those boards.
 
It is actually pretty simple to hack in the PWM mod that "schrod" (David Schroeder) wrote and mentioned in post #527. I did it a tad bit differently in that I simply downloaded the pwm.py from his git hub branch (craftbeerpi/brewapp/base/automatic/) and also added the "import pwm" to the __init__.py code in that same directory. (You obviously can also just drop that init file from github in there to overwrite the existing __init__.py). I also deleted the compiled init .pyc code, and rebooted the Pi3. And the PWM code just shows up

So I've tried to install this mod a couple times doing exactly whats described here and I've only succeeded at breaking CBP each time. Would anyone be kind enough to provide tips or tricks on how to put the PWM mod in? I'm a biologist. Python is not at the top of my list of skills.
 
Any word on when these are going to be ready?

The new Terragady 3.1 and 5.0 boards have been delivered and will be available after they're fully tested.

The 3.1 has 5 - 12v outputs with only 2 being the screw in type and the other 3 being either pin header or direct solder. The 5.0 has 8 - 12v outputs with 6 being the screw in type and the other 2 being either pin header or direct solder.

If you're interested in one or both you can send me a pm. The price points are still being worked out but the 3.1 is probably going to run $35 USD + shipping and the 5.0 is going to be around $50 USD + shipping assembled. Bare bones and D-I-Y kits will also be available.
 
Two questions (if they were answered up-thread, my apologies) about CraftGBeerPi:

1) Is there support for non-temperature sensors (like volume)?

2) Is there support for using a 1wire i2c controller rather than attaching sensors directly to the GPIO pins?

Thanks.
 
Two questions (if they were answered up-thread, my apologies) about CraftGBeerPi:

1) Is there support for non-temperature sensors (like volume)?

2) Is there support for using a 1wire i2c controller rather than attaching sensors directly to the GPIO pins?

Thanks.


1) there is an open framework coming in V3 so you will be free to develop for it, but there are rumours of hall effect sensor support being baked in.

2) not that i know of but see 1)
 
So I've tried to install this mod a couple times doing exactly whats described here and I've only succeeded at breaking CBP each time. Would anyone be kind enough to provide tips or tricks on how to put the PWM mod in? I'm a biologist. Python is not at the top of my list of skills.

There are directions on both the Facebook page and the pull request for installing my PWM mod. If you would prefer the other, the procedure is very similar. Essentially, you have to modify 1 line in one file and create one file with the new module content in it, then reboot.
 
Thanks. I don't have facebook, but found those facebook instructions on reddit. I did what is listed there, a couple times, a couple different ways, but no luck. I'll just stick with strange brew elsinore until 3.0 is released, or I learn how to do more python :^)
 
Is there a way to wire the temperature sensors to an ESP8266 and send the values to Cbpi wireless?
 
Interesting project.... Subbed - a little late I know.. But looks good so far, I've loaded it onto a RPI3 and it looks good.
 
Is there a way to wire the temperature sensors to an ESP8266 and send the values to Cbpi wireless?

Yes, but it would be a huge effort for little purpose.

The 1-wire sensors can be connected with very long wires, so it's probably unnecessary to use wireless. Or you could locate the Pi near the sensors and connect to the Pi remotely via WiFi.
 
I'm needing some advice--I fried my Pi. I've finished up my brew panel and went to test it. I have an official board connected to a Pi Zero-W. I connected this power supply to the 12v connection--V+ to the positive side and "common" to the negative side. There's also 2 SSR's and one sensor. I'm positive I don't have any power crossed into the SSR or sensor lines.

When I turned things on, the Pi wouldn't boot...didn't even get a power LED. I verified with a multimeter that I'm getting 12.93 VDC to the board's 12V input.

When I removed the Pi from the board and connected it to standard USB power, it won't even power up--dead. Any ideas what might have happened or ways to troubleshoot this?
 
Last edited by a moderator:
maybe buck module was not set to 5V (default is 12V) and it burned your Pi?

Buck module? Not sure what that is. If there's something I need to do to bring the voltage down then this is the problem. Can you tell me what this is and how to adjust it?

BTW, I'm sure there is not a defect in the board and the problem is in something I did (or forgot to do).
 
I do not know, you have to contact person from whom you bought the board or to instruction. Maybe they set the buck module already or maybe it is their mistake that they did not.
 
maybe buck module was not set to 5V (default is 12V) and it burned your Pi?

OK, I measured the voltage on my board's 5v pins and I got 11.9 volts. I guess I know what fried my Pi.

Now to figure out how to fix it. Since this is an official board, I'll get with Sebastian offline on the settings. Thanks a bunch for the help!
 
If the buck module was already installed it should be set to 5V already if they didn't specify otherwise. You should contact them for sure. On my boards there is a sign to check that voltage and regulate it. Sorry to hear that. I think your Pi is burned and fix is not easy. I am not sure if Pi0 W has some internal fuse but I guess it doesn't.
 
So I'm newer to RPi. I did a simple Raspberry Pints project a few months ago fairly sucessfuly. I recently got a RIMS tube and I was thinking I would use CraftBeerPi to control it. I have a few questions though

1) How do you interface the RPi with the Craft Beer Pi official interface board? From the pictures I've seen I haven't see how people actually get the two boards to talk.
2) Will this work with controlling just a RIMS tube and a pump?
3) Anyone doing that setup willing to share some pictures, wiring diagrams and parts list?
 
Don't quote me on this but from what I understand is that the power is connected to the Crafterbeer Pi via the 12v connection which then powers the Rasberry Pi thus you don't need to connect the power thru the micro usb port. The Craftbeer Pi board simply slides onto the GPIO pins of the Raspberry pi. Connection completed. Depending on what package you purchased from Henao the $120 and $150 kits ship with the 12v Power Supply.

Yes you absolutely will be able to control a pump and RIMS tube. Noted you will need a SSR (solid state relay) to drive the heating element. I personally run my pump continuously on my RIMs and just use a power switch to turn on and off.

When I get my Craftbeer Pi board I plan on taking lots of pictures and create wiring diagrams to help others as documentation is lacking.
 
$150?? Wow and I thought I charged too much...good thing too as it looks like he's going to be replacing someone's pi
 
$150?? Wow and I thought I charged too much...good thing too as it looks like he's going to be replacing someone's pi

$150 includes Raspberry Pi 3, Craftbeer Pi board, 4 temp probes, 12v PSU and SD card.

Not saying you don't make a good product but I have been really pleased with my experience with Henao Technologies thus far, customer support has been great.

Also please explain your comment regarding needing a replacement? Did I provide incorrect information?
 
https://www.homebrewtalk.com/showthread.php?t=593056

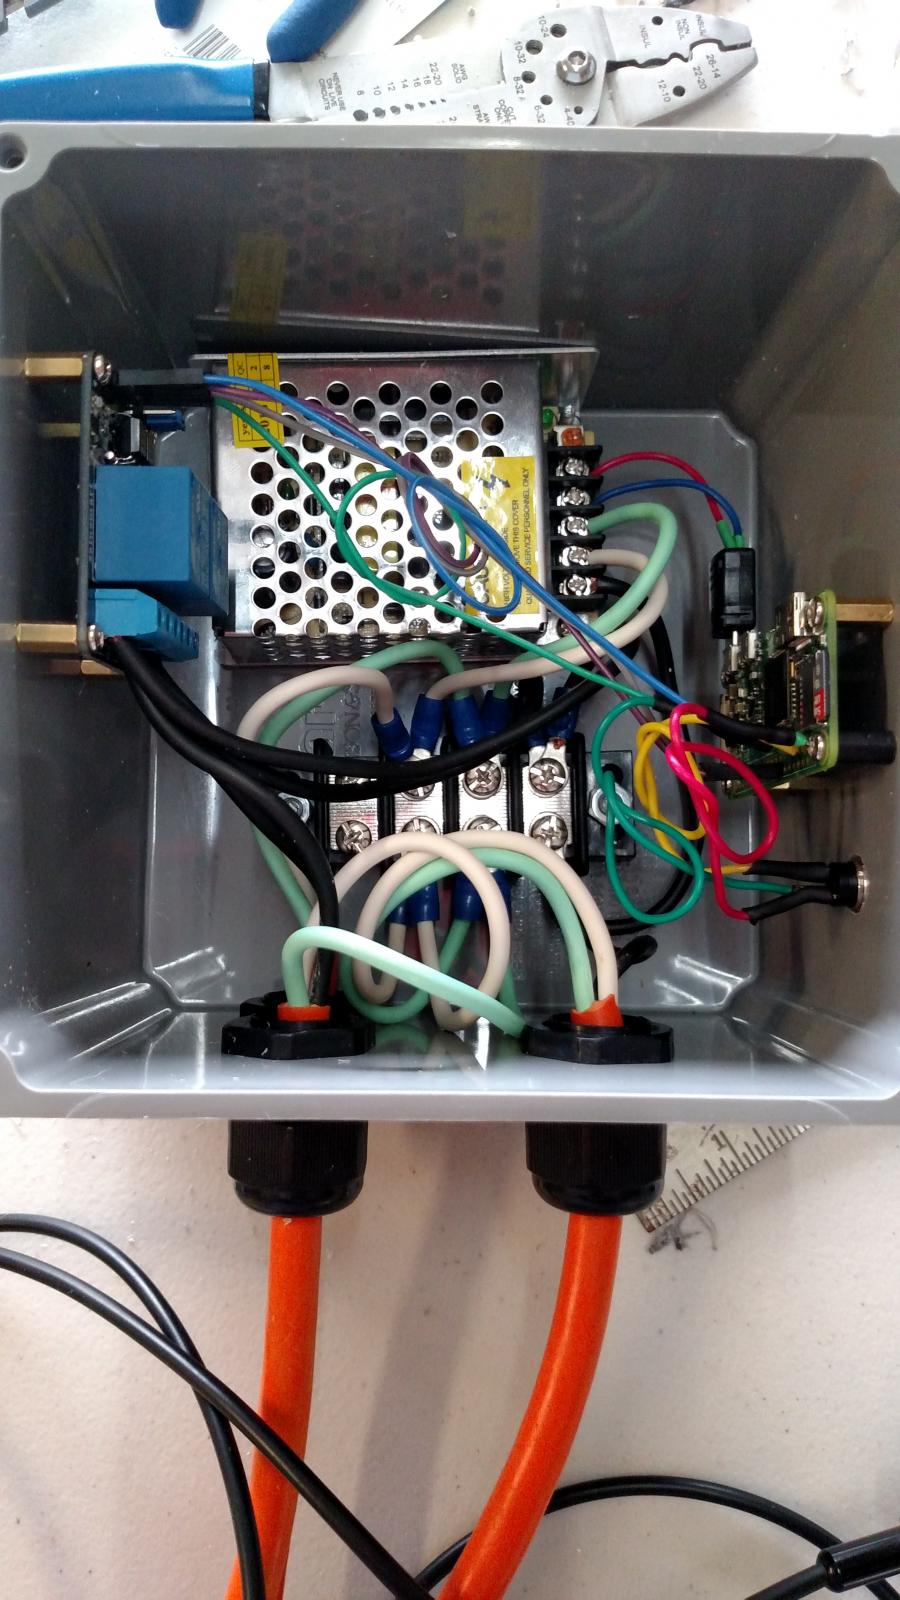
That is my not very popular rims tube controller. It is currently running​ SBE but I'm putting Craftbeerpi on it soon. It can be done, I use the ssr to control the heating element and the sainsmart relay for the pump. I didn't use the official board but I'm guessing it's​ just a hat, meaning it plugs into and utilizes the pins on the pi. I used an easy available board that I soldered together myself since it was easy enough. I don't currently have a parts list or diagrams. For the power I use a regulated power switch (?) I found on Amazon.

Edit: the rims tube element I'm using is 120v and I run the box on a 20a circuit.
 
Sorry - read up in the posts...it looks like a daughter board was sent out without the buck being set to 5v and it fried someone's pi...

No worries. I wanted to make sure I wasn't misleading anyone. Wish I knew about your boards, I was clueless there was an alternative.
 
1) How do you interface the RPi with the Craft Beer Pi official interface board? From the pictures I've seen I haven't see how people actually get the two boards to talk.
2) Will this work with controlling just a RIMS tube and a pump?
3) Anyone doing that setup willing to share some pictures, wiring diagrams and parts list?

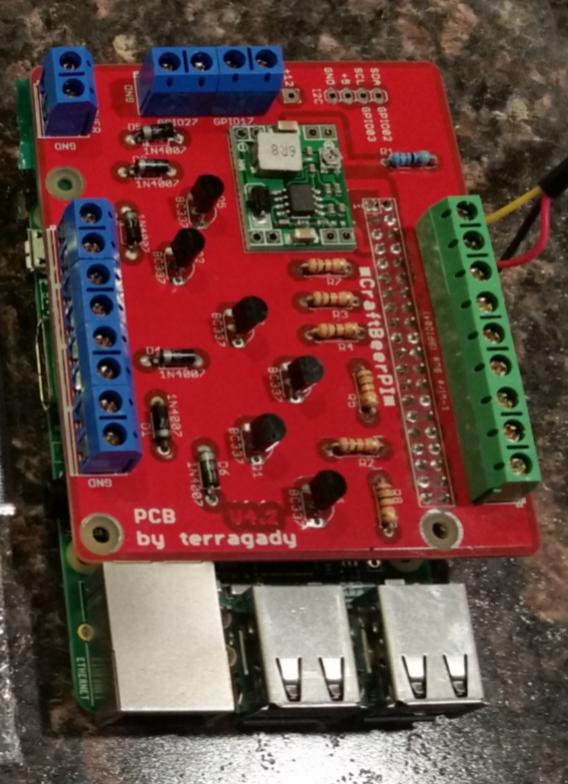
Here is a picture of one of the Terragady boards connected to the Pi and yes you can control a RIMS tube and pump easily.

board.jpg
 
Haven't done the digging/research yet, apologize if it's been mentioned before but can you still operate a touchscreen panel with that Terragady board connected? Looks like you may be able to sneak the ribbon cable in there but the GPIOs are connected up. Is it just power from the touchscreen that goes to GPIO?
 
https://www.homebrewtalk.com/showthread.php?t=593056

That is my not very popular rims tube controller. It is currently running​ SBE but I'm putting Craftbeerpi on it soon. It can be done, I use the ssr to control the heating element and the sainsmart relay for the pump. I didn't use the official board but I'm guessing it's​ just a hat, meaning it plugs into and utilizes the pins on the pi. I used an easy available board that I soldered together myself since it was easy enough. I don't currently have a parts list or diagrams. For the power I use a regulated power switch (?) I found on Amazon.

Edit: the rims tube element I'm using is 120v and I run the box on a 20a circuit.
Pretty much exactly what I'm looking to do with my 120v tube. Plus I love that ammo box for it.
 
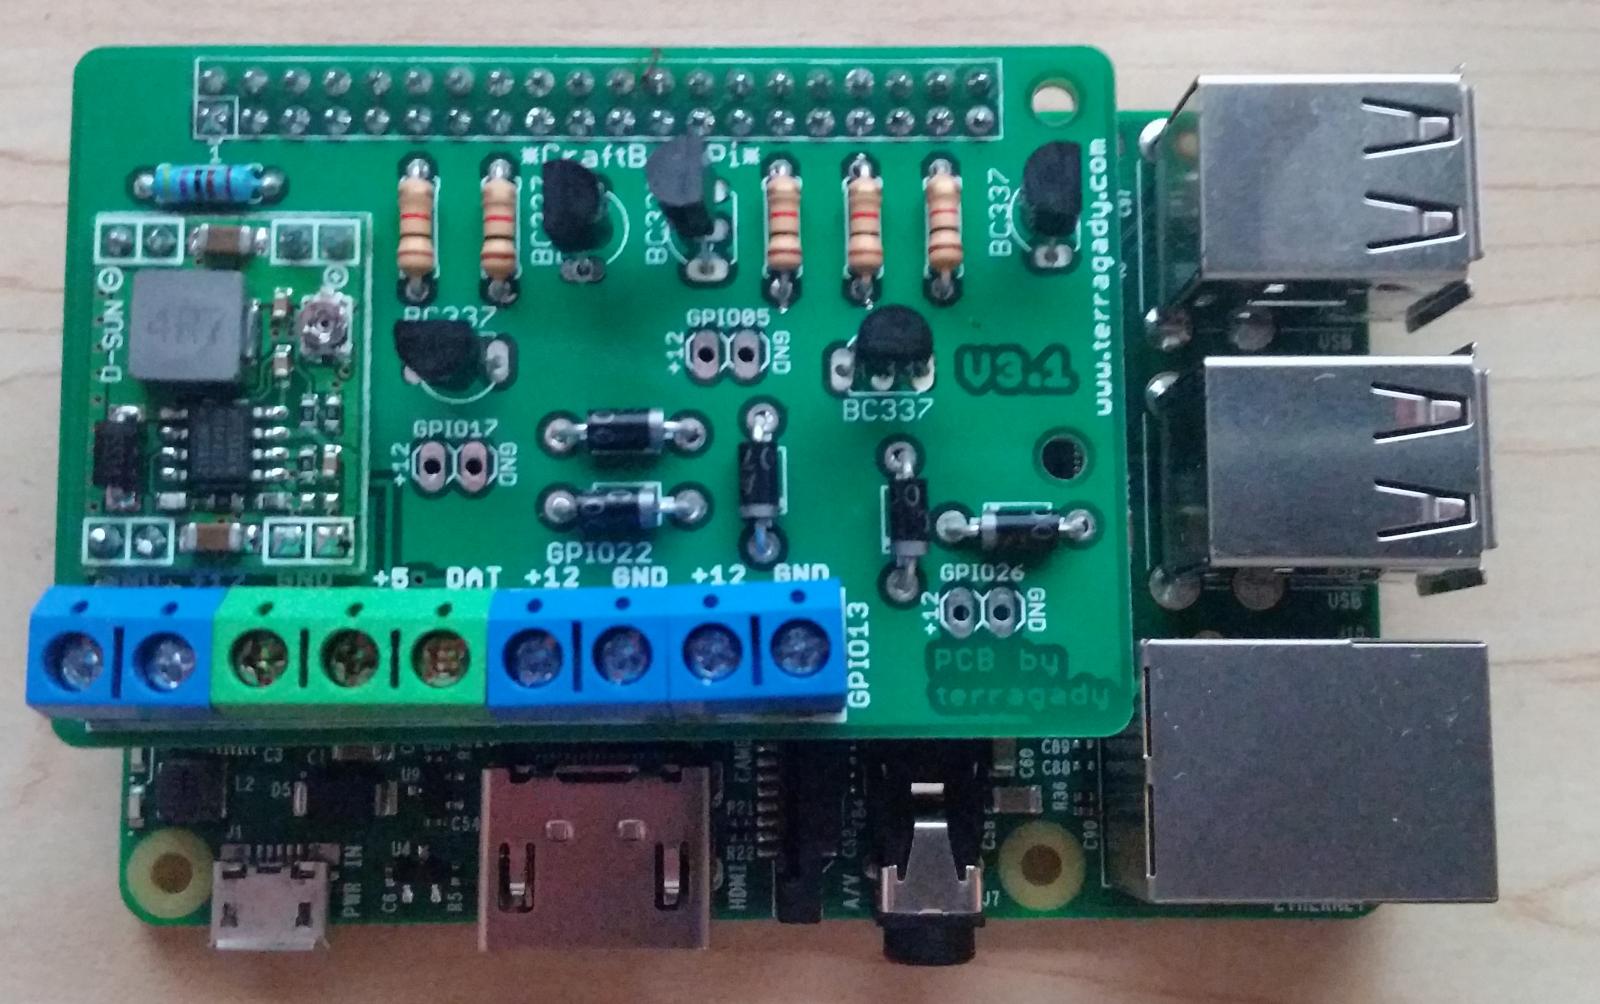
The new 3.1 board connected to the pi...perfect for the new Pi Zero or Pi Zero W.

What's the difference between PCB only, PCB DIY and the built and tested. It's not entirely clear on the site.

Also could you take a picture of the sandwiched together section
 
What's the difference between PCB only, PCB DIY and the built and tested. It's not entirely clear on the site.

Also could you take a picture of the sandwiched together section

I offer 3 different versions:

1) PCB Only - You only get the PCB board you source all the parts yourself, I can supply you with a BOM.

2) DIY Kit - I supply you with everything, you solder it yourself.

3) Built and Tested - I solder everything together and send you a completed and tested board.

Picture as requested...

Pi-Connection.jpg
 
I offer 3 different versions:

1) PCB Only - You only get the PCB board you source all the parts yourself, I can supply you with a BOM.

2) DIY Kit - I supply you with everything, you solder it yourself.

3) Built and Tested - I solder everything together and send you a completed and tested board.

Picture as requested...
Ah makes total sense now. Ok I'm jumping off the diving board and into the deep end of the pool
 
Pretty much exactly what I'm looking to do with my 120v tube. Plus I love that ammo box for it.

It's not a very hard build. I'm certainly not an expert. These boards may have on board power switching which would get rid of the regulated power switch, but a basic soldering hat will give you plenty of ability to make all you connections once you know what pins you are using for your relays. If you wanted the Pi's foot print to be smaller you could go with a pi zero w. I have Craftbeerpi running on one that will be used for my keezer once I get regulated power switches (?) that are defective. The last two I received made noise, there should be no noise.

IMG_20170331_113446255.jpg


IMG_20170331_113422637.jpg
 
Back
Top