Checklist for kegerator setup

Homebrew Talk - Beer, Wine, Mead, & Cider Brewing Discussion Forum

Help Support Homebrew Talk - Beer, Wine, Mead, & Cider Brewing Discussion Forum:

This site may earn a commission from merchant affiliate links, including eBay, Amazon, and others.

uptheirons

Active Member
Joined
Jun 3, 2023
Messages
28
Reaction score
10
Location
Folsom, CA
First time posting here! Awesome site with tons of information, so thanks to everyone.

I used to bottle my beer but now I have a spare fridge and went and bought a 20lb C02 tank, couple of corny kegs. I am overwhelmed with all the information out there so looking for some help in getting the right equipment and parts for a dual tap system (for now, but I will upgrade to more taps later).

What I have currently?
- 2 5gallon corny kegs
- 1 20lb CO2 tank
- purchased Micro Matic 842-2-PP regulator (on the way)

Thinking of getting
- CMB barbed end ball lock disconnect for gas
- CMB 1/4" ball lock disconnect for liquid
- 1/4" to 5/16" swivel nut for the liquid QD
- brass barbed nipple 1/4" MPT X 5/16" barb
- Red gas hose 5/16 ID, 9/16 OD - 24' for two lines and some extra (is this a lot?)
- EVABarrier (Not sure what size diameter or length) - I heard 10ft per beer line is recommended. Is that right?

I want to go with Duotight fittings with the EVABarrier but I am not sure which one to get and the number considering my setup.

I have decided to keep my CO2 tank outside and drill two holes for the two gas lines so that I have enough room to add additional kegs in the future. I know I need the shanks, taps and handles. Any recommendations on what size to purchase? Any think else I may be missing?

Thank you!
 
EVABarrier is the right way to go. There’s really not any reason not to use it for both gas and liquid lines. You want the 8 mm OD/4 mm ID. 10’ for each liquid line is plenty unless you like very sparkly beer. You may use less. Gas lines can be whatever length is convenient.

For EVA you want flare (1/4” MFL) fittings on everything; avoid barbs. I don’t know how hard it will be to swap flare into that MicroMatic. If you can’t do it, folks here will have some tips on how to get the EVA on a barb. But definitely get MFL disconnects.

(To expand on this: if the NPT-to-barb valves aren’t thread-locked in, just screw ‘em out and replace with NPT-to-MFL check valves (these ones might work, check the size). Remember to use Teflon tape on a new NPT connection.)

For each keg, you want 3 MFL to 8 mm Duotight fittings, gas and liquid disconnects (CMB are good), a Duotight to beer thread adaptor, a stainless steel beer shank (at least 4” if you’re going through a keezer collar, you may be able to get away with less if you’re going through a fridge wall, longer won’t hurt anything, and make sure the shank has a plain (i.e. not barbed) end), and a stainless steel front-sealing faucet (Nukataps are fine, too, or Perlick if you're feeling spendy.) Grab extra Duotight fittings (one to FFL, one to beer thread) and maybe an extra set of disconnects in case something breaks.

BrewHardware is a good place to order Duotight as well as parts with MFL already installed. MoreBeer is fine for Duotight.

Get yourself a tubing cutter. They’re cheap and save you hassle.

Be sure to push the EVA all the way into the Duotight. If you just get it past the first o-ring, it’ll probably seal at first and then blow out when you bump it. Ask me how I know.
 
Last edited:
Thank you for your suggestions. I read somewhere on this site that there's no need to go with EVABarrier for gas since you rarely need to disconnect that line for cleaning. May be its for folks trying to upgrade to EVABarrier? I'll go with your suggestion. You gave me a lot of info to research. Thank you again!
 
The rationale behind using EVABarrier for both beer and gas is the gas line connects to the same keg as the beer line and O2 ingress is bad in both cases. I changed all my lines to EVABarrier in 2019...

Cheers!
 
Basic physics in the form of Fick’s Law says that oxygen will leak through a PVC tube even if it is pressurized with CO2 inside. I’m not convinced diffusion is Fickian, and my anecdotal experience is that with barrier plastic liquid lines, PVC gas lines don’t result in faster staling.

BUT EVA is cheap, and easy to work with, and (push the tube all the way into the fitting!) is pretty easy to set up without leaks, and you’ll already have it around for use on the liquid side. There’s no reason not to use it for gas if you’re starting on a project fresh.

If you already had everything set up with hose barbs, I personally think you’d be fine with PVC gas lines. (Undersize it so it fits very snugly over the barbs, heat it in hot water to work it on, and use a hose clamp.) With the MicroMatic already purchased with barbs, you may decide to go that way. I don’t think it’ll be hard or expensive to swap in flare fittings (though it depends on whether it was assembled with thread lock; if it was, give up) and my advice is to give that a shot so you can go with EVA.

With EVA gas lines, the tubing ID doesn’t really make much of a difference. I’d go with the 8/4 so you can use the same stuff on both sides. You could use larger bore tubing for gas, but it doesn’t get you anything.

If you’re planning for more kegs in the future, you could take that Y piece off the regulator (again assuming no thread lock), replace it with a single MFL valve, and then use a manifold (also MFL.). If you do go this way, get a manifold with one more gas line than you think you’re going to need.
 
Also, 4mm ID for beer and 5mm for gas? Kegconnection only carries 4mm and 6.3mm ID. Where do you get 5mm?
There’s no need, nor advantage to use different size tubing for beer or gas. Use 4mm ID for everything and you don’t have to worry about having an assortment of different sized fittings.
 
nor advantage to use different size tubing for beer or gas.

You might feel differently if you ever try to get the 4mm ID over a 3/8" barb...

1685979792085.jpeg


Cheers!
 
I still havent received my regulator so I do not know if its easy to swap the barb fitting out. The manufacturer website sells a "Shut-Off 1/4" Barb" as a replacement. So, I am guessing its possible. I'll wait for the shipment and figure out the next steps. As of now, I will go with EVAbarrier for both the liquid and gas lines with duotight fittings. Thanks for all the help!
 
When I added the shank to my cart, BrewHardware recommended "a hex beer nut, 1/4" barbed tailpiece, and tailpiece gasket". I am guessing I need the hex nut and a "Tailpiece, 1/4mfl, Stainless Steel" and not the barbed one they recommend, correct? And the gasket is same as their "Neoprene beer washer"?
 
On the end of the beer shank you're going to need a way to attach the beer line. Some shanks have a barb end while other have no end, that's where you'll need the tail piece, nut and gasket. I'd suggest the removable style, that would be the hex nut, tail piece and gasket as you have seen suggested from BrewHardware. I know that Duotight has a shank fitting but I'd go with the metal style.

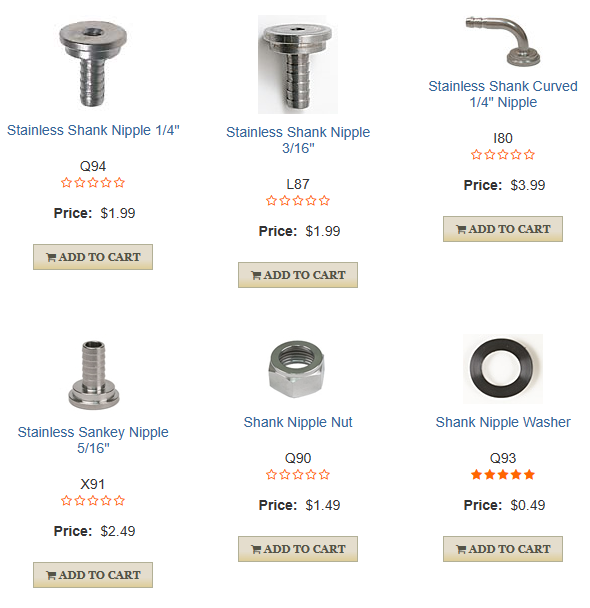
The picture shows the different shank nipples, nut and gasket you'll need. This is from Williams Brewing but only because it had a good picture of what the different pieces look like. BrewHardware is a great source too.

1686050853023.png
 
While you're at it, buying new like this, I'd suggest getting stainless steel shanks. They'll be better in the long haul. That's one thing I didn't do, but I plan to switch from my chrome plated versions with the barbed end.

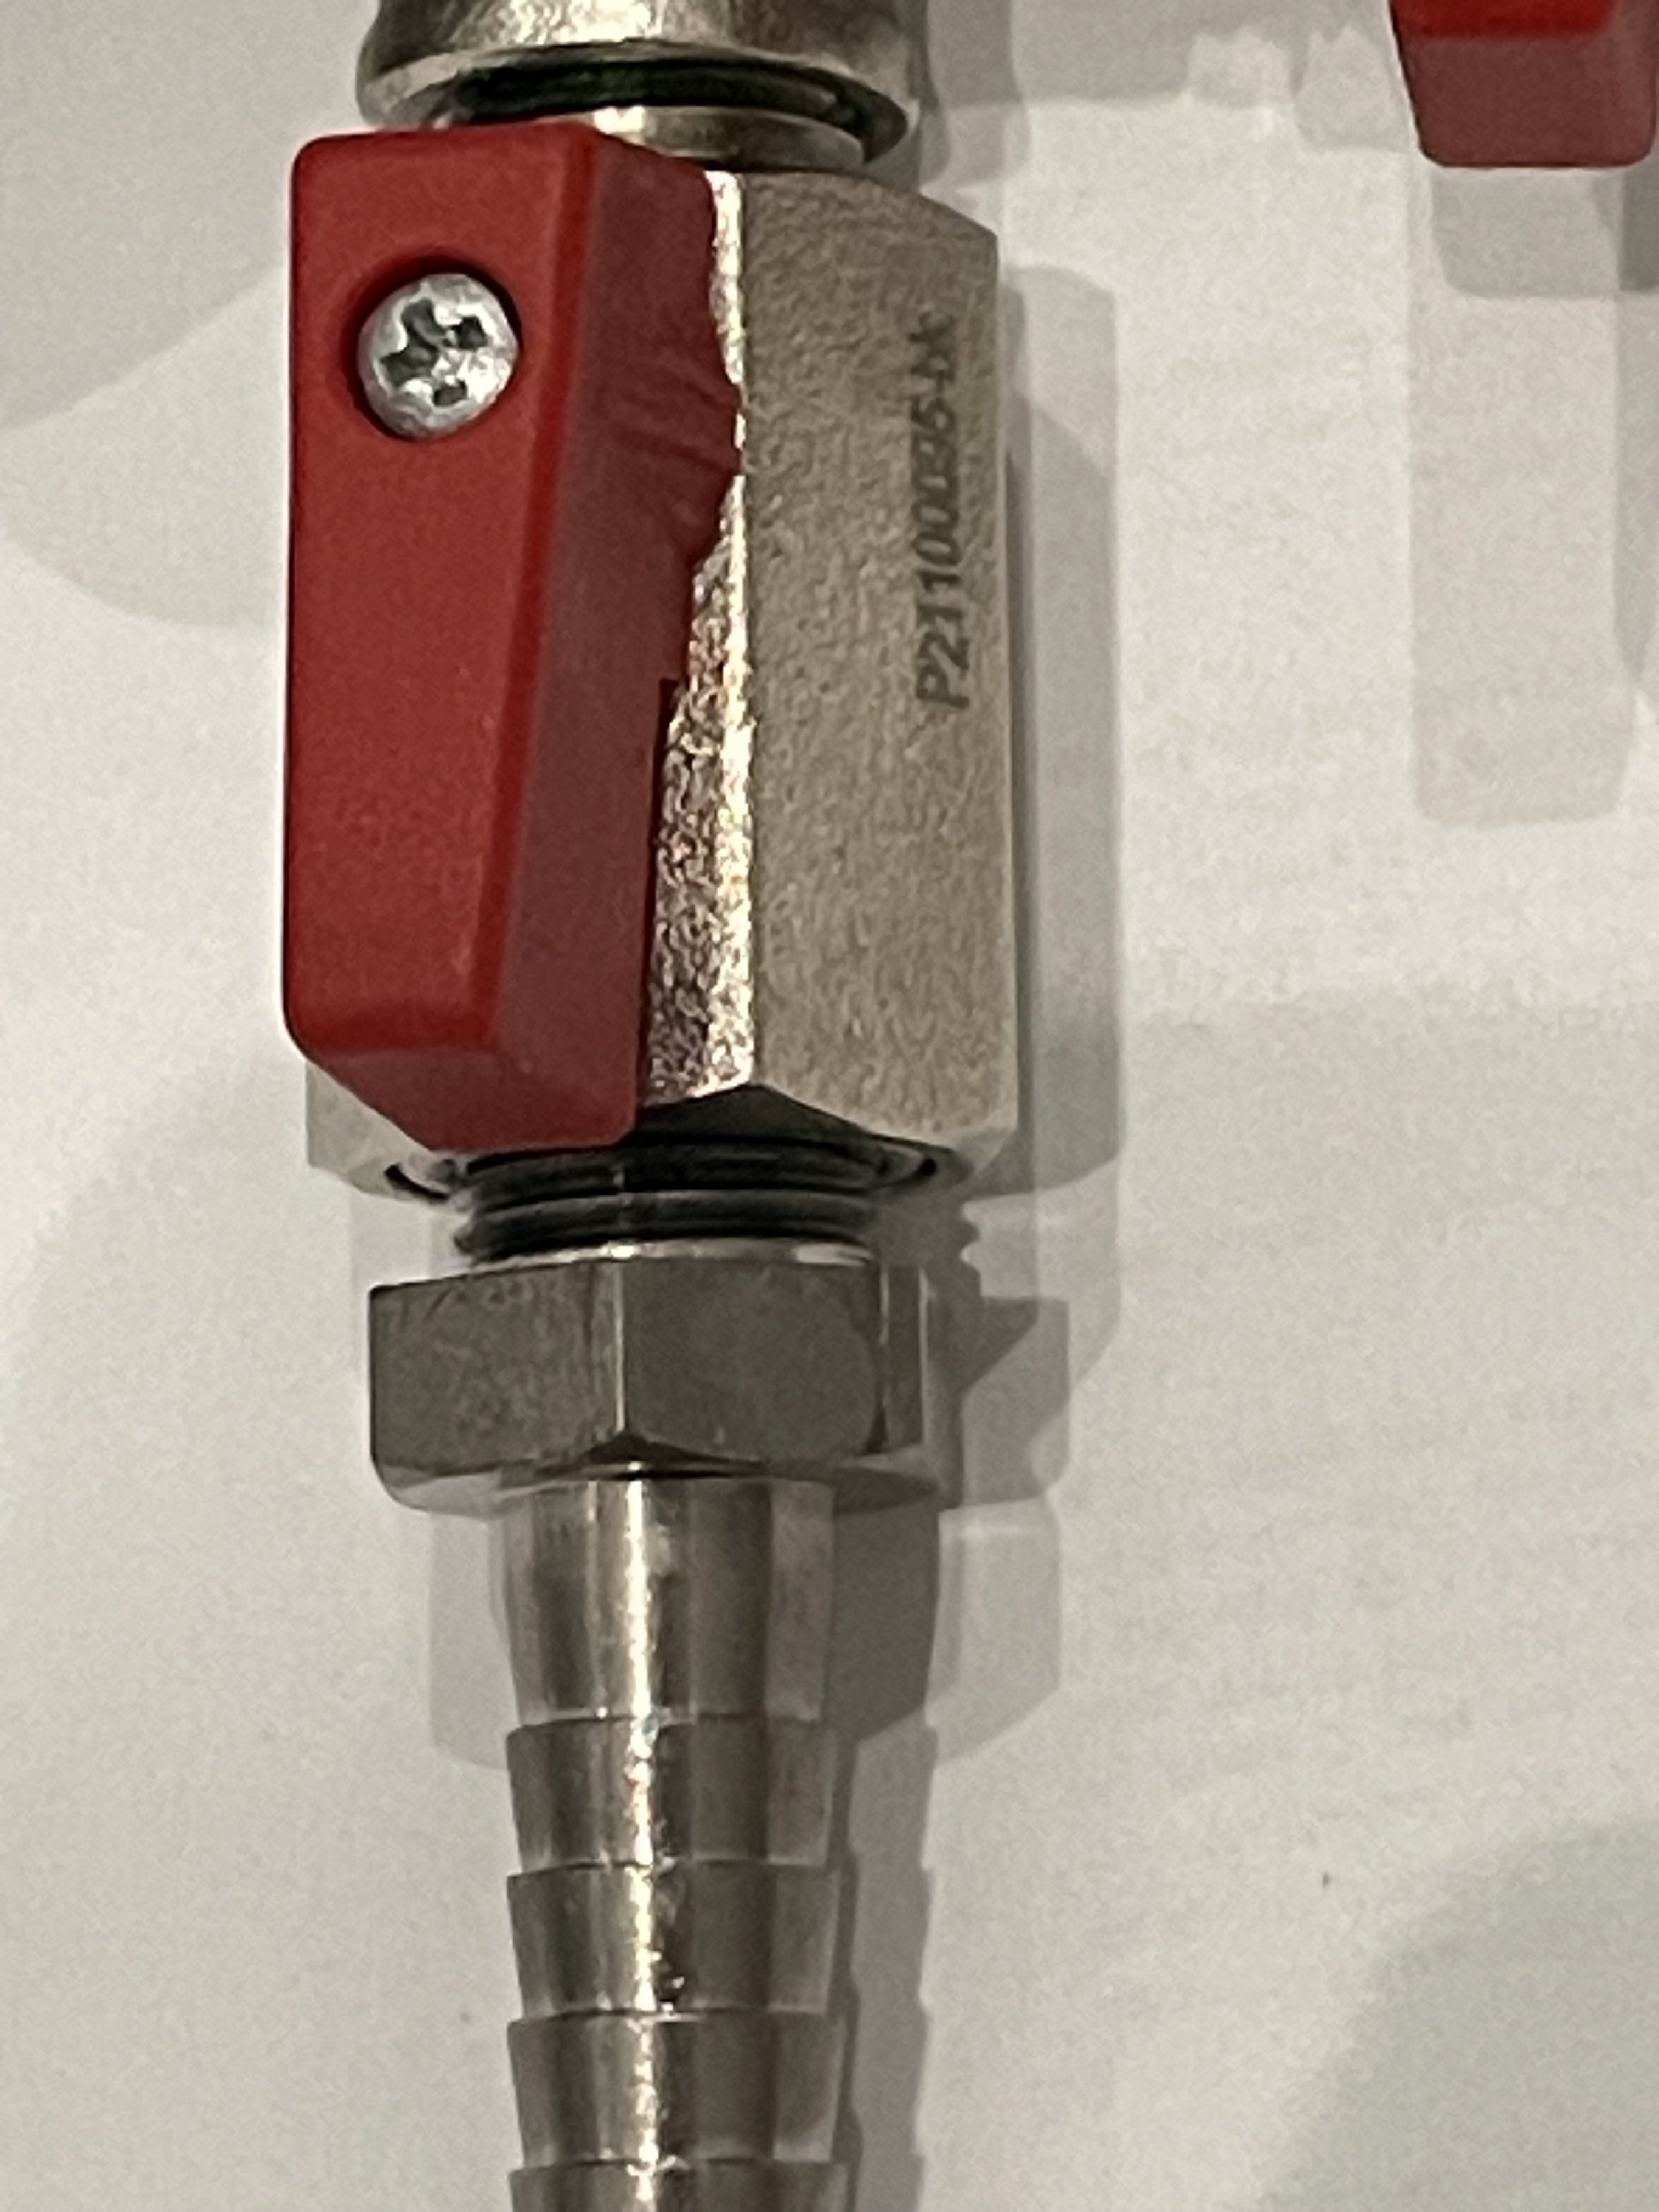
AlexKay suggested a manifold for multiple kegs. They come in styles for two or more. Also make sure that your CO2 manifold has check valves either built into the shutoffs or separate. You don't want beer pushed up into the gas lines from an over carbonated keg and certainly not pushed into your regulator. There should be a check valve at the regulator. My system has one at the regulator. Also at each keg QD I have one like what BrewHardware sells, picture below.

1686052922442.png
 
Last edited:
Is this a good shank or should I for the more expensive one (Faucet Shank, 4'', Stainless Steel)?
Yes, that's the right kind: stainless!
The "more expensive ones" you're seeing are just longer, resp. 5", 6" and 8", for thicker walls, right?

From the BrewHardware site, for the 4" shank:
[...] the actual wall thickness this shank accommodates is 2.75"
You said you're using a refrigerator, where are you planning to mount the faucets/shanks?

Yes, that's the correct Duotight fitting that mounts onto the back of the shank with an push fitting for 8mm OD EVA tubing on the other end.
Read the description on the site for directions on how to mount those without leaks or cracking them.
 
I plan to mount them on the door. I am assuming 2.75" would be enough. Or I can go with the 5# shank.
Too long is not advantageous, because it sticks out more on the inside. Space inside can be at a premium, since the line needs some space to curl in there.

For mounting through the door 4"shanks should be fine. But measure the thickness of the door where the shanks go through, for all security.
Also allow an additional 3/8" for a piece of plywood backing against which you tighten the shank nuts, to provide a solid backing (that doesn't compress much) to avoid crushing the plastic liner and the foam inside.

Depending on the rigidity of the outside shell of the door you may want/need some reinforcement there too. Such as a piece of stainless or aluminum, right behind the faucets. Neither would be very thick, 1/16 - 3/32" perhaps.

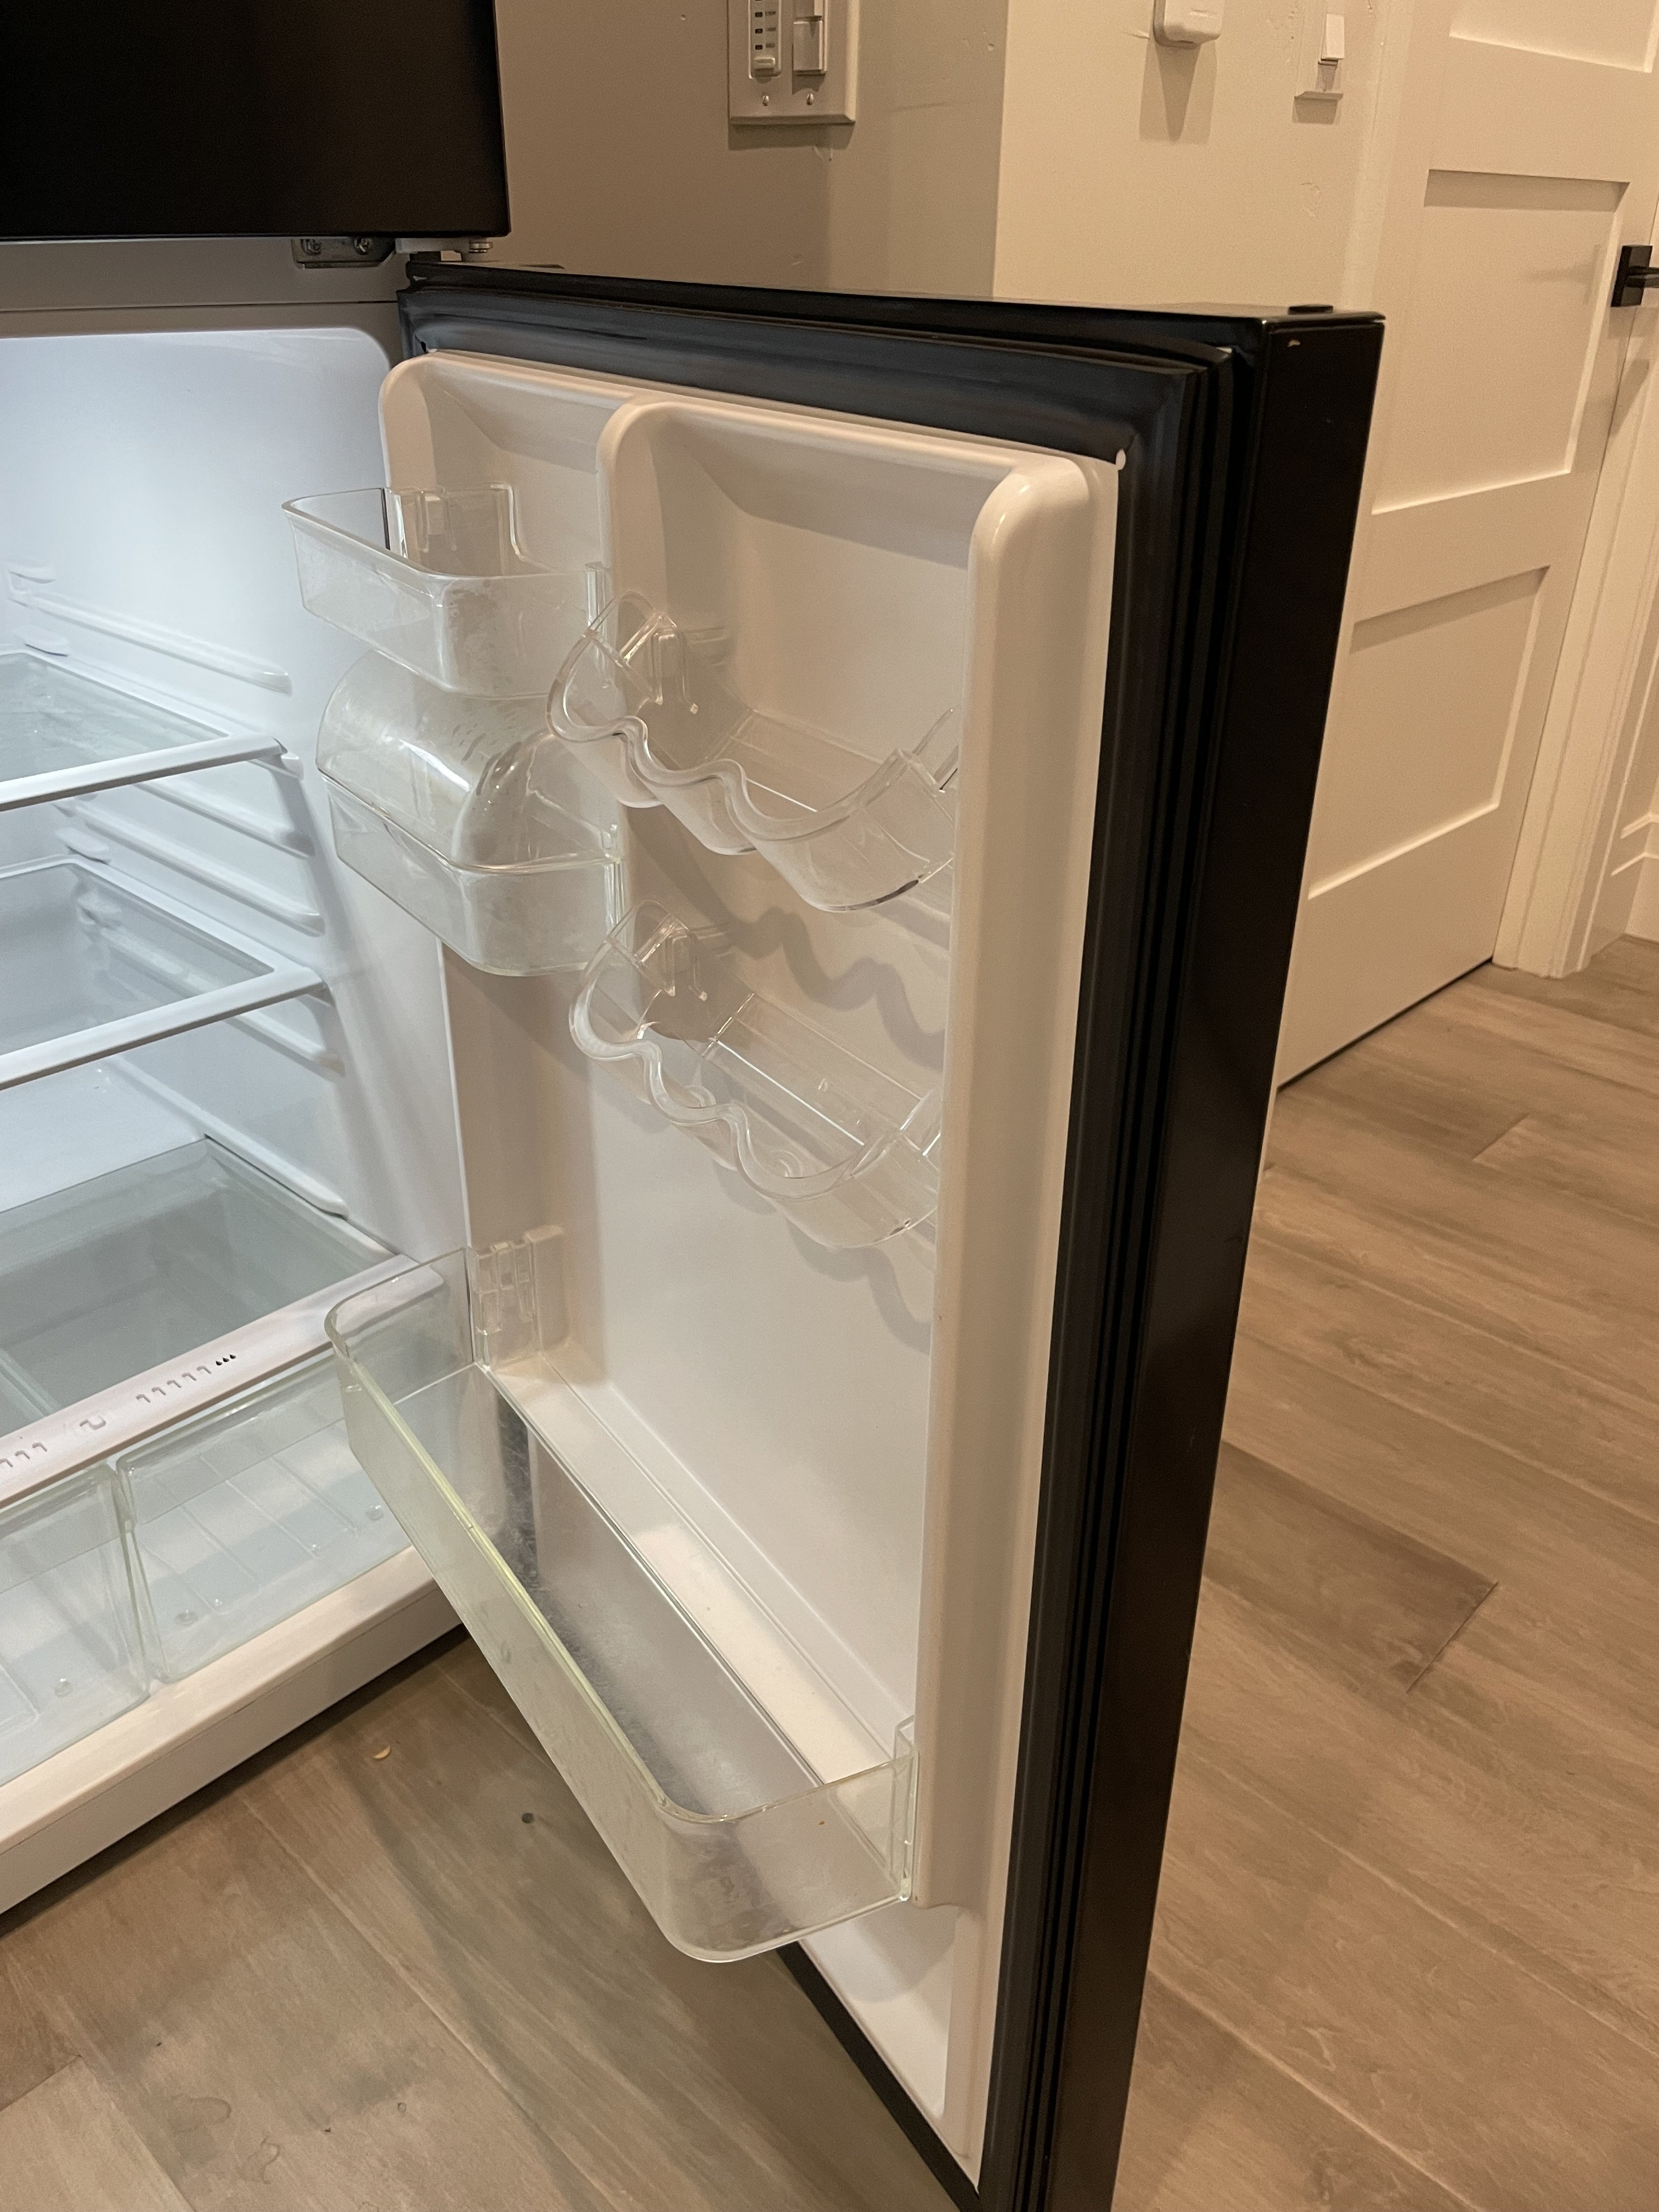
Speaking off the fridge, can you post a picture of the inside, door open?
 
Thanks! ^
Have you tried to fit 2 5-gallon cornies in there?
Is there enough space between the top of the "hump" and the fridge's ceiling to fit one or two 5-gallon corny kegs in the back?

Or only when kegs are placed on the bottom, in front of the hump?
You may have to remove some of the door extrusions to obtain enough space there to be able to close the door.
 
I only measured the height and diameter of the kegs and the inside of the fridge to make sure they fit. I just tried without removing the trays and I am pretty sure I can fit the kegs. I have 20lb tank which won’t fit. So I have to leave it out with two holes on the side of the fridge for the gas lines. Or better yet, if I can remove the y connector on the regulator, I’ll use a manifold so that I can only drill one hole for the gas line.
 
Do I need a check valve each at the QD and the regulator. Won't one suffice?
I have a check valve at each of the keg gas QD's but it's not really necessary, maybe even overkill. My thought is to protect the gas line and everything upstream from the gas QD should a keg of beer become over carbonated. This normally happens when beer starts to ferment in the keg then the pressure is higher that the regulator setting. It doesn't happen that often but could if you keg your beer to soon and the yeast starts working again.

Many CO2 manifold have check valves built into the shutoffs and most regulators have a check valve there too.

I look at it as cheap insurance to protect the regulators and all of my gas hoses. To each their own.

Glad you're getting lots of ideas for your build!
 
I have a check valve at each of the keg gas QD's but it's not really necessary, maybe even overkill.
That was my guess, but thanks for suggesting that. I will get the check valves.

Glad you're getting lots of ideas for your build!
I was somewhat overwhelmed before I started this thread. I can't thank you guys enough for all the insights. I think I am very confident I can go ahead to start putting things together for my build.

One final question. I have read a couple threads where folks were raving about the Intertap faucets. I am looking at the one on Brewhardware. Its not the one with flow control. Any thoughts on the regular Intertap Forward Seal faucet vs. Nukatap? I will invest in a Perlick at a later time (if it really makes a difference).

Thank you!
 
I don't have any experience with Nukatap but someone here I'm sure will offer some insights.

I'd look at the big name "forward seal" taps such as Intertap. I have Perlick taps but if I were shopping for new ones I'd consider the Intertap since they have a boat load of accessories like growler fillers for instance. Seal kits for rebuilding them are readily found too. See what the masses say but that would be my suggestion.

As a side note, most of us have been in your same shoes shopping around for something new. It's nice to have a site like HBT to get a variety of opinions. Over the years I found a wealth of information here.
 
Thanks! ^
Have you tried to fit 2 5-gallon cornies in there?
Is there enough space between the top of the "hump" and the fridge's ceiling to fit one or two 5-gallon corny kegs in the back?

Or only when kegs are placed on the bottom, in front of the hump?
You may have to remove some of the door extrusions to obtain enough space there to be able to close the door.
I put a 3/4" piece of plywood on top of the drawers that keeps the plastic from flexing. Longer shanks have more cooling surface area. Shanks that have welded tail piece removes potential leaks and less cleaning. I had my shanks go thru the door on my first fridge and found dealing with the lines a pain. Mine now are mounted on the side.
 
Finally pushed the button (or buttons). Bought all the parts from BrewHardware, ordered the MrBrew SS handles on Amazon and.......Belgian Tripel and La Petite Orange from Northern Brewer. My wife's not going to be happy :)

Wish me luck with my first time kegging!!
 
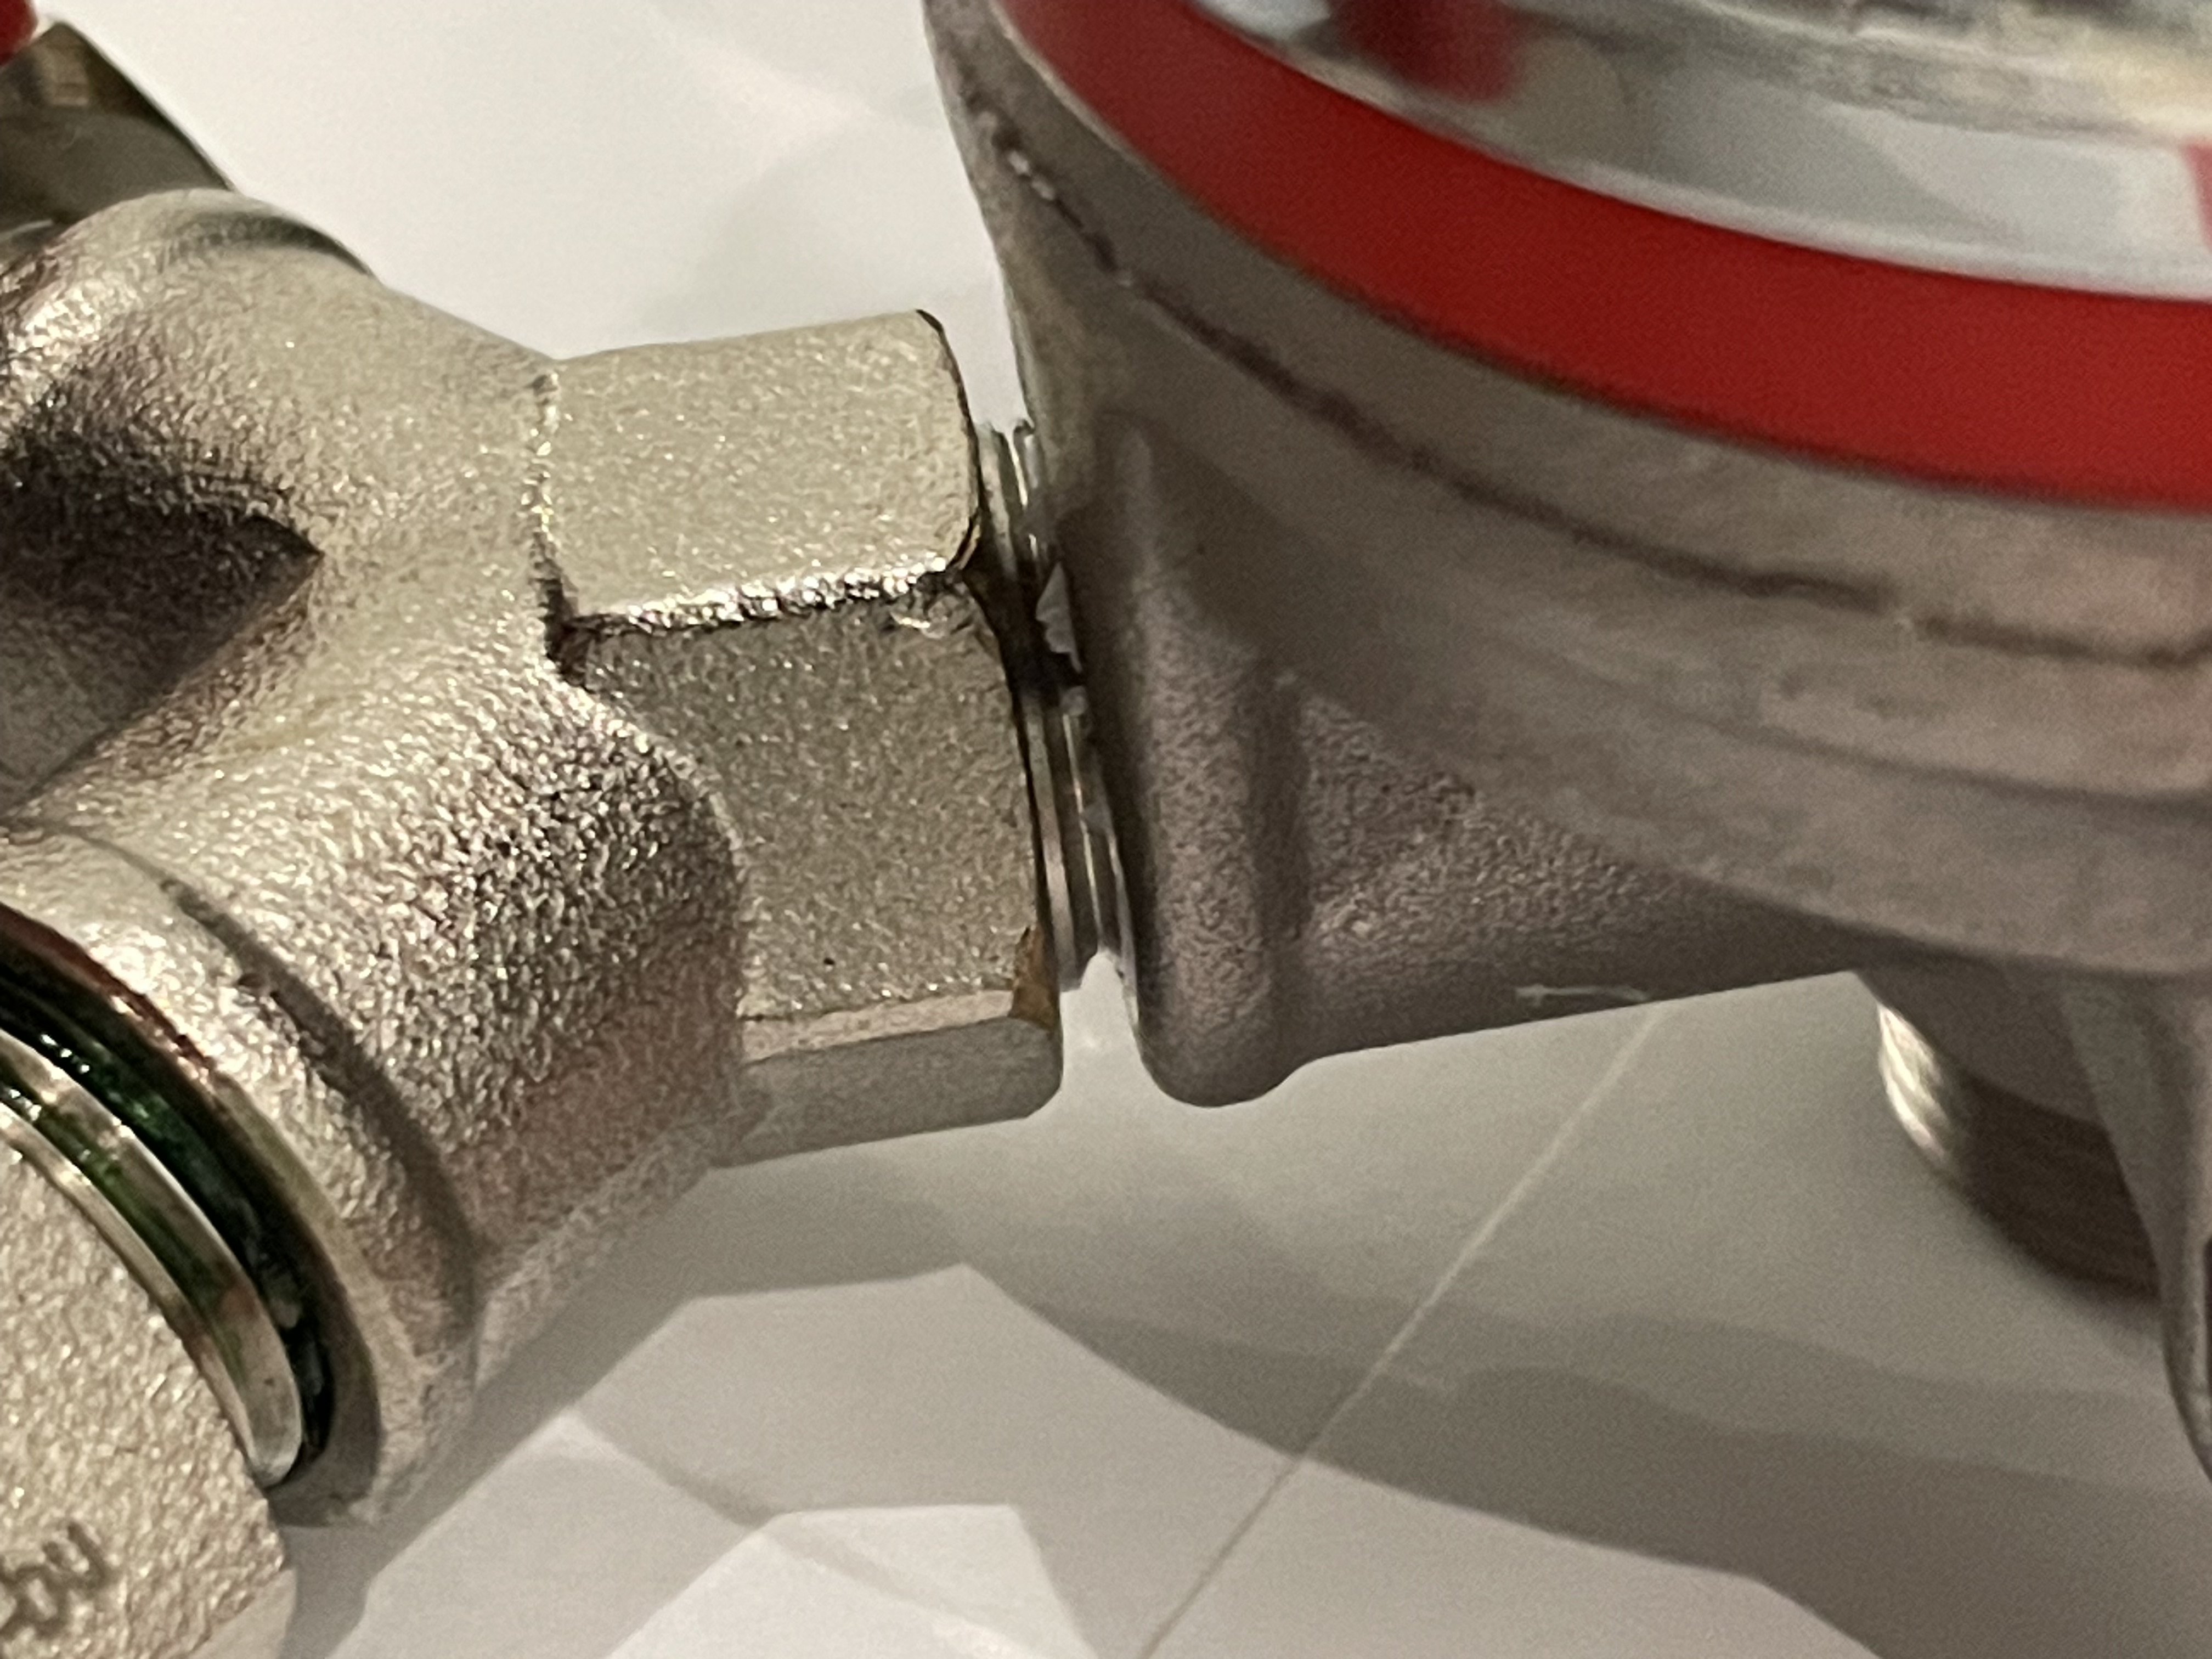
I see the threads where the y connector and the barbs are connected. I think I can replace the barbs. Has anyone tried it? Are they left or right hand threaded?

IMG_1711.jpeg
IMG_1710.jpeg
 
Those both look like standard right hand thread.
The one into the regulator looks like there is some kind of sealant on the threads, so it might be a bit tight. Sometimes warming the joint with heat gun will soften the sealant. Don't put too much heat on the regulator body.
 
They do appear to be RHT but I doubt there is anything otherwise "standard" about the threading between the barb and valve...

Cheers!
 
The valve to the Y is a simple gasket seal so should be easy to remove.
If you don't remove the Y from the regulator, you can still run a single line into the kegerator and split to 2 kegs inside then use the remaining connection on the outside for other purposes like counter pressure bottle filler or purging a keg to fill.
 
If you don't remove the Y from the regulator, you can still run a single line into the kegerator and split to 2 kegs inside then use the remaining connection on the outside for other purposes like counter pressure bottle filler or purging a keg to fill.
That!^
Make sure to put a shut-off valve on each leg of the Wye, creating 2 separate channels. One goes inside the kegerator, the other stays outside, for "utility" purposes.
 
I tried removing the barbs. They have some type of thread locker on them. One came off easily, the other also came off but has a thread reducer on it (the second one stayed put). It looks like a 3/8” to 1/4” reducer with threads on top and inside. There was no way for me to separate it from the barb. I am afraid I’ll mess up the brand new regulator so for now I’ll go with worm clamps to the regulator. Just need to figure out how to connect the EVA to the barb. I’ve seen some threads here so I’ll try those suggestions.

I like the idea of using only one output and using a manifold inside the fridge.

Just made my yeast starter last night and it’s foaming nicely when I shake the flask. I’ll wait several more hours and will be brewing a tripel in the evening.
 
Last edited:
I tried removing the barbs. They have some type of thread locker on them. One came off easily, the other also came off but has a thread reducer on it (the second one stayed put). It looks like a 3/8” to 1/4” reducer with threads on top and inside. There was no way for me to separate it from the barb. I am afraid I’ll mess up the brand new regulator so for now I’ll go with worm clamps to the regulator. Just need to figure out how to connect the EVA to the barb. I’ve seen some threads here so I’ll try those suggestions.

I like the idea of using only one output and using a manifold inside the fridge.

Just made my yeast starter last night and it’s foaming nicely when I shake the flask. I’ll wait several more hours and will be brewing a tripel in the evening.
One of these might help:
https://www.brewhardware.com/product_p/splicebarb14x38.htm
 
The barbs are integral to the function of the ball valve. They are not replaceable or interchangeable with anything on the market. I know it looks standard and that you'd find 1/4" NPT threads there but it's part of the seal.
 
Last edited:
Back
Top