Artifishal
Well-Known Member
- Joined
- Dec 1, 2014
- Messages
- 351
- Reaction score
- 26
Thank you Pliny. Yes I agree and plan on it. I had the Nalgene bottle cut and solvent welded to pvc before and moved to this bc everything come apart for sanitizing.

JB/Arti,
I actually did this two different ways:
1) I drilled a hole in the lid using a step bit. I drilled the hole the same size as the internal diameter of the ferrule. I then simply butted the ferrule to the hole and soldered.
2) I drilled the same size hole as in #1, but then pushed the ferrule through the slightly undersized hole. This created a dimple around the ferrule and held the lid to the ferrule by friction making it easy to solder.
#2 was hard to do since pushing the ferrule through the undersized hole was difficult. I ended up setting the mating face of the ferrule on a piece of wood, placing the drilled lid on the ferrule, and using a socket just barely larger than the outside diameter of the ferrule to drive the lid down onto the ferrule. Kind of a pain, but once done the soldering went easier.
I'll be doing another one this weekend with some additional modifications. If you're interested, I'll take some pics along the way to show how I do it. I'm just waiting for the ferrule to show up.
Cheers!


I bought the same lids as the OP, and have destroyed 2 of them so far trying to solder them with stay-brite solder and Stay-clean liquid flux. I sanded everything clean, used the flux, but couldn't get the solder to tin the joint... it just beaded up on the outside and rolled off. Thought maybe it was not enough heat after it failed once (using a MAPP torch) and overheated the whole thing, made the flux boil off and burn away. As I don't want to waste another trip-clover ferrule and lid, does anyone know is there is a food safe epoxy that might be able to bond these together?


I bought some sheet ss and a hole saw so I could try to make my own for a small mouth jar. I'll post later how that goes.
Artifishal,
I tried the hole saw approach but didn't like the results. I preferred a slightly undersized hole drilled with a step bit. It was a lot "cleaner" of a cut. I ended up pulling the ferrule through the undersized hole to create a dimple, but simply butting the ferrule to the lid and soldering would be good enough (given a sufficient soldering job).
Cheers!
OK - here are a few picture that show how I did this...
Pic #1 is just drilling holes in a lid - mark your layout and drill away. Since I want a ferrule and two posts (ala maierhof's yeast harvester rig), I have three holes to drill. I used a 1.5" TC ferrule so I ended up drilling a 1-3/8" hole with a step bit.
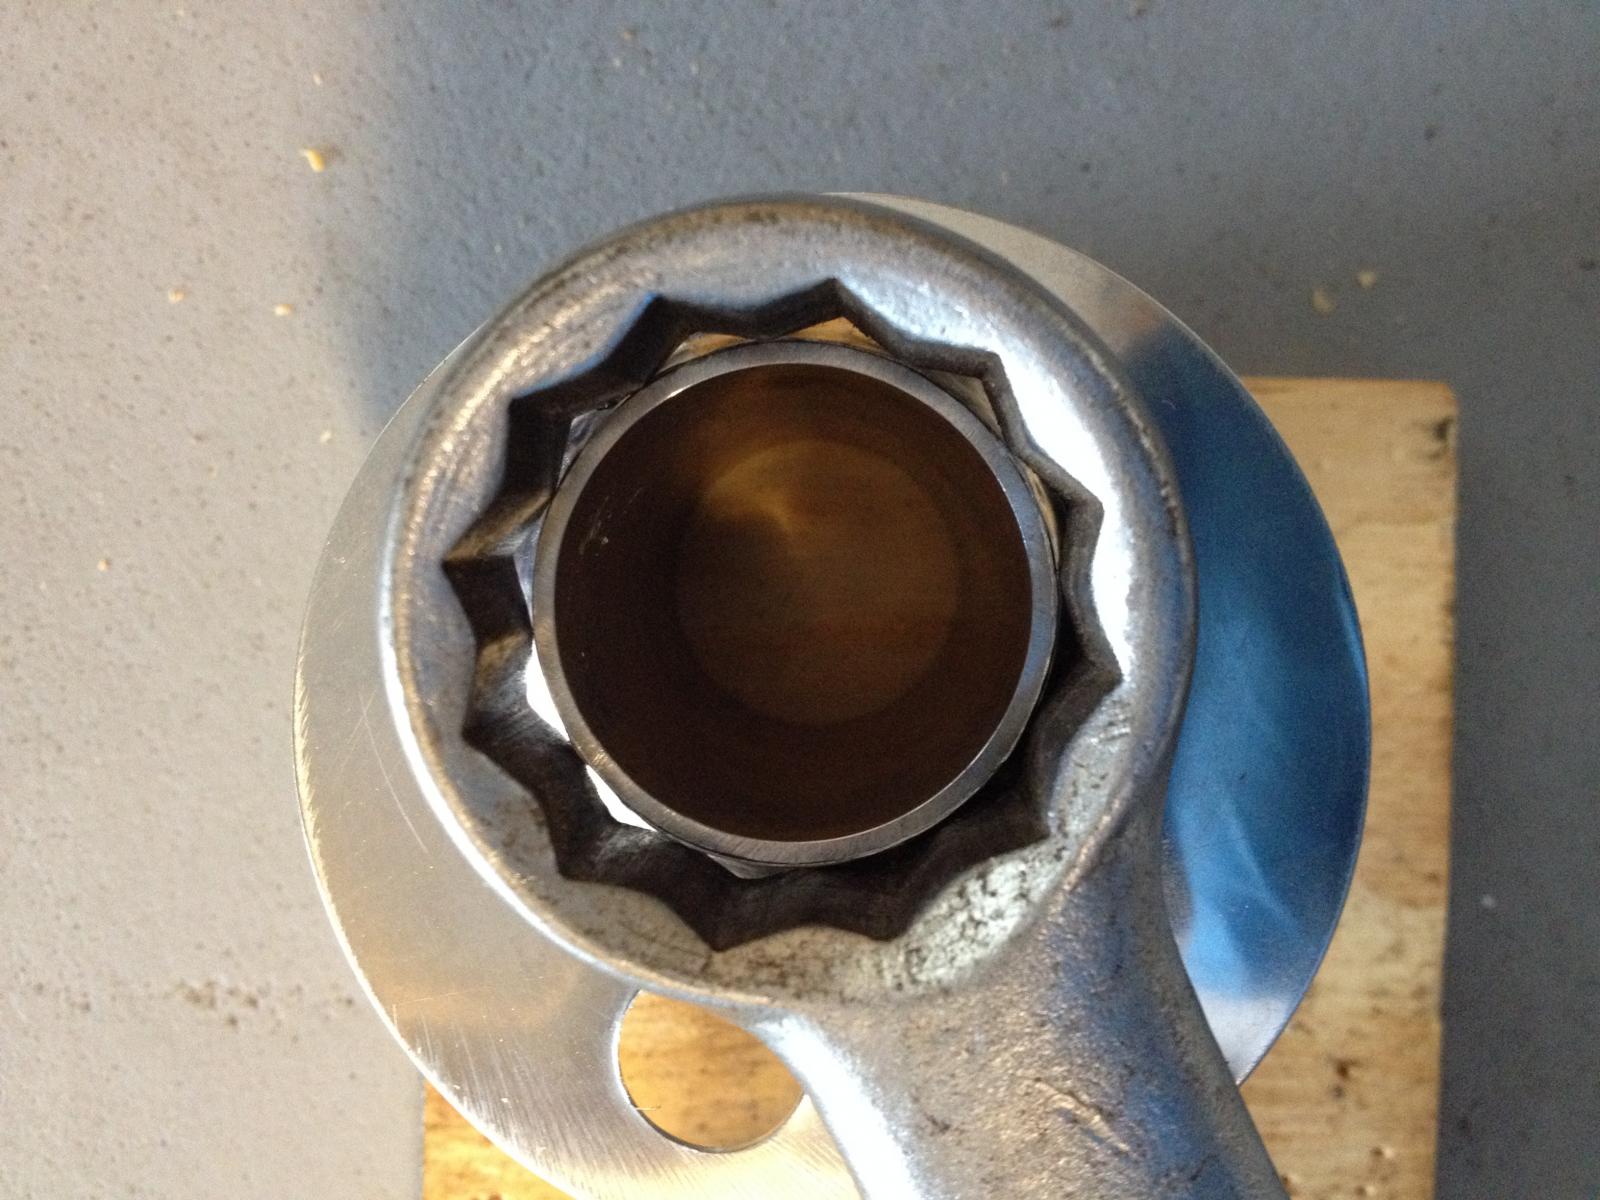
Pic #2: Next, I pulled a dimple on the lid (this is hard since that lid is so thin). Actually, I pushed the lid down over the ferrule. I happen to have a large closed end wrench that fit over the 1.5" ferrule and just hammered the wrench down on the lid until the ferrule pushed through. This is probably not worth the effort - one could just butt solder the ferrule to the lid, but pulling a dimple is stronger.
Clean and degrease everything that will be soldered. Afterwards I used gloves whenever I touched anything so as not to leave oils behind.
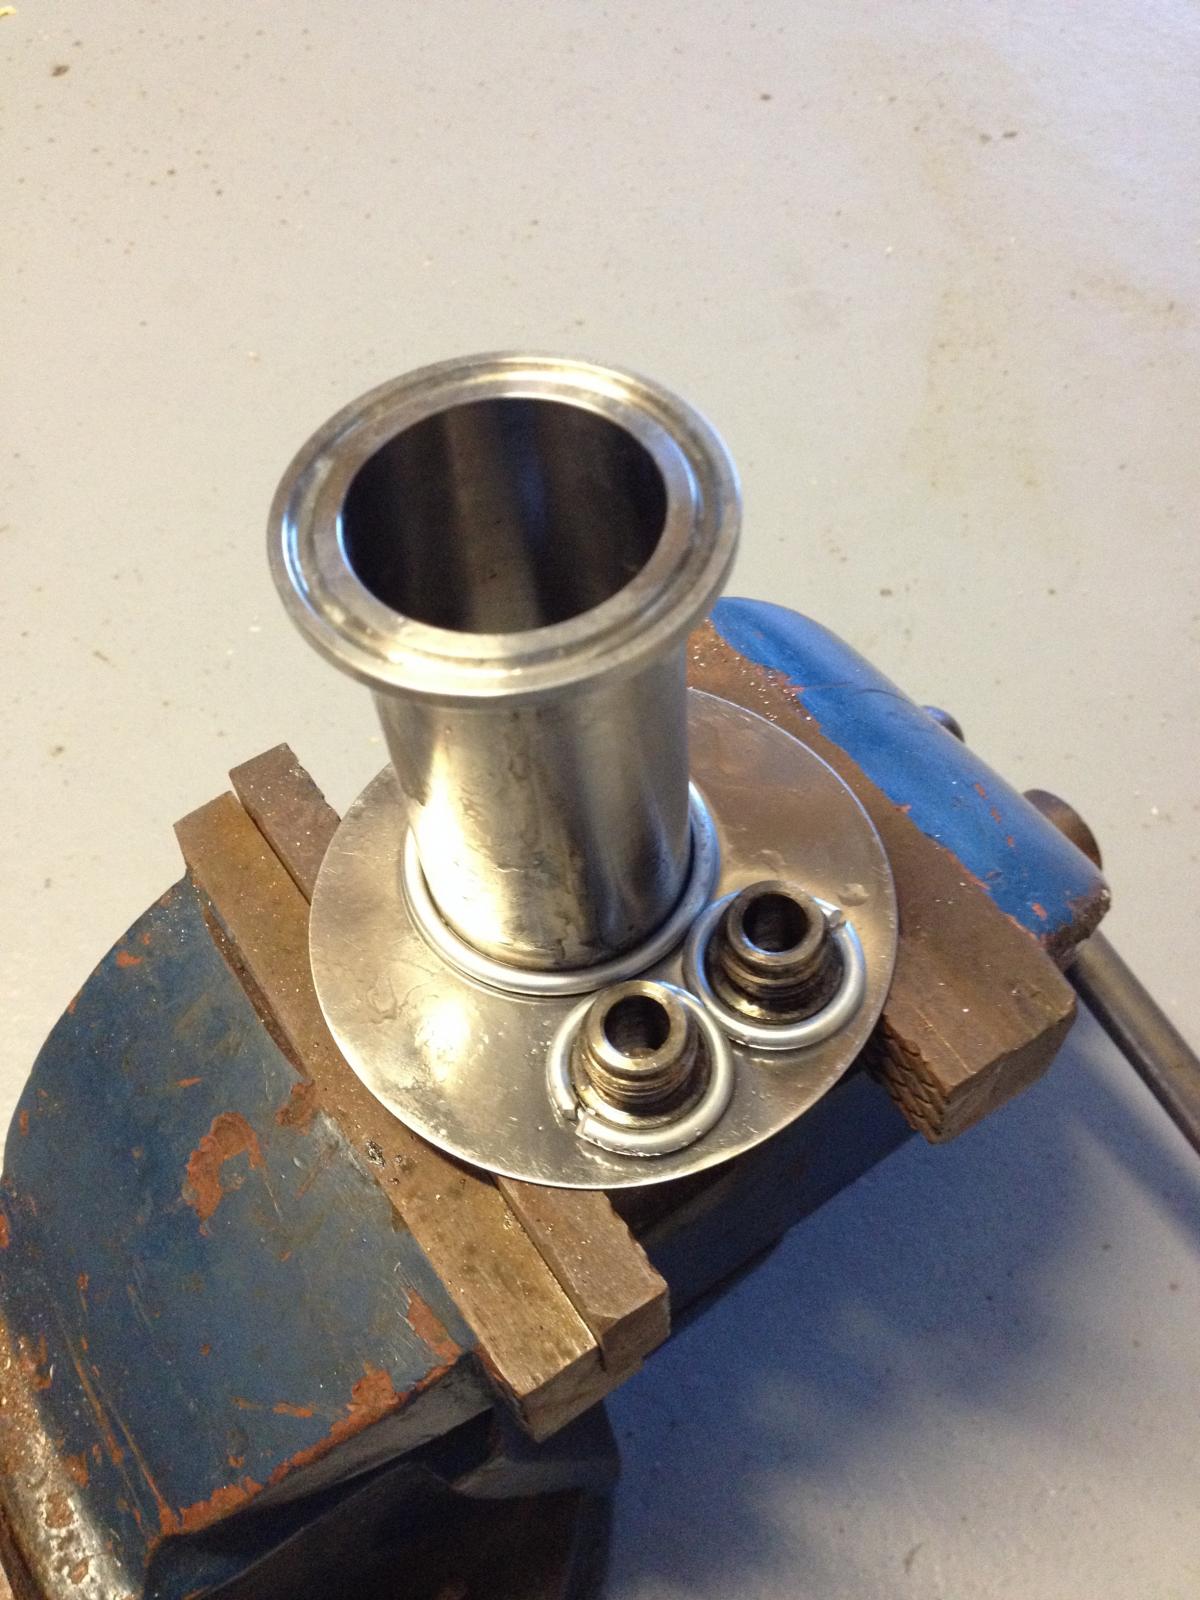
Pic #3: I wrapped each piece with solder and set it in place. Put down a little bit of flux at each joint and let the flux sit for a few minutes. Then, with a low-ish flame on a propane torch, I focused the flame on the item to be soldered to the lid and not the lid itself. I actually tilted the flame up and away from the lid. I let the item I was joining to the lid carry the heat into the lid and the solder. Once I saw the solder start to melt (it'll turn a shiny silver from a dull silver), I moved quickly to the far side of the fitting to apply heat and start melting the solder on that side. The residual heat on the first side of the joint finishes the soldering and wicking when you are working on the second side. When the second side starts to melt, just move around the joint to finish things off and to wick the solder into the joint. Pic #4 shows the lid with the finished solder joints.
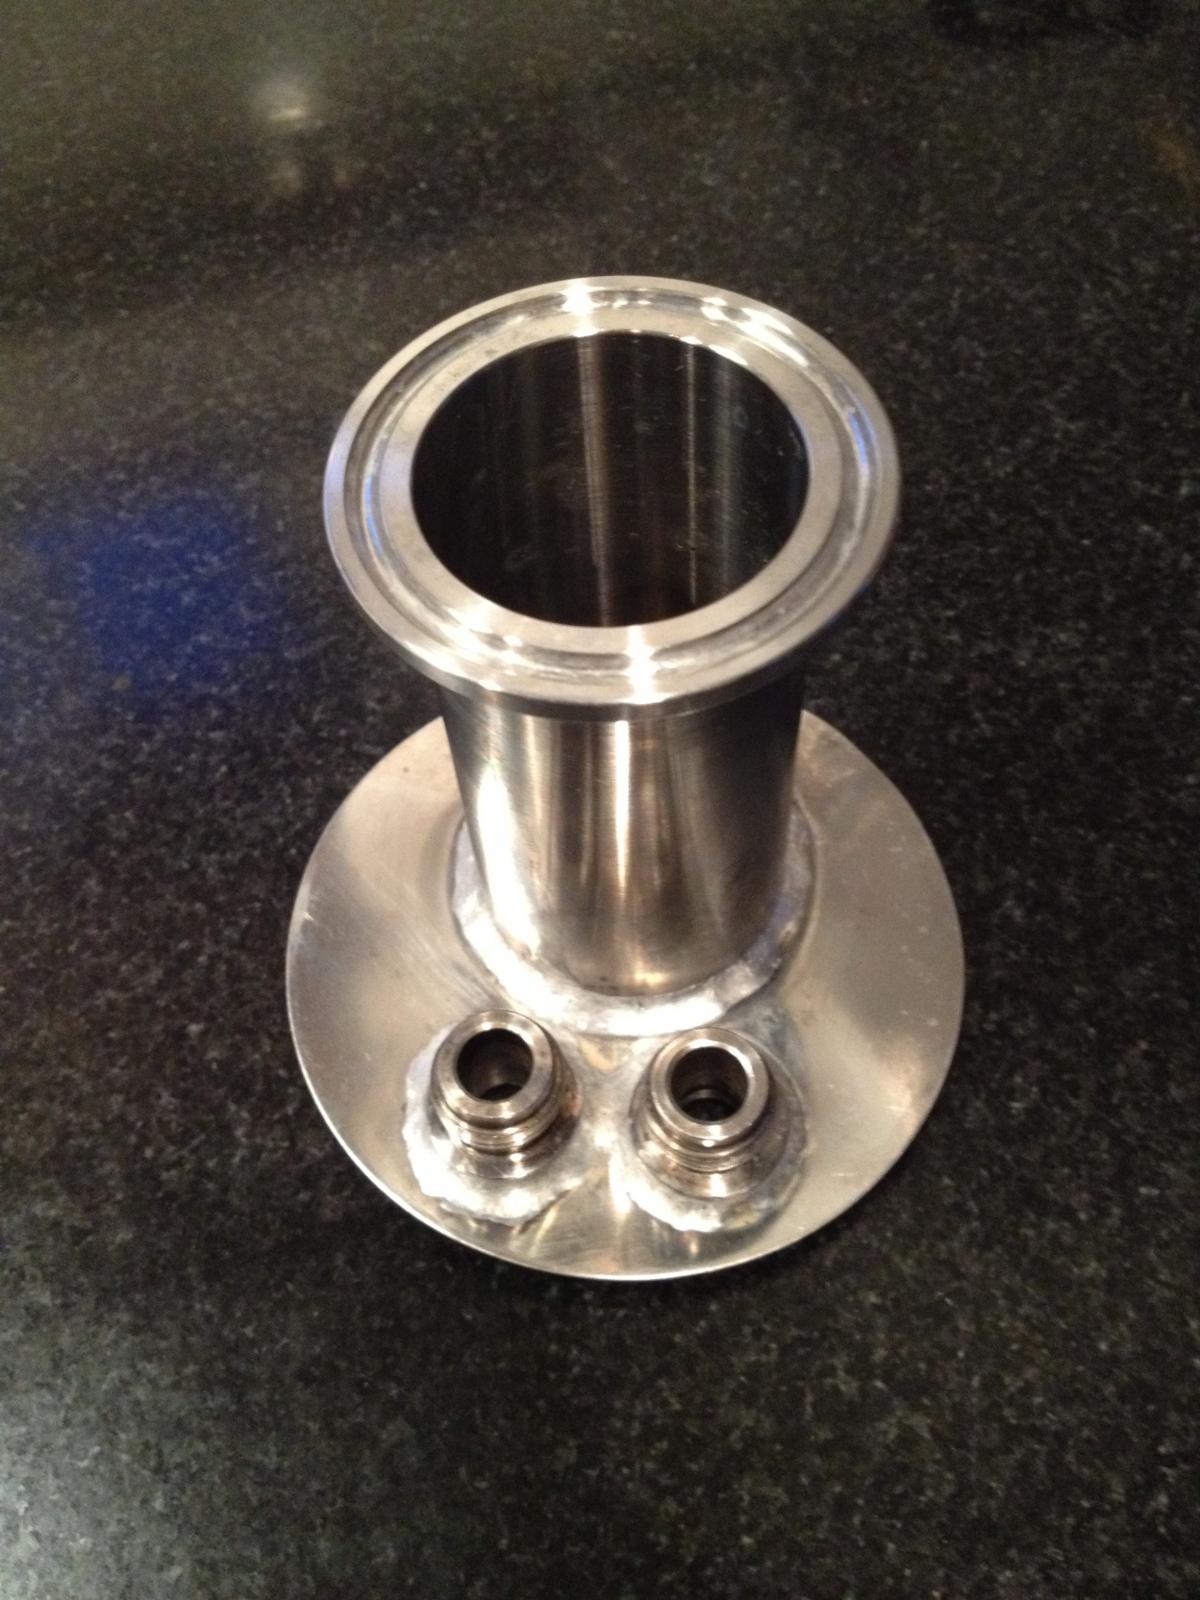
Pic #5 shows the lid all cleaned up (fairly well - still not quite done, but I was tired of cleaning).
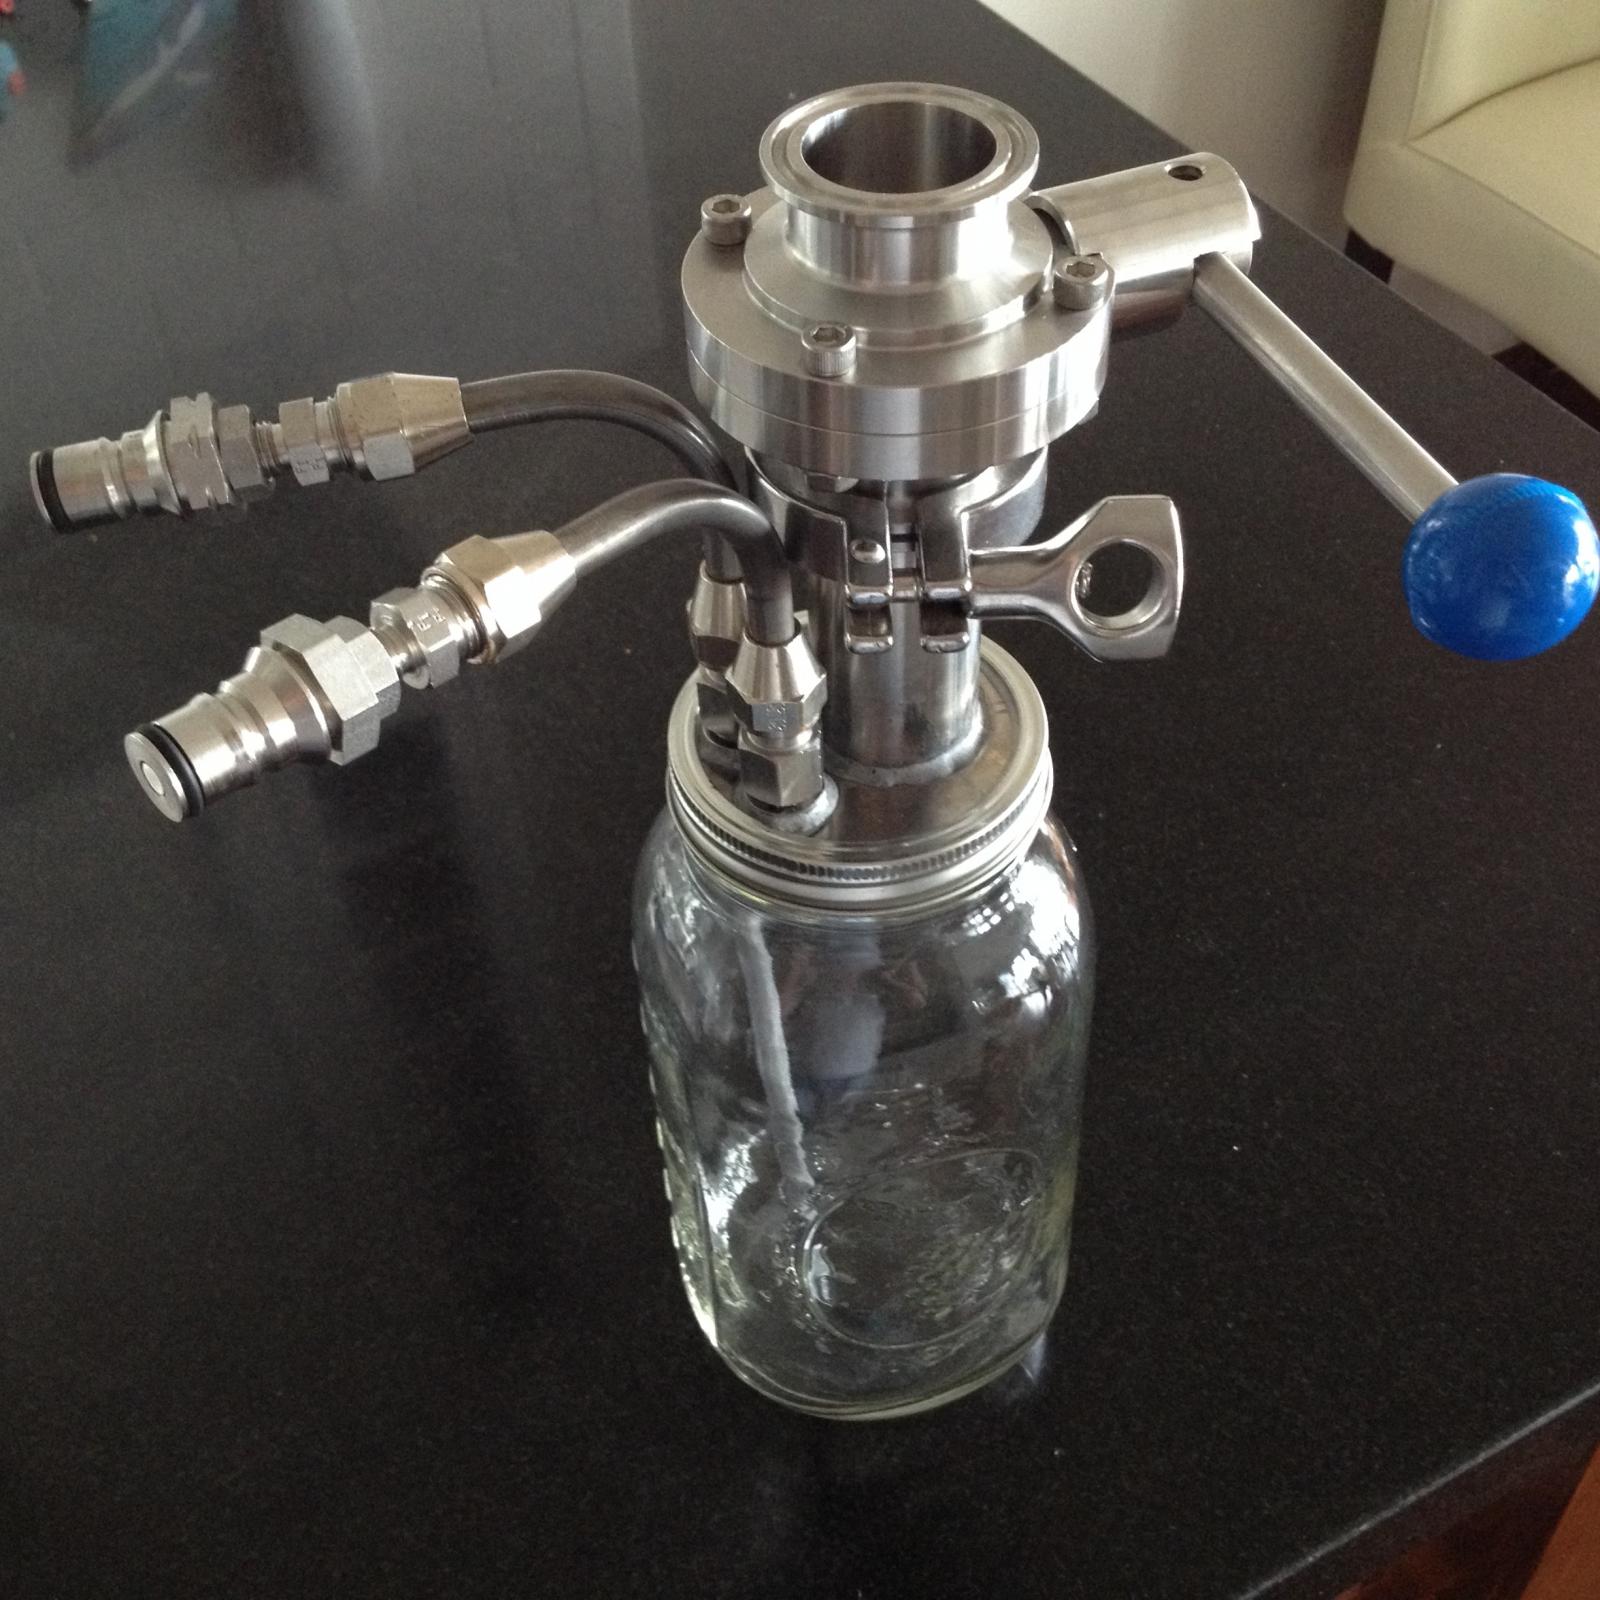
And Pics #6 and #7 show what I made. It's a jar lid that I can attach to my conical through the TC ferrule and pull trub/yeast out of. Pic #6 is just a shot of the underside of the lid showing the dimple that I pulled the ferrule through as well as the dip tubes coming through the posts. I now have a lid with a liquid-out post and a gas-in post. If I attach a jar full of water (for example) to the conical, I can put 1 or 2 psi of CO2 on the gas-in side and push all the water out - now I have a jar full of CO2. I open the butterfly valve and the CO2 (no oxygen) bubbles up through the wort and yeast/trub goes into the jar; close the valve and pull the jar. Or I can rouse dry hops as recommended by Vinnie Cilurzo - let CO2 bubble up through the settled dry hops. I think it's safe to say that I have the world's most expensive canning jar lid (that's a lot of stainless steel fittings that I used!). Hopefully, it will also be a useful lid!!!
Pliny
OK - here are a few picture that show how I did this...
Pliny
Wow--- brilliant. That is going to have to be my next test. Just as an update, I did as PlinyTheMiddleAged said, and had MUCH better success. The biggest change was not overheating... aimed the MAPP torch upward and held it pretty far away, and when the flux color started changing, moved the torch downward, then touched the solder... it was AWESOME. Just sucked right into the joint. One place had a little less than the others, but I can't see light through it, and I THINK it is liquid tight. I now have a lid that worked and doesn't even look THAT bad! Only question... how did you all pressure test this? Just fill a conical and see if it leaks?
Thank you, PlinyTheMiddleAged.
... how did you all pressure test this? Just fill a conical and see if it leaks?
OK - here are a few picture that show how I did this...
Pliny
I can't help but coming back to this post... that is such an elegant and wonderful way to do trub collection/yeast harvesting. Do you happen to have a parts list? What diameter are the tubes going into the lid? Are those just compression fittings you soldered into the lid? Have you tested this with thick yeast slurries? The last time I tried to dump trub from my conical I opened the valve and.... nothing. I left it open for 5 minutes and still nothing, so stuck on a container and left it for 3 days. When I went back, there was clear fluid only in the container. The trub layer worked like a filter so I got a perfectly clear sample of beer! And this was with a 1.5" butterfly valve!
Just want to make sure I have a tube that is big enough to push out thick trub.
Do you happen to have a parts list?