• Please visit and share your knowledge at our sister communities:
  • If you have not, please join our official Homebrewing Facebook Group!

    Homebrewing Facebook Group

Brainstorming for a keezer build, looking for ideas/recommendations, etc

Homebrew Talk

Help Support Homebrew Talk:

This site may earn a commission from merchant affiliate links, including eBay, Amazon, and others.
Going for the shipwrecked/Beachcomber look to go with the theme of my eventually tiki patio, first coat of varathane weathered wood accelerator applied to the front section.

I've learned a lot in this project - this time, stain before assembly: my glue mistakes are showing.
 

Attachments

  • IMG_20200902_220511.jpg
    IMG_20200902_220511.jpg
    3.5 MB
Hopefully people are still paying attention to this build.

All the wood is stained and polyurethaned, and dry. I'm just carving my pink foam boards (I hate this stuff).

Looking for a recommendation - glue the back half of the collar to the freezer, THEN glue the pink insulation in, or glue the insulation into the collar before mounting the collar onto the freezer?
 
think I would solve the lumber connection first. That way you can see the whole joint and seal it properly.

Adding the insulation becomes easy to fit as needed with some expanding foam to seal all the oddball areas.
 
think I would solve the lumber connection first. That way you can see the whole joint and seal it properly.

Adding the insulation becomes easy to fit as needed with some expanding foam to seal all the oddball areas.
Well, I decided against expanding foam, but I'm glad I went with your suggestion of mounting the bare wood first.

Still, my angled cuts of the foam edges where they intersection the freezer wall, were way off, they don't match the angle of the inside - but they do touch top and bottom, thanks to taking your advice.

One inch pink foam on the back and sides, two layers of one inch on the front, all that covered with reflectix, and the seams sealed with foil tape.

Just glued the lid to the front part, and I've got over 15 gallons of water sitting on top of it instead of rigging a clamp.
 

Attachments

  • PXL_20200913_173015367.jpg
    PXL_20200913_173015367.jpg
    1.8 MB
Well, I learned something important today.

Leak test items in a safe environment before testing.

Evidently I lost a head gasket for one of my beer faucets.

I found out while trying to run sanitizer though my first two beer taps, on the keezer.

They're cheap, until you factor in shipping.

I'll check LHBS (Local HomeBrew Store) before I order, but I've still got other products I'm looking to order.

In other news, the amber ale I brewed on 1 January, and never got around to bottling?

Tastes great and pours fine from the tap.

The bar is open.

I'll add photos of the inside shortly.
 
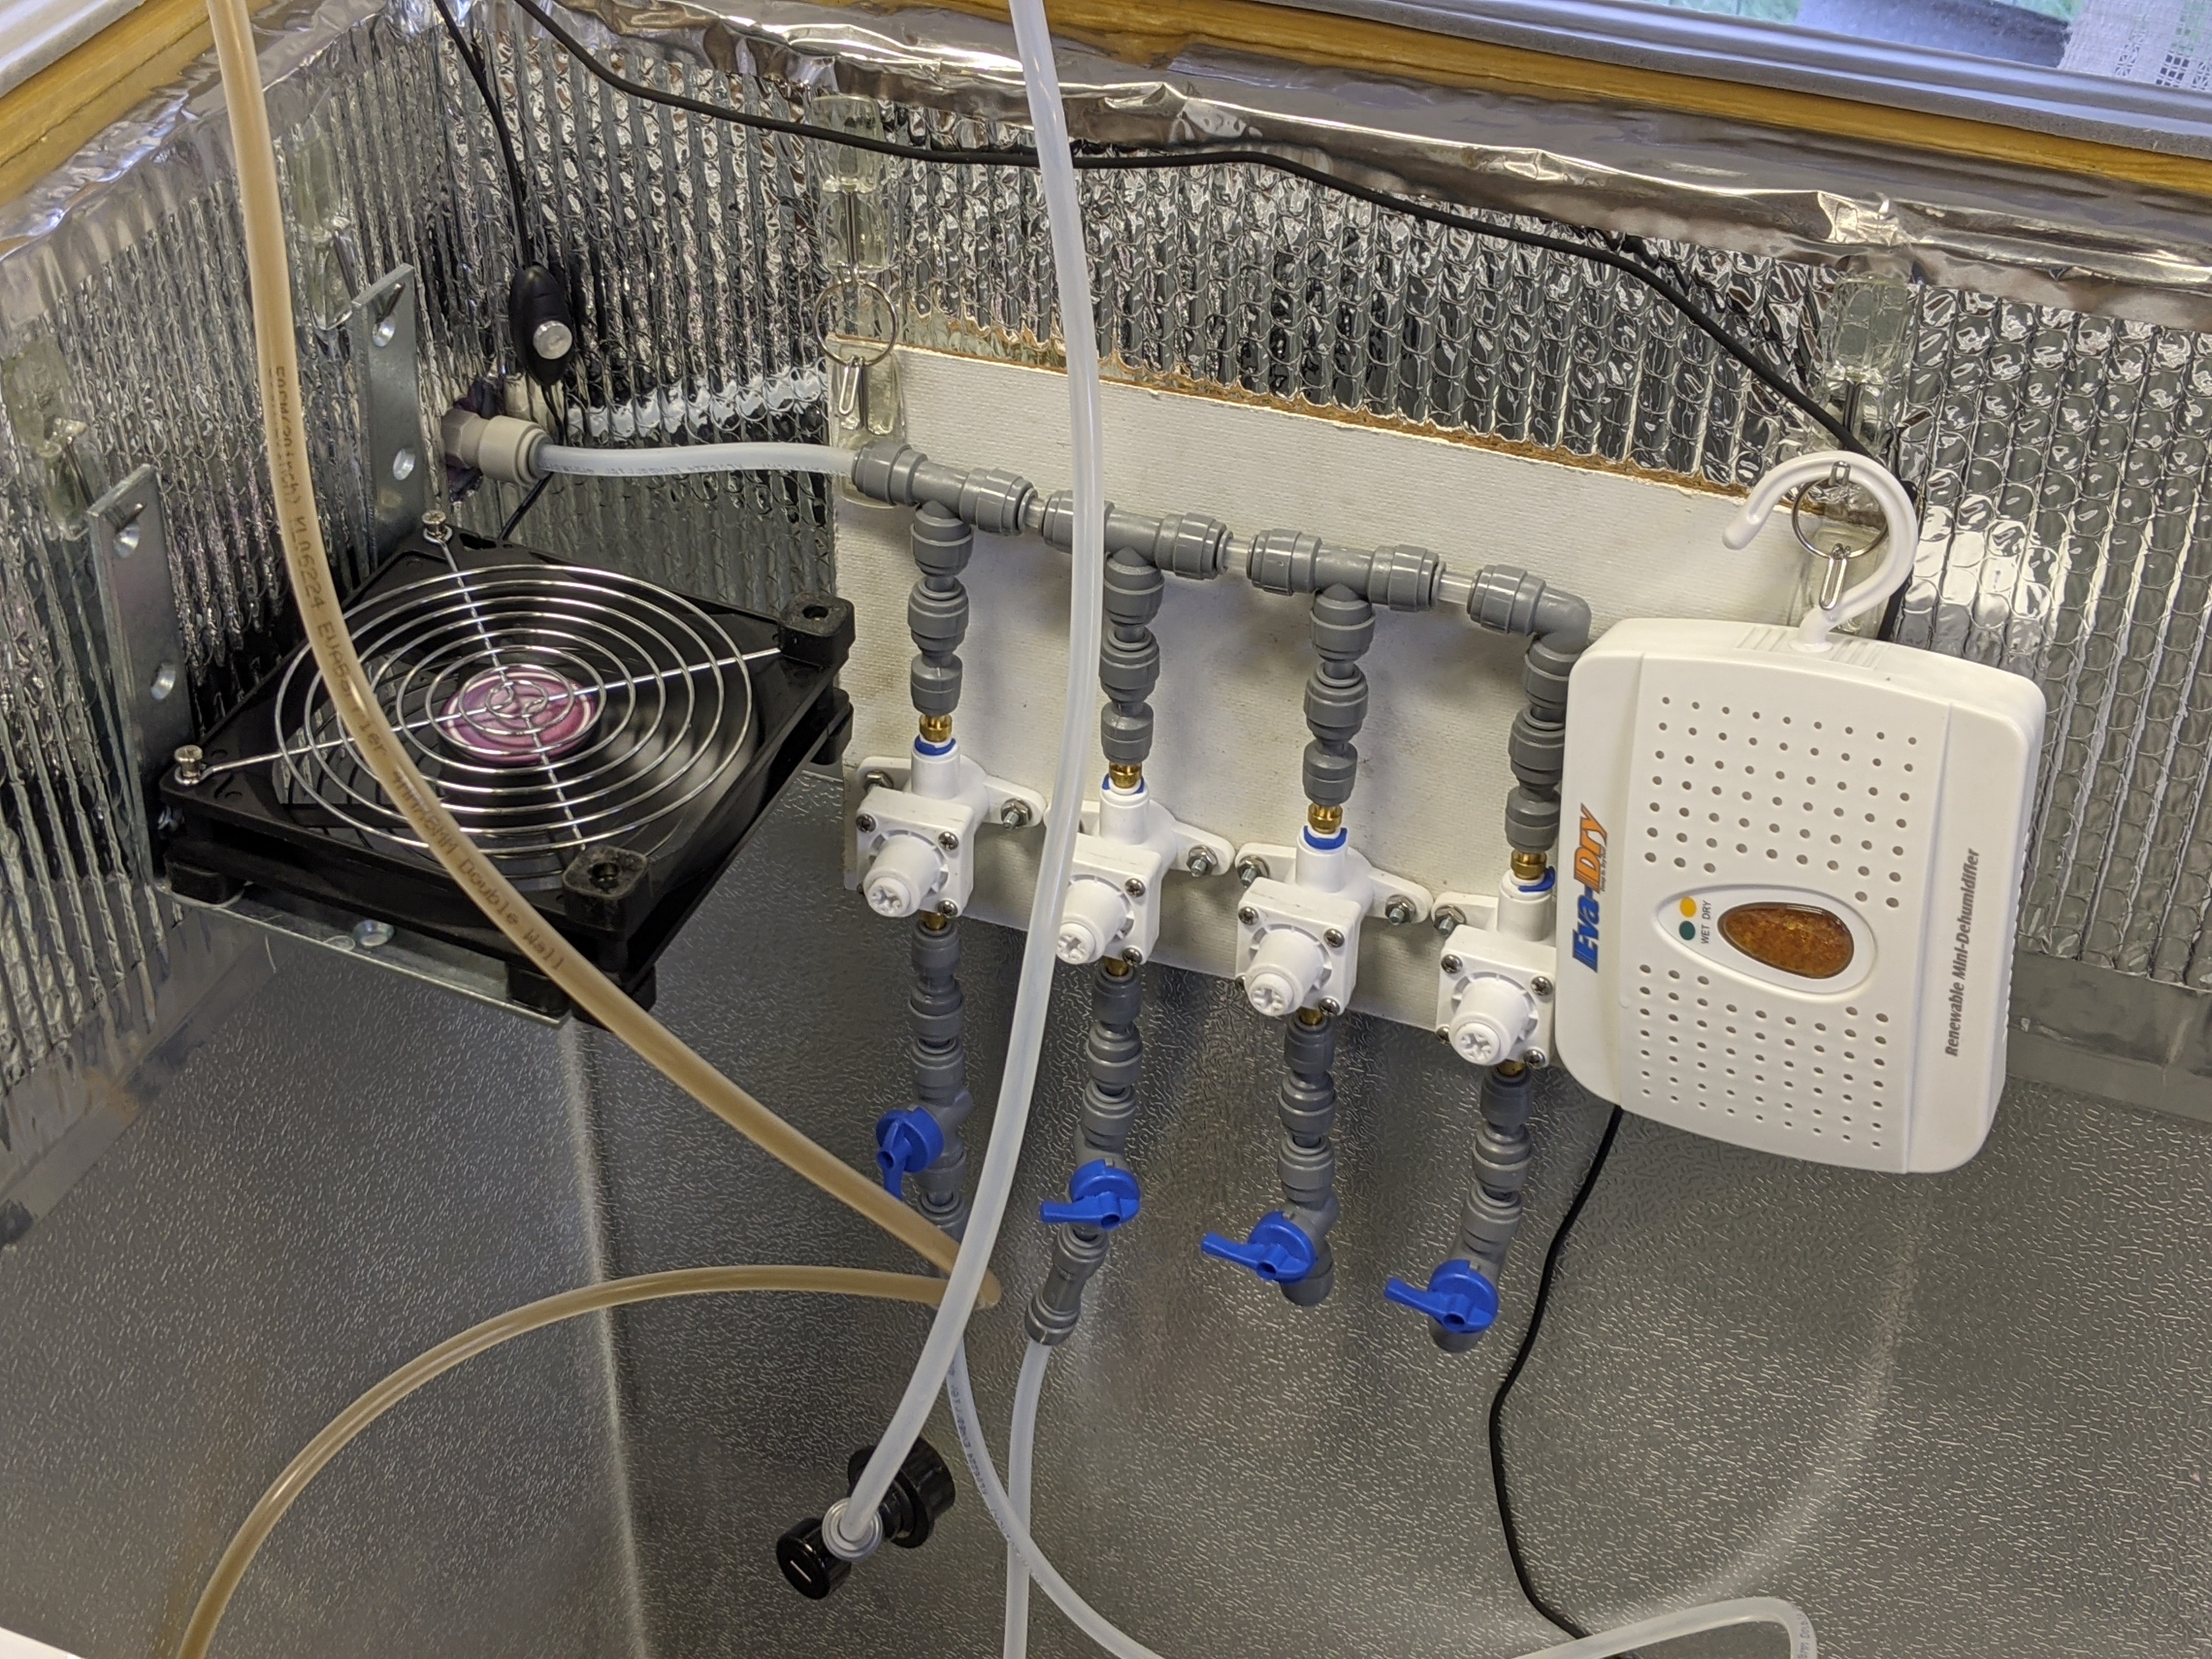
Ok, here's the inside.

Instead of a four way manifold or prebuilt secondary regulator, I built a four way secondary out of duotight components and inline secondary regulators.

I bought the regulators before the inline secondary regulators WITH gauges came out. Having played around with the blowtie spunding valve, I'm glad I didn't spend the money on the new gauged inline regulators.

I don't think there's enough precision in those tiny gauges to use where I want accuracy.

So, I built a spunding valve using a digital pressure gauge, and I hook that on the outlet of my inline secondary regulators to dial in the serve pressure.

So I need to keep a screwdriver readily available if I have to tweak something.

Big deal.

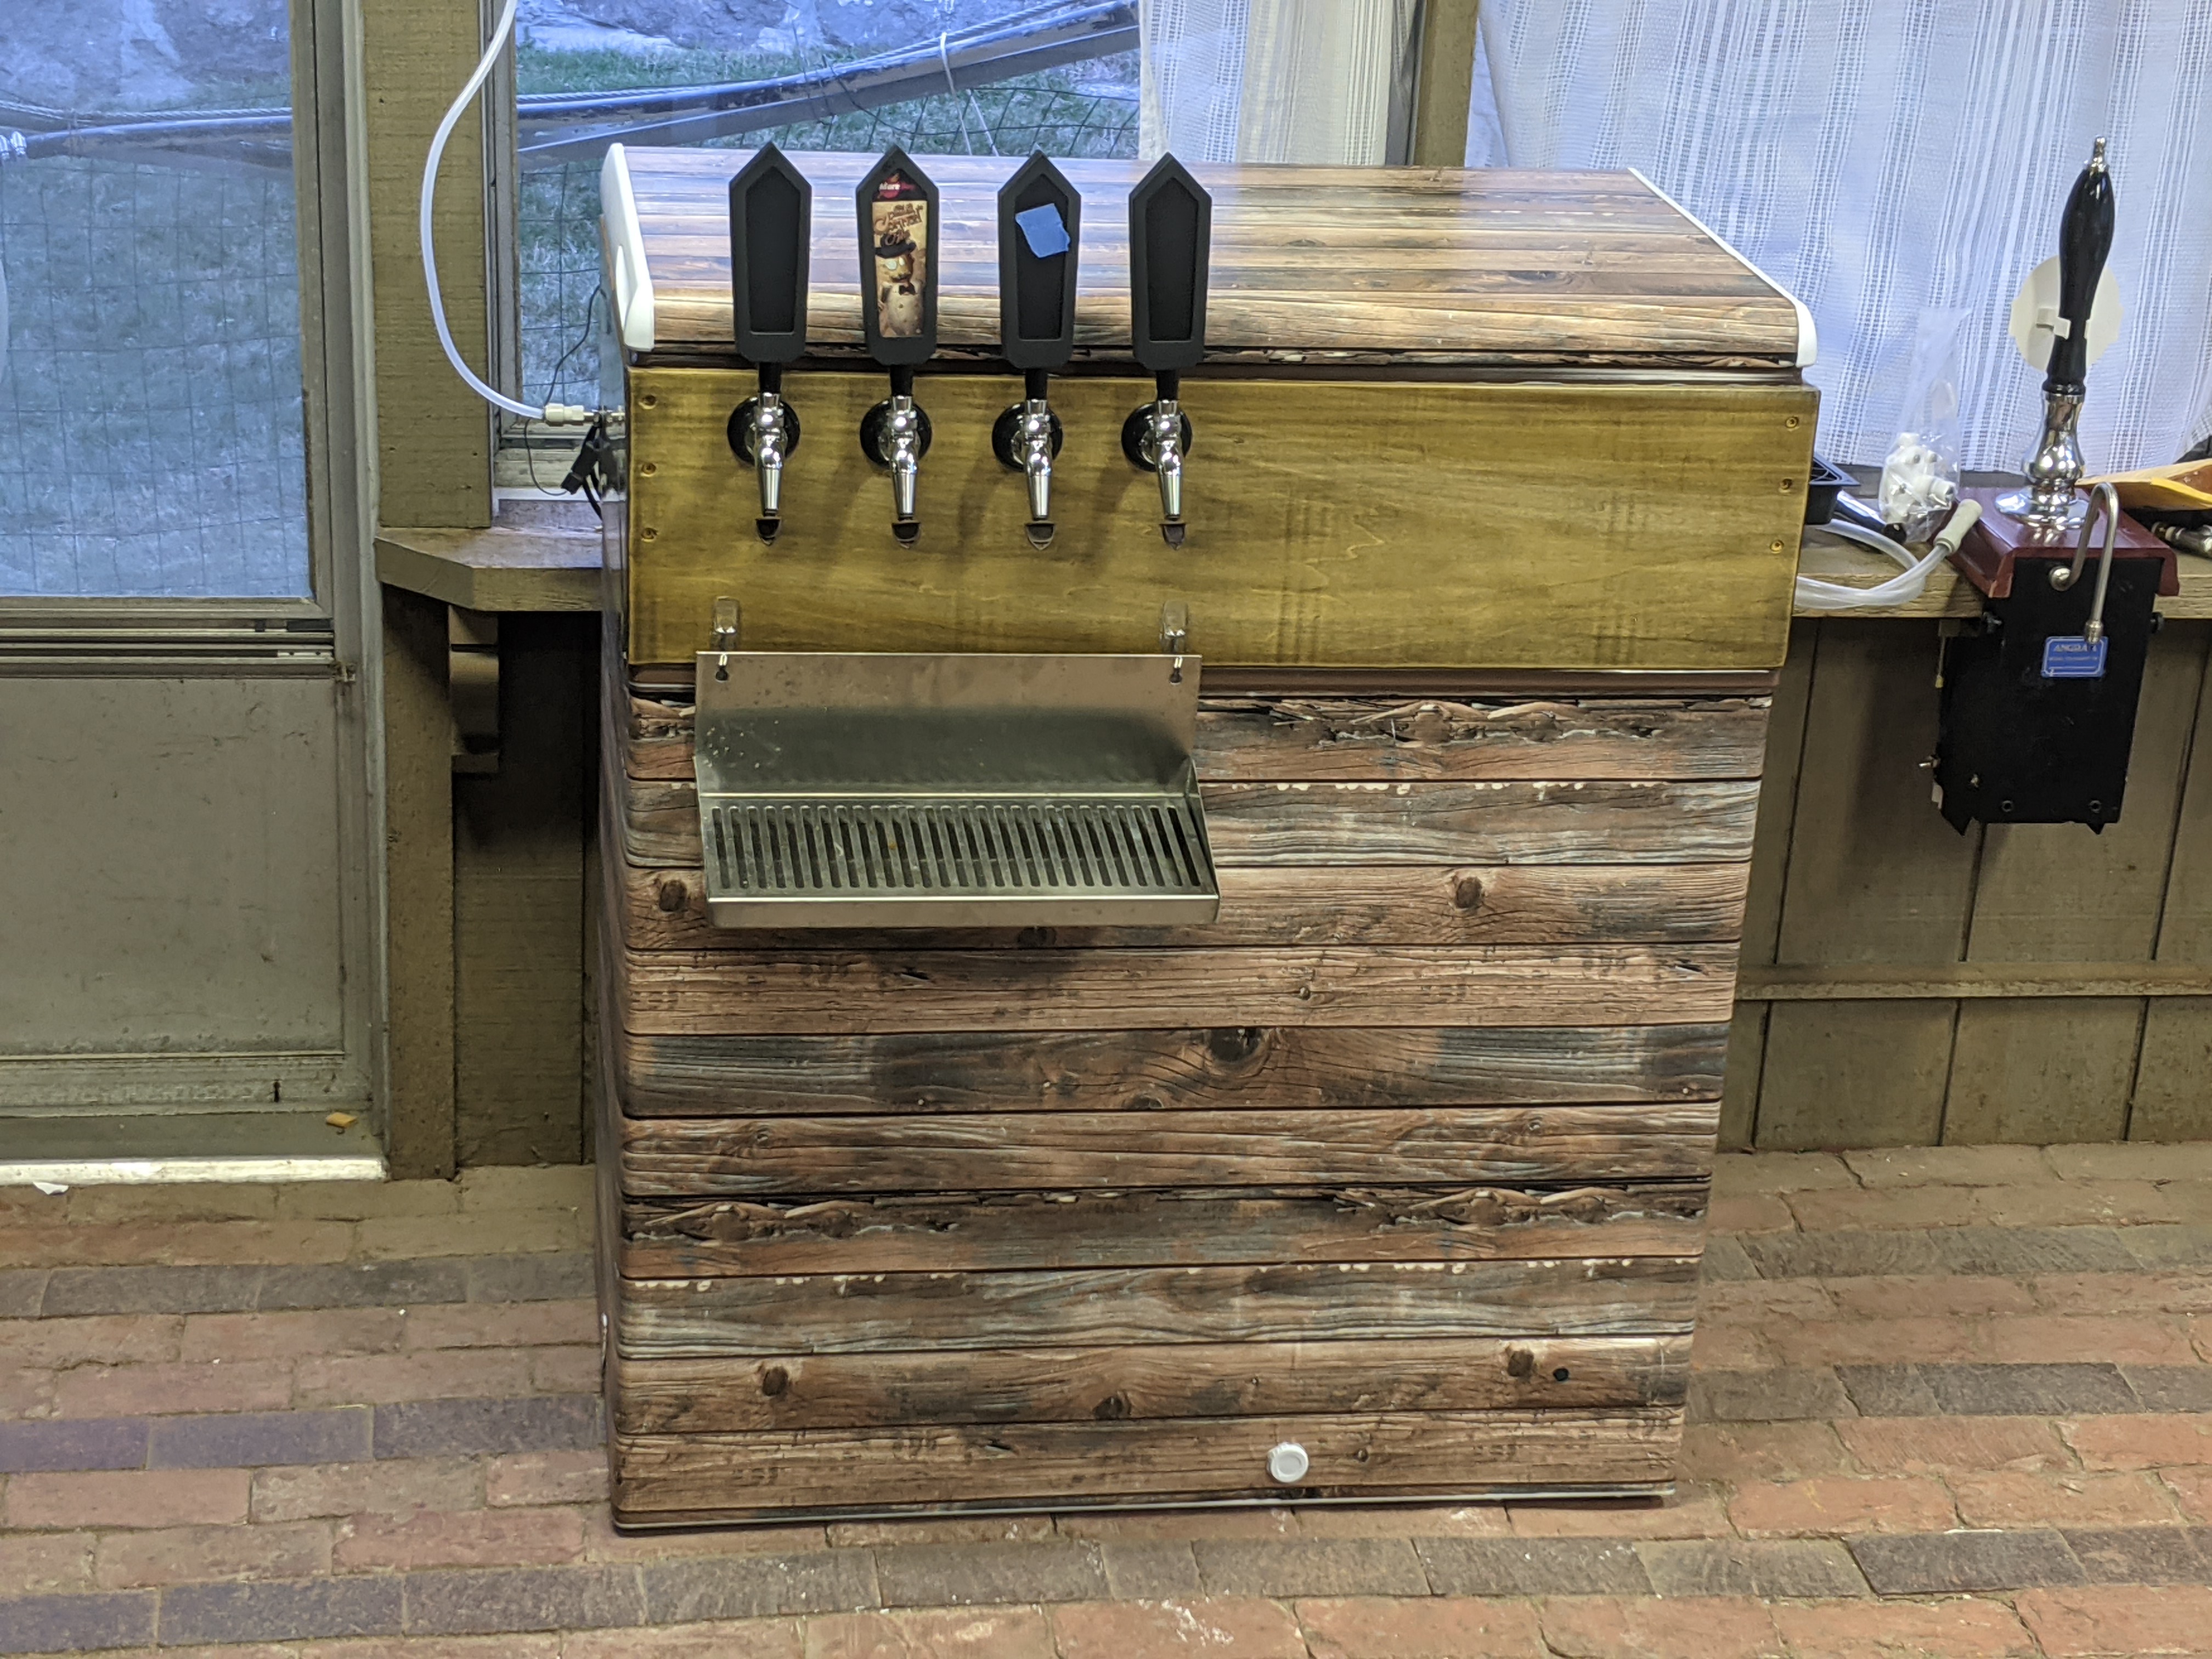
I wasn't sure how I was going to mount the four way, because kegland had not yet started selling the polycarbonate project panels they now have.

I had some spare mdf. I primed that and screwed the regulators to it.

Then I added some command strip based hooks rated for 5lbs each, two on the gas panel, two on the inside back wall, and used a split ring key ring between each pair.

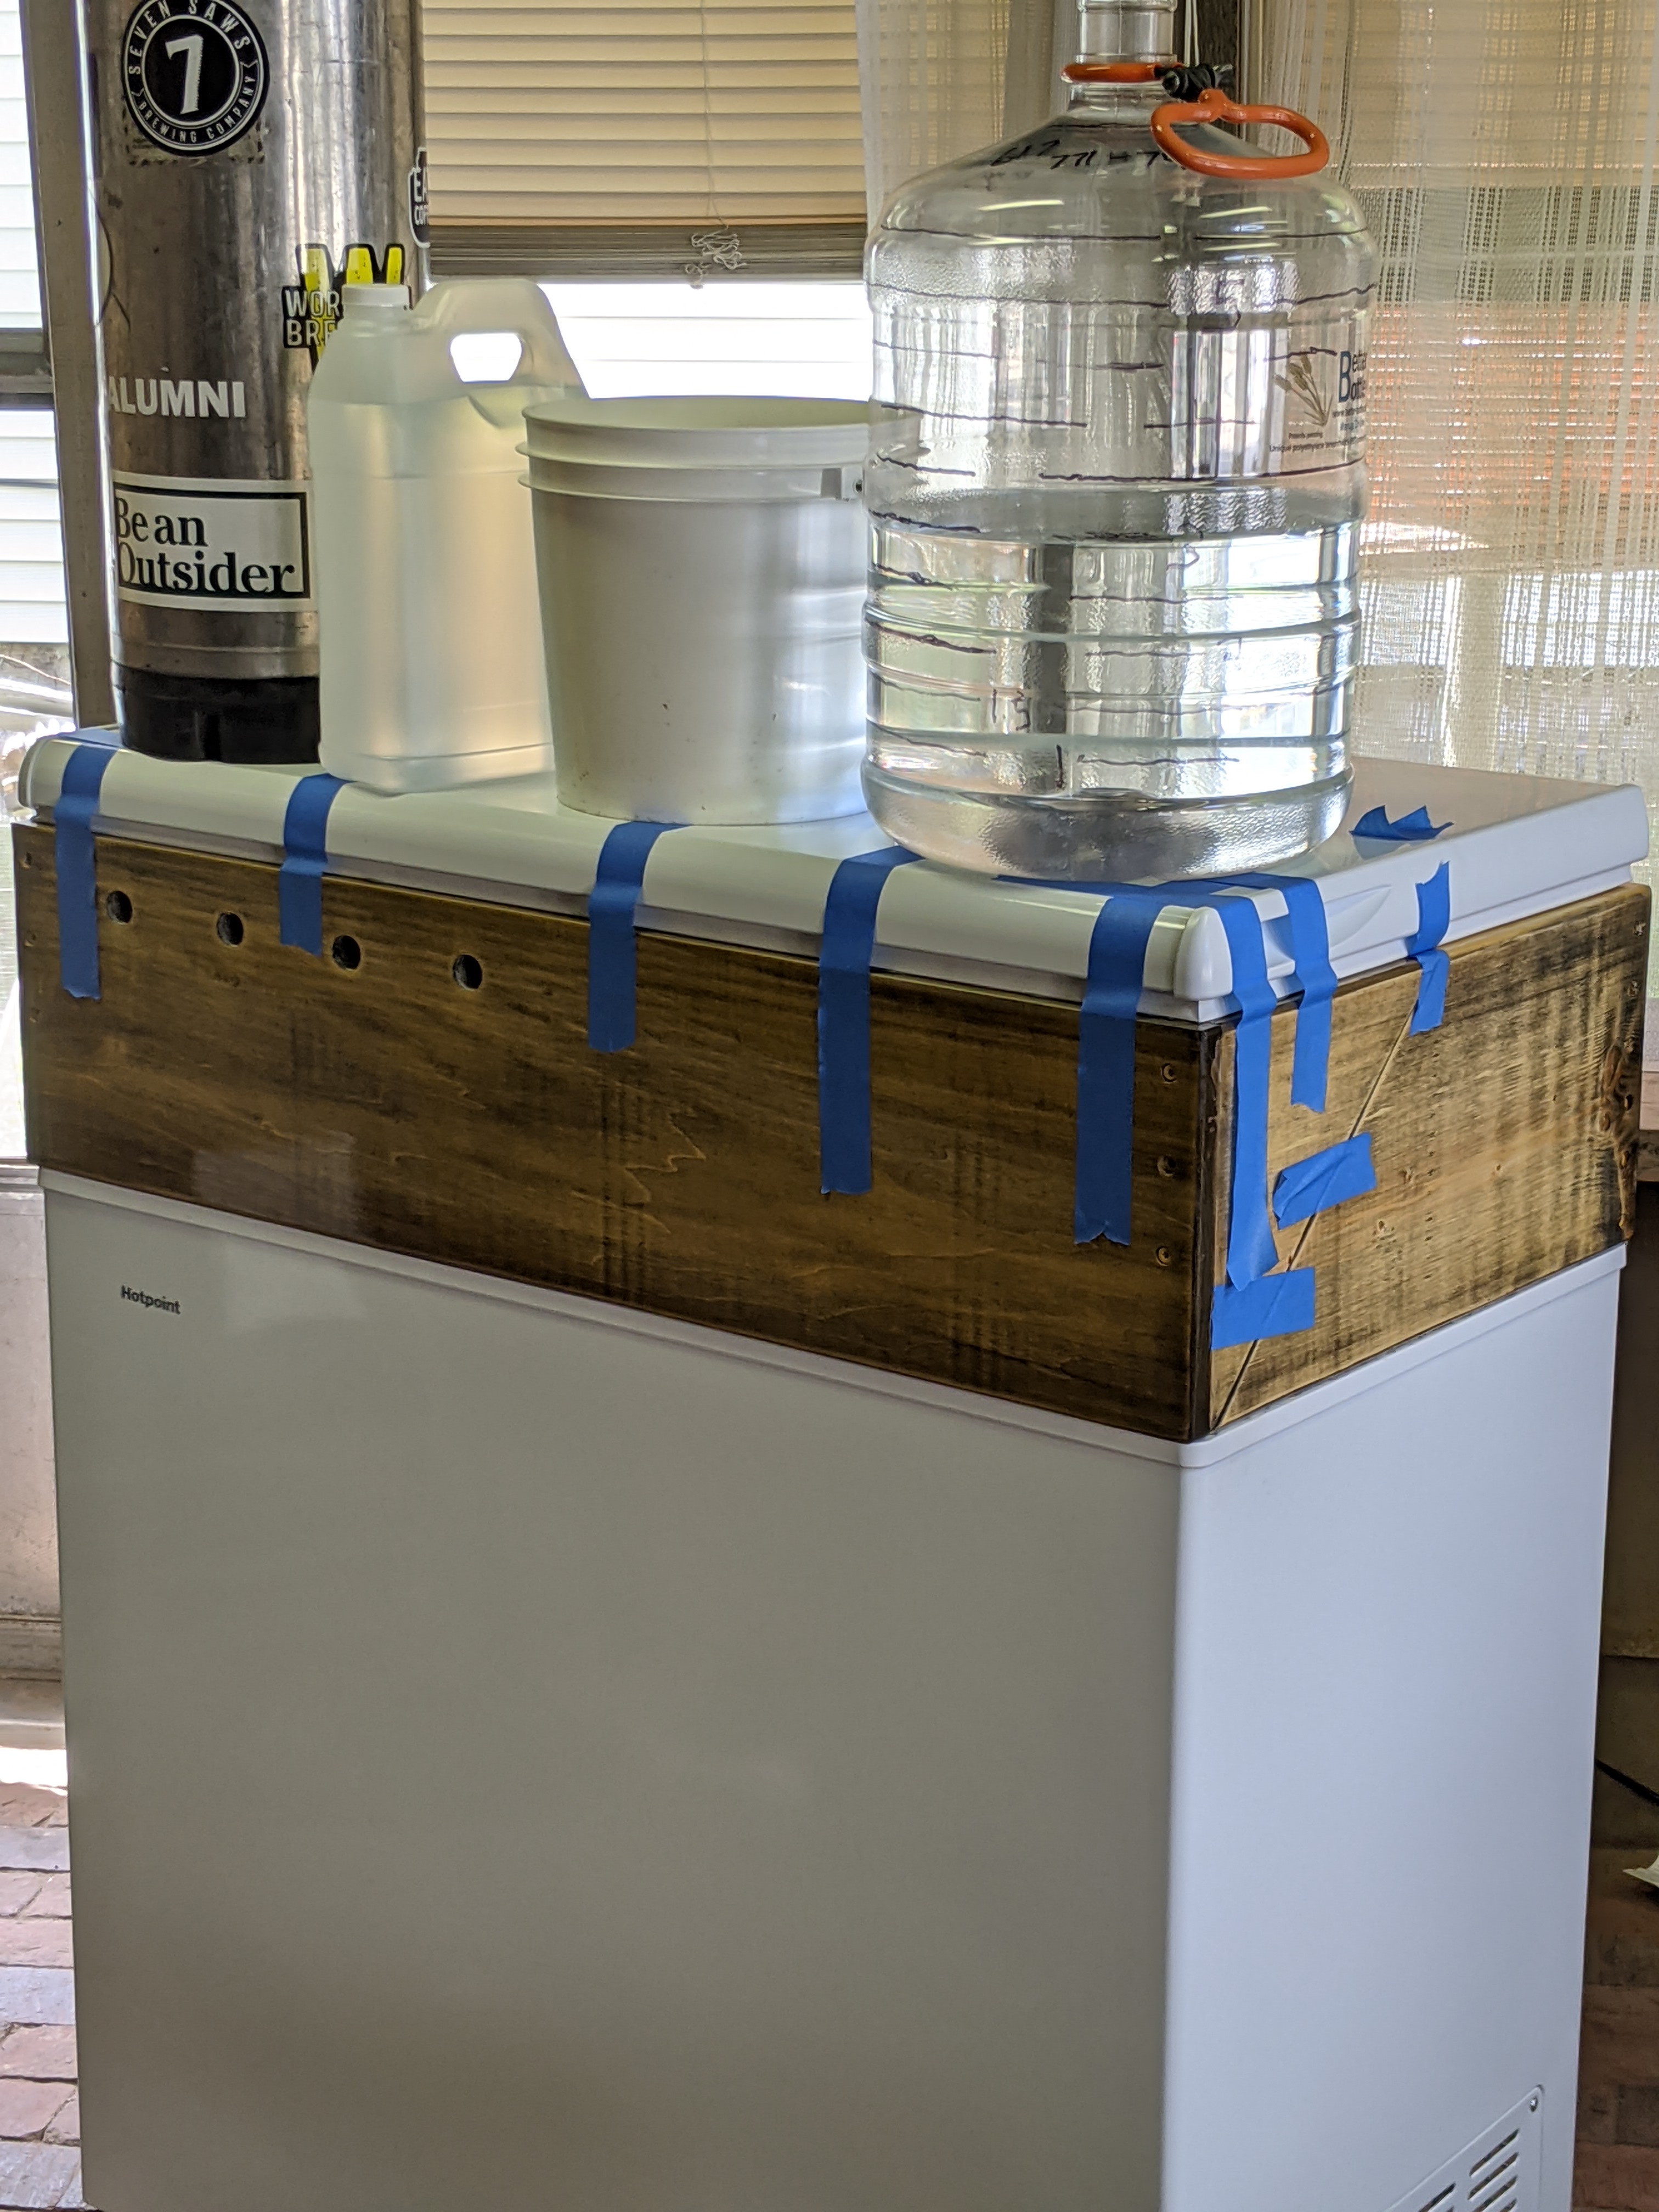
Used command hooks to hang the circulation fan (120mm usb powered) on the left inner wall. There it won't get in the way of kegs on the hump.

Intertap faucets with springs installed, and the 4" shanks designed for duotight connection - I like the modularity of their components.

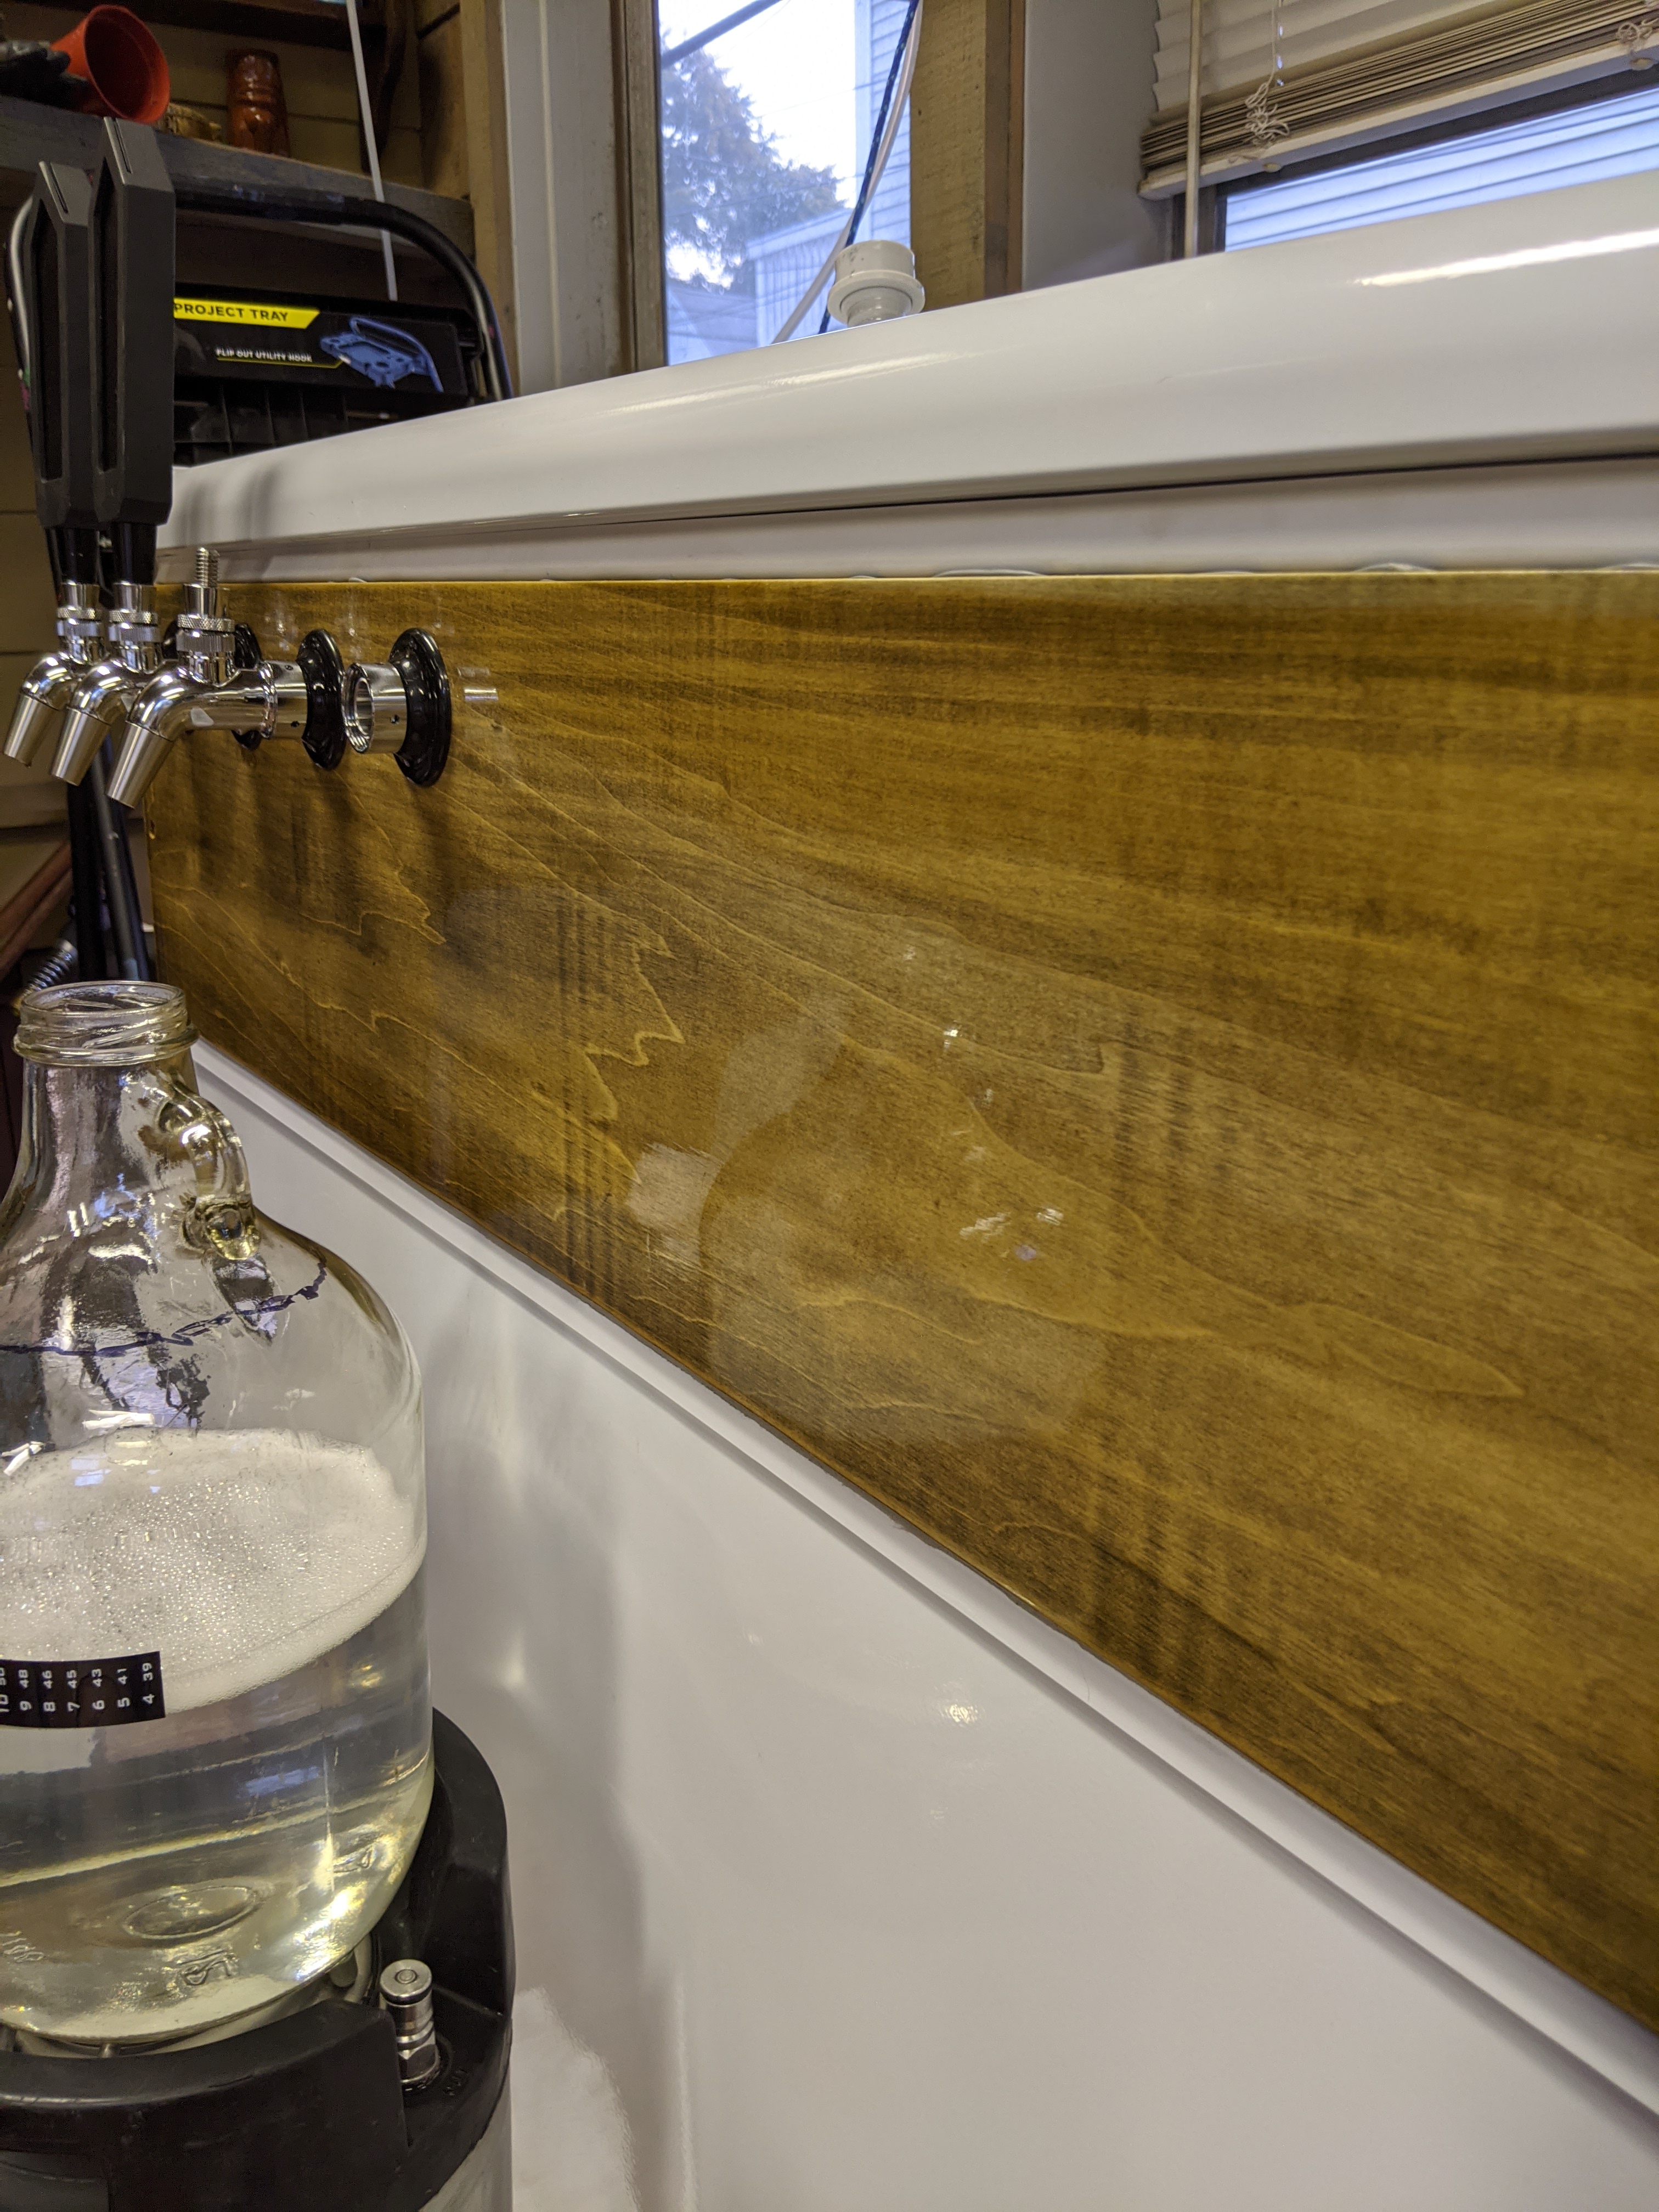
I'm including a close-up photo to show the finish on the front by way of reflection.
 

Attachments

  • PXL_20200918_223743336.jpg
    PXL_20200918_223743336.jpg
    2.8 MB
  • PXL_20200918_222455467.jpg
    PXL_20200918_222455467.jpg
    2.7 MB
  • PXL_20200918_222423726.jpg
    PXL_20200918_222423726.jpg
    3.1 MB
Looks like a cask beer engine from here. Sweet :mug:

Cheers!
It is indeed a beer engine - an Angram CQ model, which I purchased from someone here on HBT.

I was thinking about building a rolling platform and side cabinets for the keezer, and making one of the side cabinets a mount for the engine, but I have since decided against that. It is unlikely I will be serving cask all all the time, and I'm not that good of a woodworker that I'm wil;ling to undertake that project.

I ordered a demand valve (sometimes incorrectly called a check valve) from a store in the UK, which, even with international shipping and the GBP-USD exchange, was less expensive than buying it from an American store.

While they recommend 1/2 in tubing for the beer engines, given that I'm going to serve from a corny keg, which has a much narrower diameter in the liquid out tube, I'm sticking with 9.5mm eva barrier tubing and connections, with a cask breather built from a lpg regulator.

Eventually.
 
Back
Top