Tripod
Well-Known Member
Wow...just wow!

Have you paid attention at all to any heat build-up on the paneling?
Very nice build!
Just picked up a Holiday on Craig's list and am looking to do something similar but with a tower and a short collar (to gain room for hoses, etc.) and a tower.
Is the wrap pretty much all glued (panels, columns, etc.)?


![Craft A Brew - Safale S-04 Dry Yeast - Fermentis - English Ale Dry Yeast - For English and American Ales and Hard Apple Ciders - Ingredients for Home Brewing - Beer Making Supplies - [1 Pack]](https://m.media-amazon.com/images/I/41fVGNh6JfL._SL500_.jpg)


 ). How did you attach the drip tray brackets to the front? Construction adhesive?
Hop-Head,
That is absolutely beautiful. I am planning mine now, and I will be taking a lot of your ideas for the build. Like you, SWMBO insists it look like furniture, which is OK by me because it’s going in the living room.
One question (For now!
Again, beautiful work!

Sure will post the build. Another question (See, I did say, For Now), did you use the standard 5 1/8 shanks?
The other two are serving Full Circle by New Holland Brewing and a Home Brew IPA... 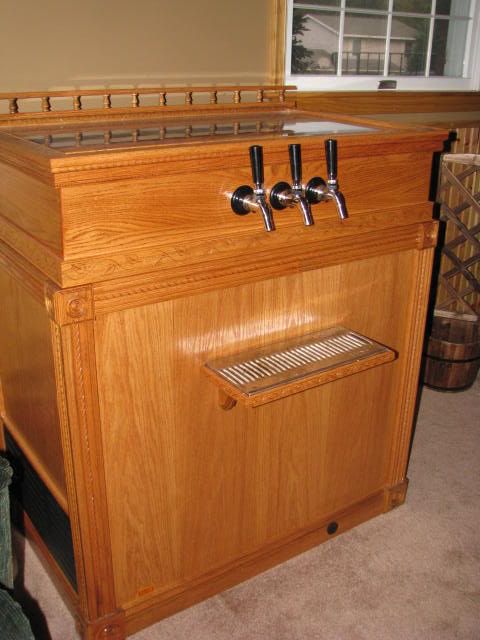
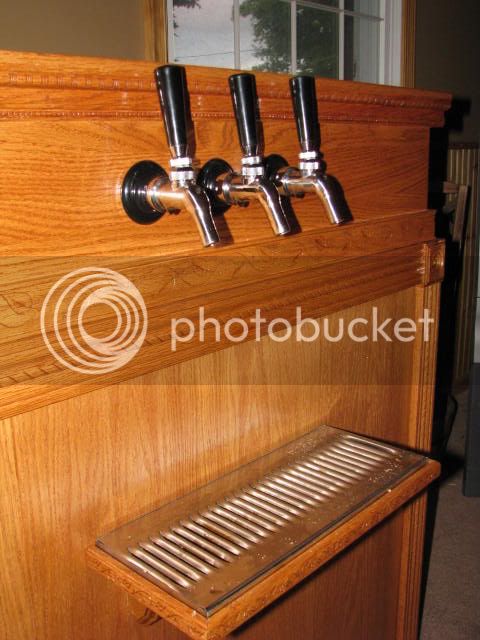
By the way.... if you're a perfectionist like me, order all your tap handles at once. These three all came from the same source and are the exact same model... unfortunately though, the "P" on the front is different with the last one I ordered... and the top of the cheap black handle is flat not rounded like the other two.... while others might not notice, I do every single time I pour.
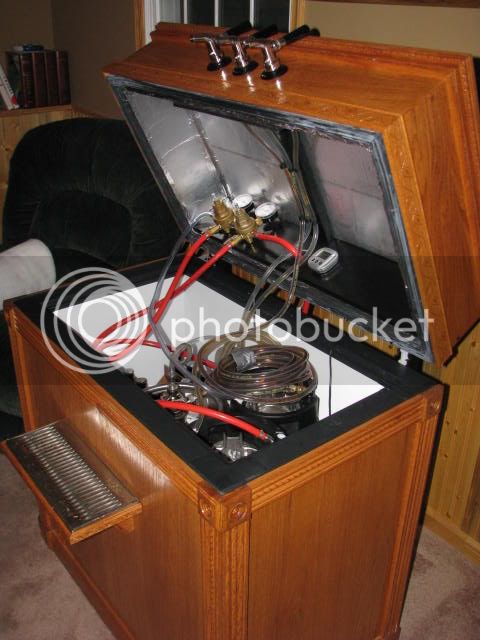
Are you able to post some pictures of the back of your keezer?
Thanks,
Henry
[snip] ... she's a work in progress, with plenty of things I'd already have changed.
However, your logic is quite good, and your subsequent positive experience is causing me to rethink that approach.
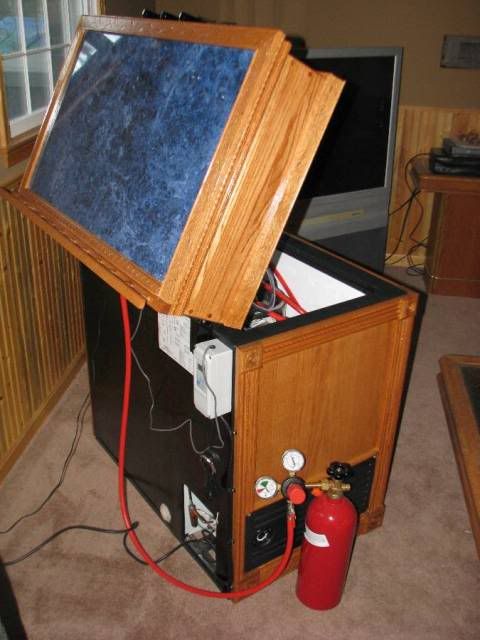
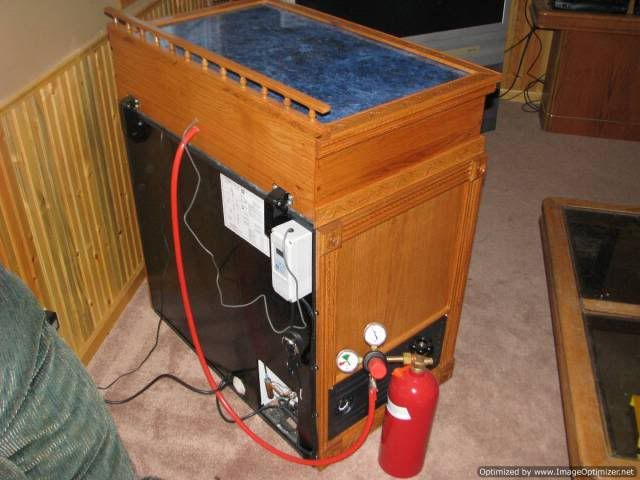
The top looks very heavy ... how is the gasket holding up?
My current plan is to use 1x6 oak for the collar (mostly to keep the weight down).
I'm also going to make a frame for the bottom that can support 2.5" casters (with a skirt around it to hide them) so that I can easily move it when needed (e.g., roll it over to the sink for cleaning) without worrying about damaging the tile floors ... and the casters will raise it up about 4"-5" to put the taps at a good height like yours.
I was worried about it taking up space on the inside. In hindsight, it would have fit inside just fine.One other question: what was the primary reason for putting the CO2 bottle on the outside?
Anyway, I just wanted to thank you for some inspiration, and let you know how much I liked your keezer. Cheers!
Anything particularly noteworthy?
Casters as mentioned above.
But mostly, if I did it again and could change something, I'd actually make the base larger than the originally freezer. In a sense, extend the width enough that I could have a smaller cabinet door on the front, with shelves for bottled beer and chilled mugs. The added width would be insulated with openings to the original freezer to keep it cold as well. The lid would just span the full width, original freezer and added area, so it all appeared original. The only difference would be that you could access the added side area without opening the top. Someone on here, excuse me for not remembering so I could credit them, did something similar. I don't think they insulated or chilled their additional space, but I would.
How did you affix the laminate paneling to the keezer? Liquid nails?
1. Construction adhesive... the entire outline of the panel and then randomly throughout. Held it tight using clamps and a lot of weight, gluing each piece separately and turning the freezer on its side as needed.
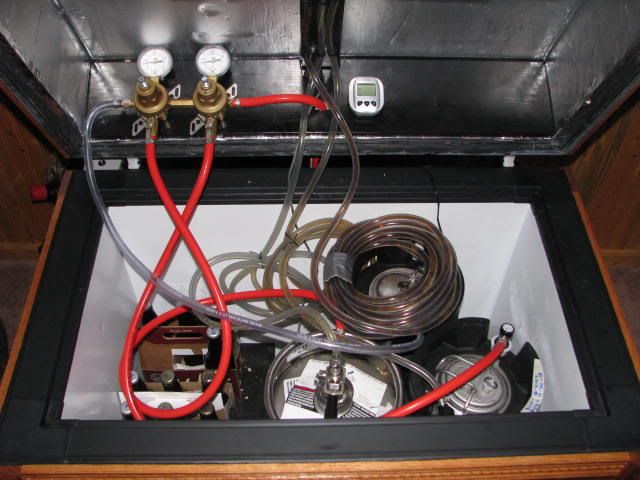
crlova2 said:What are the inner dimensions of this frigidaire 7.2 cu ft. keezer? Basically I am trying to figure out if it will fit a half barrel in it (front to back wise) and possibly two with a collar. I use half barrels for fermenting and want to use a 7.2 for a fermentation chamber. If anyone knows the inner dimensions I would appreciate that information.


