6 Tap Coffin - Don't give me powertools Build Log

Homebrew Talk - Beer, Wine, Mead, & Cider Brewing Discussion Forum

Help Support Homebrew Talk - Beer, Wine, Mead, & Cider Brewing Discussion Forum:

This site may earn a commission from merchant affiliate links, including eBay, Amazon, and others.

sleizure

Active Member
Joined
Oct 26, 2018
Messages
28
Reaction score
26
Location
Courtenay, BC
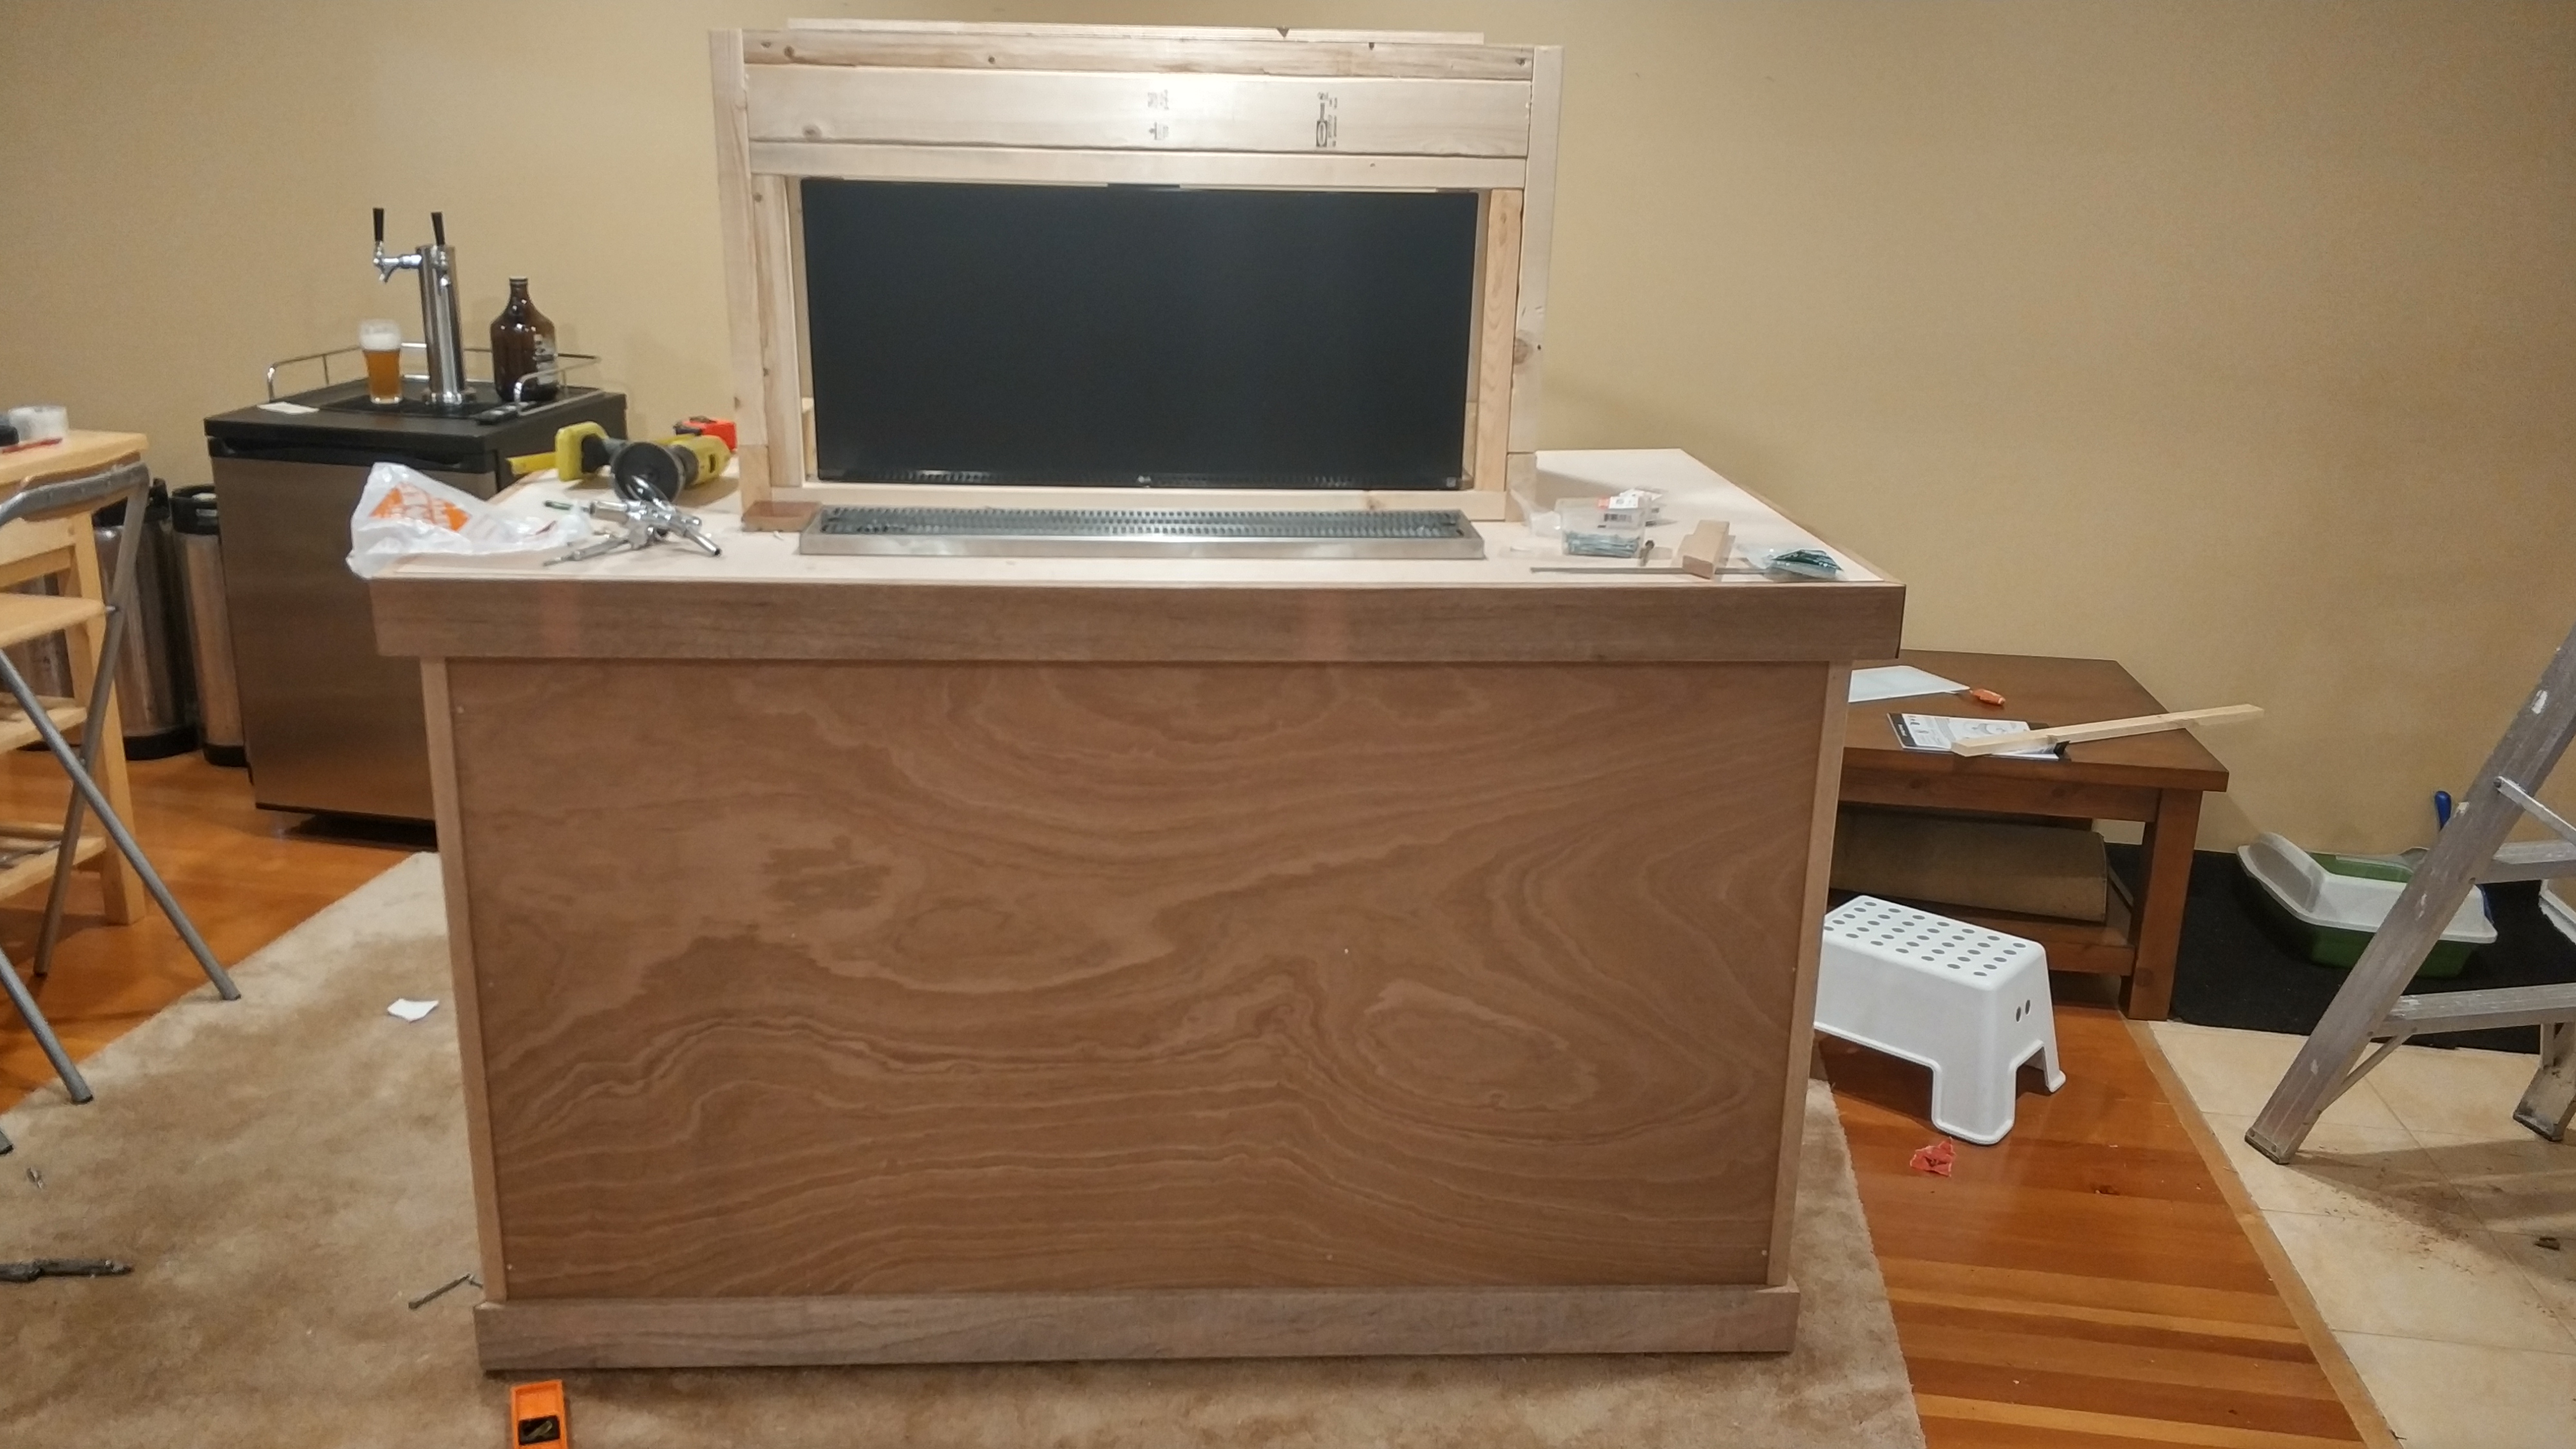
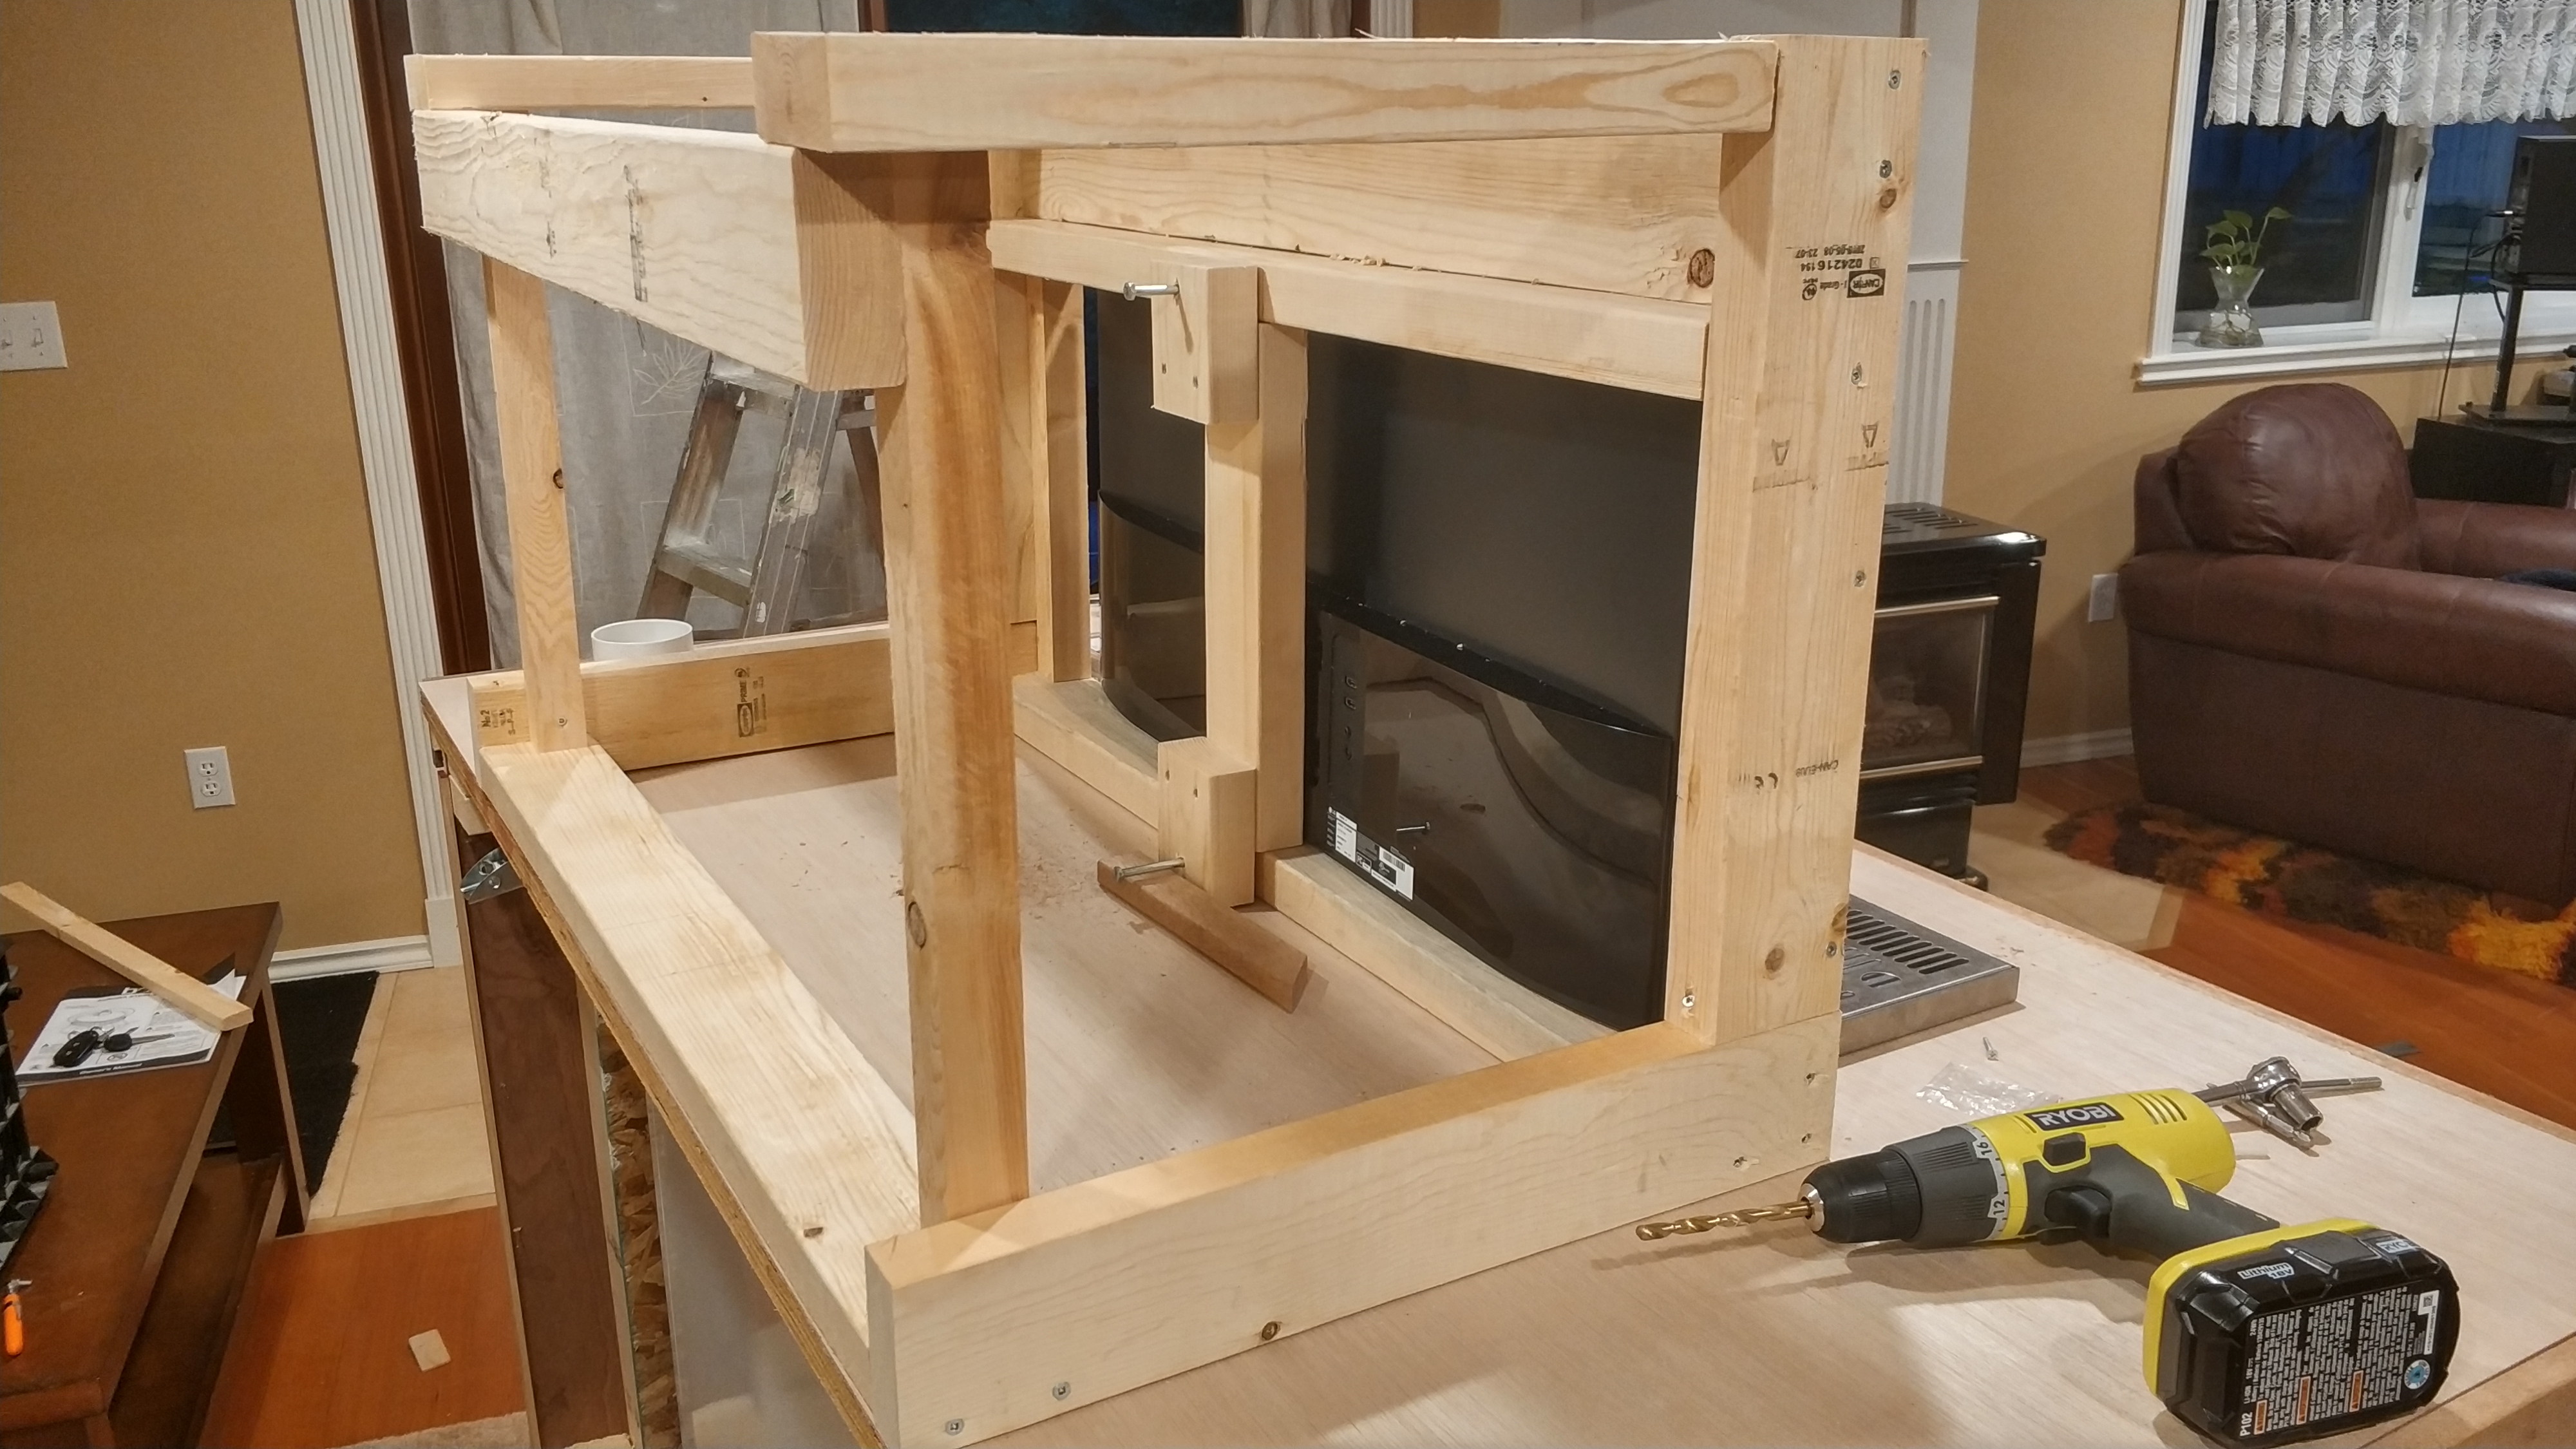
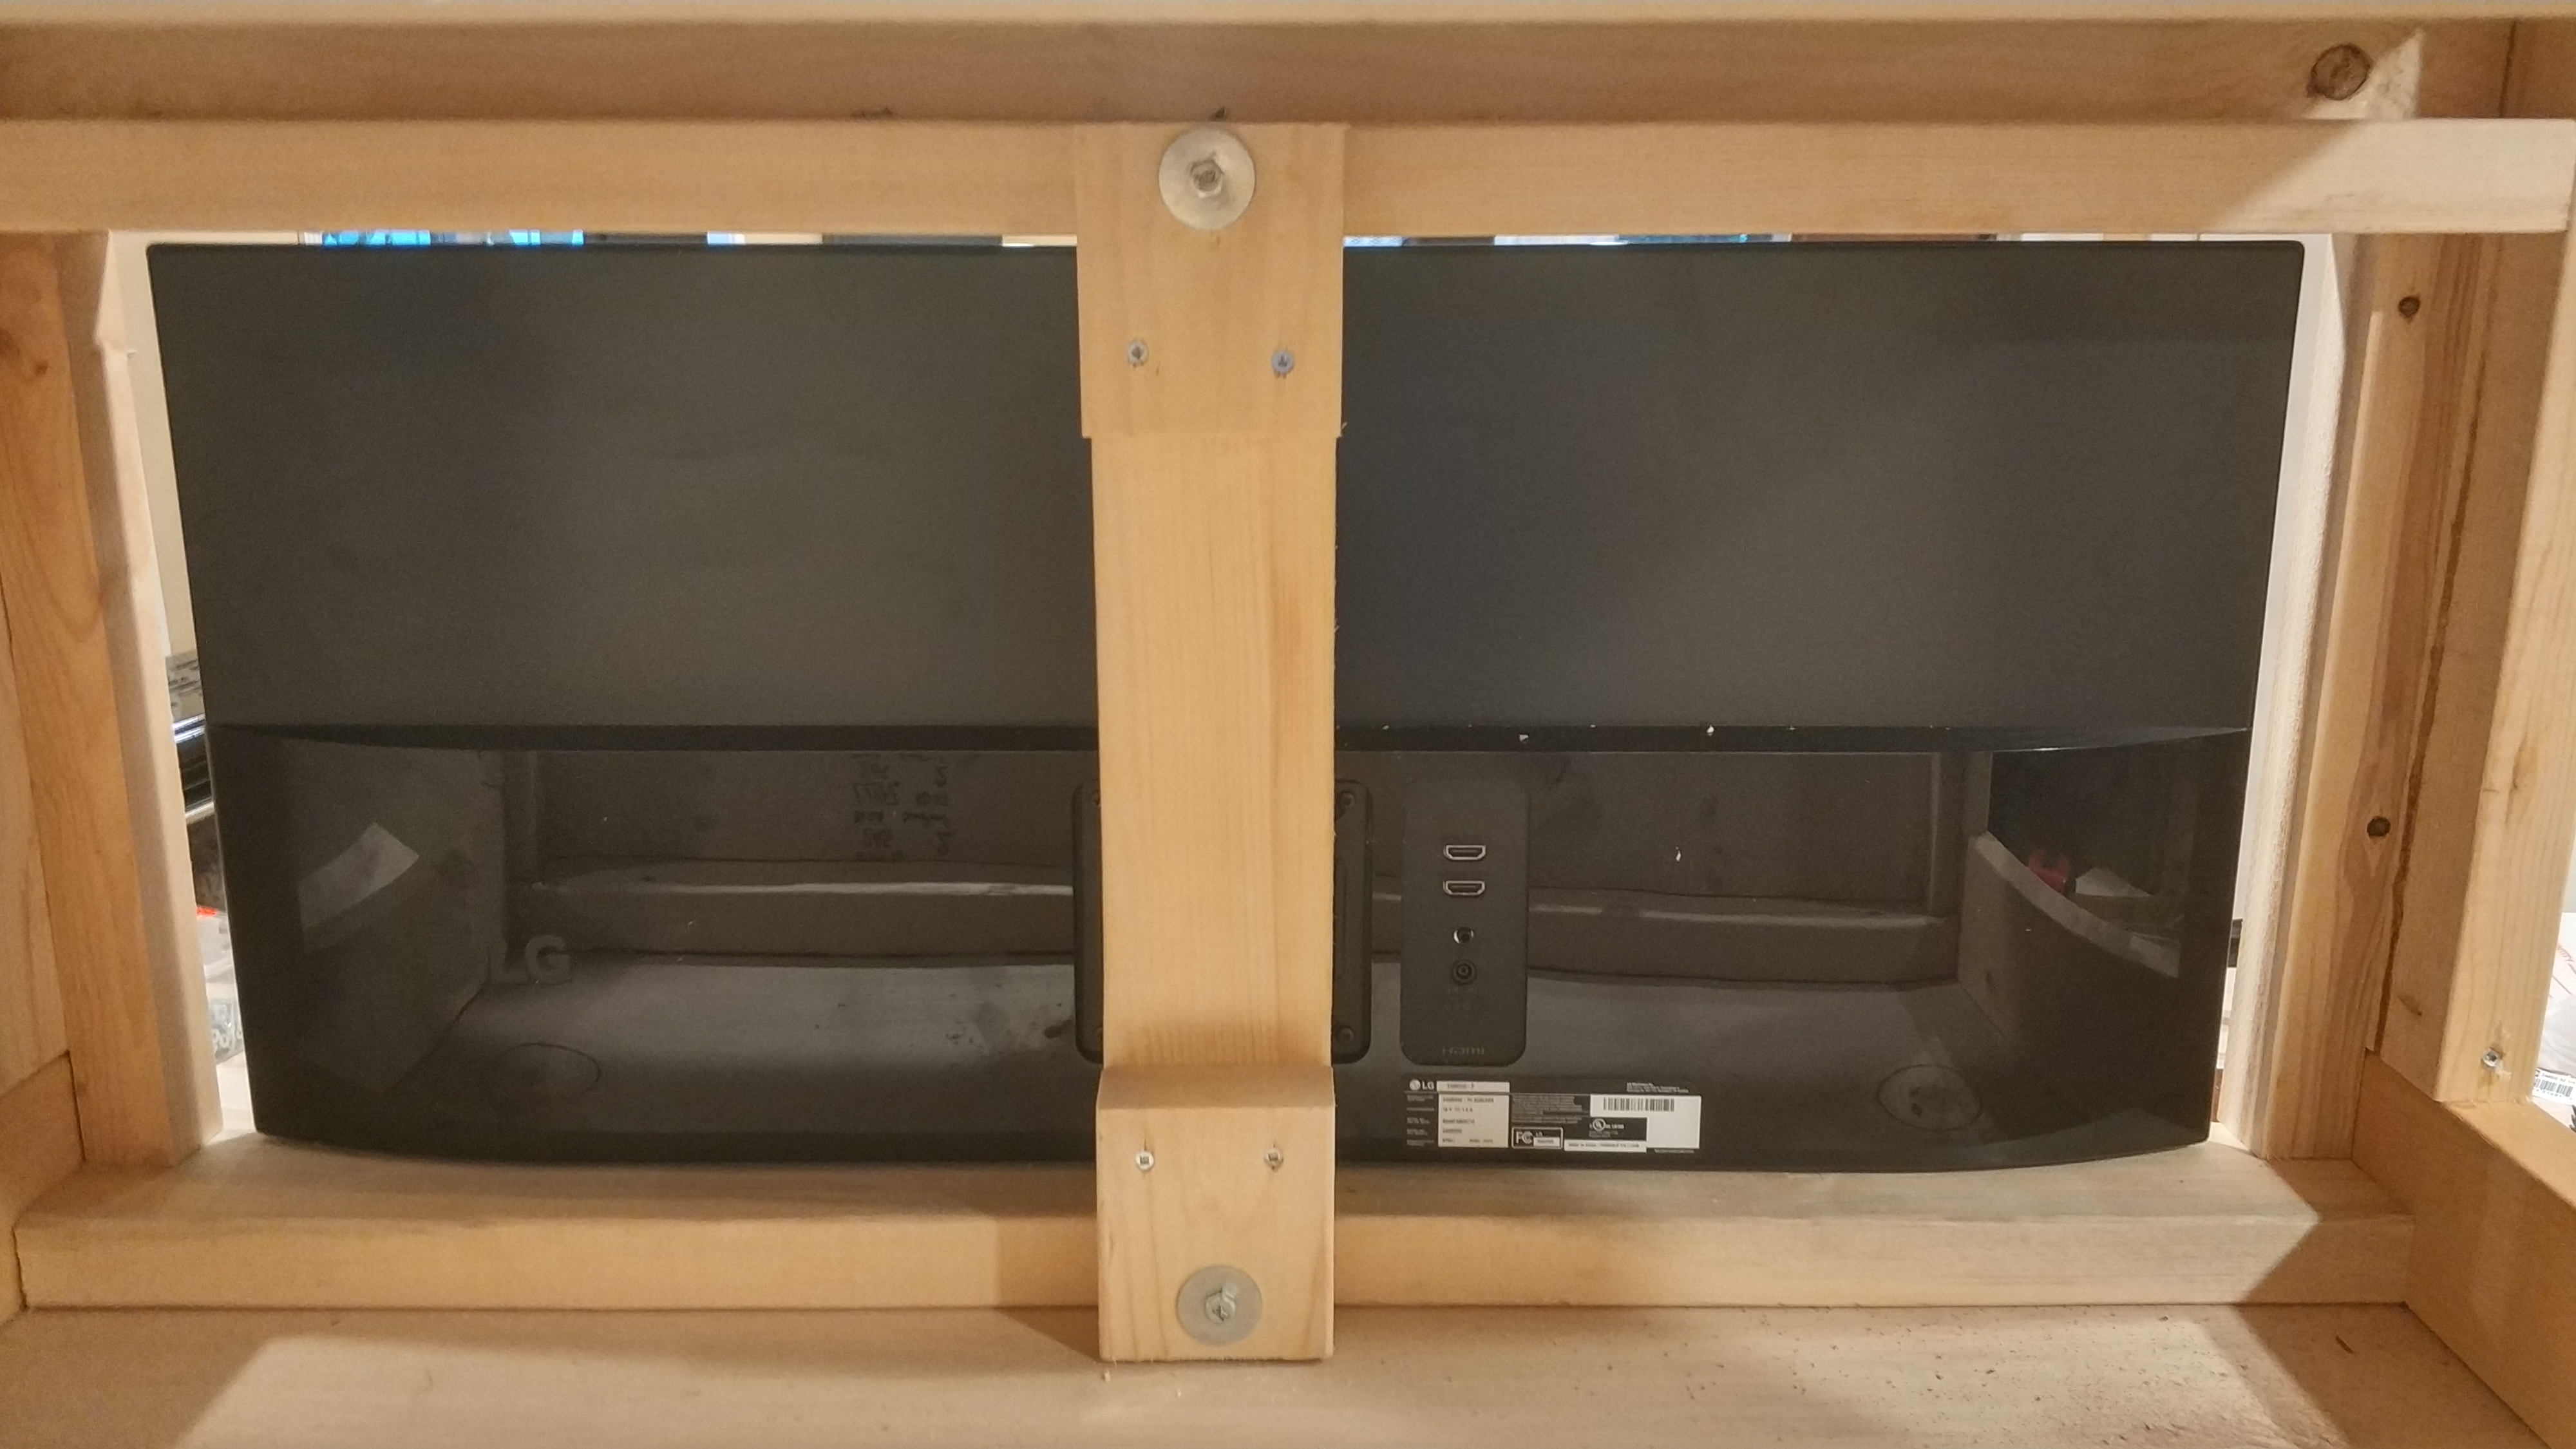
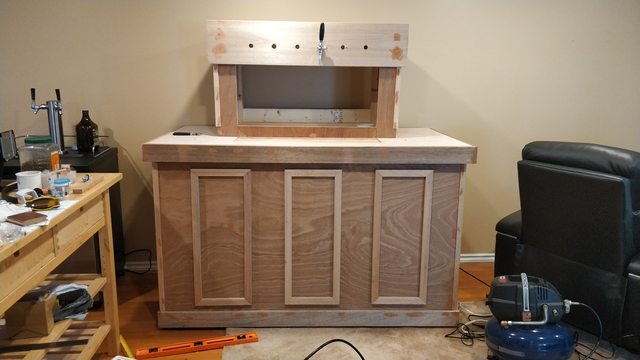
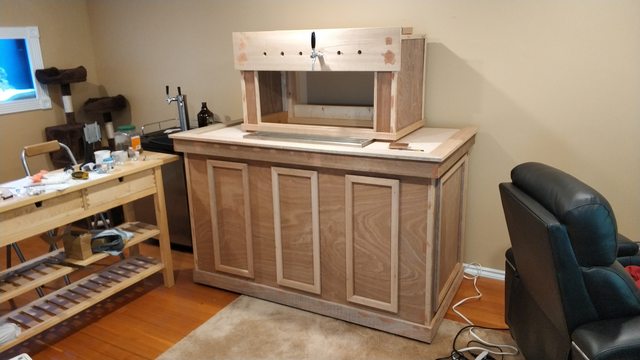
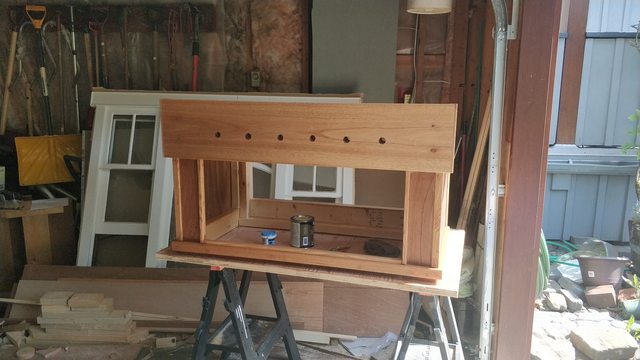
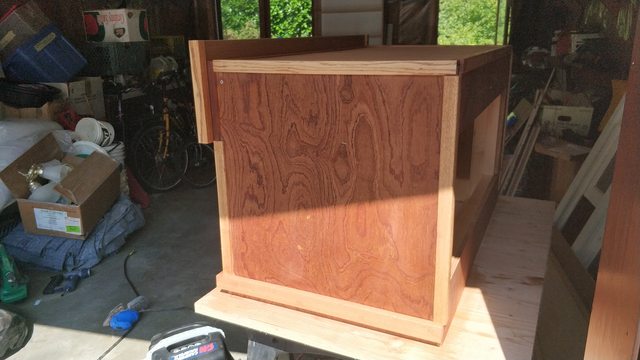
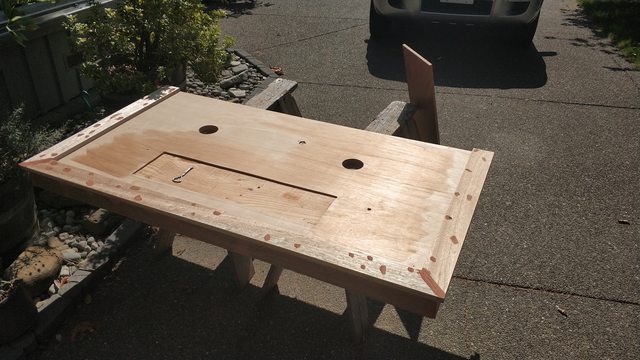
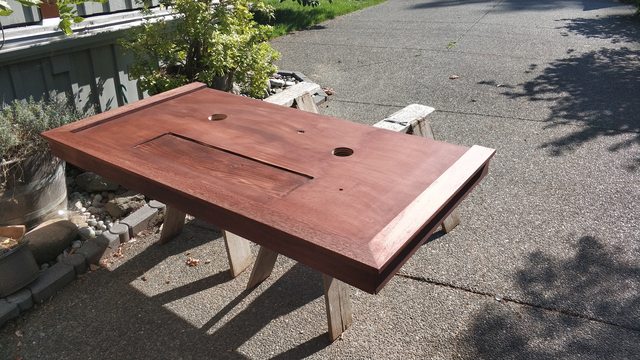
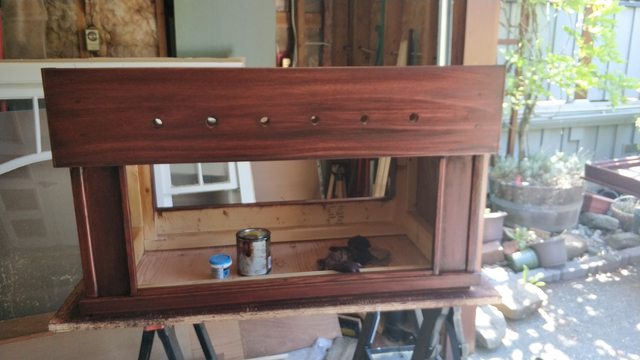
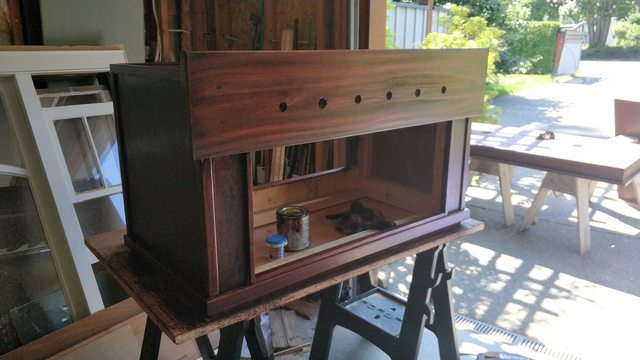
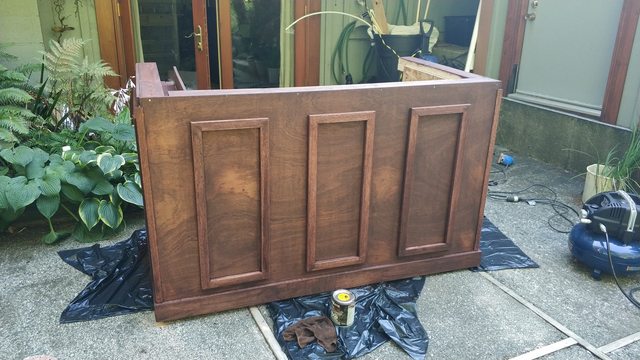
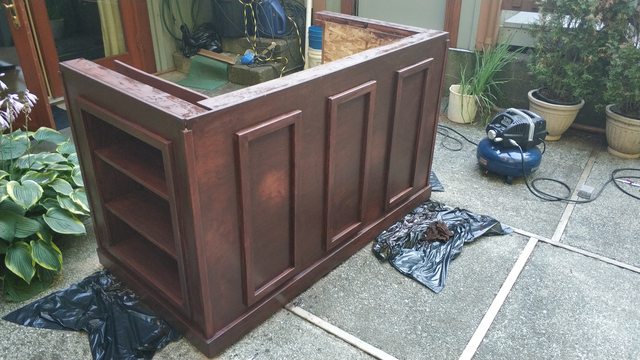
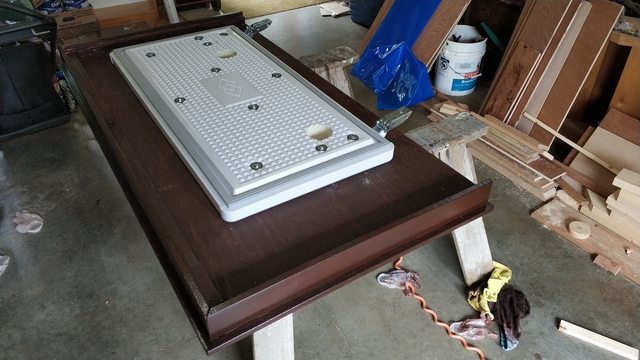
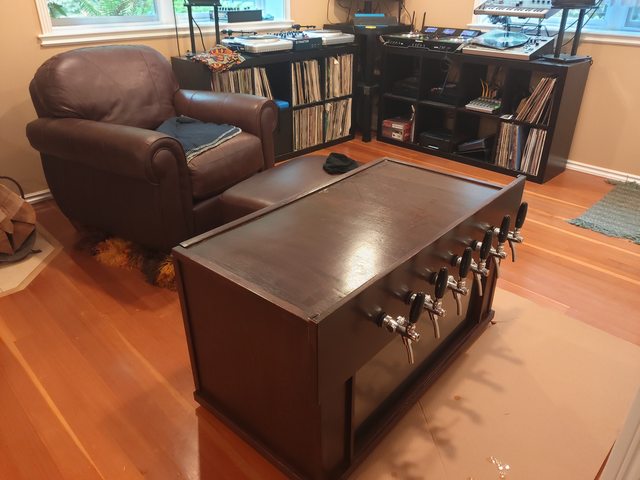
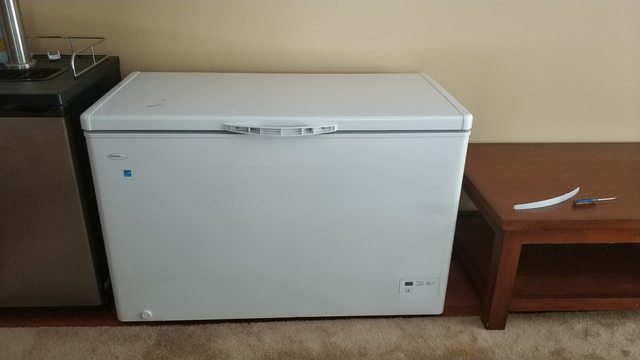
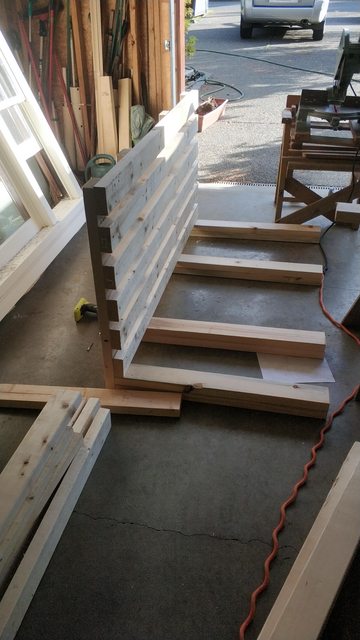
Hi all, For the past 2 (!) months I've been trying to fake making a 6 tap Keezer.

Some things that I have learned the hard way:

- I should never be allowed to use power tools
- You don't get alot done when you start drinking out of the existing Kegerator
- Wood is expensive, measure properly
- A plan helps, not just winging it each time
- Having the proper tools goes along way
- 1/4" is not actually 1/4" nor is a 2" by 4"
- Wood is strong, anything more than bare minimum is overengineering
- You should be hiring other people to do this stuff.


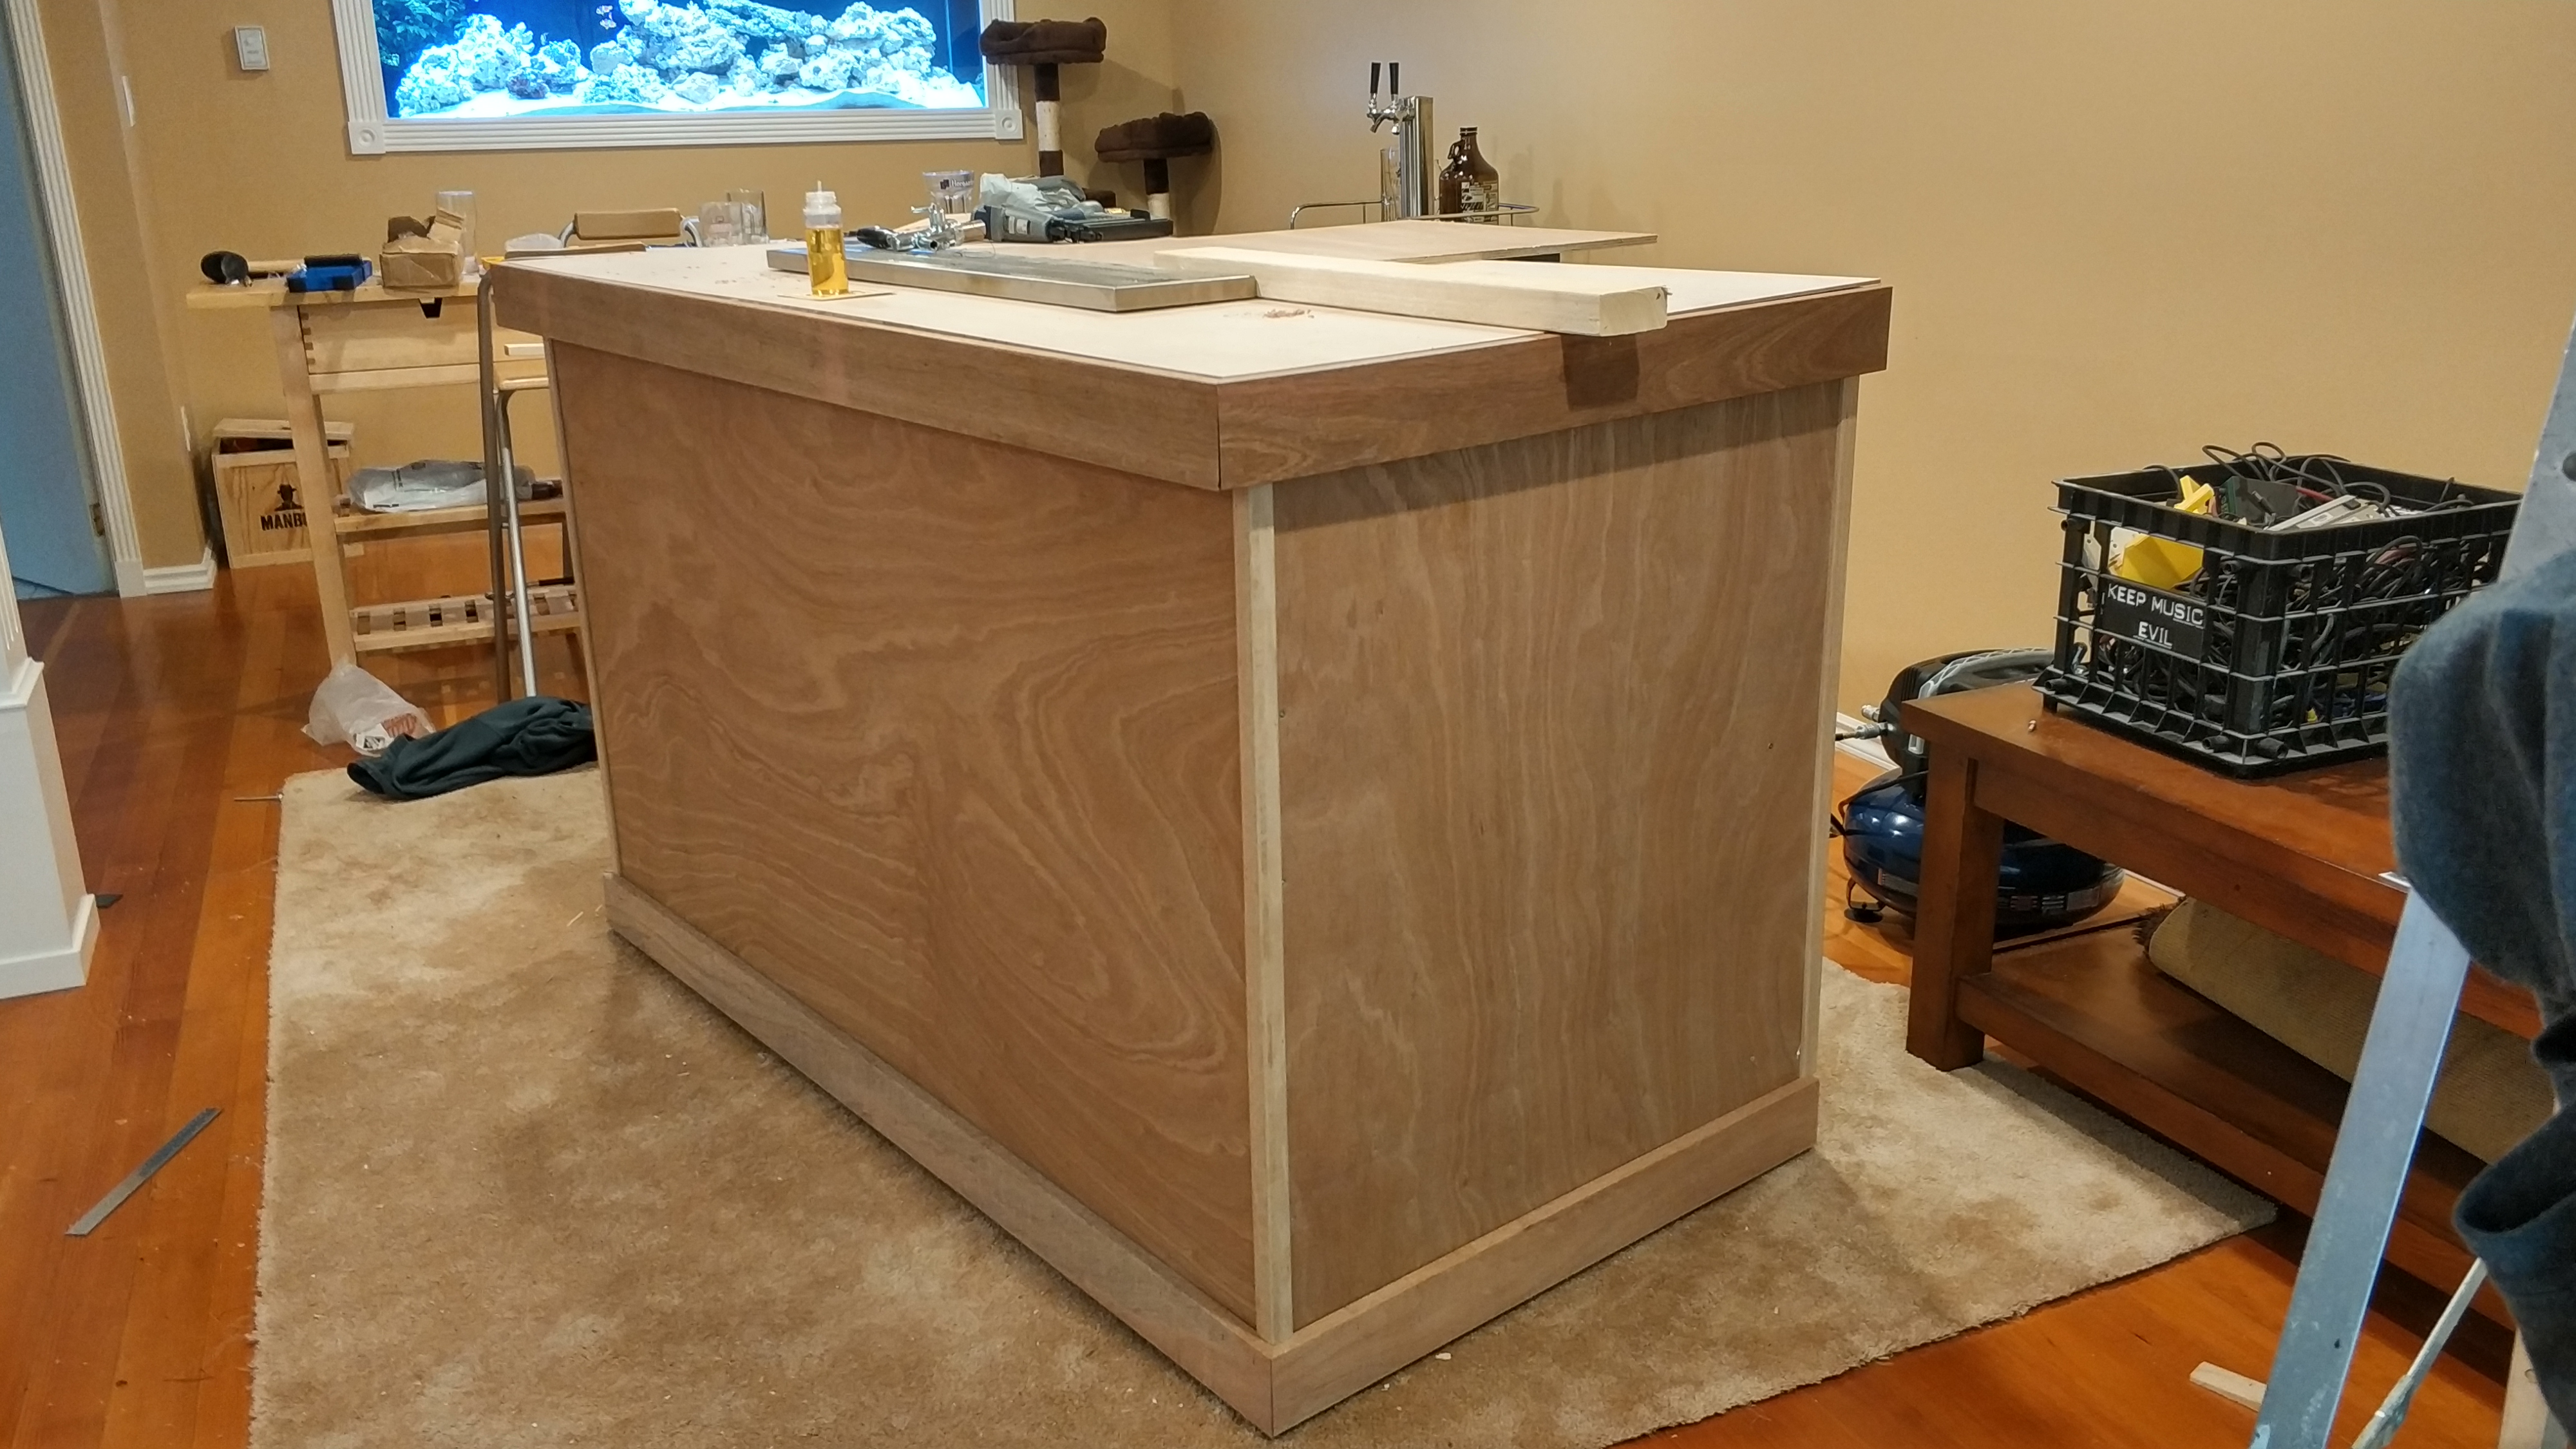
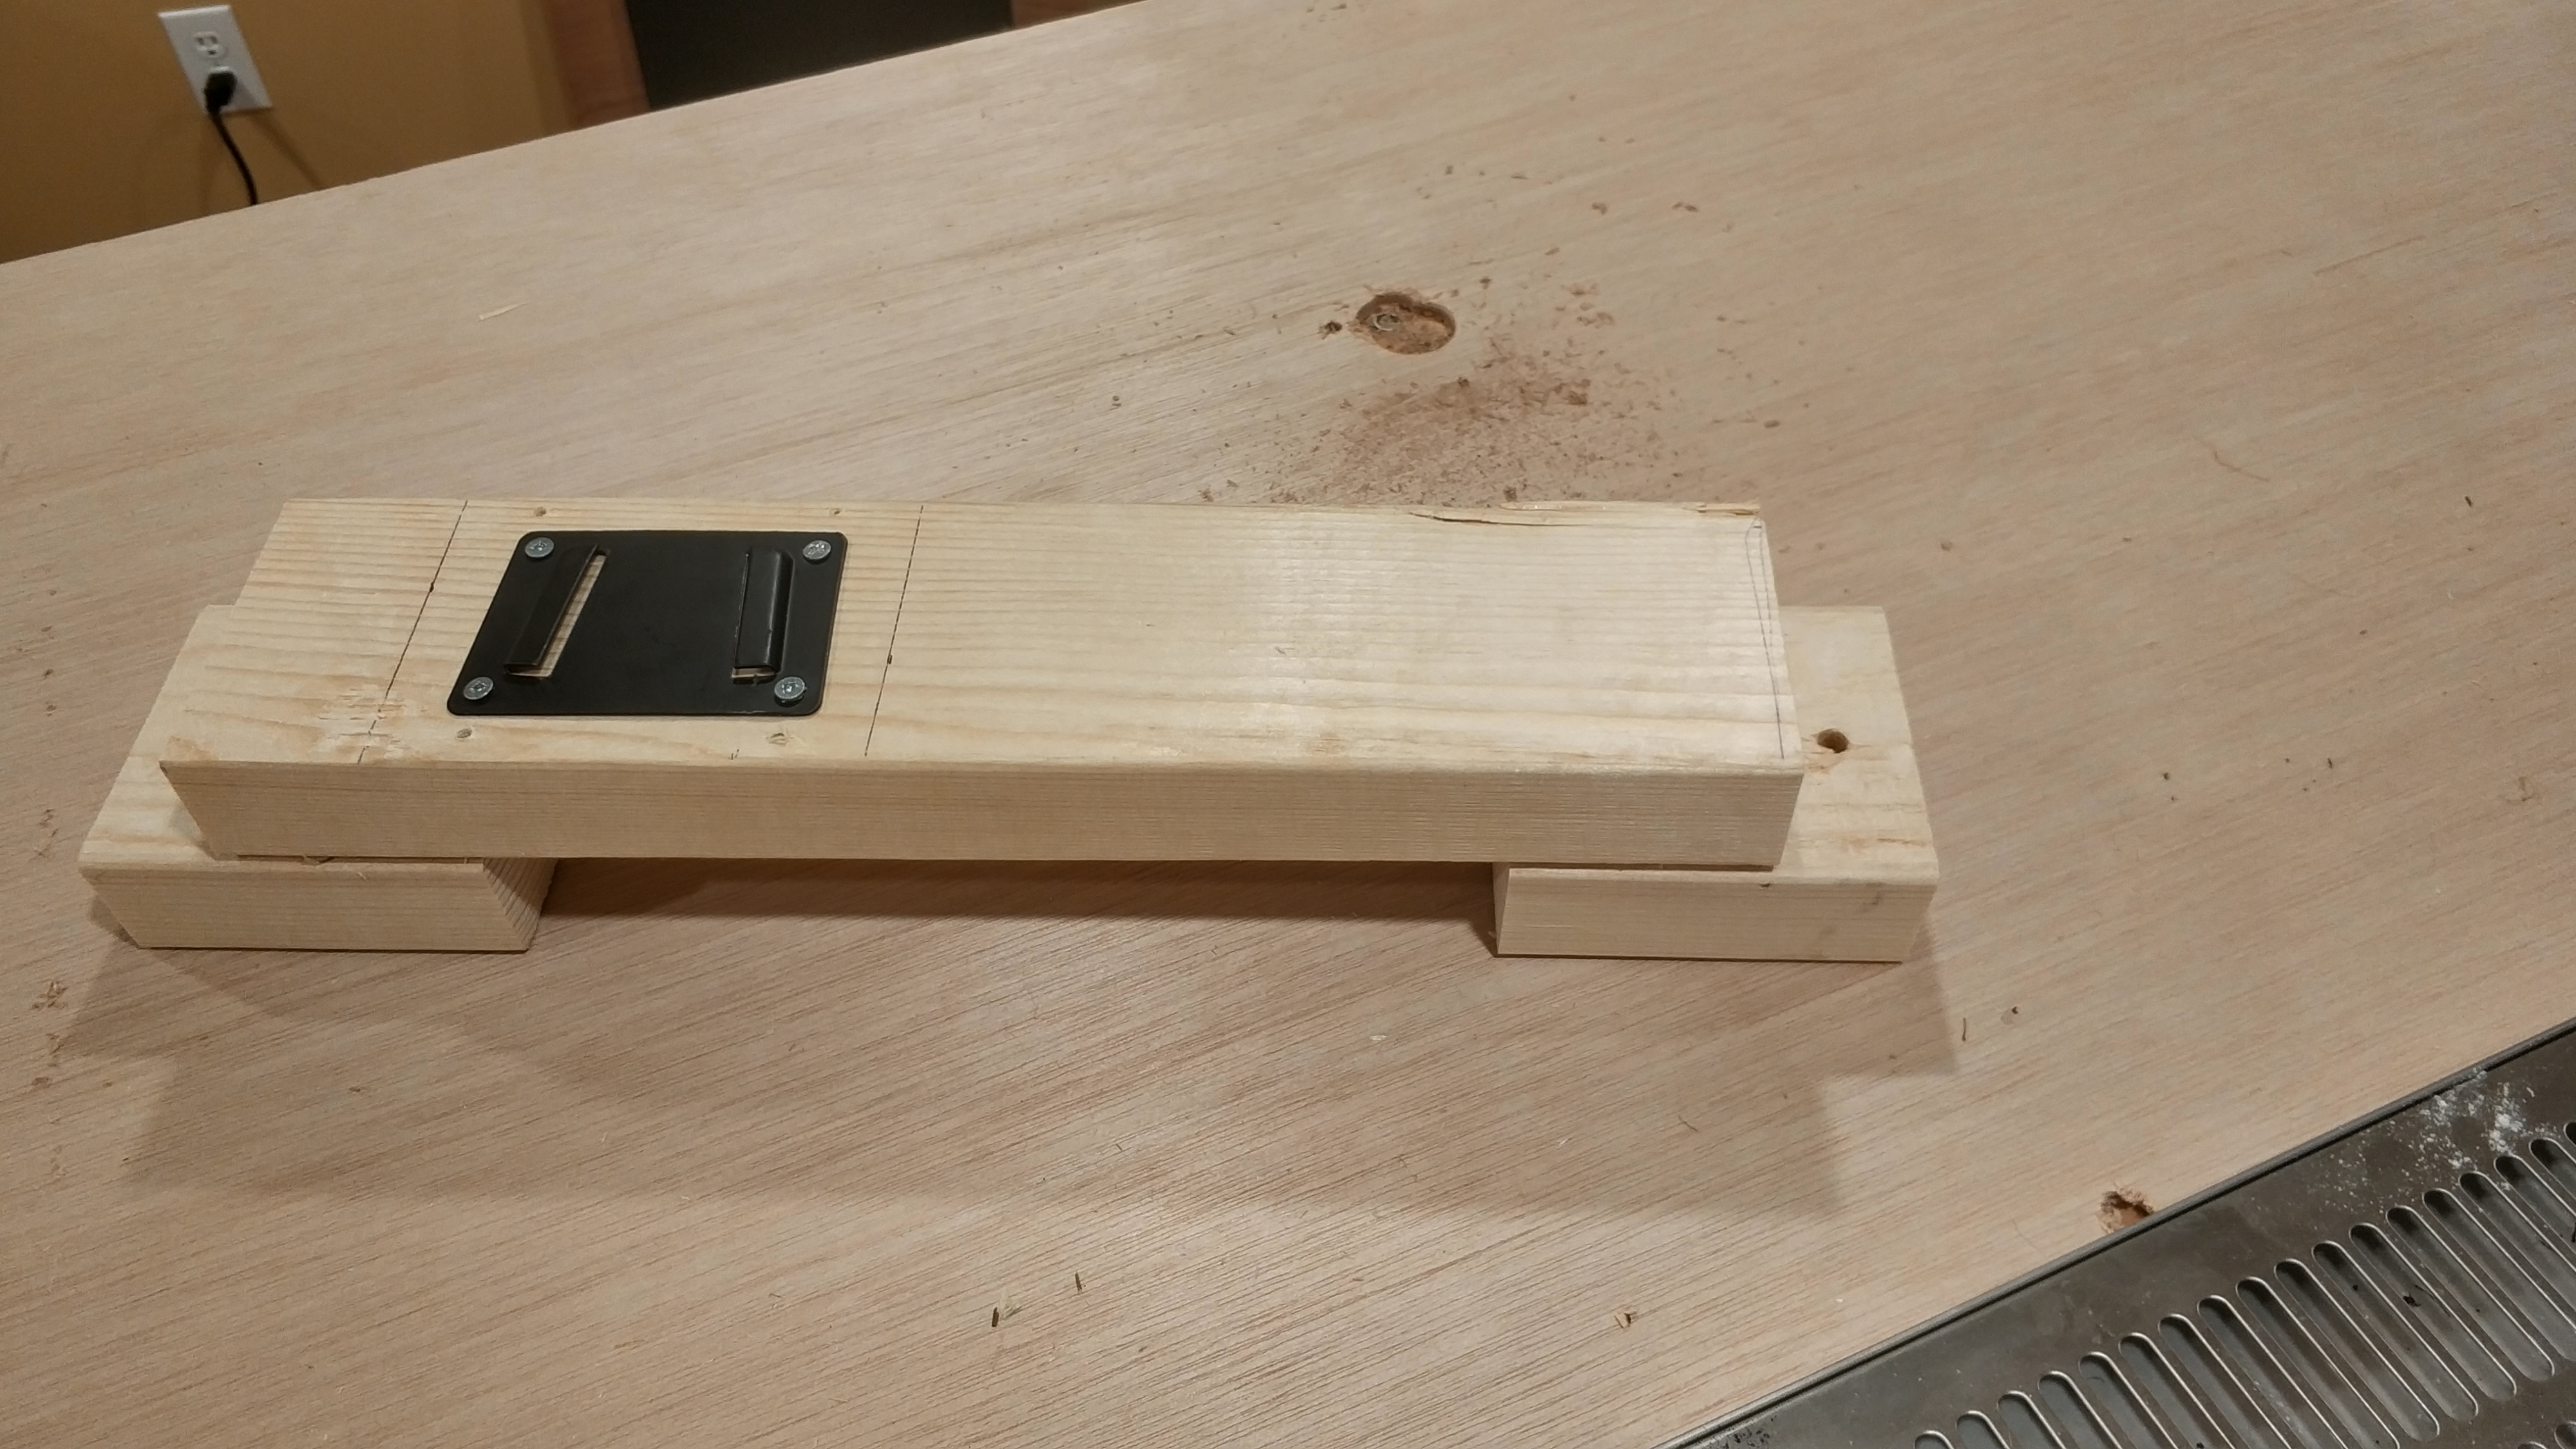
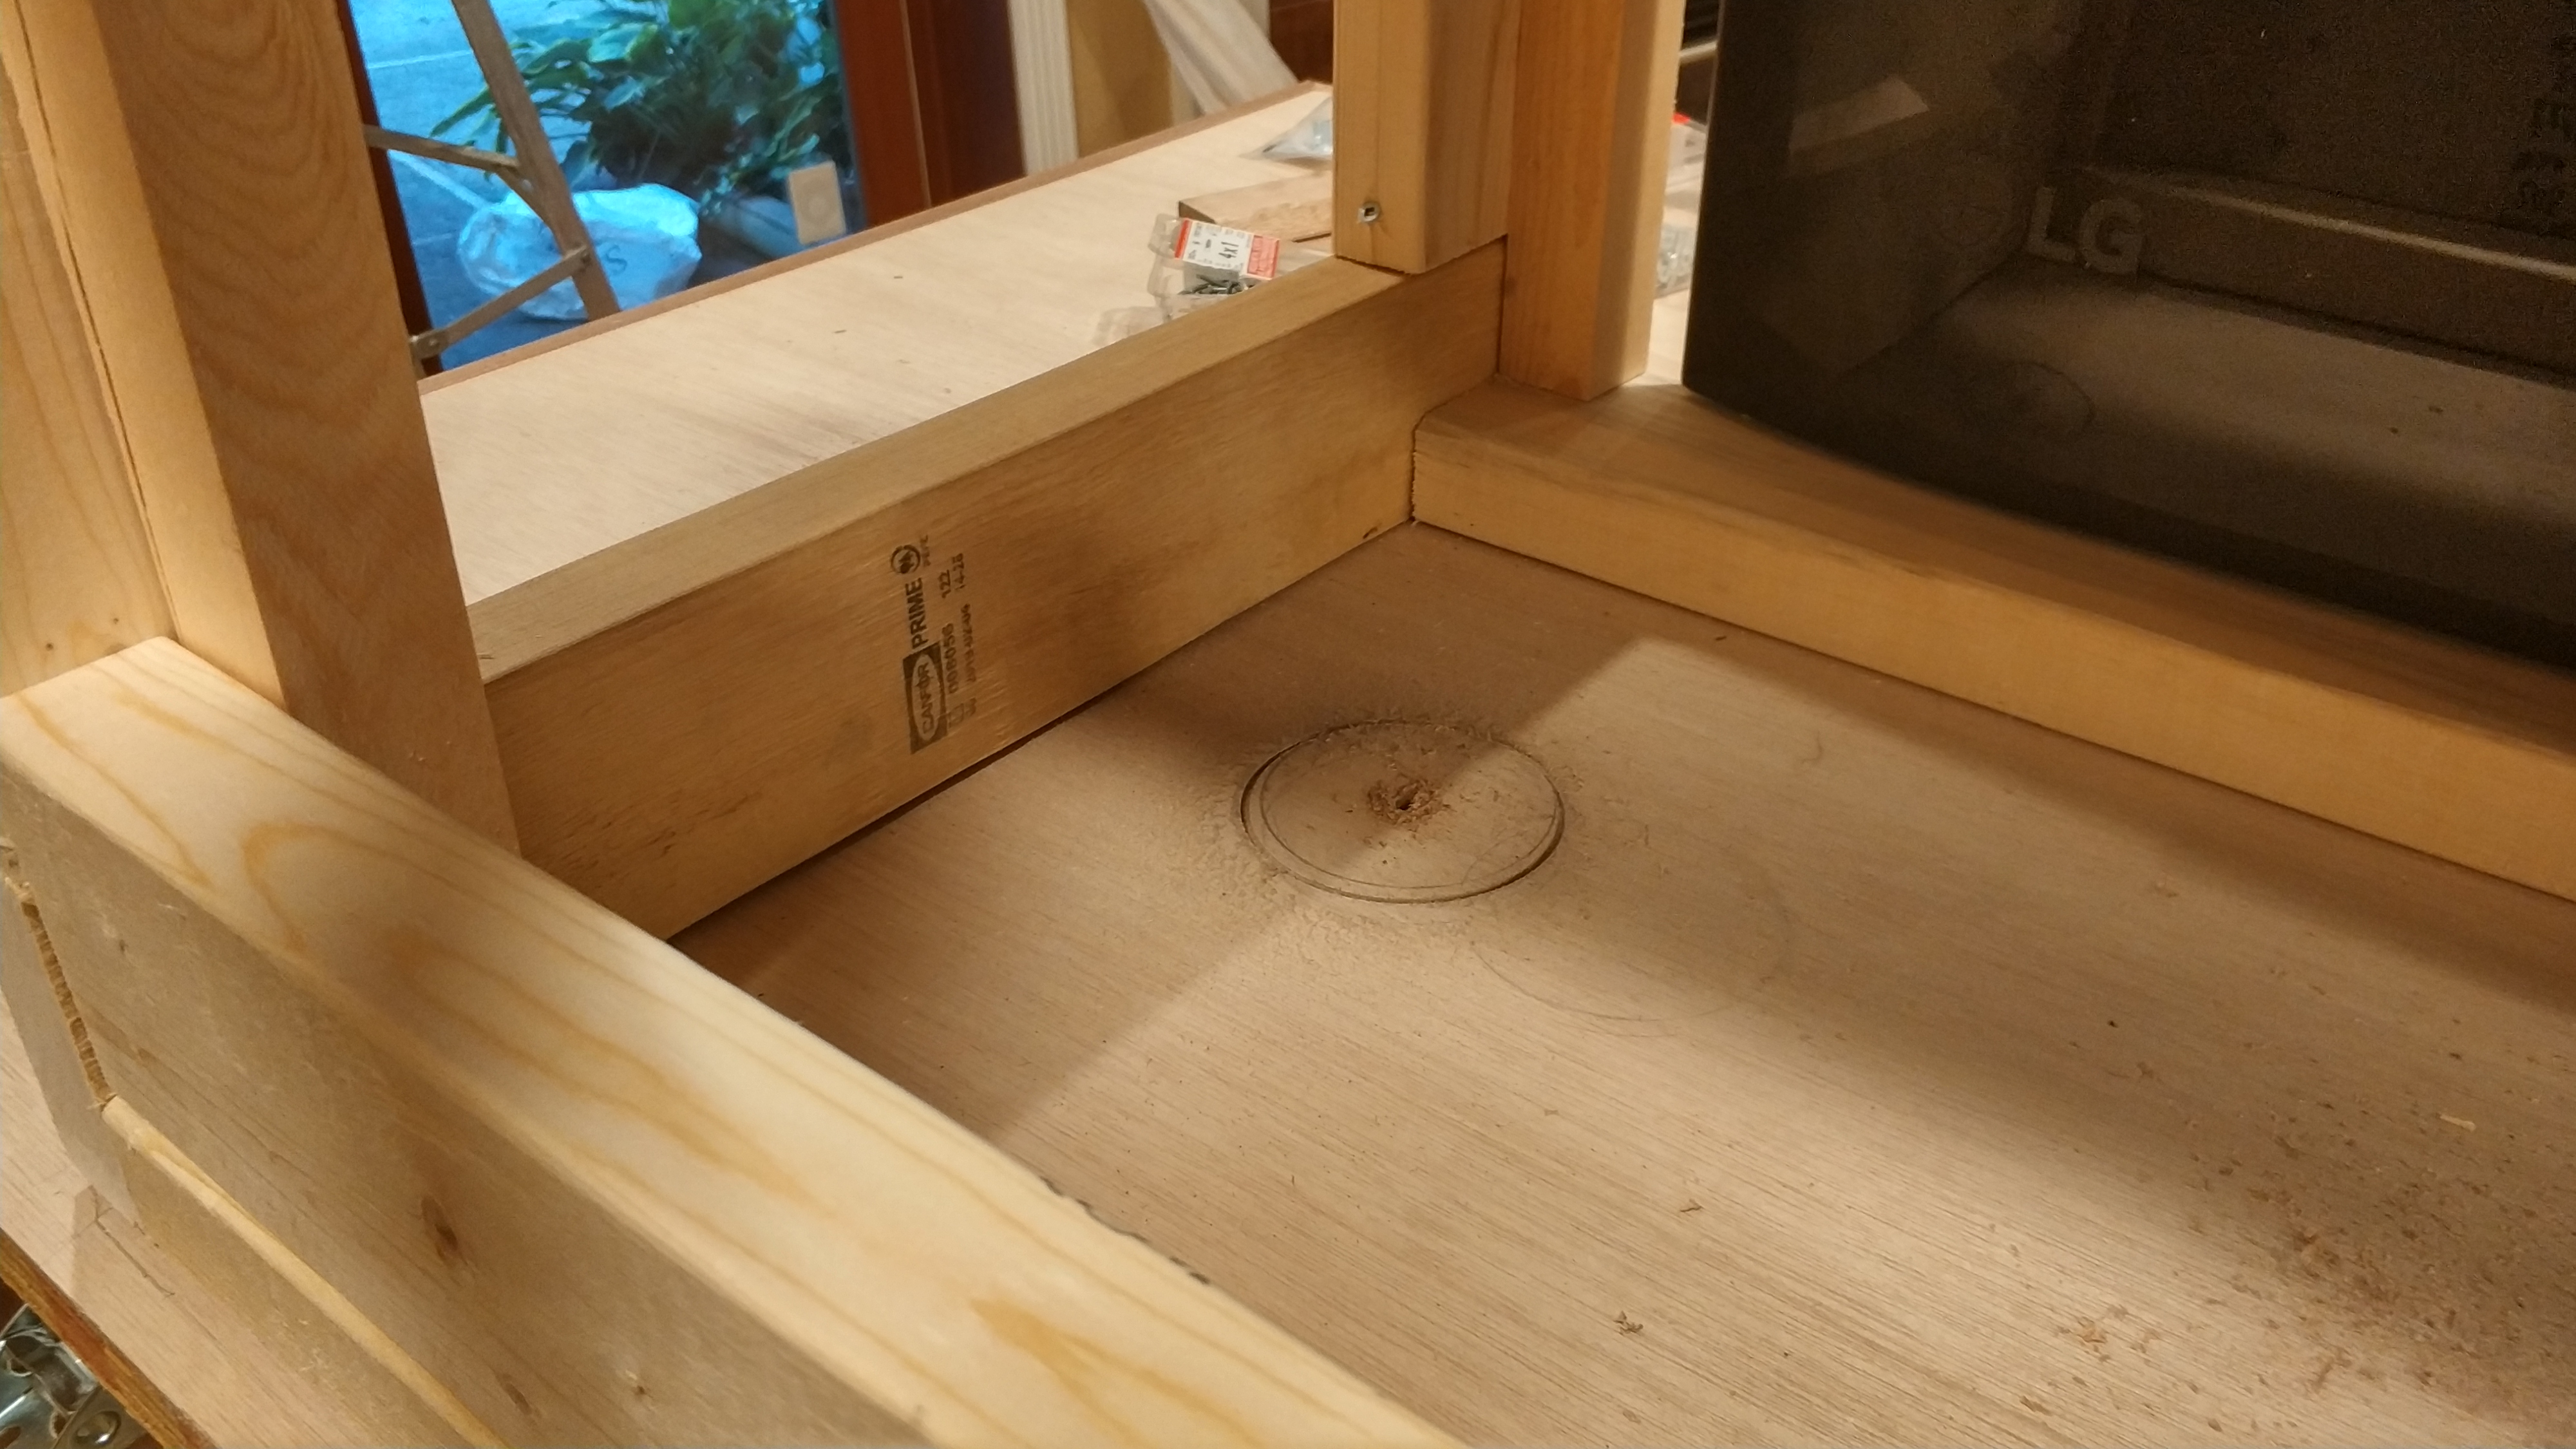
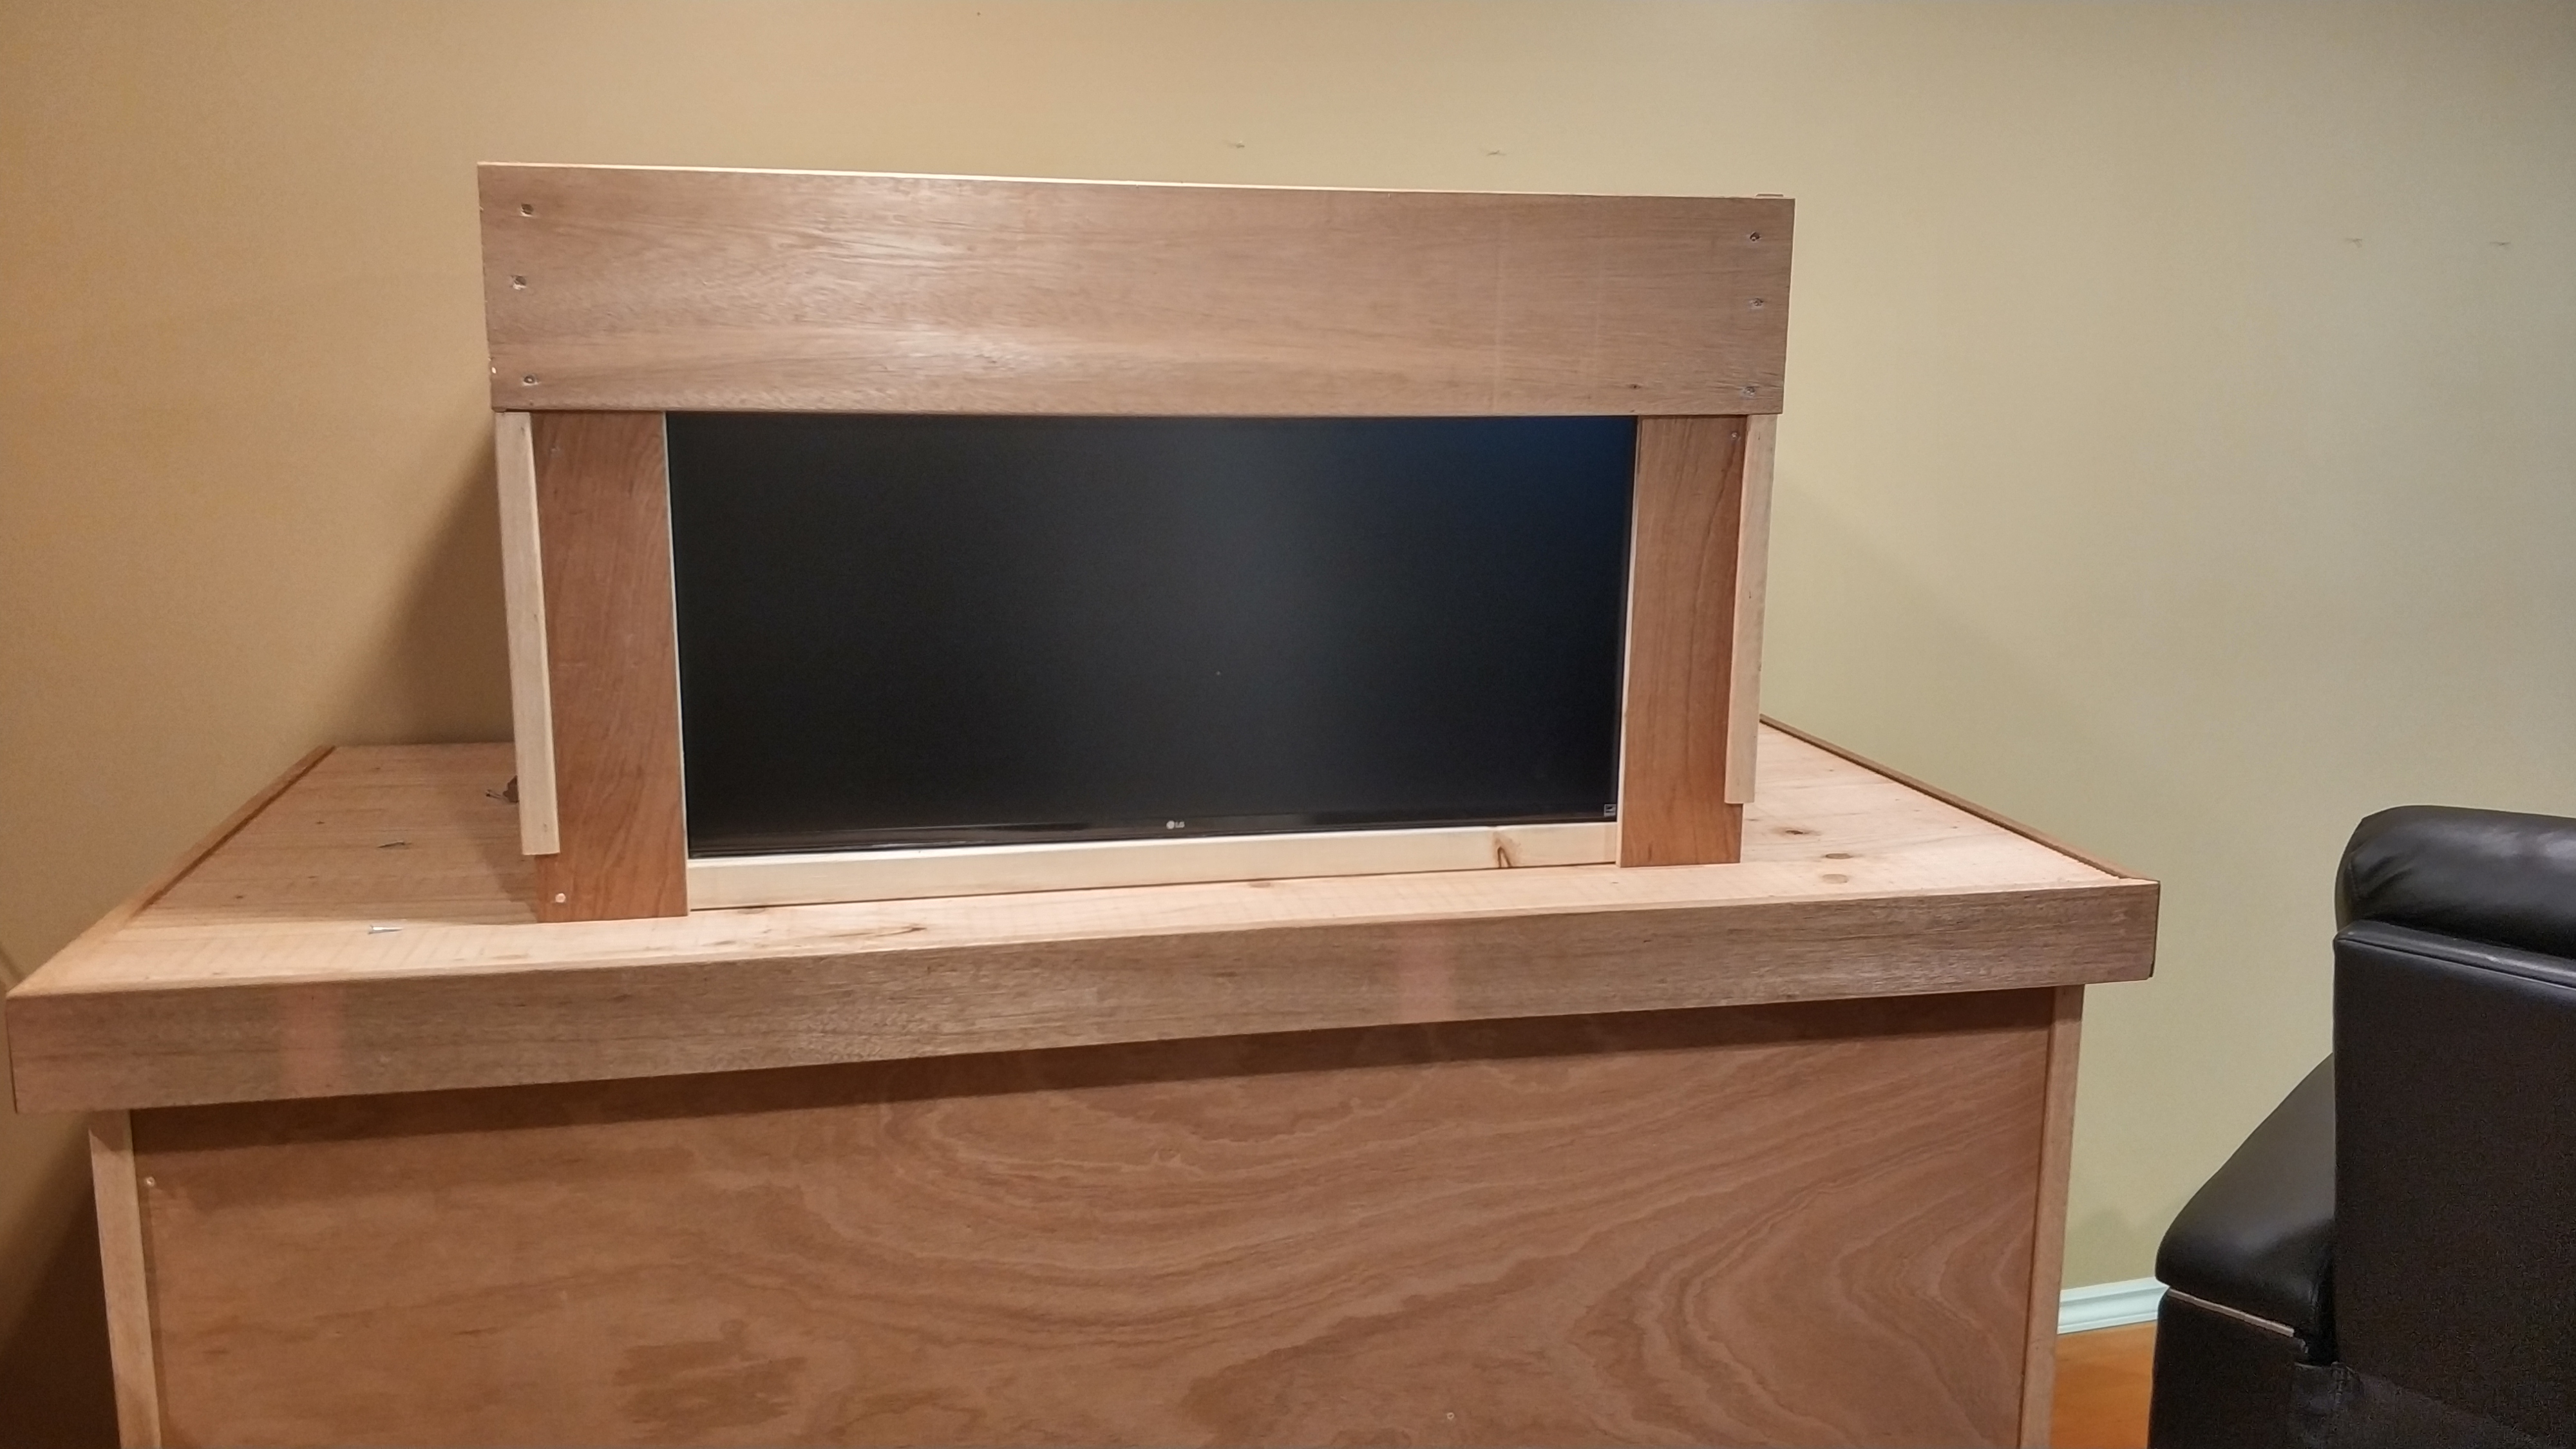
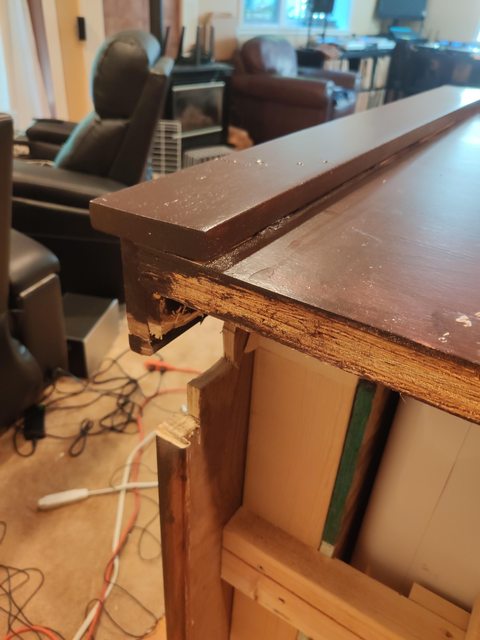
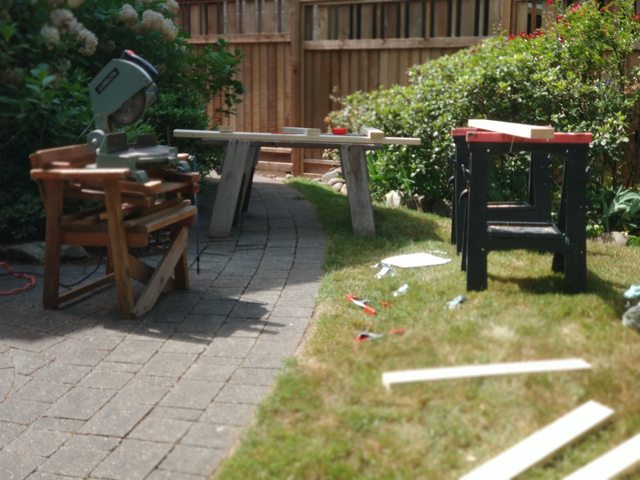
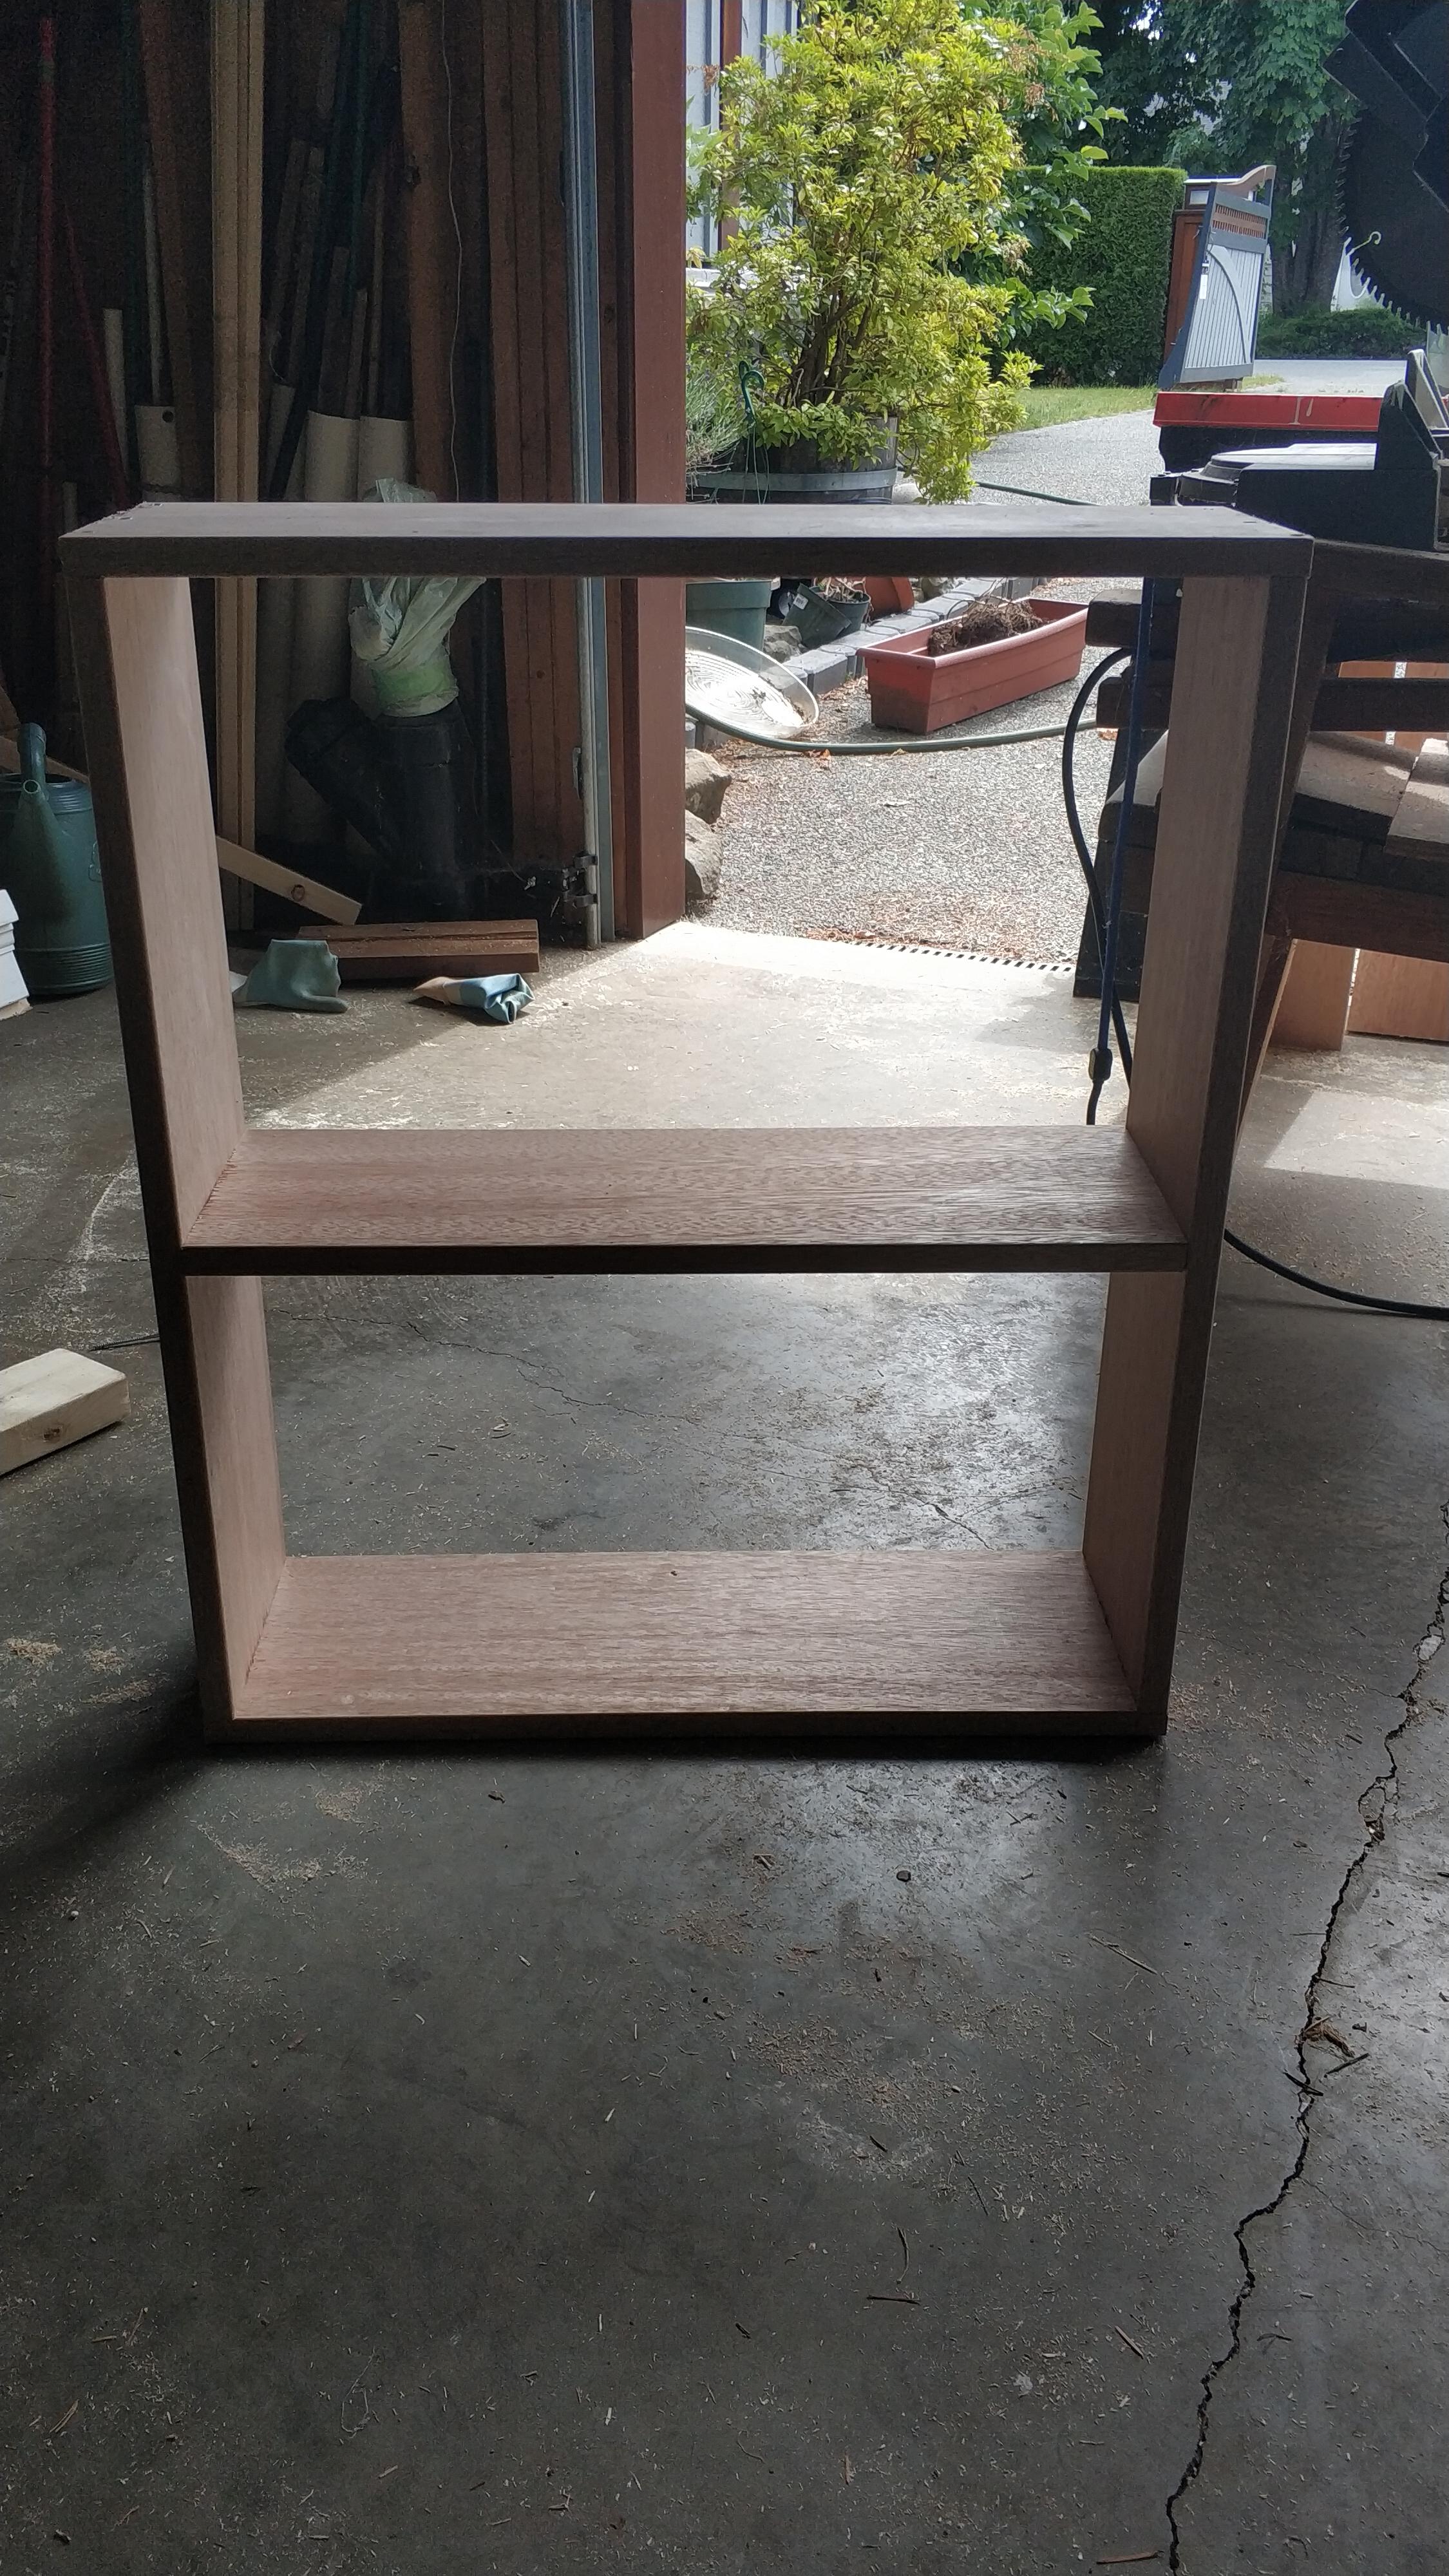
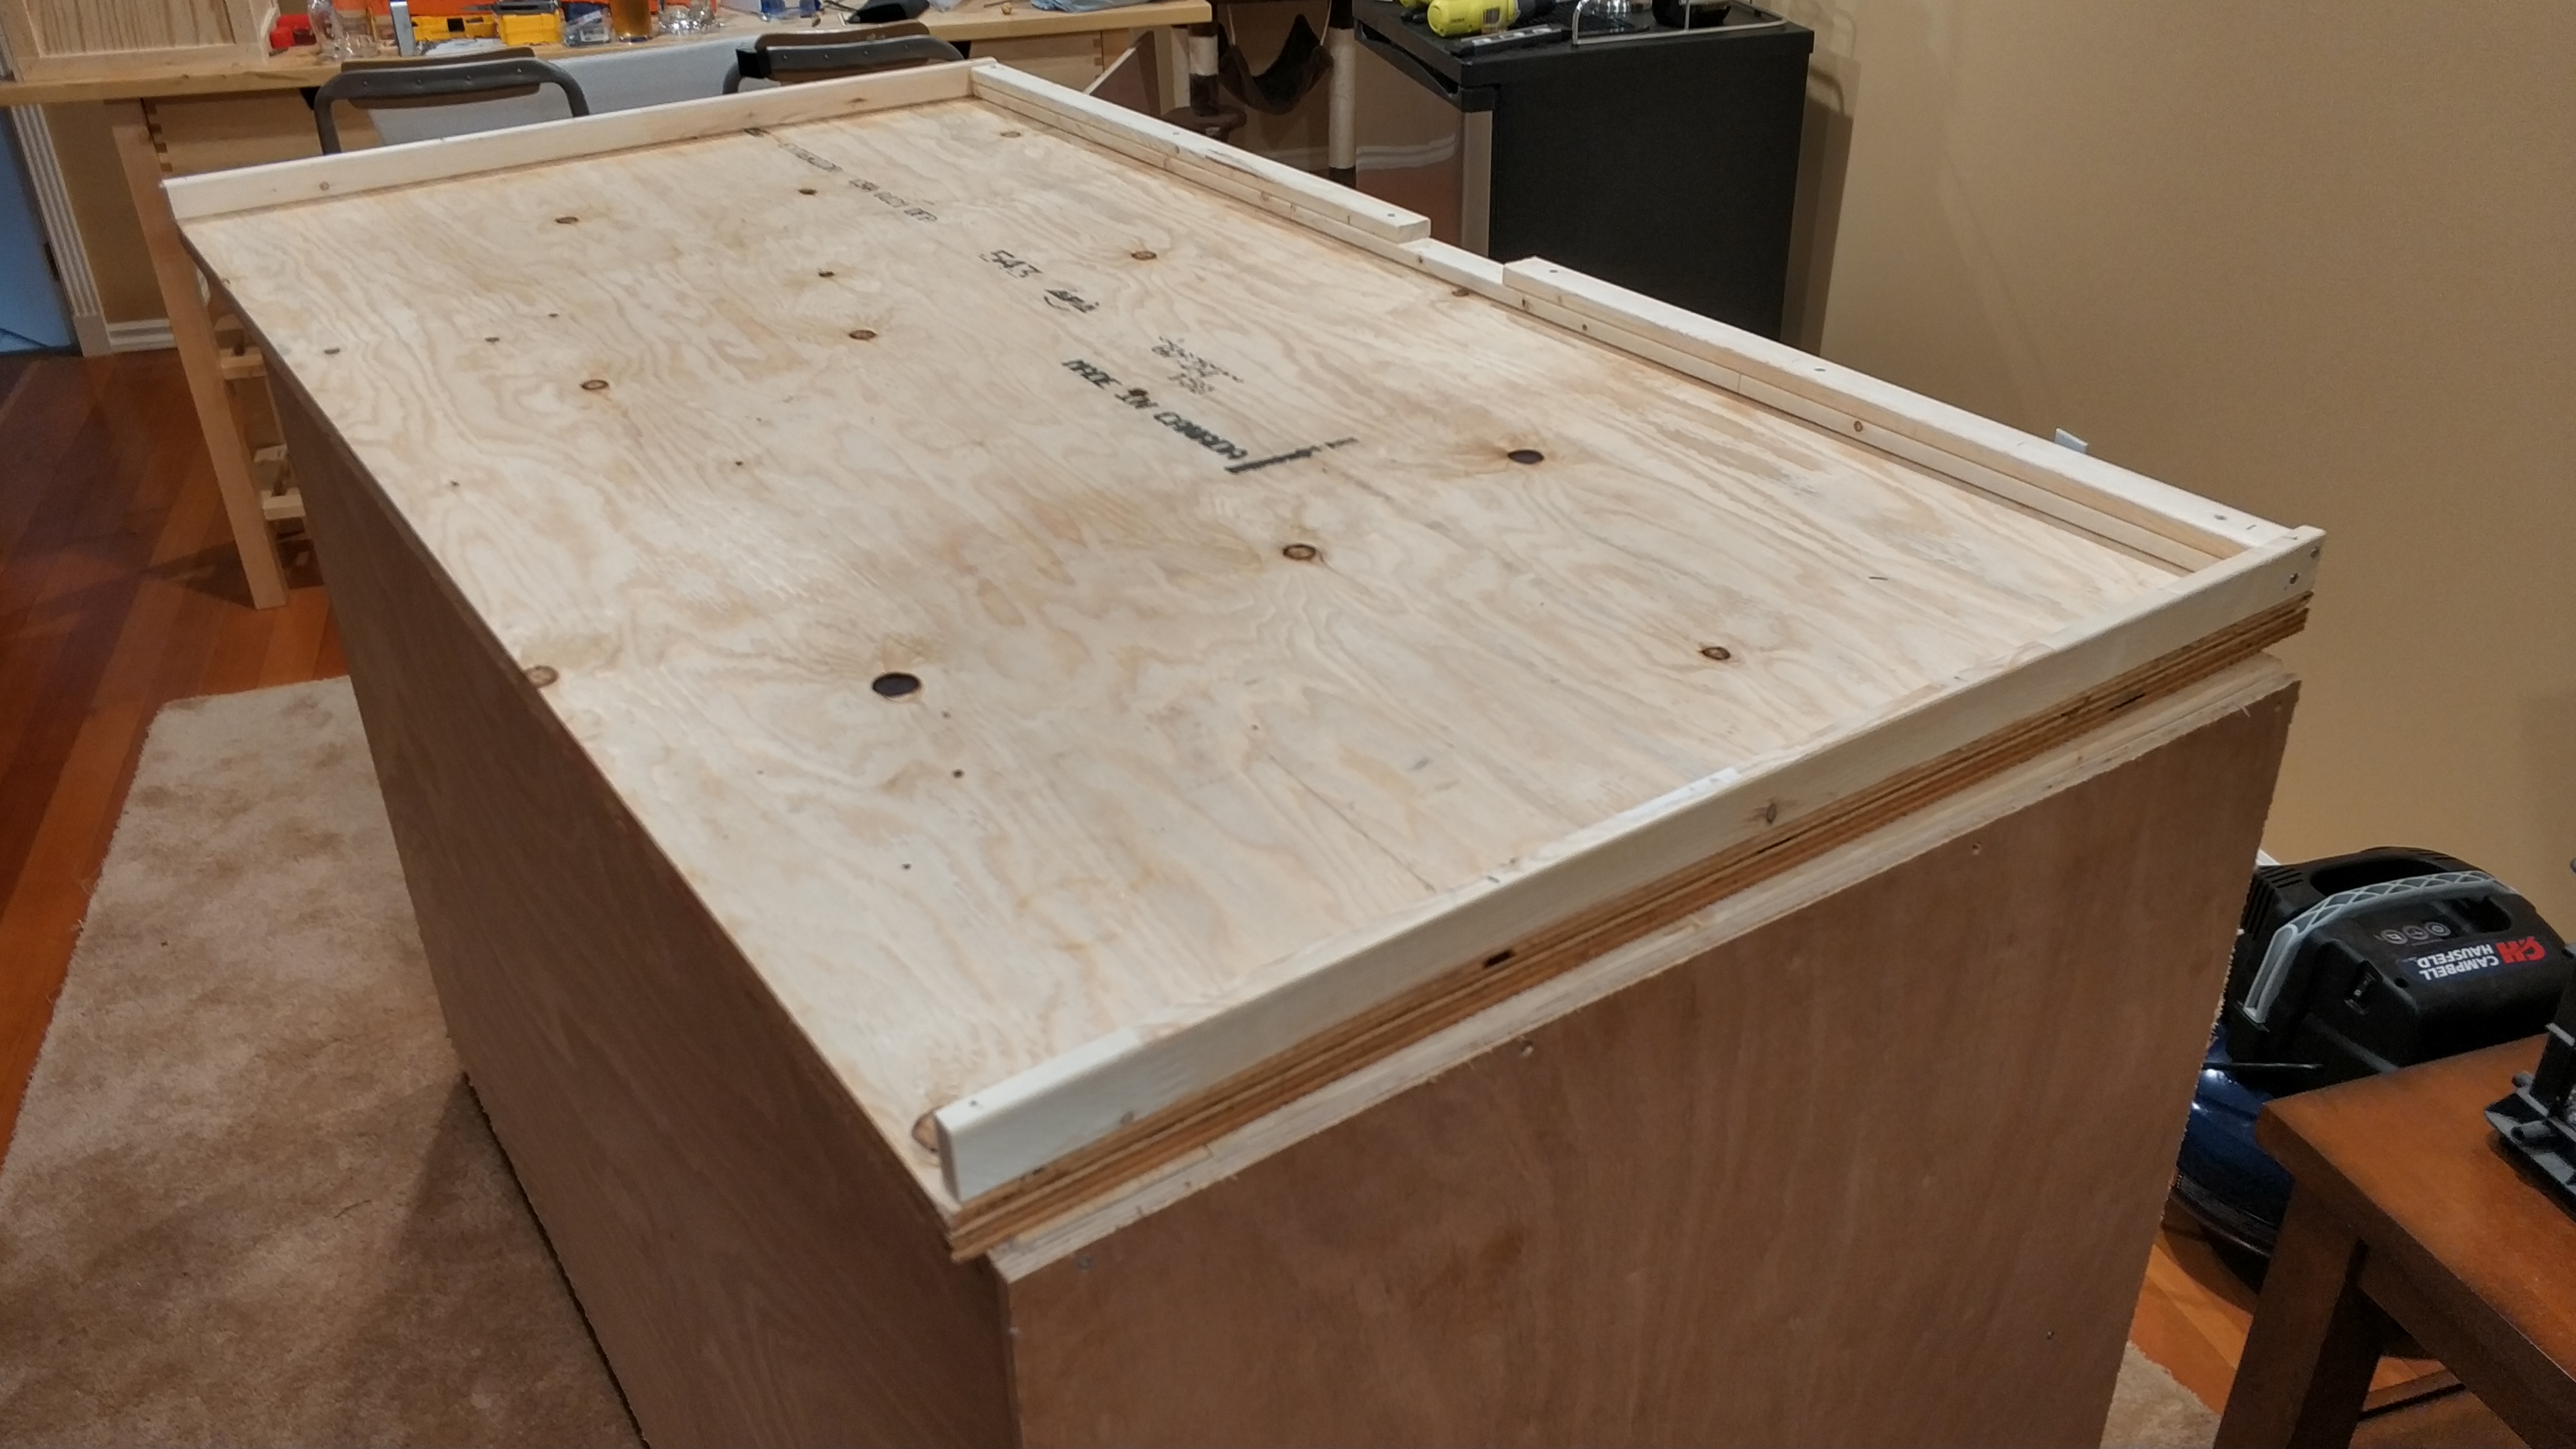
So some backstory. I have a 2 tap Insignia Kegerator which has served me just fine, but I've just been able to move into a house that the wife has let me take over the basement and do what I want with it. Obviously I need 6 taps of beer down there, so I began scouring over hundreds of threads on HBT wondering how I could go about doing mine. I figured I was coming high from success from another basement project (monster in wall fishtank) and I could certainly do this, it's not hard right? Wrong. Here's a running log with photos and some choice commentary at where I've gone wrong each step of the way.
 
tenor.gif
 
The first day we moved into the house I went and bought two freezers from Costco. Danby 9.6cuft-ers. One was earmarked for the project, and the other was for storing hops (and apparently my wife wants to use it for meat and stuff).

In all its glory.
mAzhK2Rl.jpg


Finding a couple old janky sawhorses in the garage left by the previous owner and a Dewalt Chop saw from the Bicentennial I set to work building the rib cage.

This is right before everything went sideways..
x62Vnq1l.jpg


I build the bottom part of the frame, probably twice, felt good about that I was actually doing woodwork and then had a beer and went at it the next day.
PIpevull.jpg


The next morning I began with more of the bottom reinforcement. I believe I took out those casters and moved them 3 or 4 times before I was happy with the placement. They are 2inch casters 2 of them are full rotation the other two do not rotate.
xkorxnCl.jpg


This is where I learned that having a square helped. Oh yeah, also a level. I bought them after this as I had to rebuild this a few times.
ggRNmgrl.jpg


Eventually I got the ribcage together, felt accomplished and told everyone I was nearly finished my bar. I was ridiculed.
g2EVRzTl.jpg


TBC....
 
About a week later I built up the courage to go back at it, somewhere finding some cheap ply to cover the inside of the ribcage to perform the first "is this thing actually going to fit inside of it" It did, and there was no need to hack my freezer legs and wheels off.

g7y6laBl.jpg


I headed out to the local wood store and decided that I would be building this out of Mahogany. One, because it was cheap, two because it looked nice. I picked up a bunch of 1x10 Mahogany planks and got to work again. I might have had a square by this time, and it came out still a bit off.

jPUitbu.jpg


I decided a shelf would be amazing here even though when I was in the wood store I was planning on two levels. I think I got lazy.
KI9hQ3E.jpg


It too fit inside the hole I had created
8tqiBMP.jpg


I then flew to Philadelphia for a conference and drank a whole bunch of beer there.
 
A few weeks went past and I headed out to the wood store again, asked them to cut nicely for me for the top and the outer skin of the unit.
I opted for 1/2" Mahogany on the outside, and a 1inch Plytopper for the lid, along with a 1/4" sheet of mahogany ontop of that in order to recess my drip tray properly. This is where I learned again that wood measurements on paper are not what they actually are in reality. I'll get to that fixup later on in the postings.

When I got the wood home, it was a cruel joke to find out that everything was not square and I had to take apart aspects of the frame to make it straight. I also didn't measure for proper overhangs for the plywood so ended up having a half inch gap at one of the corners. And to make it worse, the depth on one side was half an inch longer than the other. Not to worry, I figured it will add perspective, put the wood on as best I could and walked away feeling accomplished with way too many screws in the wood.

You can see the overhang and mess on the bottom right.
9tpSZlX.jpg


And of course the shelf isn't entirely straight, but neither was my cutting for the box either. The one inch plywood lid fit nicely though ontop. You'll also probably notice that I went back to my original idea of 3 shelves.

4GH7vEs.jpg


I built a small frame out of 1x2 on the edges of the 1inch ply to make sure the lid would always go down in the right place when getting ready to drill some holes in the freezer.
5EYuUIe.jpg


And of course when I drilled the holes it wasn't lined up properly, So, well I suppose I'll have to deal with that soon.
nOYGSlj.jpg


I just winged it with where I think would be good spots to drill into the one inch ply, then took it off and finished off the holes with a 3/16 bit. I found these threaded inserts on Amazon which looked beefy enough to be able to hold onto the lid, so I proceeded with getting them in, sort of, some got stripped, I got frustrated, eventually they all came together with 1/4-20 bolts. Originally I used 4 inch bolts but then scaled back to 3.5 inch bolts rather than try to fix it and wrecking things further.
mEfln2p.jpg


There is 1 rubber washer up against the inside of the lid, one fender washer, and one smaller 1/4 washer before the head of the bolt.
MdrFMir.jpg


I haven't mentioned it, but I royally screwed up with the wood in this phase. I'm to embearassed to talk about it, but those who see it, point and laugh at me!

TBC..
 
Last edited:
Feeling pretty confident about how things were going I had to go and vacuum the floor as apparently you are not supposed to be drilling and cutting on a rug (house rules?) and also went out and found some guy selling a cheap mitre saw on craigslist. Then I went to buy some trim.
I grabbed a whole bunch of Mahogany 1x2, and a bunch of 1x4 to make a small skirt. I also picked up some 1 inch x 1inch Oak outside corner trim to cover up the undermeasured plywood mess I created.

This is probably the nicest as the picture was taken so far away as you can't see how badly I blew the mitre job.
IOpb4mY.jpg


This side of it shows my "handiwork"
G2Gif4Z.jpg


TBC
 
Fast forward a few weeks and I had this crazy idea that I was going to mount a monitor into this bar to show a digital tap list. I found a LG 34" ultrawide for a pretty reasonable price, ordered some cheap mount from aliexpress and waited for it all to arrive. Once it did, I started building the top tower. Amazon just tells me today the monitor is $100 cheaper. Drat.

A67DtiJ.jpg


A blurrycam of the frame itself:
JWet1ui.jpg


A makeshift frame as the mount that came from Aliexpress wasn't what I thought, and I obviously didn't think it through good enough when 1 click purchasing. I'm using 1/4 -20 bolts on either end along with those threaded inserts again to hold it into place.
xlsNvlJ.jpg


A front shot with a test fit of the monitor
fpeSZ1K.jpg


Side profile
IdBlHKY.jpg


From the back
qK8WoMf.jpg


I sure hope that the power automatically turns on when there is power to the unit as the button is not accessible.

TBC
 
I then figured it was time to drill some holes into the 1/4", the 1inch ply and into the freezer lid. I sort of guessed where a good spot would be and started going at it with a cheap 3.5 inch hole saw.

C1czCpM.jpg


Then the drill overheated and the battery never worked again.
gHXtubT.jpg


Then I broke the holesaw
t9Ijdxf.jpg


Amazon Prime 2 day delivery definitely has never done that for me here, so 5 days of feeling sorry for myself went past before I could finish off the rest of the holes.

TBC
 
I had held off for a while going to get more wood cut because the wood shop was out of 1x2 mahogany and when I bought the last bit it was all bent and not straight. No returns at the wood shop is a real shocker, but rather than sitting and doing nothing I went and got more plywood and a 1x8 sheet for the taps to be mounted to.

Again, I had to take apart the frame for the tower as it wasn't straight, but this time I got most of the cuts right. Oddly enough one of the cuts didn't make it back home to me for the top so I had to head up the next day and cut it out of some leftover 1/4 mahogany. Still to this day the mystery of the missing piece of wood gets told around campfires...

fw3Pq6j.jpg


I actually hated the look of the 1x8 and yes I screwed up on the measurements on that one as I wanted a bit of overhang on the sides, so went the next day and got some 1x10, the following pictures will show it. I bolted the 1x10 ontop of the 1x8 to make it stick out a bit more.

LjttfPV.jpg


I also put some more of that 1x1 Oak trim around the corners to hide more of my mistakes, adding way more brad nails than I should have, but that's what filler is for right?

That's the big photo push for this thread thus far, the next posts will come in as a trickle when I get further along in the build.
 
6tap coffin???? Huh???
[emoji33] It’s too early for that! I have bills to pay and dependents to support and raise! [emoji12]
sorry man; I already drank a few pints in your honor. Give the wife my condolences.:D

@sleizure might not be top notch workmanship but props for taking it on. Next bar will be even better. Cut twice, then measure once, then head back to the mill for more wood.
 
One more for today..
The other day the replacement holesaw came in so I went to finish off the holes in the top lid and also the freezer lid. My wife came outside and was doing something and came by the garage. She seemed interested in what I was doing so I pretended I was doing amazing stuff hoping that she'd look at me like she once did before I took over the basement with brewing beer. I showed her the one hole and then started driling into the bottom of the lid only to punch through the plastic and the foam to metal on the other side. OOPS! I drilled through one of the holes used for attaching to the 1inch ply. I'm an idiot. She laughed.

I had to punch a few more holes into the lid as I'm concerned about stability at the tower is ridiculously heavy. I added two more holes and moved two of the holes on the sides as they were a) too close to the big holes I drilled, and, the idiot move hole which I thought it was probably best to just patch over that area entirely.

See my mistake here:
kIysODC.jpg


At least all the holes match now:
izZsYGy.jpg


How it looks today - I'll get to the drilling of the tap holes and that debacle a bit later.

Apparently the wood shop is going to have 44ft of 1x2 in tomorrow and I'll spend my weekend trying to mitre again and finish off some of the stuff that is outstanding. I still have a long way to go (and a postal wait!). Also hoping to source out some acrylic for to protect the screen as well.
 
Today out of all the days just sort of flowed. I was able to get 55ft of 1x2 Mahogany and a 34.5x14.5 acrylic sheet cut the day before, woke up feeling moderately good and went at it. I feel that I'm completed all of my woodwork now and getting ready to move onto the finishing, staining and all the other stuff that goes on after this.

I used 1x2 on the bottom trim and this interesting 1/2inch oak transition piece to tidy up my cuts for the monitor. I originally had wanted the transition to face the otherway, but felt it would be too much, minimal better in this case perhaps?
YQ71Eull.jpg


It's not entirely how I envisioned it overall, but I didn't really have a plan anyways, I was just reading forum post after forum post and made mental notes and when I got to that point just either took inspiration from it, or flat out ripped it off entirely.
DTrBjS7l.jpg


My mitres this time to make these 3 trim boxes on the front were smoother than I thought. I learned a few things with the saw and built some sort of routine up with the nailer and level and had this done in under an hour. I called my wife down, and for the first time she said wow. Definitely makes it look much different.
9303oqFl.jpg


kfk1mErl.jpg


Heres a picture from the top down, I put on the 1x4 on top of the surface for preparation. Again this one went fairly smooth, changes the look entirely.
IW8kMIVl.jpg


If you are wondering why my trim was up so high, this is why. I plan on putting 3/4 inch hardwood on the surface. That drip tray we'll get to that, I have a feeling it's going to give me problems in the future.
HaiIBXml.jpg


And another against the trim
n1C2yn0l.jpg


Final shot of today:
xVAH6Fal.jpg


I lifted the tower out to the garage and going to give it a good sand to get the wood filler off and going to attempt a stain. I chose Red Mahogany as the stain colour - it's rather dark. Let's see how it turns out! We're in a long weekend here in Canada, so I'm trying to get as much as I can done especially while the weather is in high 20s early 30s. The rain this summer has been a bit offputting for doing outdoor work.

I have to say it felt REAL nice to put away all my tools and clean up my workshop and sweep the garage today. I am seeing progress.
 
Are you really using mahogany? Not Douglas Fir? You my friend are a riot. I’ll stay away as long as you are using power tools. Call me when it’s beer thirty.
Cheers
 
I headed out to the local wood store and decided that I would be building this out of Mahogany. One, because it was cheap, two because it looked nice.
Just remembered I wanted to ask earlier, where the heck do you live that Mahogany is cheap?
 
I live on Vancouver Island in the Comox Valley. I too had always thought Mahogany was out of my league, but for some reason it's cheaper than Aspen, Birch, and Oak everything else. It comes from Windsor Lumber, which is a chain across Canada where they may have similar prices.
 
Vancouver Island, that’s why your Amazon is always late. I just moved off Lopez, on the American side, and ours always ran a day or two late. I used to be able to look out and see Victoria in the distance.
 
Outstandig thread! If I were 1/2 the wood worker you are I would build and post! HAHA, but seriously folks, it actually looks good, I like the fish tank too!

cheers buddy
 
Riding off my successful morning I decided it was time to put some stain on. I chose Old Masters Red Mahogany and got to staining the tower in the garage. It was 31degrees out and wiping the stain on you could almost hear the braincells popping. My neighbour found me melting on the floor of the garage and brought me a (storebought) beer, which helped.

nwFiqCkl.jpg


R9ATGeIl.jpg


When I stained it, I noticed that the colours were off on the mahogany to the Oak, I expected it but I didn't expect such a stark contrast. To say I was disappointed wouldn't be the right term, as I was trying to be all problem solvy, artsy, making up excuses on how I could make it look good and just say that I designed it to be two-toned. I finished the beer, got another, and decided to read the instructions on the can before working on the top which almost looks like a beer monster.

4Lga6oNl.jpg


The can said to shake well before applying stain, so I did, and this is what happened..

ggwY6djl.jpg


I had a good laugh after all it took was a shake and proceeded to apply 3 coats of stain to the rest of the tower. The colour evened out nicely. I have two flaws from my filler from screw holes where the taps are. I'm still trying to figure out what to do with that, I slapped some more filler on it today and will sand it down or maybe even rub it down with more stain and use a cloth to even it off. If it doesn't change the colour and blend in I may have to ... try a lighter colour of filler, or stain the top a bit more, as out of all the pieces I want that to look the best.

Here's how it looked after 3 rubdowns.
X2mL1Eal.jpg


Apologies on the dim / wacked out lighting.
5obdJTbl.jpg


Fast forward a few days - it was hot out and I decided to drink a lot of beer in a tube going down a river to cool off and get out of the garage. There was no woodworking plus my head needed a break from huffing all the fumes, and I was out of stain. I headed down to the wood shop again and picked up another bottle and also some satin sealer, which I'll apply after all of this is done and got to work on the main coffin. Here's how it looks after one application of stain, there are some issues with taking the colour where I did extra sanding, still working on a solution to that.

wsB0X47l.jpg


Snap crackle pop goes the brain after that one, and after 3 hours of drying I went at it with the 2nd coat. Planning on getting up early tomorrow to do one more coat and make the call if thats enough. It's scheduled to rain in 3 days here so I need to get moving on putting a clear coat on the coffin, the top can wait as its still in the garage. Moving the coffin sucked by the way, My placement of wheels is not optimal. Oh well.

qO1jKNel.jpg


More to come hopefully in a day or so.
 
Just wanted to add, varnishing/sealing sucks. I have made a mess out of the two sides of the coffin. I sanded off the front face of the tower and some of the lid today and in stain matching hell. no photos. just shame! Let's see what tomorrow brings.
 
Yeeow - getting close to the finish line here, but in actuality I have a tonne more to do. I finished the staining and the sealing, but overall I'm not impressed with the results. I put too much stain on which removed some of that amazing grain look and well I kinda liked it. Too late now, I'm not interested in stripping and resealing, so maybe in a few years. All of this is learning for the next project I do with wood, if ever.

After many days of waiting for paint to dry (ha) I was able to get the freezer lid back on and threw in a couple more bolts for good measure, visions of the lid ripping off are in my mind after realizing that the topper is over 80lbs. Apparently the bolts I used (1/4-20) and inserts can handle 600lbs, but .... I built this, and nothing is safe.

9VJUZhol.jpg


I then got to work on putting together some plumbing pieces. This picture shows from the top down a 4inch to 3 inch PVC Reducer, with a PVC pipe in the middle, along with a PVC 3" Coupler. The 4 inch side goes into the freezer lid, where as the coupler sits in the top of the wood.

gFcuD7Nl.jpg


My shanks arrived, sort of. I had originally ordered some taps from Aliexpress and the shanks that came with it were only an inch and a half long, not enough whatsoever. I ordered some from Amazon, and while they were shipping found some at the Canadian Homebrew Shop I order from online.. Both arrived within days and when they came I learned about bore sizes! 3/8" from Amazon didn't fit. 1/4" from the Homebrew shop didn't fit, and then I found out I've got 5/8" taps. Oh boy. So off I went to Aliexpress and ordered 6 shanks and dealing with the return process. They came quicker than expected and were in pretty reasonable quality with the exception of one that is damaged. Still waiting on a response on it.

8CoAmhRl.jpg


The damaged one - I bent it back into a bit more round configuration with some pliers, but I still want a new one.

eyf6JfLl.jpg


Then it was time to get the shanks in. After staring at them forever I probably put them on wrong with the various washers and plastic pieces they came with, so maybe I'll have to take them off again. You can see here that I'm not so awesome with drilling holes and they are off a bit in height. Drill with markings not with your eye! Especially while chugging homebrew.

J5EdDnYl.jpg


A couple weeks back I still thought that 4" shanks weren't going to fit so I got all messy with my drill (a new one) and a holesaw (a new one) and some other wacky bit that cut 2.5 inches I found on Amazon in order to be able to still tighten the shanks if there was limited space to do so. In short, I made a mess, but I believe it will actually work out as my shank ends are 90 degrees and otherwise would have pointed right into a 2x4. Behold the mess.

8c5wfPml.jpg


Then I attached the taps..

ALtoRoGl.jpg


At that point it was time to get the Acrylic 1/8" sheet I ordered. Obviously I measured wrong, so I had to take a sander to the wood inside the frame and to the acrylic to get it to fit. It was Sunday and the store wouldn't be open and I wanted the thing in.

9nhwINdl.jpg


Lifting all the pieces back to my basement was a bit of a challenge but surprisingly attaching the lid onto the freezer was easier than I expected. I thought it would be a very strong spring that would be tough to deal with but I suppose I got a lucky freezer that won't take someones eye out when they pop off. I designed some brackets and printed them in PETG on my 3d printer to hold down a wifi enabled powerstrip inside the cabinet.

R1i4NJGl.jpg


Then I got to work attaching the strip, a raspberry pi, and an Inkbird ITC308 inside the cabinet.

Pm0L6sfl.jpg


Then I had to take everything out and wash the acrylic as it was dusty to put the screen back in. I had some fiddling to do with the Raspberry PI to make it fire up under 2560x1080 QHD resolution but here we are as it looks today.

RbvIoRzl.jpg


I still have quite a bit of work to do, I need to make sure everythings tight, mount the top to the lid properly, find some hardwood floor to surface the top so I can make my drip tray stay flush, somehow find a way to attach a Co2 manifold to the inside of the freezer, and run the beer lines. I'm waiting for parts to come in the mail, hopefully Wednesday. Maybe I'll be able to pour a cold one on the weekend?
 
Today out of all the days just sort of flowed. I was able to get 55ft of 1x2 Mahogany and a 34.5x14.5 acrylic sheet cut the day before, woke up feeling moderately good and went at it. I feel that I'm completed all of my woodwork now and getting ready to move onto the finishing, staining and all the other stuff that goes on after this.

I used 1x2 on the bottom trim and this interesting 1/2inch oak transition piece to tidy up my cuts for the monitor. I originally had wanted the transition to face the otherway, but felt it would be too much, minimal better in this case perhaps?
YQ71Eull.jpg


It's not entirely how I envisioned it overall, but I didn't really have a plan anyways, I was just reading forum post after forum post and made mental notes and when I got to that point just either took inspiration from it, or flat out ripped it off entirely.
DTrBjS7l.jpg


My mitres this time to make these 3 trim boxes on the front were smoother than I thought. I learned a few things with the saw and built some sort of routine up with the nailer and level and had this done in under an hour. I called my wife down, and for the first time she said wow. Definitely makes it look much different.
9303oqFl.jpg


kfk1mErl.jpg


Heres a picture from the top down, I put on the 1x4 on top of the surface for preparation. Again this one went fairly smooth, changes the look entirely.
IW8kMIVl.jpg


If you are wondering why my trim was up so high, this is why. I plan on putting 3/4 inch hardwood on the surface. That drip tray we'll get to that, I have a feeling it's going to give me problems in the future.
HaiIBXml.jpg


And another against the trim
n1C2yn0l.jpg


Final shot of today:
xVAH6Fal.jpg


I lifted the tower out to the garage and going to give it a good sand to get the wood filler off and going to attempt a stain. I chose Red Mahogany as the stain colour - it's rather dark. Let's see how it turns out! We're in a long weekend here in Canada, so I'm trying to get as much as I can done especially while the weather is in high 20s early 30s. The rain this summer has been a bit offputting for doing outdoor work.

I have to say it felt REAL nice to put away all my tools and clean up my workshop and sweep the garage today. I am seeing progress.
That fish tank looks great!!!!
Keezer's also lookin really good too!
Also very jelly you get Mahogonay so cheap!
 
No pictures this time around, just a bit of an update of what's going on in my world. My phone fell in the river last week and all my photos are locked on it. The bag of rice trick worked for a day, but not enough for me to get the photos off. Switching rice brands.

My beer lines came in, and I went for 15 feet per line of 3/8 - Is it enough? We'll see. I also received my gas lines and spent a few hours crimping the connectors on, and proceeded to get them attached on the inside of the tower. I wrapped the inside of the PVC pipe with some ultra reflective sticky insulation in hopes that I'd keep the beer lines cool, even though there is a good 2 inches that stick out to the faucet. Oh, I also got my 4 inch shanks, and they fit, better than I expected.

The project sat there in the basement looking at me as I knew the next steps were going to be the toughest, so right now I'm sitting in the pit of despair.

First issue. Lifting the lid, man is this thing heavy - No the bolts from the freezer lid haven't pulled through, but I can't seem to get the lid up all the way, there is some resistance, and it seems like I have built the frame too long in the back and it is getting caught on it. I hacked off half an inch on either end of the top frame and its moving a bit better, but still not perfect.

Second Issue, when I lifted the lid, the freezer started to move. I nearly lost my father when he was out when we were doing the test lid as it slid out the back and nearly pinned him against the wall. I've since solved the movement issue by building a brace on the back and also blocking it up with 3 2x4's in 3 different areas.

Even still, when I lift the lid high enough the freezer lifts up about 5 inches, so there is something terribly wrong. It even happens when I have it filled with kegs. My muscles are sore.

I have a 6 valve manifold for my Co2 I was trying to install and didn't want to drill, so opted for magnets. I epoxied the magnets to the inside of the freezer and on the inside of the manifold, yet when I tried to bring them together, it seemed like the polarity was different, a wasted attempt I would guess. I'm still at a loss on how to mount my manifolds.

Regardless, I wanted to see how the faucets worked out, and fired up the inkbird and let things cool down and connected the disconnects to the kegs. 5 out of 6 of my kegs were off tasting, full of yeast flavours. Something has happened in my brewhouse and I'm not sure what, but that was a bit of a deflator. My wife went to go buy me a 6 pack from the beer store as I was hoping I could at least get a good pour.

So finally - I decided to move the old 2 tap kegerator out of the way and position the 6 tapper against the wall. As I was doing that I heard all sorts of creaking and banging, only to find my casters were disintegrating with movement. I guess 2 inch casters weren't strong enough and all the bearings are on the floor. Worse, I didn't notice and left a big gash in my floor.

So.. heres the plan. I'm going to stop sounding like a country music song and get things done.

First off, going to switch to 3 or 4" casters. Any advice on if I should be going rotational or static casters? I'm almost thing I might want to go with 6 just ... because. I think the whole unit is over 600lb.

Second - I'm going to go with a linear actuator to lift the lid. I can just see myself being decapitated with this thing propped up with a 2x4. in fact, the 2x4 i use slipped out yesterday and the whole unit came crashing down. I wasn't there, so that's why I am still typing.

It truly does seem like the last 5% is always the worst, and I'm feeling pretty down about the whole thing, especially when my kegs have gone sideways for some unknown reason as well. I'm going to take a break for a bit and go at it with a clear head. I've missed something important here but can't quite grasp it.
 
Last edited:
Sidestepping the obvious about needing some keezer viagra, clearly you need to find what is binding/dragging. Lid should not lift freezer, esp when filled with kegs.

Keezer Viagra is going to be the name of my new swing/punk fusion band. [emoji38]
 
Alot of time has passed since I've been able to give an update. I was down for the count for most of September as I put an axe through my foot (!) and was waiting for parts to arrive. I also dunked my phone in the River and lost a few photos, but this one has the goods.

I received 8 new 4 inch casters in the mail that work much better than the 2 inch ones. The downside to this is I had to take apart the entire unit as it was far too big and heavy to flip on its side put together. I had built these braces on the back due to the freezer moving about (looking back I should have made the frame flat on the bottom) so getting those off and back on later on perfectly was fun.

6RBgxeXl.jpg


Lifting off the serving part of the coffin blew my back out, so this sat on the floor for 2 weeks:

Zi1lDExl.jpg


The new casters are spaced evenly know, where as before they were in just any old place I decided to put them. I used big thick lag bolts to get them into the wood as the screws I used last time snapped easily. All the casters are all 360 degree rotational and are very smooth. Well, not so smooth fully loaded with 6 kegs but, better than before.

fPyoCx2l.jpg


Next I had to figure out why the Keezer was lifting when I lifted the lid. I actually damaged the freezer pretty hard with lifting it up and I'm surprised I was still able to use it afterwords. Rookie mistake - since the freezer is inside the coffin and the lid and frame is longer than the freezer, and the hinges are on the freezer it made a tonne of sense that I was jamming up wood on wood causing it to lift. All the nice work and care I did with wood went out the window and I started hacking away as nice as one could with a sawzall at the frame and even some of the finished wood (!) Nobody is going to notice it, and I will hang a piece of dark brown leather if someone does notice the gaps. I felt pretty sheepish that I missed this important spot, and kicking myself as I think the whole unit is a couple inches too deep - well, here's how I could have avoided it by placing the freezer as close as possible to the back.

Here you can clearly see where the frame was catching the lid:
Et3j9d9l.jpg


cq1zevHl.jpg

Bax65DDl.jpg


After I had smooth lifting with no lifting of the freezer I went and got fresh bolts for the hinges, and got to work at unpacking this linear actuator I picked up on ebay.

It's a 30 inch model apparently good for 750nm of force, which I figured oughtta lift the lid.

rJ0jZmYl.jpg


It operates at 12 volts, so I ordered a power supply from ebay, printed up some mounts on the 3d printer and got to work at putting the brackets first on the inside top of the lid, then the bottom. I had no help so most of the day was spent fiddling around trying to lift things and keep them propped up with 2x4s

g8bD2GUl.jpg


I somehow lost my DPDT switch to use so i ended up wiring the thing together and twisting wires together to see if my calculations were correct on the mount placement. Seemed ok! Eventually a couple of days later I found the switch, only to find out I ordered a non momentary one, so had to order a new one. I have a fixed switch in place now, which actually works out pretty well. When the other arrives I'll make my mind up on which one I want.

H5u4Knml.jpg


I put 6 kegs of beer in it closed it down and have been drinking out of it for the past week and now prepping for the next stage, to build a motion detector to automatically turn on the screen when someone is in the room, and I still need to source out some hardwood flooring for the surface of the lid, finding unfinished flooring is harder than I originally anticipated, but I have patience on that part.

I am half an inch short of being able to put a 15lb Co2 Canister inside, too bad, I'm using a 5 right now but intend on upgrading to a 10 shortly.

More to post when I get somewhere with the surface, in the meantime, I present to you... KEEZER VIAGRA!

 
Back
Top