• Please visit and share your knowledge at our sister communities:
  • If you have not, please join our official Homebrewing Facebook Group!

    Homebrewing Facebook Group

3-in-1 "Boil Kettle, Jacketed Chiller, Conical Fermenter" by Brewha

Homebrew Talk

Help Support Homebrew Talk:

This site may earn a commission from merchant affiliate links, including eBay, Amazon, and others.
A lot if it goes to I simply like the system and Nathan has been great.
I looked at the link provided, and I find the jacket a simpler consept than the immersion coils.

As an engineer simpler tends to work out in the long run on things that cannot afford system maintenance.
 
A lot if it goes to I simply like the system and Nathan has been great.
I looked at the link provided, and I find the jacket a simpler consept than the immersion coils.

As an engineer simpler tends to work out in the long run on things that cannot afford system maintenance.

Oh interesting, as an engineer also, IMHO the use of the immersion coil is a (much) simpler approach...cheaper to build...easier to maintain quality....no issue with over-pressurizing the jacket and crunching the fermented (see thread on this forum)...replaceable......easier to fix if a leak/problem...I guess like beauty, simplicity is in the eye of the beholders...

totally respect your opinion and not trying to be difficult...just thought it kinda interesting, I had the exact opposite view...that is what is great about the forums, diversity of opinion....

How do you like your Brausupply unit? I too looked at them before settling on a BIAC from Brewha.
 
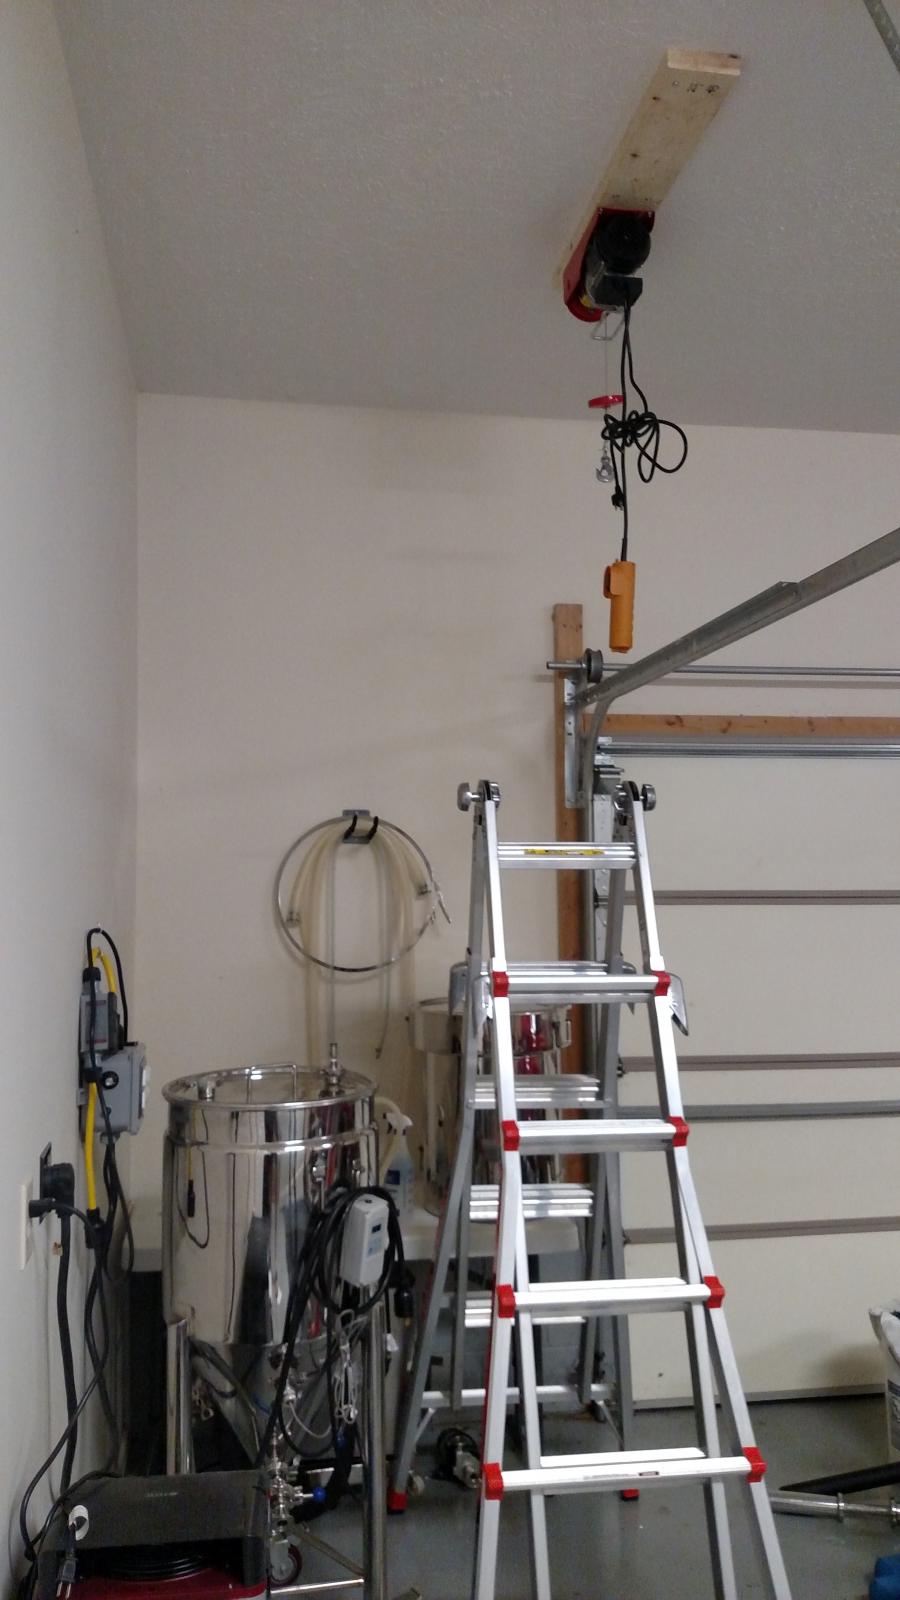
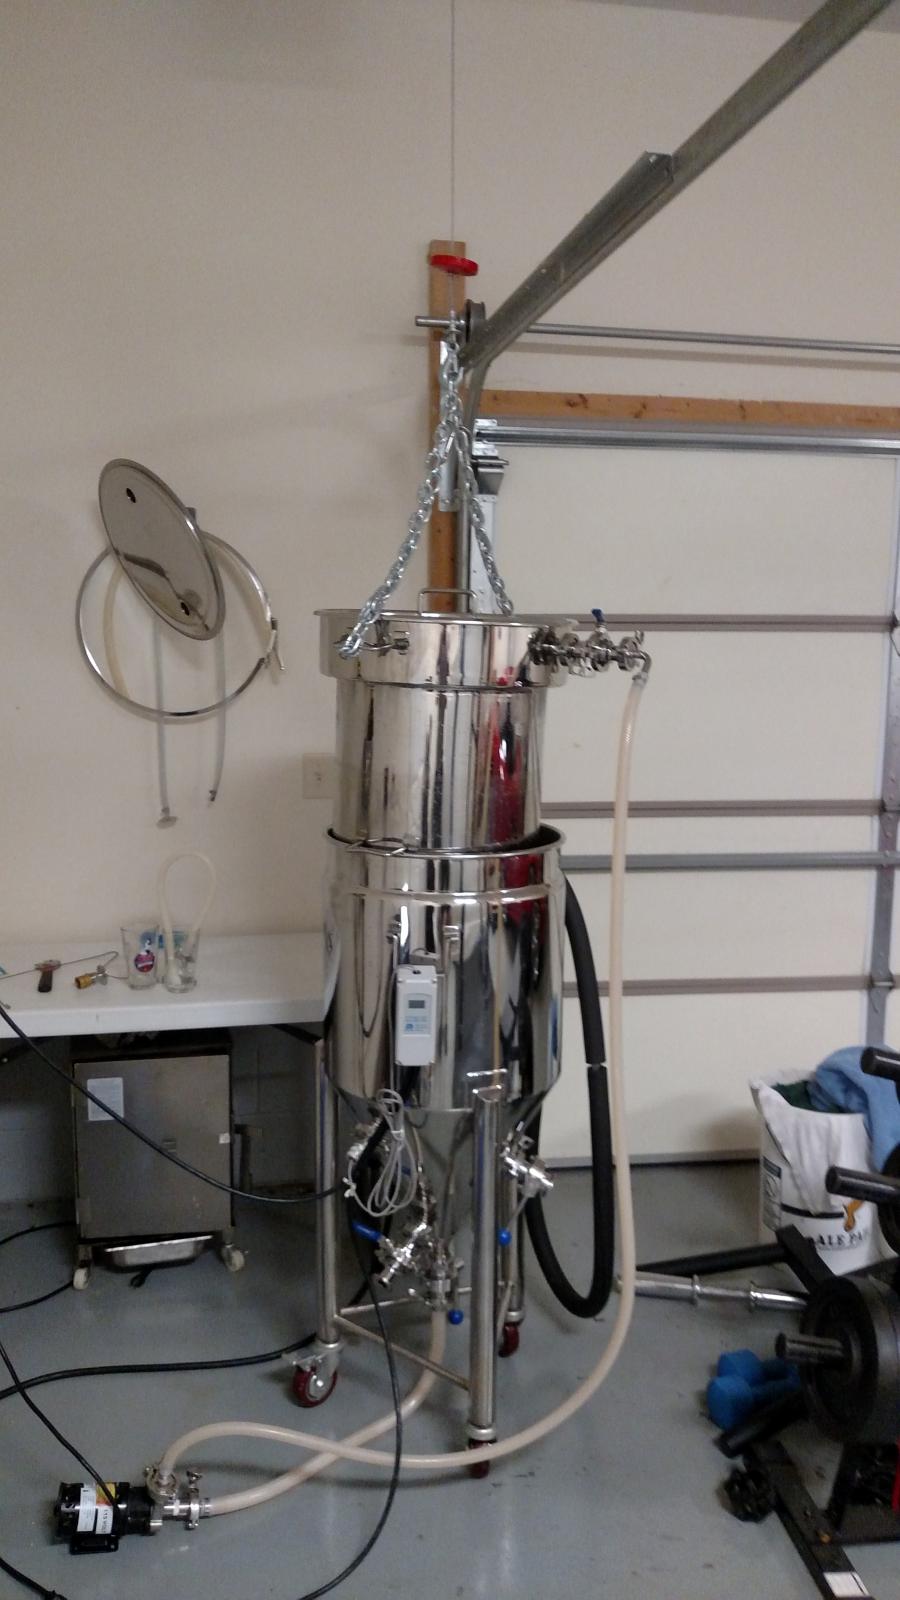
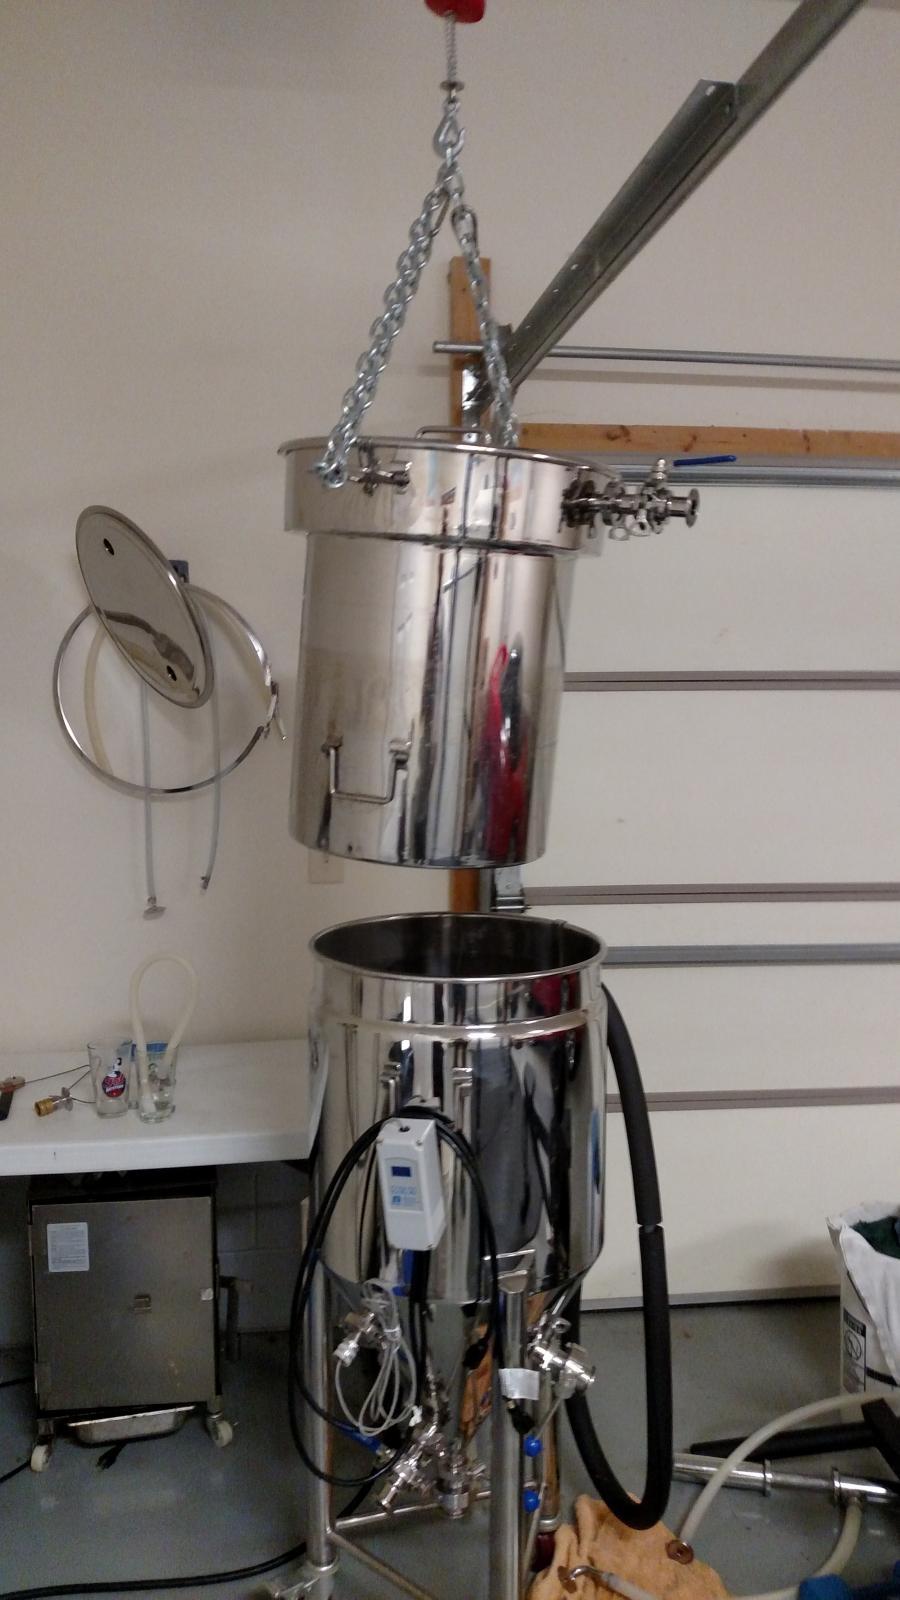
Newest addition - Harbor freight electric hoist. Running a sale and got it for $70. Looking forward to not lifting that mash tun out anymore.

IMG_20150918_202529754.jpg
 
It's the medium. I figured being a fairly athletic weightlifter that I could handle the mash tun myself when I first got it....nope :drunk:
 
Cuda, I think that is the same hoist I have as well as the same ladder :mug: It looks like you have a lot of room to move around in your space.

Check out the post by JB_Brewing 2 a few pages back. He has a nice track system so he can move his hoist around. I plan to do the same with mine before my next brew session.

I'm so pumped to not have to wrestle that mash tun up with a helper and be fully solo once again! A track would be nice but I think mine should be pretty much good. My setup is in the corner opposite of my power rack and my NSX parked on the other side, plenty of room to get around.:mug:
 
Made the day just that much easier. Finishing up the boil on my Westvleteren 6 clone

For comparison, here is my brew space. If I were doing my house over again, I'd have a brew space in the basement with a big-ass sink! I do roll it out when I need to use my hoist and the 3rd slot in our garage is full of my beer and wine making stuff. So, I can't complain too much :mug:

20150207_181812.jpg
 
The beauty of the system is that's all the space you need! Couldn't be more happy with this setup, and now with the hoist its truly the easiest system ever.

The one thing I am missing like you mentioned is a big ass sink, but rolling up the garage door and spraying everything out in the driveway with the garden hose isn't so bad either :drunk:
 
I've noticed that on my small BIAC where I do not have contol over the heater (on full or off) it can easily scortch. This is especially true when just starting the mash because particles fall through and sit on the heater and may burn. And going with a lower mash volumn to compensate for the lack of grain absorption can also cause the level to go too low during recirculation and expose the heating element whish will then scortch in a few seconds. I just ruined a batch with some flaked wheat this way when the mash stuck a bit. I'm going to get a control for the burner, but wondered what others were doing with their heater control during mash and boil. I will start turning the heat off until the grain lays a bed and will probably not go full wattage on the boil and instead ramp up a bit. I think the extra false bottom is a good idea as well. My LHBS has their mill set a little fine for the BIAC so this may help.

As for clogging the chugger, I manually vorlauf a few times with a pitcher before hooking up the pump. Learned that the ard way on my first batch.

For sparging, I ramp up my initial temp to about 175F-180F with an almost full vessel without the colander. Then run out down to my mash volume into an old insulated cooler mash tun for sparging water. When I drop the cold colander in, it pretty much settles to my strike temp. I do a mash out to 168F to get everything a bit thinner (20mins) and then sparge very slowly. I get about 80%. Hit my SG pretty consistently.

I would not recirculate the mash with the colander up as this seems like it could lead to oxidized wort too easily.


Just wanted to follow up on this issue.

Even with an element controller I was still having some scorching issues. After working with Nathan on this issue, I ended up swapping out the original small BIAC's higher density element with a lower density foldback. Nathan was a big help on this and has since changed the default element to the foldback on the site, so it should not pose an issue for future purchasers. Again, great service.

Since the foldback, I have had no issues.

Pics of the two different elements for completeness. Made a huge difference.

View attachment ImageUploadedByHome Brew1442879150.160213.jpgView attachment ImageUploadedByHome Brew1442879172.036798.jpg
 
Just wanted to follow up on this issue.

Even with an element controller I was still having some scorching issues. After working with Nathan on this issue, I ended up swapping out the original small BIAC's higher density element with a lower density foldback. Nathan was a big help on this and has since changed the default element to the foldback on the site, so it should not pose an issue for future purchasers. Again, great service.

Since the foldback, I have had no issues.

Pics of the two different elements for completeness. Made a huge difference.

View attachment 304716View attachment 304717


Glad to hear Nathan was able to work it out for you.
 
has anyone figured out the ultimate water to grain ration for best mash efficiency in the medium? I can get around 70% but I think I can do better.
 
has anyone figured out the ultimate water to grain ration for best mash efficiency in the medium? I can get around 70% but I think I can do better.

In my quest against scorching I ran thinner mashes (1.98 qts/lb which was damn near capacity for me). What I found was that this raised my efficiency, but it cost me time to get the conversion. It seems a double edged sword. The thinner mash worked better with recirculation and lautering and you run less risk of exposing the element, but I got a higher than anticipated efficiency (higher OG by +2-3 points, which you can just add water) and also a lower FG (-2-4 points) due to the wort being more fermentable (not good for a malty beers). The thinner mash also took ~30m more time to get the conversion, so I am not sure it is worth it. I am still dialing this in with the rest of my system, but I will lean more to only a slightly thinner than normal ratio at about 1.5-1.7 in the future.

Now, at the same time with this I am also dialing in my mill gap. I borrowed a mill to try out and this was better (at 0.045), but this mill was pretty inconsistent. I will get a better mill next time.

My efficiency (with a very slow recirculation and lauter) was super high in the beginning (88%), but the mill was too fine. Opening it up to 0.045 (which I think was more like 1/2 at 0.045 and 1/2 at about 0.03 on this inconsistent mill, sigh) dropped me to about 83% with the thinner mash. My guess (and what I will attempt next) is a good 0.040 crush, a "slightly thin" grain ratio at say 1.6 qt/lb and a temperature raise of 1-2F to compensate for the higher fermentability will be around 80%. I am hoping this gives me the best of everything (thinner w/higher temps for faster recirculation and good efficiency). My goal is to dial it into the 75-80% range.

My initial attempts were based on this: http://www.brewersfriend.com/2009/03/22/mashing-thick-or-thin/

He does not mention higher fermentability, but this is what I saw and also what I am reading of Palmer (http://www.howtobrew.com/section3/chapter14-6.html). Seem it may have to do with a slightly higher pH of the thinner wort which will favor alpha amylase.
 
Thanks for the feedback. I've been using the BIAC profile on Beer Smith. I sparged my last batch and still got around 70%. I may need to adjust my crush!
 
Got my kegco 3 roller mill (see https://www.homebrewtalk.com/showthread.php?t=542542 - Edit: noticed I had the wrong link better one is here: https://www.homebrewtalk.com/showthread.php?t=500657). Seems very nice for half the price of the MM3. I did a few tests with gap and settled on 0.038, but will use a grain conditioned crush. Basically spray the grain down with 2% by weight of water from a spray bottle and give it 10 minutes to soak in. Huge difference. I am hoping this will give me great efficiency and not lead to the slow mash recirculation issues I have seen with finer crushes.

First pics are normal dry crush and the others are a grain conditioned crush at the same settings of 0.038 on the kegco mill.

I'll post my experience on the BIAC later, but this is a hell of a lot better hull structure with the same sized particles I was getting 83-88% efficiency on. This definitely should help speed up recirculation.

View attachment ImageUploadedByHome Brew1443305707.376302.jpgView attachment ImageUploadedByHome Brew1443305728.790493.jpgView attachment ImageUploadedByHome Brew1443305744.309829.jpgView attachment ImageUploadedByHome Brew1443305756.483132.jpg
 
Interesting. I have been thinking about wetting the grains so your results will be useful. Will you reduce the water in your mash by 2% based on absorption that has already occurred?
 
For me with 11-12 lbs of grain that comes out to less than 1/2 cup water out of about 5.5 gallons normally in my mash. Probably not enough to worry about, but I will keep it in mind when measuring.
 
Anybody have any tricks to get all the wort out of the pumps/hoses with the least amount of work or wort spilled? I usually take them apart starting from the top and try to catch it all in a bucket to dump back over the raised mash tun, but inevitably I end up spilling some.
 
Anybody have any tricks to get all the wort out of the pumps/hoses with the least amount of work or wort spilled? I usually take them apart starting from the top and try to catch it all in a bucket to dump back over the raised mash tun, but inevitably I end up spilling some.


Use the extra valve for the cooling on the pump intake. So it is bottom valve, intake hose, valve, pump, outlet hose, valve, top. Turn off the pump. Close the valve on the pump. Put shallow pan under pump valve/intake hose joint and undo that joint first, dumping the intake hose wort into the pan. Now the whole pump/outlet hose assembly has valves on both sides and can be picked up and poured neatly into the kettle. Still a bit messy, but not quite as much.
 
has anyone figured out the ultimate water to grain ration for best mash efficiency in the medium? I can get around 70% but I think I can do better.

I had been getting 65-75% mash efficiency for just about all my brews, moreso on the lower end 68-70%. Finally changed my cereal killer mill out with a MM2-Pro and dialed in the gap to I believe 0.045 and have gotten 78% efficiency the last two batches with no other changes. I always no-sparge and recirc 100% with the BIAC as I've heard Jamil and some others chime in that the mash thickness isn't that important. Wanted to keep it as simple as possible. I also incorporated a mash-out to 168 over 20 min about 5 brews ago that seemed to help 0.001-0.002 worth of OG.

At 78% efficiency I am more than pleased. I will still probably get a second false bottom from Jaybird to speed up the recirc.

I have the same mill under a different brand name. I've been using the factory setting and it seems to be a nice even crush. I am going to double mill everything from now on. I bought my second false bottom from Adventures in Homebrewing and it definitely sped up my draining woes.

So what water to grain ratio have you been using? I've never taken the time to try calculating the boil off rate at any particular power setting. I know the BrewSmith parameters just don't seem too accurate to me.

I use whatever amount of water beersmith says to put in their based on the recipe. I seem to boil off right around 1.8gal/hr +/- some depending on the weather. I've got my beersmith settings fairly locked in now to get exactly what I need post-boil.
 
Thanks, I guess I need to really brew more often and pay attention to my notes so I can dial in my settings.
 
For all you medium owners out there, what is the smallest volume you have boiled safely w/o exposing the element? I just bought 3 all grain kits from MW that were on sale last month and I completely forgot they were 5-gal kits. I can always order another of each kit and make 10gal batches.
 
It may be a small thing to most people with these systems, but my least favorite thing is the fact that it is difficult (for me) to measure the volume of water I have in the system. The included stainless measuring device was an afterthought and was not even included with the original systems. I don't care that it is in liters. Although including gallons would be nice. I would prefer either a sight glass, a flow gauge or clear, easy to read markings on the inside of the vessel.

When brewing at night, in my garage (last night for example), it is nearly impossible to read the hanging stainless gauge that came with mine. I have been placing a piece of blue painters tape at the appropriate mark now so I have a chance of seeing the water level.
 
I either shine a flashlight at it or just lift it up out of the pot and see where the line is. It doesn't transfer heat to the lip of the handle at all so no worry of burning when lifting it out. My only gripe is that it's in liters so I'm always having to convert.
 
It may be a small thing to most people with these systems, but my least favorite thing is the fact that it is difficult (for me) to measure the volume of water I have in the system. The included stainless measuring device was an afterthought and was not even included with the original systems. I don't care that it is in liters. Although including gallons would be nice. I would prefer either a sight glass, a flow gauge or clear, easy to read markings on the inside of the vessel.

When brewing at night, in my garage (last night for example), it is nearly impossible to read the hanging stainless gauge that came with mine. I have been placing a piece of blue painters tape at the appropriate mark now so I have a chance of seeing the water level.

I'm in agreement with it being difficult to read. Have been contemplating making permanent markings on the inside using the technique in this thread:

https://www.homebrewtalk.com/showthread.php?t=463099

Just have to gather the courage to do so.
 
Yeah, I read that same thread. I don't know if I have the nerve! I think there are sight glasses that can be installed before a valve. I just need to clear the angle of the cone.
 
I'm a step away from getting a medium system myself but every time I'm about to commit something comes up that makes me delay. The price tag on electric I knew would be a leap up from gas but wow, it's thousands more! The benefits outweigh the financial hit but I'm trying to find means of sourcing alternative equipment from Brewha so I can afford the hardware, which I love.

I agree with the comments in this thread about tying up the brew equipment in fermentation, but I simply plan on filling carboys and using the conical after my other vessels are occupied.

The power box is so damn expensive, 550 to control the output of the element and add an ETC to that and I'm at 630. I can't seem to find any controllers that utilize a digital rotary encoder along with an ETC. Anyone have any ideas?

Does anyone know if I should be investing in a GFCI breaker too? My fiance is a brewer too. If it were just me, I'd go without it but I've no room for recklessness when it comes to her well-being. I thought I'd install an inline GFI but it seems they don't work with 3 prong dryer outlets, which is all I got. An electrician quoted me at a ridiculous 914 dollars to add a 30a breaker to my half-used box. Any solutions?
 
I believe Jimmy82, who is one of the original owners/posters in this thread uses his own controls. Again, I think he does. Also, if you watch some of the Brewha videos on youtube, the guy with the Large also has his own controller visible around 7:40 on this video. As far as in-line GFCI, it is something I would never go without and they are not cheap.

This is the one I and others before and probably after me bought:
http://www.amazon.com/gp/product/B00OZY2Y4C/?tag=skimlinks_replacement-20 [ame]https://www.youtube.com/watch?v=SvAOGJYTYZI[/ame].
 
Last edited by a moderator:
I haven't brewed any 5 gal batches on my medium, but I measured it when I first got it and the element is covered by about 1/4 - 1/2 inch right at 5 gals. With the expansion from heat and the extra you need to account for trub/fermenter losses I don't think it is an issue to make a 5 gal batch.
 
I'm a step away from getting a medium system myself but every time I'm about to commit something comes up that makes me delay. The price tag on electric I knew would be a leap up from gas but wow, it's thousands more! The benefits outweigh the financial hit but I'm trying to find means of sourcing alternative equipment from Brewha so I can afford the hardware, which I love.

I agree with the comments in this thread about tying up the brew equipment in fermentation, but I simply plan on filling carboys and using the conical after my other vessels are occupied.

The power box is so damn expensive, 550 to control the output of the element and add an ETC to that and I'm at 630. I can't seem to find any controllers that utilize a digital rotary encoder along with an ETC. Anyone have any ideas?

Does anyone know if I should be investing in a GFCI breaker too? My fiance is a brewer too. If it were just me, I'd go without it but I've no room for recklessness when it comes to her well-being. I thought I'd install an inline GFI but it seems they don't work with 3 prong dryer outlets, which is all I got. An electrician quoted me at a ridiculous 914 dollars to add a 30a breaker to my half-used box. Any solutions?

I would highly recommend GFCI protection for both of you. My circuit uses a 30 amp GFCI breaker in the main box in my shop. I ran the wire and installed the conduit and outlet myself. Probably cost around $300 total to do so (GFCI breaker, 100' of 10/3, 10' of conduit, dryer outlet, misc. screws and straps). Do not skimp on safety. If you don't feel comfortable wiring it yourself, try talking to a couple other electricians if possible. I don't know your specific situation (wire length, construction type, etc.) but the quote from the electrician does seem like a lot.

If you can swing it buy the complete package with accessories including the digital control box. I really like having everything from the same company in the off chance you have an issue with something.
 
I'm a step away from getting a medium system myself but every time I'm about to commit something comes up that makes me delay. The price tag on electric I knew would be a leap up from gas but wow, it's thousands more! The benefits outweigh the financial hit but I'm trying to find means of sourcing alternative equipment from Brewha so I can afford the hardware, which I love.

I agree with the comments in this thread about tying up the brew equipment in fermentation, but I simply plan on filling carboys and using the conical after my other vessels are occupied.

The power box is so damn expensive, 550 to control the output of the element and add an ETC to that and I'm at 630. I can't seem to find any controllers that utilize a digital rotary encoder along with an ETC. Anyone have any ideas?

Does anyone know if I should be investing in a GFCI breaker too? My fiance is a brewer too. If it were just me, I'd go without it but I've no room for recklessness when it comes to her well-being. I thought I'd install an inline GFI but it seems they don't work with 3 prong dryer outlets, which is all I got. An electrician quoted me at a ridiculous 914 dollars to add a 30a breaker to my half-used box. Any solutions?

Have you taken a look at Brausupply? They are a bit cheaper than Brewha on BIAC systems....
 
Back
Top