Brooklyn Brew Shop's Jalapeño Saison - Tips and Advice

Homebrew Talk - Beer, Wine, Mead, & Cider Brewing Discussion Forum

Help Support Homebrew Talk - Beer, Wine, Mead, & Cider Brewing Discussion Forum:

This site may earn a commission from merchant affiliate links, including eBay, Amazon, and others.

TasunkaWitko

Well-Known Member
Joined
Mar 27, 2014
Messages
2,824
Reaction score
984
Location
Chinook
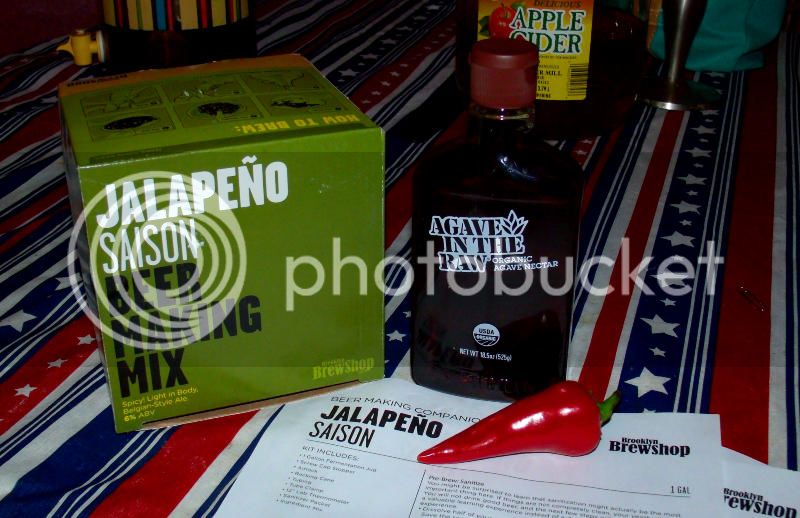
I am set to brew a 1-gallon batch of Brooklyn Brew Shop's Jalapeño Saison:

http://brooklynbrewshop.com/beer-making-mixes/jalapeno-saison-mix

[ame]https://vimeo.com/47335883[/ame]

http://brooklynbrewshop.com/directions/Brooklyn_Brew_Shop_Jalapeno_Saison_Instructions.pdf

A couple of interesting twists on this beer are that it is brewed with agave syrup and that it incorporates a jalapeño for a spicy aroma and flavour; BBS describes it as the "world's best nacho beer," and I must admit that this tagllne is what convinced me to finally try it.

This will be my sixth BBS brew, and as I gain experience, my brewing procedure gets more efficient and my confidence grows. This brew will be the first time that I deviate from the instructions just a bit. Since the "green" aroma and flavour of jalapeños and green peppers has always been very unappealing to me, I decided to use a fully-ripe red chile. It's not a very radical change, but it will allow me to flex my wings a bit and see where the variation goes.

As with my other "Tips and Advice" threads, I will chronicle my Jalapeño Saison journey here. If anyone has brewed this beer, I'd be interested in hearing about your experiences with it - please post them here!

Thanks in advance -

Ron
 
Getting started:

Jalapeno%20Saison%20-%201.jpg
 
Alright, the brew is finished, and I think it's going to be a good one.

Things went mostly well with this brewing session. One lesson learned is that if the temperature gets a little high, simply remove the vessel from the heat and let it cool on its own. I added some water to mine in order to cool it down, and managed to turn my normally oatmeal-ish mash into more of a soup. It wasn't too excessive, but I noticed that it made temperature control a little difficult during the remainder of the mash. I did manage to keep it in the 144-152 range, but it was a challenge.

Because of the above factor, I also ended up with a little extra wort at the end of the boil. A bit of a more-vigorous boil might have prevented this, but I was always taught to keep the boil gentle. Once again, not too big a deal, but it is something to keep in mind going forward.

The little bit of extra wort did allow me to get a small sample, and I think I've got a winner here. There is a definite spiciness to it that seems to be a natural fit for the malts and hops, and the chopped chile definitely added to this, providing a noticeable kick that was just restrained enough to not be obnoxious. I believe that my choice of using a red chile was the correct one, as its natural flavour had very good balance to its own spice and that of the beer, without the disagreeable (to me) "green" taste found in jalapeños. Definitely a good decision, in my estimation.

I expect fermentation to go well, and can't wait to get this bottled so that I can try the finished product. I must admit, the first time I learned of this variety, I really didn't think it was a good match for me; however, that phrase, "world's best nacho beer" sparked my interest, so I took a chance. Based even on this unfinished sample, I can easily see the accolade being well-deserved!
 
I have not done that kit but I have done many BBS kits. I'm not sure of your process, but I found it much easier using a paint strainer bag from Lowe's(like $5 for two) than the two pot and strainer method they suggest. Then just dunk and stir the bag in your second pot of water to sparge. View attachment ImageUploadedByHome Brew1434456618.469834.jpg
 
Good morning, MHb, and thank you for your reply. I have considered doing the BIAB with the BBS mixes, but have not yet tried it. The next time we go to Great Falls (Home Deopt), I'll pick up a couple of paint strainer bags and perhaps give this a try. If it makes the process easier with the same results, then that's all good, in my book!

One question I would have about doing it this way (BIAB) would deal with temperature control during the mash; do you find the temperatures to remain fairly constant? The reason that I ask is because normally when I brew, the mash is similar to what you see here in this video (time stamp :20 to :25):

[ame]https://vimeo.com/11354805[/ame]

The temperatures remain fairly constant - I am guessing because of the thick density of the mash - and only a little fiddling with the stove is necessary, so it works very well, especially in the heavy enameled cast-iron Dutch oven that I use. Last night, however, when I was mashing with a lot of extra water (perhaps a quart more than usual), the temperatures were all over the place and it was a struggle to keep it within the range, even using the heavy, stable kettle. It's very possible that there were other factors that I'm not taking into consideration, but I would appreciate your thoughts on maintaining a steady temperature during BIAB.

One thing about doing it "by the instructions" that I have found is that three vessels/kettles work a lot better than two, although two will work with some struggle. The three that I use are the 6.5 enameld cast-iron Dutch oven that I mash in, a 6-quart stainless steel stock pot and an 8-quart stainless-steel stock pot. The 8-quart pot has a mouth that is wide enough to accomodate the strainer very easily. With a third vessel, I am able to transfer the strainer full of grains over to the Dutch oven while I pour the wort (that has just gone through the grains) from the 8-quart stock pot to the 6-quart stock pot, then set the strainer back onto the 8-quart pot and use the 6-quart stock pot to recycle the wort back through the grains. It actually takes longer to type/read this process than it does to actually do it - it's pretty easy and efficient. Having said that, if BIAB works better, I am definitely willing to give it a try.

Update: I checked my fermenter this morning - the ambient temperature was 72 degrees and there were definite signs of fermentation. The fermentation did not seem as vigorous as I was expecting, but it was definitely there. Besides, we were only about 6 hours into the process when I checked, so there is still plenty of time for it to take off.

Another note on the "sample" that I was able to try last night with the bit of leftover wort: I didn't mention it above but it was certainly "complex" as the video in the opening post describes, in a good way. The chile pepper spice was there, as I mentioned, and a bit of malty-sweet, but there was also an extra something underneath that I can't really describe - it was definitely nice, though, perhaps a bit of peppery bitterness that balanced really nicely with the sweet. I didn't know what to expect when I started this beer, because it is very far from what I am accustomed too - but I like it!
 
You sound like you already have a great process down. My process is both BIAB and part their directions. I was limited on the number of large pots I have.

I put BBS suggested amount of water in pot one, 2 or 3 quarts. I place my bag in and heat to 160. I add my grains into my bag and pot to mash in. Maintain 152 by stirring and removing from heat and adding heat for one hour. To mash out it heat to 170. I then have my second pot of sparge water, whatever volume BBS said and have it heated to 170 and place my bag of grain from pot one into pot two. Leave grains in for 10 min at 170 stirring them. Then l pull them out and let them drain and squeeze out ever last drop. Then I add my pots of water together and start heating the wort.

True BIAB, you would have both your strike water and sparge water in one pot for one large volume. Add your bag and your grain and mash for a hour at 152. To mash out heat to 170 for ten minutes stirring. Pull up your grain bag and drain and squeeze. You are ready to heat your wort. In theory this should be easier to maintain your temps because you are dealing with more volume.
 
I put BBS suggested amount of water in pot one, 2 or 3 quarts. I place my bag in and heat to 160. I add my grains into my bag and pot to mash in. Maintain 152 by stirring and removing from heat and adding heat for one hour. To mash out it heat to 170. I then have my second pot of sparge water, whatever volume BBS said and have it heated to 170 and place my bag of grain from pot one into pot two. Leave grains in for 10 min at 170 stirring them. Then l pull them out and let them drain and squeeze out ever last drop. Then I add my pots of water together and start heating the wort.

I like the sound of that - it definitely has advantages versus rotating the various pots around, and sounds quite efficient.

I will be giving this a shot, as soon as I get my hands on a couple of appropriately-sized paint strainer bags. I am sure they can be found locally, but I think we're going to Great Falls this weekend, so I'll try to pick a couple up.

Many thanks for the details on your process! :mug:

Ron
 
No problem, BTW at my Lowe's the paint strainer bags come in 1 and 5 gallon. I went with the 5 gallon because they honesty don't seem that big. That's a 5 gallon bag in a 2 gallon pot in the picture above.
 
I've been checking my fermenter daily, and it looks just about right. There never was any overly-vigorous fermentation, but it is definitely taking place, and that is what matters. Ambient temperatures have been steadily in the high 60s, so the conditions are all right. I might "kick the jug" (figuratively speaking) in order to make sure that the yeasts are doing their work, but things are looking good.

Tonight, I will replace the blow-off tube with an air-lock, then wait out the rest of the time (probably 3 weeks total) until bottling. In the meantime, I've got a couple of ideas for label design..... :)
 
Another note - considering the modification that I've made, I am hereby amending the name of the beer to "Piment Rouge Saison."
 
I had an extremely long and bumpy month of July, followed by an August that wasn't much better; as a result, I did not get this beer bottled until last night.

The beer itself looked great - it was amazingly clear and had a nice, dark-gold colour that really looked incredible. The krausen on top was just a tiny bit funky, but the beer underneath smelled awesome, with a detectable spicy note that I found to be both unique and interesting. Keeping in mind that this was a red chile pepper, rather than the jalapeño that is normally used, I do believe that this was an excellent substitution for me.

The bottling went very smoothly; I always hope for 10 bottles from my 1-gallon batches, but this time I only got 8. This seems to be par for the course - now and then I might get 9 bottles, but I end up with sediment when I try too hard to squeeze every last bottle from the batch. With my next batch or two, I might try racking to a secondary after a couple of weeks, and I will see if that helps.

A unique aspect was the agave nectar that was used as a priming sugar. This stuff is unique - in a good way - and I am looking forward to see its effect on the results.

One "trick" that I picked up which is especially helpful is to have my son shine the flashlight of his iPod toward the bottle while filling. The room that I usually bottle my beer in must not have the best lighting, because I can never seem to see what's going on in the necks as I fill the bottles. The flashlight helped with this immensely, and also allowed me to see some very nice clarity in the beer.

There was a little beer left over after bottling, perhaps a third of a bottle, and I was impressed with the sampling I took. I've only had one other saison to compare it to, but it seemed similar - with it's own "spiciness" that was un-related to the pepper, and a unique bitterness that I don't encounter often, but do enjoy when I do. The pepper provided a really nice, zesty finish that was noticeable and "warm," but definitely not hot for hot's sake. All-in-all, very good.

I am not sure if the extended time sitting in the fermenter helped or hurt, but all-in all, the beer was definitely worth the wait - and will continue to be so, I hope. I will allow the beer to condition in the bottles for three weeks, then refrigerate for an additional week before sampling. I'm looking forward to trying it, and will try to remember to report on results.

Ron
 
My gf just did this kit... I helped, but I left it mostly up to her to let her get the experience.

The strainer was a PIA, so I think the paint strainer bag next time would be a good alternative.

Fermentation began shortly after we put it in the fermenter... It stopped about a day later.

It's still bubbling slightly, and sitting in the basement, no airlock activity, though. Hopefully bottling next weekend. Hoping for good results, she left a few seeds in just to give it a bit of an extra kick.

I will admit, it smells great and funky. Hope yours comes out well! :mug:
 
Thanks for the well wishes, thed163, I hope that your girlfriend's turns out well, too!

Fermentation began shortly after we put it in the fermenter... It stopped about a day later.

It's still bubbling slightly, and sitting in the basement, no airlock activity, though.

This has been my experience with every Brooklyn Brew Shop mix, and the beers always turn out great. I am not sure if it has to do with the yeast, or more likely the batch size, but I always get incredible activity for the first couple of days, then it slows down during the third. I run a blow-off tube until the end of the third day, and then go to an air-lock, and never see much activity after that, but the fermentation does continue, of course.

The strainer was a PIA

I've had excellent and hassle-free results using three "pots" and this strainer:

http://www.amazon.com/gp/product/B004I7Y3Q8/?tag=skimlinks_replacement-20

It's just the right size, and works very well, I think. As I sparge, I go from one pot to the next, and it seems to work much better than using just two pots. It might be worth a try.

Good luck!
 
Last edited by a moderator:
We used a strainer on top, and then a metal strainer underneath... I think we were supposed to do it the opposite way.

She was NOT happy when grains kept plopping back into the pot. She wanted to quit at one point.

We got through it, we used 3 pots also, I believe, but too small a strainer was all the cause of our stress... I think either bag next time, or bigger strainer.

I told her we didn't need a blowoff tube either and just hoped for not too crazy activity... It was fine. I'll try to remember to update when we bottle, and you update us how it came out with the pepperswap!
 
The bottle/light tip... very good one too.
What we did was have one of those little LED lights you can buy at the checkout counter of like home depot or an auto parts store...

and used an old book shelf to put the bottling bucket on top of... then just put the light on the shelf that was the same height as where the end of the bottling wand ended... (in case your son gets sick of holding is iPad for light or wants to play a game or something in the mean time lol)

Also, what did you use to bottle from? The 1 gallon fermenter is an option, or get one of those like lemonade gallon jugs for the fridge, with the spout on em... That seems like it could work nicely too... Curious what worked for you.
 
I was thinking of using a jug with a spigot, and might go with it next time to see it it is more convenient. What I currently do is use the system that comes with the kit and is described in the instructions, except instead of the whole gravity system, I use one of these:

http://brooklynbrewshop.com/accessories/mini-auto-siphon

This is truly my best friend, making the whole process pretty easy - but thinking about it, the spigot idea might work even better, so I will definitely see about trying that.
 
We just got the recipe so... We just have our typical five gallon batch equipment. We do have the auto siphon and racking cane which is my best friend! Bottling was so easy with that and the spring bottle filler thing. Cheap parts to make that process easy
 
When I bottle my beer, I generally leave it alone for 2 weeks, then put my labels on. While putting them on, I take the opportunity to look and see if the bottles appear to have carbonated. In reality, I am probably just guessing, but it hasn't failed me yet.

While applying the labels, the bottles get jostled around a bit, which stirs any yeasts and ensures that if any bottles haven't carbonated fully, they will. After this, I leave the bottles alone for another week, then put them in the refrigerator at least over-night, or until I drink them.

I don't know if this is "proper" or not, but it has worked for me, so I don't see much reason to change, unless someone has a good reason or a better way.

Based on this time table, I should be reporting on this beer next weekend!
 
She was NOT happy when grains kept plopping back into the pot. She wanted to quit at one point.

We got through it, we used 3 pots also, I believe, but too small a strainer was all the cause of our stress... I think either bag next time, or bigger strainer.

I have been using a Brooklyn kit to make 1 gallon batches. The technique that I devised was to use a grain bag that came with another kit. After mashing in the grain bag, I put it in a collander over top of the wort pot. No grains overflowing a strainer, no mess.
 
I put them in the fridge today, so I'll try to at least wait a couple of days before sampling.

If possible, I'll give it to the weekend before opening, but no promises! :mug:
 
I was able to sample this beer today, and really liked it. It has an interesting profile due to the addition of the chile pepper - in this case, a red Fresno chile.

Carbonation was perfect with this beer, and I opened to bottle to reveal a golden, crystal-clear ale that had an interesting, spicy aroma. The head was nice and full of life, while the beer continued to bubble throughout merrily the time that I was drinking it. The flavour was very crisp and refreshing, with a well-balanced taste of fresh-from-the-garden goodness provided by the chile pepper. In a lot of ways, drinking this beer was like a perfect, sunny day at the farm, which fits right into the saison profile. I didn't notice any real heat from the chile pepper while I was drinking it, but the finish revealed a very nice warmth from the pepper that made a perfect ending.

Brooklyn Brew Shop describes this ale as "the world's best nacho beer," and I am inclined to agree. I can't think of a better beer to go with a pile of nachos on game day, but it is also great any other time. When I first heard of this variety, I was skeptical - but I am very glad that I tried it, and plan to make it again.
 
Nice man! Good to hear. Gf has hers sitting, they've been two weeks now in bottles, thinking of putting them all in the fridge.
Hoping it comes out similar with to yours even though we used the jalapeno.
 
I think you guys will like it - my chile pepper is probably a little bit sweeter and just a touch milder, but the over-all beer should be much the same - which is very good!
 
Lol we've got a few going. Porter that's been bubbling for three weeks (a week, then a week of nothing, now bubbling again), my ipa w saison yeast been going two weeks plus constant. Roommate has a pumpkin batch. And we're brewing a dandelion gruitt next in the 1g
 
I got the dandelion gruit, too - I'm waiting until next spring to brew it, but I'm pretty sure it's going to be great!
 
Back
Top