• Please visit and share your knowledge at our sister communities:
  • If you have not, please join our official Homebrewing Facebook Group!

    Homebrewing Facebook Group

New eBIAB build, questions about controls

Homebrew Talk

Help Support Homebrew Talk:

This site may earn a commission from merchant affiliate links, including eBay, Amazon, and others.
Ok, thanks for that bit of info. One way or another, I was planning on keeping the bag off the element. With the stainless basket that's a given.
 
Well, today was 'nut up and start making holes' day.

Thankfully, I was able to borrow a punch set for the round holes. Made a lot of it much easier, especially the holes for the plugs at the bottom of the box.

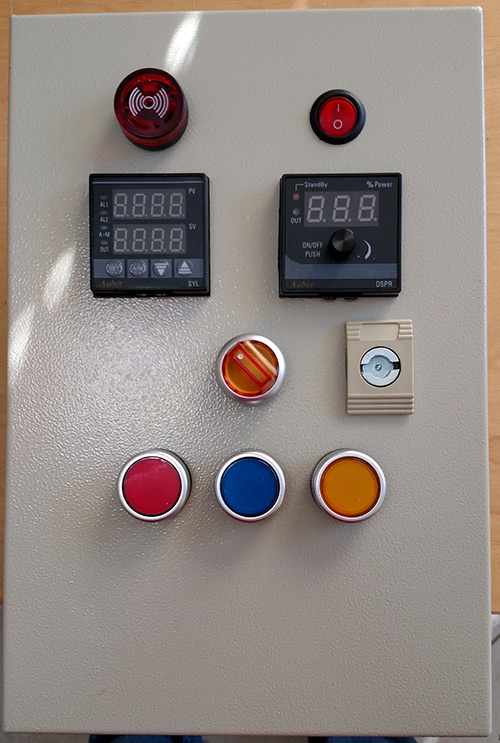
panel-1.jpg
 
That looks great. It always takes some steeling of nerve before you still that first hole in the box. Punches are wonderful too aren't they? Such a civilised way to make perfectly round holes
 
Thanks!

Yes, Punches are great. Now if only the set I had contained the right sizes for the L14-30 and the L6-30 receptacles... One size hole saw I have, now I'm off to buy the one I don't have. Nuts.
 
Looks good! What were the final decisions on operating modes:
  • Switchable 120V/240V or 240V only?
  • Switch control signals to a single SSR or two SSR's in series?

Brew on :mug:
 
No, decided to go 240 only. Single SSR, the yellow switch selects what's controlling the SSR. Figured I'd do it the easy way first, see how it works out. If I have any issues, it won't take much to change to a dual SSR configuration.

Right now the plan is when the contactor powers up the element, the yellow selector switch will light up, signifying the controls are active. The pushbutton switch light will indicate when the element is firing. Eliminates an extra hole in the panel.
 
Well, crap. I may be at a standstill.

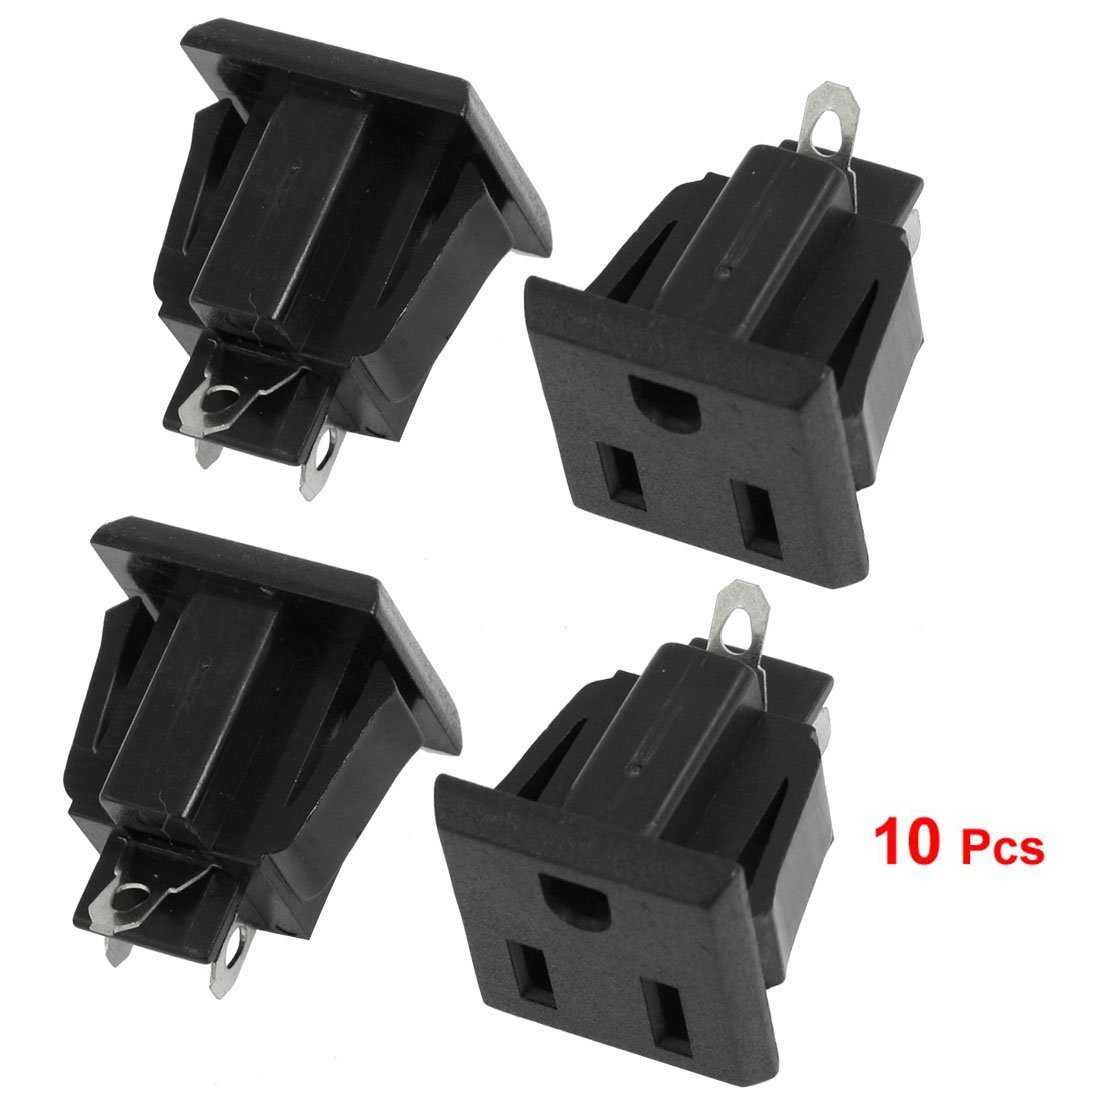
My original idea for the pump outlet was to use this:
61qEOlC0TuL._SL1100_.jpg


Now, I'm not so sure. Two issues: They require a small square hole (argh!) and I'm wondering if I should just go with a twist-lock for the pump to ensure the cord doesn't fall out.

Issue is, if I go with a twist lock I can't get one here until Monday some time. That means the panel fabrication is halted, as I'm not keen on mounting everything only to take it apart again to put in the receptacle.

Unsurprisingly, neither Lowes or Homedepot carries flanged receptacles.
 
You can get single outlets which mount in a round hole at Home Depot I believe. Not twist lock though.

Could you not use a lug mounting twist lock with a hole saw drilled hole for the outlet itself? Assuming that you have a suitably sized hole saw that is
 
I was looking at that option. Not crazy about it, though. They're not going to as stable and sealed up as the flanged version.

While I'm not doing an 'no expense spared' build on this, I'm trying to build it right (and safe) the first time. I could use a day away from the building and research, anyway.

At least, that's what I keep telling myself! :)

The parts are already on order, should show up Monday, when I'm at work for my 24 hour shift, so Tuesday I can get back on it.
 
Some more updates:

99% sure I'm done drilling holes. Everything's mocked up, so far it looks good. Decided to mount the fuses on the bottom, keep them away from the control panel face. It'll make it easier to route the wiring, as well.
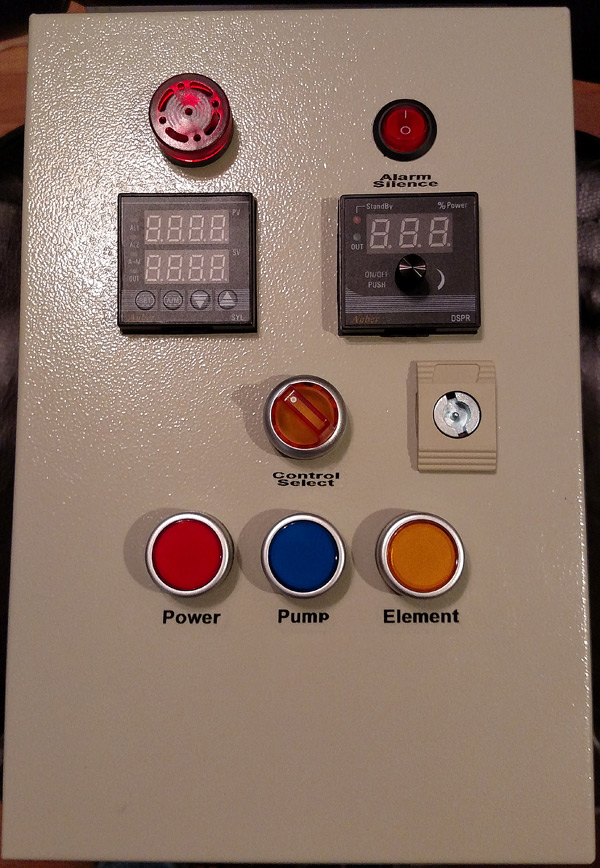
Now on to mounting the internal components and wiring.

My 30A 220v GFCI breaker showed up after putting a nice $$ dent in my wallet, so all I need for the home wiring is the outlet/box.

Getting closer!

panel1.jpg


panel2.jpg
 
Everything's mocked up, so far it looks good.
What a great (clean) controller! At some point I am sure that I will rebuild my $6 harbor freight ammo box controller and will be looking at your design for ideas.

Keep us posted on the progress!
 
I'm in the process of laying out my panel and was wondering how far apart you spaced your buttons/ switches.
 
They're 22mm buttons, spaced 40mm apart if I recall correctly.
 
Good news, everyone! (Points if you read that in Farnsworth's voice)

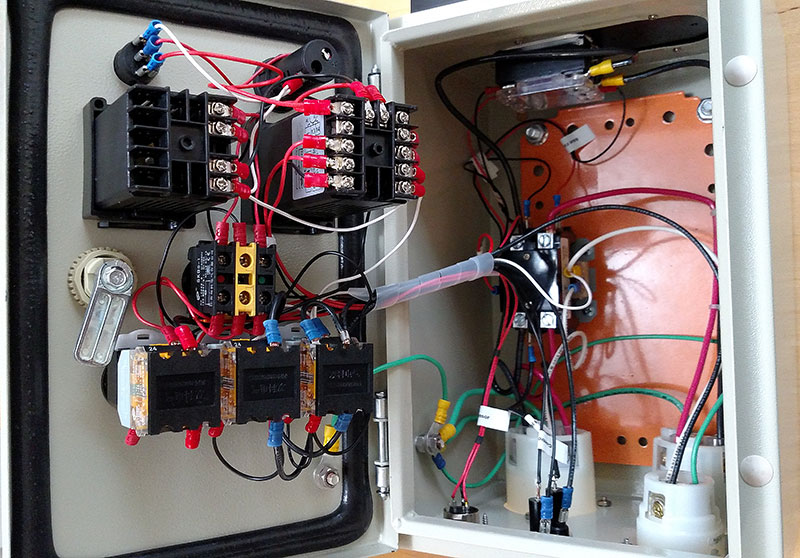
After hundreds of crimped wires that seemed as if they would never end and a lot of fussy work, the panel's done.

Bonus: When I powered up the 110v side of things, it all worked and no magic smoke leaked out! Granted the PID was in panic mode with no sensor and needing to be programmed, but it all worked and it even let me test the alarm buzzer (and the silence switch).

I still need to zip tie a few wires and neaten it up a bit, but it's functional. I also have the parts needed to install the outlet, and build the cord for the kettle. The power cord for the panel should show up in the mail tomorrow. It was actually cheaper to buy a ready-made cord than it would have been to buy the parts. My BIABasket should be here tomorrow, as well. Of course I'll be at work for my 24 hour shift tomorrow.

panel3.jpg


panel4.jpg
 
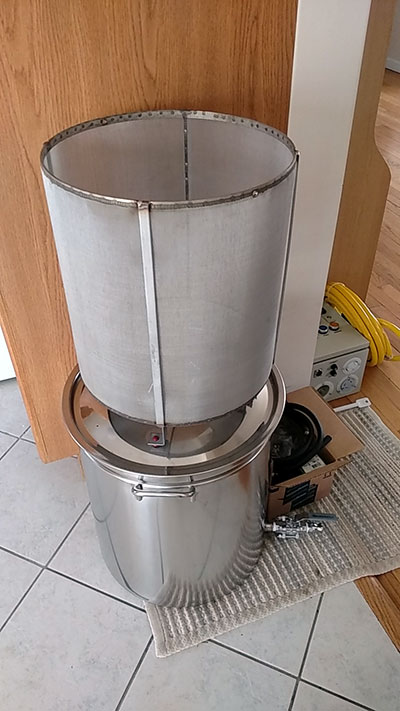
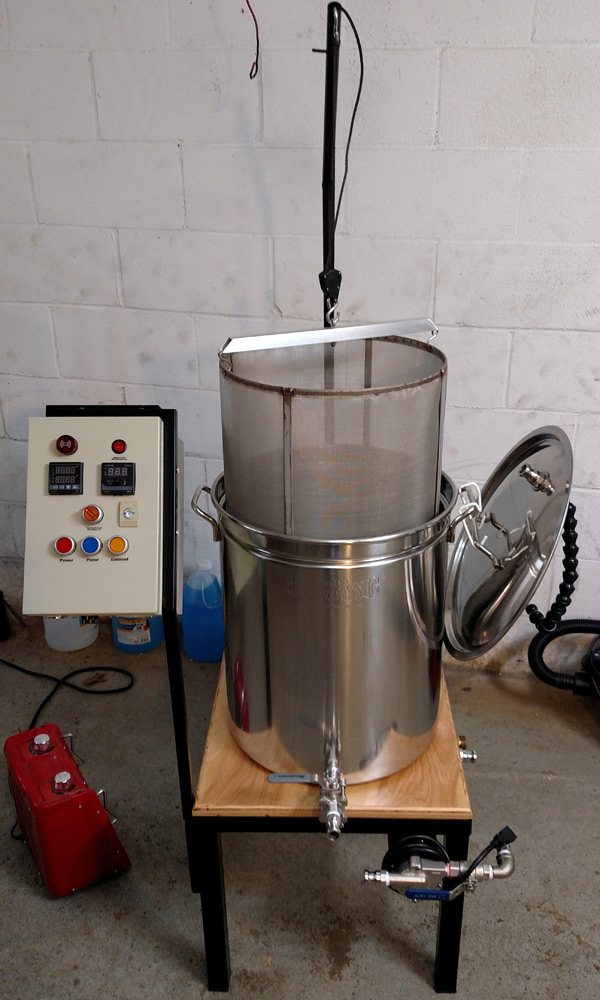
Basket and power cord came in! All I need to do is install the outlet, do a little re-arranging of my brew stand, and it's off to the races (or testing, as the case may be).

basket.jpg
 
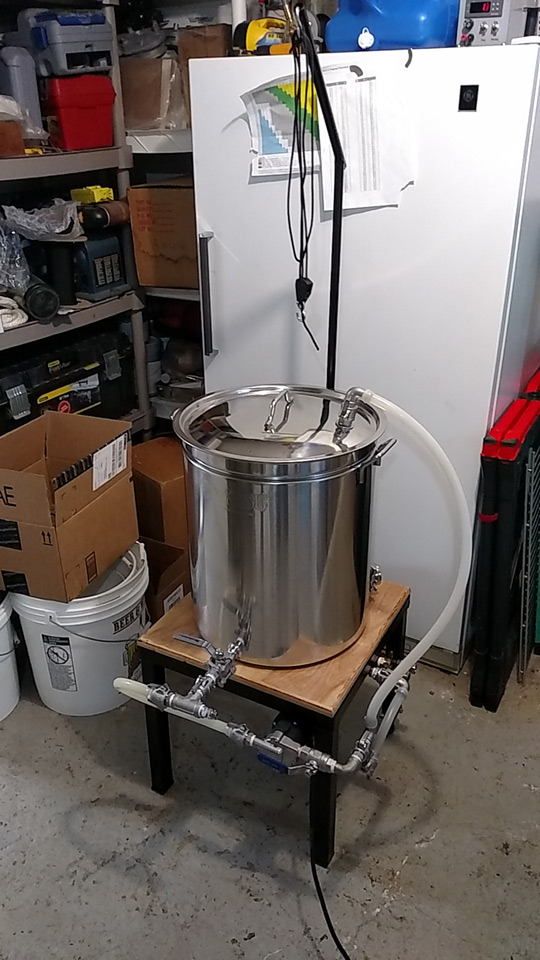
30A GFCI outlet installed, panel tested on 220v, kettle and chiller plumbing complete. Tomorrow I need to design and build the control panel mount, make a crossbar for the basket, finish the cord for the kettle element, and put the XLR connector on my RTD cable. Getting close to a wet test.

eBIAB-Stand1.jpg
 
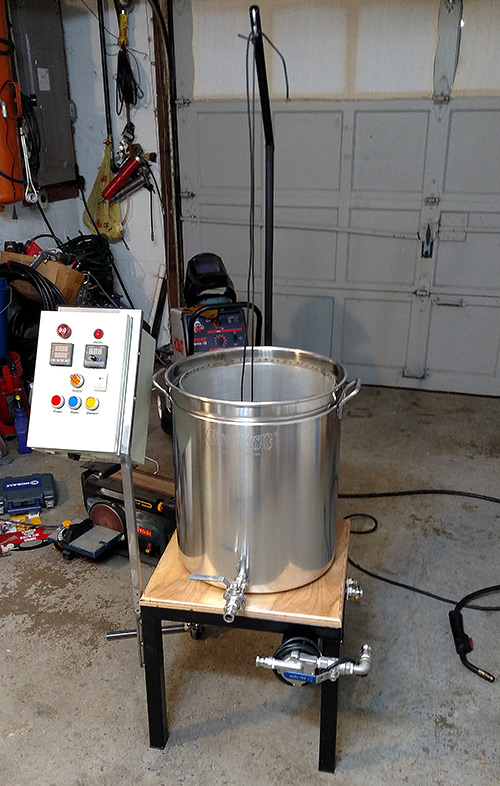
Control panel mount is done after a lot of planning, head scratching, cutting and welding. Also got the element all wired up. Done for the night, need to wait for the paint to dry.

bracket.jpg


mockup.jpg
 
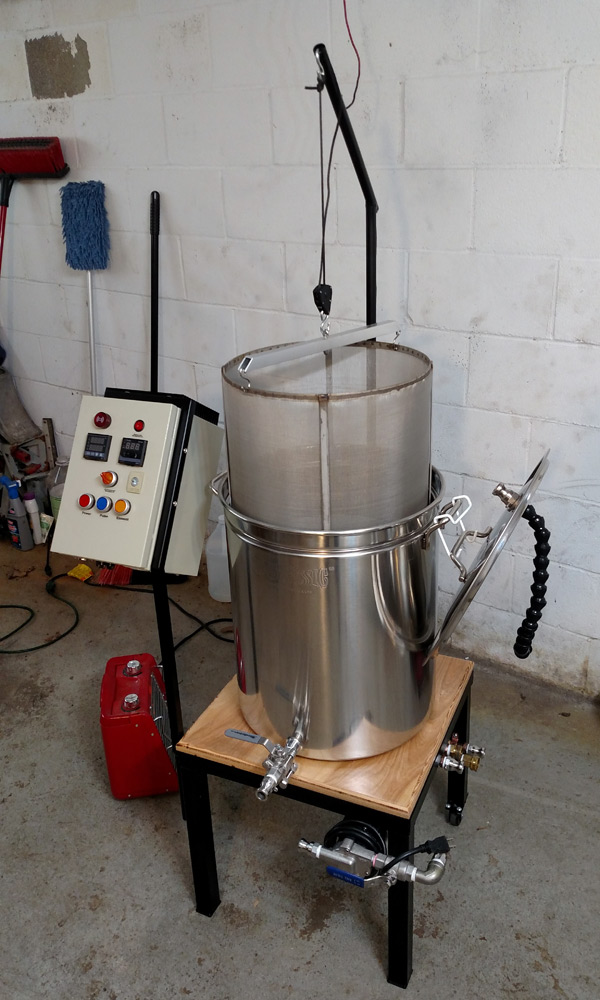
The paint's dry, panel's mounted, and the basket lifting brace is made. Now to clean up the disaster I have made my garage into.

Hoping for a water test this afternoon, but I *have* to clean up first.

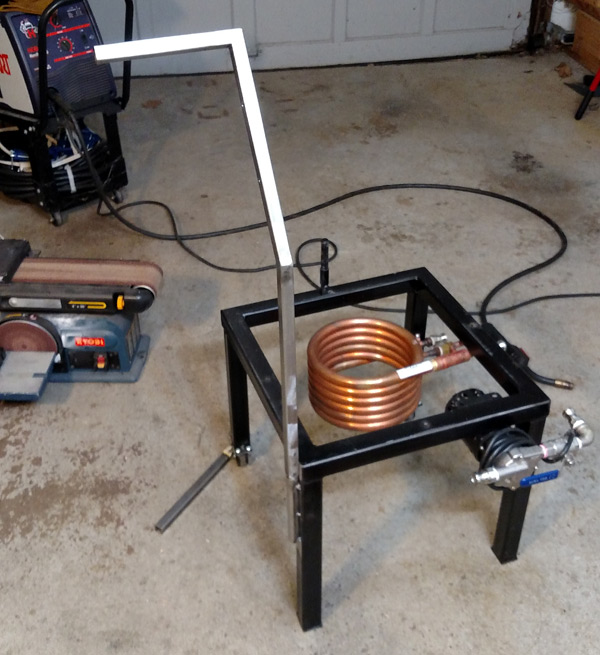
The whole setup is modular. The panel arm comes off easily, as does the boom in the back that holds the basket up for draining.

Now I just need to find some sort of trivet/insulating pad for the bottom of the kettle.

fabdone1.jpg


fabdone2.jpg
 
That looks great!

I can't tell from the pictures where you plan to mount the temperature probe. I wish now that I had mounted mine somewhere in the plumbing instead of directly in the kettle. I also wish that I'd gone with a SS thermowell instead of the cheap-o PT-100+wingnut approach.

When I do make the change I think I'm going to put the probe at the kettle outlet. It will make it easier to keep the cords from tangling, if nothing else.
 
I currently have the temperature probe mounted in a T with camlocks, so I can mount it on the kettle outlet, or switch it to the kettle return if I think it works better there. Makes it easier for cleaning, too.

IMG_20160208_122848.jpg
 
No kits, just puzzled it out and bought parts. Of course, thanks to a few changes in direction I have some spare stuff, but how bad can it be to have a spare SSR and contactor?
 
Today's wet test went great. No leaks, temps ramped very well after auto tuning.

Ran cleaner through everything afterwards, too. Should be ready to make wort now!

I definitely need a trivet between the kettle and the stand, the heat is taking it's toll on the wood's finish.

alive.jpg
 
Back
Top