Electric brewery build

Homebrew Talk - Beer, Wine, Mead, & Cider Brewing Discussion Forum

Help Support Homebrew Talk - Beer, Wine, Mead, & Cider Brewing Discussion Forum:

This site may earn a commission from merchant affiliate links, including eBay, Amazon, and others.
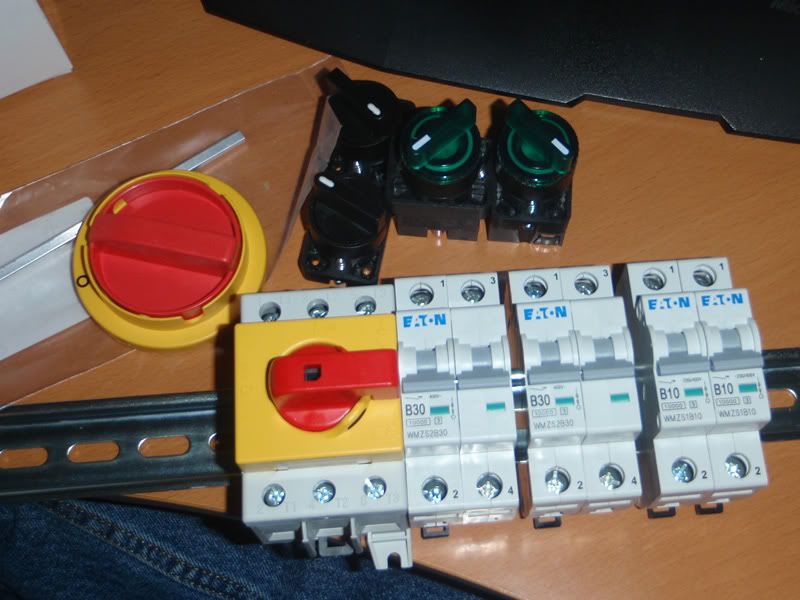
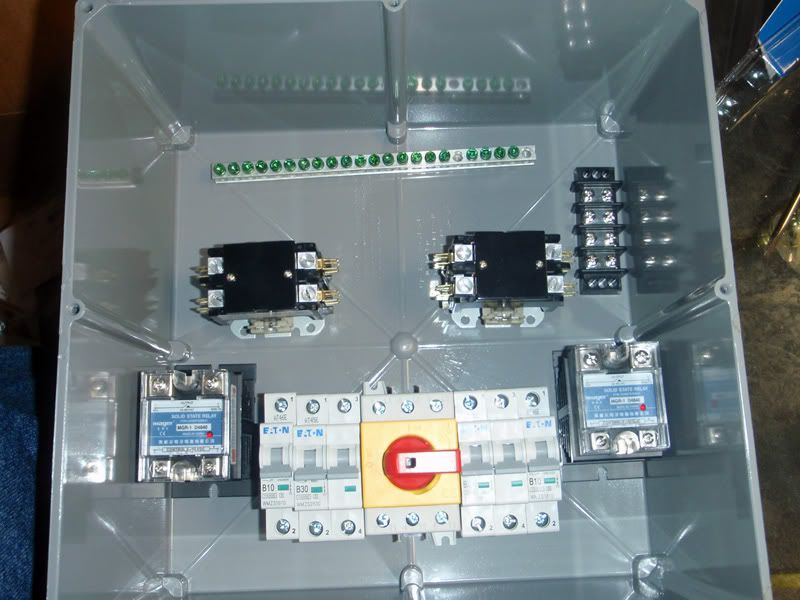
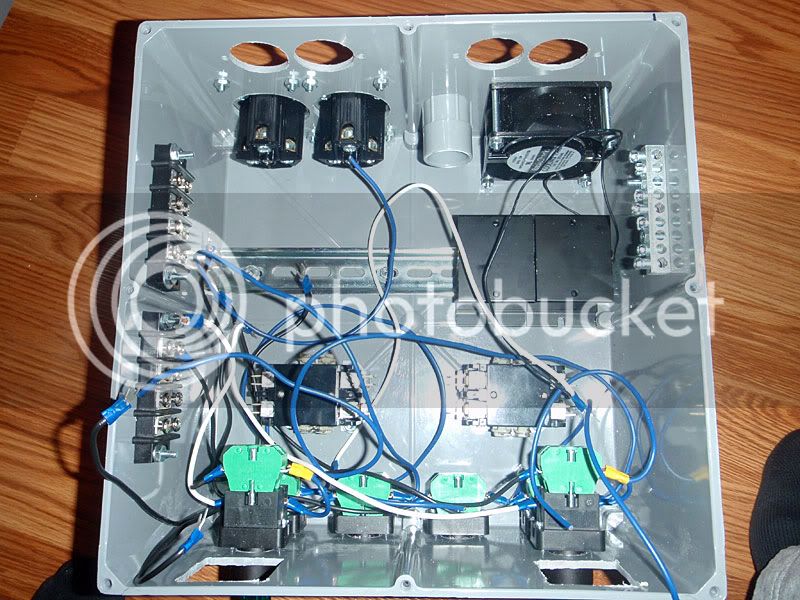
More parts show up. Working on layouts. Will I need to expose the SSR's heatsinks to ambient air somehow?

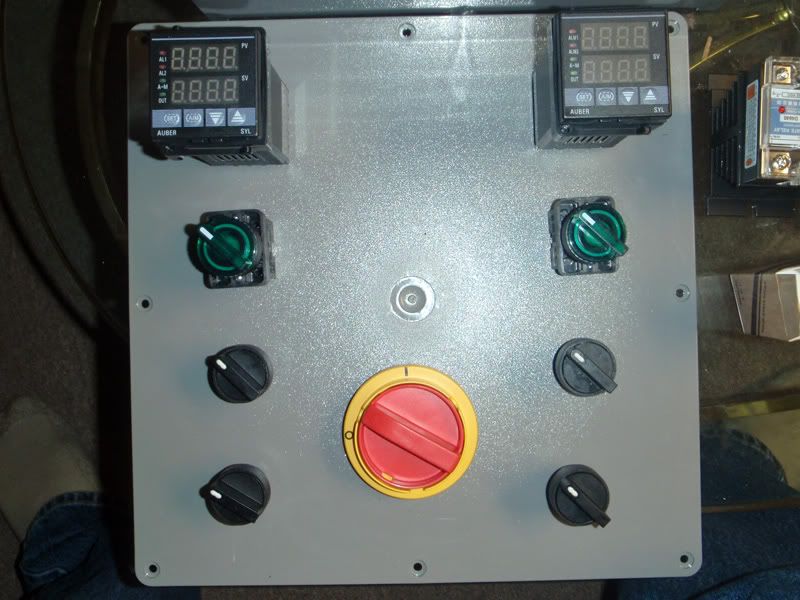
controlbox_outside.jpg


controlbox_inside.jpg


-Joe
 
More parts show up. Working on layouts. Will I need to expose the SSR's heatsinks to ambient air somehow?


-Joe
I suppose a little 2" muffin fan with an vent on the other side wouldn't be a bad idea. That's what I've been figurin anyway.

Off topic: As much as I anticipate the union electrician voice of reason and warnings of self destruction, I question the practical need for the additional 30 amp breakers. I understand the logic behind it, wire protection. It makes perfect sense in a permanent installation that is in service 24/7. How often are these rigs run unattended for long periods where a short run of 10/3 SJ to the element overheating would be catastrophic? Maybe it's a moot point if you found them cheap but... yeah, I'm a cheap bastard.
 
Mmm, muffuns. I was thinking the same, but I was concerned about all that damp air blowing around. Although I guess as long as the air is moving it shouldn't be an issue.

-Joe
 
zomg I just want to plug this thing in to see it light up :D :D

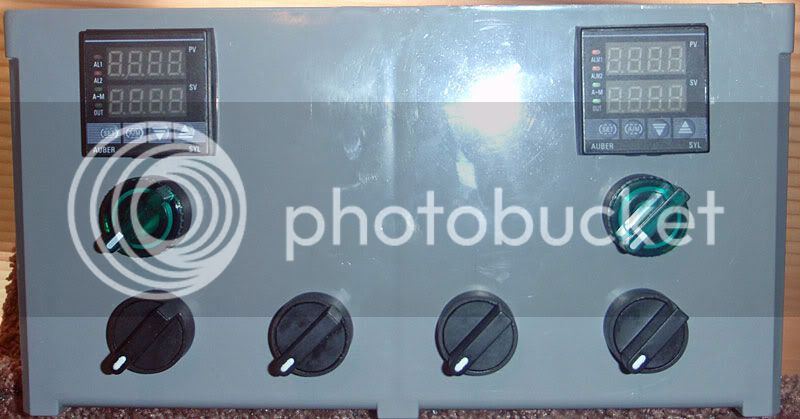
controlbox_front.jpg


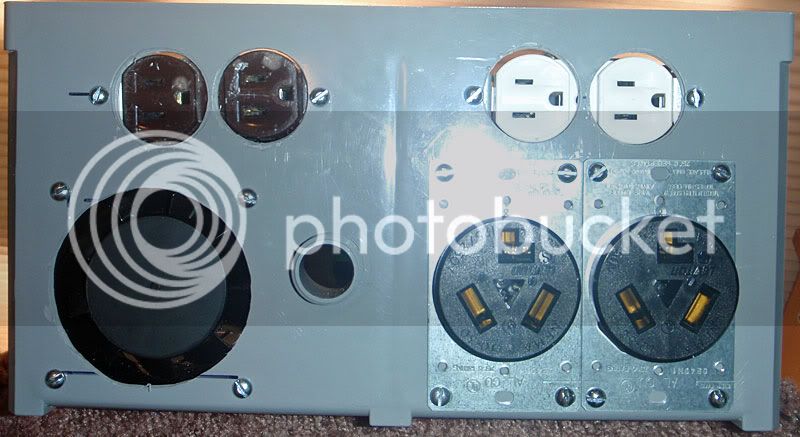
controlbox_back.jpg


-Joe

Looks like you're about where I'm at! I'm currently sanding/painting mine, then I'll get started wiring.

Scroll down through these pics, and you'll see some similarities.

By the way, I'm the guy Paul (P-J) gave control panel advice to. He's a real helpful guy, and very knowledgeable, so don't be afraid to ask him about your wiring if you're not sure.

We could probably mutually benefit from each others' electric brewery build threads. It looks like your setup will be pretty close to mine. And we're at about the same progress right now.

Good luck my friend!
TB
 
Looks nice, Tiber! I decided to keep everything in the box instead of on the lid, as originally planned. It actually worked out to give me more space (since the PIDs are so deep, there's more space under them if they're placed horizontally) and as a bonus I don't have to deal with any wires if I take the lid off.

Speaking of wires...it has begun. Things get tight in there FAST.

control_wiring1.jpg


-Joe
 
I doubt it will be an issue, but you'd get better airflow/cooling if you rotate those heatsinks 90 degrees.

+1 for this - it's definitely worth doing if it's possible as the air will travel through the fins and cool them much more efficiently.

I wish I could find some of those cool industrial switches here in the uk!

Keep up the good work:)
Henry
 
Yes, I wanted to rotate them, but they got uncomfortably close to the contactors and the fan. I'll have to try again now that everything is bolted down.

As for holes: for the big round ones I used holesaws. Not really the best for plastic - they tended to wander and make an oversized hole.

For the switch holes I used a Forstner bit, which worked quite well. I deburred the hole with my step drill (the steps aren't deep enough to make a through hole in this plastic).

For the square and fan holes I used a Dremel tool and hand files.

-Joe
 
Hey Man Skirt! I was following you on Facebook and now I see your brew system here. This is looking like its going to be a pretty sweet setup. We are using the exact same box for all of our electronics.

s23.jpg


I am also interested to know what parts you are using there inside your box. Those switches and light gray boxes look fairly industrial and kick ass. Would love to know what they do and where you got them. We picked up a emergency shutoff button from ebay.... turned out to be a POS so we didnt use it.
 
Made a little progress. Made a custom dimpling tool for 1/4" fittings. Soldered a ground lug onto the HLT. Need to order a few more bits n' bobs.

groundlug.jpg


-Joe
 
How did you make the custom 1/4" dimpling tool? I'm guessing it was similiar to the larger one you already showed us.
 
Scut: yes very similar. I took a 1/2" brass long nipple and ground the end to a taper on a belt grinder and used that as the form to pull through.

Also: I just edited my original post with a parts list. Enjoy!

-Joe
 
Scut: yes very similar. I took a 1/2" brass long nipple and ground the end to a taper on a belt grinder and used that as the form to pull through.

Also: I just edited my original post with a parts list. Enjoy!

-Joe

I seeeeee. Great pictures along the way....good detail. Keep them coming. I still like the webcam idea. Brilliant!
 
I'm trying to decide where to put the thermowell in the brew kettle.

Directly in the side of the pot, or in a tee fitting at the output of the whirlpool port? Anyone have experience here?

I'm tempted to put it in the side of the pot, but it is one more thing to clean around.

-Joe
 
Will you be recirculating through the whirlpool port as you are cooling, or do you have a plate or counterflow chiller?
 
I will be recirculating with an IC. But if I move to a plate chiller eventually, then the thermowell would be useless regardless of where in the BK it is, right?

-Joe
 
I will be recirculating with an IC. But if I move to a plate chiller eventually, then the thermowell would be useless regardless of where in the BK it is, right?

-Joe

True, but if you plan on going single pass cooling, then you'll have an extra hole in your kettle. I'd tee it into the whirlpool port, you can always change it later.
 
Well, after several hours of hunching, my back has exploded. However, I got quite a bit of work done. Installed two fuse holders, two RTD quick-connects, applied heat transfer goo to the SSRs and installed them with the 4mm screws I just bought. Then the real work started: wiring. I don't have a proper power cable yet, so I'm just using 6/3 romex jacketed from the borg. A real SJ cord will be on the list of to-dos. I'm not too concerned since it'll most likely be mounted rigidly next to the main box anyway.

All that's left is to solder up connections for the RTDs and fire it up. I'm very excited :)

controlbox_wired.jpg


-Joe
 
Wow, you could hardly fit a mouse fart in there now.

Nice, neat wiring. Looking forward to seeing it light up!

I just put the last coat of paint on my enclosure today, so I'm a little behind you now. This will give me a chance to steal- I mean look for inspiration from your build!

Keep it up!
TB
 
Question for ya:

Are you cutting your existing RTD wires to split for use inside and outside the box, or are you buying additional wire to use between the PID and the internal panel mount RTD connectors?

I was thinking about what to do with mine, and there's pretty much no way to avoid having to recalibrate the RTD with this setup.

TB
 
I'm probably using additional wire. I've got a bunch of 18gu that I've been using for the low amperage bits of the circuits. I figured I'd want to calibrate the RTDs anyway, so it doesn't really matter. I believe the PIDs have provisions for calibration built in.

-Joe
 
That is a super clean control box. I recognize the PID's, very good and great value. I am impressed how neat and clean your wiring is. Nice work.
 
That is a super clean control box. I recognize the PID's, very good and great value. I am impressed how neat and clean your wiring is. Nice work.
Thank you, and thanks Tiber for your comment. My dad is an automotive wiring guru, so I guess I get my anal-retentiveness for neat wiring from him. It also makes me feel better that everything's where it belongs when working with 50 amp service.

-Joe
 
Ok kids, we're ready for power! First, I thought you might like a glimpse into the chaos that is my workbench...

workbench.jpg


Here's the final wiring for the RTDs. You can see them connected on the right. That was a fun little bit of soldering.

wiring_rtd.jpg


And finally, the giant on-off switch. I think it makes the box :)

box_closed.jpg


Wish me luck! I know my heart will be pounding when I first throw that switch...

-Joe
 
looks great! Great job on the wiring!

I got my enclosure in today...this is inspiring

...what are the two knobs between the PIDs?
 
Back
Top