
I'm a bit of a lurker on HBT but have learned so much from this community I decided I'd give back by documenting my DIY Keezer build.
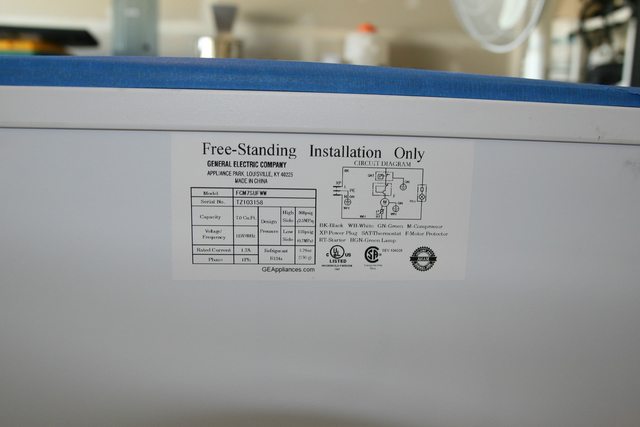
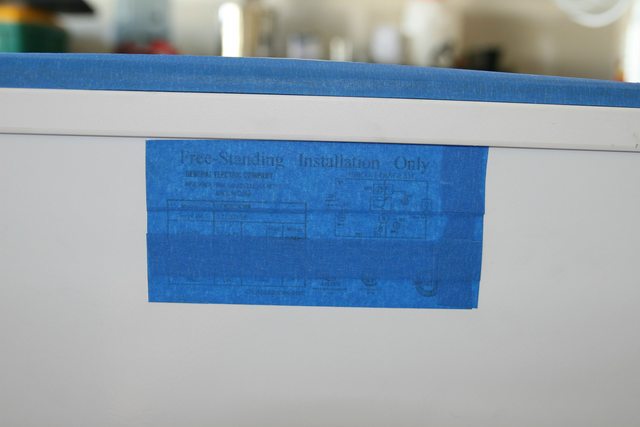
I ended up getting the GE 7.0 cu. ft freezer on a black Friday sale for $150, which for me was an absolute steal. It took me quite a few months before I decided to switch from using this as a dual purpose keg chiller and fermentation chamber to full on keezer duty, but I finally pulled the trigger this weekend with some help from my Dad who was visiting for the weekend.
So off we go:
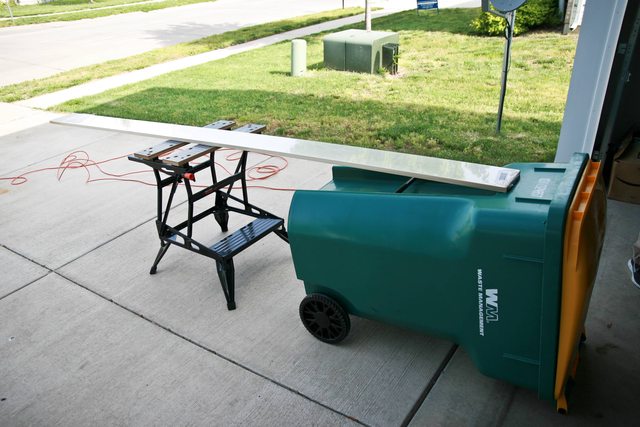
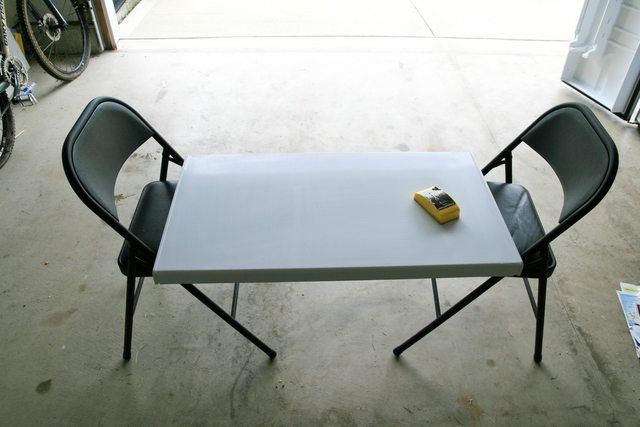
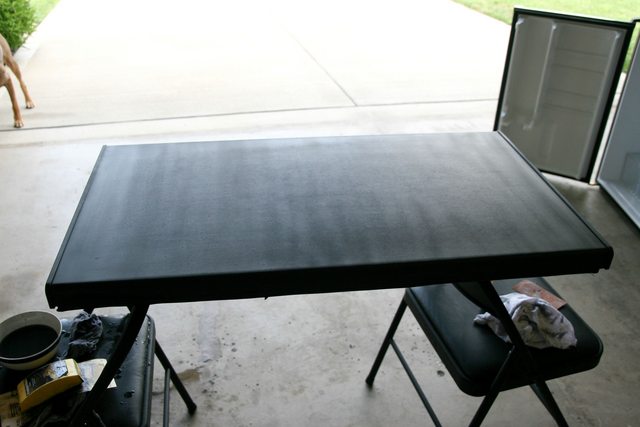
I chose to use Poplar as the wood for my collar since it was probably the best quality that I could find at the local Lowes. It was roughly $30 for a 1x8x10' board. Since I didn't have a huge workbench to work on, I had to improvise. You'll see that this is a bit of a common trend throughout this build.
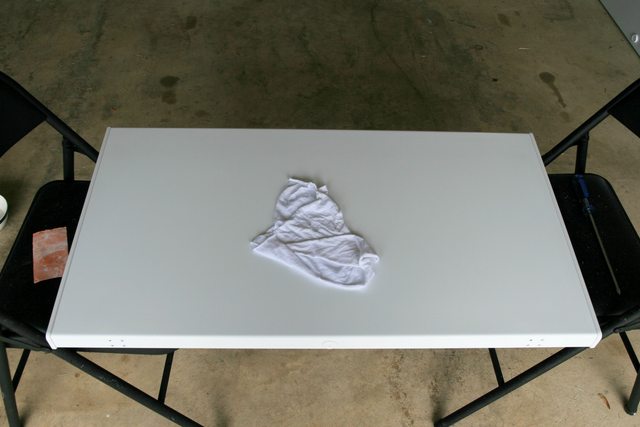
After creating our makeshift workbench, we set out to get cutting. We did a couple rough placements of the saw at a 45* angle (decided on doing miter joints) to use the least wood possible for each cut. If we cut everything right, we had only ~4.5-5" of wood left. Not a lot of room for mistakes, especially with a $30 piece of wood.

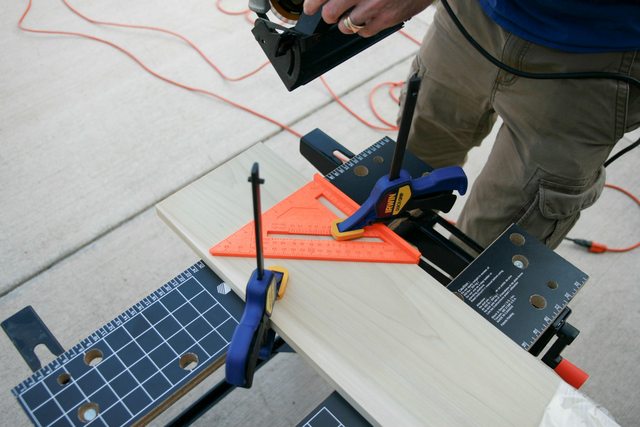
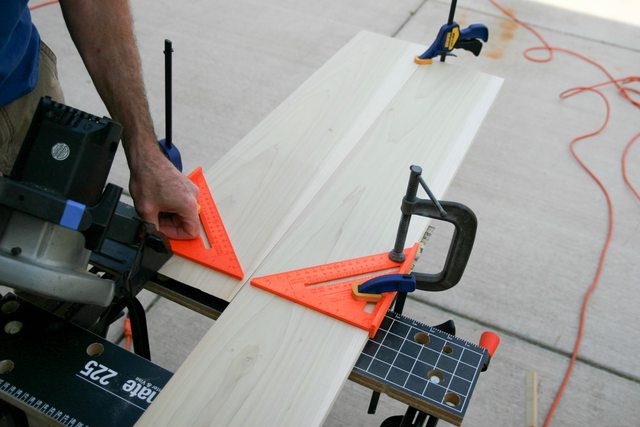
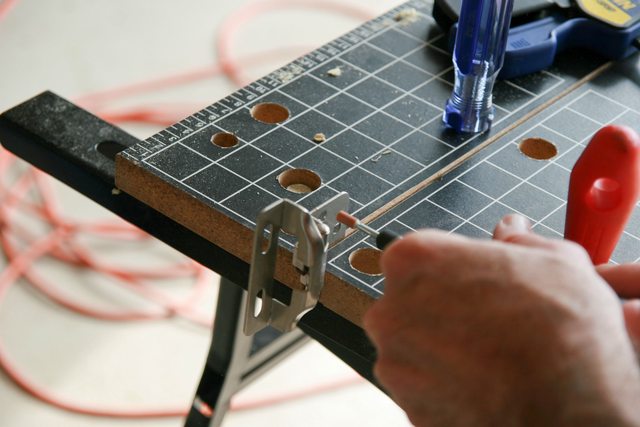
We realized that we needed a guide for the saw before the blade made contact with the wood, so we rigged some squares up to be level with the square on the wood to ensure a straight cut.
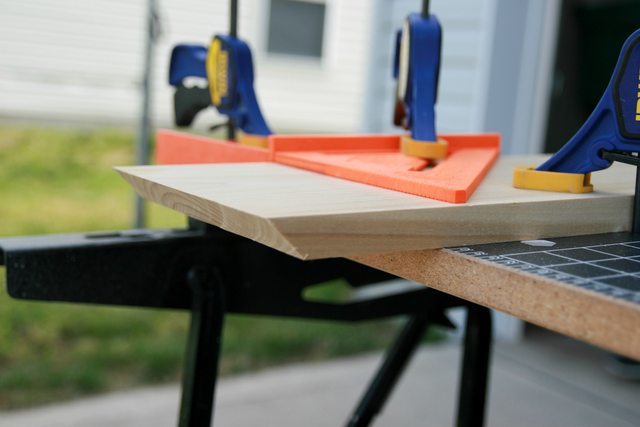
The guide worked well and we ended up with a relatively straight cut. A small amount of sanding will fix some of the slight waivers that we ended up with along the thin edge.
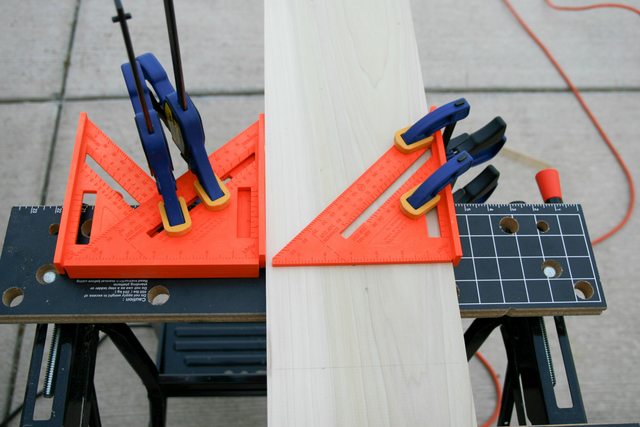
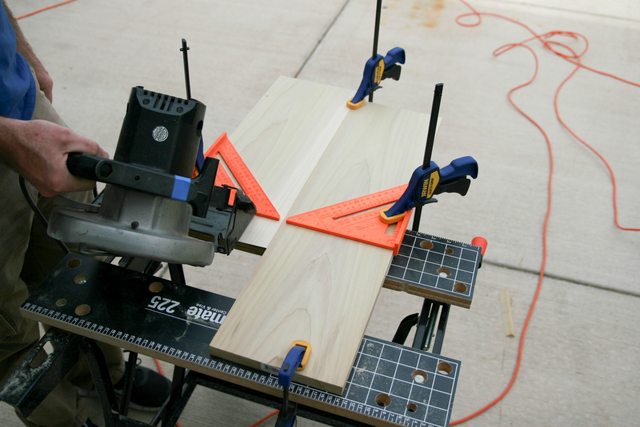
Using a similar concept to the first cut. We had to switch cutting sides to make sure we ended up with the right angle on the board.
After we made the second cut (long side for either the front or back of the keezer), life was a bit easier because we could use the cut piece to help "jig" the rest of the cuts and not have to make a pile of squares.
One of the last cuts for the smaller sides.
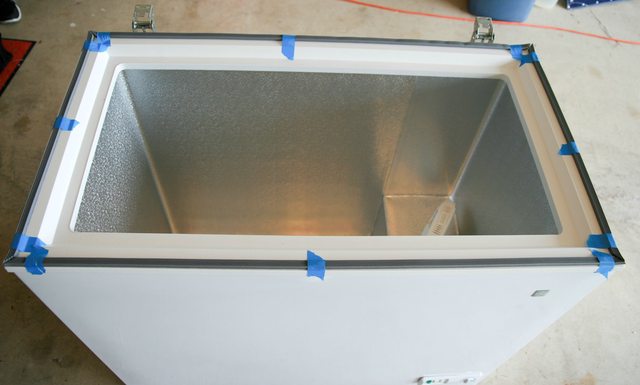
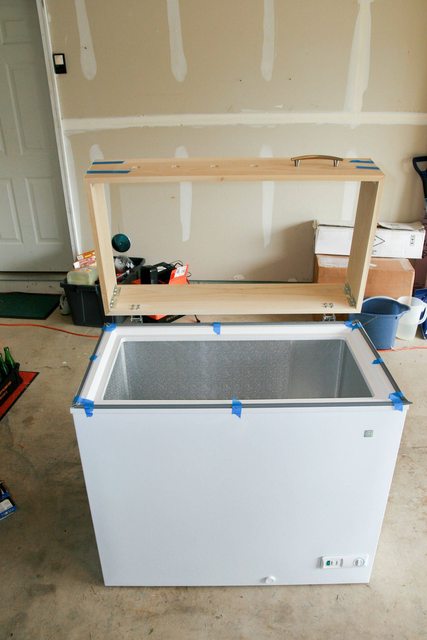
After we cut the boards to shape, we wanted to figure out how to hinge everything together. I decided on going with a dual hinge design to make life easier for working on plumbing and replacing kegs. Since the original lid had a gasket built into it, I needed to add another gasket. I decided on using some weather stripping made for windows that compressed nicely to make a solid seal. Seals were taped into place for all of the test fitting to make sure everything would work before making it permanent.
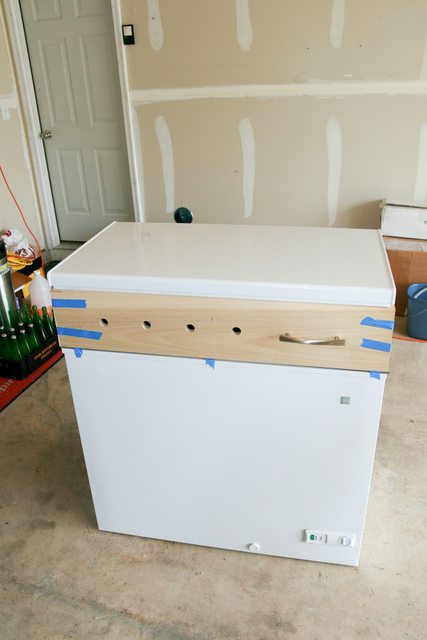
One of the many test fits we did to make sure that this would work. At this point it's all held together by my favorite 3M product: blue painters tape. It's low tack and doesn't leave behind any glue residue which is important for staining and painting in the future. Remember to test fit as much as possible before making things permanent!
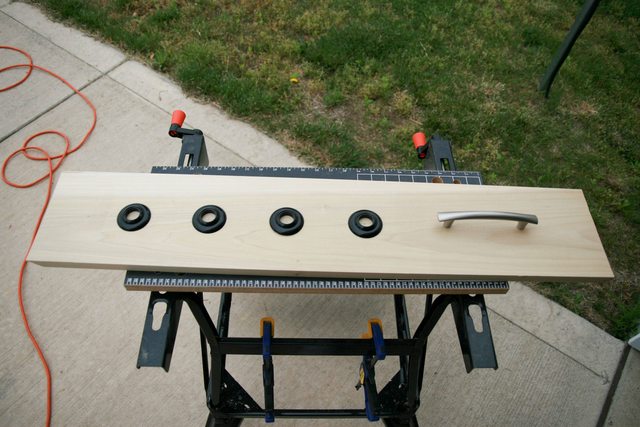
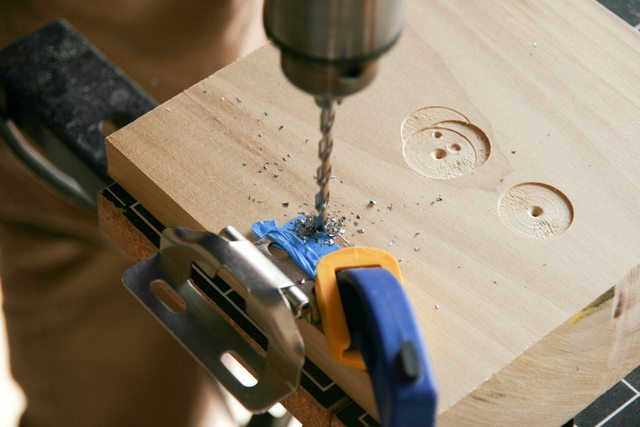
With the test fit complete, we took everything apart and chose the best fitting piece with the best grain and miter cuts for the front. I disassembled my shanks and used the plastic finishing collar to get a rough idea of how I wanted the taps laid out, as well as optimal handle placement.
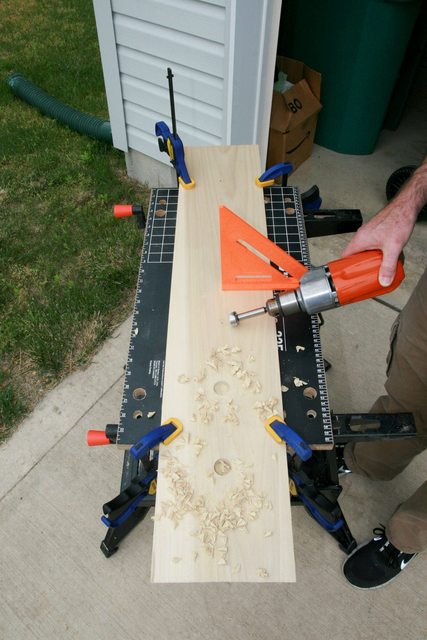
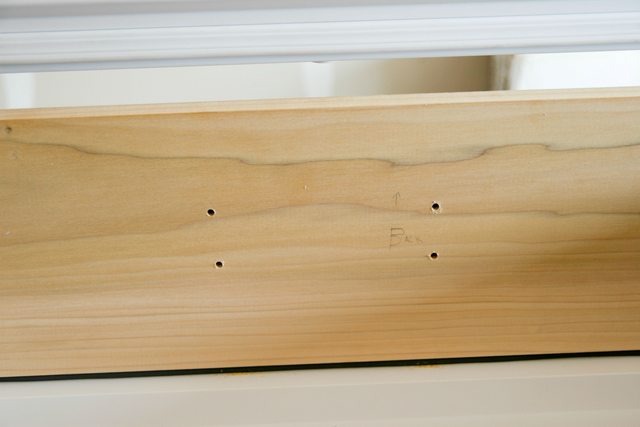
After doing careful measurements, measuring again, and then measuring again carefully, we drilled the hole. Hole sizes for shanks are 7/8". We ended up reading the placement in the drill bit case wrong and never looked at the actual bit size to confirm the hole we were drilling. Luckily it was only an 1/8" bigger than we needed, and actually gave us some wiggle room for foam later down the line. To make sure that we didn't ruin the wood on the back side, we placed our leftover 4" piece of wood behind each drill hole.
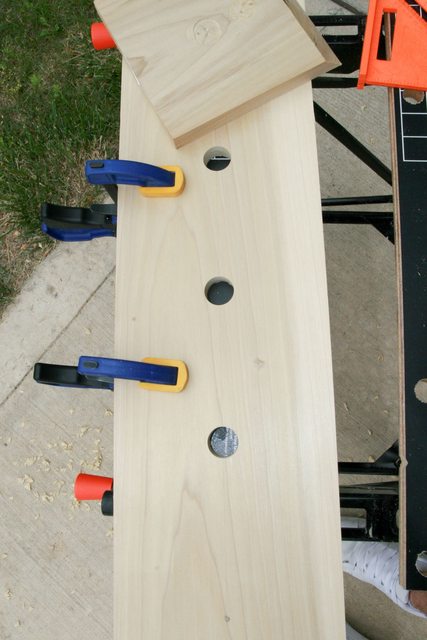
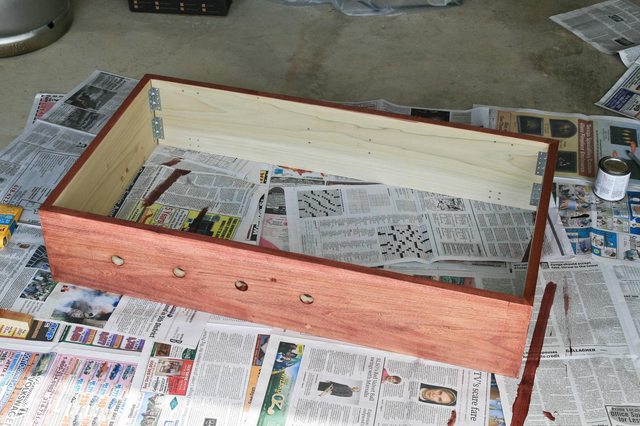
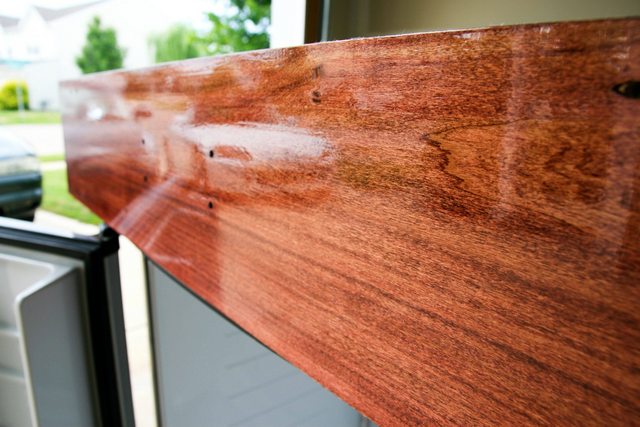
The finished product. Poplar is absolutely great to work with and cuts very nicely.
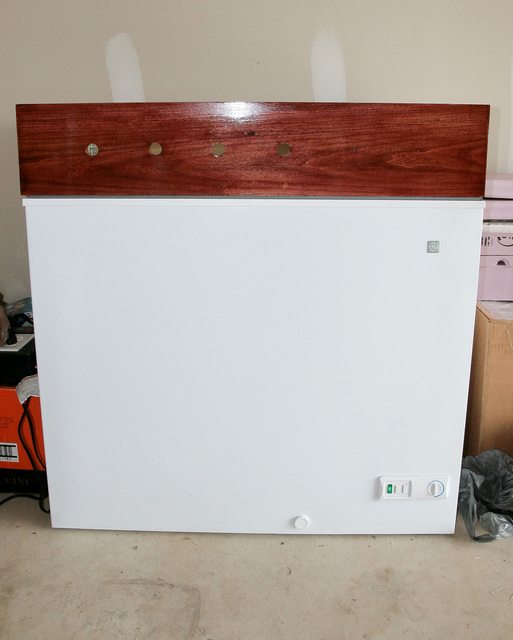
Test fitting everything together again with the handle and tap holes in place. Didn't I say test fitting was important?
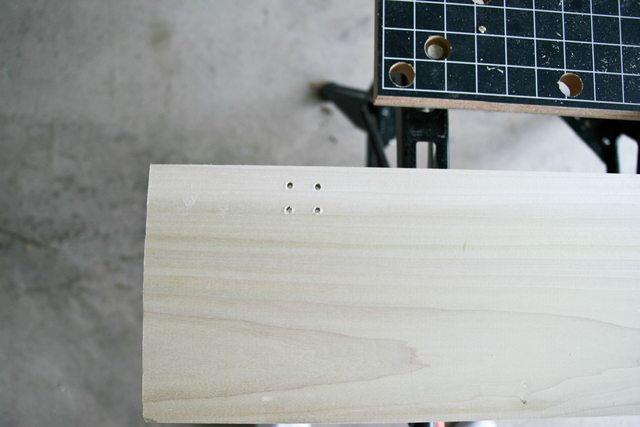
Drilled the holes for the hinges. I decided to use the OEM hinges to keep things simple, and since they would be handling the entire weight of the collar.
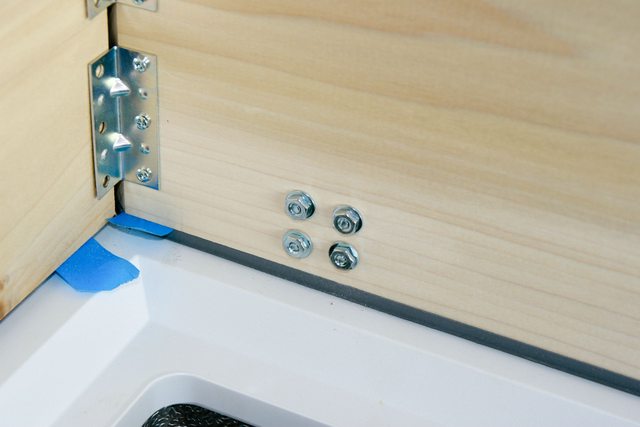
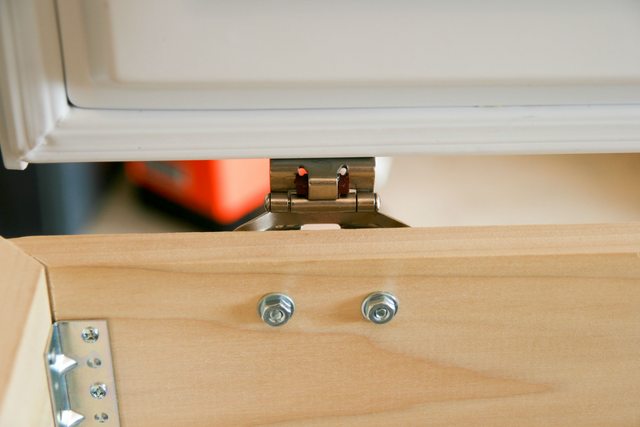
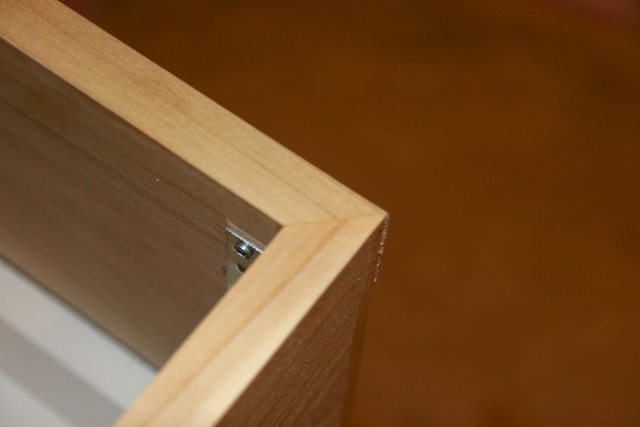
We used #10 nuts/bolts as they matched the OEM hinge holes perfectly. In this picture you can also see one of the angle brackets that we used to support the miter joints of the collar. We used 2 in each corner for a total of 8. The collar feels bomb proof with this many screws/joints.
An outside shot of the re-purposed OEM hinge with new hardware.
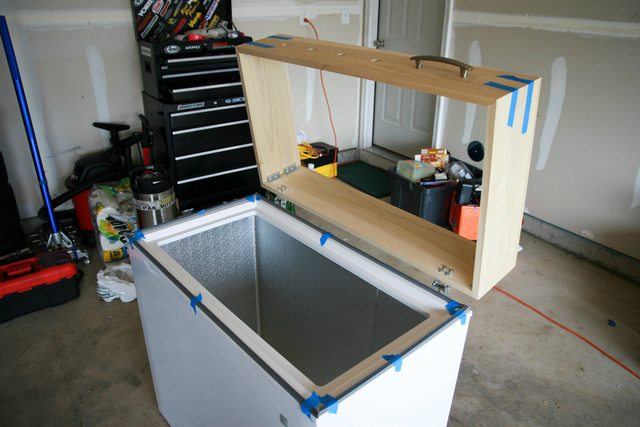
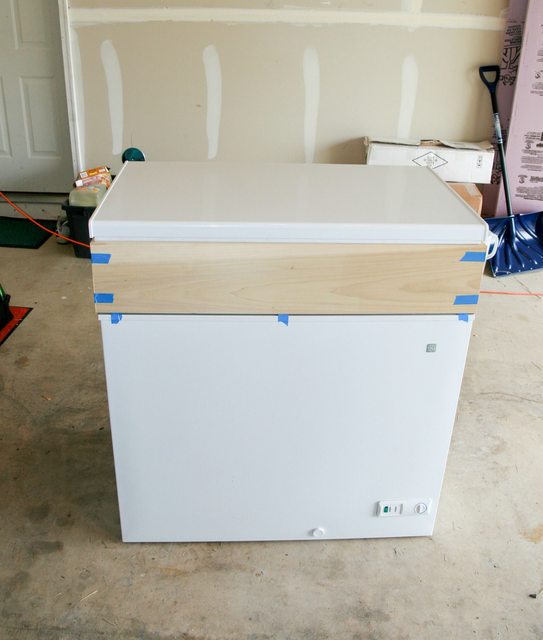
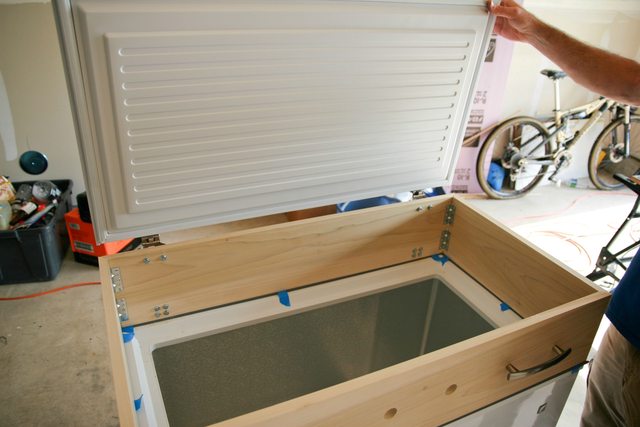
It actually works! OEM hinges showed no signs of stress with the test fit and test opening.
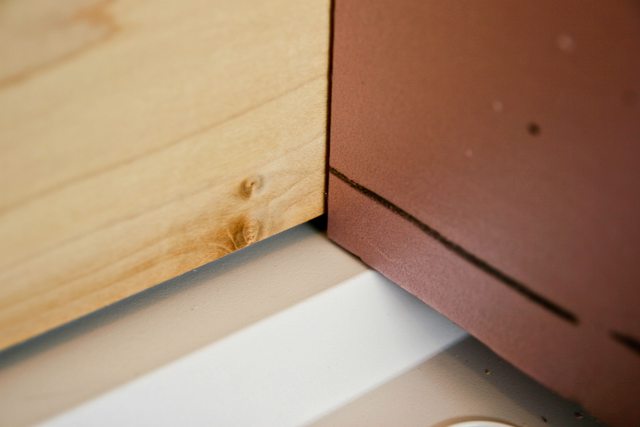
Different angle showing the collars test fit. Mounting the hinges like this allows me to easily do keg swaps while keeping all plumbing above the kegs.
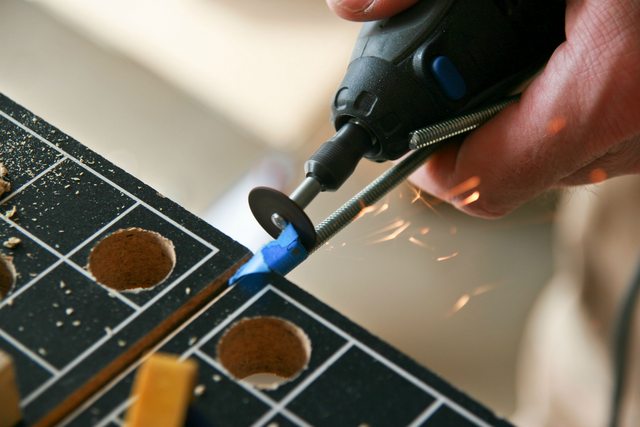
It took 2 separate trips to find the right set of hinges for the top portion of the keezer. We ended up going to Menards and found the perfect hinge to complete the task. To match the hole pattern of the OEM top, we had to drill and slightly widen the new hinges with a dremel. Make sure that you have extra grinding stones, as the two hinges essentially ate the bit.
Drilling new holes in hinges to better mount to OEM lid.
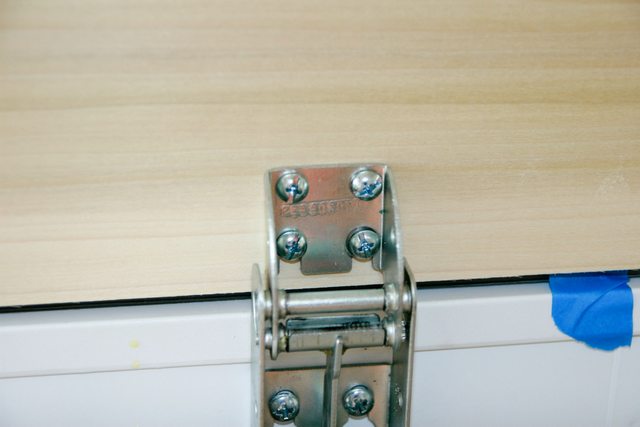
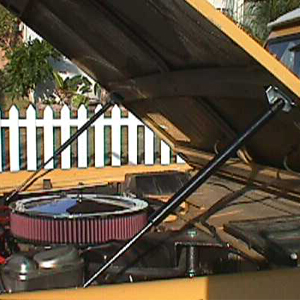
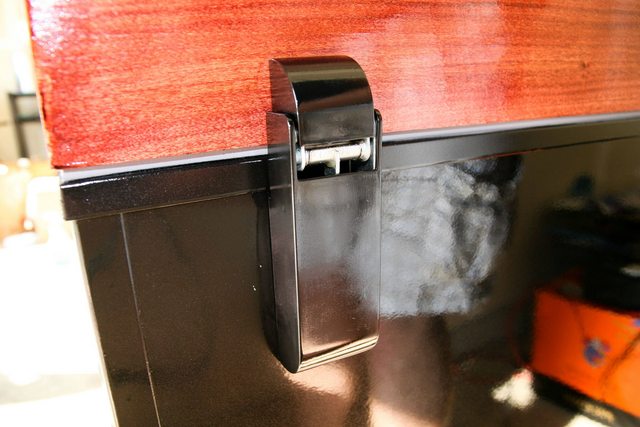
New hinges mounted for a test fit. Unfortunately there is no stop on these hinges to prevent the lid from opening too far. I'm still trying to figure out a simple, yet elegant solution to this issue. For now, I'll keep the lid propped against the wall when I'm working on plumbing to prevent hyper-extension.
Closeup of the new hinges. They are meant for cabinets, but seem like they are robust enough to support the relatively light weight of the OEM freezer top.
With hinges complete, it was time to move on to installing new insulation.
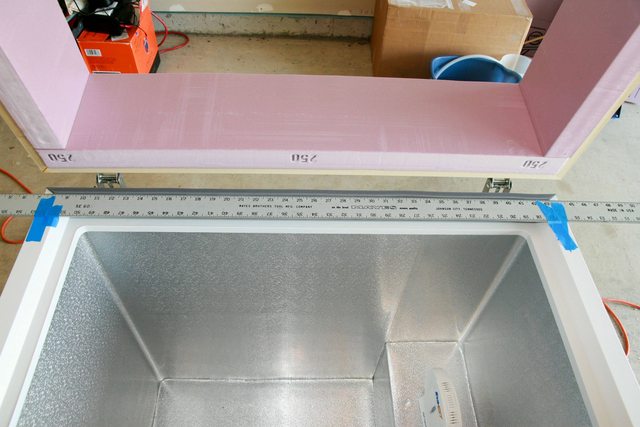
Since the OEM lid had a stair-step, we wanted to make sure that there would be a good seal with the new collar. We took measurements with the lid closed on top of the new seals to provide a solid fit.
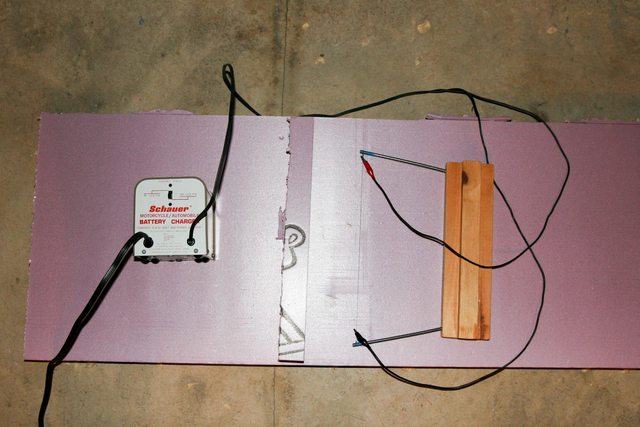
To get the clean cuts in the foam pictured above, we used a DIY "hotwire". You can see the difference between a crappy hand cut (left) vs a hotwire cut (right) on the small piece of foam.
With foam cut to fit, we moved on to final (permanent) assembly of the collar.
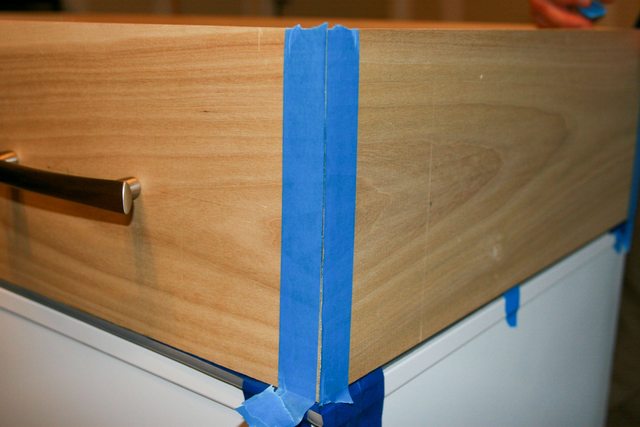
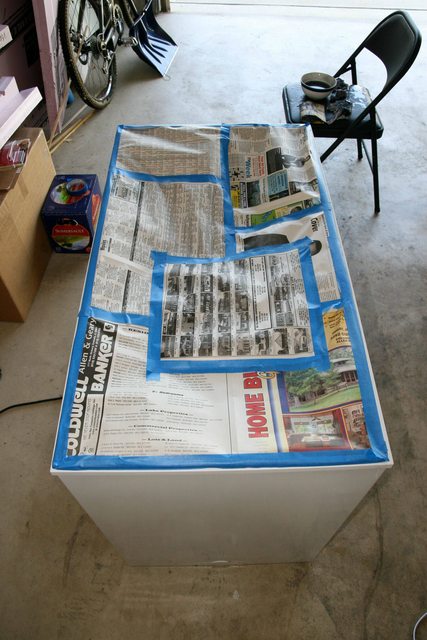
We used blue painters tape again on the outside edge of the joint before gluing to make sure that any wood glue that did seep out from the joint wouldn't ruin the wood for stain in the future.
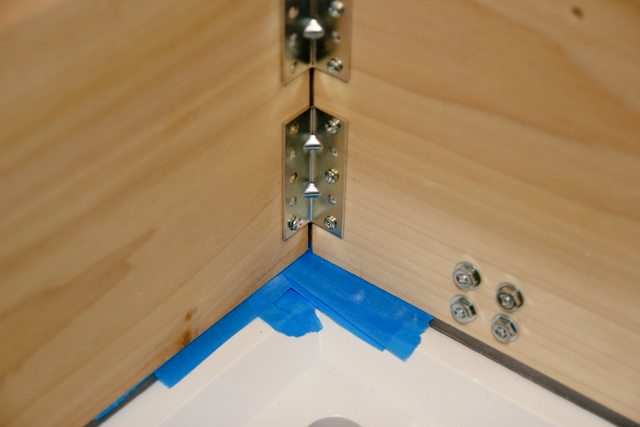
We applied more blue tape over the new gasket to make sure we didn't fuse anything together with glue.
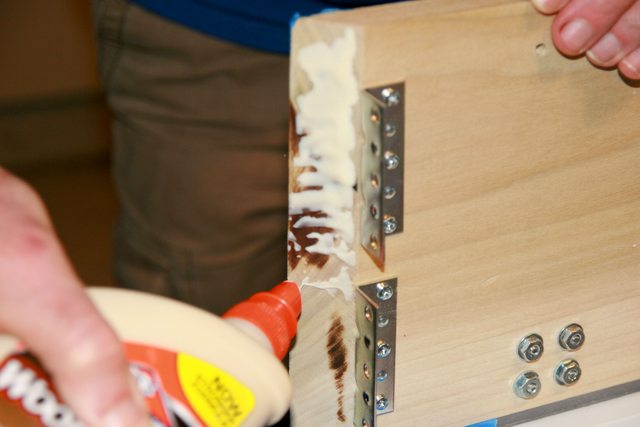
Just a shot of the amount of glue that was used. You don't need to go crazy with it, but make sure that you apply glue to each side of the joint.
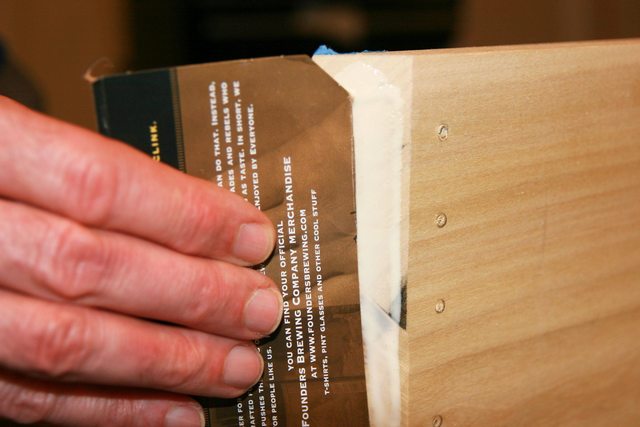
I used a piece of cardboard from a 4-pack case of Founder's Breakfast Stout to spread the glue out into a nice even layer without bubbles/gaps.
After fully screwing the joints down, we immediately pulled the blue tape off. We wiped down the joint with a wet (not soaking, you want it damp) cloth to clean off any wood glue residue while it was still tacky.
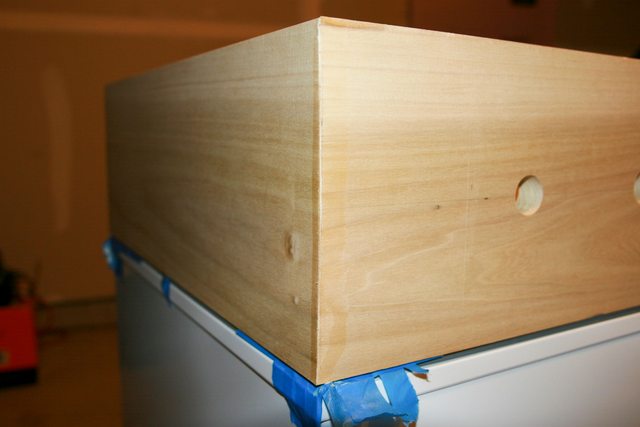
The finished miter joint. The focus was off in this shot, but you can still see how well it turned out. I'm pretty pleased with it!
At this point, we called it a day and let the joints dry overnight for roughly 12 hours. We started up the next morning with tap installation.
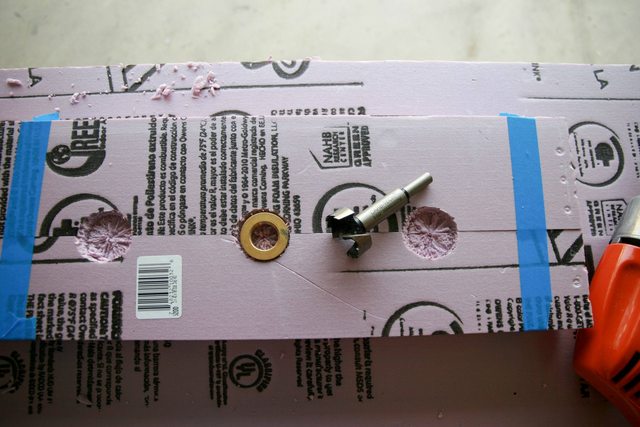
After cutting all the foam to size, we devised a way to make sure I could still cover the shanks and keep the foam flush to the wood for the best insulation. We ended up doing a shallow cut with a drill bit the depth of the shank nut to accomplish this.
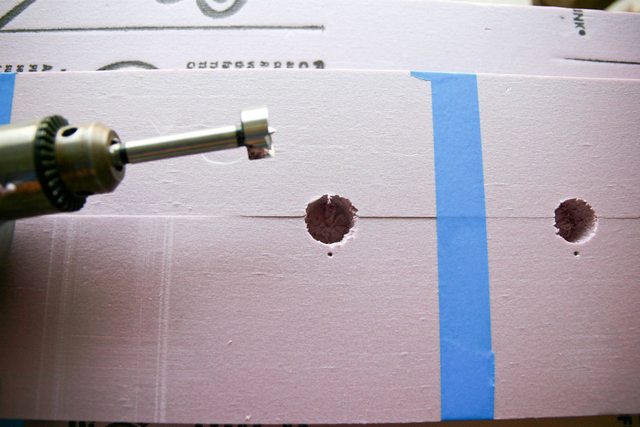
After doing the larger partial drill into the foam on the one side, we matched up the hole with a drill bit sized to the actual shank. We drilled through the other side to get a nice clean cut. You can see one of the other cuts splitting this piece into two... more on this later.
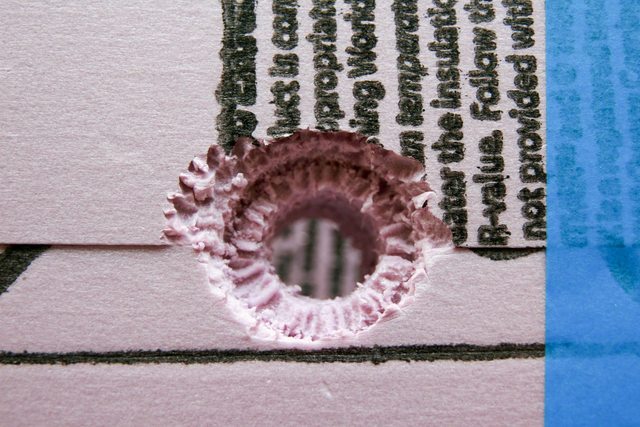
Completed hole for the shank assembly. The foam wasn't the easiest to cut with a drill, but got the job done. It'll be hidden from sight anyway when everything is assembled.

Ended up going with all stainless steel Perlick 525SS faucets and cheap black plastic tap handles for now. The build quality on these is amazing.
Test fit again to make sure everything lined up properly. Success!
Ended up going with all stainless steel Perlick 525SS faucets and cheap black plastic tap handles for now. The build quality on these is amazing.
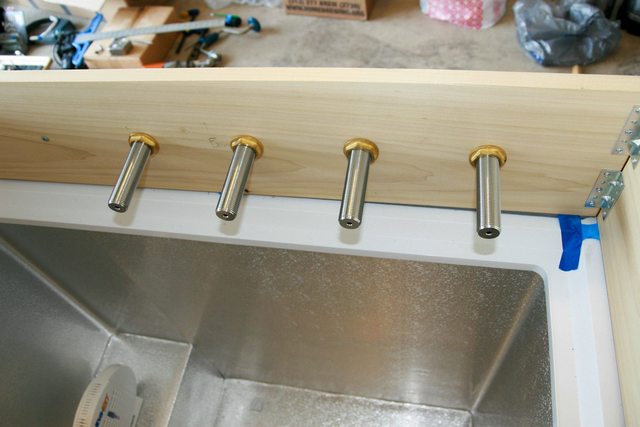
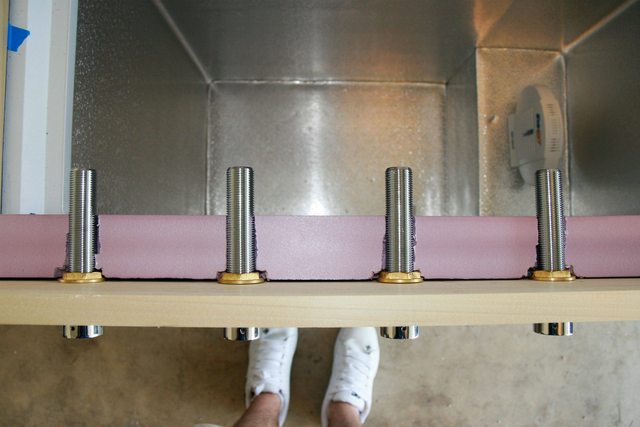
Shanks installed before inserting foam.
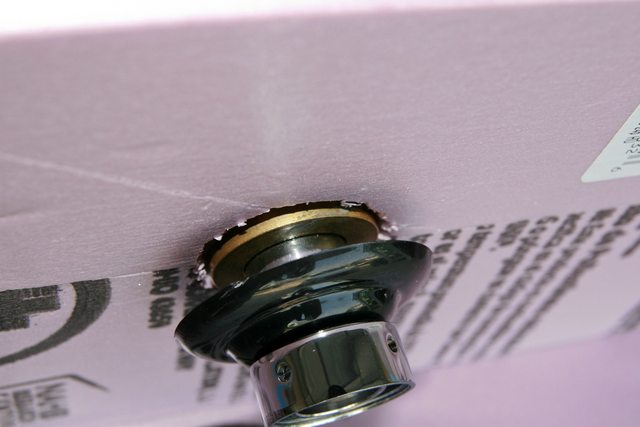
Just enough of the tail of the shank sticking out. You can see the slight cut in the middle of the big foam piece, more on this in a few images.
Flush fit of the foam against the wood for the best insulation around the shanks/taps.
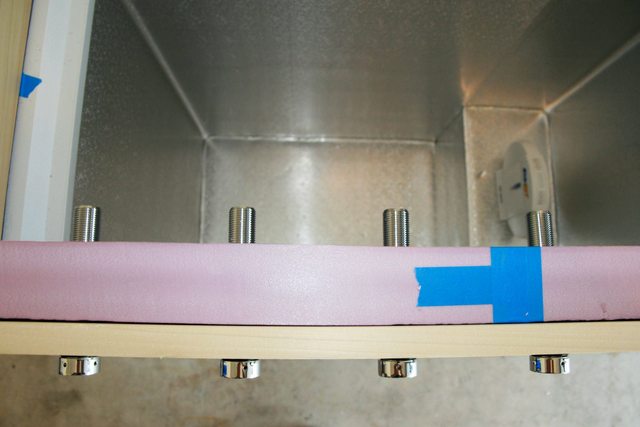
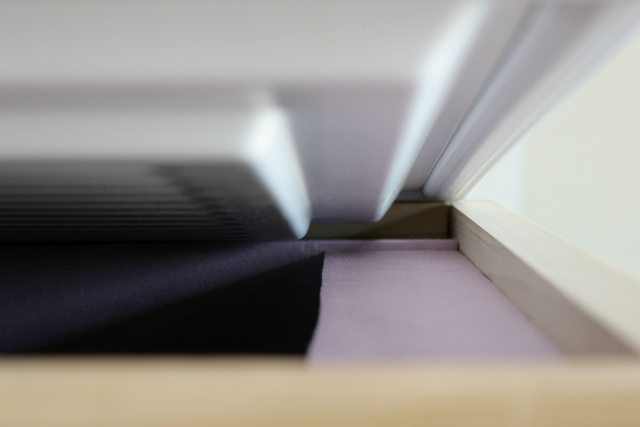
Cross section of how the foam fits around the shanks. I chose to split this piece of foam in half since I didn't want any of the foam to be permanent. With the precise hotwire cut, we were able to make everything a friction fit. This also enables me to work on the shanks without much mess or fuss.
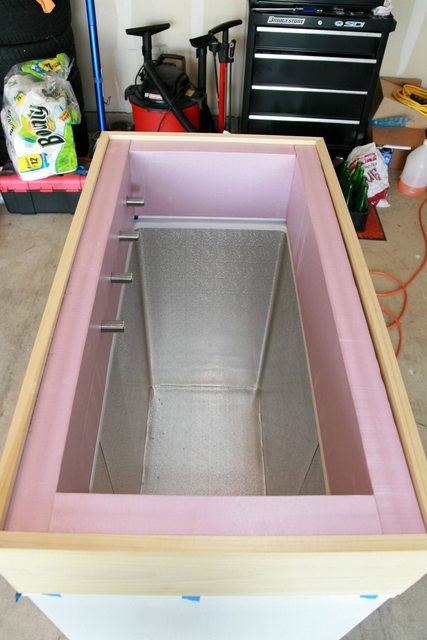
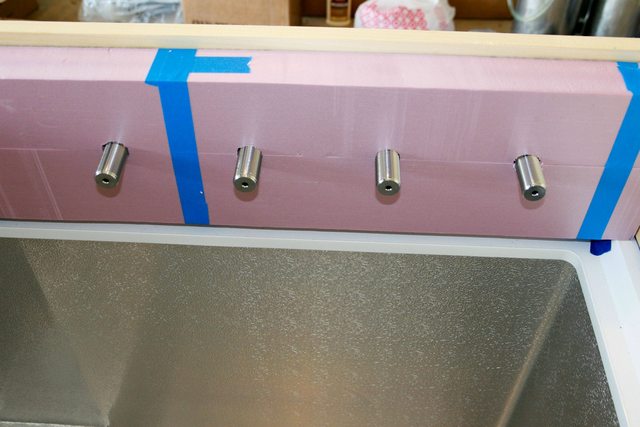
Foam completely installed.
Closing the lid yields just enough clearance to match the stair stepping and provide a really good seal.
Another view of how well the lid seals on top of the foam insulation.
With the foam insulation complete, it was time to finalize the gasket that goes underneath the collar.
Using a straight edge to prevent "squirms" in the gasket.
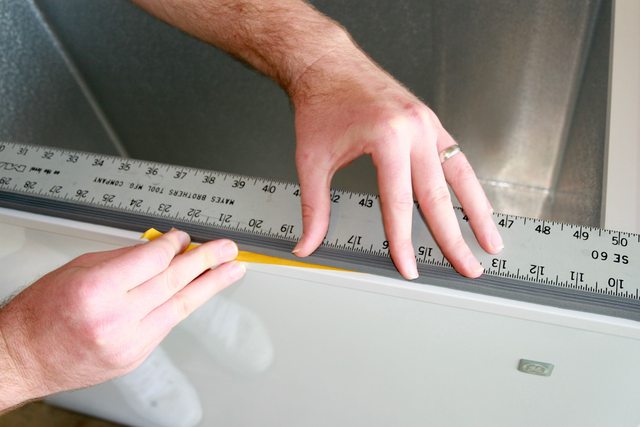
To keep the gasket straight, I pushed the gasket against the straight edge and peeled the glue backing off at a 180* angle so I could still keep the gasket flat.
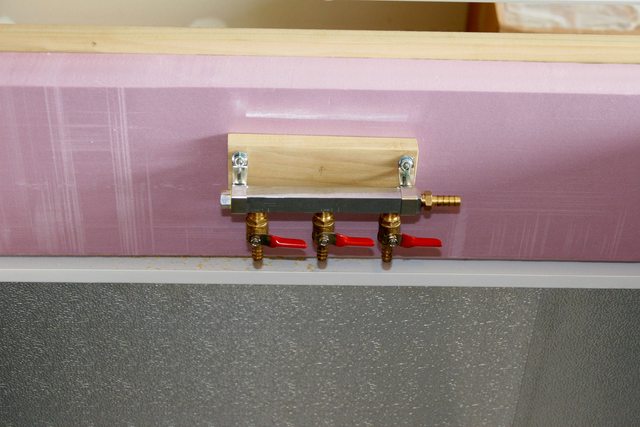
Only a few more things to do after this. Since I'm squeezing 4 kegs into this freezer, I got a 3 tap manifold so I could force carb 1 keg and keep 3 at serving pressure.
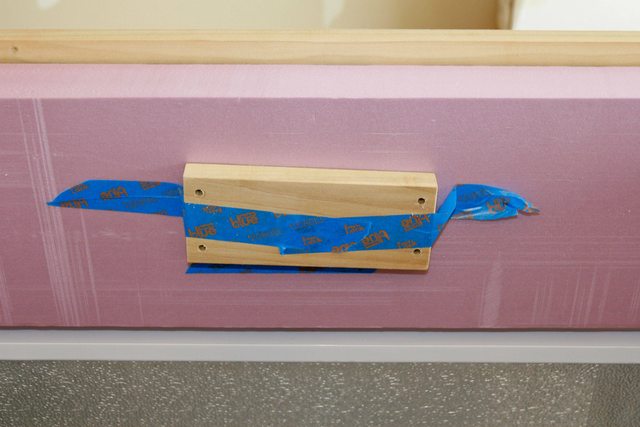
Again, a quick test fit. We used a piece of the remaining poplar to mount the manifold bracket to that would then go through the foam and mount to the collar itself for extra strength.
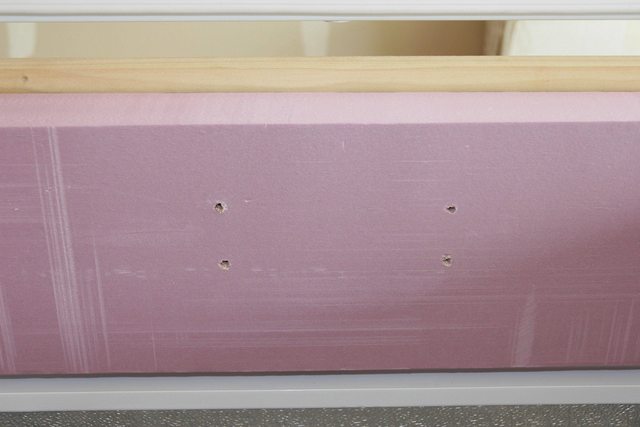
We used the drilled mounting plate as a guide to drill through the foam and collar to make sure we lined everything up for it to bolt together easily.
And the drill through the collar.
Since the overall thickness from collar to mounting plate was just over 4.5", we opted to make our own screws.
Finished product (close-up)
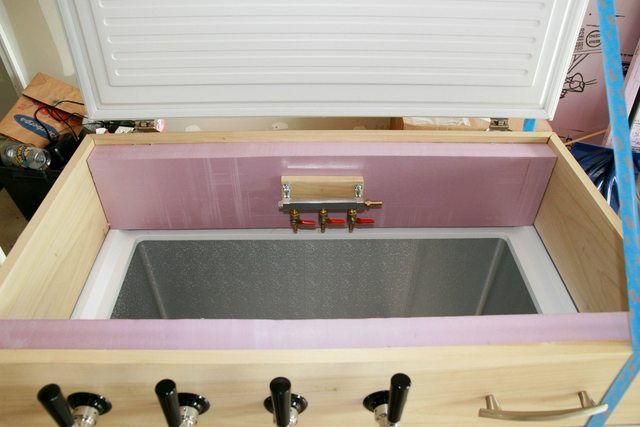
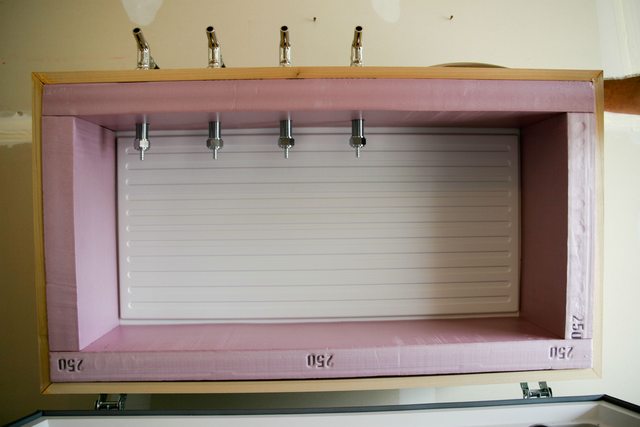
Zoomed out to show positioning within the keezer. We made sure to leave ample room for tubing running from the CO2 tank to the manifold, and then tubing from manifold to kegs.
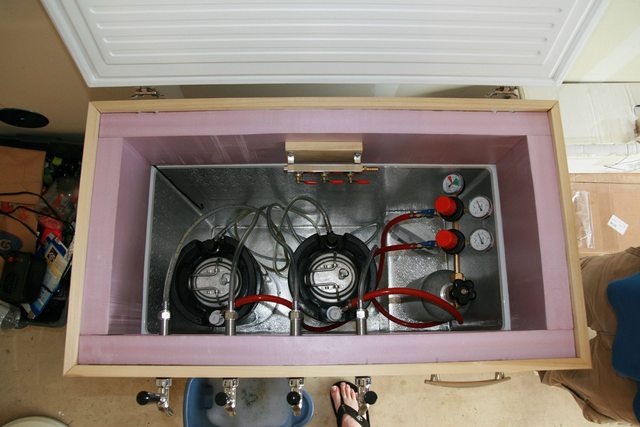
Plumbing run for two kegs.
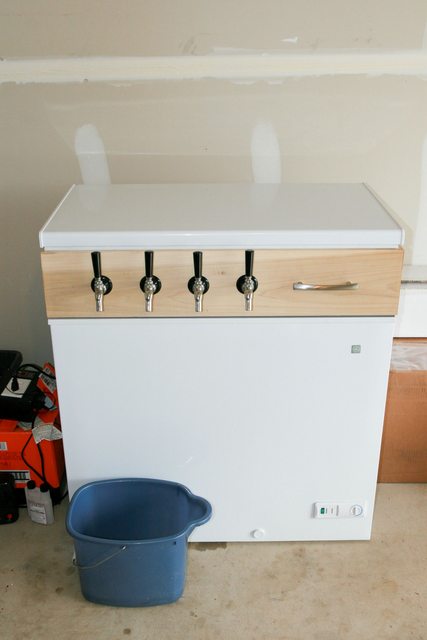
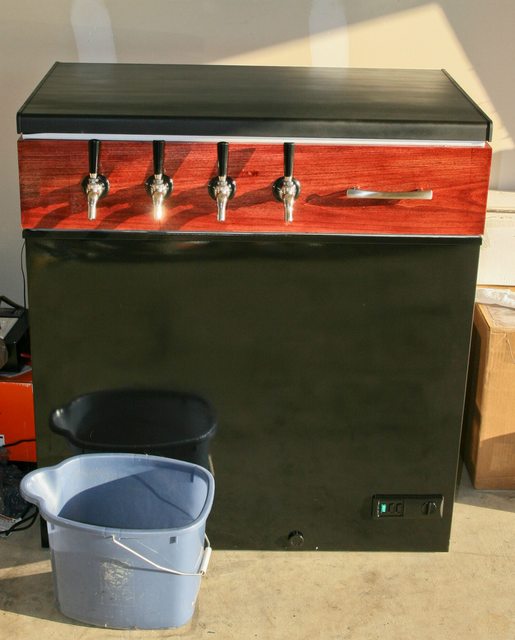
Final product as it stands. I didn't think I needed a drip tray at the time of ordering the rest of the hardware, and partially regret that now. Using a bucket as a drip tray until I can figure out how to mount the drip tray.
At this point, this is where the keezer stands. There are still some miscellaneous things to accomplish:
- Choose stain for collar.
- Stain collar.
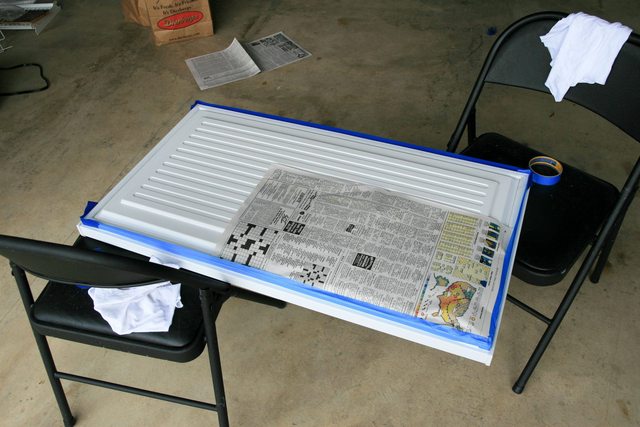
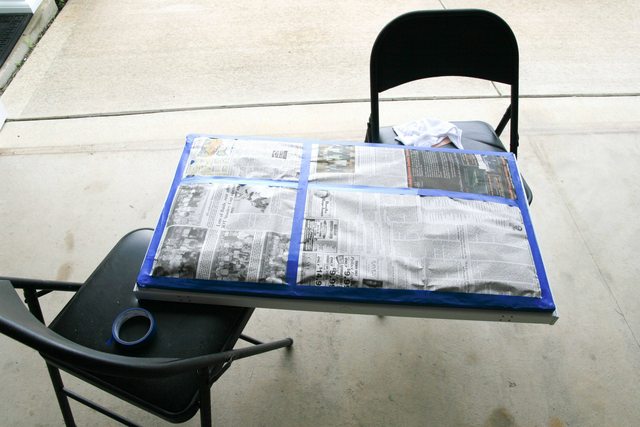
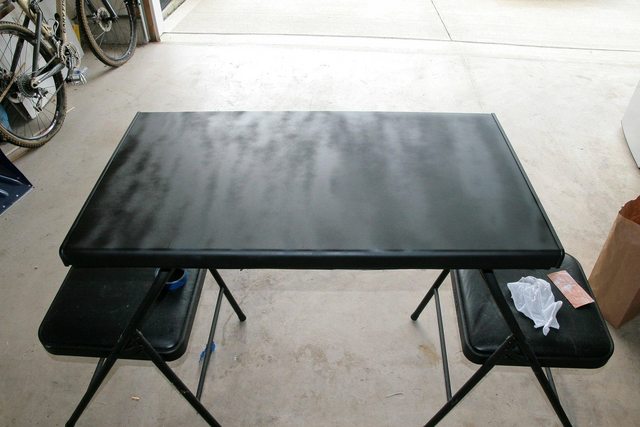
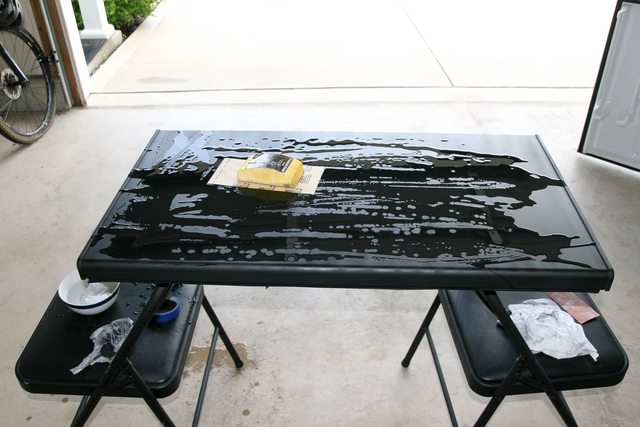
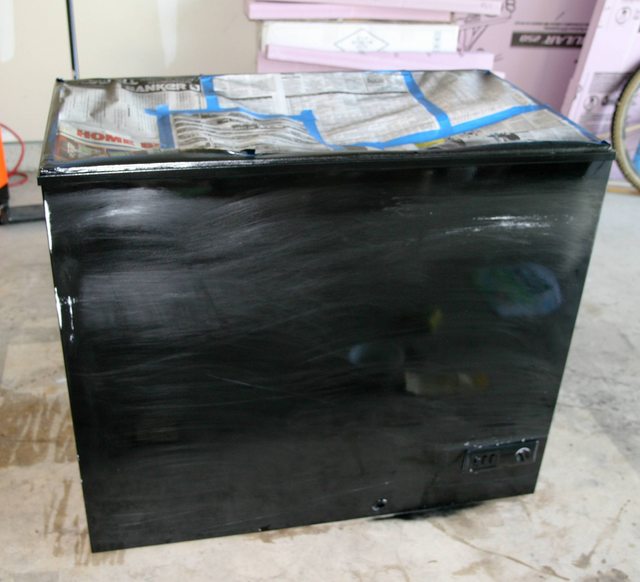
- Choose paint for freezer (thinking black enamel bottom, chalkboard top).
- Paint freezer.
- Finish plumbing for extra two kegs.
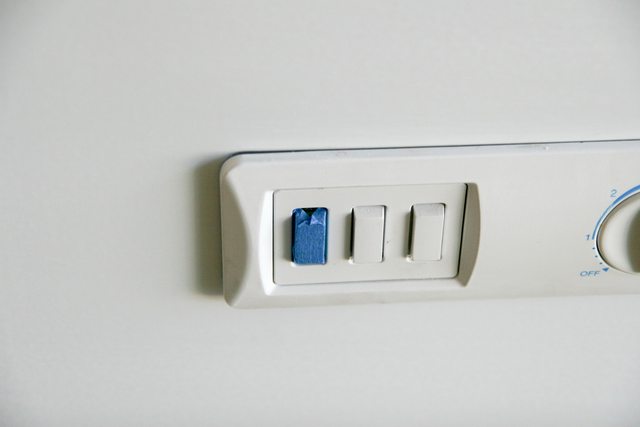
Other than that, this thing is about done! Temperature is controlled by a STC-1000 that I previously wired up following another DIY guide.
I hope everyone enjoyed the guide so far. It took about 2 days and roughly 14 hours with all of the test fitting and cutting of the foam taking the most amount of time. I look forward to everyone's feedback and questions!
I ended up getting the GE 7.0 cu. ft freezer on a black Friday sale for $150, which for me was an absolute steal. It took me quite a few months before I decided to switch from using this as a dual purpose keg chiller and fermentation chamber to full on keezer duty, but I finally pulled the trigger this weekend with some help from my Dad who was visiting for the weekend.
So off we go:
I chose to use Poplar as the wood for my collar since it was probably the best quality that I could find at the local Lowes. It was roughly $30 for a 1x8x10' board. Since I didn't have a huge workbench to work on, I had to improvise. You'll see that this is a bit of a common trend throughout this build.
After creating our makeshift workbench, we set out to get cutting. We did a couple rough placements of the saw at a 45* angle (decided on doing miter joints) to use the least wood possible for each cut. If we cut everything right, we had only ~4.5-5" of wood left. Not a lot of room for mistakes, especially with a $30 piece of wood.
We realized that we needed a guide for the saw before the blade made contact with the wood, so we rigged some squares up to be level with the square on the wood to ensure a straight cut.
The guide worked well and we ended up with a relatively straight cut. A small amount of sanding will fix some of the slight waivers that we ended up with along the thin edge.
Using a similar concept to the first cut. We had to switch cutting sides to make sure we ended up with the right angle on the board.
After we made the second cut (long side for either the front or back of the keezer), life was a bit easier because we could use the cut piece to help "jig" the rest of the cuts and not have to make a pile of squares.
One of the last cuts for the smaller sides.
After we cut the boards to shape, we wanted to figure out how to hinge everything together. I decided on going with a dual hinge design to make life easier for working on plumbing and replacing kegs. Since the original lid had a gasket built into it, I needed to add another gasket. I decided on using some weather stripping made for windows that compressed nicely to make a solid seal. Seals were taped into place for all of the test fitting to make sure everything would work before making it permanent.
One of the many test fits we did to make sure that this would work. At this point it's all held together by my favorite 3M product: blue painters tape. It's low tack and doesn't leave behind any glue residue which is important for staining and painting in the future. Remember to test fit as much as possible before making things permanent!
With the test fit complete, we took everything apart and chose the best fitting piece with the best grain and miter cuts for the front. I disassembled my shanks and used the plastic finishing collar to get a rough idea of how I wanted the taps laid out, as well as optimal handle placement.
After doing careful measurements, measuring again, and then measuring again carefully, we drilled the hole. Hole sizes for shanks are 7/8". We ended up reading the placement in the drill bit case wrong and never looked at the actual bit size to confirm the hole we were drilling. Luckily it was only an 1/8" bigger than we needed, and actually gave us some wiggle room for foam later down the line. To make sure that we didn't ruin the wood on the back side, we placed our leftover 4" piece of wood behind each drill hole.
The finished product. Poplar is absolutely great to work with and cuts very nicely.
Test fitting everything together again with the handle and tap holes in place. Didn't I say test fitting was important?
Drilled the holes for the hinges. I decided to use the OEM hinges to keep things simple, and since they would be handling the entire weight of the collar.
We used #10 nuts/bolts as they matched the OEM hinge holes perfectly. In this picture you can also see one of the angle brackets that we used to support the miter joints of the collar. We used 2 in each corner for a total of 8. The collar feels bomb proof with this many screws/joints.
An outside shot of the re-purposed OEM hinge with new hardware.
It actually works! OEM hinges showed no signs of stress with the test fit and test opening.
Different angle showing the collars test fit. Mounting the hinges like this allows me to easily do keg swaps while keeping all plumbing above the kegs.
It took 2 separate trips to find the right set of hinges for the top portion of the keezer. We ended up going to Menards and found the perfect hinge to complete the task. To match the hole pattern of the OEM top, we had to drill and slightly widen the new hinges with a dremel. Make sure that you have extra grinding stones, as the two hinges essentially ate the bit.
Drilling new holes in hinges to better mount to OEM lid.
New hinges mounted for a test fit. Unfortunately there is no stop on these hinges to prevent the lid from opening too far. I'm still trying to figure out a simple, yet elegant solution to this issue. For now, I'll keep the lid propped against the wall when I'm working on plumbing to prevent hyper-extension.
Closeup of the new hinges. They are meant for cabinets, but seem like they are robust enough to support the relatively light weight of the OEM freezer top.
With hinges complete, it was time to move on to installing new insulation.
Since the OEM lid had a stair-step, we wanted to make sure that there would be a good seal with the new collar. We took measurements with the lid closed on top of the new seals to provide a solid fit.
To get the clean cuts in the foam pictured above, we used a DIY "hotwire". You can see the difference between a crappy hand cut (left) vs a hotwire cut (right) on the small piece of foam.
With foam cut to fit, we moved on to final (permanent) assembly of the collar.
We used blue painters tape again on the outside edge of the joint before gluing to make sure that any wood glue that did seep out from the joint wouldn't ruin the wood for stain in the future.
We applied more blue tape over the new gasket to make sure we didn't fuse anything together with glue.
Just a shot of the amount of glue that was used. You don't need to go crazy with it, but make sure that you apply glue to each side of the joint.
I used a piece of cardboard from a 4-pack case of Founder's Breakfast Stout to spread the glue out into a nice even layer without bubbles/gaps.
After fully screwing the joints down, we immediately pulled the blue tape off. We wiped down the joint with a wet (not soaking, you want it damp) cloth to clean off any wood glue residue while it was still tacky.
The finished miter joint. The focus was off in this shot, but you can still see how well it turned out. I'm pretty pleased with it!
At this point, we called it a day and let the joints dry overnight for roughly 12 hours. We started up the next morning with tap installation.
After cutting all the foam to size, we devised a way to make sure I could still cover the shanks and keep the foam flush to the wood for the best insulation. We ended up doing a shallow cut with a drill bit the depth of the shank nut to accomplish this.
After doing the larger partial drill into the foam on the one side, we matched up the hole with a drill bit sized to the actual shank. We drilled through the other side to get a nice clean cut. You can see one of the other cuts splitting this piece into two... more on this later.
Completed hole for the shank assembly. The foam wasn't the easiest to cut with a drill, but got the job done. It'll be hidden from sight anyway when everything is assembled.
Ended up going with all stainless steel Perlick 525SS faucets and cheap black plastic tap handles for now. The build quality on these is amazing.
Test fit again to make sure everything lined up properly. Success!
Ended up going with all stainless steel Perlick 525SS faucets and cheap black plastic tap handles for now. The build quality on these is amazing.
Shanks installed before inserting foam.
Just enough of the tail of the shank sticking out. You can see the slight cut in the middle of the big foam piece, more on this in a few images.
Flush fit of the foam against the wood for the best insulation around the shanks/taps.
Cross section of how the foam fits around the shanks. I chose to split this piece of foam in half since I didn't want any of the foam to be permanent. With the precise hotwire cut, we were able to make everything a friction fit. This also enables me to work on the shanks without much mess or fuss.
Foam completely installed.
Closing the lid yields just enough clearance to match the stair stepping and provide a really good seal.
Another view of how well the lid seals on top of the foam insulation.
With the foam insulation complete, it was time to finalize the gasket that goes underneath the collar.
Using a straight edge to prevent "squirms" in the gasket.
To keep the gasket straight, I pushed the gasket against the straight edge and peeled the glue backing off at a 180* angle so I could still keep the gasket flat.
Only a few more things to do after this. Since I'm squeezing 4 kegs into this freezer, I got a 3 tap manifold so I could force carb 1 keg and keep 3 at serving pressure.
Again, a quick test fit. We used a piece of the remaining poplar to mount the manifold bracket to that would then go through the foam and mount to the collar itself for extra strength.
We used the drilled mounting plate as a guide to drill through the foam and collar to make sure we lined everything up for it to bolt together easily.
And the drill through the collar.
Since the overall thickness from collar to mounting plate was just over 4.5", we opted to make our own screws.
Finished product (close-up)
Zoomed out to show positioning within the keezer. We made sure to leave ample room for tubing running from the CO2 tank to the manifold, and then tubing from manifold to kegs.
Plumbing run for two kegs.
Final product as it stands. I didn't think I needed a drip tray at the time of ordering the rest of the hardware, and partially regret that now. Using a bucket as a drip tray until I can figure out how to mount the drip tray.
At this point, this is where the keezer stands. There are still some miscellaneous things to accomplish:
- Choose stain for collar.
- Stain collar.
- Choose paint for freezer (thinking black enamel bottom, chalkboard top).
- Paint freezer.
- Finish plumbing for extra two kegs.
Other than that, this thing is about done! Temperature is controlled by a STC-1000 that I previously wired up following another DIY guide.
I hope everyone enjoyed the guide so far. It took about 2 days and roughly 14 hours with all of the test fitting and cutting of the foam taking the most amount of time. I look forward to everyone's feedback and questions!


")
