The Big SS Upgrade with reviews

Homebrew Talk - Beer, Wine, Mead, & Cider Brewing Discussion Forum

Help Support Homebrew Talk - Beer, Wine, Mead, & Cider Brewing Discussion Forum:

This site may earn a commission from merchant affiliate links, including eBay, Amazon, and others.

jmill

Well-Known Member
Joined
Apr 28, 2016
Messages
168
Reaction score
44
After a few bad brew days, I decided to go ahead and accelerate the upgrades of my equipment. I began with partial mash kits and a starter kit from my LHBS. After a handful of brews, I moved to a 2 cooler AG system. After some research and lots of planning, I've decided to make one final upgrade so I have a system I can really grow into and can avoid more frequent upgrades. I can do 5 gal batches with this system, but it should be good for most 10 gal batches absent a huge barley wine. I settled on a direct fire SS system. I have 1 pump for now, and may add a second before I'm done.

I've received all but two pieces, and began rearranging the garage. I thought I'd share both to keep a record for myself and perhaps provide unbiased reviews for some of the products I am using.

I welcome any advice you may have. Anyone have the Beersmith profile for a 15 gal Spike MLT? Or wanna guess how much my efficiency is going to rise?

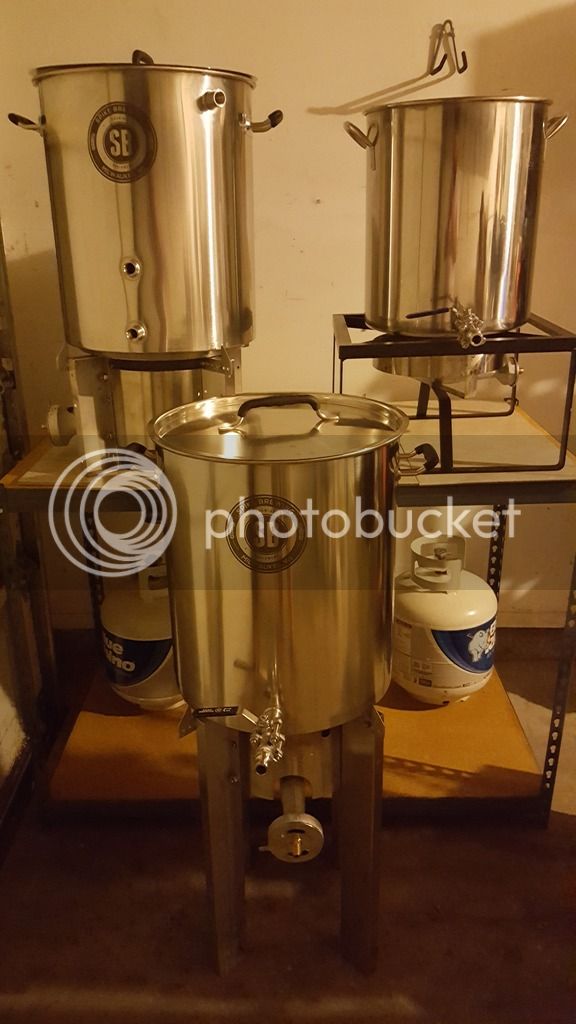
Here is the new lineup:

Brew stand: heavy duty steel shelves with partial board shelves (sealed) (in 2 parts - one for brew stand and one for work bench/grain/equipment storage)
10 gal 1 weld LHBS SS HLT with internal markings + LHBS bayou based burner
15 gal 3 weld Spike MLT with Spike false bottom and SS Brewtech re-circulation manifold + Blichmann burner
15 gal 1 weld Spike BK + Blichmann burner with leg extensions
6" x 16" Arbor Fabricators Hop Basket
1 Chugger SS center outlet pump + quick disconnect camlocks
Jaded Hydra IC with whirpool + pre-chiller
SS Brewtech Brewmaster Bucket
Cool Brewing coolers for fermenting temp control

I'm going to be out of town this weekend, so looking forward to putting this to the test next weekend. I'm planning a Boulevard Tank 7 clone so I don't have to worry too much about overshooting the grain profile/underestimating my efficiency. I have 2 bottles of the original in the fridge awaiting a comparison taste test.

I received the Spike MLT today and was a little concerned with the condition of the box. (See pics.) The handle on one side was torn, exposing the 3rd weld. Luckily it wasn't bent or damaged. There were some scratches on the front outside, but nothing worth complaining about. This thing is going to get moved around a bunch, so I am sure it'll have it's marks after use.

And now for some eye candy...


For the beersmith profile, this is easy. All you need to measure is your dead space. Fill with enough water of a known volume to get over the dip tube so you can drain it out. I recommend weighing your water on you grain scale for best accuracy. 8.?? pounds per gallon. Then drain out the mash tun. Then you can either weigh out what you drained out, or dump the leftover water still in the mash tun and weigh that. This will give you your dead space.

Next is your heat coefficient. Use the 0.12 or whatever is listed in beersmith for stainless steel.

Now for efficiency, there are way too many variables involved to have any idea how much of an increase you will get if any at all. Sadly your mash tun will probably have a negligible affect on your efficiency. Other parts of your process will have a greater impact. The most important of the is how you sparge. Batch vs. Fly, how fast you soarge, how well is your grain bed set, are you getting channeling through the grain bed, etc., etc. Additionally your grain bill plays a role in this too. Light 3.5% beers have higher efficiency than a heavy 8% because the ratio of strike to sparge water changes. I fly sparge and if I tediously sparge at 1qt/min I get up into the 90's, but if I speed things up I can drop that significantly.

Thanks for the tips. I do need to get my setup calibrated properly by taking all of those measurements.

I didn't really buy the mash tun with the intent of increasing efficiency. That was more of a comment on how much my efficiency has improved due to prior upgrades. The last brew resulted in an 8.5% Oktoberfest.

I have been batch sparging, but with that recirc manifold, I could probably use it to fly sparge as well.

Yeah. Once you get your volume losses for each step dialed in, it really makes it easier to achieve consistency between batches. Using beersmith to do all these calculations for you makes it so much easier. It's worth way more than what you pay for it.

I started out batch sparging and moved to fly. It really is 6 to one and a half dozen to the other. I was getting up into the mid 80's with efficiency with batch sparging and can now get I to the 90's fly sparging. However, I am starting to purposely drop my efficiency. On light beers I am starting to notice tanning extraction. Additionally this will save some time with sparging.
 
If you plan on fly sparging with the SS Brewtech manifold, you'll be very disappointed. I purchased it thinking I could and it did not work very well. Water was not coming out of any of the smaller holes and only 1 or two of the very large holes at the end of the manifold. If you'll recirculate only with it, then it should work out.

For fly sparging I moved over to the Locline and it works 100 times better. Others use the loclines to recirculate as well.
 
Assembled and cleaned the final piece: a Ss Brew Tech Brew master Bucket. Looking forward to my first run on the complete system tomorrow with a Tank 7 clone. I'll be posting initial thoughts on all the major components over the next week or two.

View attachment 1469330311603.jpg
 
In the middle of boil of my second brew with this setup. Slowly getting a better feel for it. Reviews to come soon.

This brew: 5 gal Centennial Blonde
 
Took a little white, but finally getting around to posting these reviews. Hopefully these will help those making decisions about setups as they get into all grain.

First up....

The Brew Stand

Steel Shelving Unit from Lowes

I've had this now for about 6 months and it has held up well. I needed a brew stand that I didn't have to build from scratch. I split it up into two 2-shelf units, using one as a brew stand and one as a work bench.

I treated each particle board shelf with a waterproof sealant. Initially, I had my burners sitting on tile on top of the treated wood. After some spillage and neglect on my part, the shelf started to bow. Luckily, I caught it before it broke during a brew. I discarded that shelf and took another from the bottom of the workbench. I wrapped it in heavy duty vinyl sheets glued with gorilla glue, replaced the tile on top and sealed the joints with a waterproof caulk.

So far, so good. I don't know how long these will last, but at less than $100, I expect to get another year or two out of them. I'm considering replacing the shelf where the burners sit with a piece of counter top stone cut to size. That would be expensive, but would relieve any headaches caused by a ruined brew day.

I've done 10 gal batches with a full mash tun and 9 gal of sparge water in addition to the burners and kettles without issue. I believe each shelf is rated to hold 800 lbs.

Overall rating: 8/10
Price paid: $59 on sale


Spike Mash Tun

15 gal with Spike false bottom and thermometer

Overall Rating: 10/10
Price: $270

I received my Spike MT as a gift from my wife after she read some articles about chemicals leaching from water cooler plastics. (I'm sure there isn't anything to worry about unless you are using a 10 year old cooler that is scratched.)

Although one of the most expensive upgrades I made, the Spike mash tun is one of the best pieces of equipment I have.

I've brewed about 15 batches now with it. Never had a stuck sparge. I can turn the burner on low during colder brew days without any recirc and end up with no scorched grain. It holds temps very well, losing only 2-3 degrees in summer and 4-5 during winter. Fairly easy to clean.

I can brew 10 gal batches of lighter ABV beers, like blondes and my house kolsch.

The only thing I'd change about it is the weld placements. I wish I would have opted for the welds to be both on the bottom, instead of the traditional thermometer above the valve. When I brew smaller ABV small batches, the water doesn't reach the thermometer, so I have to rely on a probe thermometer. Not a huge deal, but may be something to consider if you are looking at this mash tun.


Back
Top