Super Simple 15G Plastic Conical

Homebrew Talk - Beer, Wine, Mead, & Cider Brewing Discussion Forum

Help Support Homebrew Talk - Beer, Wine, Mead, & Cider Brewing Discussion Forum:

This site may earn a commission from merchant affiliate links, including eBay, Amazon, and others.
@Neopol: Your decision to do your yeast collection after the butterfly rather than before it intrigues me. Was it simply a matter of space constraint, or did you have something more specific in mind?

My setup is catcher->butterfly, I do an initial trub dump, then harvest, then rack, all off the bottom in my configuration.
 
I'm in, ordered two of them. Welding up a rack/stand. Building the yeast trap. Making airtight. Installing racking arm. Great thread.
This is going to take a lot of hassle out of the post-brew necessities. Cheers!
 
@Neopol: Your decision to do your yeast collection after the butterfly rather than before it intrigues me. Was it simply a matter of space constraint, or did you have something more specific in mind?

My setup is catcher->butterfly, I do an initial trub dump, then harvest, then rack, all off the bottom in my configuration.

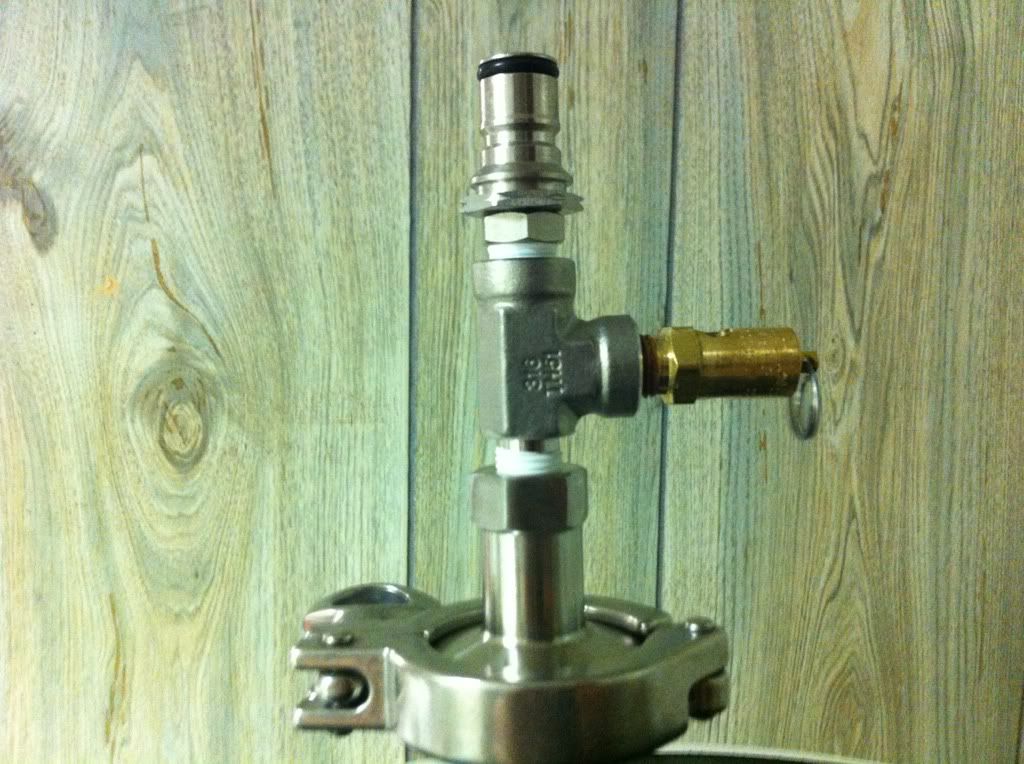
Well after seeing that the trub flowed out like drywall mud when draining it off (but when it breaks it flows), I figured that using the sightglass would let me make a little less of a mess when I purge the trub.
So my process is once I get to my target gravity and plan to rack it off.
I purge the trub, close the valve when I see the buttery colored yeast start into the glass.
Remove, dump, clean, sanitize, reassemble and install end cap loosely to purge air out rather than into your tank.
Open butterfly and collect one cylinder of "Middle Layer" yeast, and pour into a flask for washing/harvesting.
Reassemble and drain the rest of the yeast off for dumping (this is at least a quart or more of yeast and trub on 20+ gal).
(This is the hard part it requires...P..A..T..I..E..N..C..E..)
Clean and reassemble and let it rest for a couple more days to continue floccing and allow what may have stirred up to settle again before moving the process to to racking arm alone.

You have a little less moving parts, its all about what works for you and your process. The above takes me about 15-20 Minutes on a Wed night for a Sat racking.
Hope that helps! Sorry if its overly wordy.


@Neopol - Where did you get your cart from?

Amazon, it is 18 x 24 with a basket, handle and casters I dont recall the brand but there was only a couple options that were reasonable about $80. Very convenient to move 200lbs of liquid around and for cleaning, different ferm-temps etc...next project is to figure out an exterior pex tubing jacket or internal SS coil for isolated temp control.
P1010330-0001.jpg

@Neopol - Thanks a ton. Really appreciate the setup info!!

Sir, you are very welcome!

I owe a big thanks goes to all those who worked, innovated and shared ideas from the beginning of the thread.

It is truely amazing how well an open source of idea sharing can work to the benefit of many .. now if only our congress would quit throwing sand and crapping in the sandbox and cooperate...I know wishful thinking...

In Beer We Trust!
 
question about the lids on the norwesco tanks. mine has a blue piece in the middle. it almost looks like it's a plug that goes all the way though... but then again, i couldn't move it in any way so maybe it's a solid piece.

anyway, wondering if i'm interested in sealing this thing if i'll need to do something with that middle blue plug-like piece.

thanks!
 
well i discovered the answer to my own question. the blue plug looking thing on the lid ISN'T sealed. not a big deal, i'll just seal it before next batch... but a heads up to anyone out there getting a norwesco tank and wanting to seal the lid - you need to seal that blue center plug piece.
 
Great thread!! I'd do this in a second if my fridge width was bigger. I'm limited to 17.5". Ideas??
Could I make it work?
 
drkwoods said:
Great thread!! I'd do this in a second if my fridge width was bigger. I'm limited to 17.5". Ideas??
Could I make it work?

Make your own insulated box and use the guts of your fridge to cool it. There are lots of threads in the DIY section on people who have done that. Some who just took the door off and built an insulated box around it.
 
I bought the 15 gal FD model and attached a variety of tri clover fittings. While performing a leak test, I noticed a tiny drop had escaped from the threaded connection between the tank and my 1-1/2" threaded tri colver connector. After disconnecting, re-taping threads, and re-assembling, I find that the only way to stop the drip is to re-apply the hose clamp that came with the shipping plug. Don't remove the hose clamp. Anybody else notice this?
 
cyclonebeer said:
I bought the 15 gal FD model and attached a variety of tri clover fittings. While performing a leak test, I noticed a tiny drop had escaped from the threaded connection between the tank and my 1-1/2" threaded tri colver connector. After disconnecting, re-taping threads, and re-assembling, I find that the only way to stop the drip is to re-apply the hose clamp that came with the shipping plug. Don't remove the hose clamp. Anybody else notice this?

Yes same here:)
 
OK, I'm a noob to the brewing game, so bear with me if this is a dumb idea...

I read through this entire thread and got a lot of good ideas. Repeatedly, the concern was brought up about introducing a 1qt. air bubble into your brew when re-attaching your yeast trap.

Couldn't you rack off some of your brew into your yeast trap after cleaning and sanitizing it, then hook it back up and open the valve? I realize this wouldn't completely eliminate introducing air to the brew, but it would seem like it would minimize it.
 
Yup that would work. Or you could just not fill it and not worry about it. A lot if people on here are a little over anal. Not a bad thing for brewing but I'm just saying.
 
HomeBrewFoSho said:
Yup that would work. Or you could just not fill it and not worry about it. A lot if people on here are a little over anal. Not a bad thing for brewing but I'm just saying.

Just an idea at this point but I was thinking maybe I could just simply add CO2 at the bottom of my yeast trap and maybe install a small port near the top of it to release and push out air before I open the valve? I'm working on this idea
I'll post pics if I build it in
 
I plan on building a quart sized yeast catcher, just waiting on some sanitary fittings from Brewers Hardware. I would think that if the catcher is filled with wort or must to the brim from the sample port and then reattached, there might be just a couple cubic inches of air that will be introduced.

Wouldn't the CO2 in solution help scrub out the cubic inch or two making it a nonissue?
 
I recommend a 1.5 to 2qt yeast catcher. Mine is 2qt and it is the perfect size for the yeast and trub I get.
 
Has anyone done anything about the extra threading on the female threads on the induction tank? It seems that there is extra threading above where the male threading screws on to the induction tank. Sealing them? Melting the plastic to make them smooth? OR Don't worry about it and just clean and sanitize thoroughly?
 
Has anyone done anything about the extra threading on the female threads on the induction tank? It seems that there is extra threading above where the male threading screws on to the induction tank. Sealing them? Melting the plastic to make them smooth? OR Don't worry about it and just clean and sanitize thoroughly?

Don't worry about it and just clean and sanitize thoroughly
 
I haven't got the conical yet, but your setup here is pretty much the route I intend to take... except I don't want to do drill for a racking arm at all.

I want to take this tri clover and add this adapter and keg post.

It seems you could just slap that on there when you remove the sight glass full of yeast, open the butteryfly, and then go from ball-lock fitting to ball-lock fitting right into your keg. No drilling, no leaking racking hole, easier to clean than some of racking arms I've seen on here.

So... it would be really cool if someone would spend the $40 to guinea-pig my idea for me! :D


It is more like $102 for the parts you listed plus a 1/4" SS street tee and a pressure relief valve and shipping. There could be a savings of $11 to $21 by foregoing SS in favor of a brass street tee.

This set up allows secondary fermentation of wine or mead must after having driven off the CO2 by adding nitrogen or argon to the head space and by venting off the air via the PRV. And of course, the appropriate gas could be used to push the beer, wine or mead to a keg, firkin, etc.

Making the conical airtight is a prerequisite before going down this path. I will post a pic when all the parts arrive.
 
Yup that would work. Or you could just not fill it and not worry about it. A lot if people on here are a little over anal. Not a bad thing for brewing but I'm just saying.
anal and beer- I'm not sure i'd like to try their beer as it may taste like...
I don't close the valve until I'm ready to transfer into a keg, usually about 3 or 4 weeks, so I never 're- attach' the yeast catcher and send a big bubble through the fermenter.. my thinking is that the trub is pretty well isolated in the capsule and their is no harm and some benefit to leaving the beer on the yeast cake. Keep in mind also that the surface area of the yeast is but a fraction of the size it would be if fermenting in a carboy or bucket. The only reason I 'secondary' out of the conical is if I want to chill a beer down to drop the yeast out of suspension, or maybe if I want to further condition the beer with a brett yeast that needs to be isolated from the brew equipment.
 
Here is the pressurizer....

b933aa13.jpg


...for transferring beer, wine or mead or for maintaining a protective blanket of gas for wine or mead, both of which can conceivably be done once the lid is airtight.

I hope to test it out next weekend.

It is comprised of a triclover 1/4" female NPT adapter, a 1/4" street tee, a 1/4" male NPT 50 PSI pressure relief valve, and a matched 1/4" male NPT adapter and gas-in post.
 
This is off topic a bit, but if I wanted to wrap a couple of these 15 gal in 3/8 copper tube would it be effective? I'm sure with steel there is a lot of transfer but would the glycol mix be effective in removing heat from the plastic conical and maintaining temperature?

Thanks
 
Finally made it all the way through the thread. I probably missed it, but I can't recall seeing what people are using to seal the threads on these. Are you using nothing, Teflon tape, pipe dope, or something else? What has worked well for these?
 
Finally made it all the way through the thread. I probably missed it, but I can't recall seeing what people are using to seal the threads on these. Are you using nothing, Teflon tape, pipe dope, or something else? What has worked well for these?

Mine has the 2" FPT so I'm using Teflon tape on the threads and the band clamp that came with the tank.
 
Looks good. Is it beneficial to drop out the break/trub material before the yeast dropout to save yourself some effort washing yeast?
 
Looks good. Is it beneficial to drop out the break/trub material before the yeast dropout to save yourself some effort washing yeast?


Are you going to harvest yeast? Before pitching yeast, whirlpool wort with spoon or drill mounted stirrer. Wait at least 15 minutes to allow trub to settle at bottom. Then dump trub. Then pitch yeast.

I use a yeast catcher as described in this thread and it is attached using triclover fittings. It is recommended to save the middle layer of yeast. This layer contains yeast with the best attributes to preserve for subsequent reuse. By dumping the trub first, the harvested yeast in the middle layer should be clean.
 
FSR402 said:
I like the yeast catcher but what I don't like about it is the beer (what little is in there) is getting light struck and skunking.

Could you make a cardboard shield?
 
Thanks sebring96hbg. I will be moving soon. So not in the near future. Eventually I will. I was just curious if it was common to remove it. Especially after seeing the results of the latest byo/bbr collaborative experiment. I could see some styles/recipies benefiting from removing it, while others wouldn't. James did mention that his trub plus fermentation started much quicker, and thought that it may act as a yeast nutrient. So maybe removing after fermentation is going strong and trub has all fallen out would also be an interesting experiment. Lots of options. As long as careful sanitation measures are taken of course.
 
Back
Top