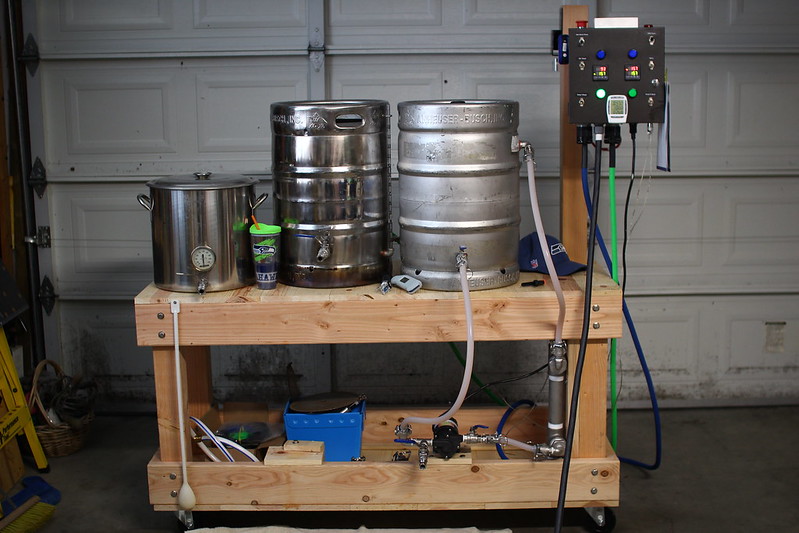
I used Kal's plans at
www.theelectricbrewery.com to build my control panel and to modify my Kettles. The Kettles I used are 10 Gallon kettles from Spike Brewing. The only difference between my control panel and Kal's setup is I left the AMP/Volt meters off, I didn't feel they added anything in my opinion. By eliminating the AMP/Volt meters I was able to leave off the door bell transformer, the DC power supplies and the Shunt. If you use the plans from Kal's excellent site, you can build the same control panel on your own, he has everything well documented there and it made no sense for me to re-invent the wheel.
As for the Mash Tun, it's the standard round 10 Gallon cooler with a False bottom and a valve kit, nothing special there.
For the stand, I built that out of spare 2x6 and 2x4 pieces of lumber I had from when I was doing some framing work around the house. I used 1x4 pine for the tops spaced out about a nails width. The whole stand was built to fit in that space I had, if I had more room I would have built it wider but I had to work with that I had in terms of location. I then sealed it using Cabot's stain and seal where the varnish is already in the stain and it came out great.
I am using a pump to pump water from HLT up to the MT. I drilled out a hole at the top edge of the water cooler, just below the threaded top, and mounted another valve where the outlet hose from the pump attaches to. This way I can control the water flow from there while looking into the MT instead of adjusting the valve near the pump then stand on a step to see the water flow and keep bouncing around.
There is no RIMS/HERMS setup here since I am using a cooler as a MT, If I need one down the line I can upgrade my setup.
If you need any other detailed info, let me know.

")


.jpg")
.jpg")


