It took just under a year to plan an execute this build, but that's mostly because I have too many hobbies, a 9-5, etc.. Once work began, it only took a few weeks of actual work.
We started with the unsuspecting Sunbeam chest freezer I received for my B-day last year, which the Missus insisted I get the largest Menards had. Ah yes, that's why I married her...
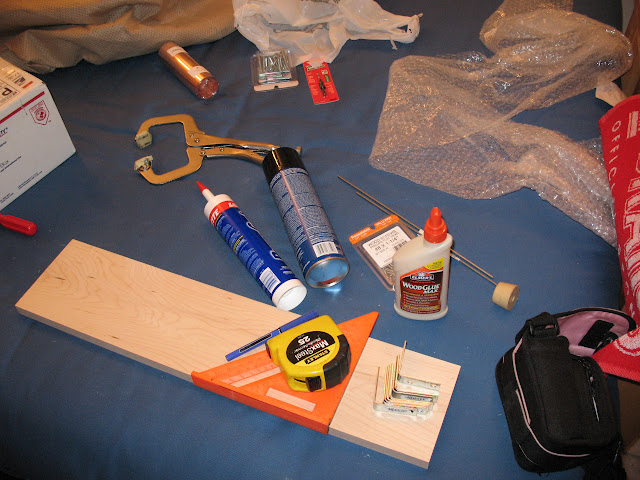
Tools of the trade. Don't know why you can't see the labels on anything, that wasn't planned. But the caulk-tube looking thing is some Loctite construction adhesive, for the collar-to-lid junction. The aresol can is 3M (I think) medium strength upholstery adhesive for the copper-to-wood work. Copper roll in the upper left. Various screws, and angle brackets...
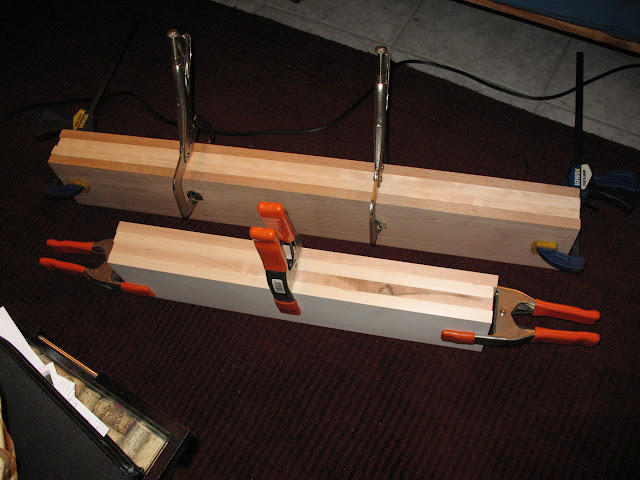
The woodwork begins. To start off with, I glued a piece of aspen to a piece of Oak. Aspen for good looks on the outside, and the Oak for strength. Glued and clamped for a few days.
What I don't have pictures of, is the actual cutting and fitting of the 4 pieces of the collar, which was the hardest part. I'm no carpenter, so my 90 degree angles weren't, and gaps were present. But a coworker, who's a world-class woodworker who knows I'm a car-guy, said use Bondo to fill in the gaps. That worked a treat! Just smooshed Bondo into the gaps, let it set, and sanded to the final shape. Worked great, because I needed to round the outer corners anyway, so the copper wouldn't get pierced by it when applying or just through use.
In the planning stage, a friend suggested copper would look cool, and you know what, he was right. So I wrapped the collar in thin layer of real copper. Used the aforementioned upholstery adhesive to do the job.
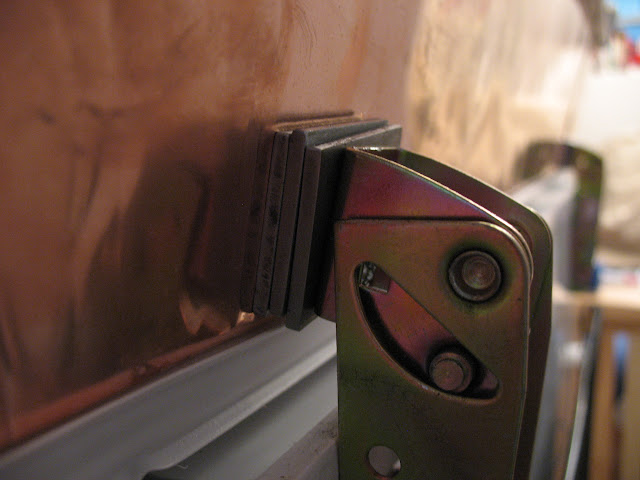
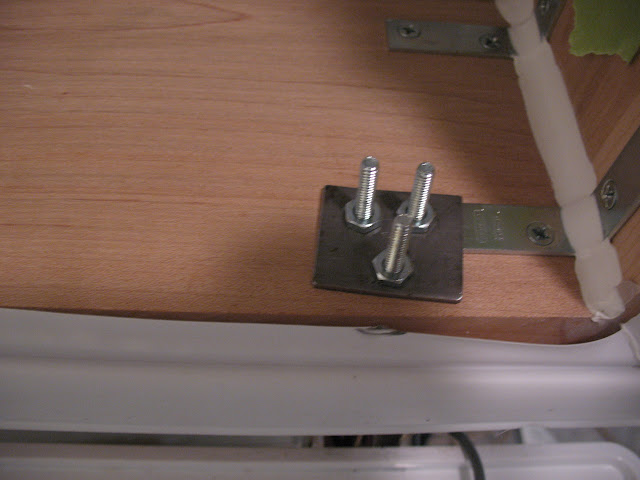
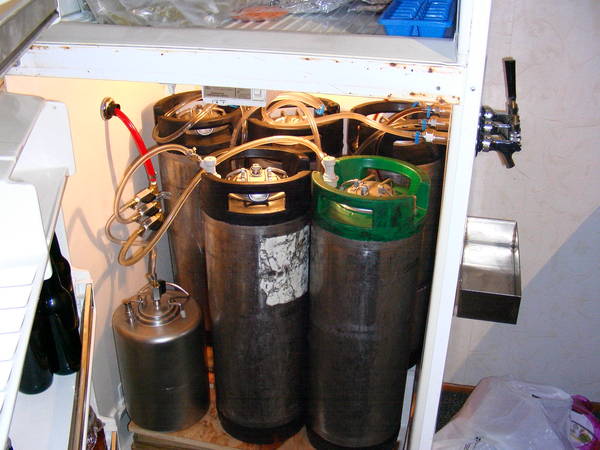
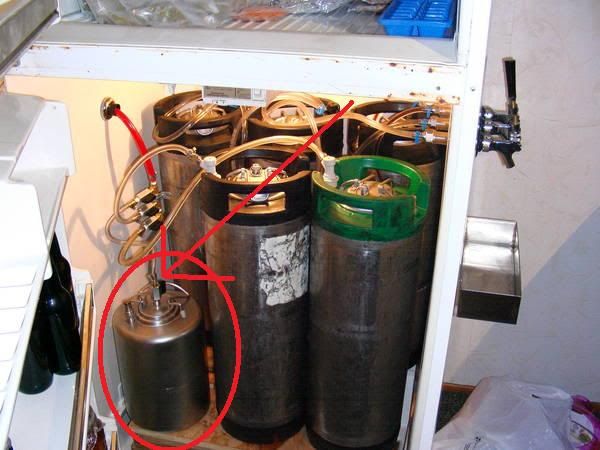
The really tricky part of the whole build was getting the hinge to collar to work right. My solution, was to take a bunch of flat stock, cut it into rectangles about the size of the hinge plate, and drill holes through them. This did 2 things: Gave me spacers to make up the distance from the hinge to the collar, and gave me a backing plate that is effectively a large, funny shaped washer.
Here's the spacers:
And here's the funny-shaped washer:
Those spacers aren't my best work, but they do the job, and nobody looks at them anyway.
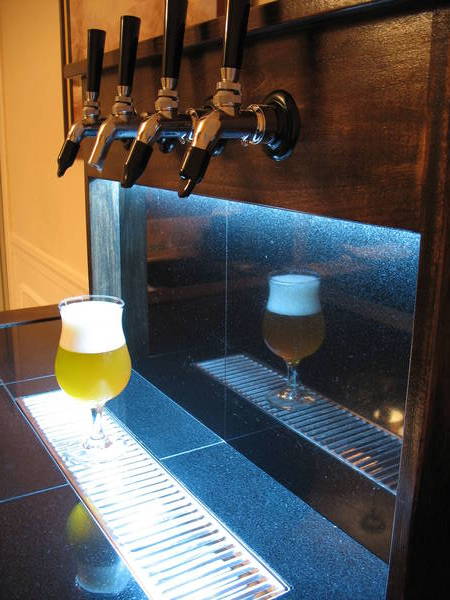
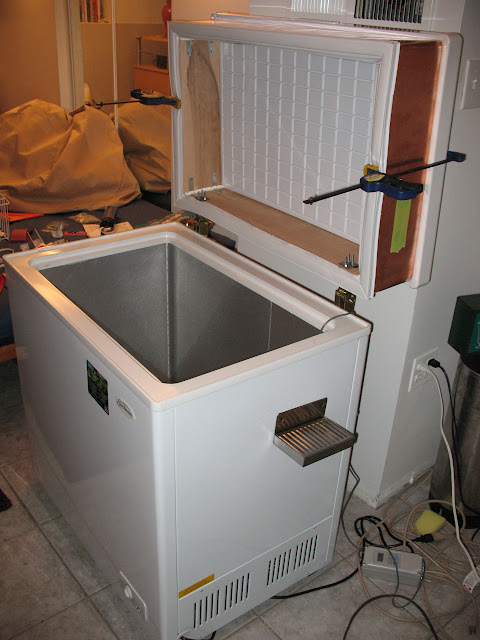
And here we are gluing the collar to the lid. Green tape covers the 2 holes for the taps:
Here's it with lid closed:
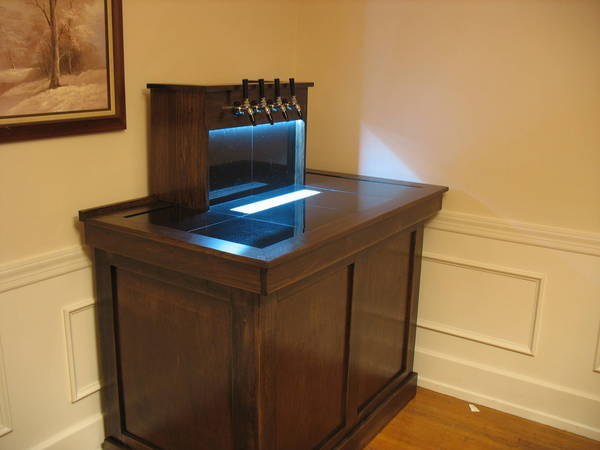
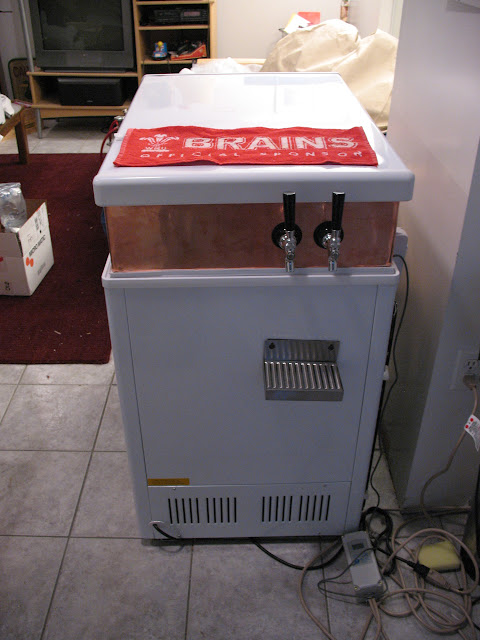
And the money-shot: The final product.
So far 1 Corny Keg of The Windsor Knot has passed through the tap, and I have to say, it's a success! The copper is taking on a nice patina, and I don't think there are any air leaks so the compressor isn't running any more than before the conversion.
With summer coming to an end, I'm hoping I can get back to brewing so I can have BOTH taps providing beer!
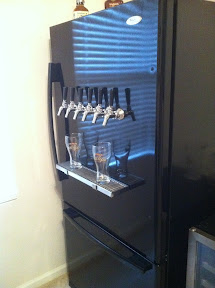
I put the taps on the side of the fridge because of the way my basement is laid out. The front of the fridge is a high-traffic pass-through. I didn't want to be bumping the taps every time I walked by. And it's more convenient, as the taps face the stairs landing. So once you step off the stairs, you're 2 steps away from a pint. The only downside to this tap arrangement is that when you're showing it off to your friends, and opening the lid after pouring, a few drops of beer will come out and miss the drip-tray. And the Brains towel always slides off!


")