Scuba's Herms Build!

Homebrew Talk - Beer, Wine, Mead, & Cider Brewing Discussion Forum

Help Support Homebrew Talk - Beer, Wine, Mead, & Cider Brewing Discussion Forum:

This site may earn a commission from merchant affiliate links, including eBay, Amazon, and others.
MrFebtober said:
Wow, you've been busy, ScubaSteve! Lookin' good. Not having any welding skills or means myself, it's great to see that a good rig can be made of wood and angle iron.

BTW, this thing is pretty stout. I turned the burners on, and didn't really notice any difficulty with the wood. Only time will tell.;)
 
You'll only really know after a good long 60 minute boil. On my jury rigged stand, I had a piece of plywood about 6" UNDER my burner and after about 30 minutes, it started charring.
 
I figured as much...i'll do my first brew without flashing, then will likely install it.
 
Okay guys-

Makin' definite progress. I'm just glad I can park my car in the garage again!
So, I got 2 Banjo burners in the mail (just the burners, $25 ea at Amazon)
IMGP3142.jpg

Those suckers are pretty big...my hat does it no justice! Then, I ran my propane lines with 1/2" black steel pipe, using gas tape to make a good seal. I originally used teflon paste, but it sucked. There are no leaks except for a small union right at the burner:
IMGP3156.jpg

I will promptly replace this, but the leak was pretty insignificant; I test fired the burners and they ROAR! Here's a few shots:
IMGP3153.jpg


IMGP3154.jpg
 
Here's the other burner I used; it's in the center for a gentle direct fire on the MLT. It's only a 10psi burner, but it rips when hooked to my 20 psi. Gotta throttle it back!
IMGP3155.jpg

Here's the semi finished product, still gotta plumb my water lines. I'm thinking I'll used QD's for ease of use/cleaning.
IMGP3148.jpg


IMGP3151.jpg

Here's the front center. I left a space for toggle switches on my pumps, and created a rail to protect the manifold/provide a work surface. I finished the wood with Antique Walnut One-Step polyurethane stain, to protect it from the occasional spill. :
IMGP3152.jpg
 
Finally, here's the rig all nestled up to my kegerator:
IMGP3159.jpg


So what do you think????:D
 
That is a bad ass looking rig, the wood came out really nice looking
 
Thanks, guys!:ban:
Since my kegs all have 3 couplings, I may just plug off the 2 small ones, and then use ball valves and QD's with silicone tubing. I'll probably just brew with the KISS method, and get used to my pumps in the process.

I've still gotta:
-Fix the small propane leak at the couplers! (Can't show off my burners until I fix that!)
-Mount the pumps on the bottom, creating a waterproof but breatheable housing
-Wire toggle switches/GCFI plugs to control the pumps
-Install a drip tray in front.
-Eventually run a herms coil in the HLT ( I have a 50' 1/2" IC ready to make the ultimate sacrifice :D )

I'll definitely be posting more pics when I do each of these things (especially when I get the burners up! :rockin: )

Any ideas you guys have are more than welcome...I couldn't have gotten this far without this awesome forum! :mug:
 
chris21274 said:
Man, that setup rocks.

What's the first recipe? I hope it turns out half as pretty as that thing! :)

Man, I haven't brewed in a while! I'll be glad when I can start going to the LHBS instead of HD for once! I think I'll do something simple to get a feel for this thing...maybe a Stone IPA Clone....?
 
Grimsawyer said:
I love beer porn. This is one sexy rig!:rockin: :rockin: :rockin:
BIG and sexy...this thing is SOLID....must weigh 150 lbs....
 
Okay...UPDATE!!! Finally felt safe enough after checking and rechecking my propane plumbing with soapy water that I could really test the "legs" on this thing. Before we start, here's the rig by day:

IMGP3153.jpg
 
A short recipe:

2 Banjo burners
1 "Revolution" burner from Eastman Outdoors (My old turkey fryer I salvaged to provide low heat to the MT)
1 20 PSI Bayou Classic regulator
1 wood brewstand
2 Keystone lights
2 Gordon Biersch Marzens
2 Pints of Apfelwein

Combine these ingredients, and you get:

One Banjo full blast at 20 PSI:

[YOUTUBE]5YYqjTD7Gb0[/YOUTUBE]

The Whole Shaboodle:

[YOUTUBE]kzzm2aJ-ehs[/YOUTUBE]

Just had to show someone! SWMBO was there, and she was like...I don't know how you do it!:p Little does she know about my secret life here on HBT!:ban: Thanks, guys! :mug:

More pics to come....next, I'm gonna start plumbing liquids and doing electrical stuff. I already got some frickin' hardcore switches for my pumps!:rockin:
 
Sniff.... sniff.... it's so purty.... sniff.... sniff.... :rockin: That is one sweet lookin setup for sure! Good luck on the rest of the stuff!!!
 
wow! impressive set-up. as others have stated, that is one sexy rig! I'd love to have the room to do something like that. can't wait to see it up and running completely! :rockin:
 
Alright guys....brewing a Stone Clone on it right now....gonna follow Ed's recipe, but will also add 2 oz. whole Cascade continuously towards the last 30 mins, and also during whirlpool (first time doing this). I was setting up and my neighbor across the street had to come over and ask me the obligatory questions....he said he and his GF jokingly thought I was a terrorist:cross: I'll take that as a compliment :D

BTW, Bobby you're right:mug: Not 15 minutes into heating my mash water did the thing start to smoke and bubble the polyurethane stain! I just turned it down and I was fine. I'm thinking about a couple mods already:

1) Beer holder
2) Therm holder
3) Using that fireproof concrete impregnated fiberglass board as a wind/heat shield

I'll keep y'all posted:mug:
 
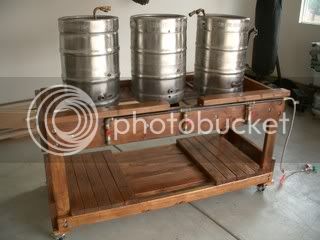
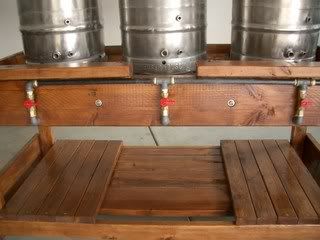
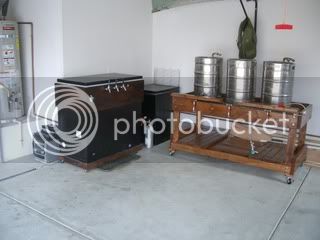
Okay, so I had my first brew day on the rig as-is. I have not yet incorporated the HERMS coil, pumps, etc. etc. I just treated it as one big turkey fryer.:D

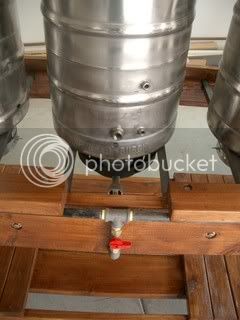
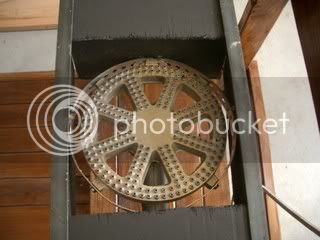
The brewhouse eff per ProMash was 62%; that was using a double sparge (with half of the sparge water: sparge, vorlauf, etc...then repeat with other half) and no mash out. I have a perforated stainless false bottom.

The recipe I did was Ed's Stone Clone, 'cept I also used 2 oz. whole cascade hops towards the end, and also at whirlpool.

Those DAMN whole hops screwed me!:mad: There was at LEAST a gallon left in the kettle, and no matter what I did, I couldn't siphon, filter, or strain it out while still maintaining sterility!

I ended up with probably 4 gallons of VERY hoppy brew. It'll probably turn out pretty darn good, but I'm pissed that I left all those good soldiers behind :)

I don't think I'll be using whole hops again, unless I can figure out a way to prevent this from happening again. Any suggestions:confused:
 
ScubaSteve said:
I don't think I'll be using whole hops again, unless I can figure out a way to prevent this from happening again. Any suggestions:confused:

What are you using at the bottom of the boil kettle?

Google the Hop Stopper.
 
here's an idea. boil longer to evaporate your beer down too much. Then In your HLT boil up some water and move it right on the hops in your empty keg. Chill and fill your fermenter to where it should be?
 
olllllo said:
What are you using at the bottom of the boil kettle?

Google the Hop Stopper.

I knew about the hop stopper....but:
A) It's expensive (for some odd reason)
B) I use an IC

And does the hop stopper REALLY work THAT well (for the price)?:confused:
 
Grimsawyer said:
here's an idea. boil longer to evaporate your beer down too much. Then In your HLT boil up some water and move it right on the hops in your empty keg. Chill and fill your fermenter to where it should be?

Say what? You mention boiling down and evaporating even more wort.....absorption and wort loss was the problem, not the solution. How would this help? Are you suggesting I raise my OG and then add water back in the fermenter? :confused:
 
olllllo said:
It does exactly what it says it does.
It will not work well with an IC.

So are you using a braid or false bottom? other?

Hmmm....these days, a product performing as advertised is a pretty big thing;)

I use a false bottom in a keggle with a 1/2" ball valve. The keggle MT only lost 5F over 60 mins. I used smaller thermoplastic tubing (1/4") to drain with.....maybe that slowed down my sparge.....but then again that may not be a bad thing.
 
ScubaSteve said:
...Are you suggesting I raise my OG and then add water back in the fermenter? :confused:

yes. Although not an ideal solution, just thinking outside the box. Lets say you can only get 4.5 gallons from a 5.5 gallon batch. reduce your wort down a bit before any hop additions so when it's done it's a bit concentrated. Chill that and put it in the carboy, then pump more hot water in chill and pump to primary. Literally rinse and repeat until you have your 5.5 gallons in your primary. You will be rinsing the sugars left behind in the hops into your pirmary and you won't lose any volume. :) Kind of like doing a partial boil extract batch. I use to boil 3.5-4 gallons of wort in my 20quart kettle on the stove. When it was done I'd put a strainer on funnel on my carboy and dump everything out into the strainer. I'd then top up pouring water THROUGH the hops to recover what extract/sugars were left in the hops. The same theory here. I'm not saying it's a good or practical solution but I'm sure it would work if nothing else.
 
Okay....here's the latest:

On my maiden voyage, I had some issues with the wood charring; especially on the back and front boards. Solution: Heat Shields!

I got some DuraRock (I think orfy uses this under his burner) which is basically concrete-infused drywall. It is labelled as "fire-retardant". I tried to light it on fire, and it was a no go :p SO,

I spray painted everything in Hi-Temp black and made a box around both Banjo burners (the middle burner did just fine, and will only be at lo temp) the finished product looks like this:

IMGP3168.jpg


The bottom is open:

IMGP3169.jpg
 
Another one of my problems were the fumes/hot gases coming up from the burners. When I woud try to lean in to stir, view, etc., they would blast me. I was also concerned for the ball valves (and future tubing) that are right in the middle of this high heat area. So, I created a permanent (but still classy) Nad Guard (Copyright Bobby 2007) :mug:

I basically clad a 2x8 on the bottom with more DuraRock and hi temp black:

IMGP3171.jpg


I let it protrude a bit to take the heat off the front of the Nad Guard. I suspect I may still have to clad the front. Also, I made recessions in the surface so the kegs could remain centered over the burners/shields:

IMGP3166.jpg


And here's the finished product:

IMGP3165.jpg


More to come! I still have a long way to go! I can brew on this rig as-is, but I have 2 march pumps and 100' of 1/2" copper whispering my name.....
 
I'd just like to add that this is completely "drop-in" and removable should I need quick access to propane plumbing, etc. It also adds a BUNCH of workspace...I can have more equipment at the helm this way! I also suspect that this will provide protection for my electrical wiring....when I get around to it....:)
 
Okay....So....

The "Drop In" method didn't work....I decided to go with the "Open Air" method. basically, I removed the board with durarock lining and went a different route. I lined the inside of the frame with durarock and said, "Let 'Er Burn!!!"

ss1qt9.jpg


Basically, I lined the "Hot Spots" with the durarock paited in hi-temp black. That stuff is awesome. Right near the burner, that stuff glowed cherry red but didn't burn.

Oh yeah....and I decided to go Lo-Pro and chop the whole rig down 6".

ss2qx5.jpg


ss1qy1.jpg


I'm MUCH happier with the ergonomics. I'm 6' tall, and before, I had to lean in to stir/peek/take temps/etc. NOW, I just look down, and I'm good. 6" makes a HUGE difference. It's all about streamlining; keeping the "Brew Corner" to just a corner in the garage.....;)
 
So then I decided to address a feature I had been struggling with. Workspace! The little rail up front is just for looks ( and possibly integration of an AWESOME waterproof switch system I have in mind...)

So, I thought that any added tablespace in the front of the rig would further inhibit me...and then I decided to integrate a side table....
ss2qx5.jpg


Look to the right and you can see the table in its fold-down position. I wanted to add work space for laying my hops, recipes, spoons, etc. down...without adding physical storage space. Here's the extended table:

ss3qd6.jpg


I used Cedar for the work surface...it was scrap and replaced a MUCH heavier 2x10 model...(WAY too bulky!)
 
Next, I plan on aquiring the QD's and Silicon tubing to integrate the pumps! I also have a pretty smooth idea for a sparge/recirculation ring. After that, I'll address my shoddy durarock heat shields ( thinking about getting 2 large pots from GoodWill) :)
 
Yeah ScubaSteve! This is such a sweet rig! I want to build my sculpture out of metal, but you make the wood look so good!:ban:
 
talleymonster said:
Yeah ScubaSteve! This is such a sweet rig! I want to build my sculpture out of metal, but you make the wood look so good!:ban:

Thanks, man! It requires a little more thought when it comes to protecting the wood, but I think I'm almost there. The durarock was like $8 for a sheet, so it's really not a big deal. I don't think I'd have such a problem if I weren't using the Banjo Burners!:ban:
 
ScubaSteve said:
Next, I plan on aquiring the QD's and Silicon tubing to integrate the pumps! I also have a pretty smooth idea for a sparge/recirculation ring. After that, I'll address my shoddy durarock heat shields ( thinking about getting 2 large pots from GoodWill) :)

I took an idea I saw from 2 people in my brew club and tweaked it for my purposes. I took some copper tubing(the same diameter that most immersion wort chillers are) and bent it in a circle. I then cut 3 - 5" lengths of copper tubing and squished them flat. Next I wrapped them around the tubing at one end and bent a 90* angle at the other. I soldered them onto the ring of copper. I now had a way to hang my circle of tubing from the rim of my converted keg mash tun. I took my dremmel and sliced thin slits every 1/2 inch or so of this ring. On the end I found a HUGE SS bolt and crimped the end down on it so if and when grain gets stuck in the sparge arm/ring/whatever... I can unscrew the bolt and flush it out easily. Earlier I had went out and bought a bunch of 1/2" copper tubing and fittings and sweated them together then made that arm adjustable. It was complicated and impossible to clean out. KISS meathodology RULES!!!:rockin: I love my new sparge arm! It works, it's easy to clean and there's no adjusting anything. Hope this helps.
 
Ya gotta post pics! (But make a new thread...don't jack my build thread! :p )
 
Back
Top