
MikeRussell
The Brew Shed!
Hello, HBT.
Hopefully I found the right section to post my fermentation chamber build - feel free to move or re-categorize if needed.
First and foremost, a HUGE thank you to the community. I've been lurking for quite some time. I am constantly impressed and have learned volumes by reading. Hopefully now I have something to add.
I hear it is common practice to show the completed project photos first so the lazies can peek without reading. Here goes:
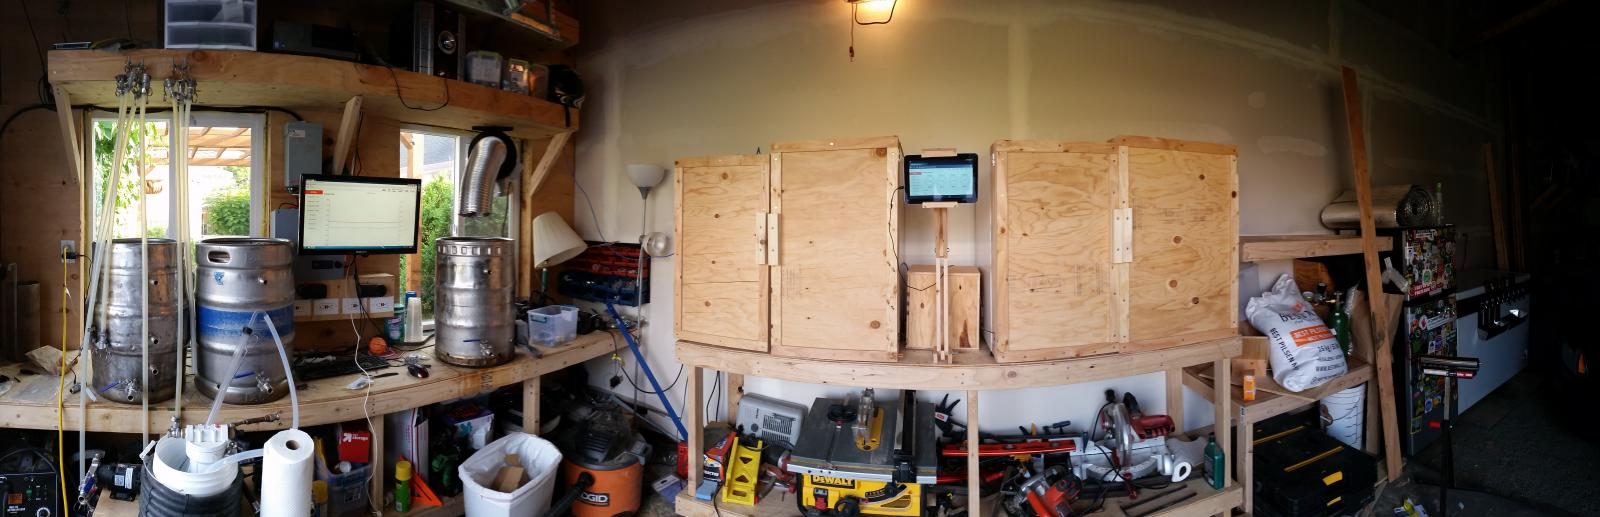
The wife and I recently built a new garage and I was able to negotiate an addition for dedicated brewing space. My brewing system is out in the shop, but I ferment in a small basement room. I am constantly hauling carboys down stairs and then kegs back up a few weeks later so I can serve beer on draft out in the shop.
The basement room is temperature controlled by an STC-1000 and space heater. This works great for the most part, but some of my recipes call for yeasts that can create excellent flavors at higher temperatures. Other yeasts are happier when it is cold.
For this project, I decided I would like independent control over each batch so I could create ideal conditions for the batch at hand. Also, if I was able to ferment in the shop I would have a single location for brewing, fermentation, conditioning and serving. That would be pretty neat!
I like to brew 5 gallons at a time, and I like to brew often. I decided I want 4 independent zones so I can keep a rotation going.
After brainstorming a few solutions, I decided I wanted to start by purchasing mini fridges from Craig's List. I narrowed my search to 'cheapest fridges about 4 cubic feet' which is about what you need to fit a carboy. The smaller sized fridges can do pretty well with a little modification, but I wanted to be certain that the fridges I buy would keep up with 5 gallons of yeasty goodness.
In a day I was able to find and purchase all 4 chambers. Here's the before photo.
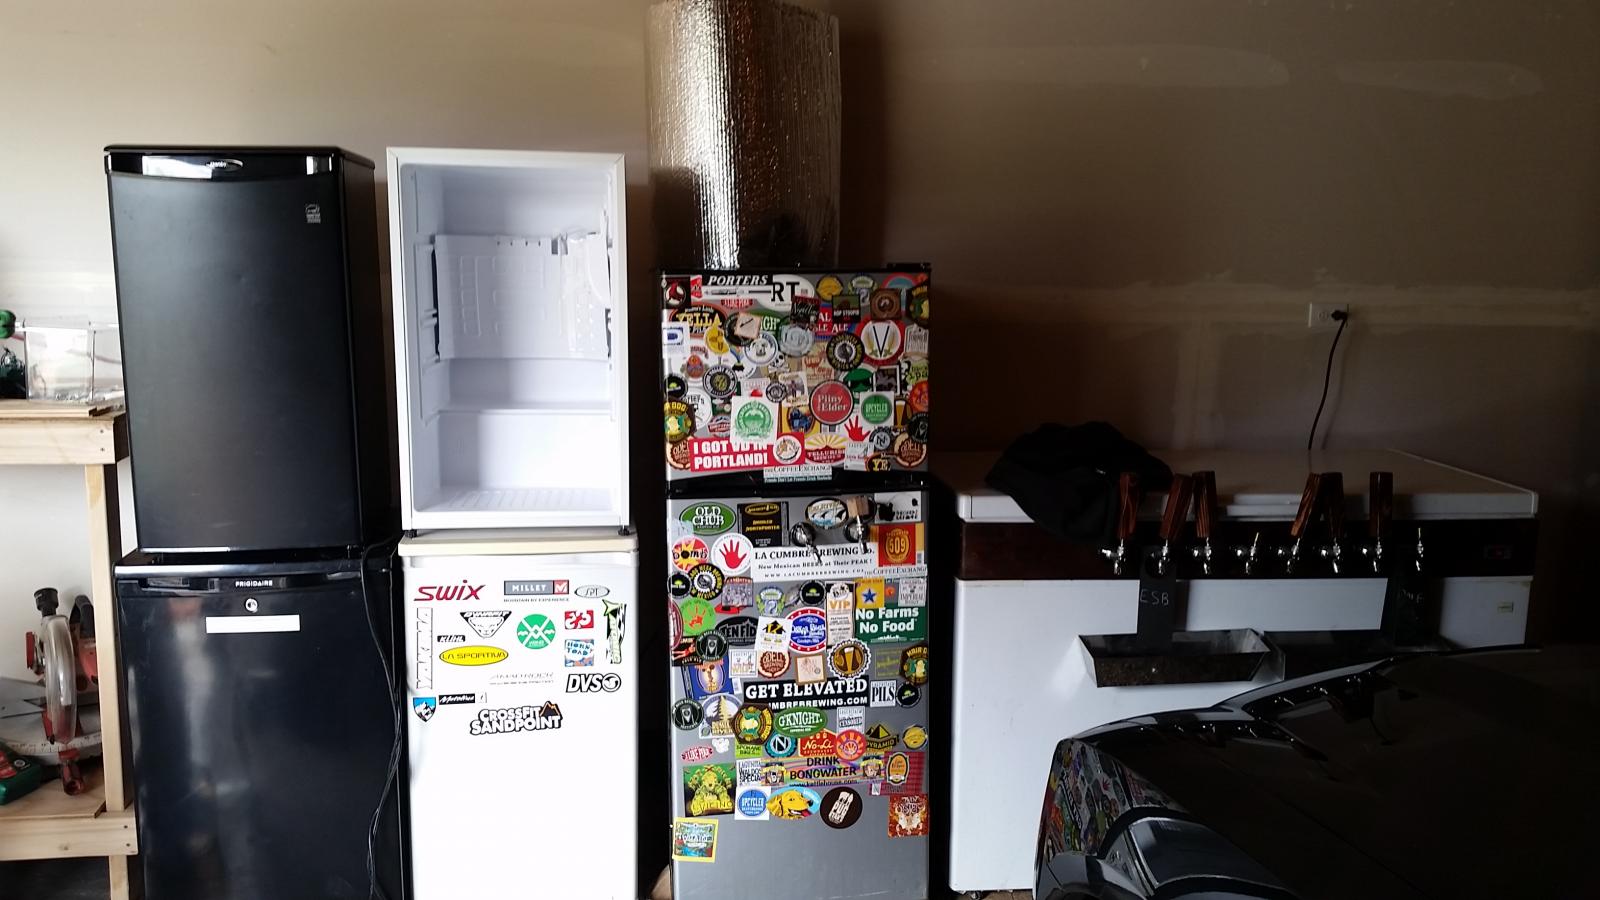
The one mini fridge came with a bunch of stickers I didn't enjoy - look how it barely measures up to the beer sticker fridge!! Hah! Anyone notice a sticker from where you're from?
When I bought the fridges, I knew only one of the them would actually fit a carboy so I planned on adding a 2x4 framed collar to each one. I wasn't super excited about the doors. A couple were decent but ultimately I decided I wanted to build custom doors so they would match the rest of the shop counters.
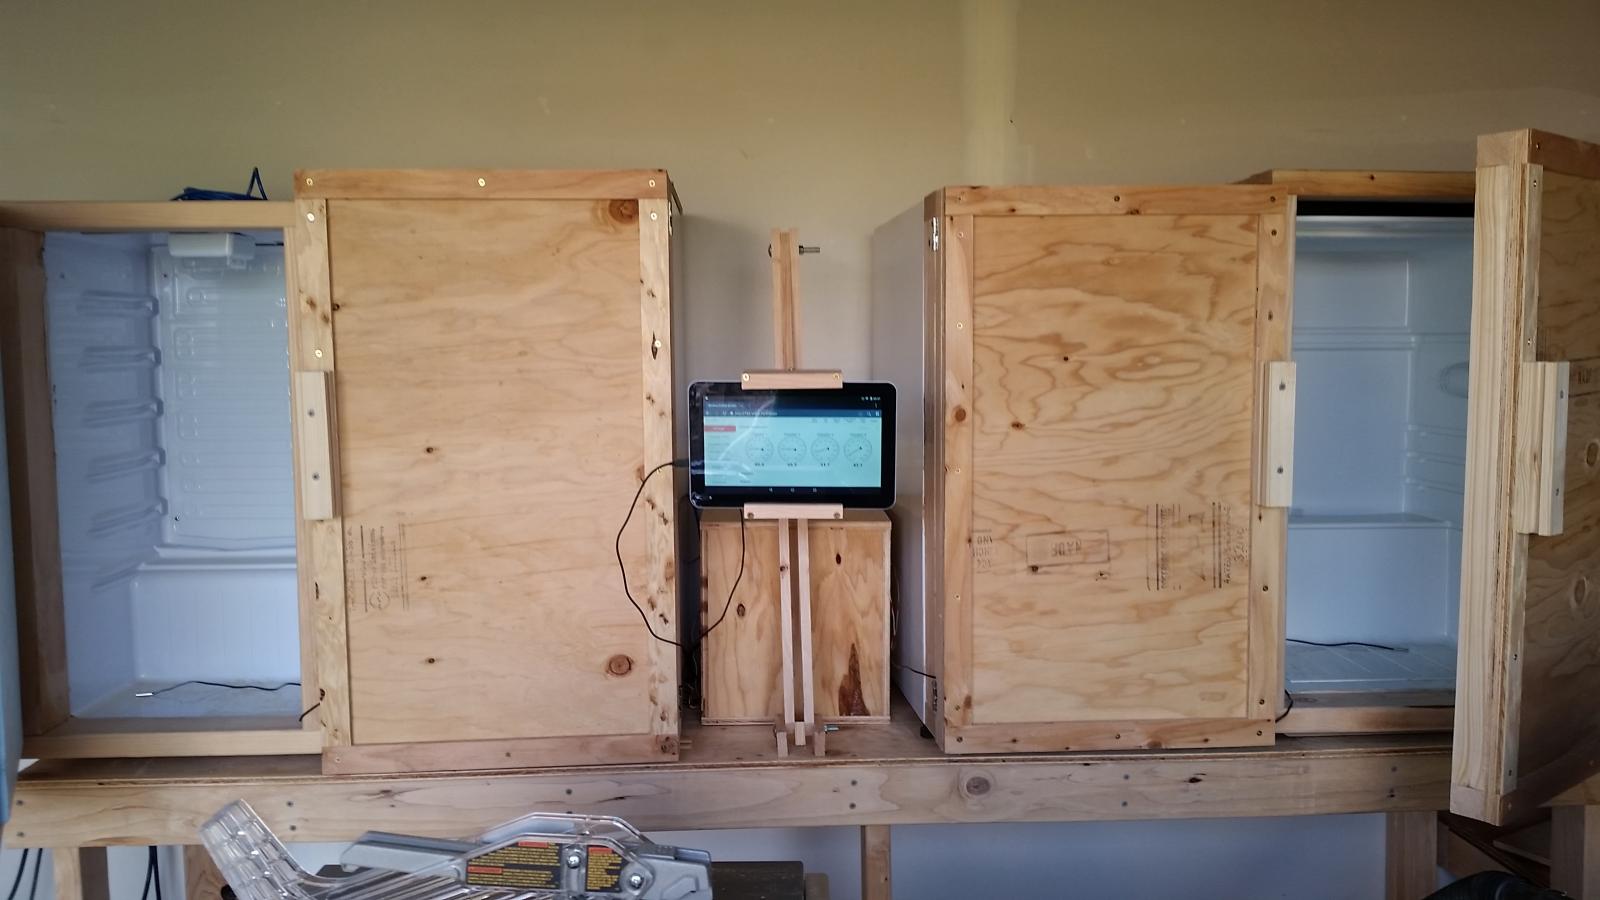
I started by removing the doors and building collars:
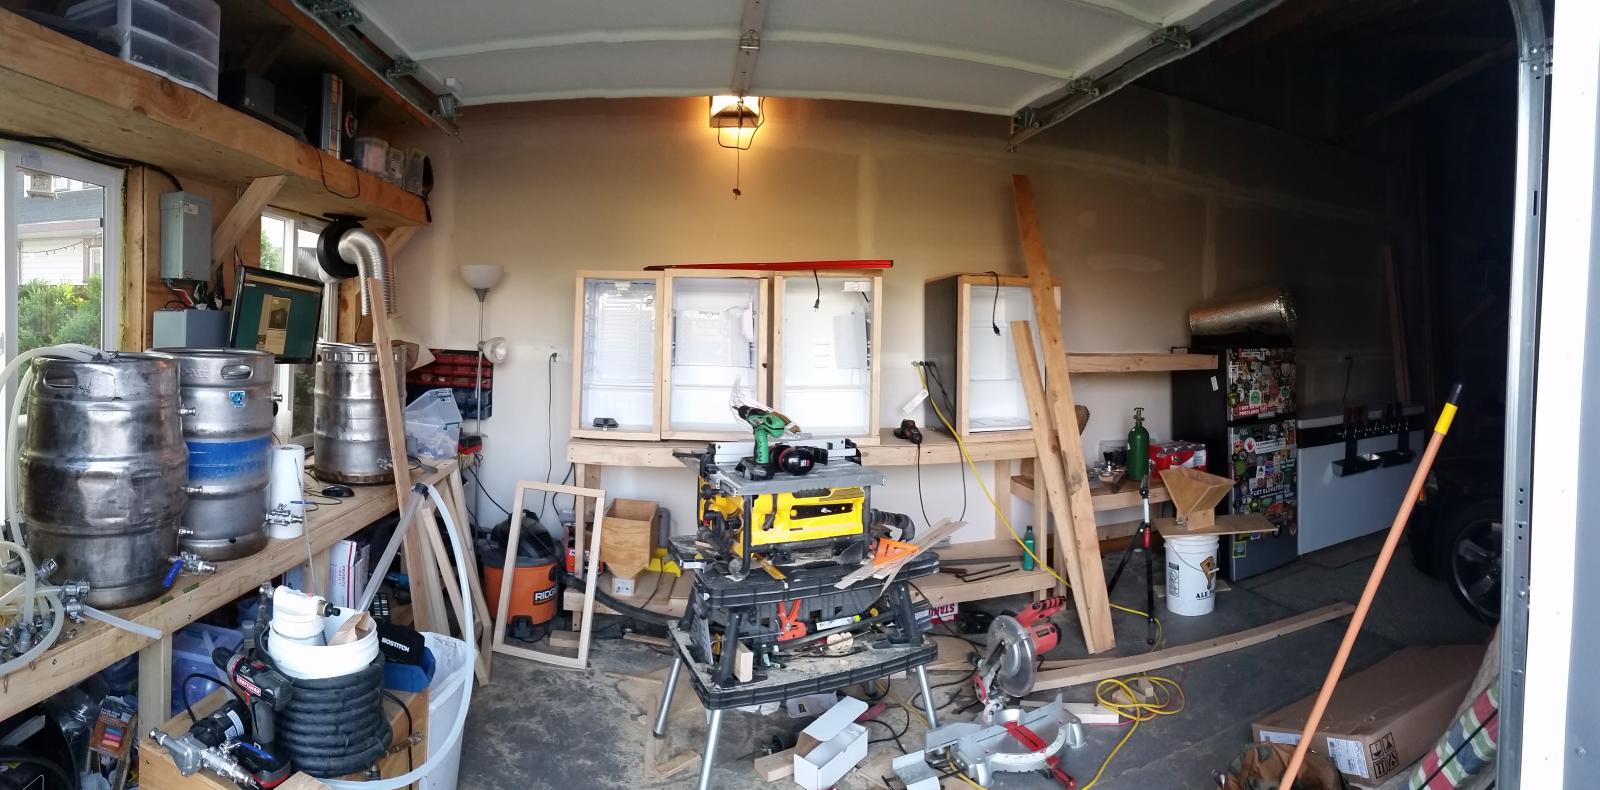
Then I created door frames and cut some blue foam (which was donated by a fellow home brewer!!) to insulate the new doors:
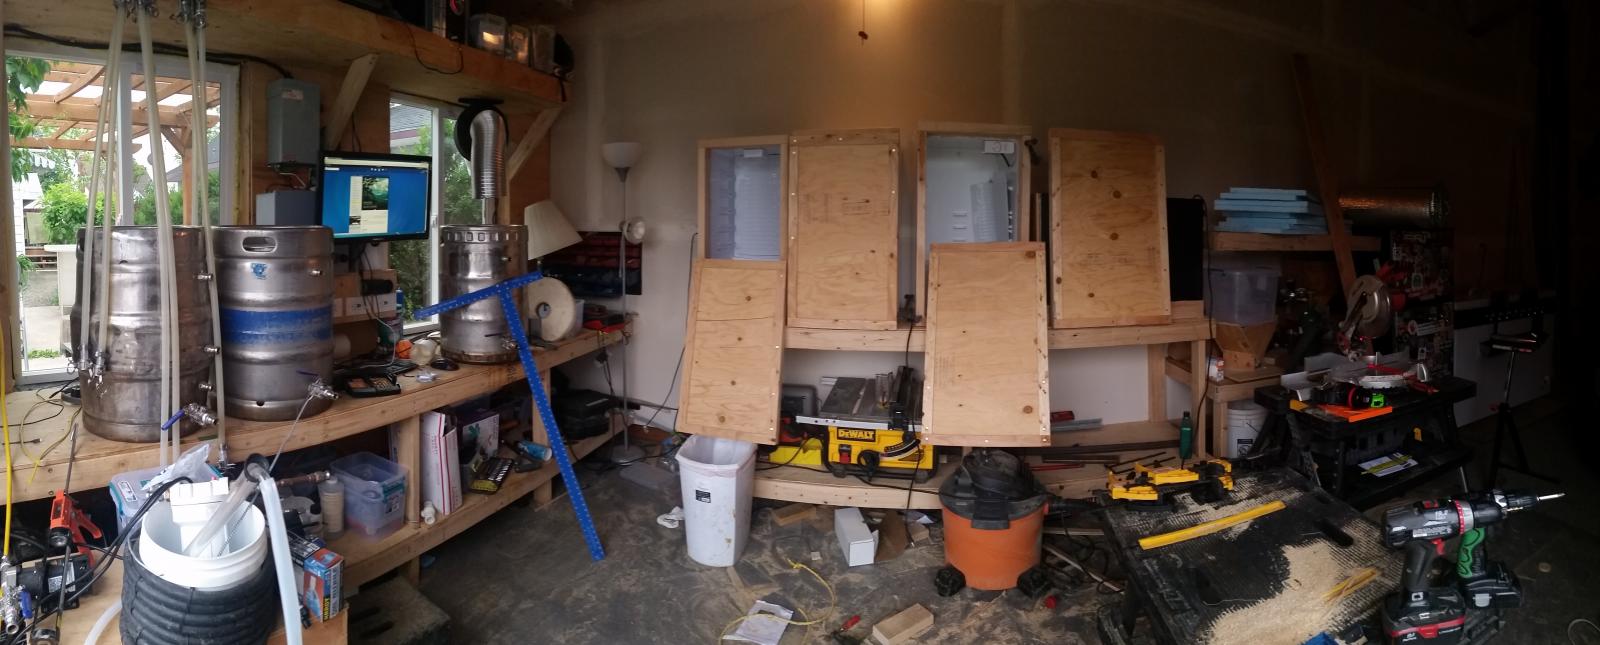
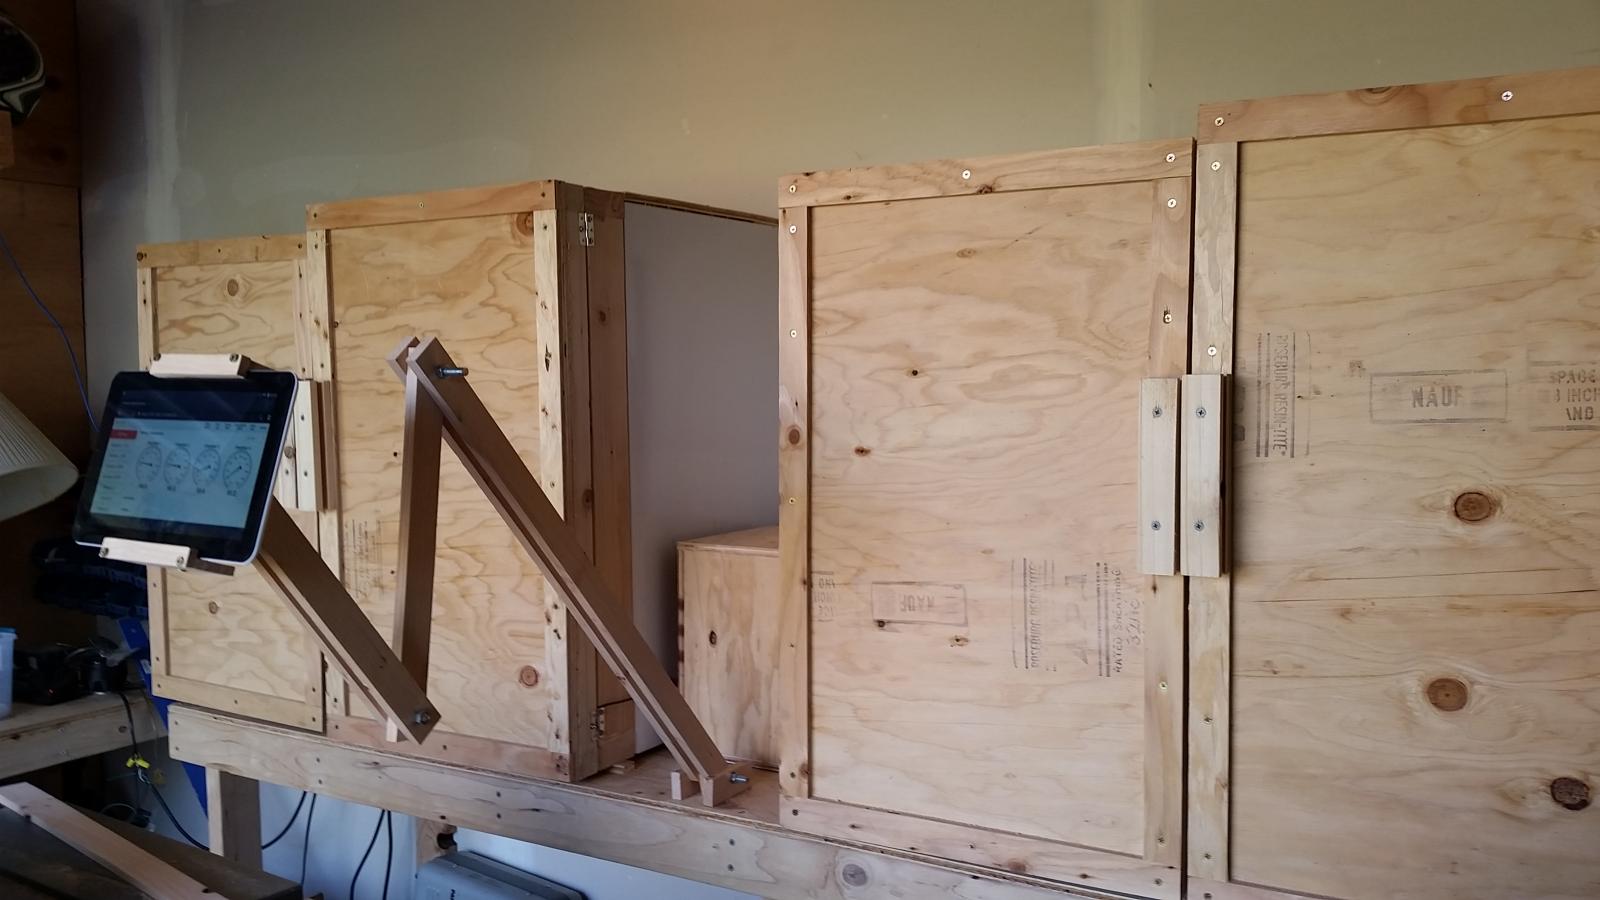
With the new doors assembled, I added handles and mounted them to the collars:

Then I needed to deal with some some temperature control guts. I did a little freelance development work a while back to create a temperature logger for a friend and posted the resulting applications online. Apparently it solved a problem for quite a few people, one person even sent me a free BCS (THANKS Oakbarn!!!) which is a big reason I kicked off this project.
For those who haven't checked it out, the BCS will monitor each carboy's temperature and turn on either a heating or cooling circuit based on the current set-point. The BCS also has a web interface so you can interact with it from a phone, tablet, computer or whatever you have that can view web pages. The BCS allows you to pre-program a fermentation schedule with multiple set-points over time.
Back to the build, I made a little control box to house my components:
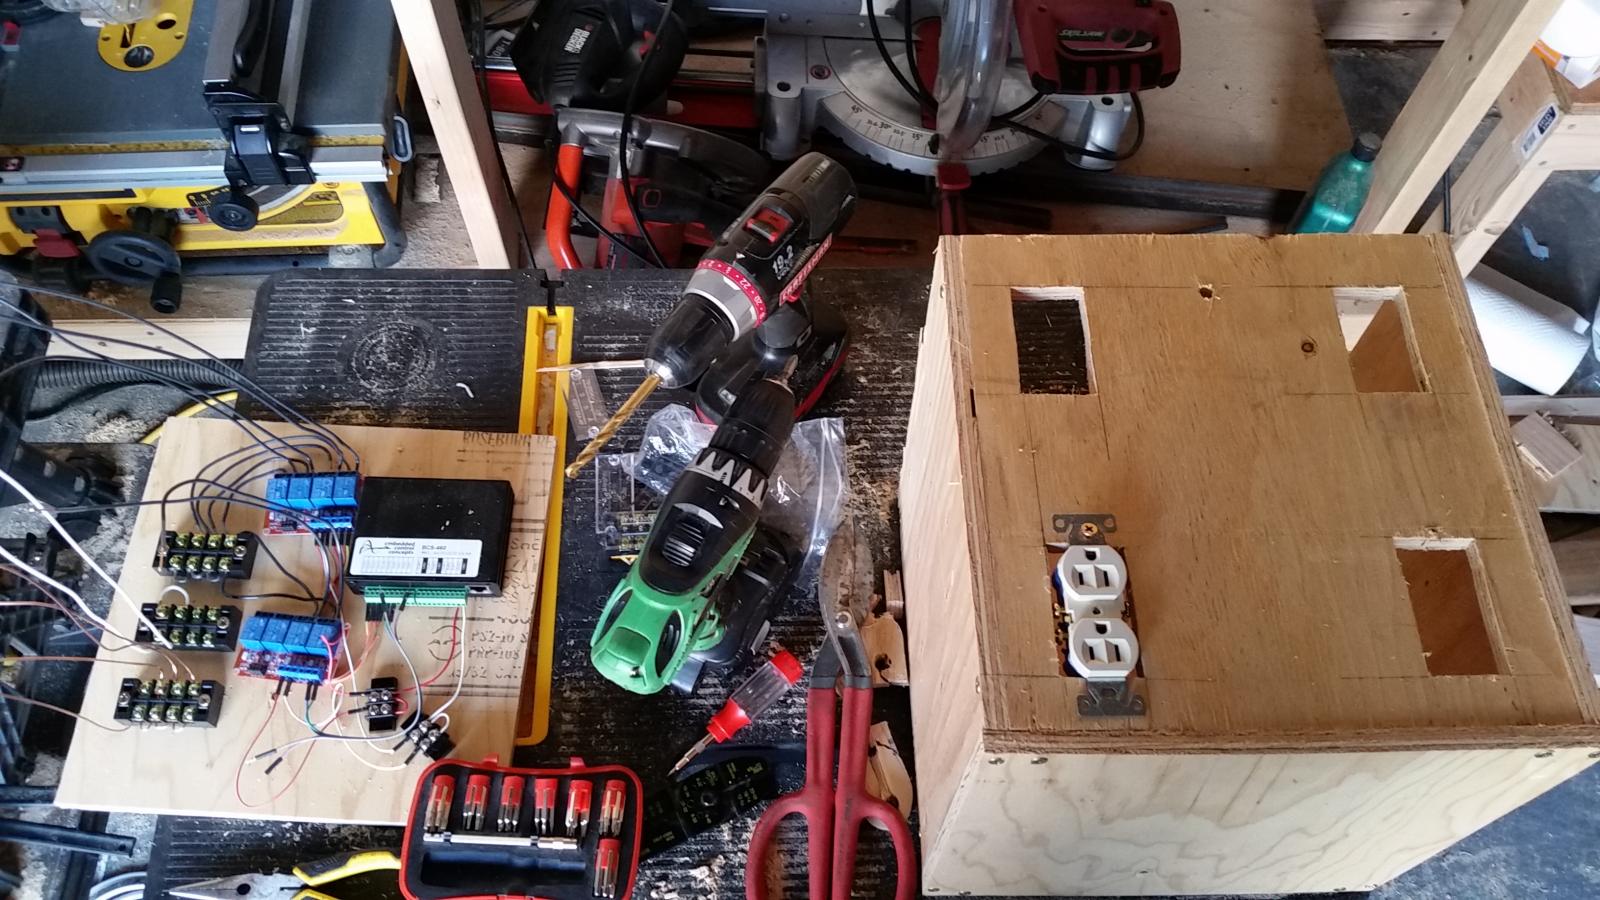
This picture obviously isn't final - I had to run wires for four thermometer probes, power and ethernet in addition to the four outlets.
With thermometer probes dry fitted into each chamber, I was able to run some tests and make sure things are running as expected.
Then I built an adjustable tablet mount so I can visualize the current status of the fermentation chambers and make any adjustments as needed:
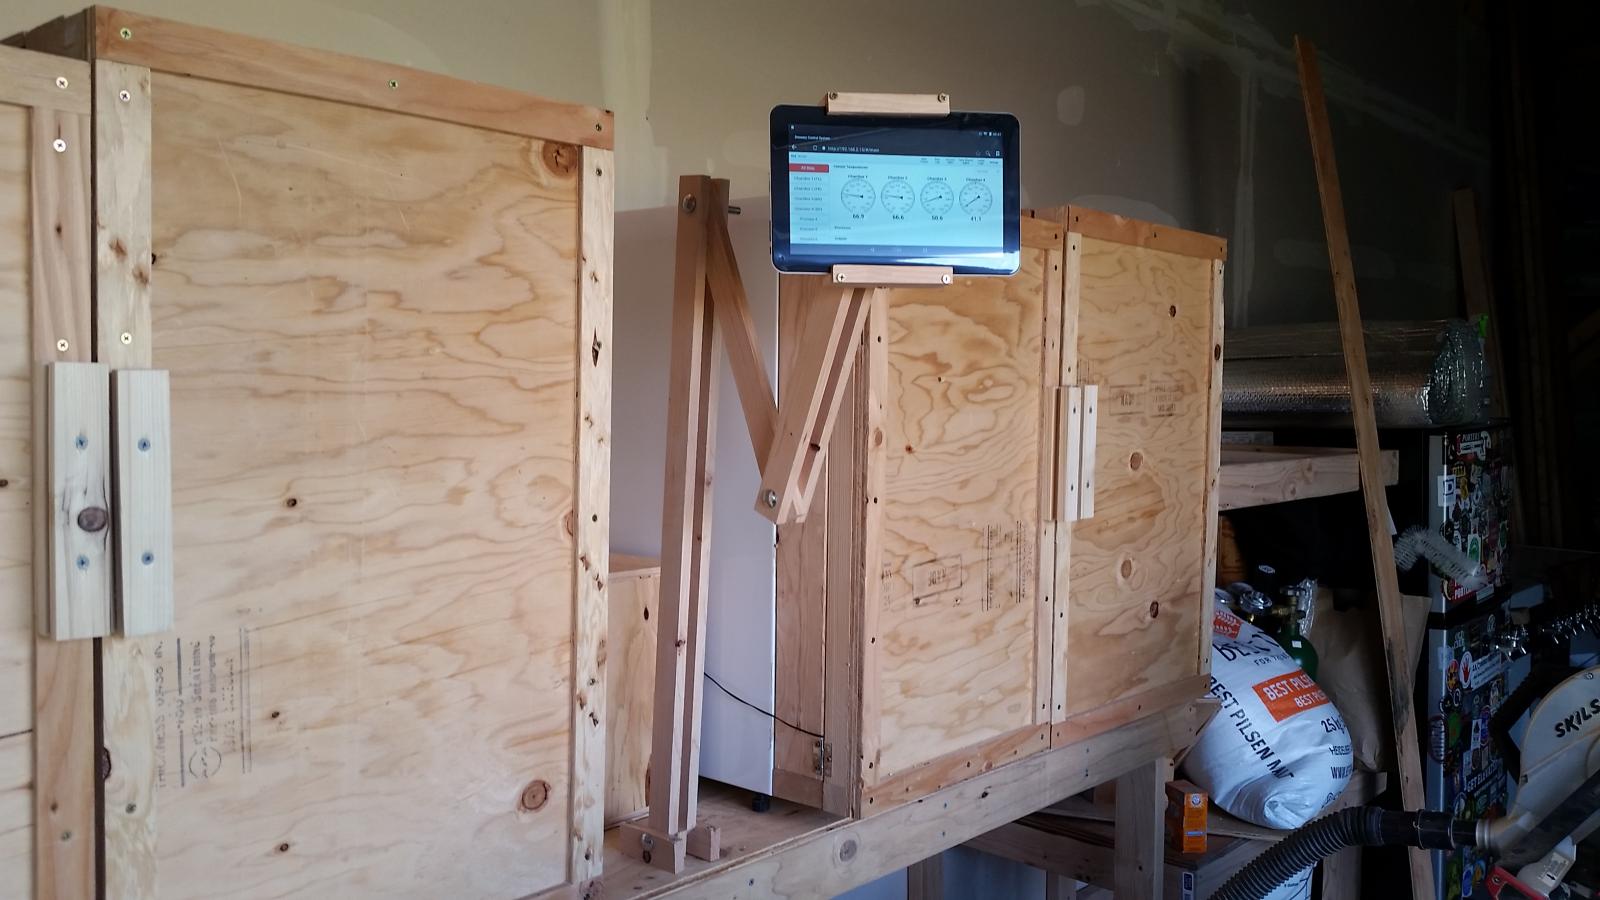
Which finally brings us back to the first and last photo, the status as of today:
In the future I plan to do paint/burn/stain some sort of design on the chamber doors. Probably something related to barley or hops, you know the story.


Hopefully I found the right section to post my fermentation chamber build - feel free to move or re-categorize if needed.
First and foremost, a HUGE thank you to the community. I've been lurking for quite some time. I am constantly impressed and have learned volumes by reading. Hopefully now I have something to add.
I hear it is common practice to show the completed project photos first so the lazies can peek without reading. Here goes:
The wife and I recently built a new garage and I was able to negotiate an addition for dedicated brewing space. My brewing system is out in the shop, but I ferment in a small basement room. I am constantly hauling carboys down stairs and then kegs back up a few weeks later so I can serve beer on draft out in the shop.
The basement room is temperature controlled by an STC-1000 and space heater. This works great for the most part, but some of my recipes call for yeasts that can create excellent flavors at higher temperatures. Other yeasts are happier when it is cold.
For this project, I decided I would like independent control over each batch so I could create ideal conditions for the batch at hand. Also, if I was able to ferment in the shop I would have a single location for brewing, fermentation, conditioning and serving. That would be pretty neat!
I like to brew 5 gallons at a time, and I like to brew often. I decided I want 4 independent zones so I can keep a rotation going.
After brainstorming a few solutions, I decided I wanted to start by purchasing mini fridges from Craig's List. I narrowed my search to 'cheapest fridges about 4 cubic feet' which is about what you need to fit a carboy. The smaller sized fridges can do pretty well with a little modification, but I wanted to be certain that the fridges I buy would keep up with 5 gallons of yeasty goodness.
In a day I was able to find and purchase all 4 chambers. Here's the before photo.
The one mini fridge came with a bunch of stickers I didn't enjoy - look how it barely measures up to the beer sticker fridge!! Hah! Anyone notice a sticker from where you're from?
When I bought the fridges, I knew only one of the them would actually fit a carboy so I planned on adding a 2x4 framed collar to each one. I wasn't super excited about the doors. A couple were decent but ultimately I decided I wanted to build custom doors so they would match the rest of the shop counters.
I started by removing the doors and building collars:
Then I created door frames and cut some blue foam (which was donated by a fellow home brewer!!) to insulate the new doors:
With the new doors assembled, I added handles and mounted them to the collars:
Then I needed to deal with some some temperature control guts. I did a little freelance development work a while back to create a temperature logger for a friend and posted the resulting applications online. Apparently it solved a problem for quite a few people, one person even sent me a free BCS (THANKS Oakbarn!!!) which is a big reason I kicked off this project.
For those who haven't checked it out, the BCS will monitor each carboy's temperature and turn on either a heating or cooling circuit based on the current set-point. The BCS also has a web interface so you can interact with it from a phone, tablet, computer or whatever you have that can view web pages. The BCS allows you to pre-program a fermentation schedule with multiple set-points over time.
Back to the build, I made a little control box to house my components:
This picture obviously isn't final - I had to run wires for four thermometer probes, power and ethernet in addition to the four outlets.
With thermometer probes dry fitted into each chamber, I was able to run some tests and make sure things are running as expected.
Then I built an adjustable tablet mount so I can visualize the current status of the fermentation chambers and make any adjustments as needed:
Which finally brings us back to the first and last photo, the status as of today:
In the future I plan to do paint/burn/stain some sort of design on the chamber doors. Probably something related to barley or hops, you know the story.

![20160807_140910[1].jpg](https://cdn.homebrewtalk.com/data/attach/341/341090-20160807-140910-1-.jpg "20160807_140910[1].jpg")
![20170326_080015[2].jpg](https://cdn.homebrewtalk.com/data/attach/341/341093-20170326-080015-2-.jpg "20170326_080015[2].jpg")
")
