New Rig Construction

Homebrew Talk - Beer, Wine, Mead, & Cider Brewing Discussion Forum

Help Support Homebrew Talk - Beer, Wine, Mead, & Cider Brewing Discussion Forum:

This site may earn a commission from merchant affiliate links, including eBay, Amazon, and others.

Seabee John

Swing the BIG hammer
HBT Supporter
Joined
Oct 1, 2007
Messages
2,309
Reaction score
71
Location
Sunrise
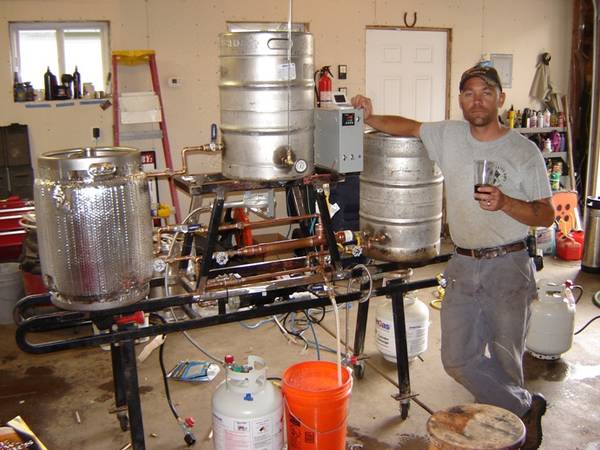
I, recently finding myself as a poor college student after selling my business and opting for a career change, had to make a decision... wait to build my brew rig, or use what I have to get it done.

In the spirit of masterful creations like the "brewflex," I present to you, my new brewing system... The BrewGuard

builddayone.JPG


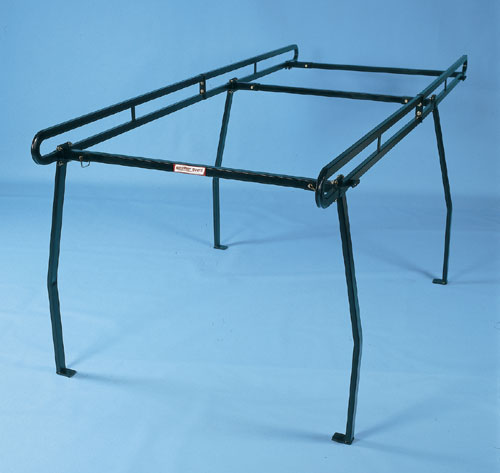
Well at leased it will be. This is a photo of the Weather Guard Ladder rack that I had on my truck before I sold my business. I opted to keep it for the steel rather than sell a used rack.

I'm not finished with my rig yet, but here are the build photos so far:

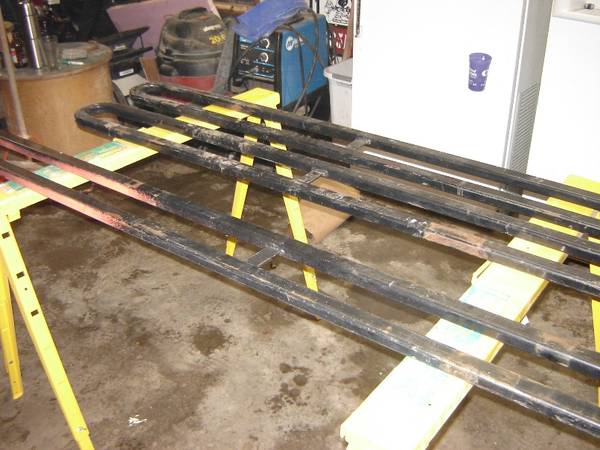
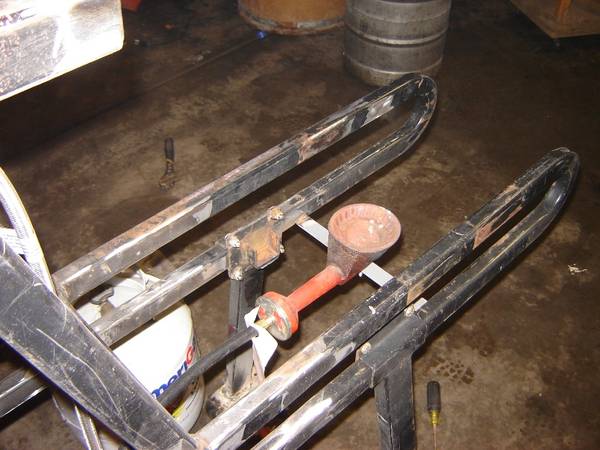
Day one (basic frame)

These are the side rails that will make up the main frame:
builddayone1.JPG


Welding the rails together:
builddayone3.JPG


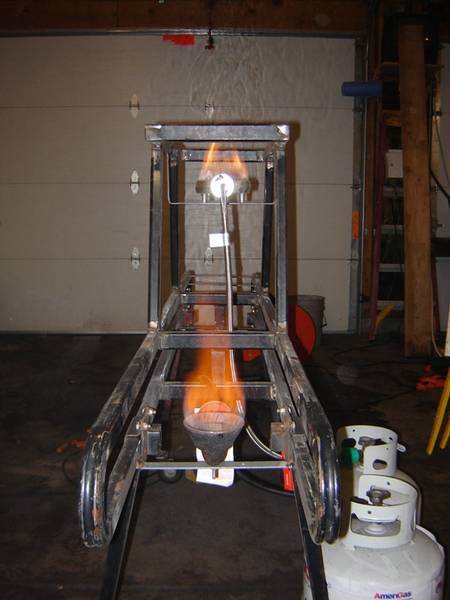
Day two (upper deck)

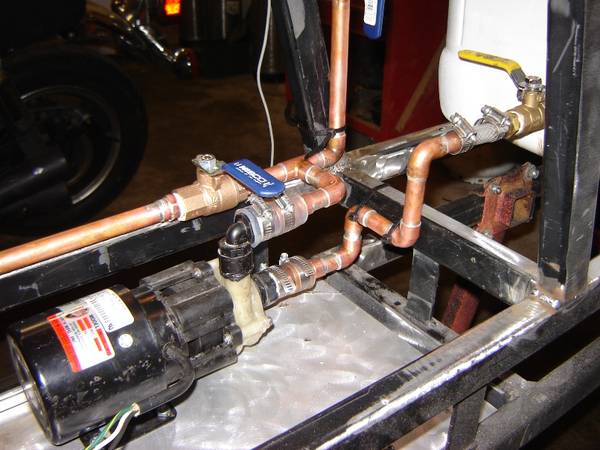
I'm planning on continuing to use my Herms system, with a gravity fed MLT, so I raised the HLT level which will also give me room for my pumps and valves, not to mention any future control devices.

builddaytwo2.JPG
 
Here are the latest

Support & burner install

MLT Supports
builddaythree1.JPG


HLT Burner & support
builddaythree2.JPG


Main kettle burner
builddaythree3.JPG


Burner Test
builddaythree4.JPG


I know it's not too pretty, but give me time. I plan on getting all the components mounted with welded brackets first. I'll then unbolt everything, grind the welds, sandblast the whole shebang and then have it powder coated.

staytuned
 
This is what happens when you are a poor college student, and have been a Seabee so long that you no longer know what the word can't means. LOL, I am looking forward to seeing this thing in action this weekend. S.
 
Ok, scraped together a buck or two for some new 1/2 valves. time to start the plumbing.

step one, mount the base shelf (stainless road sign cut to size...and no the road sign was not stolen)

builddayfour1.JPG


Mount pump and plumb Herms

builddayfour2.JPG


Run tubing from HLT into MLT and plumb test sample spout

builddayfour3.JPG
 
Hook up pump feed to Kettle (whirlpool spout)

builddayfour4.JPG


Copper Jungle.... See if you can follow the lines... from the MLT to the pump, from the pump split one line to the Herms coil and the other to the kettle. From the Herms coil to the test sample spout and then back into the MLT.

builddayfour5.JPG


What's coming next??? well, I still have to get another pump to recirculate my boil kettle (whirlpool) I know I could just use the one I have, but I like marathon brewdays where I have one batch mashing while the other boils. Then I'll have to construct my control panel. I plan on eventually installing a love control to operate the Herms pump. who knows where it will be by the weekend. The inaugural brew will be a 10 gal batch on sat.

I'll keep y'all posted
 
Nice job! I like the recycled truck rack - cheap and apparently very effective. It's hard to follow the plumbing, but as long as you can manipulate it rather easily to get water/wort to go where you want it (without leaks), you're on the right track. I'm sure you can't wait to use it - I know I'd be anxious!
 
Yuri_Rage said:
Nice job! I like the recycled truck rack - cheap and apparently very effective. It's hard to follow the plumbing, but as long as you can manipulate it rather easily to get water/wort to go where you want it (without leaks), you're on the right track. I'm sure you can't wait to use it - I know I'd be anxious!

Thanks Yuri,
I can't wait to brew with it...All of the parts (except the frame) have been producing for some time...but this new configuration will hopefully make things a little more predictable and streamlined.
 
So THIS is what youve been busy with! Looks awesome John, let me know when you fire that bad boy up for a brew.
 
mr_stimey said:
So THIS is what youve been busy with! Looks awesome John, let me know when you fire that bad boy up for a brew.

Stop by on Sat. I wired the pump last night... everything is working as planned. just gotta clean and sanitize and I'll be ready to rock.
 
Nice. Too bad I didnt read this 10 minutes ago, I just put in for 11 hours of overtime this Saturday. What time you guys mashing in at?
 
No photos tonight,
got the last of the plumbing done, and ran some cleaner through the lines. everything seems to be working just fine. I'll be posting photos after the brew on sat... maybe even a youtube vid or two.

one note: I was on the phone with SLNies tonight, (I was putting things together to clean the system) and I noted to him that I seemed to have a bunch of annoying little leaks. Like the weldless fitting on my MLT...drip... wait a min...drip... wait a min...drip... any way he started telling me this and that about how I can fix the leaks... I simply laughed and said "this rig is just like the fuel tanks on an SR-71 Black Bird... they leak like hell till she warms up... then shazam! all sealed up!" He said it sounded like we had a new name.

So what do ya think the "SR-71 Brew Bird"???
 
Nicely done!! I'm going to be welding up my brew rig later this spring and this setup really got me thinking about some different designs. I like the way this looks. I'd like to use as little steel as possible yet build something that's sturdy. This design looks like it's doing that well. Congrats on a job well done. :mug: :tank:
 
67coupe390 said:
I need to see more pics of this sweet sweet rig!!!!! You can do it!!!!

I've got another pump on order and a little more copper to buy. I should be installing a the rest of the hardware this weekend...I'll get you all the Pics I can.
 
Ok, due to high fuel prices and my love for spilling wort on the floor, my build has again taken another turn. I've almost completely redesigned the system. (yes photos to follow soon) I've abandoned the HeRMs and decided to copy Slnies's RiMS process. shown here

I've also scrapped the cooler MLT in favor of a sanke w/ a false bottom. Any ideas on what to insulate the keg with would be helpful.

The process has become less complicated and more refined to increase control and become more energy efficient.

Another change that came with the keg MLT is the ability to direct heat the mash if necessary. I installed a third burner under the MLT that can be deployed if want to change the flavor a little. I've also finally decided to add a second march pump for the boil kettle so I can whirlpool while a second batch is recirculating through the RiMS.

I've screwed up a few batches working the bugs out and some would say better planning would have saved me, but the experience has been worth a ton. I started out with efficiencies in the 60's but now 85's the norm. With the new set up, I'll be able to repeat the process more precisely with the addition of the PID.

I'll try to get some pics up as soon as parts arrive. As soon as the build is done, I'll disassemble, paint the frame, polish some copper, and reassemble. I hope to have the prettiest rig on the block!
 
Ok here it is, complete (well almost). I'm going to strip it down and send the frame to get bead blasted and powder coated. I brewed a 10 gal batch of a nut brown today (1st batch on this set up) and hit 81% eff. Not to bad for the first shot.

Here are the pics:

newrig1.JPG


Like I said, it's aint to pretty yet...but then, neither am I.

newrig3.JPG


This (above) is the new MLT (duh) ... any way Notice the three pipes going in. The bottom one feeds the pump, then next one just above is the return from the pump, and the top is obviously the feed from the HLT.

The reason I went into detail there was because I've got a great sparge/vorlaugh manifold. The return from the pump and the feed from the HLT join together in a vertical pipe. then from a free (unsolder ed) "T" extends a swing arm with the manifold seen below in action

newrig5.JPG


All in all, having this set up was 10 times easier to brew with and constant even temps were the best.

I also discovered that the PID & element couldn't quite heat the mash as fast as I wanted, but I've got a burner under the MLT and put it on low and the assist was great.

I can't wait to brew again
 
Sweet! Copper & valves, & stuff. Looks like a portable reactor for frigate. :D

I went with all copper because I've had such a hard time with flex tubing in the past, plus with the intro of Slnies' RiMS design, I was over 60% copper anyway. The nice part is with all the copper, I included all copper unions before entering each vessle, so I can disconnect quickly and the whole rig slides right into the back of my truck for transport. If I disconnect the legs, I can sit the frame on the back of my tailgate and brew just about anywhere I can find electricity. The cost savings on heating with elec. over propane are huge. I used to go through a full 20# cylinder of gas on a brew day, yesterday, I think I used all of a 1/4 of a tank.
 
That looks identical to my set up.

Except I don’t yet have a pump.
Or copper plumbing.
Or a false bottom.
Or a fancy controller.
Or a fly sparge device.
Or cool coasters on my rig.
Or a rig.

Other than that…we’re like twins.


Except for the horse shoe.
Or the combination dry erase / cork board.
Or the hat……
 
That looks identical to my set up.

Except I don’t yet have a pump.
Or copper plumbing.
Or a false bottom.
Or a fancy controller.
Or a fly sparge device.
Or cool coasters on my rig.
Or a rig.

Other than that…we’re like twins.

Except for the horse shoe.
Or the combination dry erase / cork board.
Or the hat……

Sounds like my setup is closer than yours...at least I've got an orange bucket!
 
That looks identical to my set up.

Except I don’t yet have a pump.
Or copper plumbing.
Or a false bottom.
Or a fancy controller.
Or a fly sparge device.
Or cool coasters on my rig.
Or a rig.

Other than that…we’re like twins.


Except for the horse shoe.
Or the combination dry erase / cork board.
Or the hat……

Yeah, but you have an unfinished basement with a kegerator, a chair, a tv, and a case of Trisquits. :D
 
Great work! And who says beer makes you dumberer! :mug:

81% efficiency first run I think you said!? AWESOME! I see some great brews in your future!
 
No, I think it just brings the tinker out in everyone. Some are just better at it than others.
 
Update:

After many successful brews, I just ordered a 3rd March pump and will be adding a "RiMS" style setup to control and heat my HLT. I'm hot on the look out for a cheap PID as well as tossing the idea of just switching to the BCS 460 to control the rig.

If I run the BCS rout, it will be temporary as I will soon (a year or so) begin to switch to natural gas much like Nickstecks Rig. So at that point, I'll either sell what I have and start over, or cannibalize the parts and build a new frame. Either way, I'll keep the updates coming.
-cbj
 
Found another watlow PID (the same model as the one I currently own) and managed to win the auction for a poultry $24 ... $32 after shipping.

In order to finish the temperature maintenance system for the HLT, I need only an element and an SSR. The "RiMS" tube seen in other threads is already complete. I'm still stuck on weather or not I have studs welded to the outside of the HLT for mounting of the pump and RiMS tube, or if I mount them lower on the frame. I'm leaning on mounting them on the lower frame which may mean a complete re-plumb of the system.... I'll keep you posted.
 

Latest posts

Back
Top