My Ugly Junk- Corona Mill Station...

Homebrew Talk - Beer, Wine, Mead, & Cider Brewing Discussion Forum

Help Support Homebrew Talk - Beer, Wine, Mead, & Cider Brewing Discussion Forum:

This site may earn a commission from merchant affiliate links, including eBay, Amazon, and others.
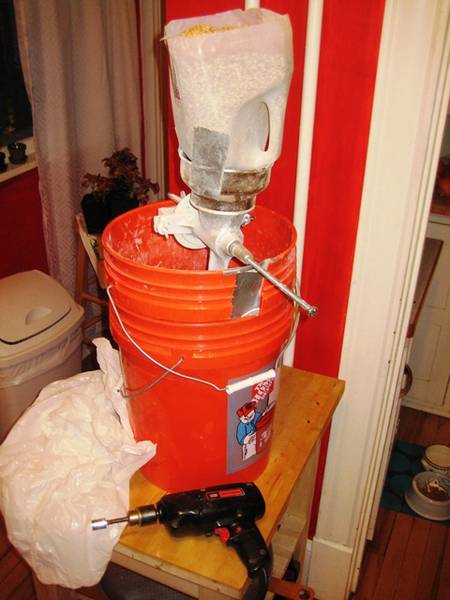
So for give me for my ignorance, but when I tightened down my adjusting bolt I could barely turn the mill. And my 7 amp 1/2" B & D drill was not even close to doing so. I don't have any grain to mill yet but I'm pretty sure that at that setting it would be instant flour.

I placed 2 washers on each side in between the mill and the cover plate but I still don't understand what this does. Wouldn't it just make it so you have to turn the adjustment knob further and get the same result?

Going to the LHBS to grab a some grain. But from what I've read grind it until its pretty fine? No whole grains or torn husks? I've got a CPVC manifold, I've not had a stuck sparge yet so I'll cross my fingers.

Thanks for listening to me complain.
 
yeah, you want it to be able to turn semi freely for sure. that tight sounds like it's gonna be "barley-meal". you want it basically so there are no whole kernels. just keep crankin till you're scared! hell, i got scared and it was too lose, then i turned it more and am setup around 70%, dont wanna eff with it anymore :).

and the washers? i'm not sure exactly, my grind looked like crap till i got them, now looks tons better.
 
The loosest you can mill from the factory is way too tight. I'm running three washers each side and only a slight tighten of the adjuster
 
Ya I'm not sure. I've read several guidelines like the distance b/w plates should be around that of a credit card and that you have to tighten down the bolt as much as possible then back off just a little. I was just messing with mine and with the adjusting bolt barely turned I was at a little more than a credit card. If I tightened it down a turn or two I would be well under a credit card. I guess the only thing to do is grab some grain, brew, and get an efficiency.
 
Look at the crush. Should see some mostly whole husks and not tons if flour
 
Just remember that you may not need the washers. The reason they are needed sometimes is because of the imprecision of the manufacturing process. Mine doesn't need any--I can go from not even crushing to unable to turn the mill just with the adjustment bolt. Just figure out what you need to get your mill to give you a crush like the pictures in the wiki.
 
Good point. I've read enough people who needed the washers, as I did, that I assumed all of these "corn mills" needed them. As always, look at your crush, adjust as needed.
 
Looks nice. Please follow up with how this batch tastes to you.

Well, I think I might have some tannins or something. I think this was due to paying too little attention to sparge temp and/or oversparging. I mashed at 1.5 qts/lb and did a single batch sparge with the remainder of 3 gallons shooting for 2 gallons of 1.045 into the fermenter. I didn't notice when I had a wee taste of the first runnings, but did notice it in the finished wort. Maybe the hops were open in the freezer too long. I hope it ferments/conditions out. It smells lovely in the fermenter.
 
How freely should the disc spin? Just received my mill, but no Grain to try it out yet.

I tightened down the large wing nut until the disc spins relatively freely, but definetly some resistance on each spin.

Just trying to gauge a starting point before I process some grain.
 
Depends.. mine is wobbly a bit, so half a turn is tight, other half is lose lol
 
Found some 2-row in the garage.

Using a stock Discount Tommy "500" mill, here is my first attempt - no mods whatsoever, just loosened the large wingnut all the way, then re-tightened until I got some resistance when cranking. No intact grains at all in this crush.

This look OK?

coronacrush1.jpg
 
How freely should the disc spin? Just received my mill, but no Grain to try it out yet.

I tightened down the large wing nut until the disc spins relatively freely, but definetly some resistance on each spin.

Just trying to gauge a starting point before I process some grain.

A starting point posted by someone earlier in the thread is to use a credit card a a feeler gauge. I did that, but ended up cranking down some more before I got a crush I was happy with. "Wilserbrewer" advanced a good way to judge if you've gone far enough: turn it down 'til you're scared, and then crank it in a bit more.
 
My crush pictured above got 74.8X% efficiency. I started really tight then loosened until it looked good. Just get some grain, give the handle a few turns, look at what comes out, and adjust slowly. Rinse and repeat. Maybe it's best to do the first adjusting by hand so you can get it dialed in before hooking up a drill. I'll tighten mine down a little bit before my next batch, just to get a little better efficiency.
 
I had just gotten mine on Friday and ran some grain through it. The plates werent lining up right and it seamed like the top part was making a very good crush while the bottom was letting a few whole one through. Any ideas on home i could fix this???
 
zmad2000 said:
I had just gotten mine on Friday and ran some grain through it. The plates werent lining up right and it seamed like the top part was making a very good crush while the bottom was letting a few whole one through. Any ideas on home i could fix this???

The same thing happened to me. This is one of the reasons why so many of us "Corona" style mill users place a few standard washers on the wing nuts on either side of the plate cover.

I'm not sure which brand mill you have but it may have come with a washer on the wing nuts on either side of the plate cover. I added two washers to each side in addition to the thin washers that came with the mill. So I have 3 washers on each side, 6 total.

This plate cover should have what appears to be a lightly-greased ball inside that touches the feeder shaft that runs through the mill. Opposite this ball is the main adjustment screw. I was noticing that on my mill the cover was not aligned properly allowing the adjustment screw and ball to put uneven pressure on the plates. Placing a few washers on either side of the cover wing nuts seems to help solve this issue.

After you make this change, you may have to tighten the main screw, as adding the washers will pull the plates a bit further apart.
 
I had just gotten mine on Friday and ran some grain through it. The plates werent lining up right and it seamed like the top part was making a very good crush while the bottom was letting a few whole one through. Any ideas on home i could fix this???

From Page 7 - my same problem
"Replaced the cotter pin on my Corona last night! used a 8-32 1 1/2" long nut and bolt. WOW what a difference. Never realized how far out my plates really where.

Thought I messed something up when I put it back together. lol plates are really close and adjustment is slight (always had a lot of play in adjustment since plate was so loose and out of parallel). Added an extra washer to sides (up to 4) and played with the main adjustment. I think this will finally work the way it was "supposed to". Might have a question on how to adjust a properly set up corona, I have no idea now!

Right now It sounds like the teeth on the plates are just hitting slight "ting" as the plates rotate. Can't get it any looser though. Can go tighter, all the way down to unable to turn.

Never saw one that wasn't like this from the factory. So I thought it was meant to be that way! lol. Some Quality Control in ol Mexico!

Might explain my first partial mashing disaster.

Excellent thread with awesome info! thanks again."

Revy's and my photos are on page 8 of this thread.
 
I've seen a lot of questions about the thread diameter of the handle bolt for those who want to use a drill, only to see responses to just take the handle bolt to the store and figure it out.

I did this, and found the threading type is 8mm-1.25...5/16 coarse" kind of works, but not the best fit, at least on my mill.

I personally bought this to use a socket head on my drill - works beautifully:

Menards.com
 
Got my new Discount Tommy mill and just hand cranked 21lbs of grain. Not too bad, but I think I'll add the drill for next time.

No kidding. I did 10lbs. last brew and this weekend when I went to do it I hooked the 3/8" drill up and said "Screw it if it burns out!"
 
I've lately been doing double batch sparging and have been getting 80% eff%. Screw you roller mills lol
 
tennesseean_87 said:
Well, I think I might have some tannins or something. I think this was due to paying too little attention to sparge temp and/or oversparging. I mashed at 1.5 qts/lb and did a single batch sparge with the remainder of 3 gallons shooting for 2 gallons of 1.045 into the fermenter. I didn't notice when I had a wee taste of the first runnings, but did notice it in the finished wort. Maybe the hops were open in the freezer too long. I hope it ferments/conditions out. It smells lovely in the fermenter.

Did you take pictures of your crush? I'm wondering if the tannins were from a crush that destroyed too many husks.
 
After more research, I think I was wrong. A few post-fermentation hydrometer samples didn't taste the same as it did when I tasted the post-boil wort. Picture of the crush is posted above, but I'm gonna crank it down a little more, since I only got 75%, and it was a small beer.
 
tennesseean_87 said:
After more research, I think I was wrong. A few post-fermentation hydrometer samples didn't taste the same as it did when I tasted the post-boil wort. Picture of the crush is posted above, but I'm gonna crank it down a little more, since I only got 75%, and it was a small beer.

Glad to hear it. I still have yet to brew my first batch with the mill. I like to know that others continue to have great success with this.
 
JoeyChopps said:
Sweet green bucket what's the middle part of ur hopper?

A giant plastic cup from Aurthur Bryants BBQ in Kansas City. Originally I had a small oatmeal container but the cardboard was too flimsy and didn't stay put well. Green bucket I've had forever and isn't suitable for liquid in my opinion so made a good mill bucket
 
OK now I am wanting to do this as well but I might have a issue with my mill. It is a dirt old and I mean really old flour mill that has stones not the metal plates. I can adjust them out far enough I suppose to crush instead of make flour but I worry about tearing the hulls.

Silly worry and should I finish building the abortion or should I go ahead and buy a mill like your guys?
 
A giant plastic cup from Aurthur Bryants BBQ in Kansas City. Originally I had a small oatmeal container but the cardboard was too flimsy and didn't stay put well. Green bucket I've had forever and isn't suitable for liquid in my opinion so made a good mill bucket

This thread is getting long enough that we need to set up award for ugliest junk. I think yours would probably win in the "most clashing colors" category hands down.....much more colorful that my old Pratt & Lambert gray paint bucket.
 
OK now I am wanting to do this as well but I might have a issue with my mill. It is a dirt old and I mean really old flour mill that has stones not the metal plates. I can adjust them out far enough I suppose to crush instead of make flour but I worry about tearing the hulls.

Silly worry and should I finish building the abortion or should I go ahead and buy a mill like your guys?

Give it a try is all I can offer. Crush a cup of grain and post some pics here. I wouldn't put a lot of time into it untill I ran a test crush.

The mills w burr plates tear the hulls as well.
 
Thought I'd share how much uglier my junk has become in recent months of use. I've been having some efficiency problems lately, and it looks like the plates aren't quite as tight as they should be. Going to need to see if I can work out a solution, but haven't gotten around to it yet. Much too tempting to just drink a homebrew and philosophize about it.

IMG_08542.JPG


I'm obviously very handy.
 

Latest posts

Back
Top