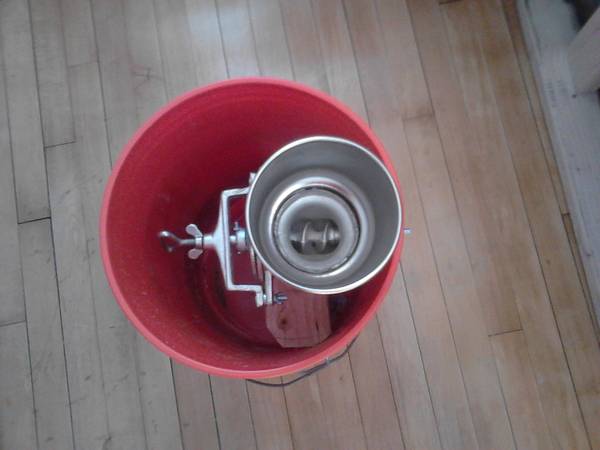
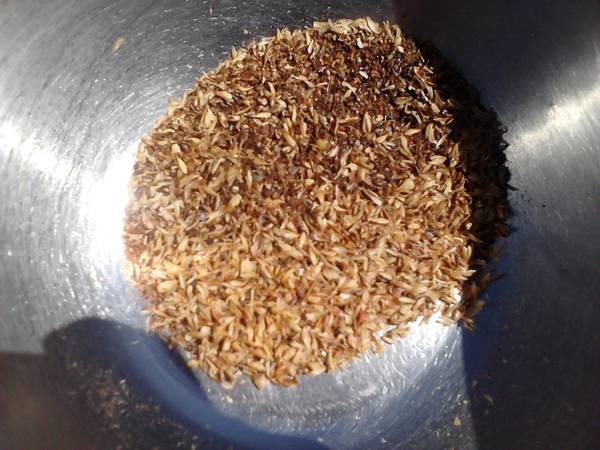
I received my 500 from Discount Tommy a couple weeks ago- I expected crude-and this certainly is. The setting appeared rather wide, yet a few cranks and its grinding the plates. Metal flakes galore- more wobble than I think I can straighten out without a centered hole, straight line or square point to be found. I did break it all down ( that cotter pin was a biotch! ) I'm sure I can get it done somehow- too many folks here have, I'm just not sure where to start lol
You are using an out of date browser. It may not display this or other websites correctly.
You should upgrade or use an alternative browser.
You should upgrade or use an alternative browser.
My Ugly Junk- Corona Mill Station...
- Thread starter Revvy
- Start date

Help Support Homebrew Talk - Beer, Wine, Mead, & Cider Brewing Discussion Forum:
This site may earn a commission from merchant affiliate
links, including eBay, Amazon, and others.
rico567
Well-Known Member
You got the cotter pin out, which was a good start. That was the hardest part for me. I went & got a stainless steel screw & nut that fit that hole, which I had to run the same size drill through to even it out so that the screw would go in. Then it's a matter of finding which way the plate goes on that's most even (there are several grooves the cotter pin went through, so you can experiment around a bit with this. Did my plates end up being completely even? No. Do they do a great job of crushing malt? Yes.
I actually had to put a big rubber oring (i forget what it was from) between the actual plate, and the "nut" (its not a nut, since there's no threads) type thing with the grooves for the cotter pin. WIthout doing this there was no way the plate was snug enough to not wobble. It didnt matter if i used the cotter pin or a screw through the hole. Neither one put enough pressure on that "nut" to hold the plate steady without wobbling. It's good and secure now though.
I have my new nut/bolt set up- still have to drill out the shaft and probably open up those grooves a tad to make room for the new bolt as the grooves don't line up well with the hole in the shaft- I'm sure that added to the difficulty removing the pin. Also the pin looked to be hammered in before being bent over. I filed off some slag from that point where the shaft sits into the plate and it seemed to help some. I have my buckets ready, my wood mounting bracket cut out and notched- I just need to get her in the ballpark here. 
FirstStateBrewer
Well-Known Member
Since everyone is showing off their Corona mills, here's how I rigged mine last Spring! Works great!


Varmintman
Well-Known Member
Well I got mine out yesterday and I was surprised to see it is a corona hybrid sort of deal. It is cast with the corona name on the side of it and another name on the handle and yet a third name on the plates that hold the stone.
I guess though mine is old enough that they still took pride in their stuff. because it sits square and grinds pretty good other than a bunch of flour. I think the flour is because mine has stones and not steel plates.
Going to mill a batch though this weekend and try it
I guess though mine is old enough that they still took pride in their stuff. because it sits square and grinds pretty good other than a bunch of flour. I think the flour is because mine has stones and not steel plates.
Going to mill a batch though this weekend and try it
Here's my new ugly junk...now if only I had some grain to crush! Thanks for the help in this forum!


FirstStateBrewer
Well-Known Member
jEld, I like the way you have your mill mounted on that rolling table! May have to copy that! 

Happened to find that table in someone's driveway on trash day last week...you know you are addicted to brewing when you see garbage and think "grain mill stand".
FirstStateBrewer
Well-Known Member
Happened to find that table in someone's driveway on trash day last week...you know you are addicted to brewing when you see garbage and think "grain mill stand".
I was just checking out the junk in my mom's shed for similar treasures! LOL!
BTW, you need to attach a bottle opener... ;-)
I was just checking out the junk in my mom's shed for similar treasures! LOL!
BTW, you need to attach a bottle opener... ;-)
I thought he had one- upper left of photo? lol
FirstStateBrewer
Well-Known Member
I thought he had one- upper left of photo? lol
I thought that was the bolt that secures the Corona mill to the wood, but I could be wrong.
Who needs a bottle opener...I just use my teeth like a real man
Disclaimer: I'm kidding
Disclaimer: I'm kidding
I thought that was the bolt that secures the Corona mill to the wood, but I could be wrong.
Yup- my bad! I always see bottle openers...
Nice job on both of your mills guys!

This thread is getting long enough that we need to set up award for ugliest junk. I think yours would probably win in the "most clashing colors" category hands down.....much more colorful that my old Pratt & Lambert gray paint bucket.
haha, yeah I basically took the oldest stuff that I cared the least about, and made it out of that!
Happened to find that table in someone's driveway on trash day last week...you know you are addicted to brewing when you see garbage and think "grain mill stand".
Are you kidding me? I went to garage sales last week and all I could think of is "can I use this in my brewery?!?"
How fine are you guys grinding? I have ZERO whole grains, mostly half-husks and a decent amount of flour and I'm stuck in the 60's for efficiency no matter what I do. I BIAB so I could probably go finer...then again, I just installed a stainless braid manifold in my MLT...that's still fairly fine, though. I think I'll try batch-sparging once and see if I increase efficiency that way, then address the crush...which I thought was actually on the fine side.
I'm not sure how to hook up my mill to my drill. The bolt that holds the handle onto the auger is bent into a hook at the end to push down a washed that holds the handle. and I'm pretty sure that the bolt isnt a standard thread. Anyone have an answer for me? I got one of the 500 mills at discount tommie
I just took that piece to the hardware store and looked through the bolts until I found one with a similar thread and size. Then I cut off the head and filed the bolt end into a hex shape for grip in the drill. Seems to work fine for me so far!
rico567
Well-Known Member
I'm not sure how to hook up my mill to my drill. The bolt that holds the handle onto the auger is bent into a hook at the end to push down a washed that holds the handle. and I'm pretty sure that the bolt isnt a standard thread. Anyone have an answer for me? I got one of the 500 mills at discount tommie
I have the same mill from DT. I just did a quick-and-dirty adapter. The bolt that goes into the back of the auger is metric thread, as one would expect. I went to the hardware store with the bolt (taking the auger would probably have been better) and found a stainless steel metric bolt that fit. I threaded it in , and just used a 13mm socket (that's the size of the bolt head) to adapt it to an old Craftsman 1/2" AC drill I have. Been crushing malt with that setup for over 3 years, no problems.
Here are some pix of my setup from way back in this thread: https://www.homebrewtalk.com/f51/my-ugly-junk-corona-mill-station-90849/index21.html#post1408147
rico567
Well-Known Member
Thanks guys. I may try that out. I brought the bolt in with me to try to find a nut that would fit on it and then finding the corresponding bolt for it. I might not have tried the metric sizes.
It's made in Mexico, so I figured metric. Don't need a nut. The bolt screws in clockwise, the same direction the mill is run by the drill. Just screw it in and go.
From what little i can see i would say crush more...do you have any whole or undamaged grains at all? All grains need to be broken...use this as your guide and don't fear some flour IMO.
starrfish
Well-Known Member
Crush more, I crush pretty fine and use a strainer bag, but that's just me and my set up hovering in the 76-79% range depending on wheat content.
That being said your looks like it can use a bit more. It does take a bit to dial in... have you measured your gap? I'm at a credit card plus a not quite a thin bonus card (tech terms eh!) I can't get 2 credit cards in gap.
OH BTW that looks like crystal or some toasted roasted malt... TEST with Base grain 2-row. Corona Handles kiln dried malt differently than base. Tune fore base malt... the rest is gravy.
Rugrad02
Well-Known Member
This is my milling station. It is the Weston mill from walmart.com. I attach it to my Black & Decker Workmate 200. Under the plates I attached a funnel that has been notched to fit under the mill. The spout of the funnel was cut off about an inch. On top of the factory hopper I added an HVAC vent boot that I found from my local Lowes store.
On brew day, I place a bucket under the bench. I then clamp in a piece of PVC piping. I attach the mill to the bench and work in the funnel. The grain collects nicely right into the bucket.
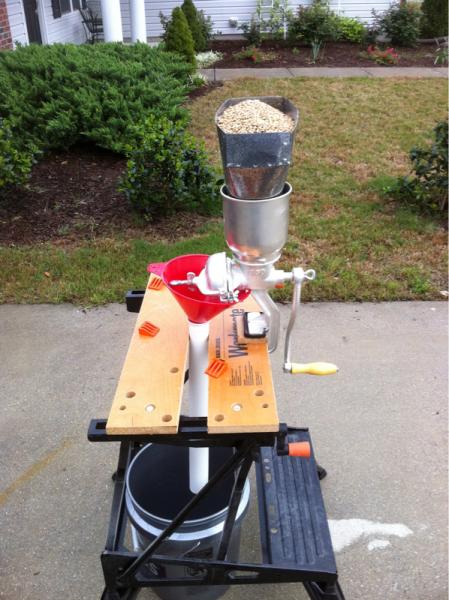
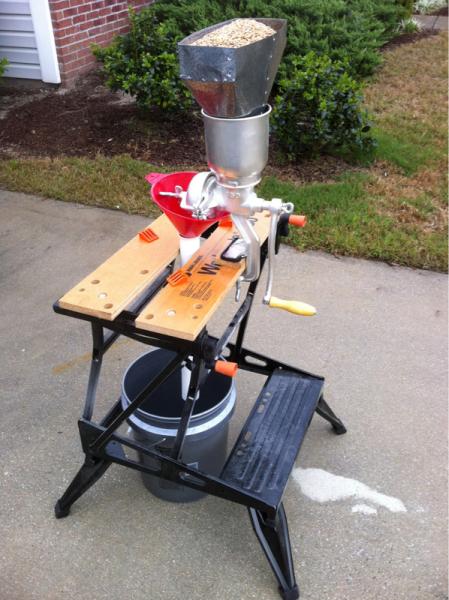
On brew day, I place a bucket under the bench. I then clamp in a piece of PVC piping. I attach the mill to the bench and work in the funnel. The grain collects nicely right into the bucket.


rico567
Well-Known Member
I haven't posted the mods to my original UJ mill since I assembled it. There are two big improvements: 1) I got tired of filling the included hopper, so a neighbor donated an enlarged hopper to handle the biggest grain bills. 2) The bucket I was using to catch the discharge of grist wasn't any too stable, so I used an "Ale Pail" that was being retired from fermentation as a catch bucket....worked perfectly. ("Perfect" in this context meaning that the bucket containing the mill rests on the rim of the lower bucket without becoming stuck.)
The second pic shows how the mill is mounted below the rim of the bucket and driven through a hole in the side. This allows the lid to rest on top with the hopper in place, preventing stuff from flying all over.
The fourth pic just shows how everything looks with the drill in place and completely assembled.
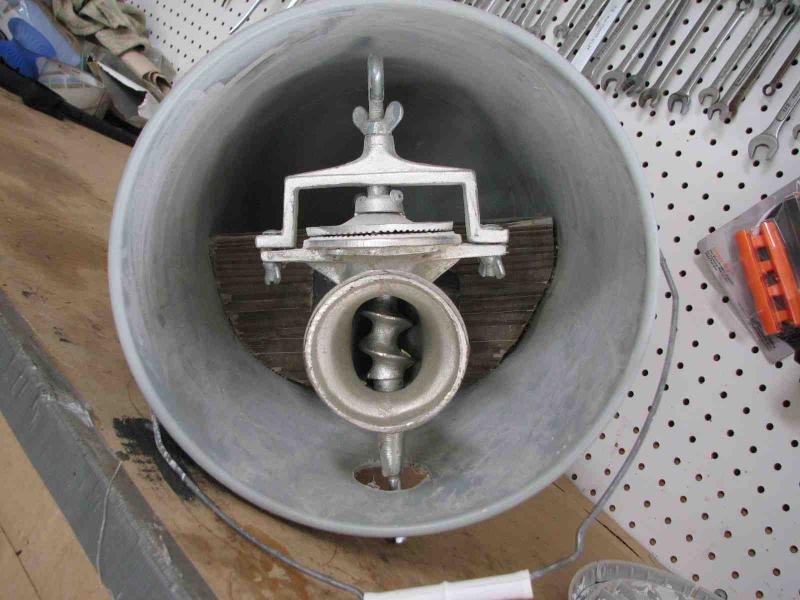
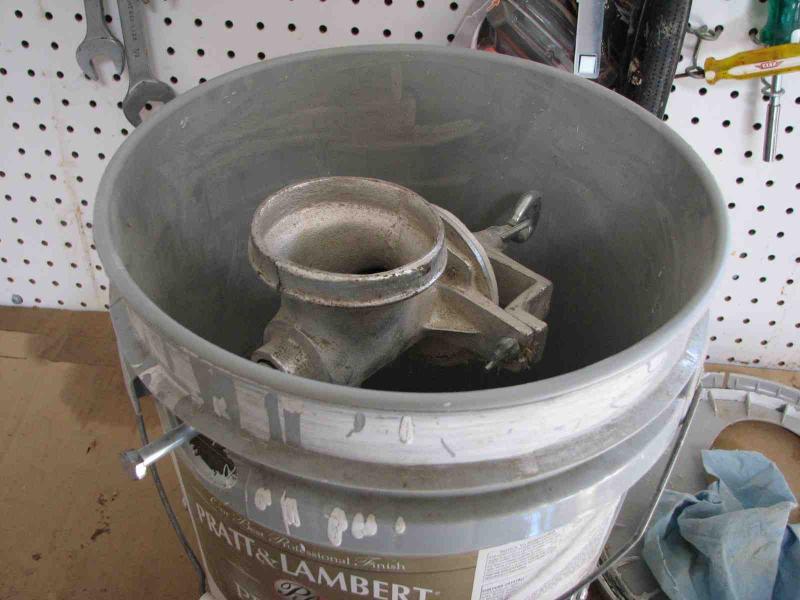
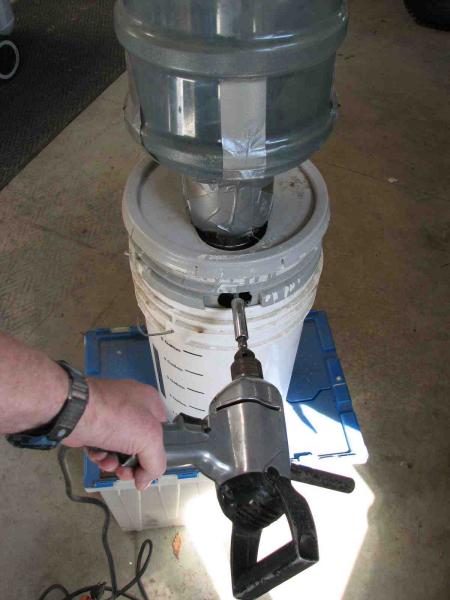


I NEED the giant water jug hopper. I have a monster cup-type deal with the stock hopper and even that will only hold about 3lbs. of grain at a time. I want to load all my grain to the hopper, set the drill/motor, and walk away/do other things.
You BIAB with an MLT?
Yep. Used to, still could if I wanted to. I didn't want to lose any heat but didn't want to have to wrap and keep a pot on a burner throughout the mash. This way I have an unattended mash and can do a dunk sparge in clean water.
Now I added a hose-braid manifold to the cooler and just did my first batch-sparge. Volumes were off so my efficiency was bad too...have to figure out the new setup.
tennesseean_87
Well-Known Member
You BIAB with an MLT?
I BIAB in an extra bottling bucket. It was cheaper than an extra kettle to heat sparge water in!
Beer_Eugenics
Well-Known Member
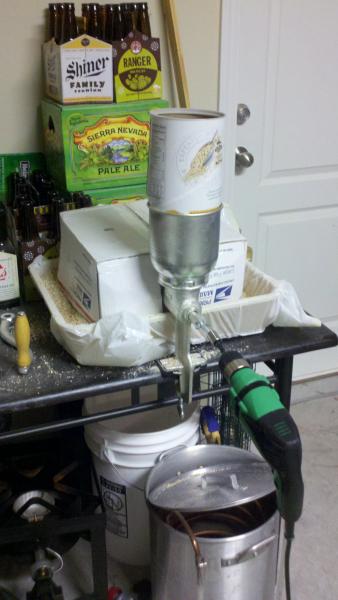
Here is mine.

rico567
Well-Known Member
"Beer Eugenics": A thing of beauty.
I got a 5g. water jug given to me by my neighbor/co-brewer. Next brew I will attach it to the station and I plan on being able to have all of my grain dumped in at once rather than stopping to fill the hopper or doing two things at once, holding drill and filling hopper.
tennesseean_87
Well-Known Member
I think my crush is pretty fine, but there still seem to be some whole kernels. I haven't been able to brew in a while, but I tightened it up after getting 65% on my last batch. I'll see how the next one goes and then consider the JB weld on the cotter pin. Is that the recommended fix for an uneven crush?
I think my crush is pretty fine, but there still seem to be some whole kernels. I haven't been able to brew in a while, but I tightened it up after getting 65% on my last batch. I'll see how the next one goes and then consider the JB weld on the cotter pin. Is that the recommended fix for an uneven crush?
I did it and it seems to have worked well to even the gap, but it is tricky to get it aligned...knowing what I know now
Sometimes it can be as simple as the big cotter pin is driven in tight and crooked holding the mill plate at an angle, a smaller pin or bolt will allow it to self align. These things are built so cheaply, but I think the origninal design intent is for the mill plate to be a loose fit and find its own home which shoud be good at the close gaps we use for barley.
tennesseean_87
Well-Known Member
I think it is floating, but I'll check again next time I brew, which will hopefully be this weekend. Thanks for the reply.
I think as long as you have a fair amount of large husks available to create a filter-bed on the manifold...the rest can be quite fine. More vorlaufing is probably the biggest "problem" to a fine crush.
Similar threads
- Replies
- 15
- Views
- 2K

