I just used s fan speed control as shown in the UTube vid on solderless construction. Works great.
You are using an out of date browser. It may not display this or other websites correctly.
You should upgrade or use an alternative browser.
You should upgrade or use an alternative browser.
My Stirplate... Cheap and Easy Build...
- Thread starter Anthony_Lopez
- Start date

Help Support Homebrew Talk - Beer, Wine, Mead, & Cider Brewing Discussion Forum:
This site may earn a commission from merchant affiliate
links, including eBay, Amazon, and others.


I just used s fan speed control as shown in the UTube vid on solderless construction. Works great.
Is the link to that bid buried a pages back in this thread?
Yes but you can find it fairly easily w/ a You Tube search.
Let me make sure I'm clear. I've built one with the potentiometer. The trouble is that it is not variable. I was told here on this thread many pages back that I need an additional piece (am SSR I believe). That is what I'm looking for.
I used this:
Computer PC CPU 3 Pin Cooling Fan Speed Controller Computer PC CPU 3 Pin Cooling Fan Speed Controller
Sold by: uxcell
Got it on Amazon for under $8. Comes w/ a Molex plug that plugs right into the fan power cord. No soldering.
Computer PC CPU 3 Pin Cooling Fan Speed Controller Computer PC CPU 3 Pin Cooling Fan Speed Controller
Sold by: uxcell
Got it on Amazon for under $8. Comes w/ a Molex plug that plugs right into the fan power cord. No soldering.
Also- here's a link from the You Tube video for a source for the controller:
http://www.dealextreme.com/p/pc-cpu-cooling-fan-speed-controller-front-bay-mount-5986
http://www.dealextreme.com/p/pc-cpu-cooling-fan-speed-controller-front-bay-mount-5986
fletchergsmith
Well-Known Member
- Joined
- Apr 2, 2014
- Messages
- 81
- Reaction score
- 12
Had my stir plate built from the original post schematics, and it worked pretty good but didn't have enough power for larger starters. So I upgraded the power source from a cell phone charger to a 12 v wall wort from an old external hard drive. Now when I turn it on it starts off at my previous top speed and goes up from there. My question is can I just wire in a second potentiometer and get some more control or do I need something else. If this has already been covered in this thread I'm sorry but I didn't manage to find. Also a radio-shack part no would be great, as I'm not very familiar with all this stuff.
Also- here's a link from the You Tube video for a source for the controller:
http://www.dealextreme.com/p/pc-cpu-cooling-fan-speed-controller-front-bay-mount-5986
I highly recommend staying away from dealextreme, unless you are okay with waiting weeks (months) to receive your stuff. I'm still waiting for some lithium batteries and a car USB adapter that I ordered in September. Supposedly the first shipment was lost and they've shipped the USB thing again, and the batteries are backordered now. I doubt that I will ever receive any of it, and it's too late to do a chargeback.
I highly recommend staying away from dealextreme, unless you are okay with waiting weeks (months) to receive your stuff. I'm still waiting for some lithium batteries and a car USB adapter that I ordered in September. Supposedly the first shipment was lost and they've shipped the USB thing again, and the batteries are backordered now. I doubt that I will ever receive any of it, and it's too late to do a chargeback.
I must admit I ordered mi e from Amazon along w/ the fans and magnets. I just referenced the link fri the post for the part description.
I read a whole bunch of this thread, thank you everyone! I am in the process of putting the parts for this together based on this video:
[ame]https://www.youtube.com/watch?v=XVLB9c0j1iU[/ame]
I have yet to get the fan, but I have an router power supply which outputs at 12v / 1.5amps. From what I read this is pretty powerful. Does anyone see any issue with this given I will be using a normal computer fan? I do have other chargers but this one has a real nice long cable which will help in my house which is slightly wall socket challenged.
I bought a 5V fan from Amazon that had a speed control with it (I think it's just a rheostat) for $11. I'm almost finished making a stir plate out of it. For a power supply, it plugs into a spare USB phone charger. I got the idea for it in another thread here.
I just put four 2" machine screws thru the holes in the fan, put nuts on them, then rubber caps to act as feet. I think I can use the fan grill for the top plate if I cut the center out. If the grill is too small to hold the flask, I might drill 4 holes in an old CD (to attach it) and use that.
I just put four 2" machine screws thru the holes in the fan, put nuts on them, then rubber caps to act as feet. I think I can use the fan grill for the top plate if I cut the center out. If the grill is too small to hold the flask, I might drill 4 holes in an old CD (to attach it) and use that.
Spartybrew
Well-Known Member
I built this awhile back but never posted a picture. Switch, potentiometer, PC fan, rare earth magnets, and a cell phone charger wired in a cigar box. I don't recommend using a cigar box with he fire hazard and all but I accept the risk and like the way it looks! Not a great picture but you can kind of see the small funnel. Had a bit of a crack form on the front but it works regardless. View attachment ImageUploadedByHome Brew1420673931.229301.jpg
I built this awhile back but never posted a picture. Switch, potentiometer, PC fan, rare earth magnets, and a cell phone charger wired in a cigar box. I don't recommend using a cigar box with he fire hazard and all but I accept the risk and like the way it looks! Not a great picture but you can kind of see the small funnel. Had a bit of a crack form on the front but it works regardless. View attachment 247217
Nice, clean build! I just wanted to let you know that you may get better yeast growth on your stirplate if you replace the airlock with a bit of sanitized aluminum foil or a foam stopper. One of the reasons stirplates are so efficient at propagating yeast is due to the constant stirring, which allows continuous replenishment of the oxygen in the vessel, which is an essential component for growing lots of healthy yeast cells. Using foil over the mouth of the flask or a foam stopper both allow plenty of O2 to get into the vessel while keeping out stuff that could infect the starter. Unfortunately, using an airlock means the only O2 available for use in yeast growth is what you had in the vessel at the start of the ferment.
I know you weren't looking for this sort of feedback, but I hope it helps!

Spartybrew
Well-Known Member
Nice, clean build! I just wanted to let you know that you may get better yeast growth on your stirplate if you replace the airlock with a bit of sanitized aluminum foil or a foam stopper. One of the reasons stirplates are so efficient at propagating yeast is due to the constant stirring, which allows continuous replenishment of the oxygen in the vessel, which is an essential component for growing lots of healthy yeast cells. Using foil over the mouth of the flask or a foam stopper both allow plenty of O2 to get into the vessel while keeping out stuff that could infect the starter. Unfortunately, using an airlock means the only O2 available for use in yeast growth is what you had in the vessel at the start of the ferment.
I know you weren't looking for this sort of feedback, but I hope it helps!
I welcome any and all feedback Barrooze, especially the kind that makes me a better brewer! Thanks for the tip I will definitely use sanitized foil or foam next time. Cheers
How about using a large cotton ball for the stopper?
fletchergsmith
Well-Known Member
- Joined
- Apr 2, 2014
- Messages
- 81
- Reaction score
- 12
Cotton might be more difficult to sanitize. With a foam stopper I just soak it in star San and ring it out and it springs right back into shape. I would think cotton would just clump, and I wouldn't be comfortable waiting for it to air dry, partially because it would be in open air allowing for possible contamination, but mostly because I'm impatient. Aluminum foil has work well for me also, just make sure it's loose fitting to allow air to enter.
I managed to find a website in the UK that stocks all the RadioShack bits, very helpful! I placed my order tonight:
2710265 - 25 ohm Rheostat - £2.33
2737075 - Switch-Mode Power Supply - 1000mA 3-12Vdc - £4.16
2750018 - 12VDC/30A SPST Illuminated Rocker Switch with Red LED - £1.24
2740424 - 1' (25mm) Knurled Knob 1 - £2.08
6403131 - Pk10 Insulated Quick Disconnects - £0.83
2741583 - Size N Coaxial DC Power Jack W/Switch - £1.24
For my fellow UK-ers and any that might be searching for a DIY Stirplate build the website is : http://www.t2retail.co.uk
I decided to go for a switching power supply and power jack for a clean build.
I will report back in a couple of days when I get the bits.
So this is where I am at so far:
View attachment ImageUploadedByHome Brew1421511089.153993.jpg
View attachment ImageUploadedByHome Brew1421511124.323712.jpg
View attachment ImageUploadedByHome Brew1421511153.178317.jpg
I would also like to include a power jack, but I don't know how to incorporate it in to the wiring, can any one help with an idiots guide type diagram?
View attachment ImageUploadedByHome Brew1421511253.738735.jpg

nealm
Well-Known Member
Where does everybody get those nifty cigar boxes?
Nealm
Nealm
Where does everybody get those nifty cigar boxes?
Nealm
Picked up mine in Havana. Full of nice cigars, too.
Where does everybody get those nifty cigar boxes?
Nealm
eBay for me. Shops know there is a market for them here dye to Cigar Box Guitars and try to gouge you on price.
I finished mine today!
View attachment ImageUploadedByHome Brew1421604054.005379.jpg
View attachment ImageUploadedByHome Brew1421604086.557618.jpg
http://youtu.be/dkctBl9maj8
I picked up four for a dollar each at a flea market.
DrumForHire
Well-Known Member
I've had some success and some problems with my stir plate. I followed the original post's instructions except for the switch (since I figured I won't have it plugged in while I'm not using it). The fan shows "DC 12V --- , 0.11A". The power supply is from an old modem and shows "Input: 120~ 60Hz 0.3A; Output: 12V --- 1.0A". I don't know much about electrical, but hopefully that helps some of you more capable people understand a bit about it.
Now, it works. It will spin, but it just spins too fast. I can get the stir bar to spin for about 5 seconds before it gets thrown off even with the rheostat turned all the way down. I've tried it with a couple lower-rated power supplies to see if this would help, but neither would make it spin at all. One shows "Input: 120VAC ~60Hz 5.5W; Output: 6VDC 400mA" and the other shows "Input: 100-240V~50/60Hz 0.2A; Output: +5V---1A". Again, I'm no expert, but I'm wondering if there was a mismatch between these power supplies and the fan. What should I look for to get the speed down, but still work with the fan?
A little more info if it helps: I have it mounted in a cigar box, and I tried opening up the lid and placing the flask as close to the magnet as I could, and it was able to keep the stir bar spinning without being thrown off, but even at a full 2L the vortex eventually lightly touches the stir bar. So, a possible fix could be to keep the fan exposed and put a temporary top on it (I've seen it done with plexiglass) or I could cut a large hole in the top so that the magnet is freakishly close to the flask. However, I think that the nice look of the box I got will look more professional and safer, both of which will help me convince my girlfriend to not throw it in the garbage. So, any ideas of how to improve it would be much appreciated!
I did this on a Friday afternoon at work while the boss was away. I used a 92 mm fan from an old PC (12 V, 0.85A). The speed control is done via the LM317 chip and a precision 2k pot. I fed a standard 120 Vac PC power cable into the box and used a laptop 18 Vdc power supply to feed the speed control circuit. Note that you can use any DC supply up to 37 V for your LM317 chip. It is the pot to resistor ratio that determines the maximum output voltage and mine is set to 12V because the PC fan is at max speed at that voltage. If you use a standard 12 V dc wall wart your maximum output from the LM317 will be 10.5 V(decreased speed, not that it matters). If you do this with the voltage regulator, you need to start at high speed and turn the pot down for adjustment for magnet coupling because PC fans do not start up at low voltages but can be regulated down to about 5 V in my experience. Anyway, whichever way you do it, the main thing is to keep that magnet in the flask spinning and creating a healthy environment for the yeast to multiply. Happy brewing.

I apologize if this was covered as I haven't paged through the entire thread, but has anyone attempted this with the thermatake USB fan from this thread:
https://www.homebrewtalk.com/f255/my-shamelessly-cheap-12-diy-stir-plate-338695/
Im using a 5vdc 1amp power source and with the rheostat that comes on the fan it was a bit fast even on the lowest setting. So I hooked it up to this radio shack set up and now it won't spin fast enough even with the rheostat turned all the way up.
I am not using the wiring that went to the stock rheostat, just the two power wires, and I'm wondering is that might be why because its wired just like the op has it.
I apologize if this was covered as I haven't paged through the entire thread, but has anyone attempted this with the thermatake USB fan from this thread:
https://www.homebrewtalk.com/f255/my-shamelessly-cheap-12-diy-stir-plate-338695/
Im using a 5vdc 1amp power source and with the rheostat that comes on the fan it was a bit fast even on the lowest setting. So I hooked it up to this radio shack set up and now it won't spin fast enough even with the rheostat turned all the way up.
I am not using the wiring that went to the stock rheostat, just the two power wires, and I'm wondering is that might be why because its wired just like the op has it.
Never mind, I got it figured out.
The red power wire from the fan and the black ground wire from the stock rheostat are not needed. Use the red power wire from the stock rheostat and the black ground from the fan and wire like the diagrams here.
The thermaltake fan is the way to go. Beyond the ~$12 for the fan, I purchased some rare earth magnets and a plastic project sheet at HD along with multiple sized stirbars from Amazon. Cheap, and the only wiring was plugging it in! Works like a champ.
I have been using a little piecemeal stir plate formed out of a computer fan and an old model train controller:
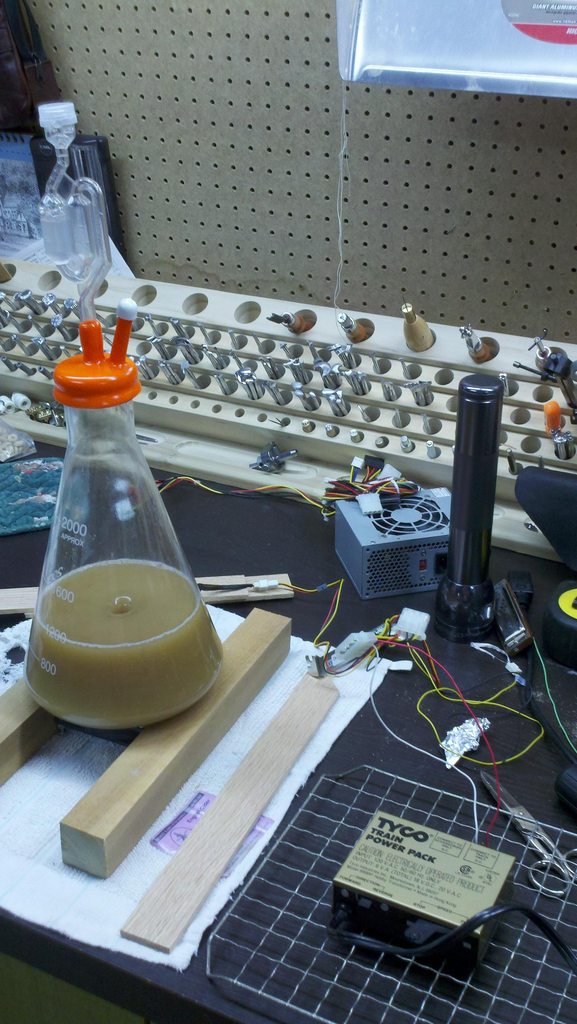
I wanted something that is:
(1) stable
(2) decent looking
(3) capable of do two six liter starters simultaneously.
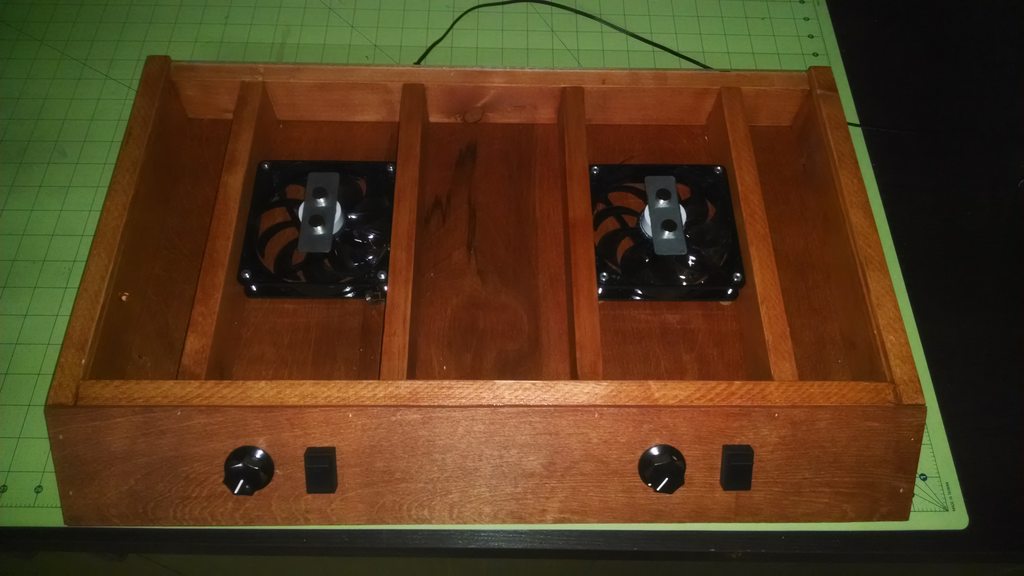
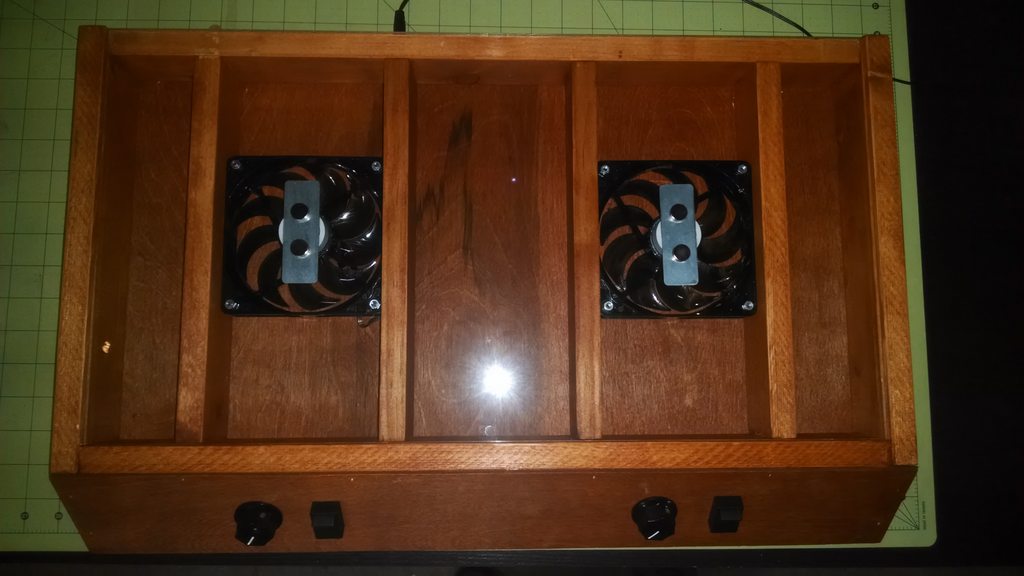
Here is what I came up with:
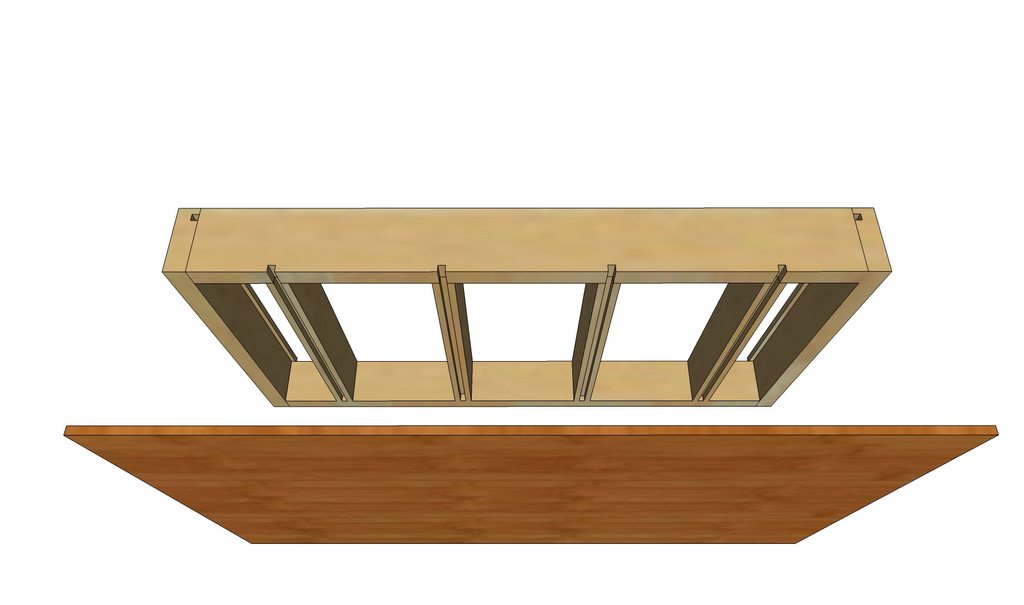
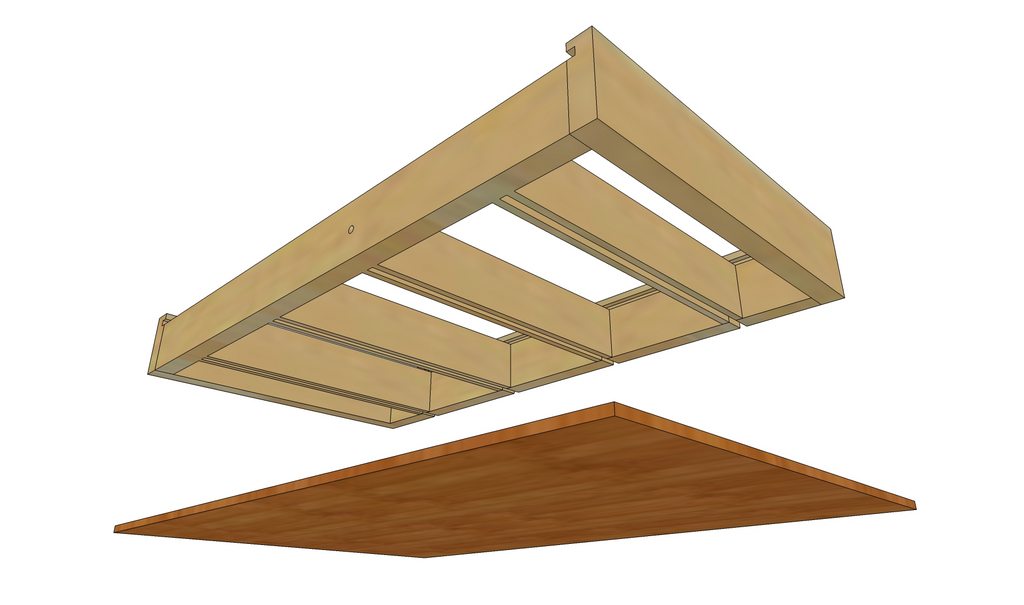
Sketchup pictures:


Mocking up the electronic portions:

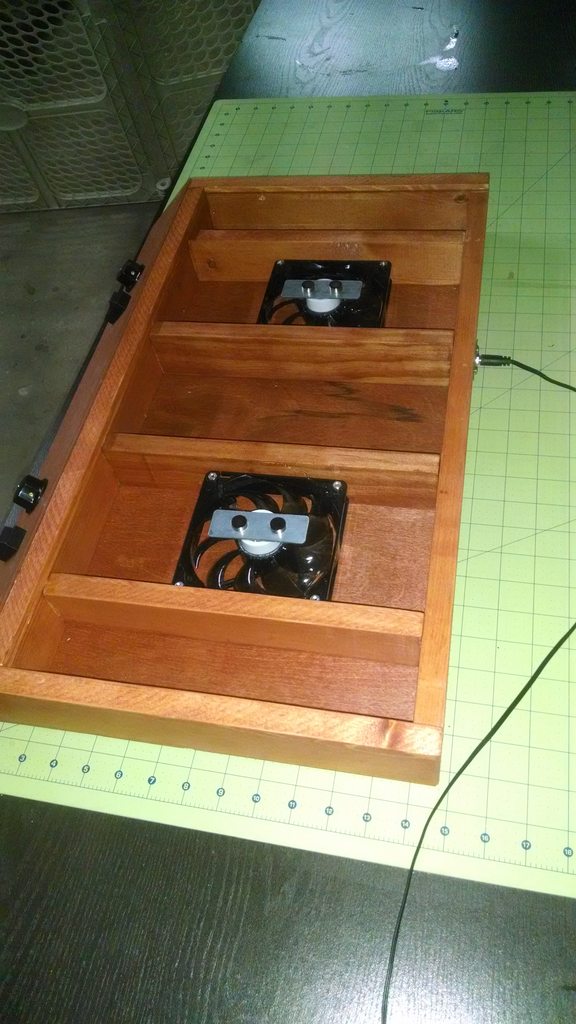
Basic assembly and stain:
Front:
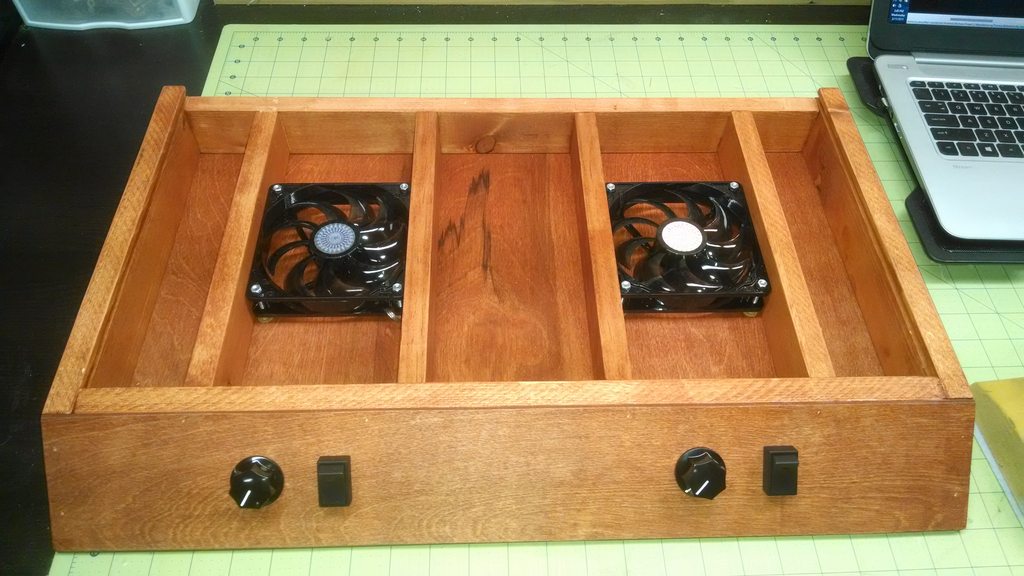
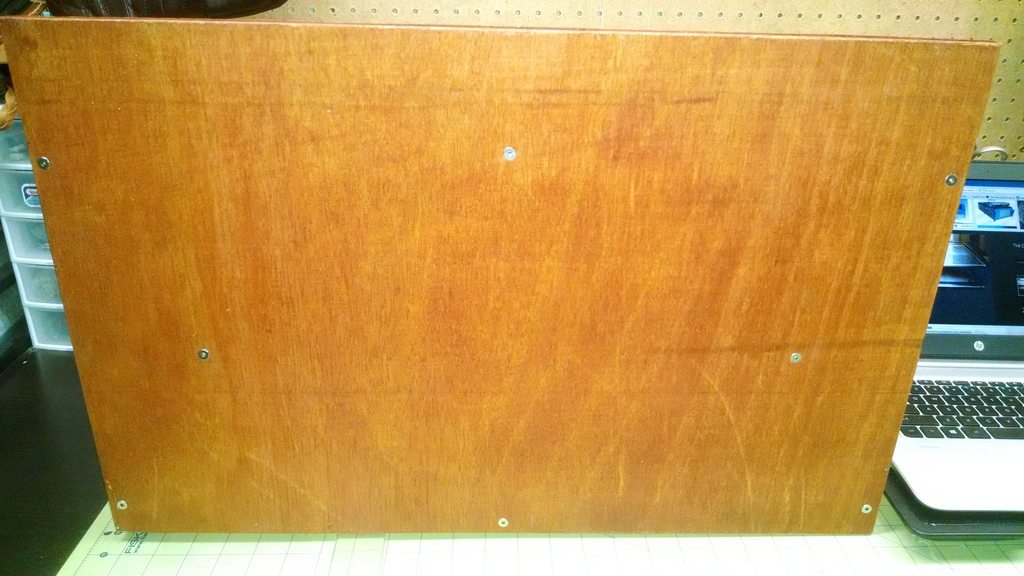
Back:
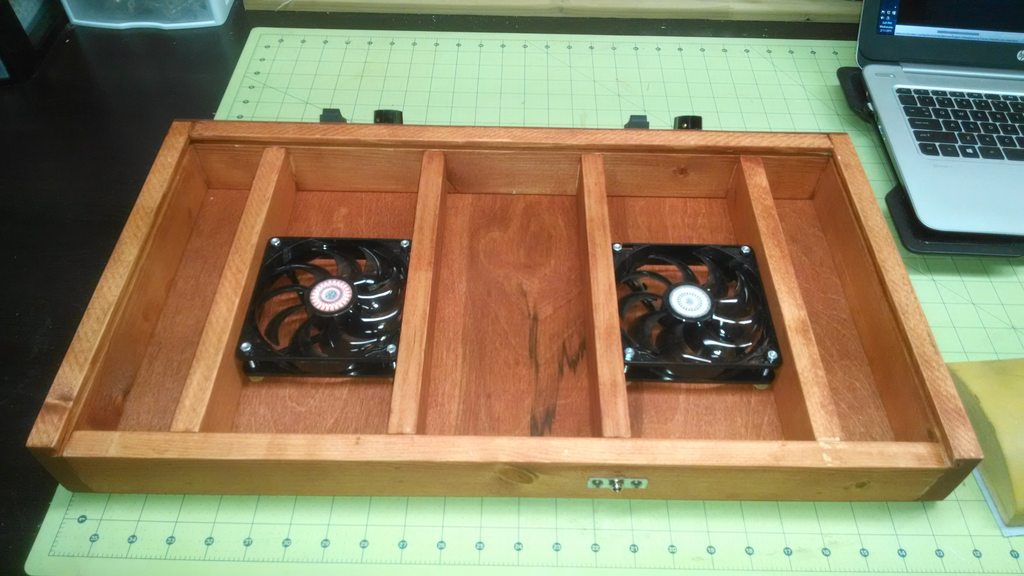
Base:
Testing the acrylic fit:
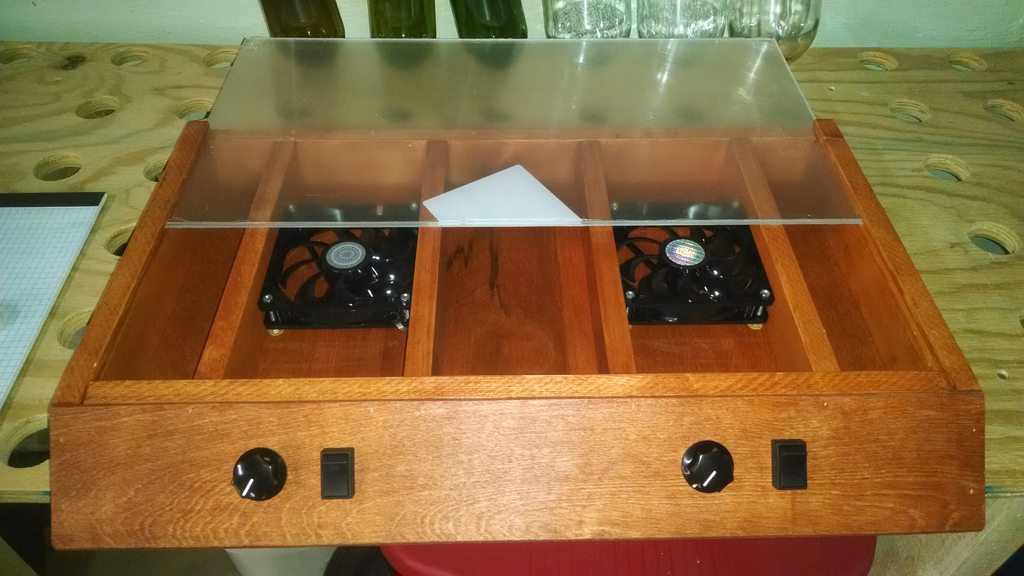
Spacers and bars attached:
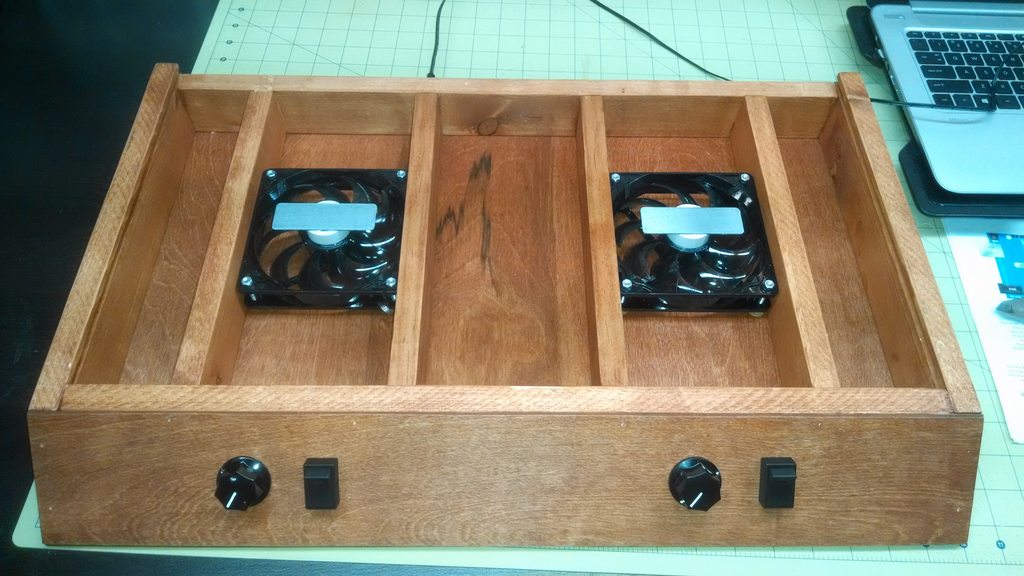
Magnets set and acrylic installed:
Front:
Top:
Side:

Back:
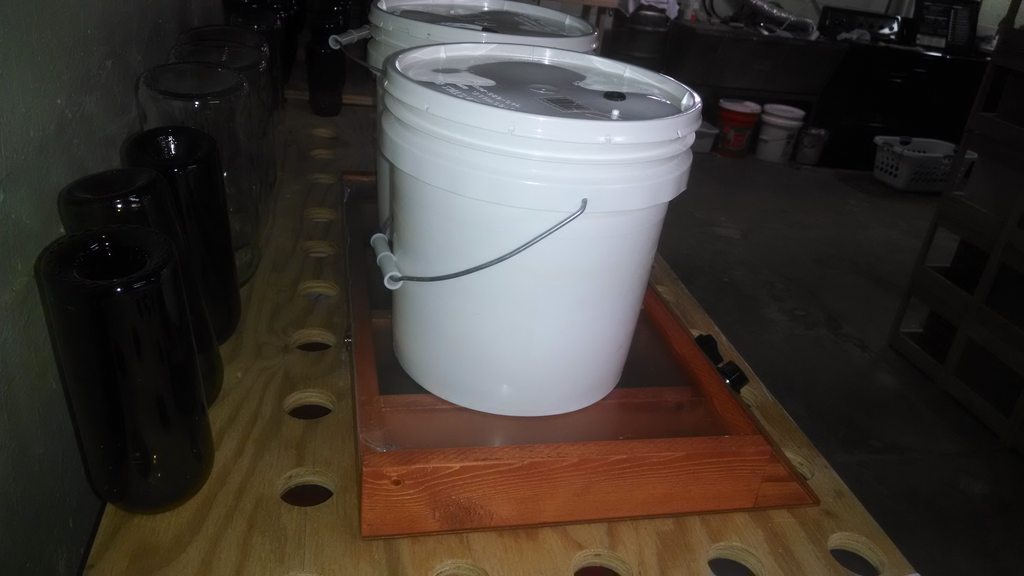
Test run:
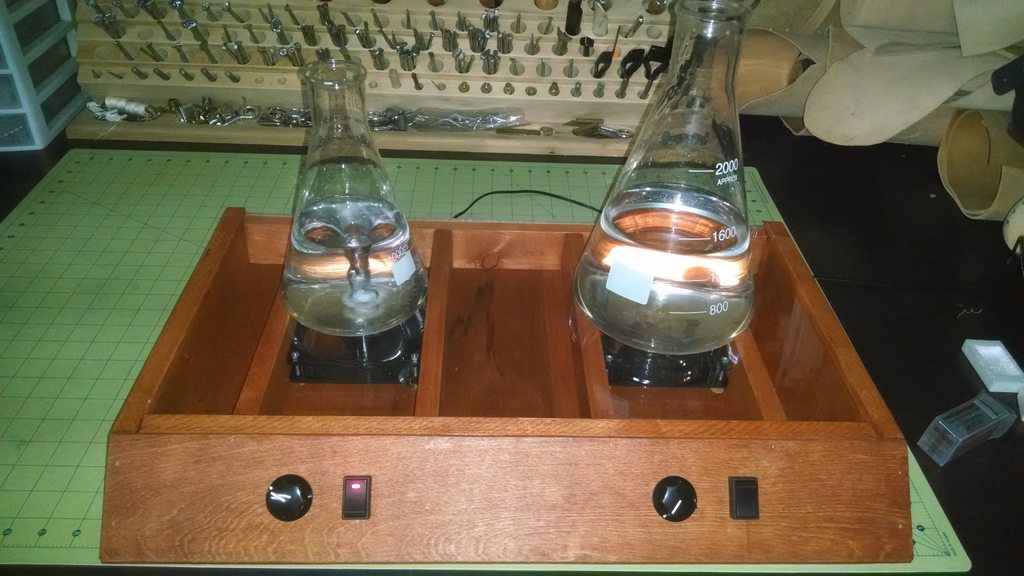
Theoretical maximum usage:
Front:
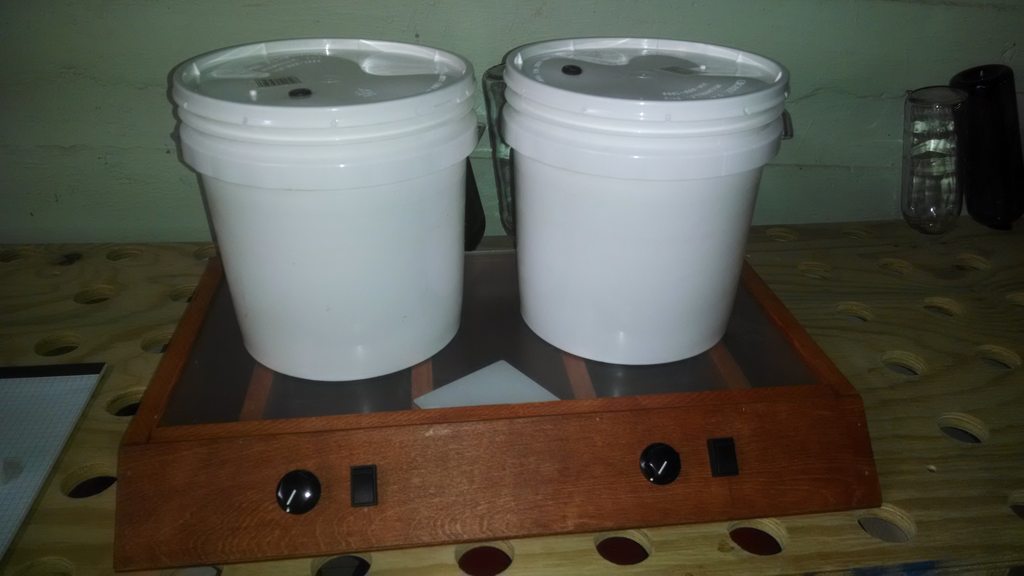
Side:
I still need to disassemble and put a varnish coat on the wood parts, but it is up and running. If I were doing the project again, I would increase the height from 2.5" to 6". This would give me more opportunity for adjustment.
I wanted something that is:
(1) stable
(2) decent looking
(3) capable of do two six liter starters simultaneously.
Here is what I came up with:
Sketchup pictures:
Mocking up the electronic portions:
Basic assembly and stain:
Front:
Back:
Base:
Testing the acrylic fit:
Spacers and bars attached:
Magnets set and acrylic installed:
Front:
Top:
Side:
Back:
Test run:
Theoretical maximum usage:
Front:
Side:
I still need to disassemble and put a varnish coat on the wood parts, but it is up and running. If I were doing the project again, I would increase the height from 2.5" to 6". This would give me more opportunity for adjustment.
What program did u use for the sketchup pictures?
- Joined
- Aug 26, 2009
- Messages
- 284
- Reaction score
- 25
I have been using a little piecemeal stir plate formed out of a computer fan and an old model train controller:
How much leather working are you doing now that you have found Home Brewing?
What program did u use for the sketchup pictures?
Sketchup - http://www.sketchup.com/
Fast, easy to learn, and a pile of pre-build models (like the fans in my drawing - I just downloaded and inserted them into the sketch). My brother is an architect and while he says the professional options are better, I still catch him using SketchUp for little projects he does around his house.
")
How much leather working are you doing now that you have found Home Brewing?
Between school, family, work, and other responsibilities there has been very little leather work or brewing recently.
Hoping to change part of that with the e-BIAB system I am finishing up now. Just need to build my CFC and I will be ready to brew again.
Last edited:
OK. That's pretty nice.
Thank you - I am hoping it works really well!
jrowland74
Well-Known Member
First off, thanks to everyone who took the time on this thread to share so much information. I put one of these together using this thread, but I don't seem to have much speed range. I am also planning to make another, but want to get this one right first. I was trying to troubleshoot this on my own with my zero electrical knowledge, and am thinking it may be related to the rheostat. Could someone please explain in layman terms why we are using a 25 Ohm 3 Watt rheostat? I went looking for different sizes, but really can't figure out what the numbers mean in relation to their use...
Similar threads
- Replies
- 9
- Views
- 2K
- Replies
- 2
- Views
- 2K
- Replies
- 0
- Views
- 1K
