My simple 240V 5500w Single Element one pump K-Rims Panel Build

Homebrew Talk - Beer, Wine, Mead, & Cider Brewing Discussion Forum

Help Support Homebrew Talk - Beer, Wine, Mead, & Cider Brewing Discussion Forum:

This site may earn a commission from merchant affiliate links, including eBay, Amazon, and others.

Genuine

Well-Known Member
Joined
Nov 19, 2011
Messages
1,101
Reaction score
610
Location
Putnam
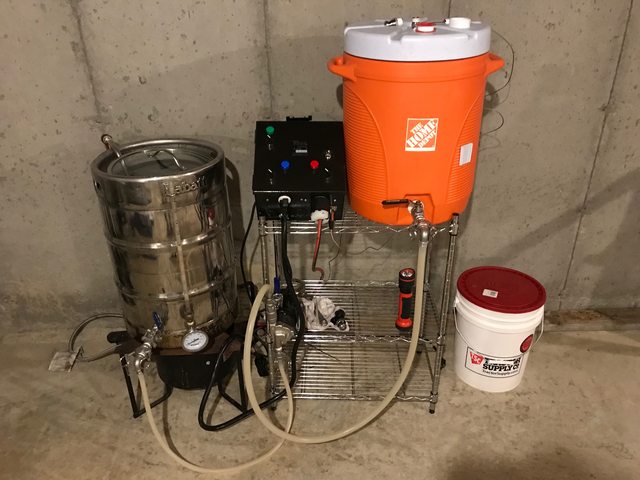
Been lurking the electric forums for years and built a K-Rims brewing rig with a buddy of mine a couple years ago. You may have seen this photo floating around:
IMG_2400.jpg


I was so pleased with the performance of it that I planned to build one for myself! Plus, the ability to crank out a batch in 4 hours was very alluring! I’ve been brewing for about 6 years now using a Mini E Herms system to keep consistent mash temps, along with a bayou classic banjo burner for heating sparge water and boil.
IMG_2223.jpg

IMG_2224.jpg


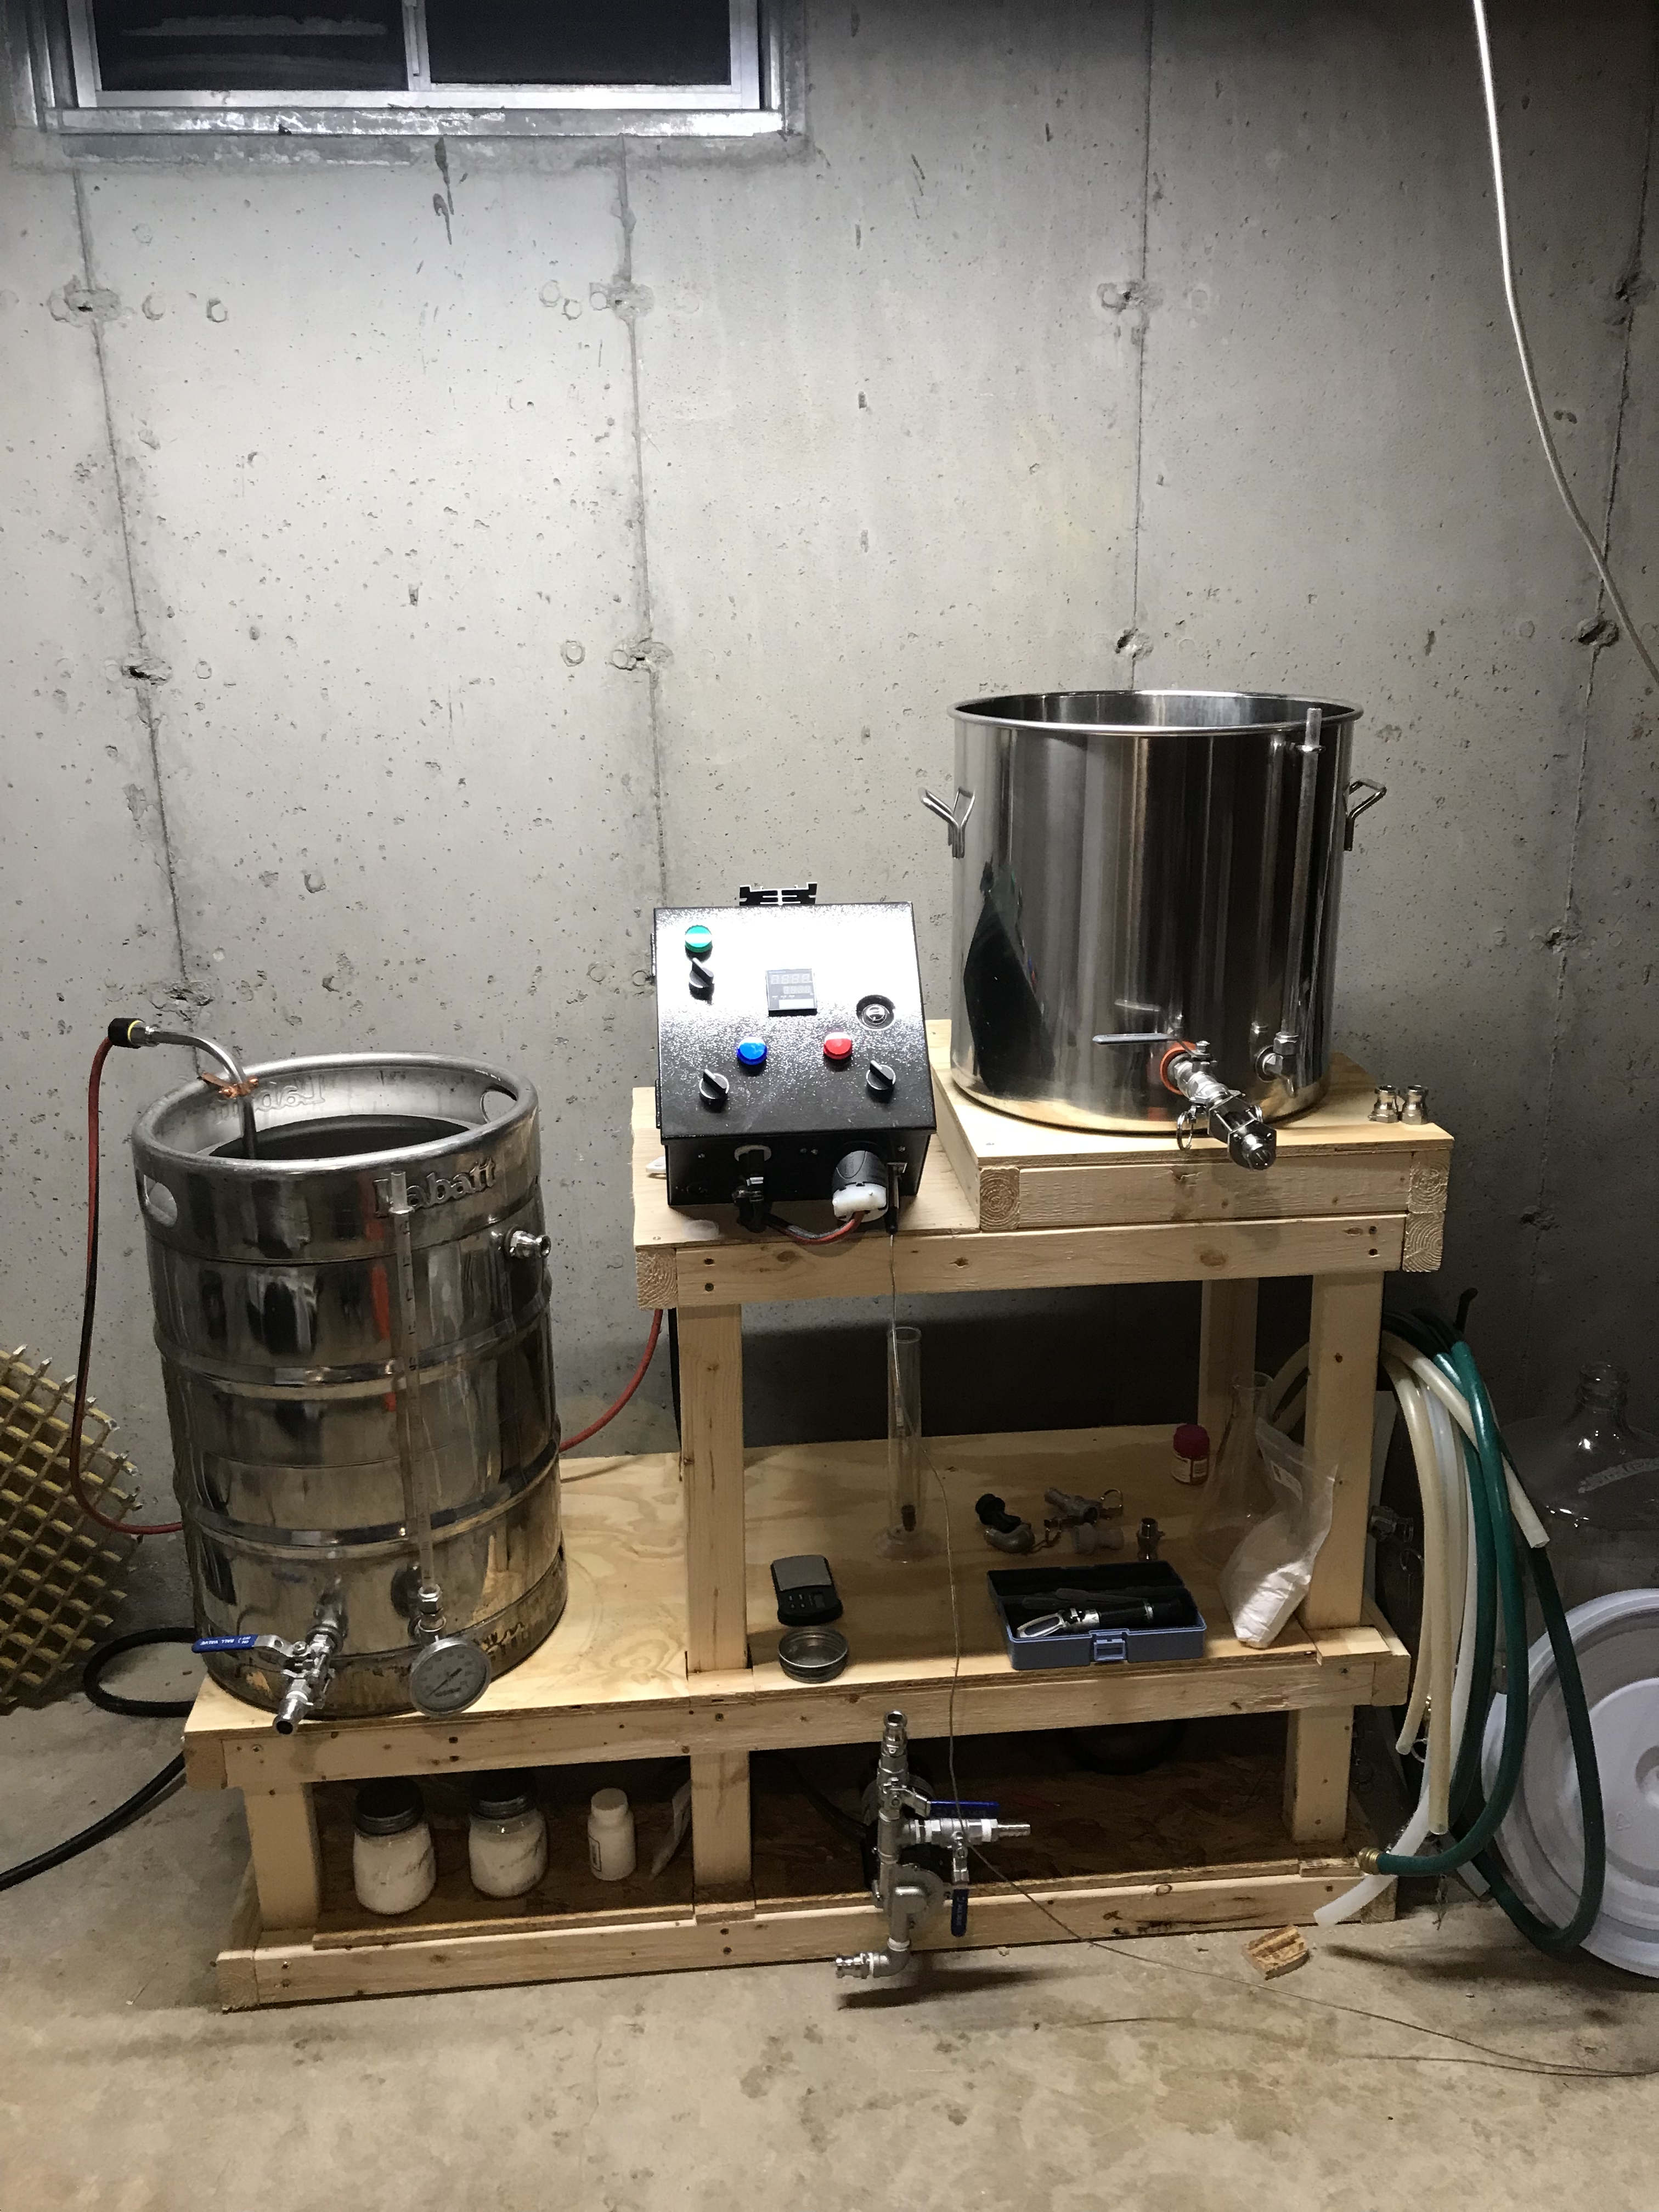
I did about 3 batches at my new place with This set up and was reminded of the time it took to heat up water, get to a boil, and always needing propane. I finally took the plunge and ordered the components to build my panel. I have a 240v 30a outlet downstairs by my dryer at my disposal and it’ll be where I can brew regardless of the weather.

So, taking some inspiration from Kal’s set up, and skrilnetz.net panel build and Joe Aka Terpsichoreankid on Youtube, I knew I wanted to build a simple single PID, one element and one pump panel. I’ll be doing full volume no sparge kettle rims brewing since the other system has been working so great and more importantly, cutting down time it takes to brew.

Here’s the day after getting some items in, and planning placement:

IMG_2473.jpg


Next, tons of measuring and re-measuring and double triple checking, I cut the holes using a jigsaw and step bit:

IMG_2523.jpg


Next step is Paint which I should be able to get accomplished tonight. I’m beyond excited to start wiring!

Things Left to Order/Do:
-Prep and Paint Enclosure
-Install Panel Components, switches, lights, PID, etc
-Begin Wiring
-Test
-Order Element, and 10/3 Cable for HotRod Heatstick. I currently have a 2000w 120v element in there with 12/3 cable...which I'm on the fence about using for 5500w element. Pros/cons would be appreciated (plus it would save me some extra work).
-Power Wire and figure out if I'm going to put in a GFCI Breaker or go the Spa Panel Route.

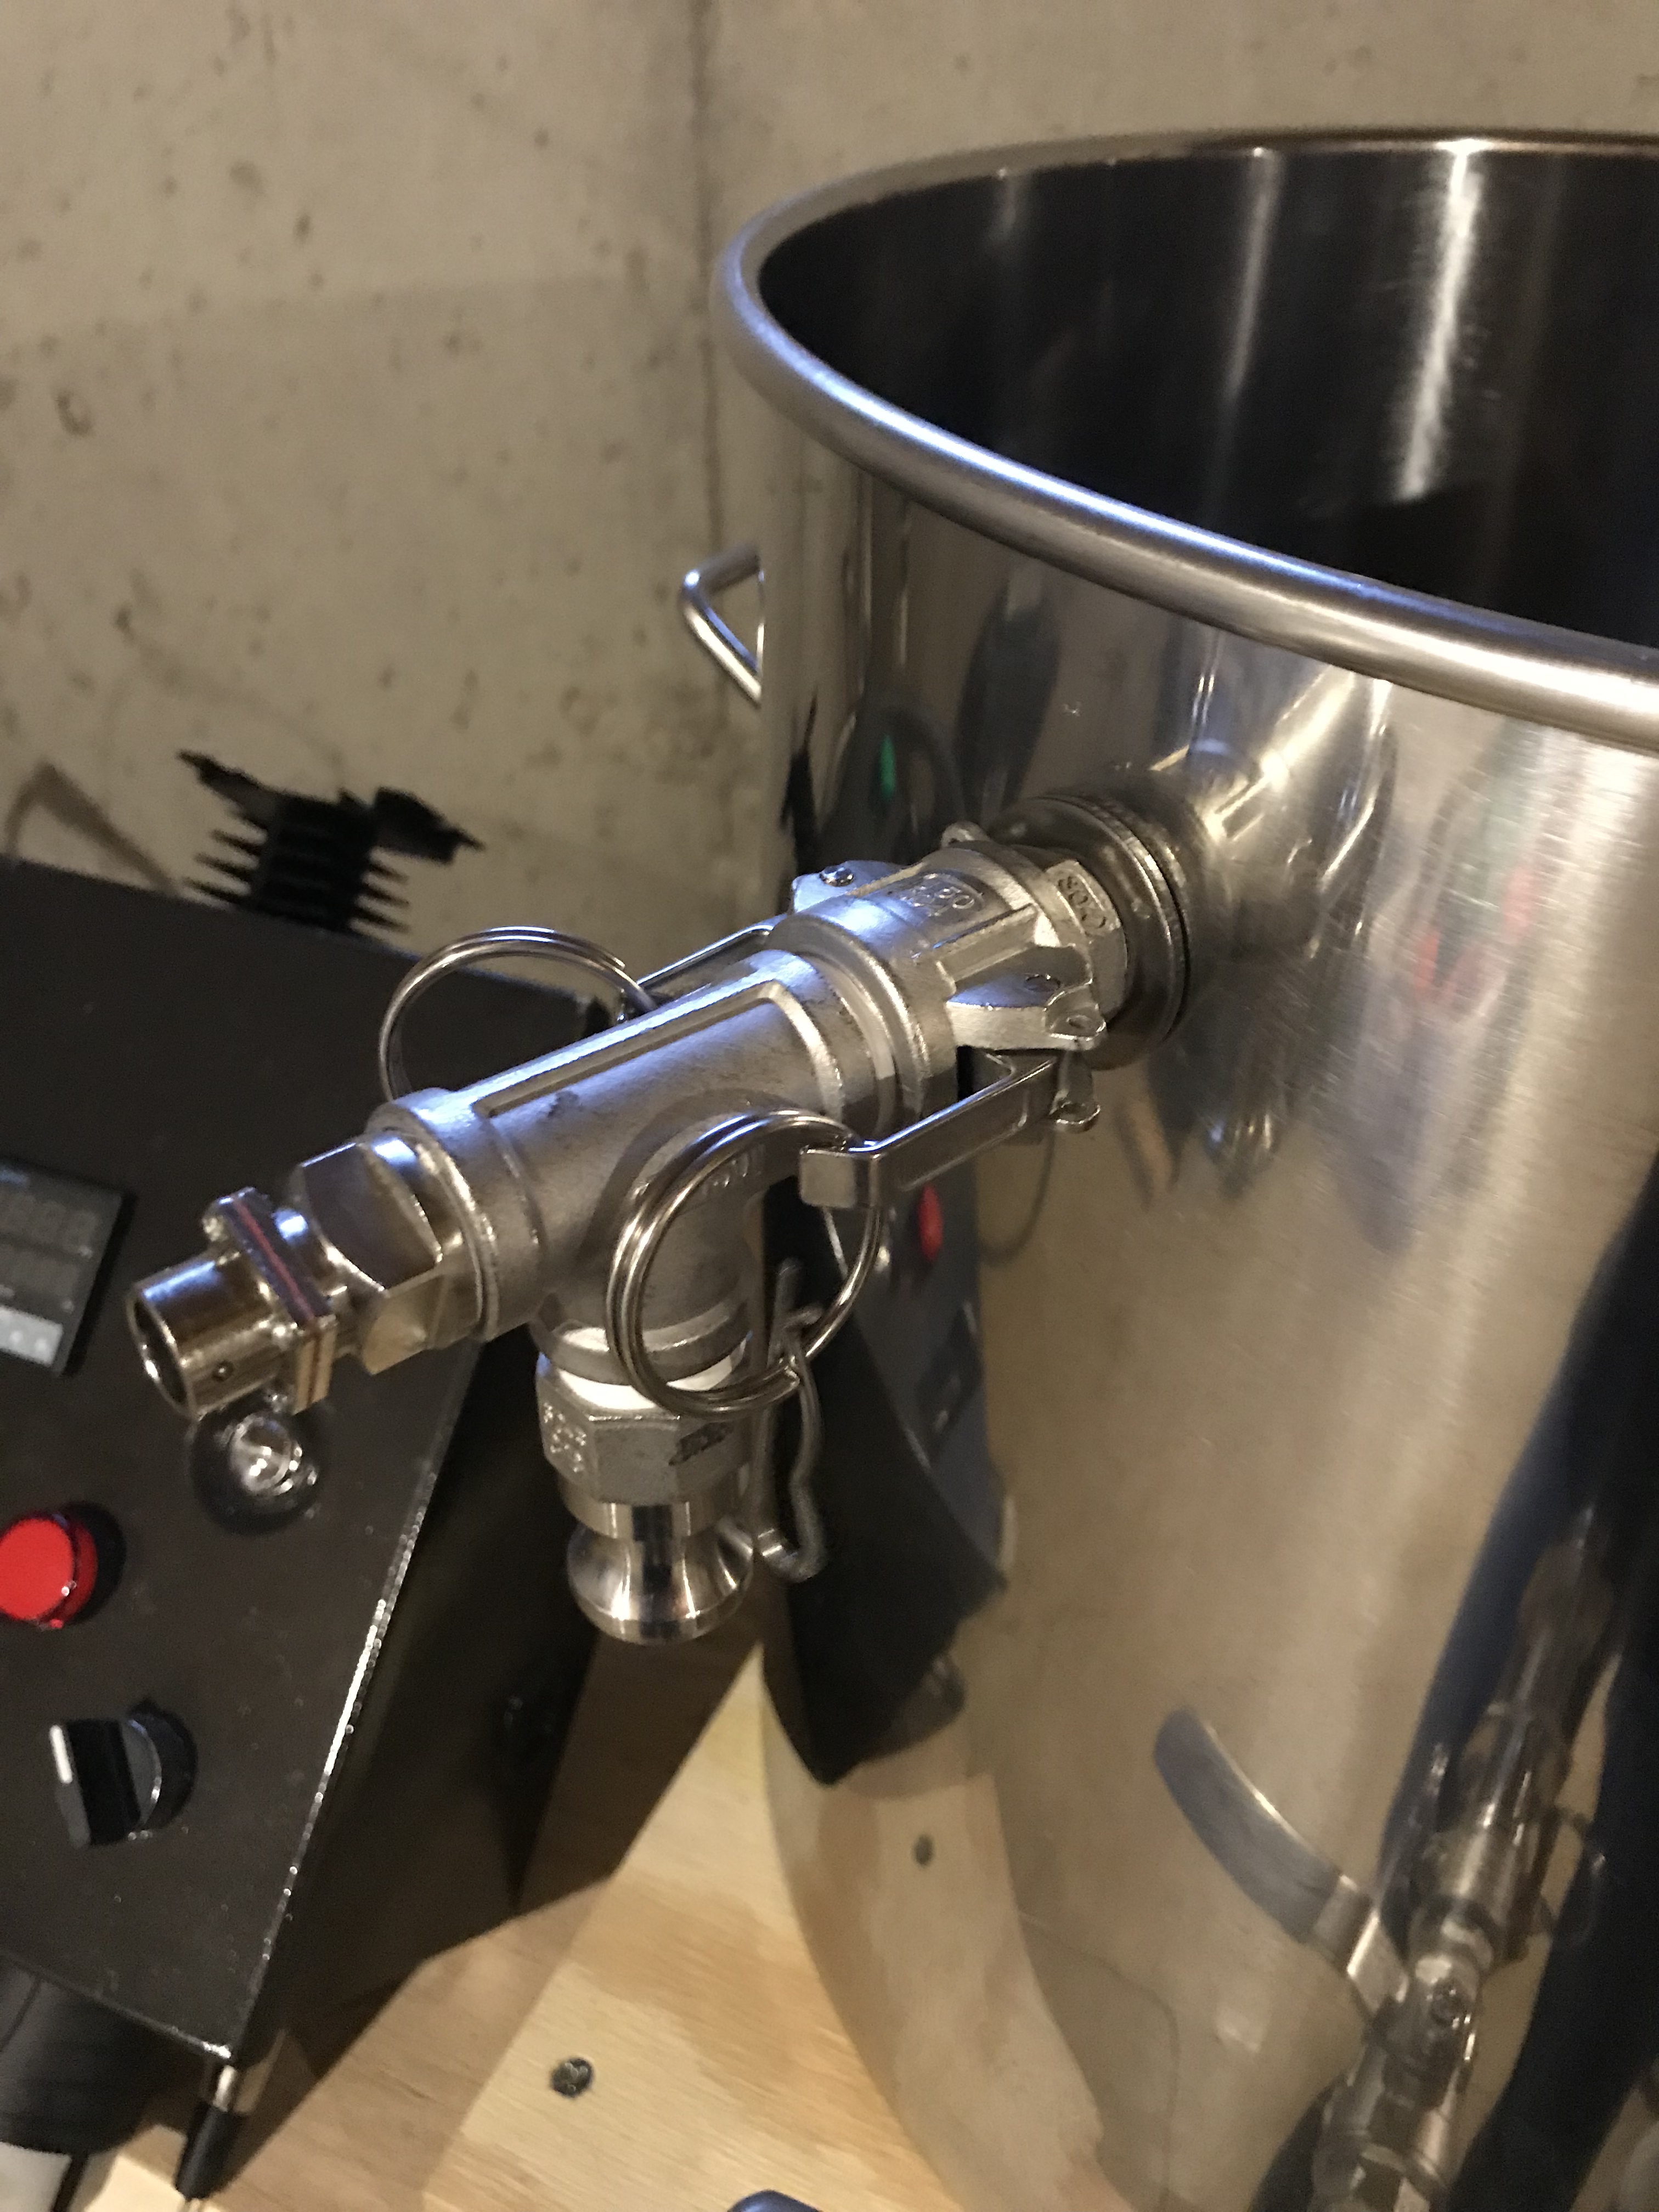
I've ordered a couple 1/2" Detachable RTD's from Amazon, and have received a 4 pin detached cable. I returned the first one for being a 4 pin and wanting the 3 pin since that's what it looks like everyone is using and got another 4 pin in the mail yesterday. Main reason for going with the 3 Pin is because I want to get a 2nd RTD to install through the T in my boil gettle (will need RTD with 6" long probe) and I noticed that Auber Ins has that with 3 pin RTD. Anyone else using 4 pin?
 
Last edited:
Got it painted and started to install the components this morning before work.
IMG_1527777997.276227.jpg


Need to install the busses and contactors, etc on the inside tonight and begin wiring.
 
I finished about 98% of the wiring last night

Just tested her out and glad to report we’re up and running! I don’t know if I’ll use the 4 pin detachable RTD or just order a 3 pin. Let me know your thoughts!

IMG_2550.jpg


IMG_2548.jpg
 
Last edited:
Looks great. Sorry no input on the RTD pretty sure mine use 3 pins . I bought them from auberin. Cheers
 
I've got a mix of three and four pin probes in my stuff. I made a couple of each type of cable, so they can all be used interchangeably.

How did you go about making cables for them? I quickly tried to find the name of the connector but haven’t found it yet. The main reason for wanting the 3 pin is that auber has an RTD with 6” probe which is surprisingly difficult to find anywhere else.
 
How did you go about making cables for them? I quickly tried to find the name of the connector but haven’t found it yet. The main reason for wanting the 3 pin is that auber has an RTD with 6” probe which is surprisingly difficult to find anywhere else.

Every probe I've ever bought comes with a cable. I just solder XLR connectors on the other end of them all. I've never messed with those RTD connectors. It's a pain to solder stuff that small.
 
Every probe I've ever bought comes with a cable. I just solder XLR connectors on the other end of them all. I've never messed with those RTD connectors. It's a pain to solder stuff that small.
Ohhhh, I wasn't sure if you were going through the trouble to solder the RTD Connectors.

I may just do that and deal with 2 cables instead of trying to use one.

Have you noticed any temp differences between the 2? I would imagine you just calibrate till they're correct...
 
I have not noticed any difference in any of the 4-5 sensors I have. Some are auber, some are ebay.
 
How did you go about making cables for them? I quickly tried to find the name of the connector but haven’t found it yet. The main reason for wanting the 3 pin is that auber has an RTD with 6” probe which is surprisingly difficult to find anywhere else.
ebay... "search aviation connector" or "3 pin connector" theres another term to describe them too but the term escapes me right now..

The rtds on ebay are the same make as auberins sells (DTC I believe) they just spec them with 3 pin connectors and ebay sellers use either 2 pin (with outer plug being the third conductor) or 4 pin with only 3 pins wired up. They are likely not allowed to sell them configured in the exact way as the ones they manufacture for auberins as they usually have a contract stating such in these cases.

I have found the 3 pin version of those connectors on ebay myself.
Thank you so much for the tips!

I think I'm going to stay with one temp sensor and use the analog dial thermometer on the kettle for the time being. I'm ordering some fittings now so I can finish building my hoses with this set up. I also have to drill one more hole in the kettle for the whirlpool arm which I may tackle this weekend. I'll need to extend the power wire going to the controller and I'm on the fence about that if I want to just replace the breaker with a 30amp gfci and get a longer power cord (which I think will be the less expensive option) rather than making a portable spa panel with required cable length.
 
Here's a quick Mock-Up before I get the Brew Stand built. Finished soldering the temp sensor connections. I'm also waiting on a couple T, Elbow, camlock and new hoses before the whole thing is operational and can do a water test, auto-tune PID and test the counterflow wort chiller.

gPZCm6Nl.jpg
 
Update:

Decided to install a L14-30R FI on the bottom of it since I found a great deal on a 25' Dryer Plug to 14-30P cable that'll be able to bring power to where I want to brew. May dive into that tomorrow once I figure out where I can put it since it's already cramped in there.
 
looks like the wires from the pid are running to the back of the keggle... so he might be just having it on the burner as a pseudo stand or he uses the burner to help get the keggle to temp and then uses the element to maintain temp.. just my thoughts.. who knows.. he could just have it for looks... lol
 
I'm obviously missing something. What are you controlling with the PID?
Sorry, Just used my propane burner to get the keggle off the floor to help with pump priming, etc. It's not used in the process now whatsoever.

The PID is controlling the Element that's in the Kettle and it's read by the temp sensor for the mash tun return.

I was able to get 9 gallons up to strike temp in less than 30 minutes, while recirculating. Cheers!
 
BTW I bought a bunch of tri clamp rtds with detachable cables off ebay for like 20-30 bucks and they all have the 3 pin connectors.. go figure..
 
BTW I bought a bunch of tri clamp rtds with detachable cables off ebay for like 20-30 bucks and they all have the 3 pin connectors.. go figure..
LOL

I was just looking at a couple of the links you posted of the RTD's with teflon Cables. Just thought of a question for my particular set up...if I install an RTD into my boil kettle....could I just unclip from the RTD in my mash lines and plug it in there and have an accurate temp reading? I'm asking since I had to calibrate the first RTD to read correctly....I'm sure I'd have to do something similar to the 2nd one.
 
Sorry, Just used my propane burner to get the keggle off the floor to help with pump priming, etc. It's not used in the process now whatsoever.

The PID is controlling the Element that's in the Kettle and it's read by the temp sensor for the mash tun return.

I was able to get 9 gallons up to strike temp in less than 30 minutes, while recirculating. Cheers!
Aaah! That makes sense. Nice rig!
 
So, I thought I was "finished" with it.....but I always have to tinker. I replaced the rubbermaid cooler mash tun and repurposed the first kettle I ever bought. 12.5 Gallons or 50qt's...all stainless. I just tore it all done, cleaned the fittings, valve, etc.

jmsw02j.jpg


Needed to add a recirculation Port so drilled the hole and installed that this past weekend.

DgD57eZ.jpg


Also finished the temp probe T and fittings so I can move from monitoring mash temps to chilling temps/whirl pool, etc

pq4o6pv.jpg


oKFlNOq.jpg


I can't wait to do a water leak test, run some oxy through everything and plan the next brew day!
 
Last edited:

Latest posts

Back
Top