Hello!
Last December my grandpa randomly had the idea to go to our LHBS after we started talking about how he made wine "back in the day." Needless to say...the addiction began. Even though I don't post very often, I am on HBT quite a bit. I initially bought the Deluxe Starter kit from Brewers Best and got an 8 gal stainless kettle to go with it. I have only attempted to brew extract batches and have wanted to make the jump to all grain for a while now. At first I was looking at building a 3 vessel propane system, but I decided I wanted something slightly more compact. Since I am a college student, I need something that can be used in an apartment without the risk of getting evicted. Even though I love having lots of beer, I figured 5-6 gallon batches are the perfect size for me. After a lot of browsing through the electric brewing forums, I stumbled on Russkis build. Having read his thread, I figured I would give an eBIAB build a go. Due to school/Rugby/financial reasons I have slowly been working on building my system. I had no experience building anything like this when I started...but it has been a fun learning experience.
I am uploading the pictures with image shack and cant rotate some of them. As I update this thread ill try and fix that...
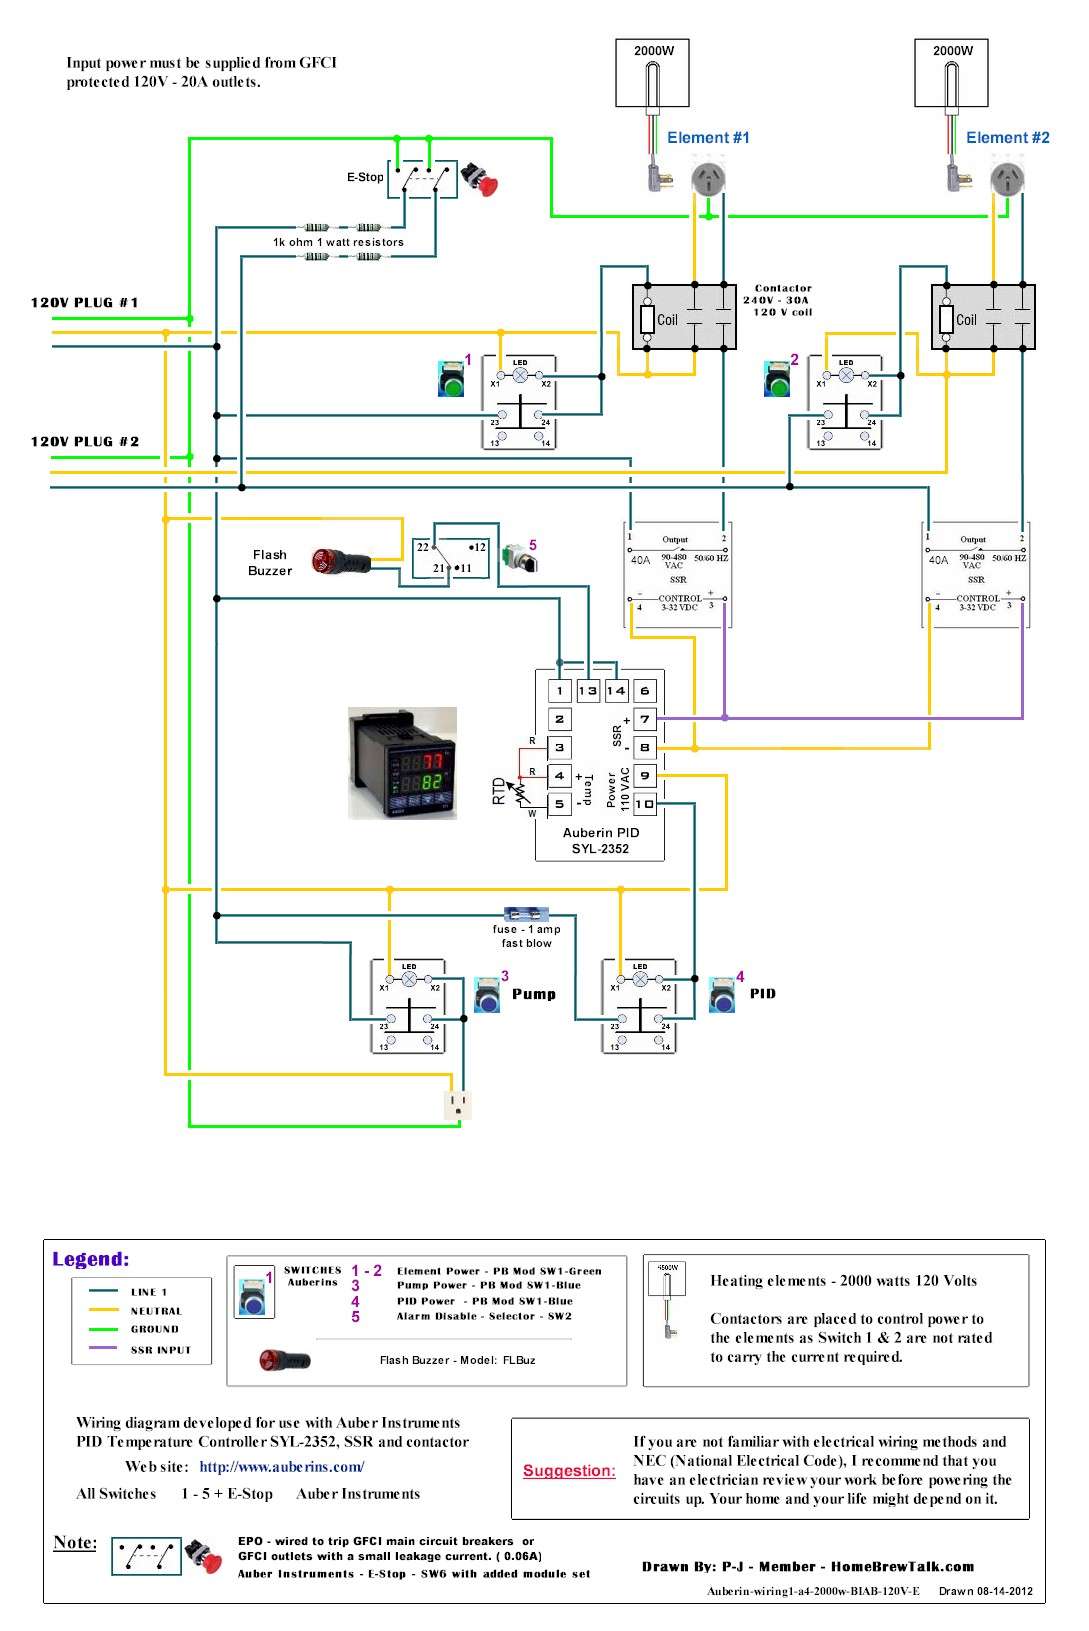
I decided to go with 120V because not all apartments will have a 240V outlet. I can also swap out the elements for something smaller if needed be. Here is the wiring diagram I used (thanks P-J):
I ordered most of my stuff from Auber Instruments (the PID is SYL 2352). I found the plastic box on Amazon. After a while of messing with the layout, this is what I came up with:
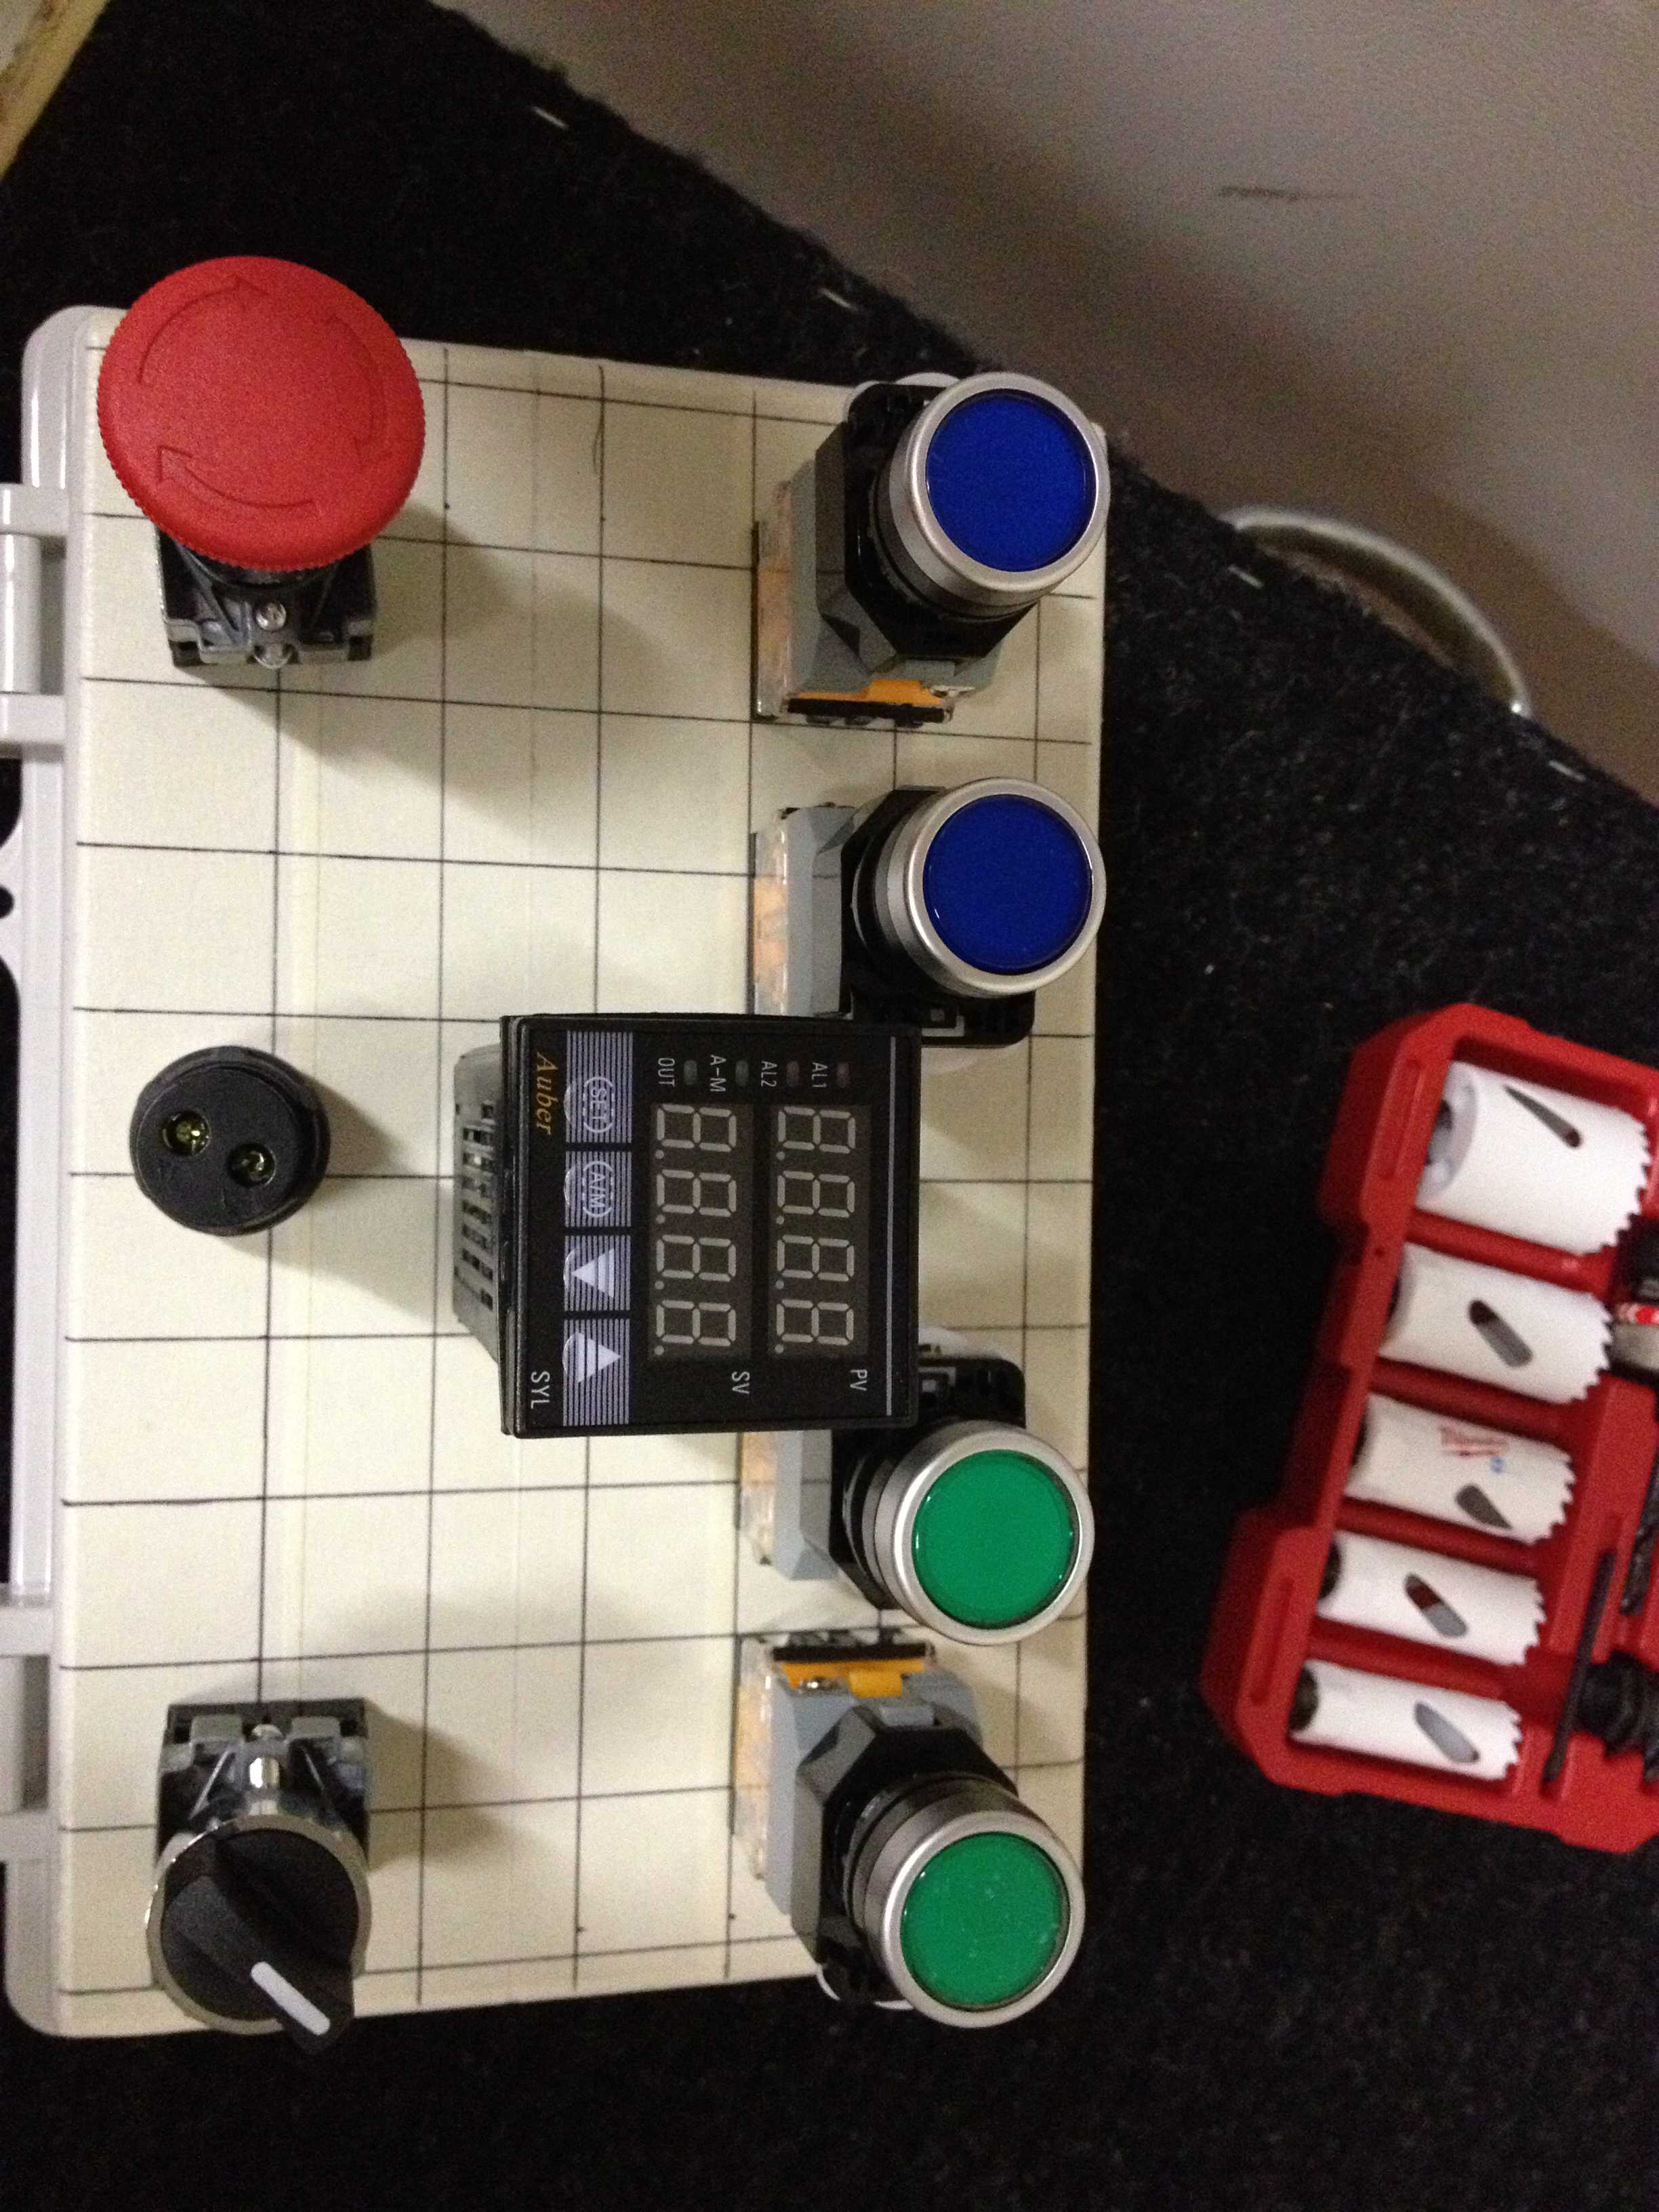
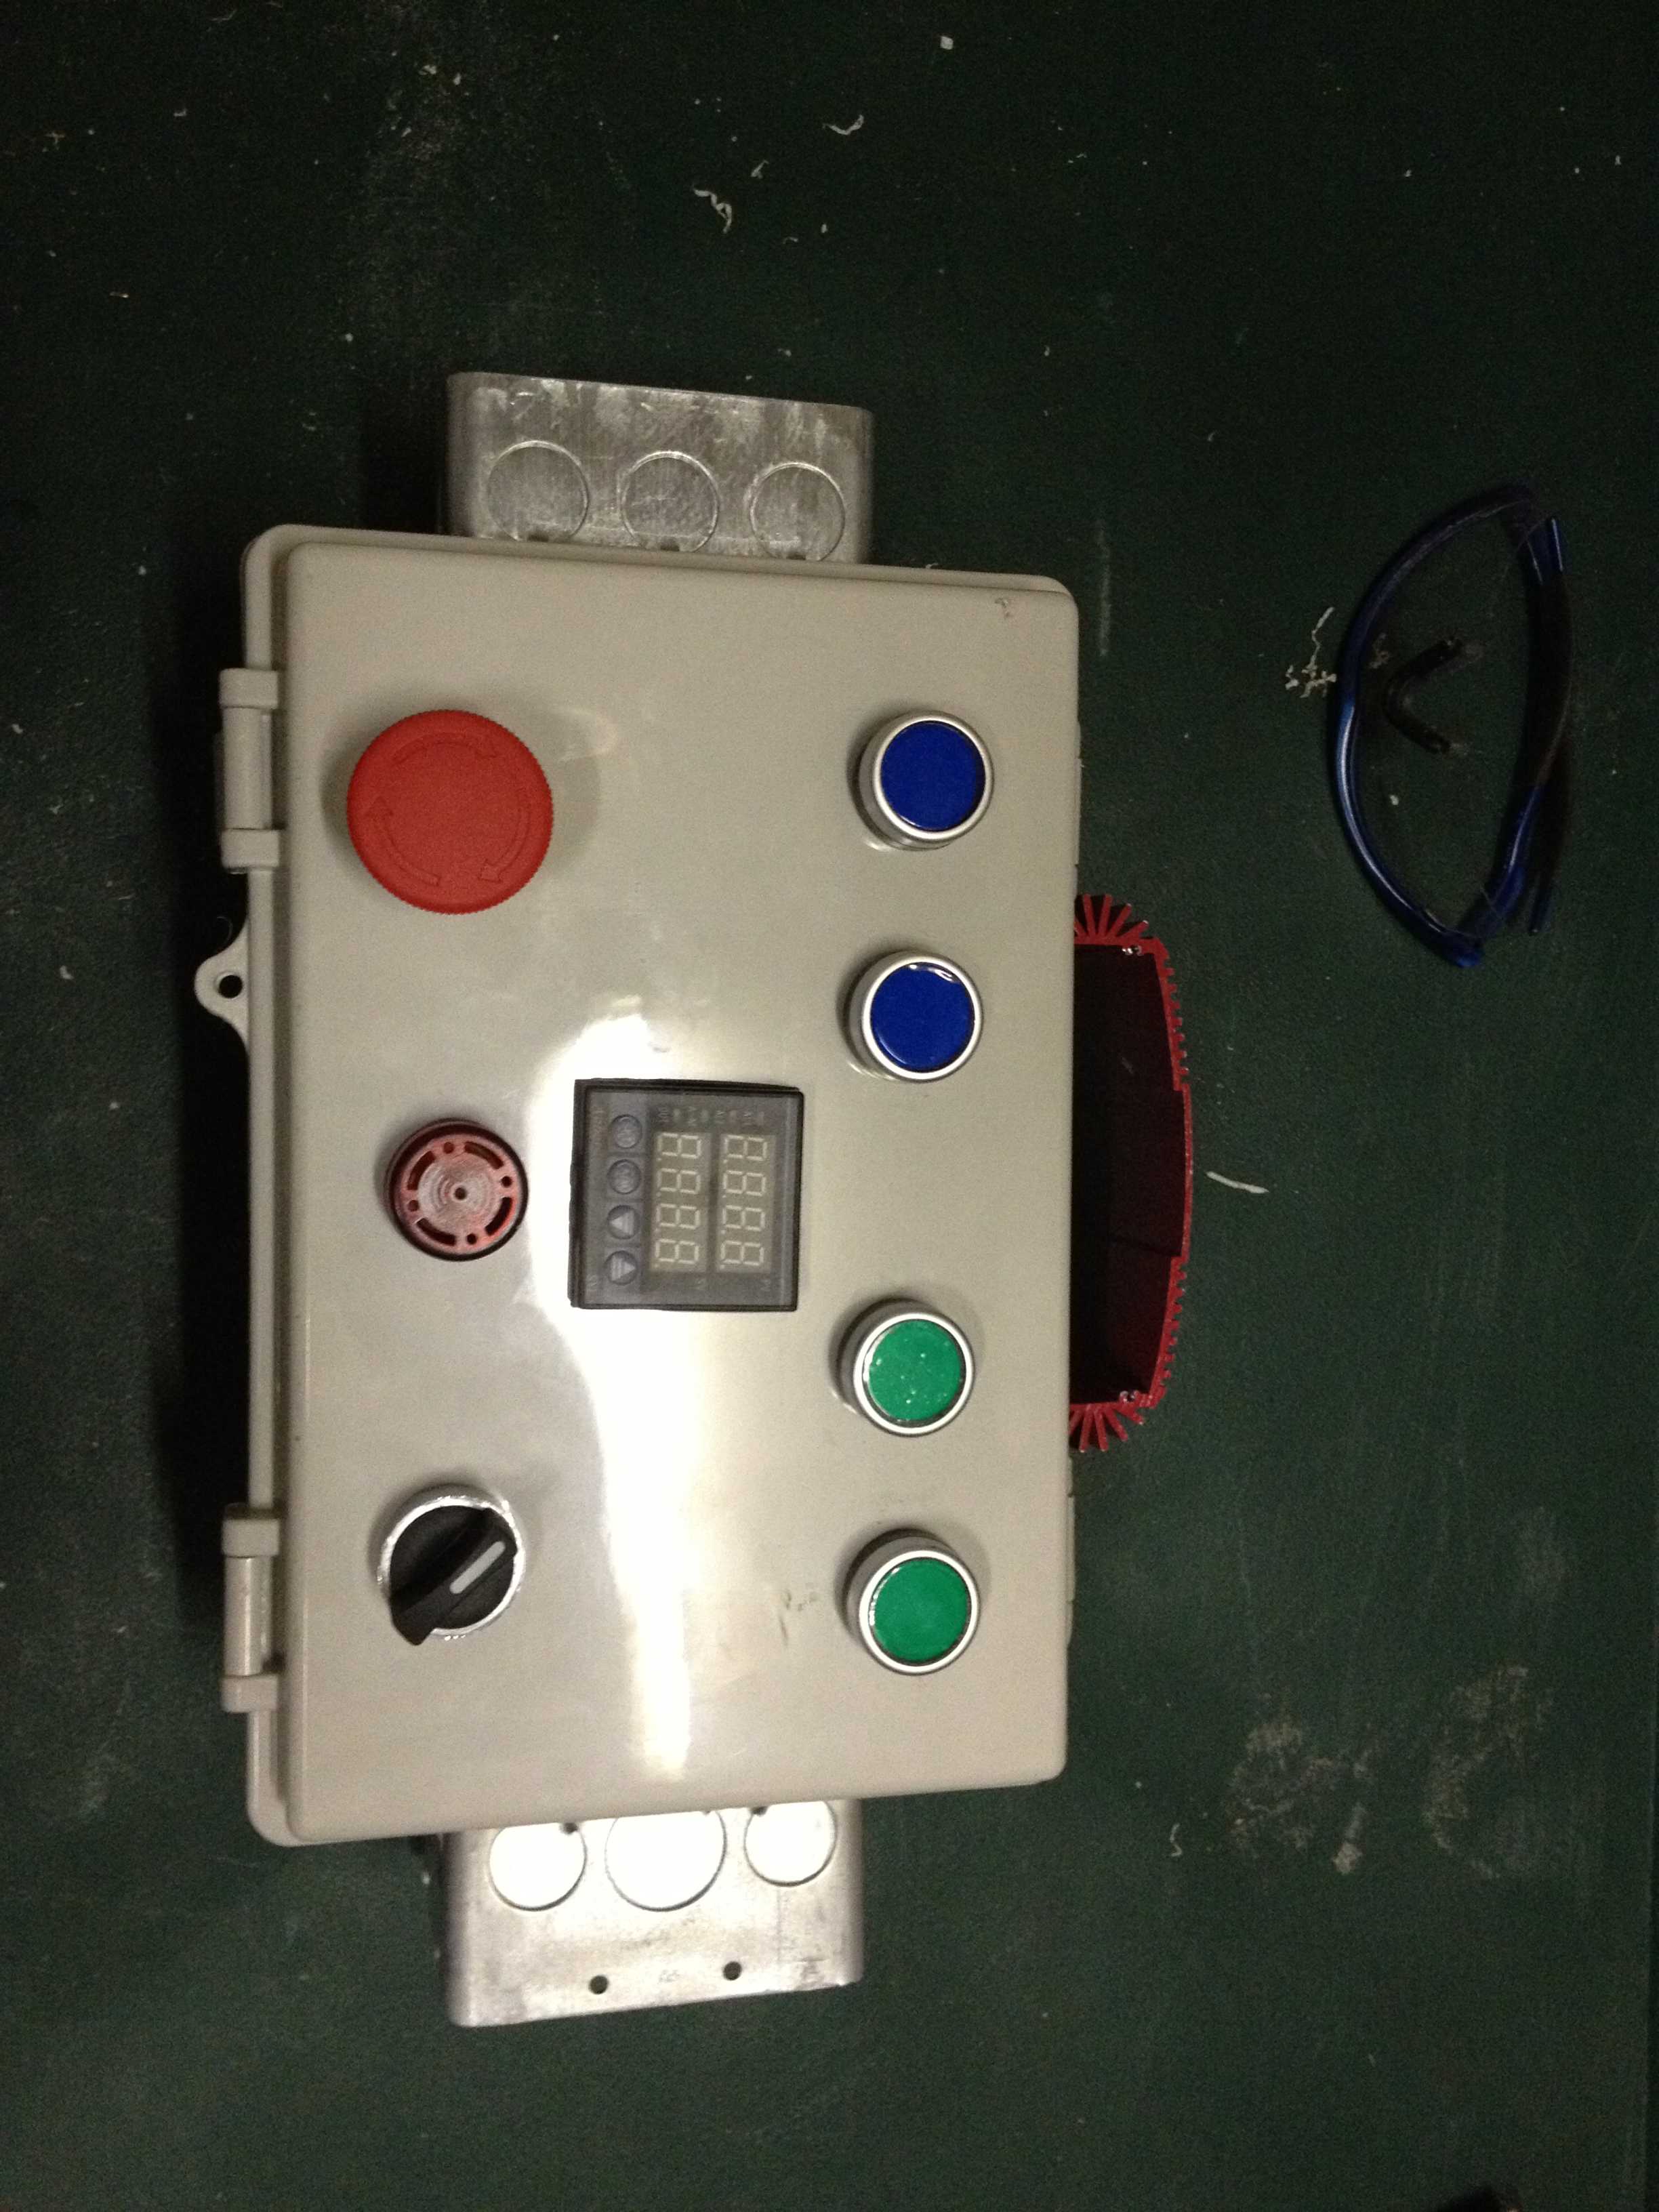
Here is what it looks like after I cut all the holes and put the switches, PID, and Buzzer in. I had gone to a party that night and decided 3am was a good time to cut all the holes. I had forgotten about what I had done the next morning, but I think it turned out well since I was relatively hammered.
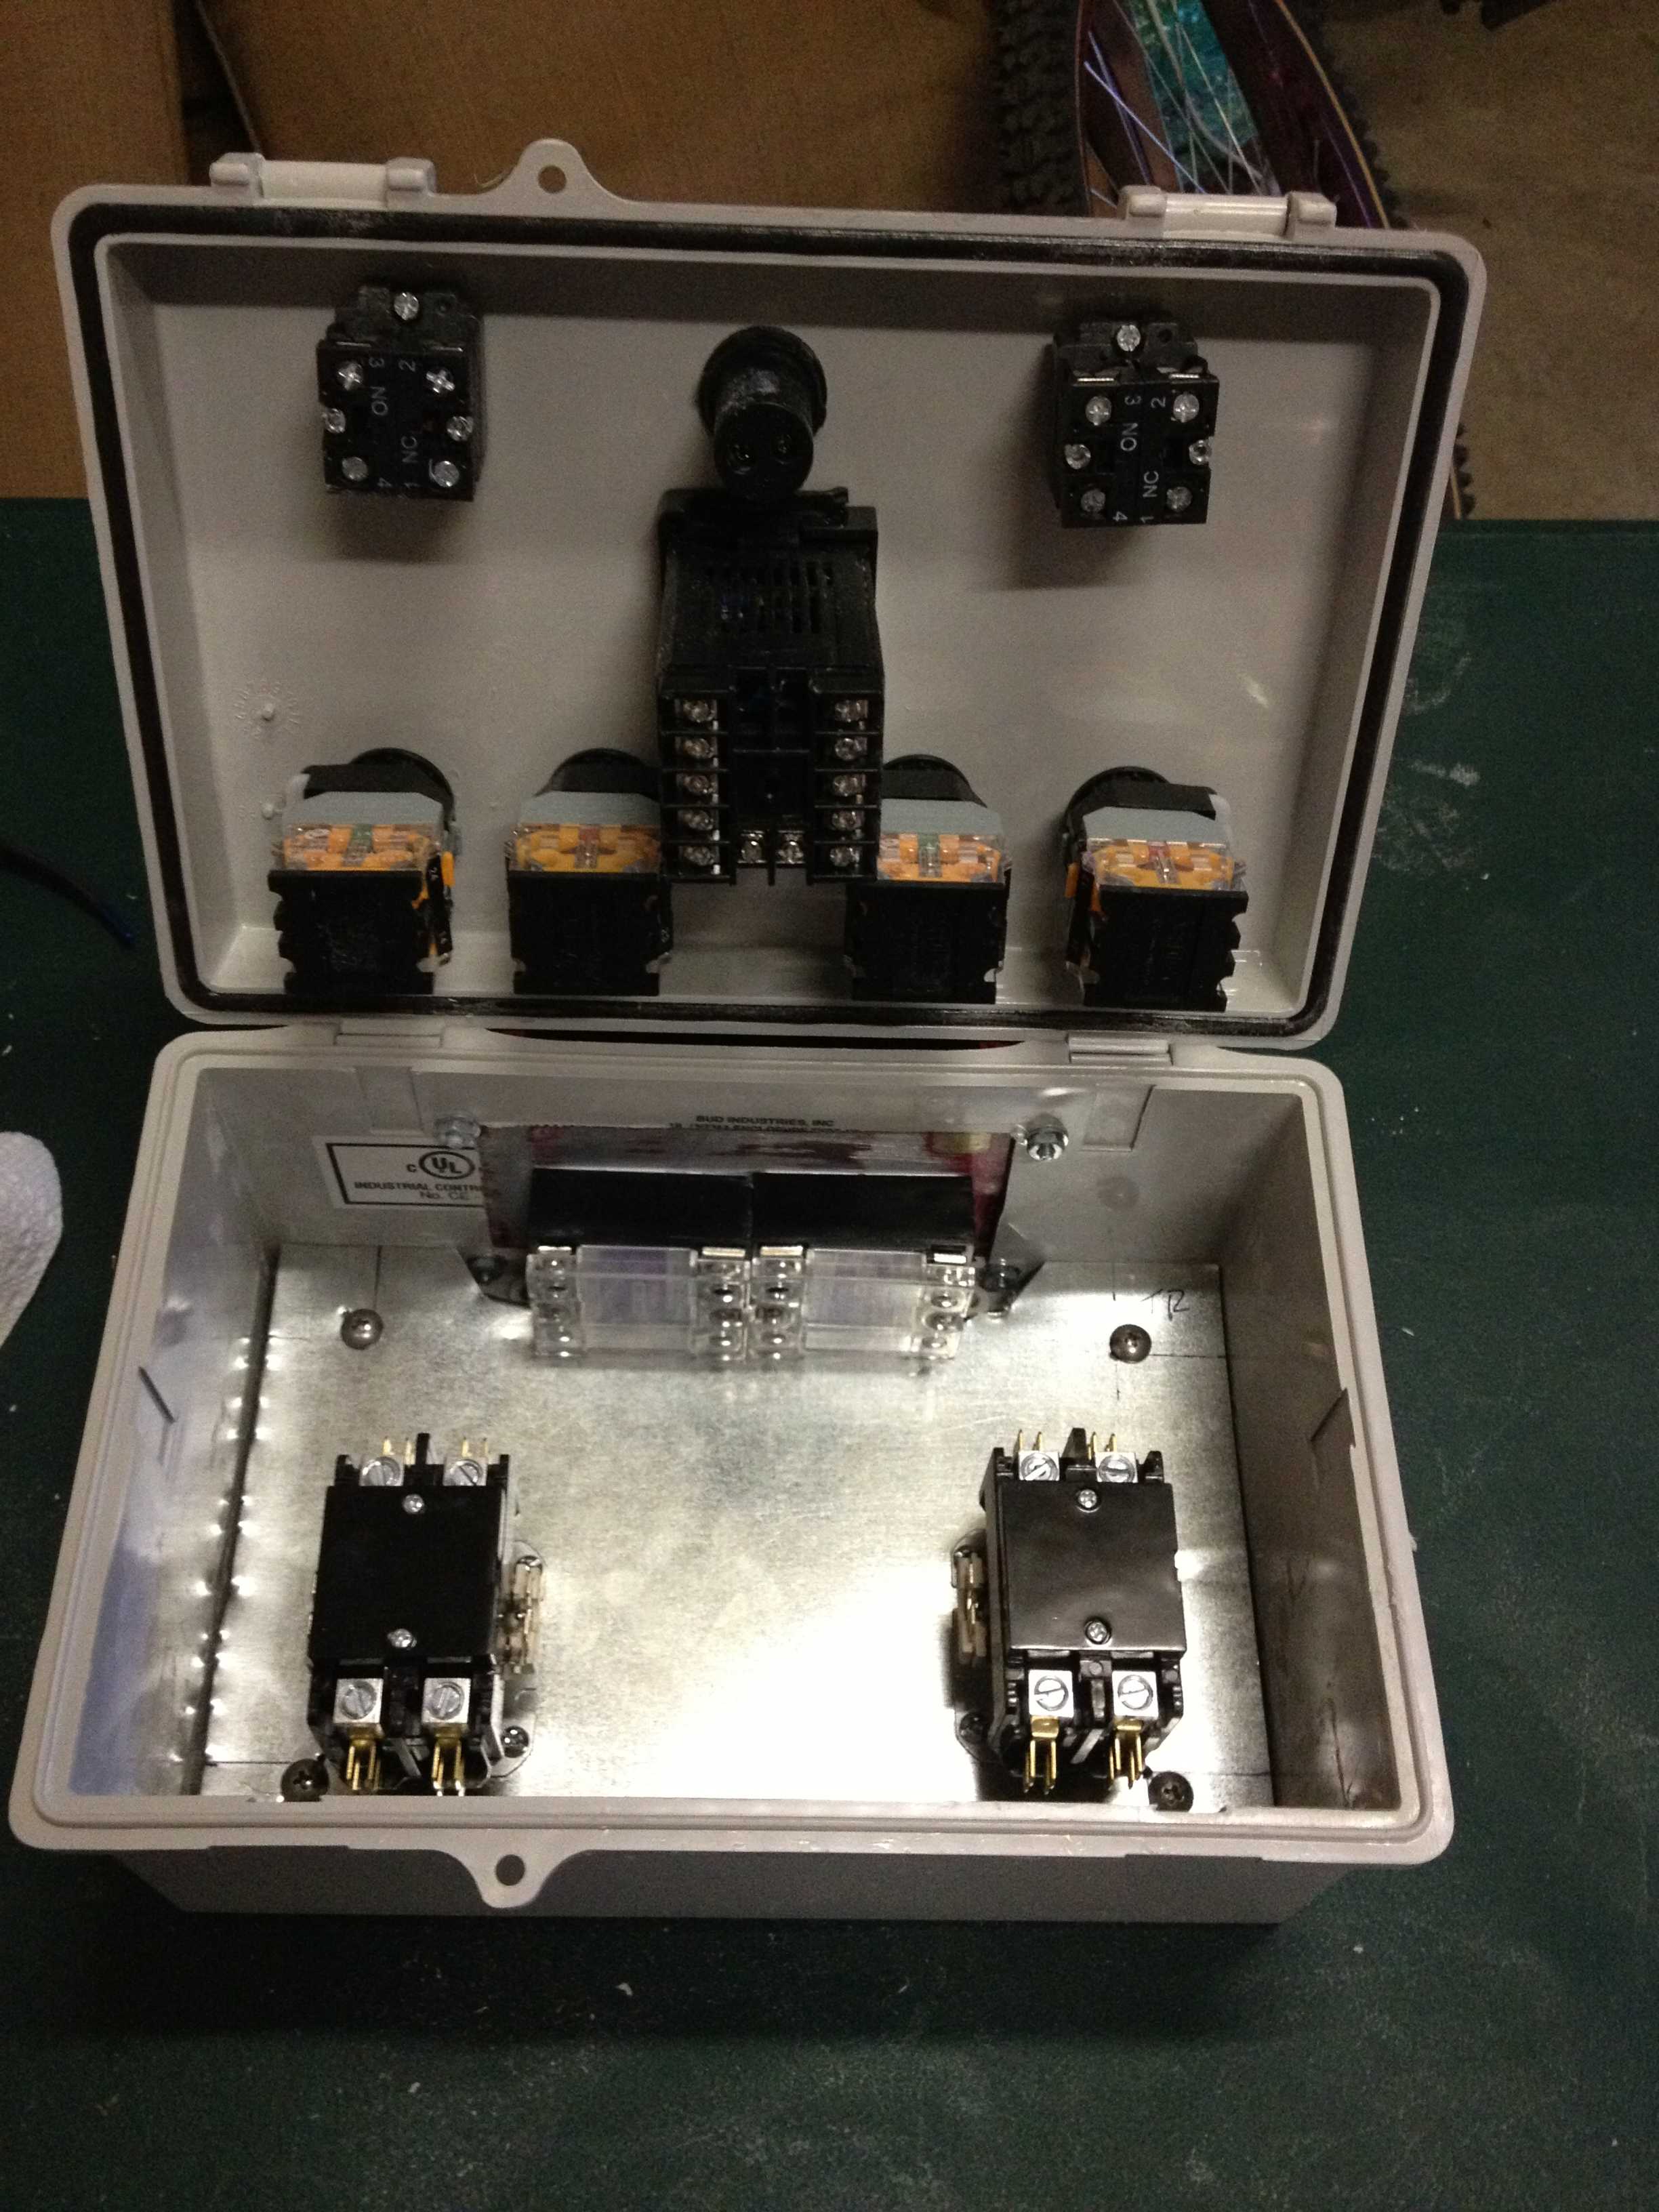
Since the box didn't come with a back plate, I had to make my own. I bought a 1'x1' piece of metal sheeting from Home Depot and cut it to fit inside the box. The contactors I used were from Blazer and the SSR's are from Auber. I cannibalized an old DC to AC converter so I could attach the SSR's to a heat sink. Here is what the inside looks like with the hardware in it:
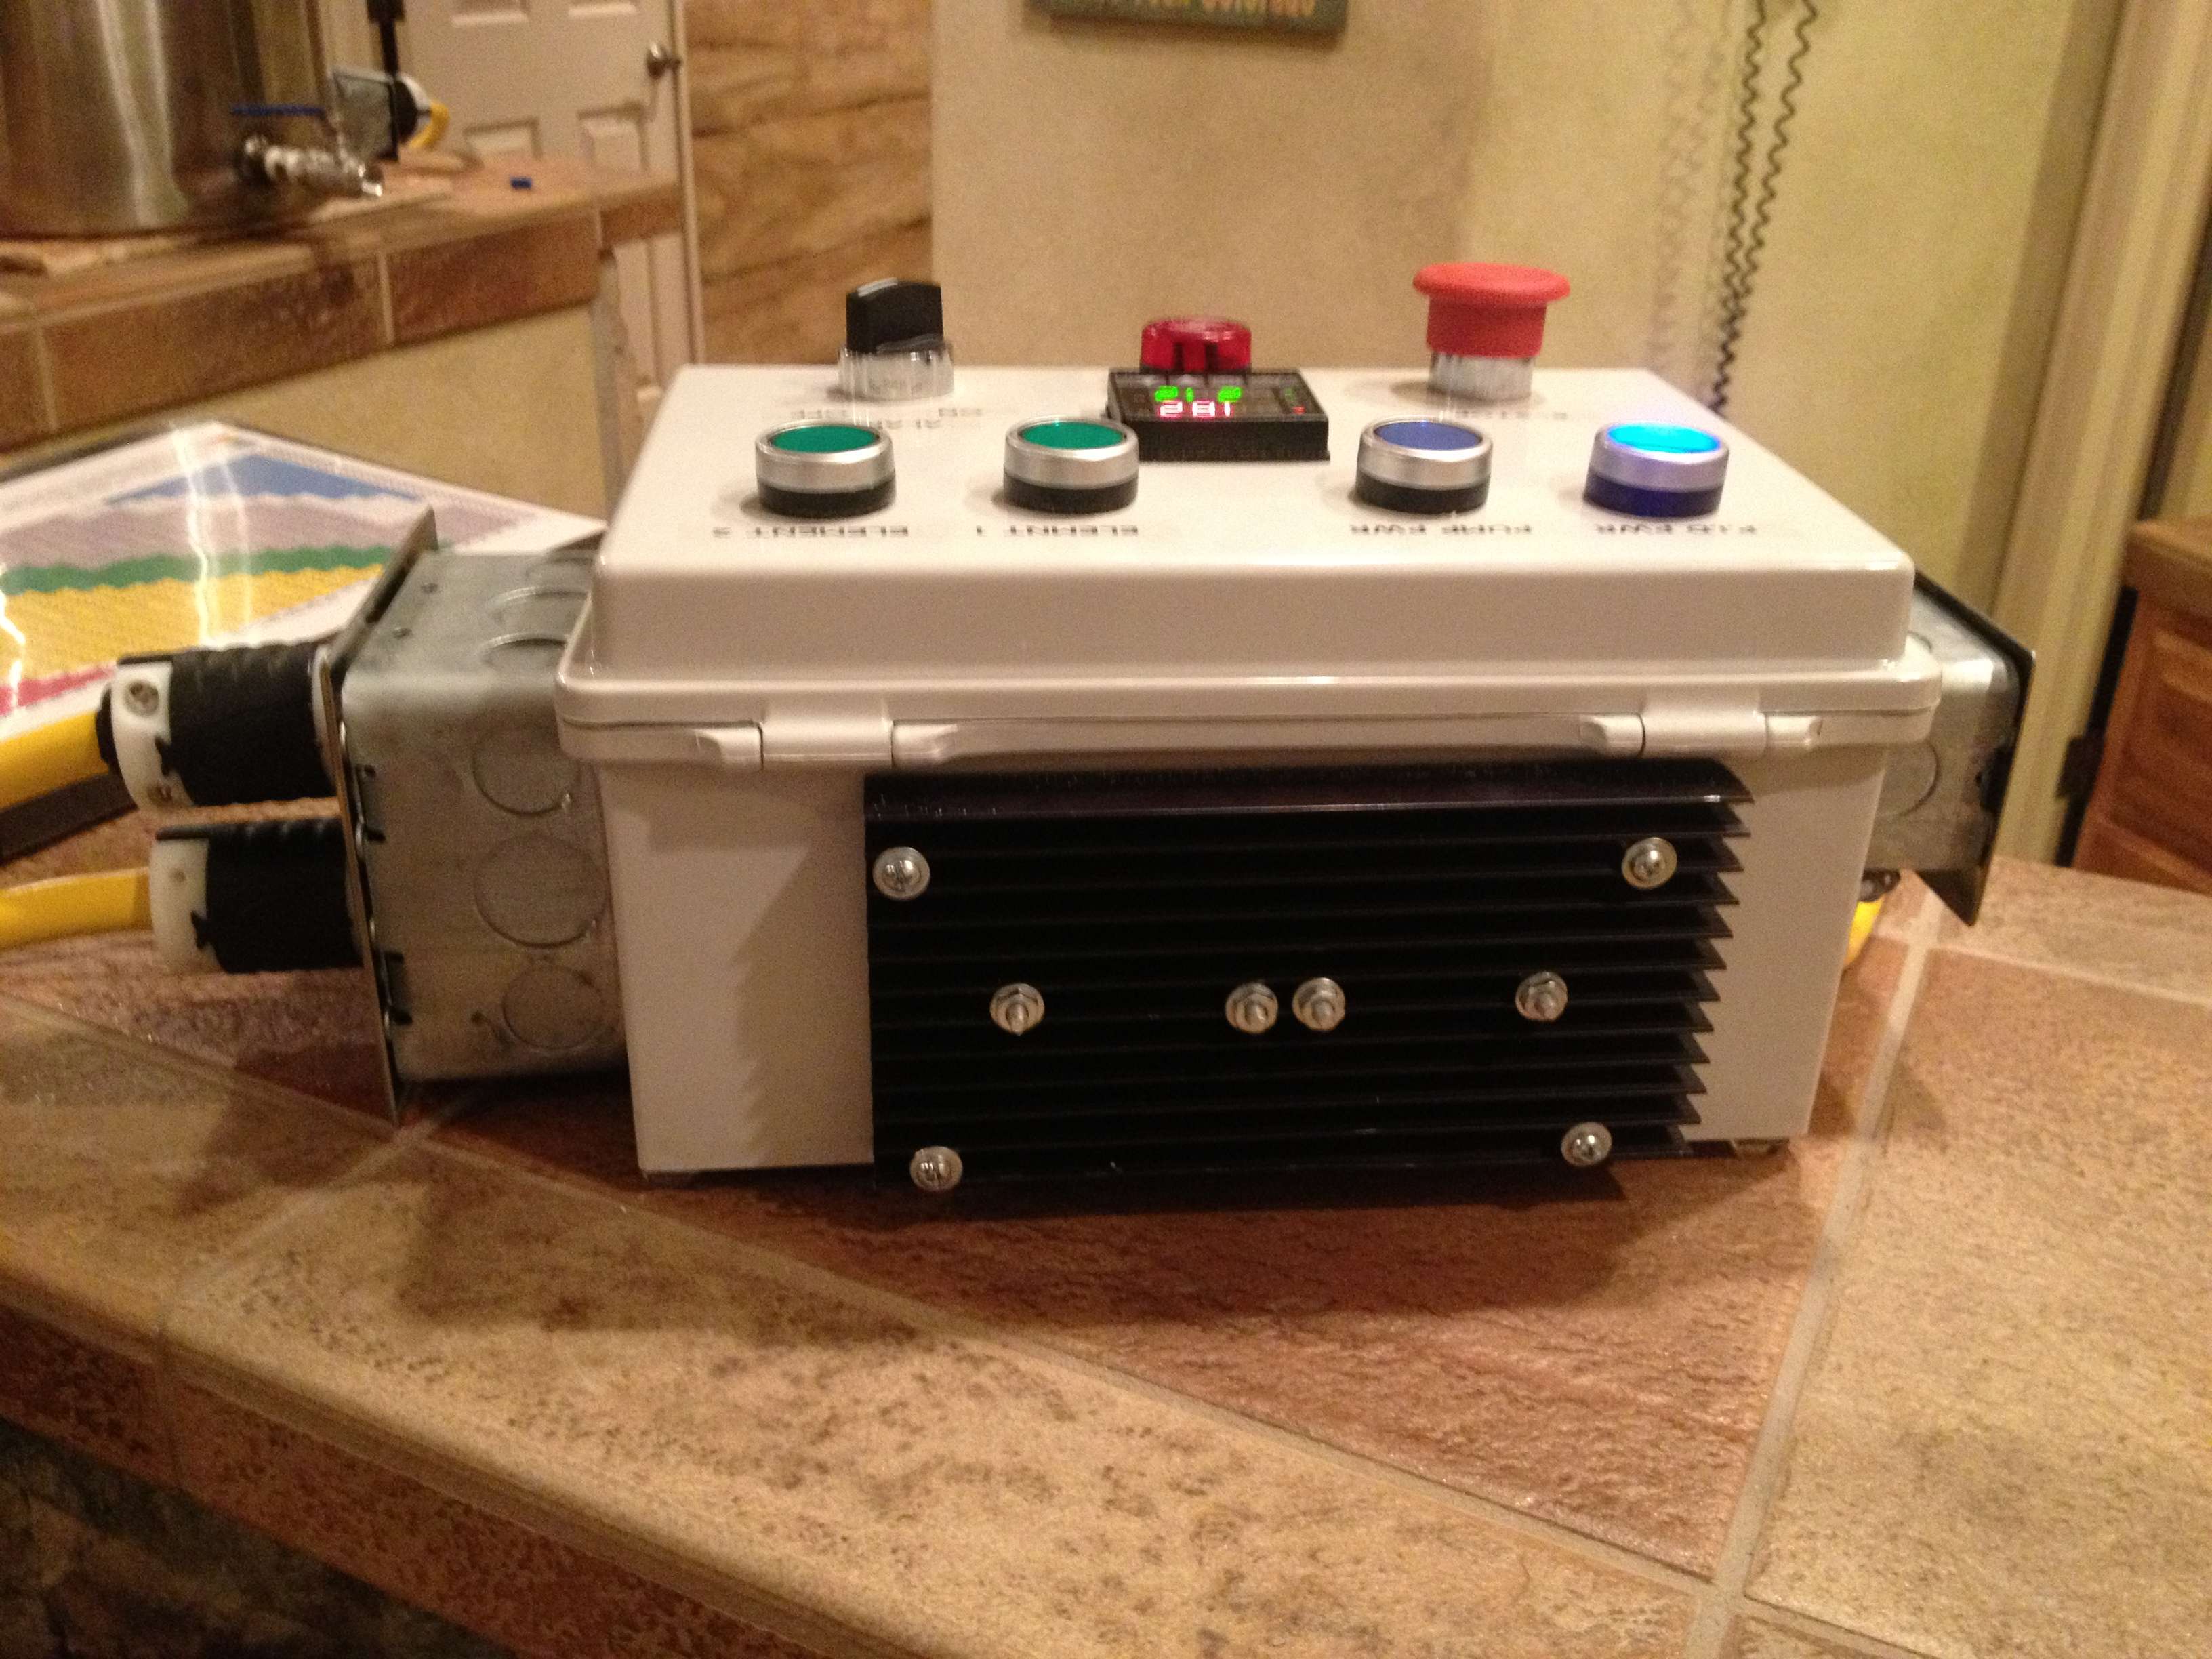
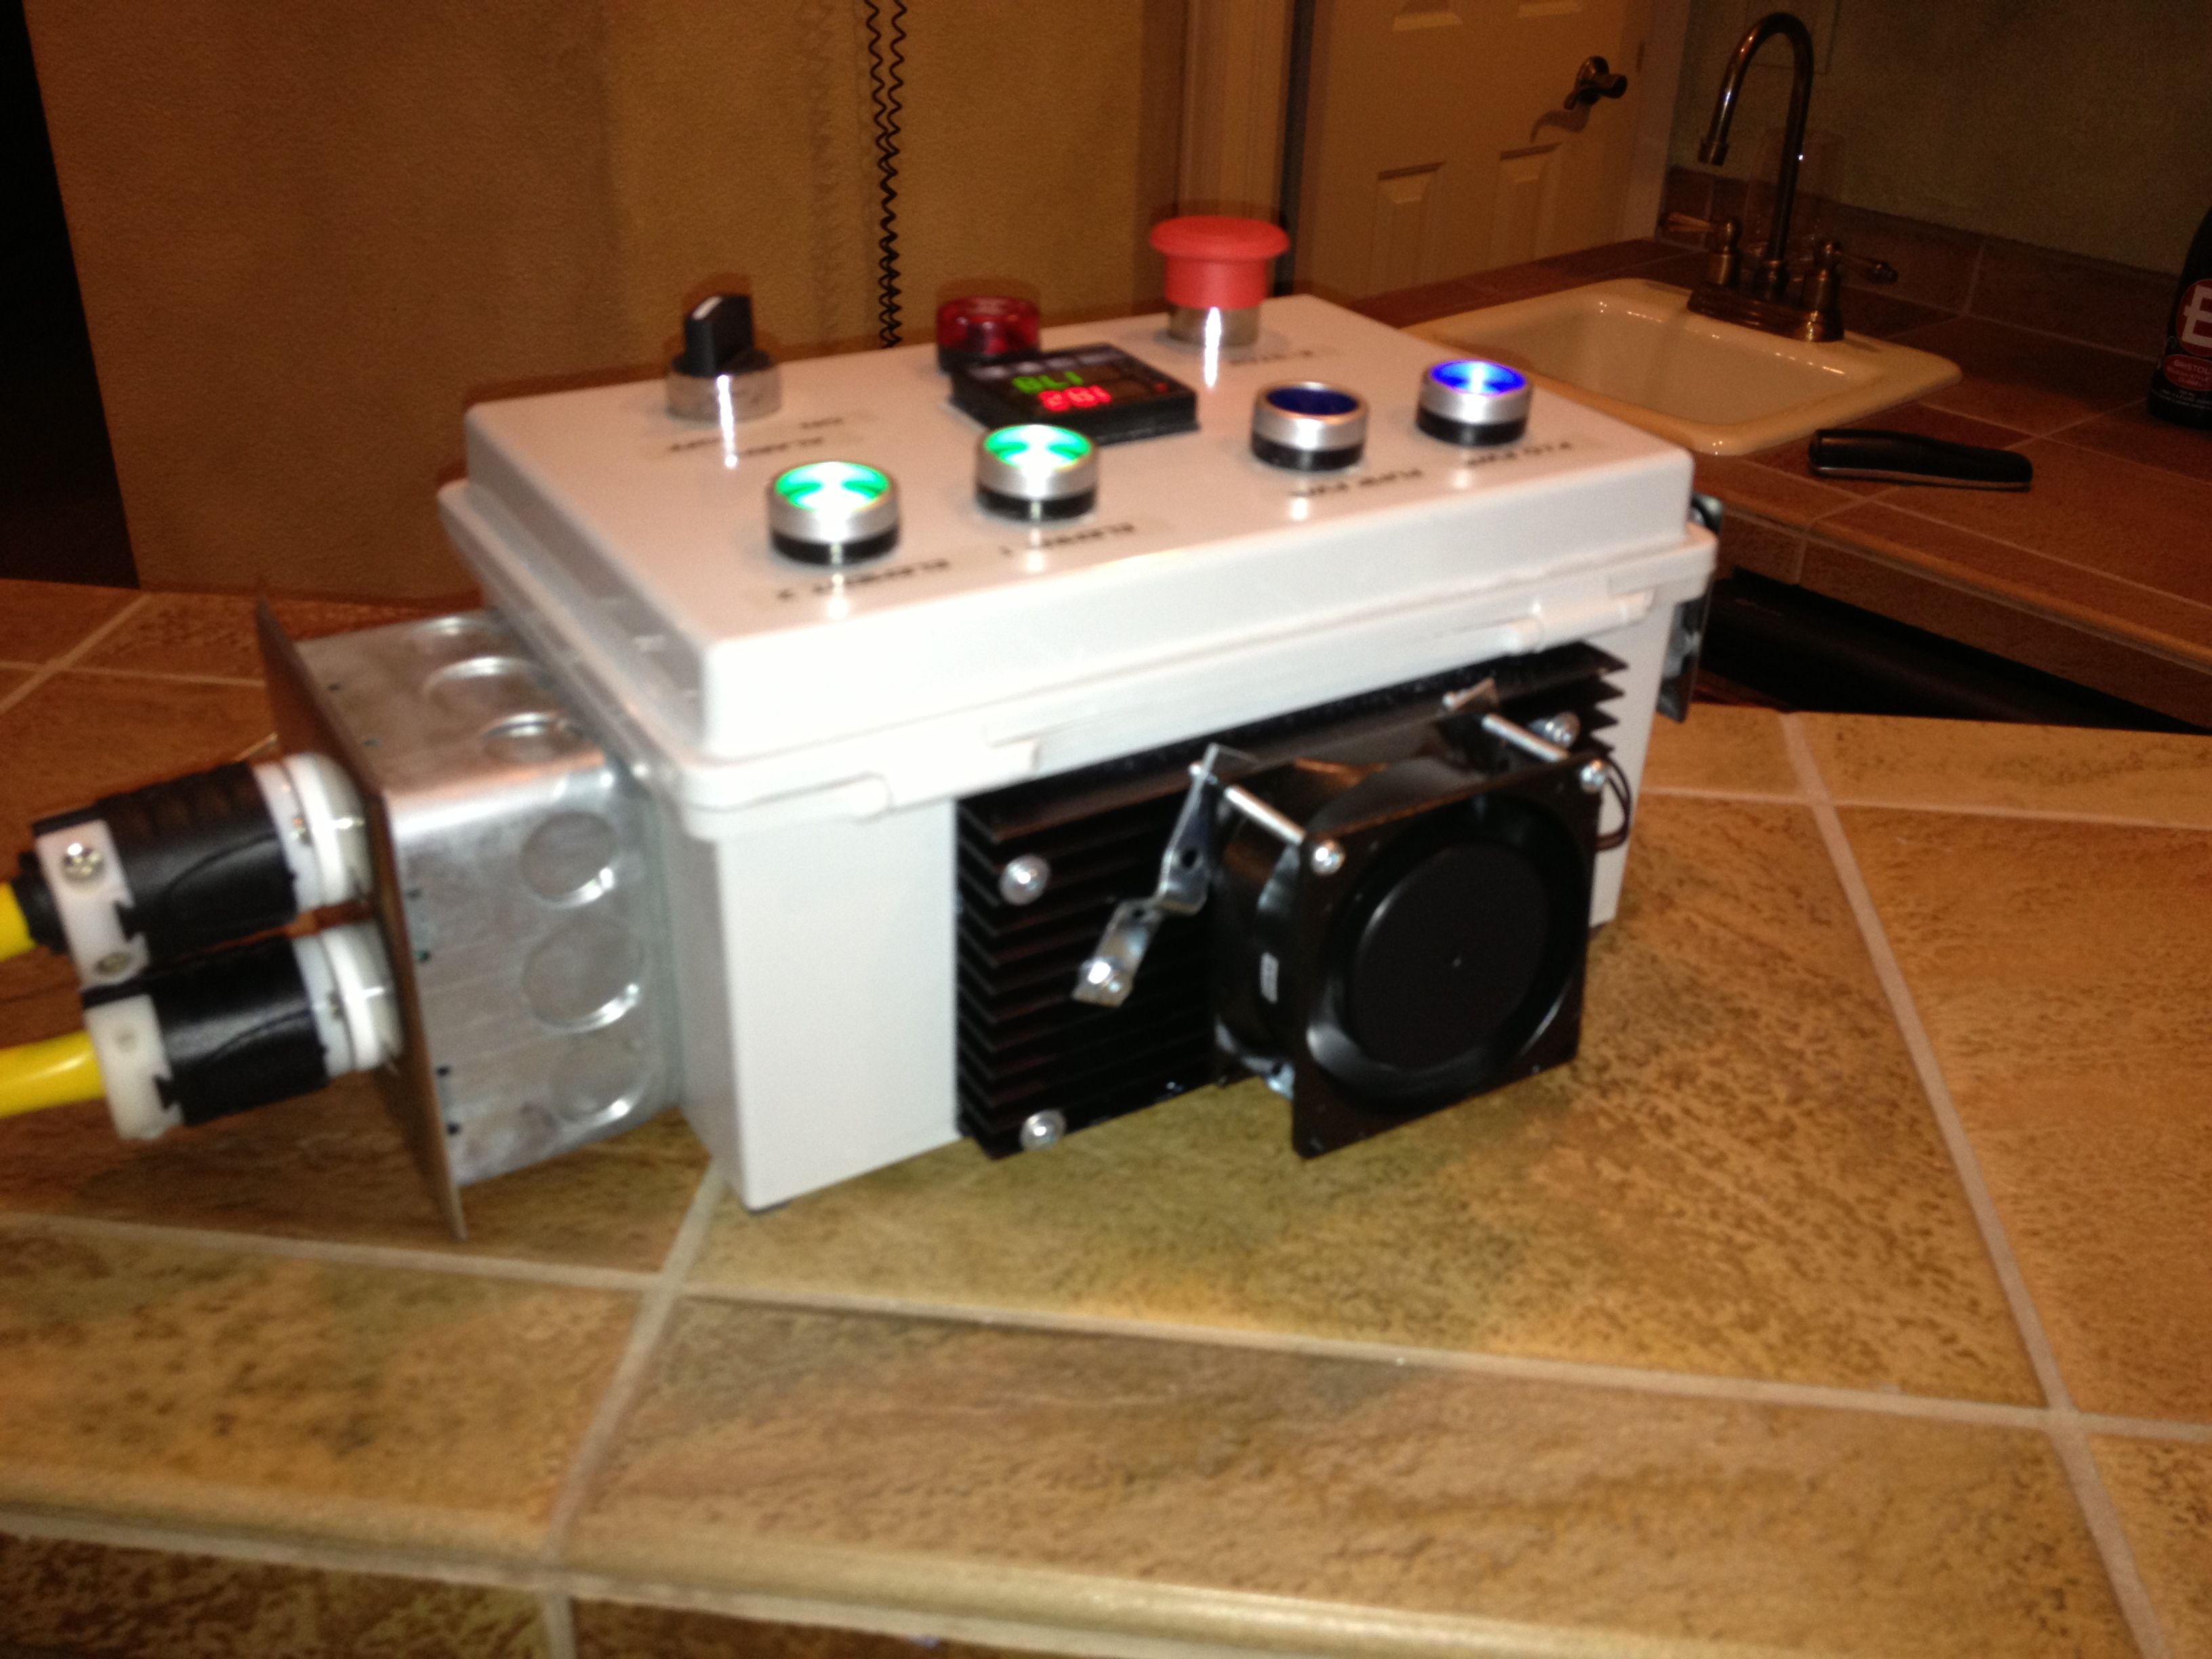
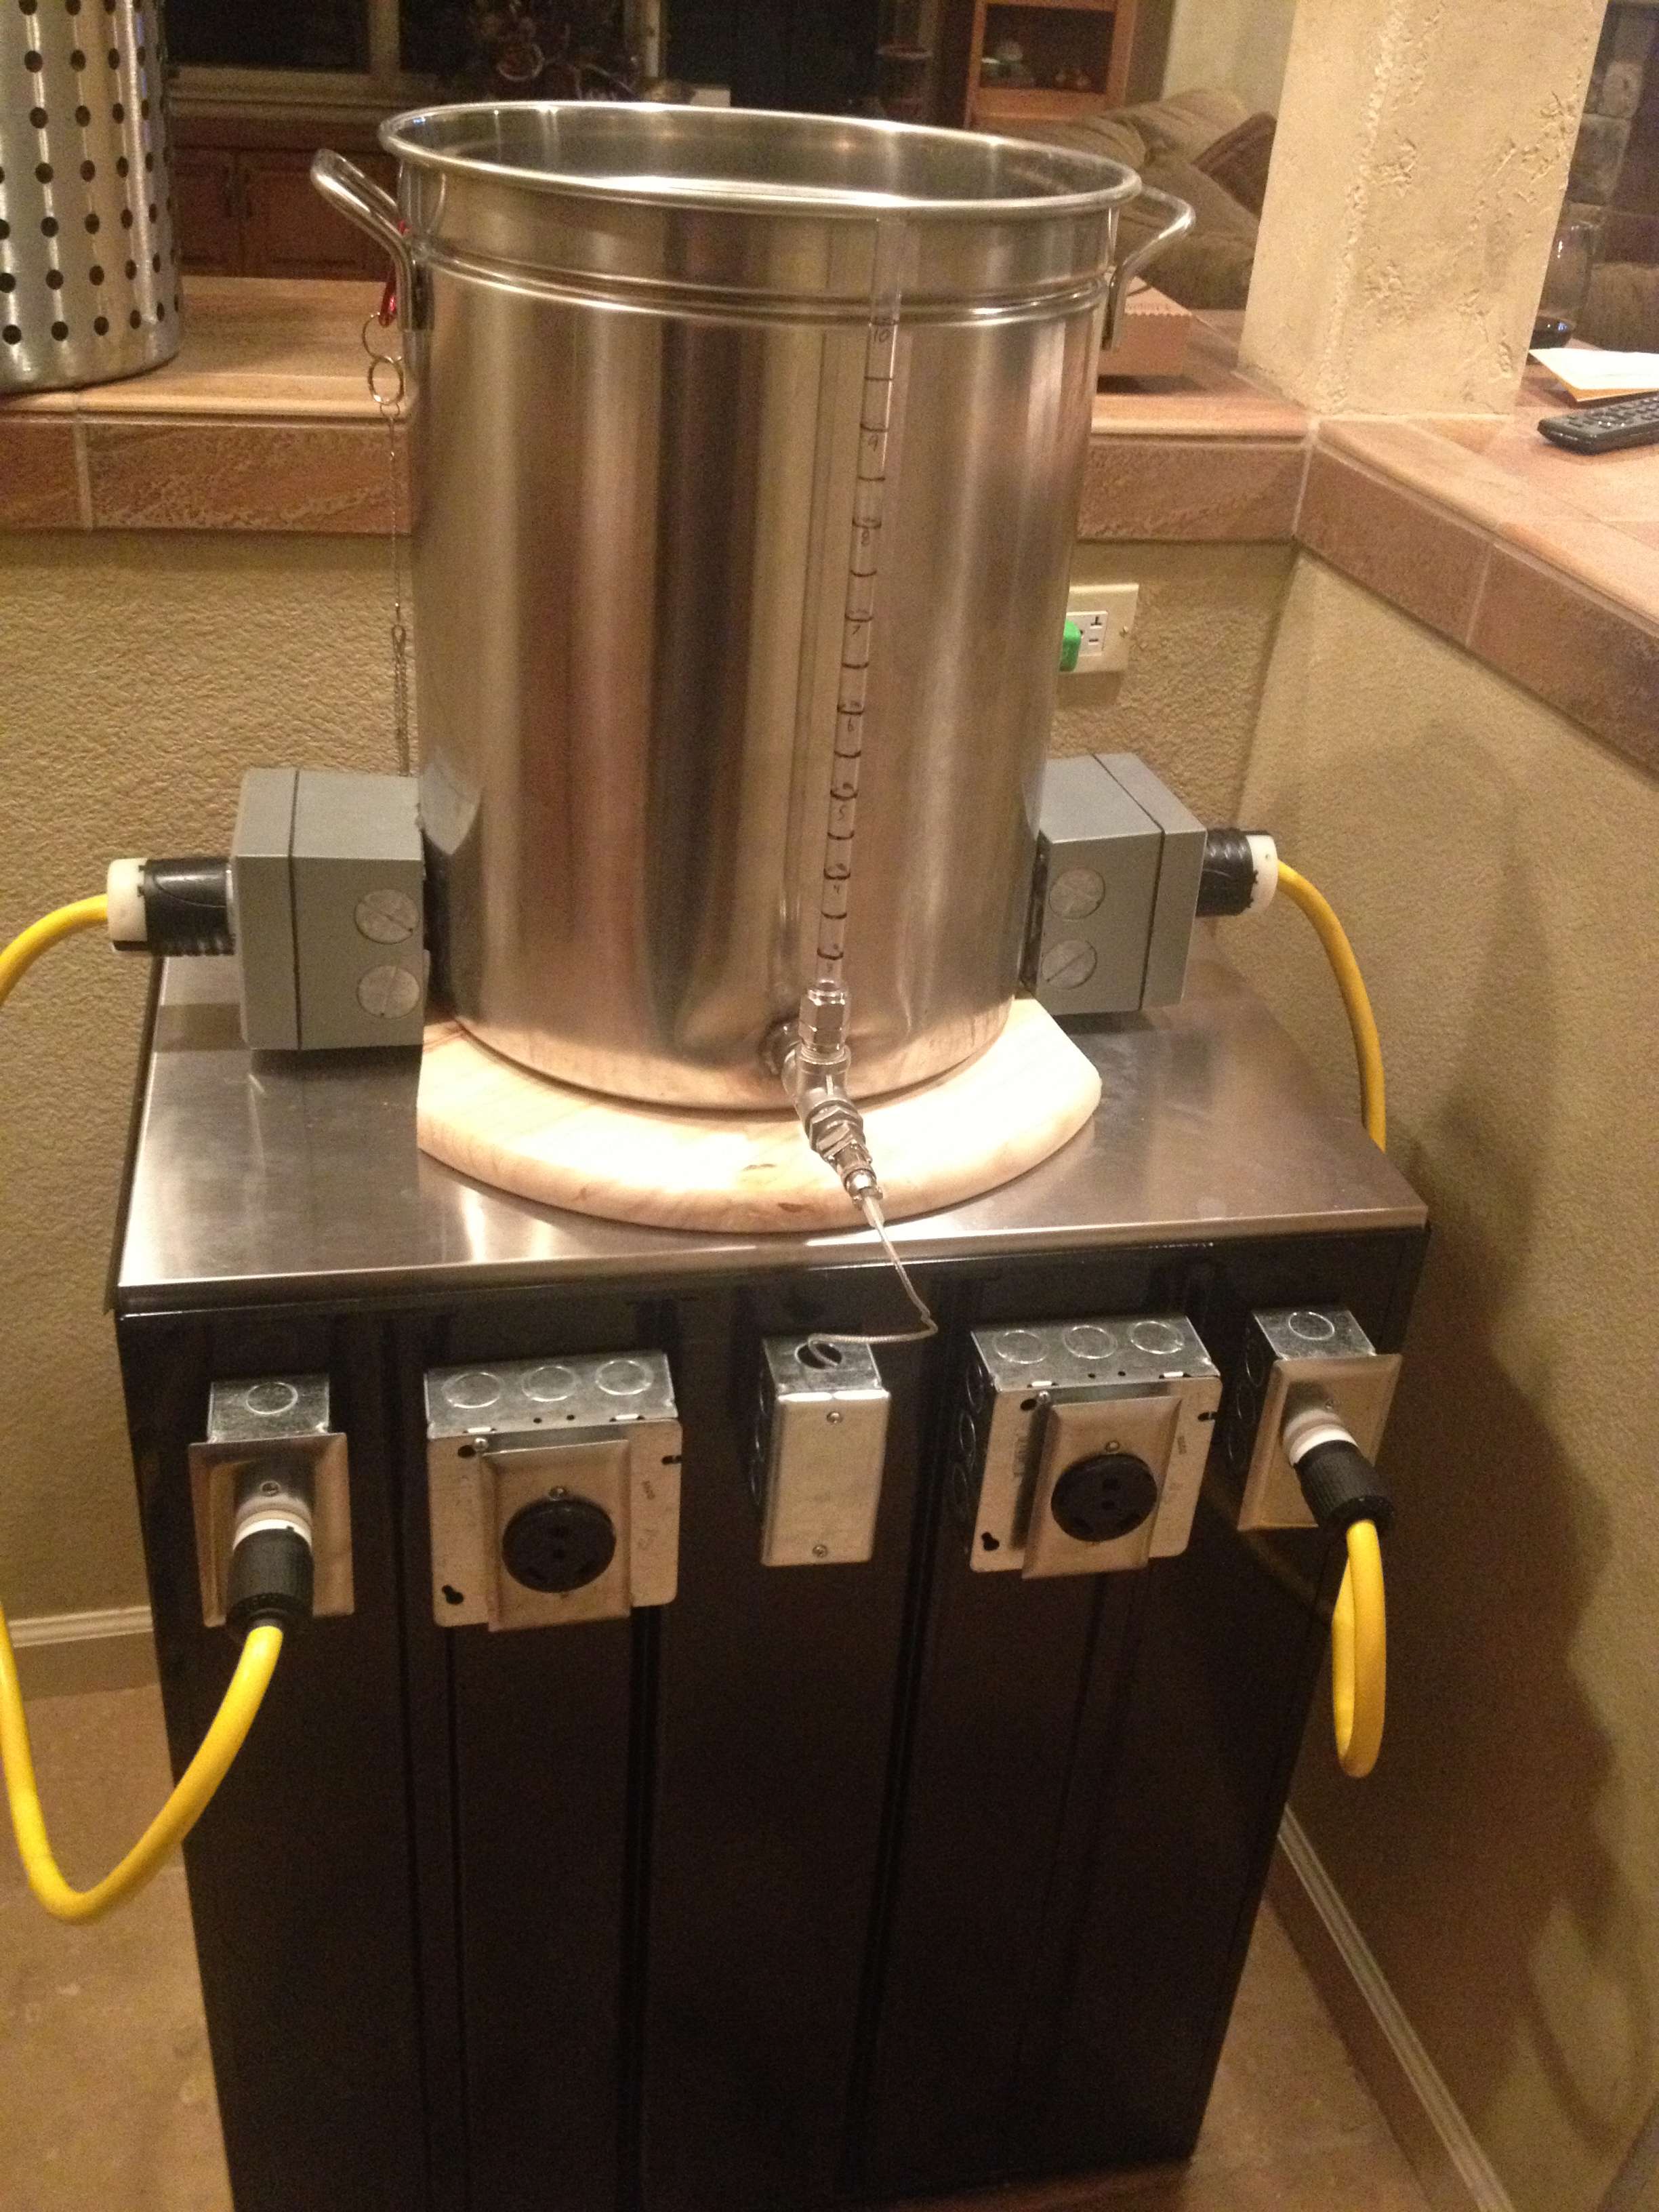
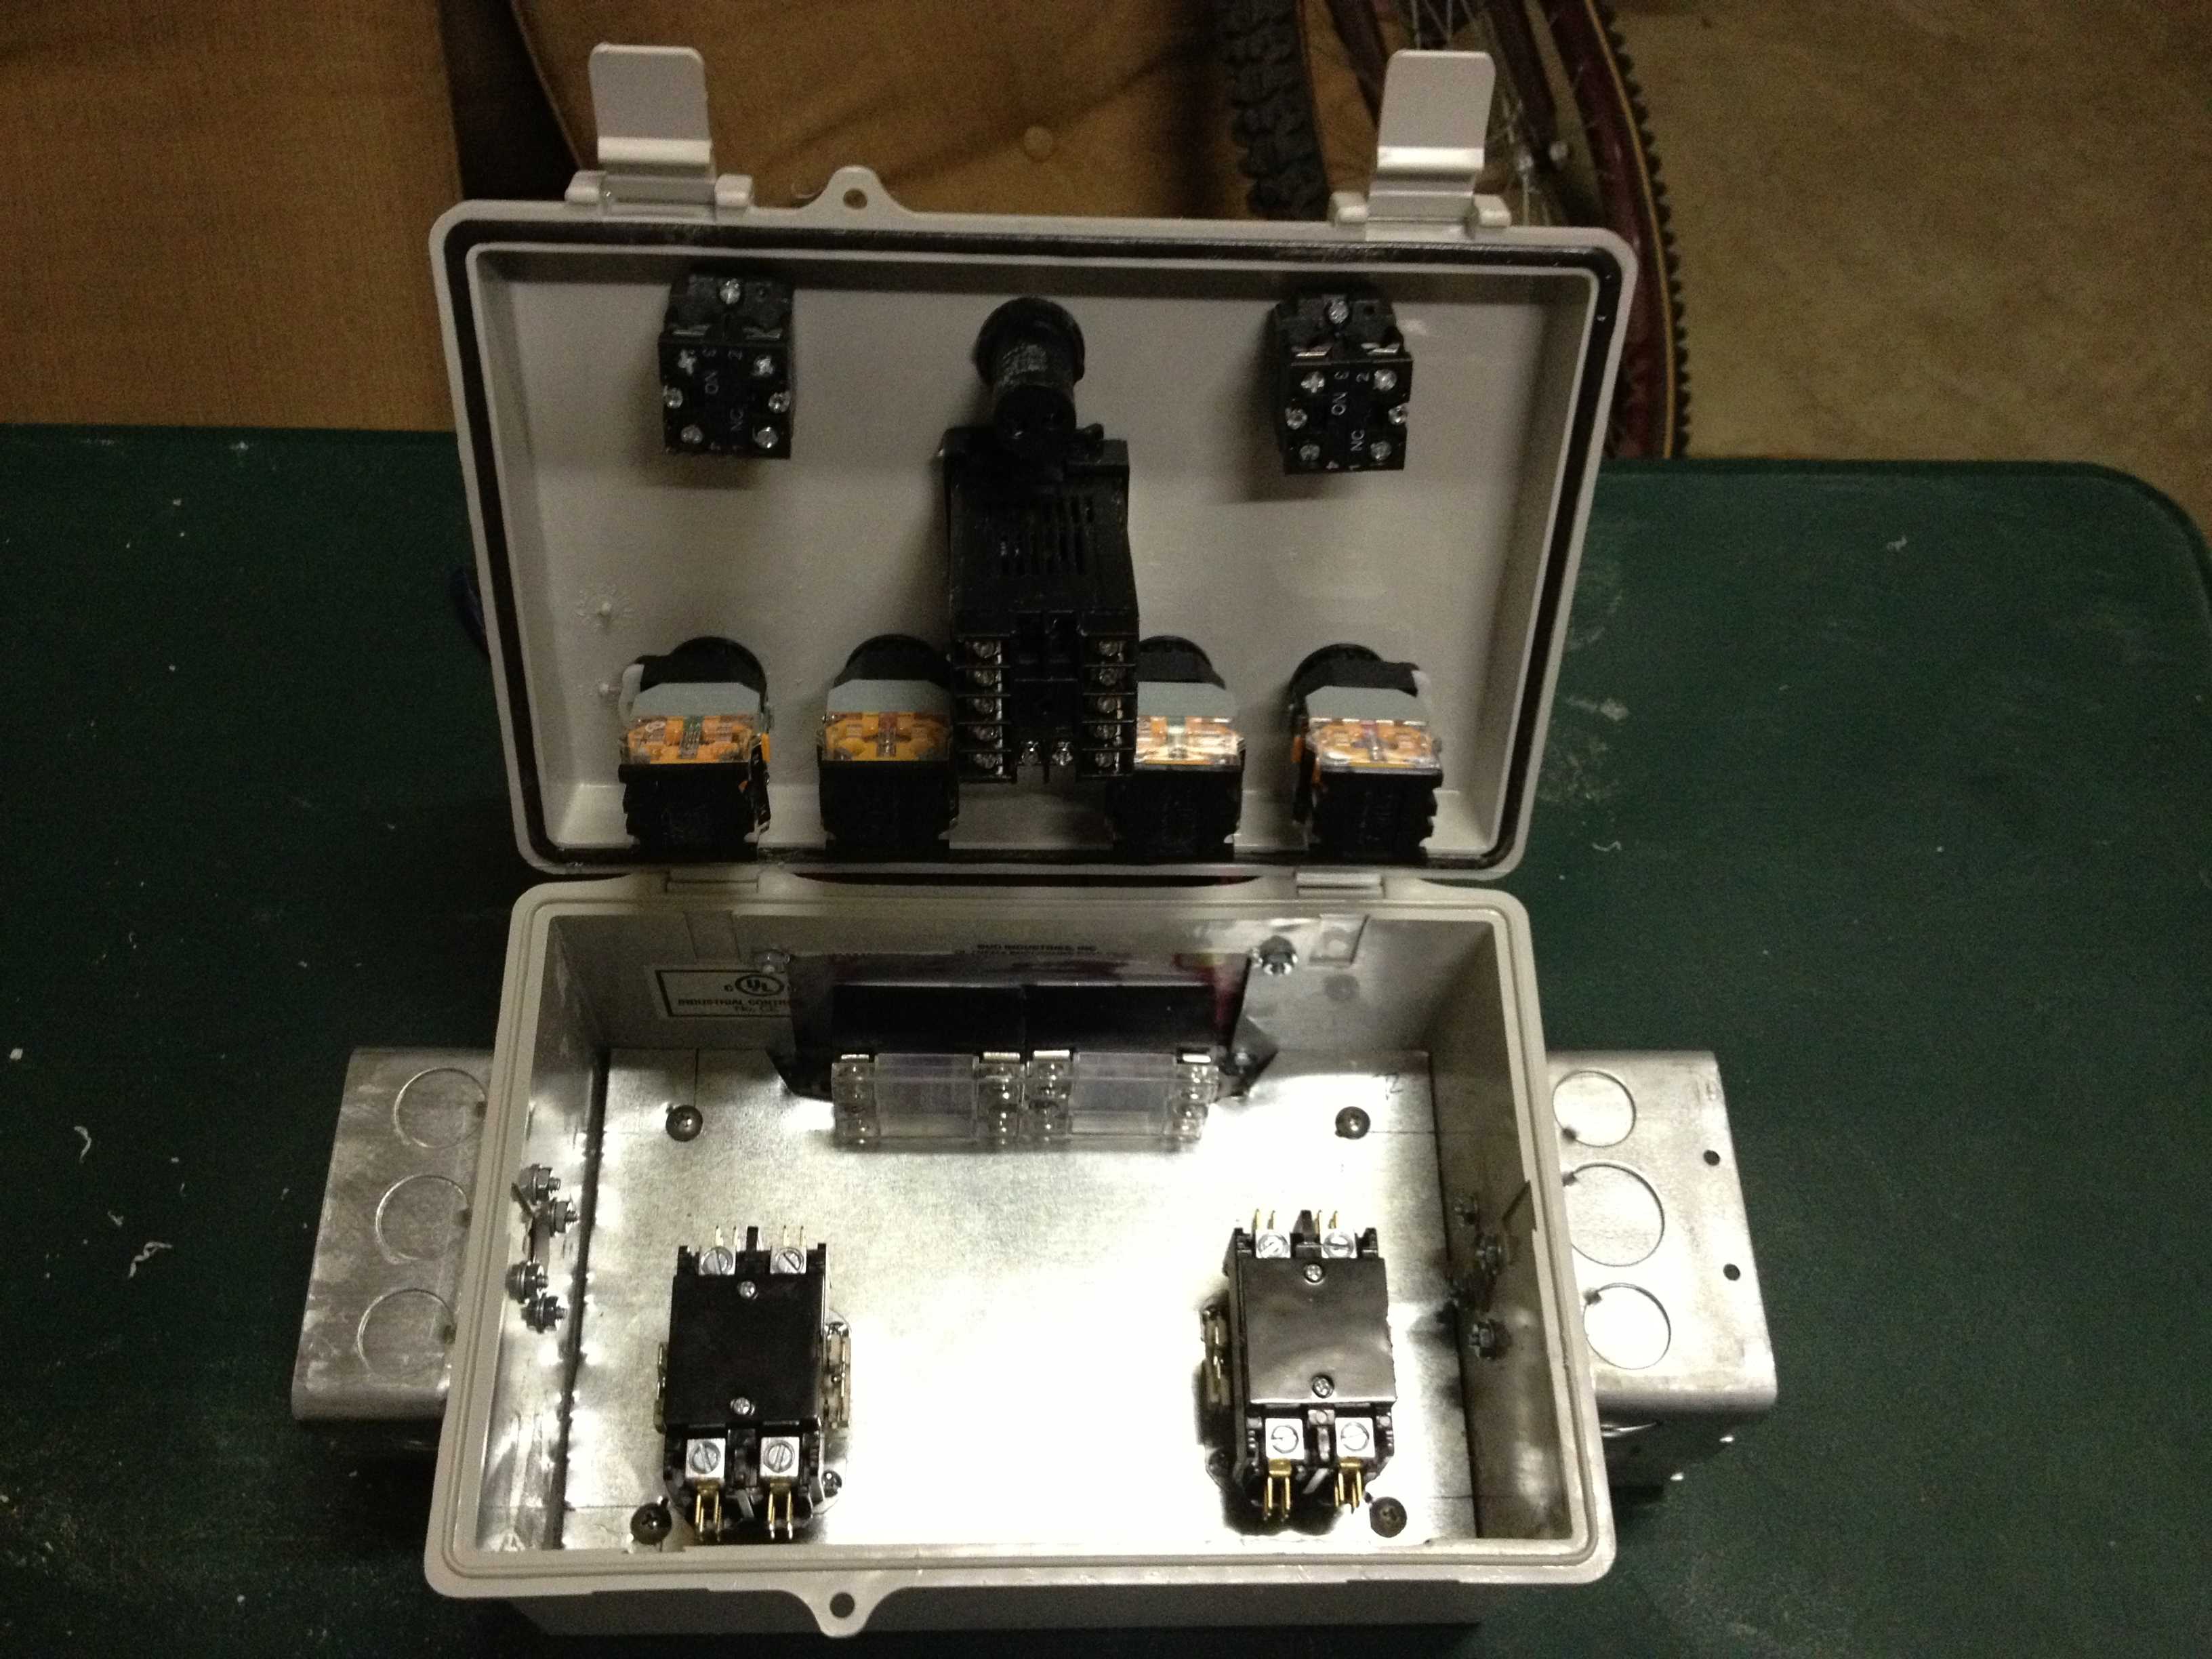
My next step was figuring out how I wanted all the cords to come in/leave the box. I walked around Home Depot for a while and decided to attach some metal outlet boxes on the side. The 2 gang box has two single 20A outlets for power to the kettle and the 1 gang box has another 20A outlet for the pump. After I attached the boxes, I wished I had put a 2 gang box on the left instead of just a 1 gang box for more space (the power cords come in on the left).
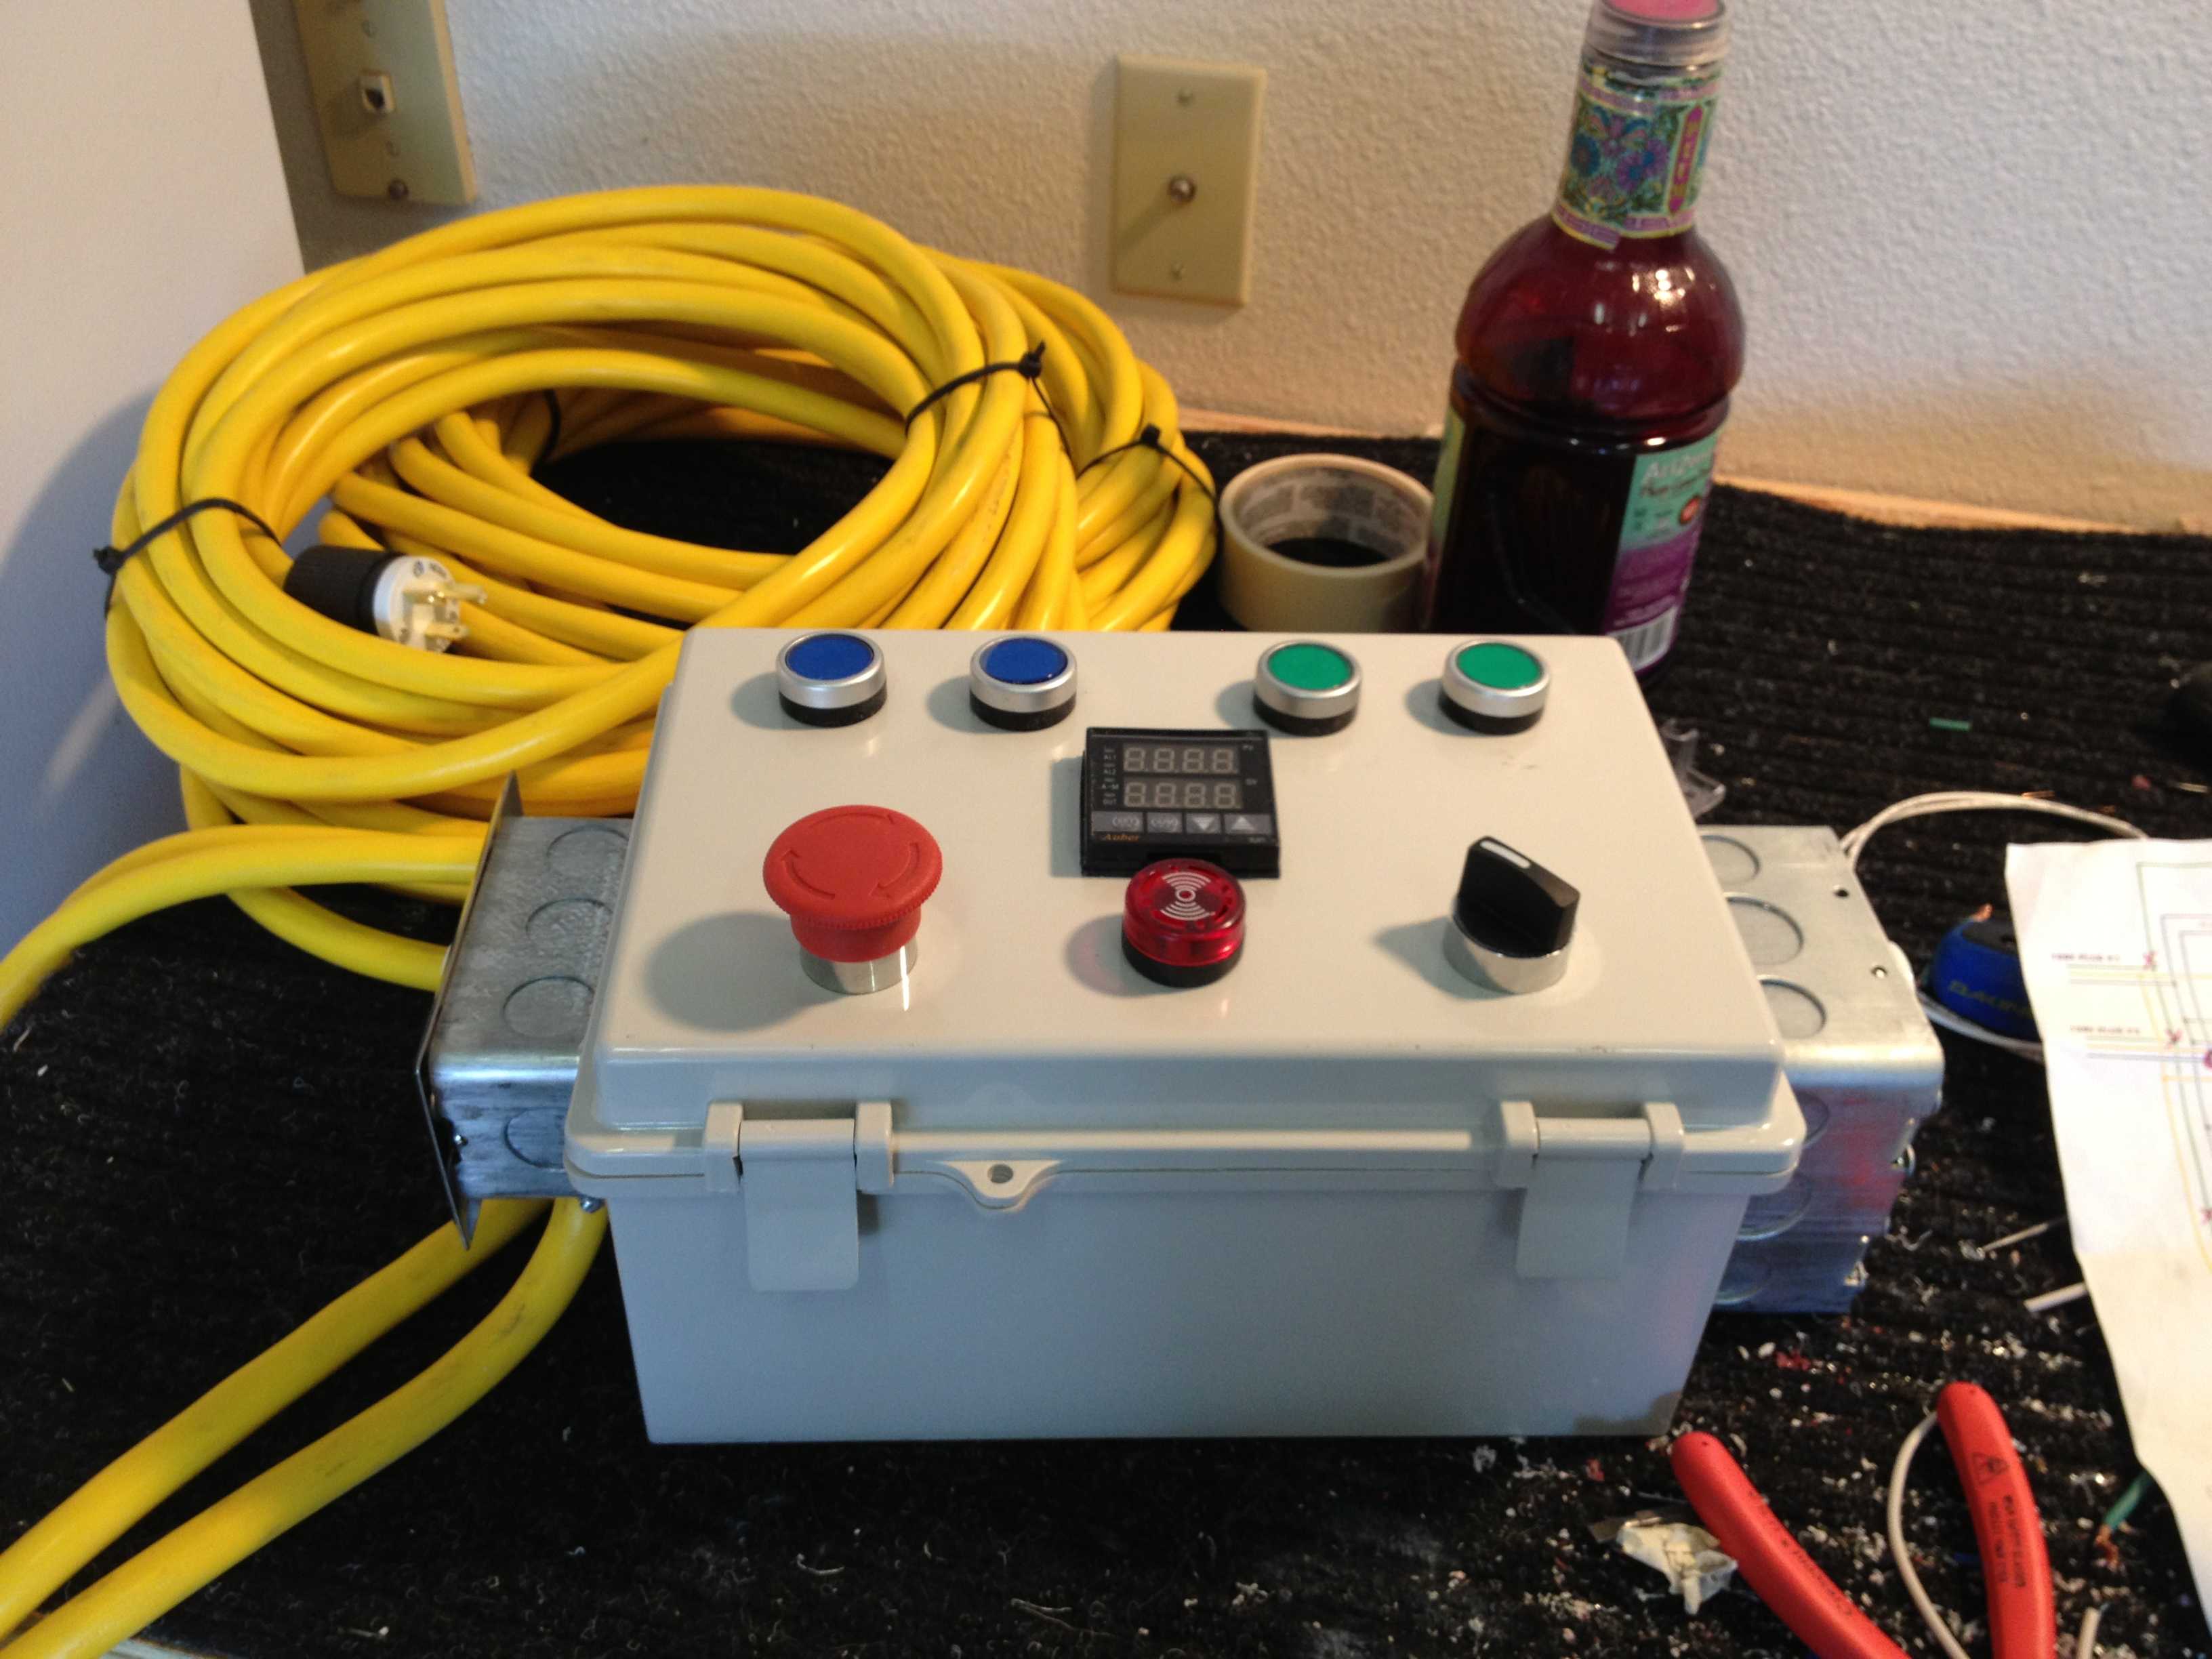
Here is a pic with the lid closed. The red part is the heat sink I cannibalized from the power converter. I went to every electric supply store I could find and no one had heat sinks in town...ill find out later if it gets too hot.
Since I wanted to be able to brew outside if its nice out, I picked up a 100' extension cord. I have two 40' sections that bring power into my system, and I made two 10' sections that will connect my control box to the kettle.
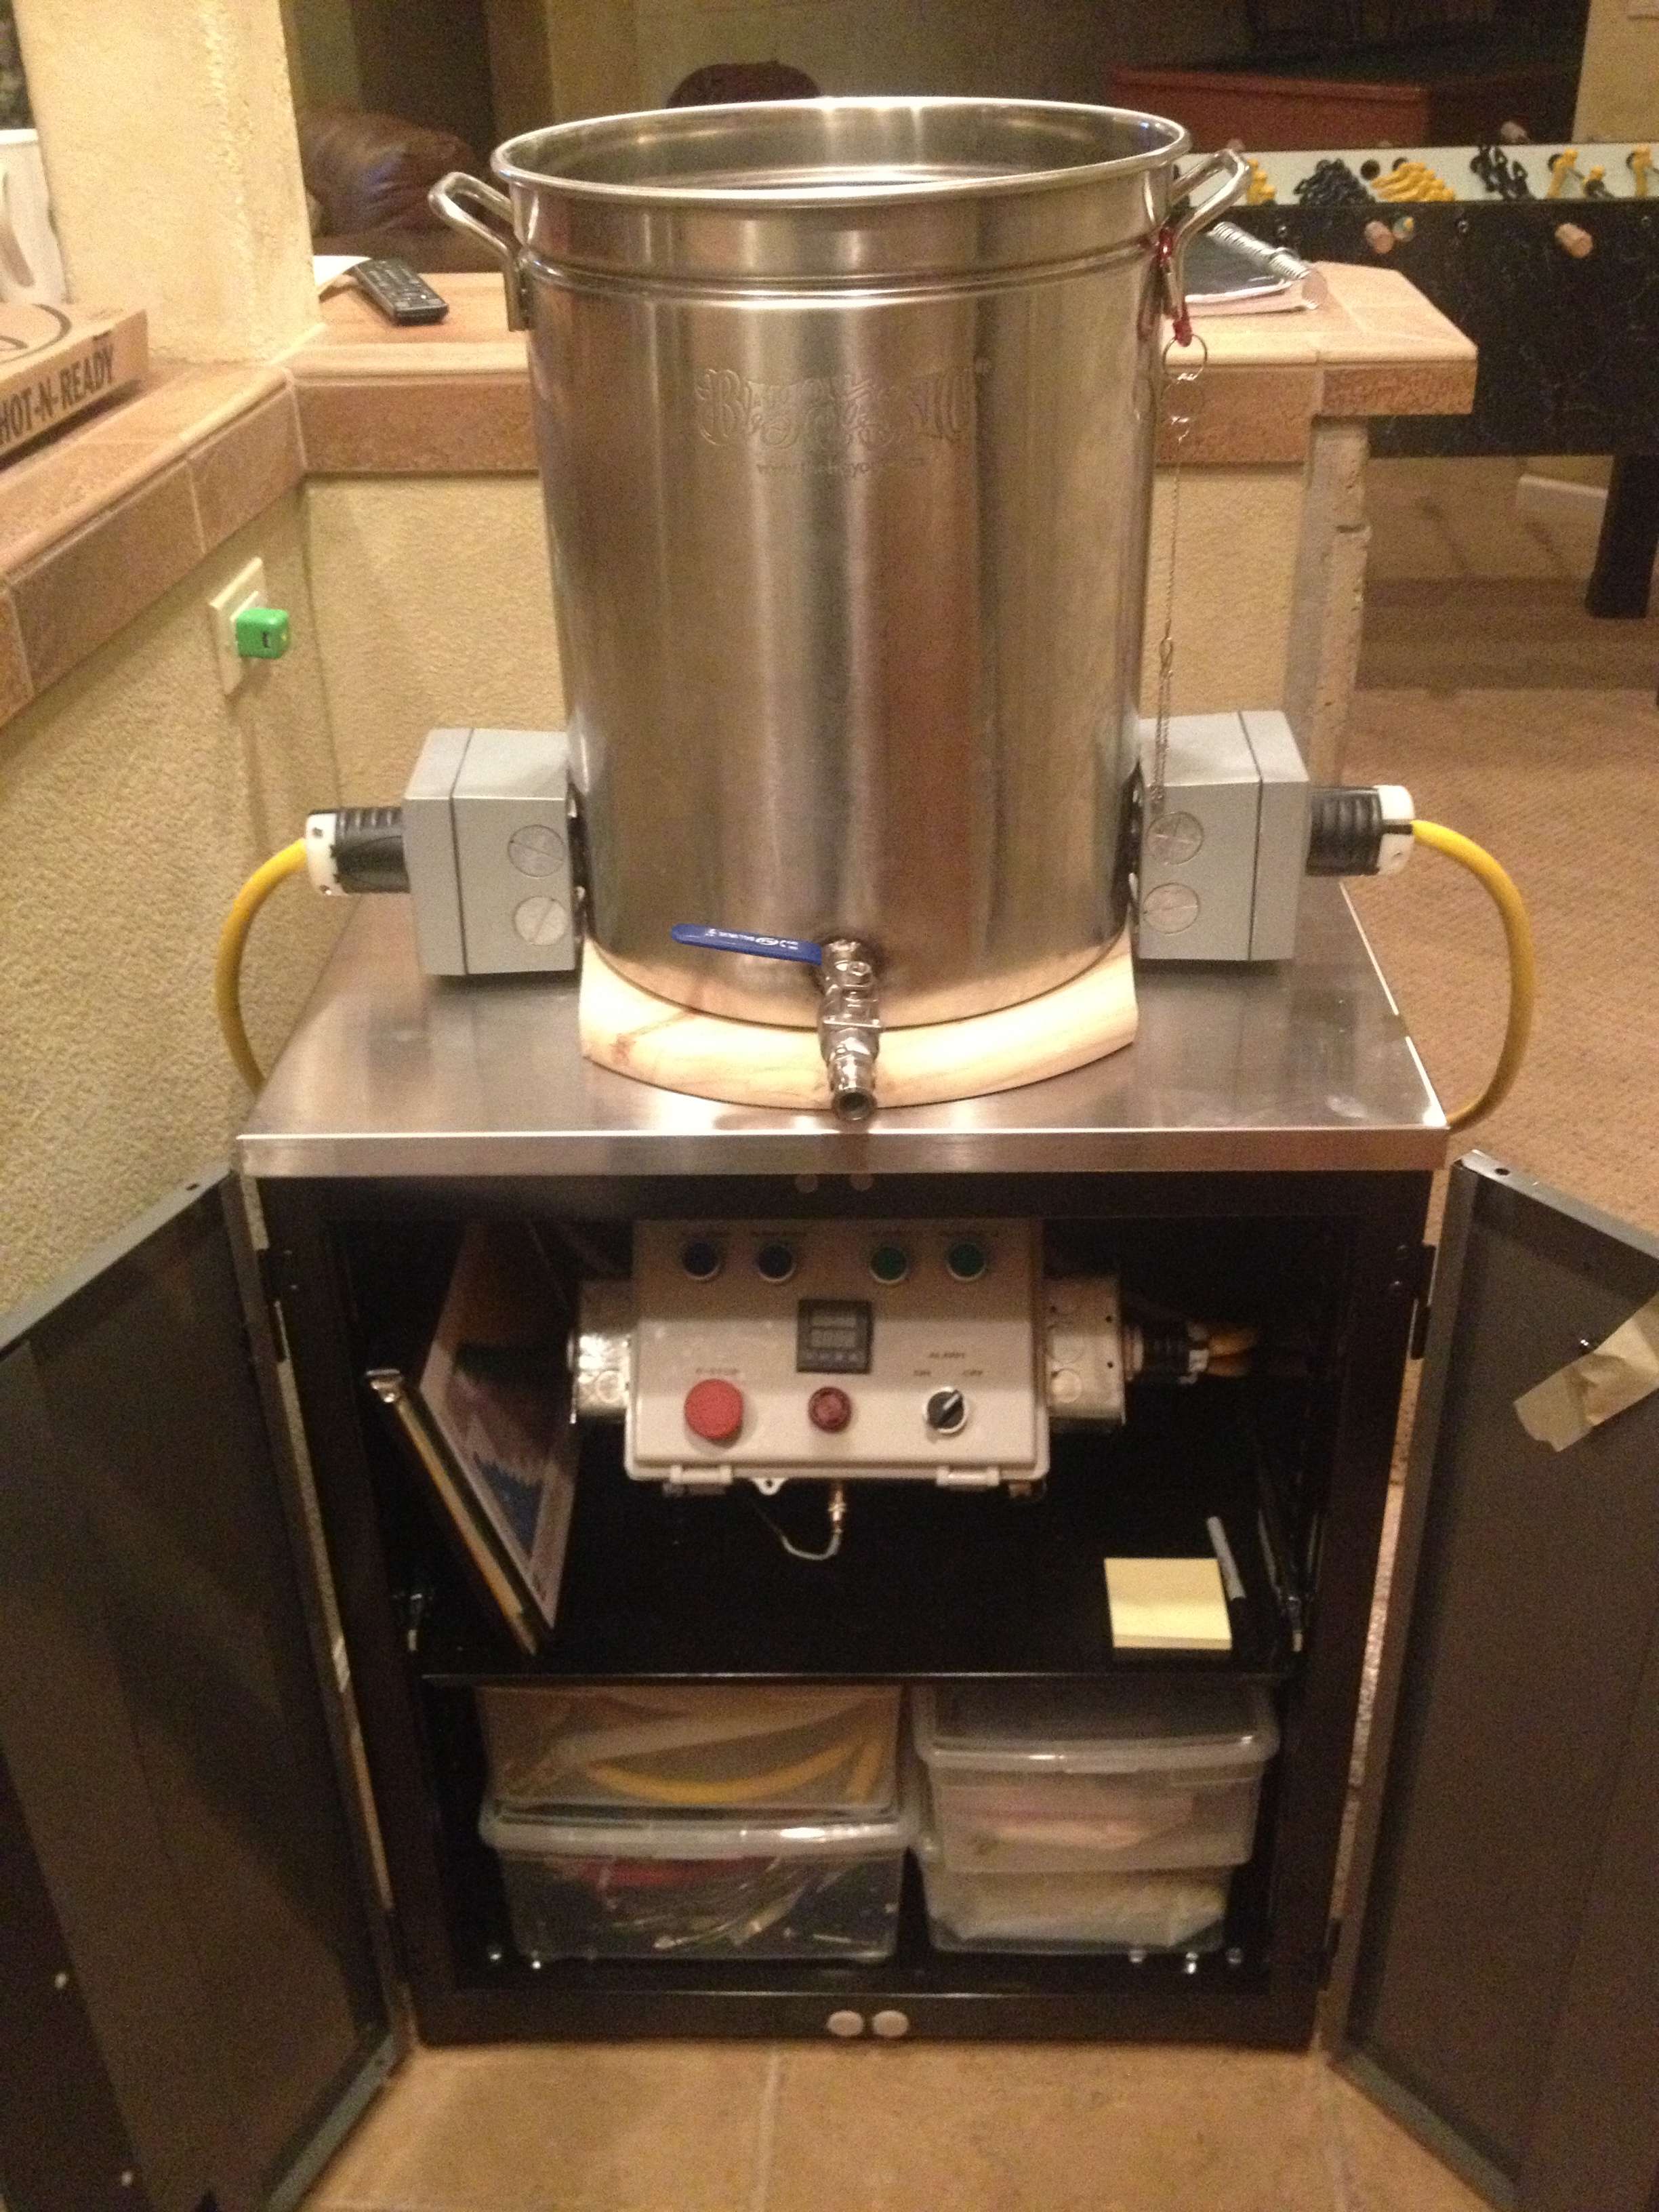
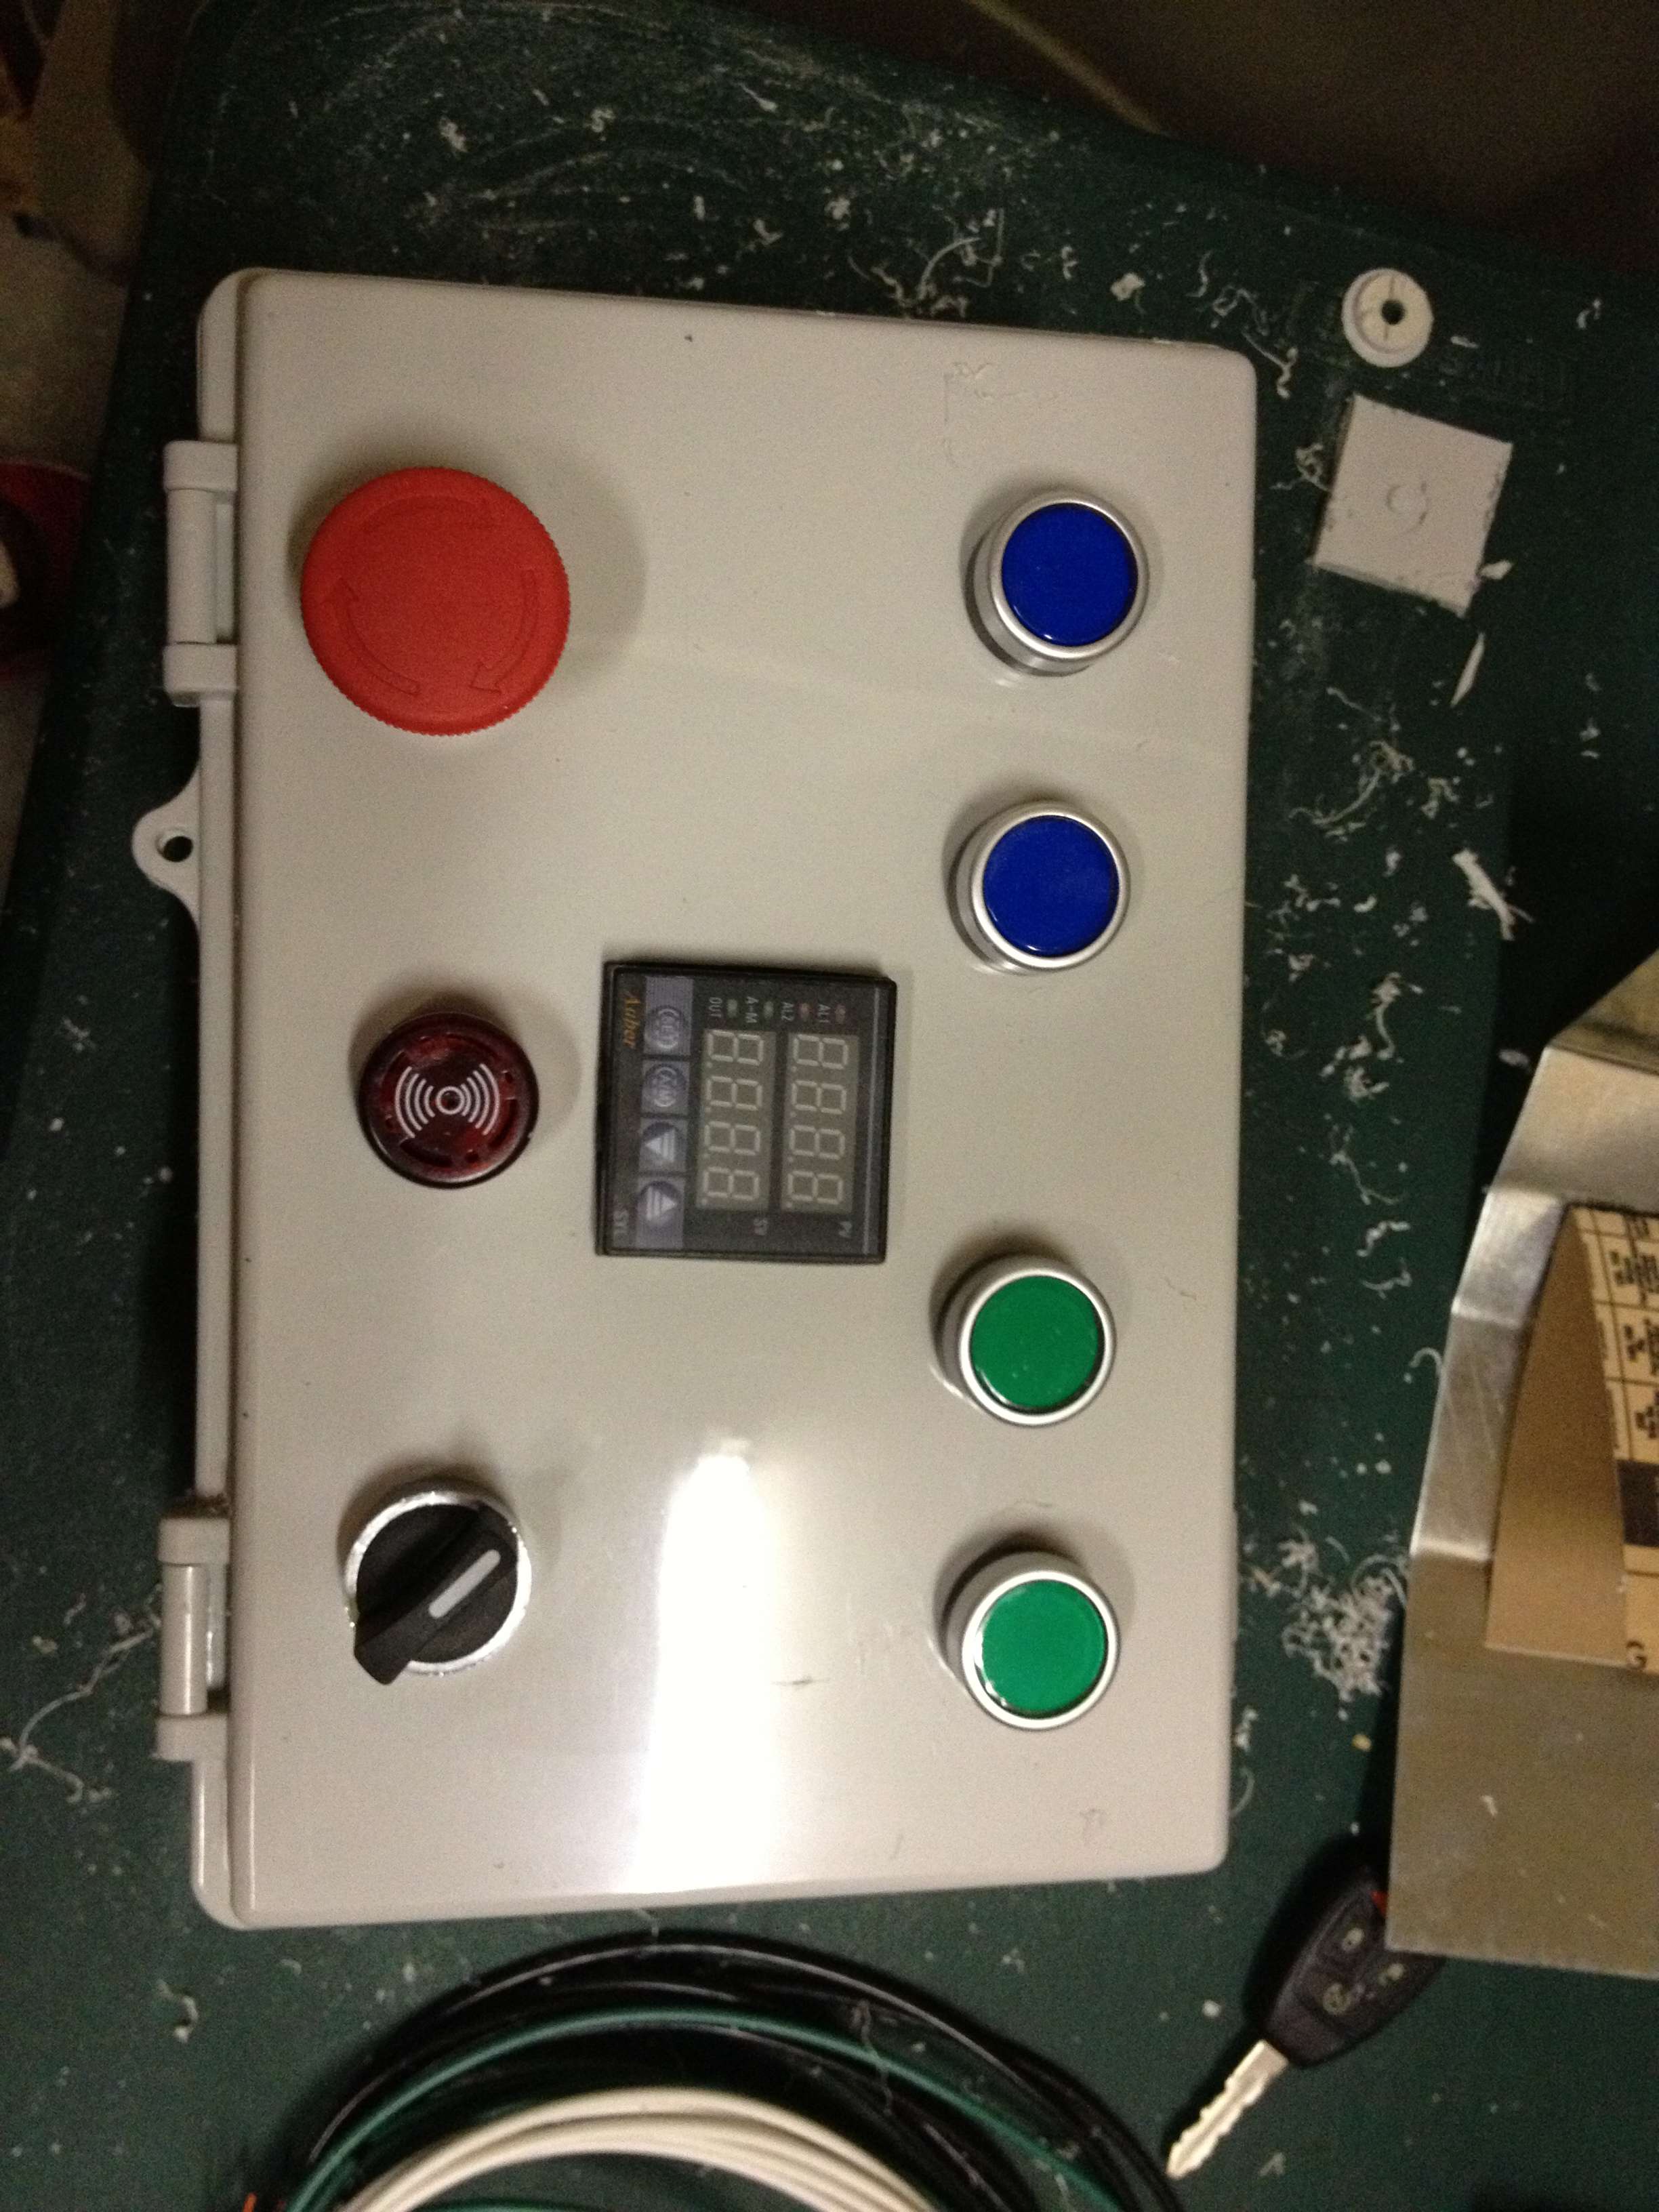
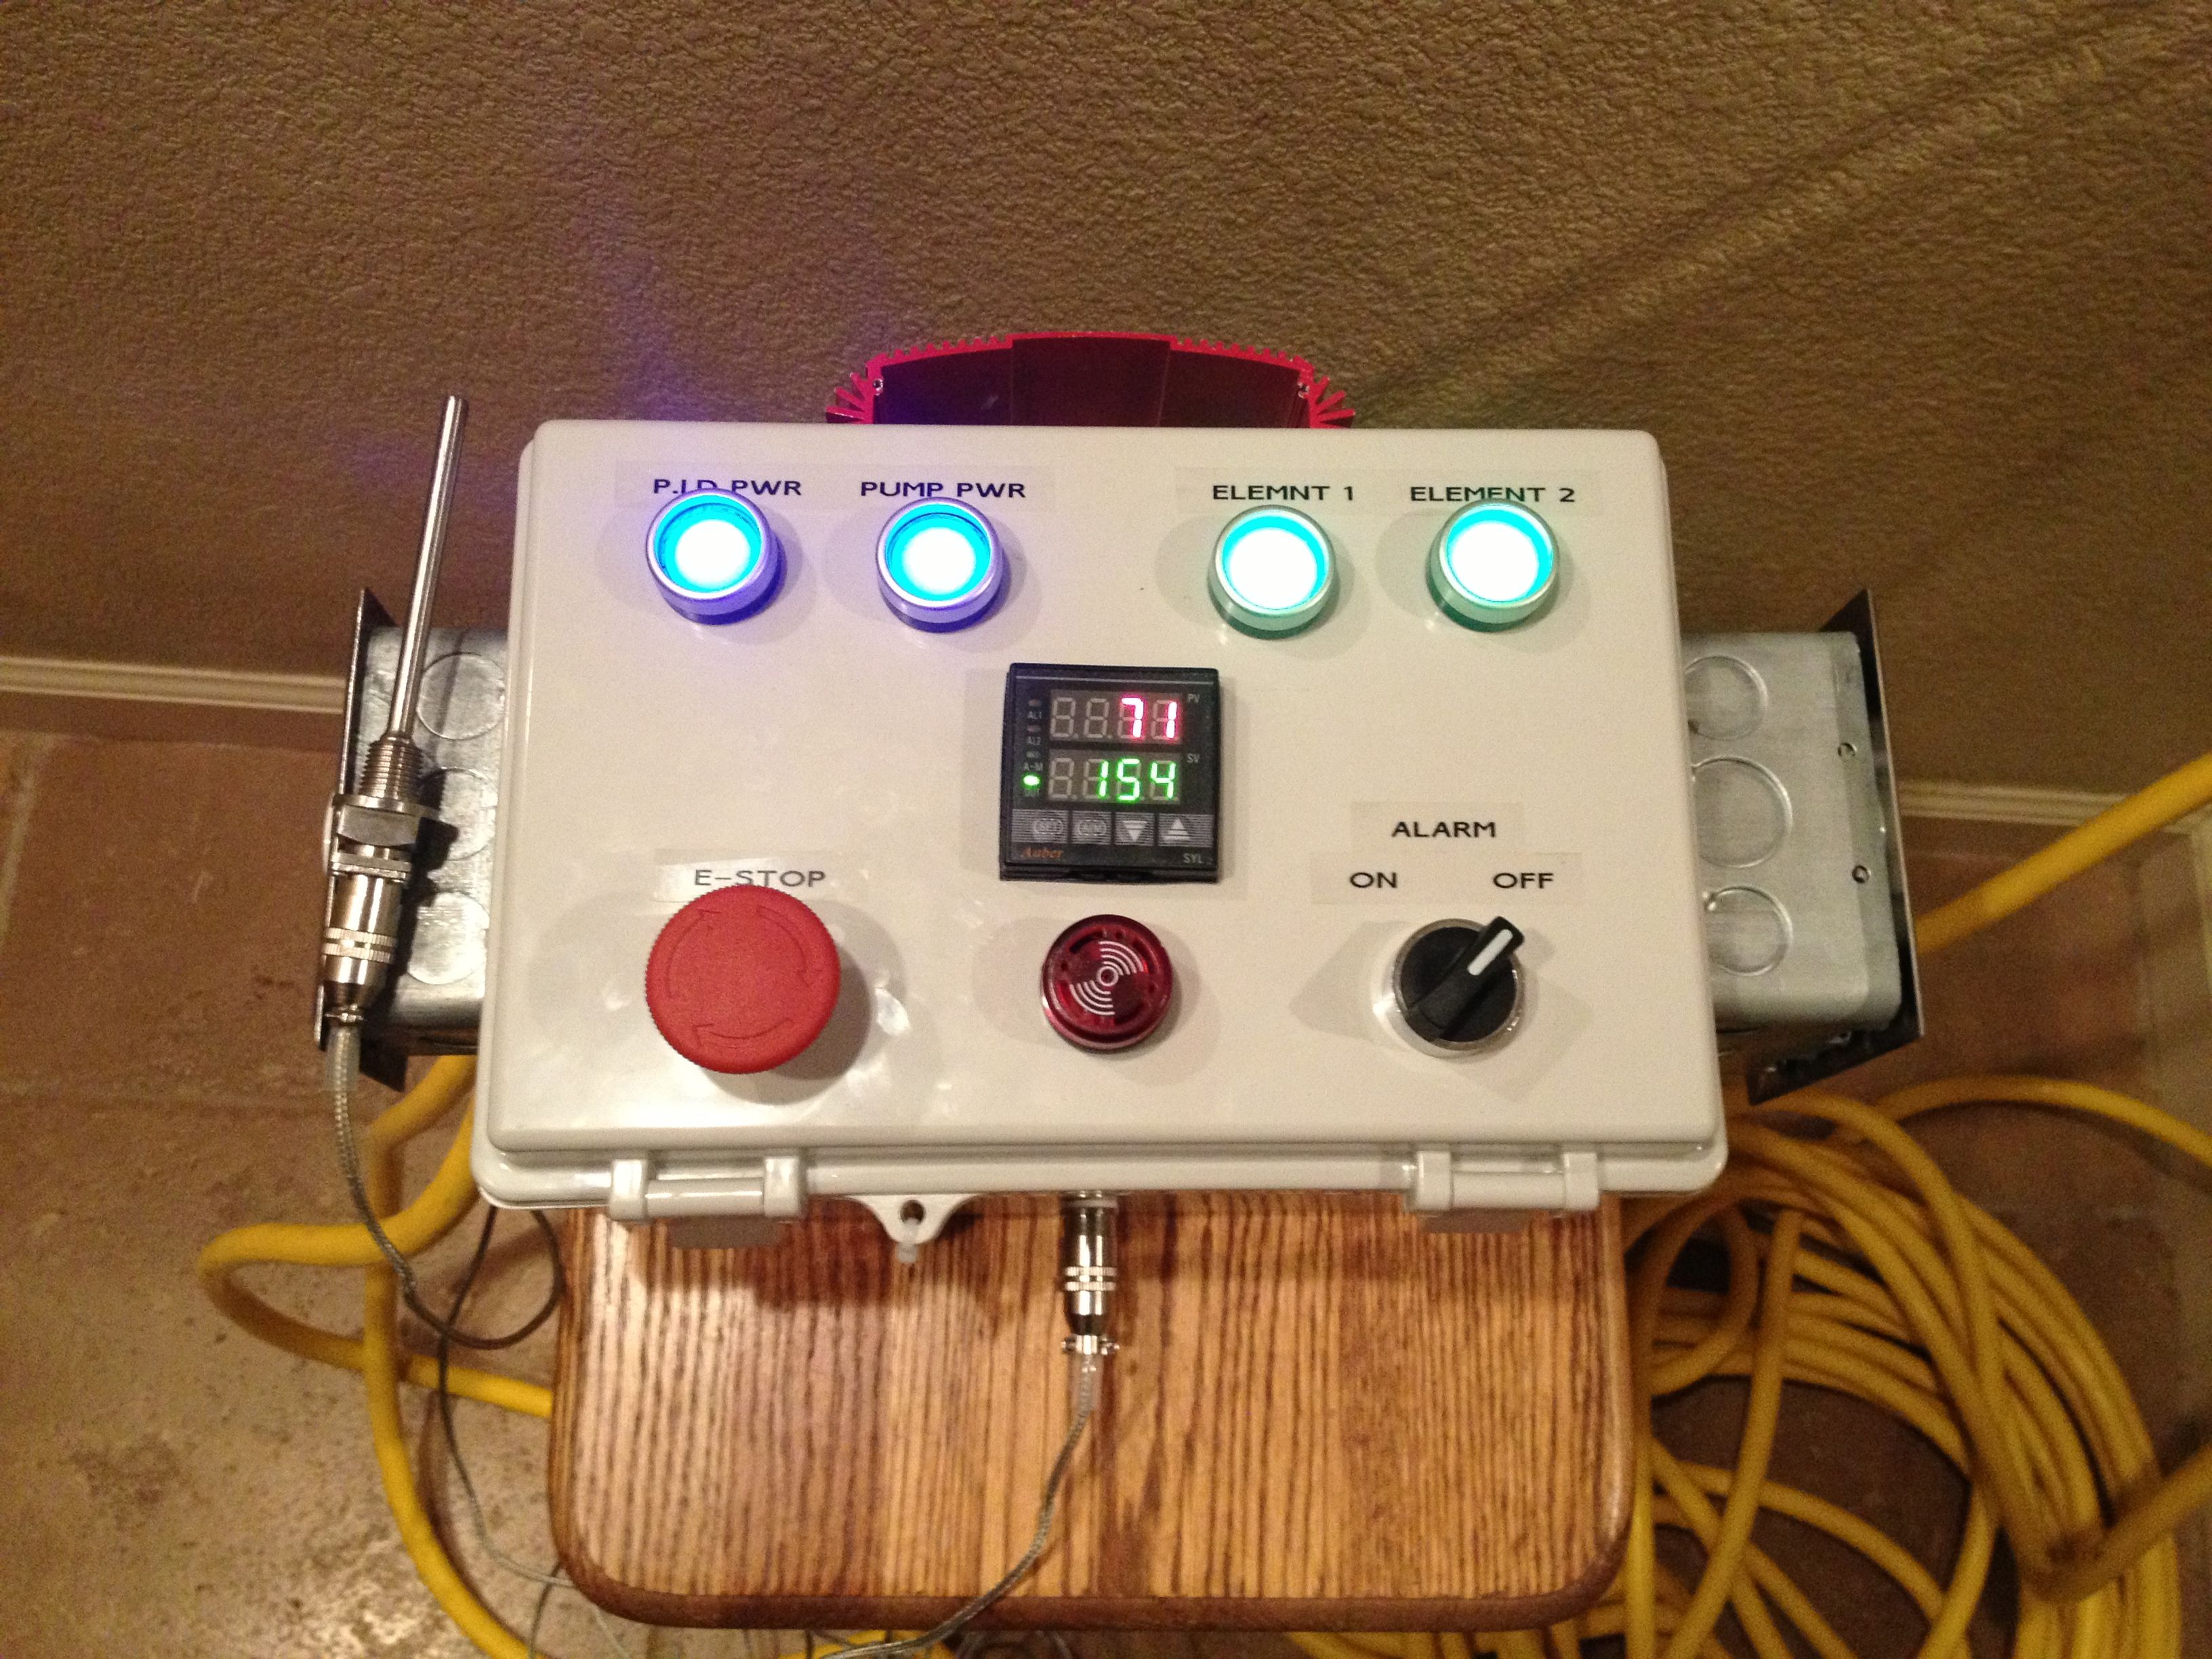
I won't show the wiring because it is really messy inside (its my first time wiring something like this). One of these days if I rebuild the control box or just want to clean the wiring up, ill tear it all out and make it look nice. I installed the RTD probe in the front of the box and got everything labeled. Here is what the finished control box looks like:
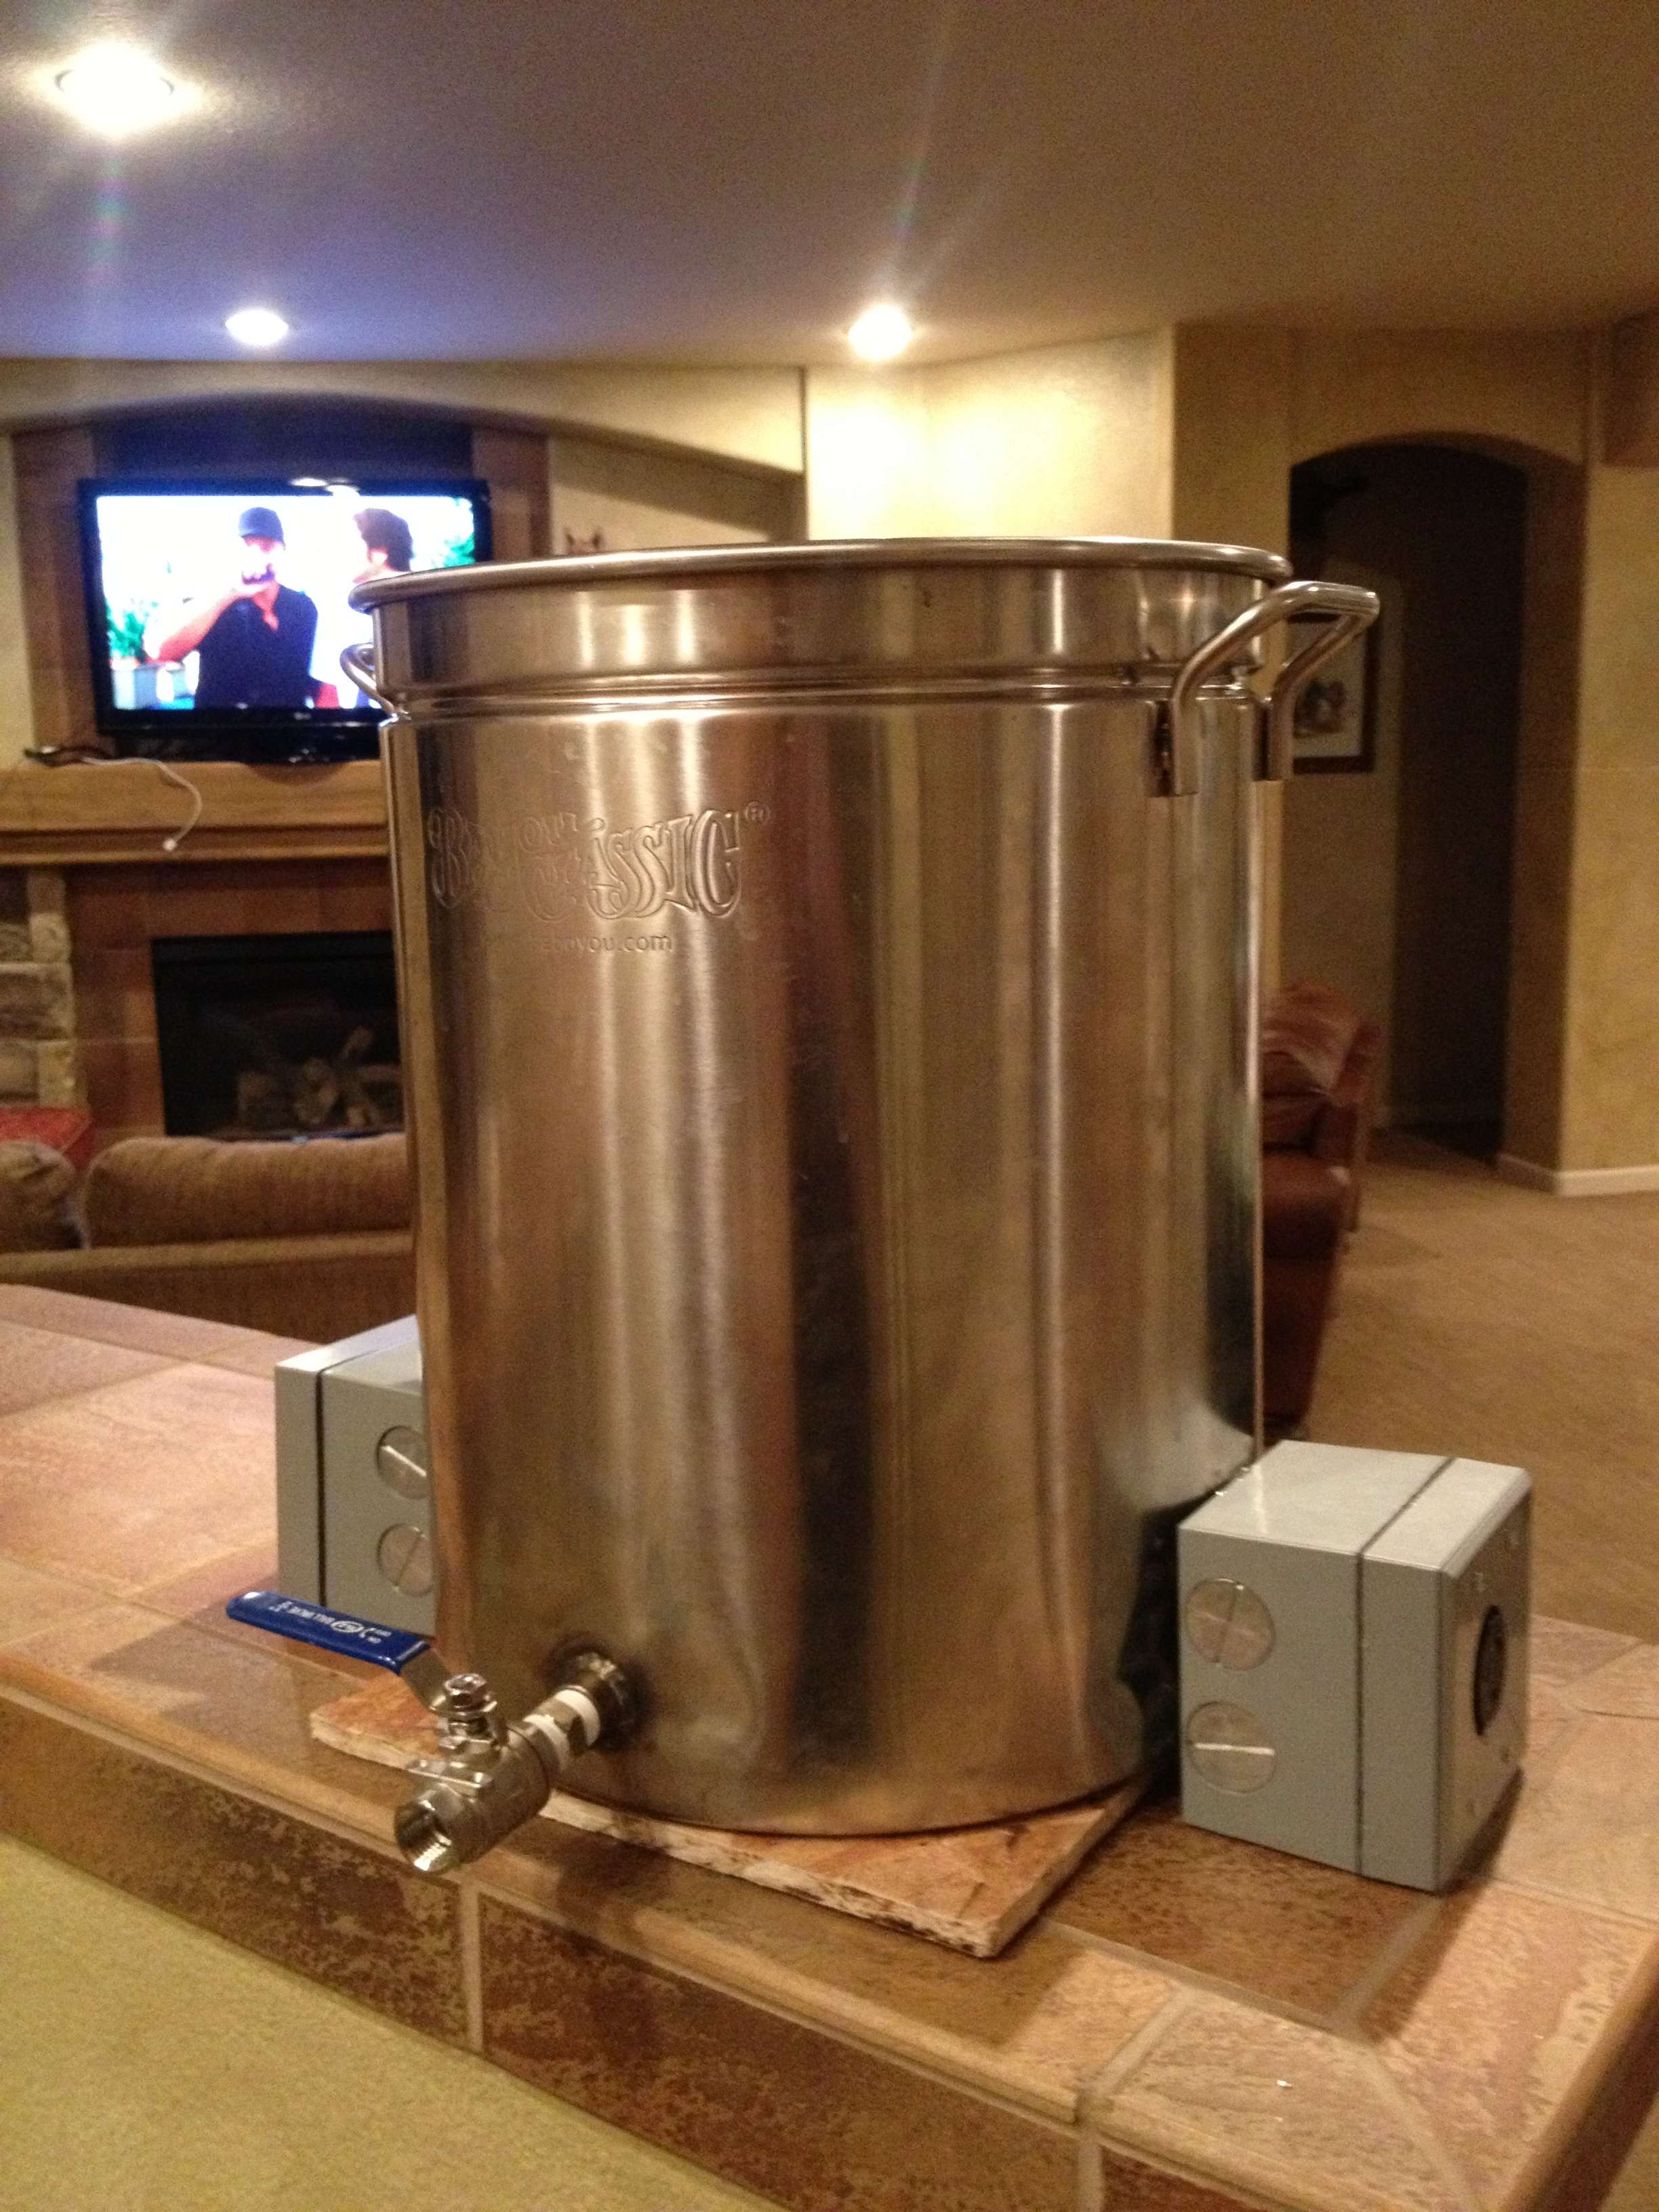
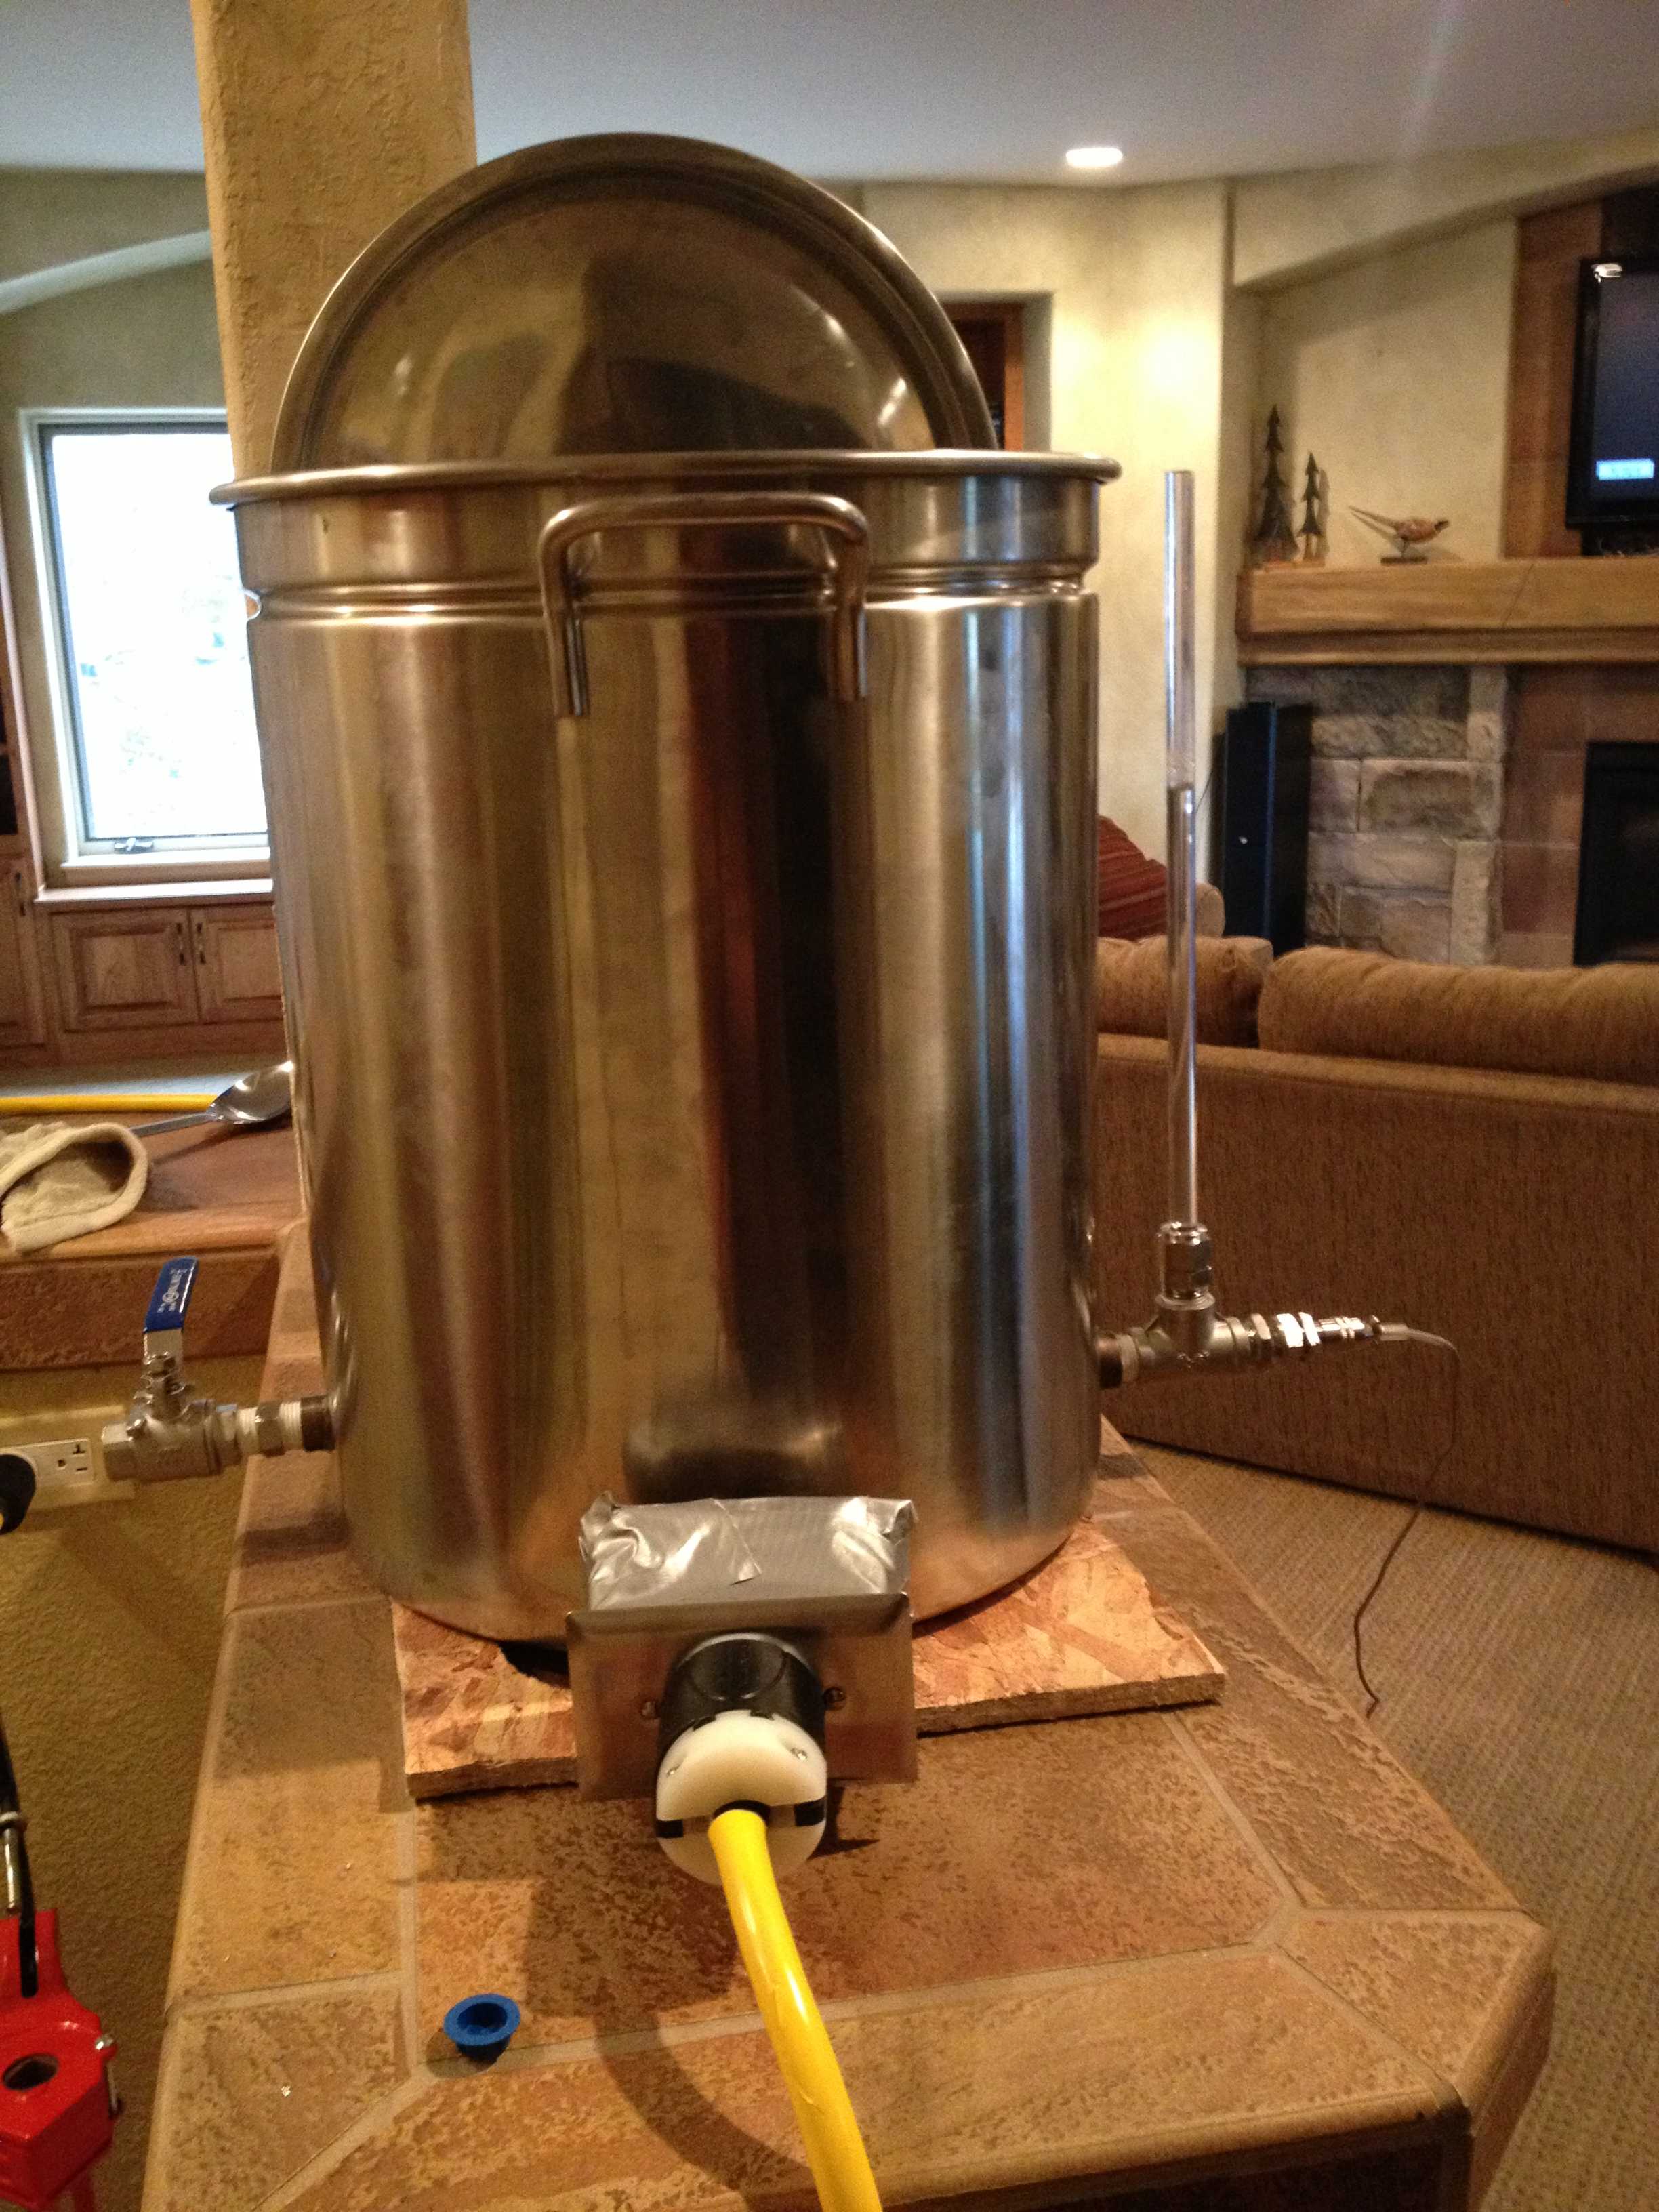
For my kettle, I bought a Stainless 44 qt Bayou Classic Fryer. It came with the frying basket and was on sale on Amazon. I drilled the holes in the bottom for all the couplers. I have a 1/2" coupler for the ball valve/dip tube, 1" half couplers for the elements, and a 1/2" half coupler for the sight glass/RTD probe. Here is a pic of my kettle, basket, sight glass, and couplers:

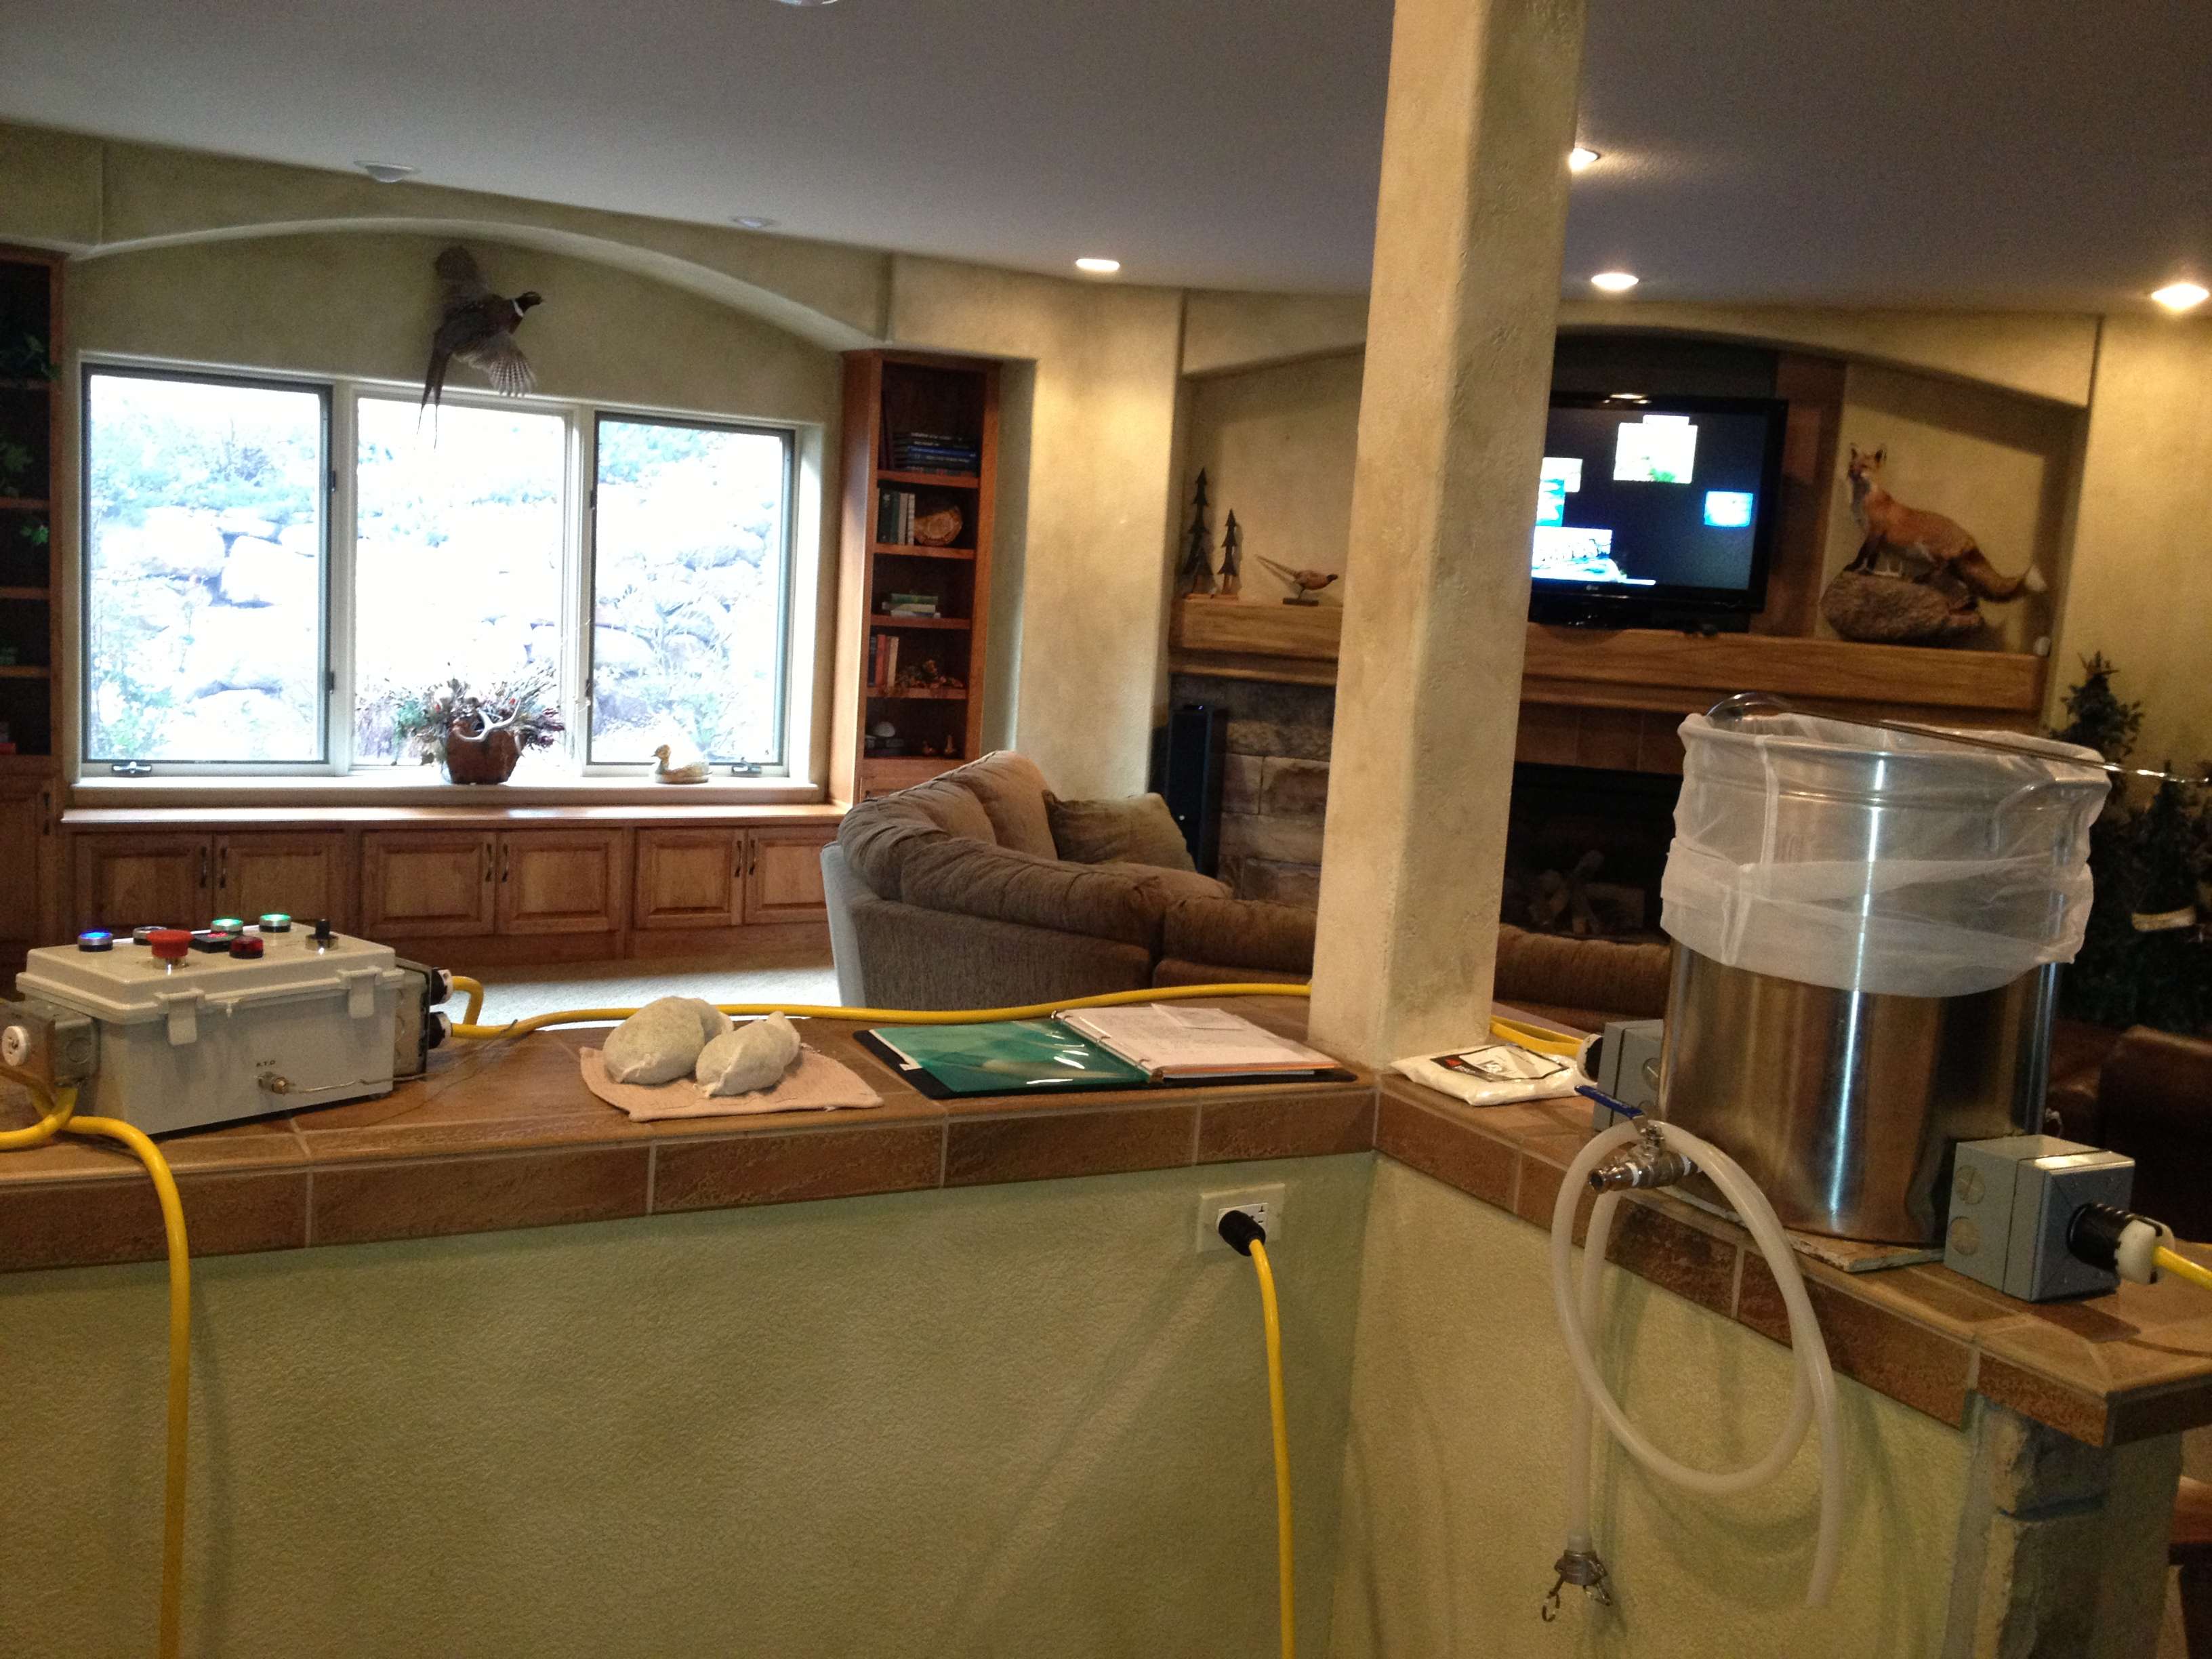
This is everything I have done right now. The couplers should be welded on by Friday. If all goes according to plan, I will have the kettle finished this weekend. I still need to figure out what the stand is going to look like. I need to either build something that can store everything or buy one. I also want to buy an extra lid and attach a copper or stainless immersion chiller to it w/ quick disconnects on top. Since I am only brewing 5-6 gal batches, I don't see the need for a counter flow/plate chiller.
Last December my grandpa randomly had the idea to go to our LHBS after we started talking about how he made wine "back in the day." Needless to say...the addiction began. Even though I don't post very often, I am on HBT quite a bit. I initially bought the Deluxe Starter kit from Brewers Best and got an 8 gal stainless kettle to go with it. I have only attempted to brew extract batches and have wanted to make the jump to all grain for a while now. At first I was looking at building a 3 vessel propane system, but I decided I wanted something slightly more compact. Since I am a college student, I need something that can be used in an apartment without the risk of getting evicted. Even though I love having lots of beer, I figured 5-6 gallon batches are the perfect size for me. After a lot of browsing through the electric brewing forums, I stumbled on Russkis build. Having read his thread, I figured I would give an eBIAB build a go. Due to school/Rugby/financial reasons I have slowly been working on building my system. I had no experience building anything like this when I started...but it has been a fun learning experience.
I am uploading the pictures with image shack and cant rotate some of them. As I update this thread ill try and fix that...
I decided to go with 120V because not all apartments will have a 240V outlet. I can also swap out the elements for something smaller if needed be. Here is the wiring diagram I used (thanks P-J):
I ordered most of my stuff from Auber Instruments (the PID is SYL 2352). I found the plastic box on Amazon. After a while of messing with the layout, this is what I came up with:
Here is what it looks like after I cut all the holes and put the switches, PID, and Buzzer in. I had gone to a party that night and decided 3am was a good time to cut all the holes. I had forgotten about what I had done the next morning, but I think it turned out well since I was relatively hammered.
Since the box didn't come with a back plate, I had to make my own. I bought a 1'x1' piece of metal sheeting from Home Depot and cut it to fit inside the box. The contactors I used were from Blazer and the SSR's are from Auber. I cannibalized an old DC to AC converter so I could attach the SSR's to a heat sink. Here is what the inside looks like with the hardware in it:
My next step was figuring out how I wanted all the cords to come in/leave the box. I walked around Home Depot for a while and decided to attach some metal outlet boxes on the side. The 2 gang box has two single 20A outlets for power to the kettle and the 1 gang box has another 20A outlet for the pump. After I attached the boxes, I wished I had put a 2 gang box on the left instead of just a 1 gang box for more space (the power cords come in on the left).
Here is a pic with the lid closed. The red part is the heat sink I cannibalized from the power converter. I went to every electric supply store I could find and no one had heat sinks in town...ill find out later if it gets too hot.
Since I wanted to be able to brew outside if its nice out, I picked up a 100' extension cord. I have two 40' sections that bring power into my system, and I made two 10' sections that will connect my control box to the kettle.
I won't show the wiring because it is really messy inside (its my first time wiring something like this). One of these days if I rebuild the control box or just want to clean the wiring up, ill tear it all out and make it look nice. I installed the RTD probe in the front of the box and got everything labeled. Here is what the finished control box looks like:
For my kettle, I bought a Stainless 44 qt Bayou Classic Fryer. It came with the frying basket and was on sale on Amazon. I drilled the holes in the bottom for all the couplers. I have a 1/2" coupler for the ball valve/dip tube, 1" half couplers for the elements, and a 1/2" half coupler for the sight glass/RTD probe. Here is a pic of my kettle, basket, sight glass, and couplers:
This is everything I have done right now. The couplers should be welded on by Friday. If all goes according to plan, I will have the kettle finished this weekend. I still need to figure out what the stand is going to look like. I need to either build something that can store everything or buy one. I also want to buy an extra lid and attach a copper or stainless immersion chiller to it w/ quick disconnects on top. Since I am only brewing 5-6 gal batches, I don't see the need for a counter flow/plate chiller.