Brewed this IPA a few weeks ago.
I really like this juicy, piney, dank beer.
Dat Hop schedule!


Brewed this IPA a few weeks ago.
I really like this juicy, piney, dank beer.
This was a reply to someone looking for the colander I use.
Here is the sterile syphon starter if that's what you are seeking.
Let me know if there is something else you are looking for? I'd be happy to post a different link if you are looking for anything in particular that I showed in the thread.
Wow, this looks 10 times easier for sanitization and use than my auto siphon. If my LHBS has one, I'm getting it. Then I'll use my racking cane for a sparge wand, since I was dumb enough to buy O2 sparge system without the wand....as soon as I hit the regulator, the stone comes to the top. Duh!
Gavin, really appreciate your approach, it has helped me immensely getting set up for BIAB, since I have similar kitchen, taste in beer, and love of process control.
2 questions:
1. Surprised you have the pickup elbow set up like you do in the kettle....while it helps yields, don't you send a lot of trub/cold break to the fermenter that way, or has your experience been it has no impact on flavor getting in the fermenter?
2. Curious if you (or others) see a huge benefit of recirc plate chiller vs just sticking with my immersion chiller. It's 1/2" x 25 ft, gets the job done in about 20 minutes when combined with ice bath, but next batch I'm trying to avoid moving the hot pot off the stove, so I'm expecting longer cool time...and I don't like wasting water. (Rain barrel almost full from last 3 batches, and winter just starting). Did you start out with plate and pump from beginning? I tend to agree with your approach to avoid recirc during mash, seems too troublesome....


...
2. Curious if you (or others) see a huge benefit of recirc plate chiller vs just sticking with my immersion chiller. It's 1/2" x 25 ft, gets the job done in about
 (I threw it out with the spent grain after saving enough for dog cookies) But even with a new bag, without doing a Vorlauf, a lot of malt dust gets through. It wouldn't be so bad except it doesn't compact very well at the end of fermentation, and I feel like I'm losing a lot of beer because of it.
I've skimmed over the whole thread (I loved the first 30 or so posts); maybe this was answered and I missed it.
I've been doing BIAB for a couple of years (not all that many brew sessions cuz I don't get to brew very often) The biggest problem I'm having is the amount of draff that makes it into the fermenter. Part of the problem this weekend was my bag had holes in it
How long do you leave the beer in the fermenter. Mine usually settles pretty well but I leave my beer for 3 to 4 weeks before bottling.
Hey Tommy
Thanks for the kind words. I'm glad you're able to get some use from the thread.
Here is a rough out of the mash profile. Essentially a single infusion at 149°F with a gradual loss of heat from the mash over time.
Overnight Mash Profile
View attachment 382397
When I got up from bed in the morning I removed the insulation, fired up the stove, stirred it well and pulled the bag.
I did not do a mash out on the overnight mash.
I insulated the pot with reflectix in my usual manner.

Gavin, this overnight mash has my interest. ..... Will you continue to do this on a regular basis? ....
Gavin, I recognized your pics in the Zymurgy article from this month's issue. Congrats-nice write up! Thanks also for sharing your expertise in this thread, too. I started doing Biab last year from your examples. I love the way you document your processes- really helpful for understanding what you are doing. Cheers!
Just a follow up to your question...Will you continue to do this on a regular basis? ...


..
How are you insulating your kettle during the mash (what materials)? ..... what is your typical temp drop in a 90 min mash?


Thanks Gavin. I left the message before heading to my LHBS this morning to pickup the recipe for the next brew, so I hadn't seen your response. On the outside chance that what I thought was Reflectix I picked up a roll & that was confirmed when I got home & saw your response. Did you tape the insulation on the lid to the lid?
Gavin,
I'm looking to update my brewing setup ..
Just a follow up to your question.
____________________________
Hibiscus Saison
I carried out an overnight mash for this morning's brew. The plan is a dry finish on this beer so one could argue there is minimal downside to a prolonged mash.
- A saison.
- ~8hour mash duration.
- 77% Mash efficiency.
- 74% BH efficiency
Grain-Bill
View attachment 384587
Dough-In
Full volume no-sparge. Single infusion at 151°F
Insulation placed
A temperature measurement 8 hours later. (Mash stirred before reading was taken to eliminate any thermal stratification.)
OG 1.068
View attachment 384589
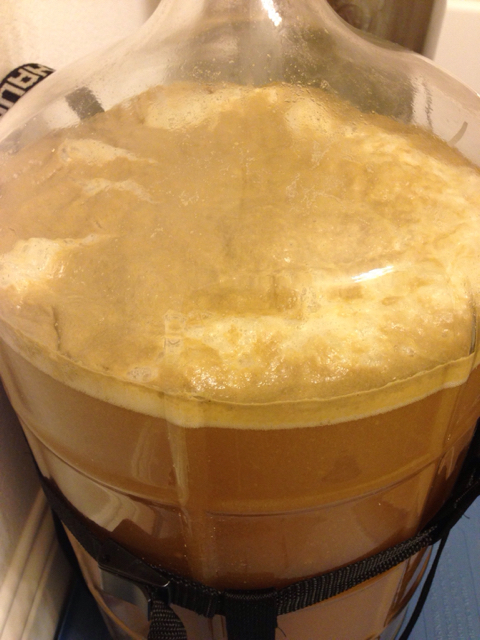
~12 hours after pitching Belle Saison (no temperature control)
_____________________
6 Days later dry hops & Hibiscus Tea added to FV
14oz Hibiscus Flowers and 96oz of water (chloramines removed) ~2L of tea final volume.


View attachment 385399
View attachment 385400
View attachment 385401
12 days of fermentation. FG is reached.
View attachment 386429
My setup as illustrated sort of evolved over a series of brews at the outset of the hobby. Improving the setup to solve various problems I identified as I learned.
I would advise against a pot smaller than 10 gallons (mine is 11 but called 10)
I stopped using a prechiller after a few summer brews. Didn't bother this summer and simply accept the need for more coolig the the fermentation chamber before a cold pitch. It did work but I didn't see much need after experimenting with one.
I would not bother with a thermometer on the pot. It's redundant and gets in the way during lautering. A good instand read thermometer is a much better investment.
I'm happy with the chugger pump. I regulate the flow with a valve on the out port. Anything from a trickle to full bore is doable.
Plate chillers get a bad rep but I like mine and how it fits my stove-top counter-top setup. No problems cleaning it after a brew.
An IC might be easier but I like not having to trail a garden hose in from outside to get the flow rate I would want. If going the IC route I would go big.
I might install a better dip tube at some point but that's minimally important. The dip-tube I cobbled together works well.
I really like having a whirlpool arm. There are neater ways to install one that I would chose if doing it again but I just wanted to repurpose the hole in the pot from the dial thermometer I removed.
Hope that ramble is of some use. Let me know if there are any other bits and pieces you want outlined in more detail. I'm happy to share what little experience I have. If it's of use, all the better.
Cheers NTex. (You entering BBBO this year? I'll hopefully be there for 1 of the days)
Would it be an increase of efficiency this route?.
Thanks
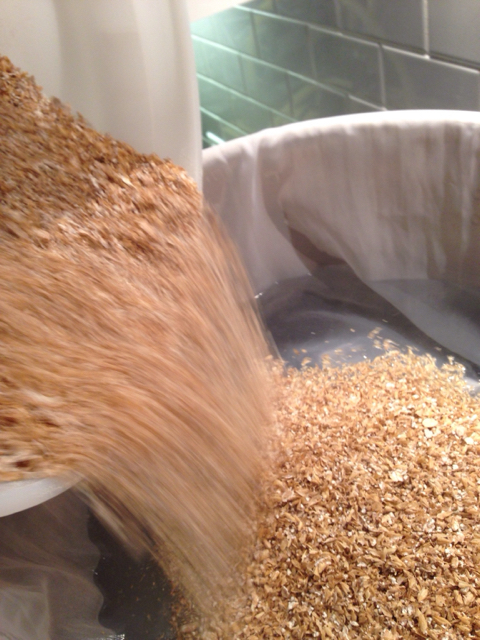
Isn't grain conditioning incredible!?!?
It has no impact on efficiency. (I suppose in theory if you're losing less stuff to dust it will have a negligible positive impact but it would not be measurable on this scale)
Yes. It really makes a difference to the grist's appearance.
Given what I saw, I'm surprised it's not considered the norm for folks using a conventional mash-tun where intact husks are going to be to the brewer's benefit.
I've been meaning to give it a try for ages. I really liked the absence of dust and the light fluffy grist that resulted.
I am probably going to be the only person to disagree. I started grain conditioning about a year or so ago and loved it at first too. For some reason my efficiency suffered though. I was missing my target OG by 2-3 points every time. Last week I decided to try it without doing that again and hit my numbers spot on for both brew sessions. Nothing else in my process changed.
My only thought is that when comparing the crush, the conditioned grains seem more intact and the inside of the grain less split open/exposed.
I suppose I should have qualified my assertion WRT the lack of effect on efficiency being based on just theory.
Obviously with me having just 1 personal data point I could neither back up or refute any claim on efficiency with any weight. Seems your bigger data set should give your opinion given greater credence than mine.
I'll continue to condition my grain for the foreseeable future and see how my numbers trend. I'm a bit of a dataphile so always value these sort of insights. Thanks mate.
My stove won't bring my 8 gallon pot to a boil. It has trouble with a 22 quart canner if I have more than 3.5 gallons in it. I'm thinking seriously about getting a brewhardware.com "hot rod" to supplement the heat. It's kind of pricey, but it looks like it will last forever, and cheap immersion heaters don't.
Do you think 875W is enough heat to make a difference? (they are out of 1500W elements, and I have a 3500W 240V element already) I'd really like to use my larger kettle. Worst case is I can try it and it's not enough, then buy a larger element later.
@Gavin, are you double crushing your grain after you condition? What gap are you using?
While the 875w element may get you to boil, heating times would be much quicker with a 2000w element, assuming you have a 20 amp circuit in your kitchen. Since you already have the 3500/4 or 875w element give it a try.
With the larger element, you would just run the element at 100% and use the stove dial to control the boil.
Enter your email address to join:
