HOWTO - Make a BrewPi Fermentation Controller For Cheap

Homebrew Talk - Beer, Wine, Mead, & Cider Brewing Discussion Forum

Help Support Homebrew Talk - Beer, Wine, Mead, & Cider Brewing Discussion Forum:

This site may earn a commission from merchant affiliate links, including eBay, Amazon, and others.
Status
Not open for further replies.
185 Fahrenheit represents an error condition (same as 85 Celsius). So, probably the software could not get a valid temperature reading initially. If it happens a lot check your wiring.

The 1-wire temperature sensors are factory calibrated and will be within 0.5 Celsius of the actual temperature. They can't be calibrated further, but you can adjust the value in software by adding or subtracting an offset after the sensor has been read. It's generally not necessary however.
 
That shouldn't happen, ever. 85 (C) / 185 (F) is an error code.

fwiw, there is a calibration routine - you can find my write-up here - but that's to "tweak" a probe.
What you're seeing is a malfunction.

If you got DS18B20-PAR probes that would explain what you're seeing. Those are wired for parasitic operation and they don't play well with BrewPi...

Cheers!
 
Clarification, please: how many sensors are you now running, and how many of the sensors are the new ones?
And which ones are reporting 85°C?

Cheers!

At the moment 4, but its just for testing the
plan is to use 3, one for room temp, one in the glycol and one in the cct.


85 deg is the temperature you get from the sensor when there is some kind of error. Chase the BrewPi guys - it sounds like there may be a power issue.

All the sensors have independent 5v suply so the te arduino has some juice for him self
 
If you got DS18B20-PAR probes that would explain what you're seeing. Those are wired for parasitic operation and they don't play well with BrewPi...

All the sensors have independent 5v suply so the te arduino has some juice for him self

Just to reiterate - if you got the parasitic mode sensors, that may be the issue. The problem you have is with the sensors themselves. They're powered and responding to your BrewPi, but are sending back an error code.

Since they're temperature sensors, one way they do that is by reading back an invalid temperature - for DS18B20 sensors that's defined by the manufacturer as 85deg C.
 
That shouldn't happen, ever. 85 (C) / 185 (F) is an error code.

fwiw, there is a calibration routine - you can find my write-up here - but that's to "tweak" a probe.
What you're seeing is a malfunction.

If you got DS18B20-PAR probes that would explain what you're seeing. Those are wired for parasitic operation and they don't play well with BrewPi...

Cheers!

Thanks for the quick responses!

Here's what I purchased and it appears in the comments that it is setup for parasitic mode, great... could anyone recommend a vendor where I can for sure get the correct probe? I'm having trouble opening the ebay link that was posted.
 
Last edited by a moderator:
Thanks for the quick responses!

Here's what I purchased and it appears in the comments that it is setup for parasitic mode, great, could anyone recommend a vendor where I can for sure get the correct probe?

I've had pretty good luck with these on Amazon -- but they'll require some work on your part as they come with nothing attached to the "wire" end.
 
Last edited by a moderator:
....And which ones are failing? Just the new ones, or all of them?

Cheers! (I'll drag this info out of you eventually: ;))
 
....And which ones are failing? Just the new ones, or all of them?

Cheers! (I'll drag this info out of you eventually: ;))

The new ones, ive taken them out and now it works just fine withe old ones, i'm thinking off leaving it this way for now, i micht try to figure it out later cauls i just want the thing to work so i can fine tune it so i can brew a new batch of beer

I just cant get my head around the whole software or pc code thats needed to gzt the damn thing working
Butt none the less thanks for all the info, i'post a picture of the set up later on the day.
 
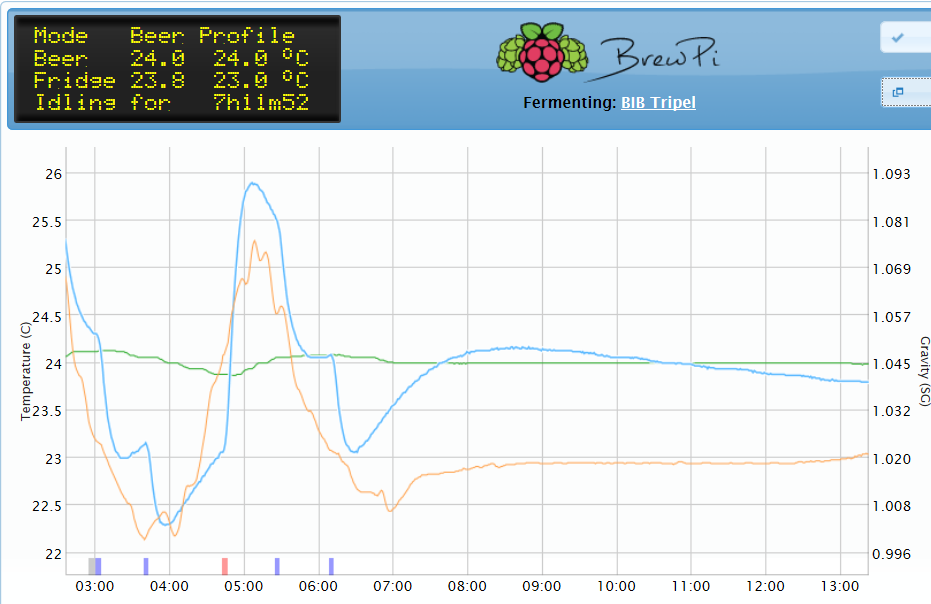
Maybe a bit? But not really, the fridge temperature more or less follows the fridge setting(which is where BrewPi wants to be), maybe overshooting by 1 degree or so but that doesnt really matter because your temps are staying pretty stable.

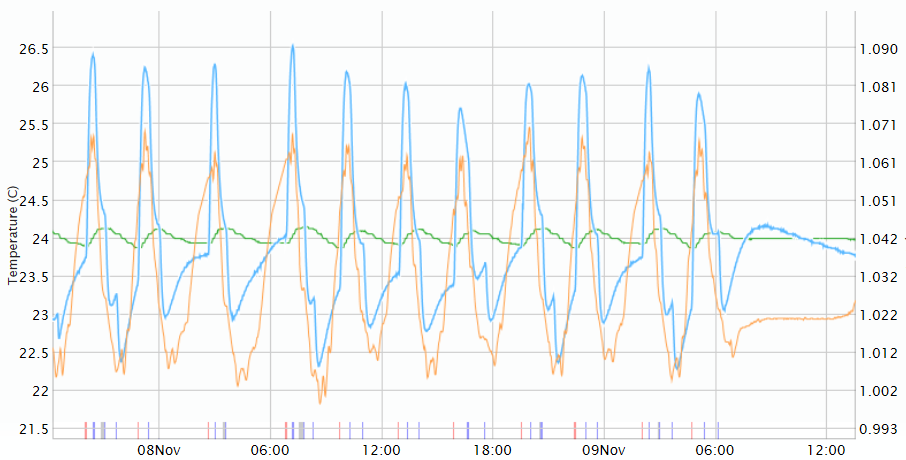
The thing I don't understand is why the brewpi does not correct for this overshoot. It's heating for 8 minutes, resulting in an overshoot of more than 1 degree (fridge temperature). On other parts in the graph, it's only heating for 4 minutes, with no overshoot (but that's 1 out of 10 peaks that I have in the graph).

The beer temperature peaks are about 0.12 degrees up and down from the setpoint. Where when only cooling is necessary (for example at the beginning of the fermentation where heat is produced by the beer), these peaks are smaller than 0.05 degrees.
 
The new ones, ive taken them out and now it works just fine withe old ones, i'm thinking off leaving it this way for now, i micht try to figure it out later cauls i just want the thing to work so i can fine tune it so i can brew a new batch of beer

I just cant get my head around the whole software or pc code thats needed to gzt the damn thing working
Butt none the less thanks for all the info, i'post a picture of the set up later on the day.

I would not discount the possibility that the BrewPi store errantly sold you parasitic sensors, but first you should make sure they are wired correctly. There are probes with confusing wiring colors...

Cheers!
 
The thing I don't understand is why the brewpi does not correct for this overshoot. It's heating for 8 minutes, resulting in an overshoot of more than 1 degree (fridge temperature). On other parts in the graph, it's only heating for 4 minutes, with no overshoot (but that's 1 out of 10 peaks that I have in the graph).

The beer temperature peaks are about 0.12 degrees up and down from the setpoint. Where when only cooling is necessary (for example at the beginning of the fermentation where heat is produced by the beer), these peaks are smaller than 0.05 degrees.
I don't see it as an overshoot to a degree (pun not intended) worthy of any worry. You are wanting a steady beer temp. If you are +-0.10 degrees that's pretty darned good.

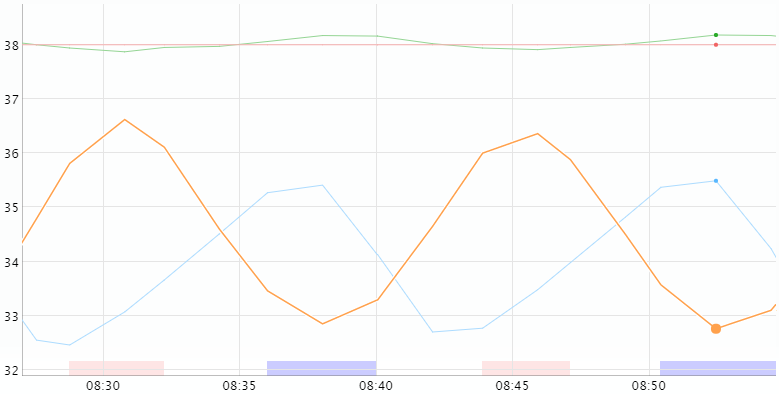
Maybe it will steady out, maybe you could tune it, but I don't see a reason to do so. Here's a zoom of mine cycling. It's actually calling for heat and then dropping off before it gets a chance to do so with some pretty wide swings. Do I care about those swings? Not at all since I am +-0.10 degrees.

Capture.PNG
 
The thing that bothers me is the fact that the heating is followed by 2 cooling cycles each time. This tells me that he is countering his own "mistake" of heating it too much, something often seen with simple TC controllers. In this case I would expect it to heat it and then let it cool down on its own before heating again, not cooling it down with the fridge to counter his own heating cycle..
 
The thing that bothers me is the fact that the heating is followed by 2 cooling cycles each time. This tells me that he is countering his own "mistake" of heating it too much, something often seen with simple TC controllers. In this case I would expect it to heat it and then let it cool down on its own before heating again, not cooling it down with the fridge to counter his own heating cycle..

You may have mentioned it, but what is your heating appliance? It appears (to me) that it is too powerful. Also, I might guess that you are using a heat wrap, or something that is attached directly to the vessel. I believe the algorithms work best when the temperature is adjusted by cooling/heating the air within the chamber.
 
Heat wraps work just fine. it's all about probe placement, the pid will figure out the rest
 
Sorry, I'm not trying to infer that it does or doesn't work. I'm only asking the question. He's not happy with his overshoot. So, maybe probe placement is the help he needs. I don't use a heat wrap, so maybe someone that does, can help. If indeed that is the heater he is using. (Since I don't know, for sure)

ETA: But when I use the Lasko MyHeat in my fridge, it results in a similar pattern. Which I believe is a result of the heater being too powerful for the size of chamber I've got.
 
Just wanted to chime in with my first ever post and thank everyone that has contributed to this thread over the years. I was able to get a working setup going just by following the guide and reading/searching the thread when I ran into any hurdles.

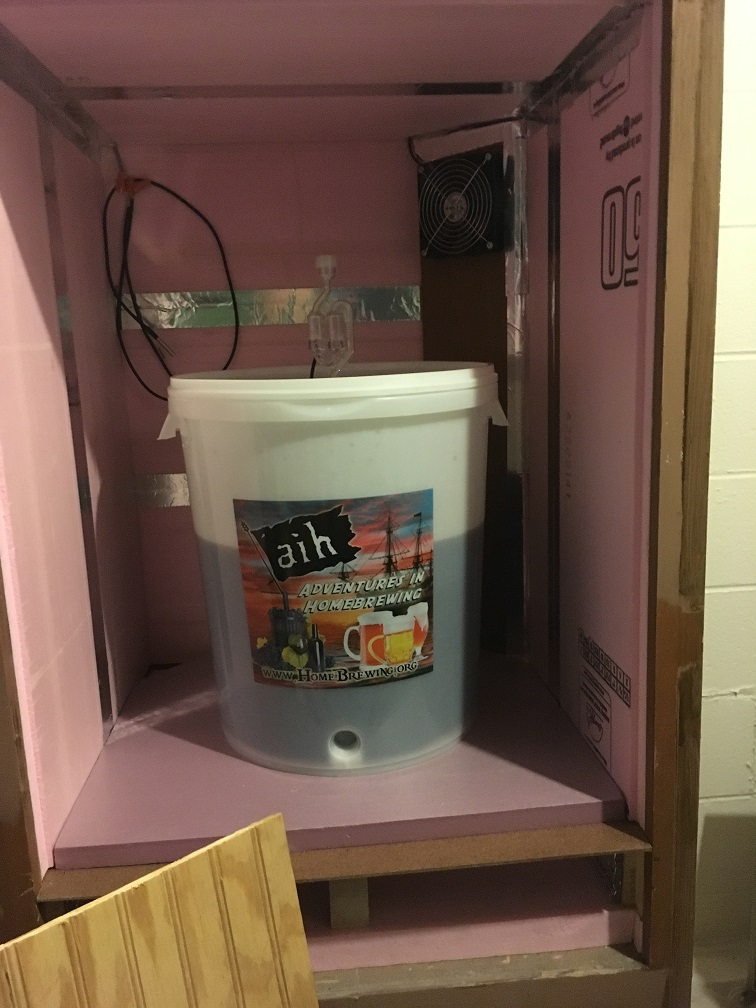
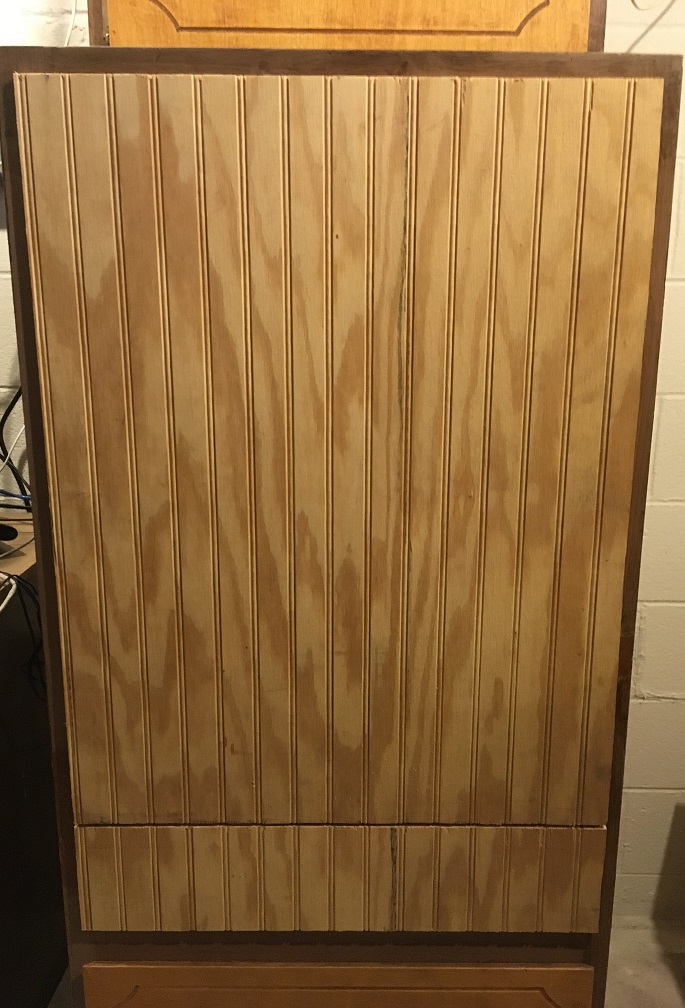
It also compelled me to convert an old cabinet that I saved several years ago when remodeling the kitchen that originally held a wall oven into a modified Son of a Fermentation chamber. The opening for the oven was the perfect size. I've attached a couple of pictures.

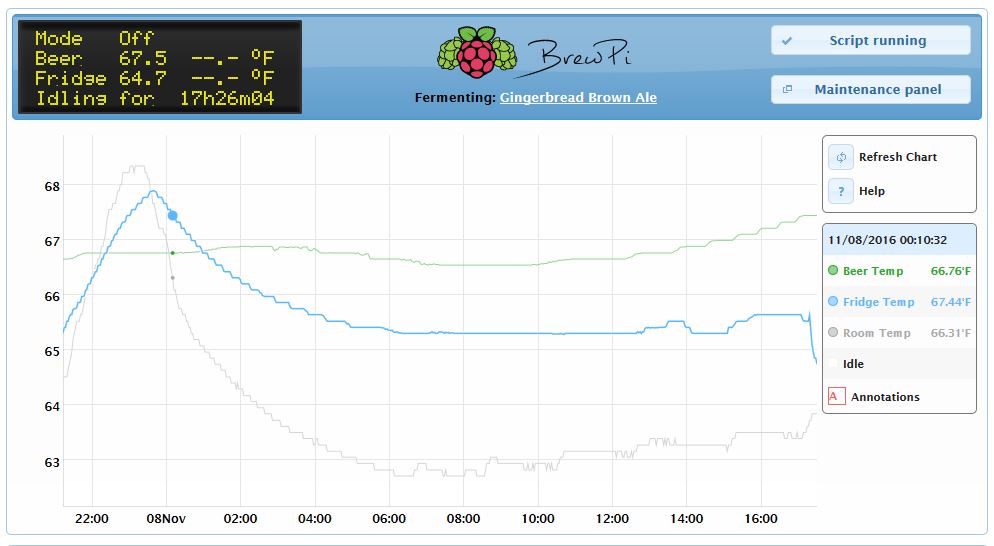
I brewed a Gingerbread Brown Ale last night and have it in the chamber. The BrewPi is only recording temps at the moment.

Thanks again! Hopefully I can contribute to the forum in the future.

fc1.JPG


fc2.JPG


fc3.JPG


fc4.JPG
 
You may have mentioned it, but what is your heating appliance? It appears (to me) that it is too powerful. Also, I might guess that you are using a heat wrap, or something that is attached directly to the vessel. I believe the algorithms work best when the temperature is adjusted by cooling/heating the air within the chamber.

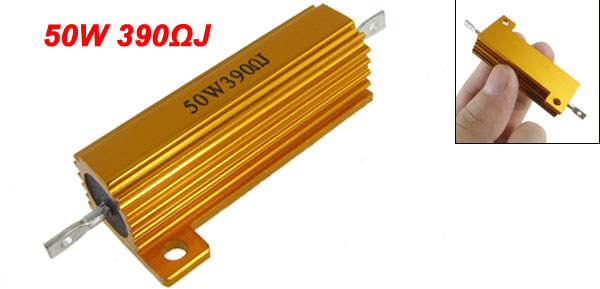
I'm using 2 50 watt resistors that are mounted on a panel under the CCT (see photo). Next to these elements, 2 fans are mounted, one pointing up, the other pointing down (in order to force a flow of air going around). The probe is mounted on the sidewall somewhere half way up.

Today I noticed that all of a sudden the graph stabilized (its had peaks of cooling and heating for the past few days and now all of a sudden it stopped). I checked the log file and the PID values were not updated.

IMG_8300.jpg


IMG_8315.jpg


brewpi log.png


brewpi log2.png


maintenance panel.png
 
I'm using 2 50 watt resistors that are mounted on a panel under the CCT (see photo). Next to these elements, 2 fans are mounted, one pointing up, the other pointing down (in order to force a flow of air going around). The probe is mounted on the sidewall somewhere half way up.


Today I noticed that all of a sudden the graph stabilized (its had peaks of cooling and heating for the past few days and now all of a sudden it stopped). I checked the log file and the PID values were not updated.


Ummm I want to know more about that panel in the bottom I like the way it looks.
 
That's a sweet setup. fwiw I use a single 25w heater for my setup and it's got plenty of heat for 25l wort. I started with 200 w but kept dialling it down. I would try disconnecting one of your 50 w banks and also get the probe in free air further up the chamber.
I find that the temp control is very tight when active fermentation is happening and the wort is churning and widens slightly as the ferment slows and the liquid stagnates. Much like fuzzes first post.
 
Sorry, I'm not trying to infer that it does or doesn't work. I'm only asking the question. He's not happy with his overshoot. So, maybe probe placement is the help he needs. I don't use a heat wrap, so maybe someone that does, can help. If indeed that is the heater he is using. (Since I don't know, for sure)

ETA: But when I use the Lasko MyHeat in my fridge, it results in a similar pattern. Which I believe is a result of the heater being too powerful for the size of chamber I've got.


What I find that works best, (I use carboys in a fridge. with heat wrap) is to put the beer probe in a thermowell inside the liquid and then put the fridge probe under the heatwrap (reptile tape) against the side of the carboy. No insulation on the outside of my carboys just the reptile tape. this allows the probe to sense the changes in temperature almost instantly inside the fridge and from the reptile tape.
 
Sweet looking setup! I guess I really didn't know what you meant by CCT Panel and resistors. But now I don't know why your seeing the overshoot. But it looks like it may have calmed down.
 
Could someone kindly explain why the BrewPi uses both a PID algorithm for the fridge setting and a "predictive on/off" algorithm to stop heating/cooling before hitting the target fridge temperature? I don't get why both are necessary :)
 
Could someone kindly explain why the BrewPi uses both a PID algorithm for the fridge setting and a "predictive on/off" algorithm to stop heating/cooling before hitting the target fridge temperature? I don't get why both are necessary :)

I think in this case it's the same thing. The new version of the controller firmware explicitly labels it as PID while the older version basically implemented PID and called it "predictive on-off" (and displayed it as such)
 
Sweet looking setup! I guess I really didn't know what you meant by CCT Panel and resistors. But now I don't know why your seeing the overshoot. But it looks like it may have calmed down.

It calmed down for 1 cycle, now it's back to the heating - cooling cycling again.. There are 2 things I could try, 1 is to put the fridge probe under the plate (in the zone where the resistors are). So It will feel the heat much quicker. See what that would do (off course the PIDs will need to calibrate themselves again).

If that does not work, I will connect the resistors in series or just use 1.

I will do this testwork after this beer is ready, no need to start messing in there right now. I'm planning to start cold crashing in a few days anyway
 
So i'm looking at making a PI/Arduino Bridge that includes all additional components to make a brew work without a million wires.... any and all input would be great. the idea is that this thing would create a solid bridge between pi and arduino and bypassing the need for a usb cable... making it a smaller footprint. I know cadibrewer's design is more refined but i am hoping for some input to head in that direction. It also has a secondary connector to retain all pi GPIO.

Screen Shot 2016-11-11 at 1.56.15 PM.png
 
[edit] Had a hard time seeing how that mechanically connects to an RPi and an Uno.
Aside from not supporting the ISP header on the Uno I guess it'd work.

That said, you're missing all the decoupling capacitors...and the Bluetooth/Wifi header...

Cheers!
 
Bluetooth and wifi are both on the pi already, I thought perhaps they would be redundant but I might not be visualizing it properly. I can understand in your integration where you are not using a pi at each "minion" (as I understand your setup). There is connection between the UART pins on the pi and pins 0,1 (rx,tx) on the arduino. If that's confusing I can understand but was merely trying to communicate between arduino and pi via pins instead of USB.
 
You're right, there's no need for wireless link between the two :smack:
Still want to put some .1uF/10V caps at the power pins and the shift register...

Bluetooth and wifi are both on the pi already, I thought perhaps they would be redundant but I might not be visualizing it properly. I can understand in your integration where you are not using a pi at each "minion" (as I understand your setup). There is connection between the UART pins on the pi and pins 0,1 (rx,tx) on the arduino. If that's confusing I can understand but was merely trying to communicate between arduino and pi via pins instead of USB.
 
I guess that's what I'm asking for help on would be most effective places to put as in, pin specific assignment.
 
Definitely want one at the shift register VCC pin to the closest GND net.
Then, at each point that power is entering or leaving the bridge.

btw, you aren't thinking of tying the Pi 5V to the Uno 5V are you?
I would not...

Cheers!
 
I was thinking of going pi 5v to duino Vin... or maybe just using an mp1584en and powering both as well as 5v net
 
I was thinking of going pi 5v to duino Vin... or maybe just using an mp1584en and powering both as well as 5v net

You definitely don't want to go from 'Pi 5V to Uno VIN. Arduino VIN is on the "wall-wart side" of the Uno's 5V linear regulator (ie: what would usually be a 9-12VDC external power supply).

If you're determined to run the Uno with the 'Pi 5V you do want to go 'Pi 5V to Uno 5V.

But the 3A buck regulator would be a better way to go and power both boards from it.
You'd need to add a barrel receptacle or equivalent for a 12VDC wall-wart, but you have the room.

fwiw, I use a ton of MPS buck and dual-buck regulators (mostly because Intel ended up with Enpirion who's buck/dual-buck/triple-buck product line I preferred, but that's another story) and they work well if you pay attention to the placement and routing recommendations.

BUT (and it's a biggie) you'd be signing everyone up for soldering an 8 pin SOIC, and it has a thermal pad underneath that should be solder-bonded to a matching copper fill.
With all the whining about the BSS84 used on my shield design, THAT's going to be interesting :D

Cheers!
 
Status
Not open for further replies.

Latest posts

Back
Top