
OP
OP
FuzzeWuzze
I Love DIY
After about a year hiatus I brewed up my first batch and fired up my DIY BrewPi fermentation chamber. That batch fermented as expected and the fermentation chamber ran as expected.
I brewed again over the weekend and was surprised to find my beer temp 10 degrees cooler than it was set for. I thought perhaps I forgot to put the probe in the thermowell, when I got home that night I checked and the probe was in the thermowell. I then decided to stop that batch in brewpi and start a new beer. The temps went back to normal but last night it looks like things went crazy and my beer temps hit almost 80 degrees F.
Interesting, can you get a zoomed in shot of the "broken" timeframe? Its hard to see what the fridge/heater along the bottom are doing at such a zoomed out timescale its just a mash of blue and red.
Also where is your fridge probe? You can see during the bad time that the fridge setting is set low where it should be(so i dont think its a software problem), but your fridge is not getting the fridge temp anywhere near where it wants it so it just keeps cycling trying to get it down.
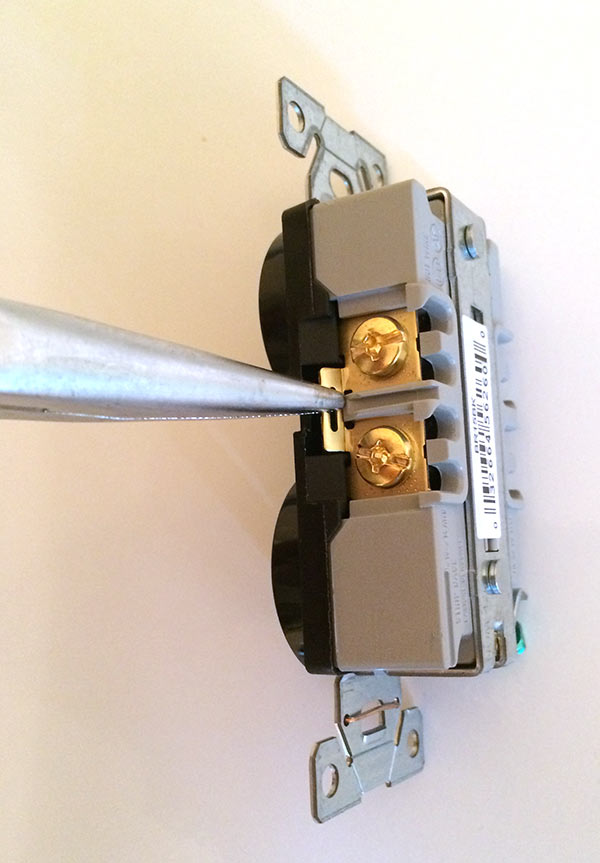
Cant tell why though without a zoomed in shot. Is it possible that you actually wired both outlets together(didnt break the tab)? So both your heating and cooling are running at the same time keeping the fridge from doing its thing?


")


