HOWTO - Make a BrewPi Fermentation Controller For Cheap

Homebrew Talk - Beer, Wine, Mead, & Cider Brewing Discussion Forum

Help Support Homebrew Talk - Beer, Wine, Mead, & Cider Brewing Discussion Forum:

This site may earn a commission from merchant affiliate links, including eBay, Amazon, and others.
Status
Not open for further replies.
Do you have a handle on why this does not work on the RPi 2?

While I've read that there is supposedly some potential for incompatibility, everything I've coded and everything else I'm running works perfectly on the 2. Kind of curious about this.

Also curious about why a supposed "One Wire" device is incompatible with the Dallas spec...

Cheers!

huhmm Well I haven't really read through this whole forum so maybe I'm missing exactly what incompatibility you're referring to since I'm running everything on a RPi2 and it's working just fine. The only reason I thought people might not be able to access the page is due to the fact that I'm currently still testing it and finishing up housing it all in its permanent home and possibly some compatibility issues with certain web browsers since I've only ever used chrome to verify that everything was working.

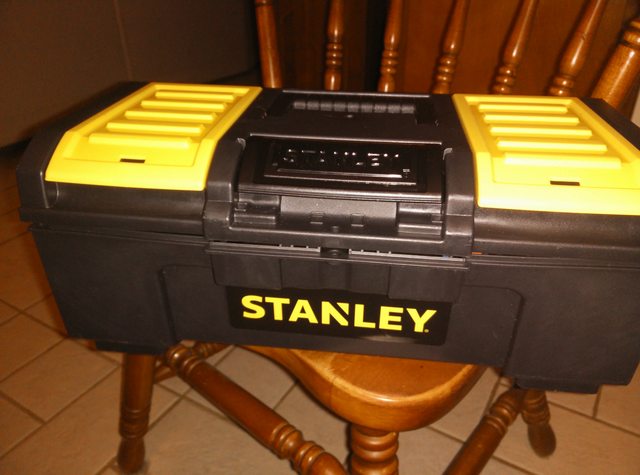
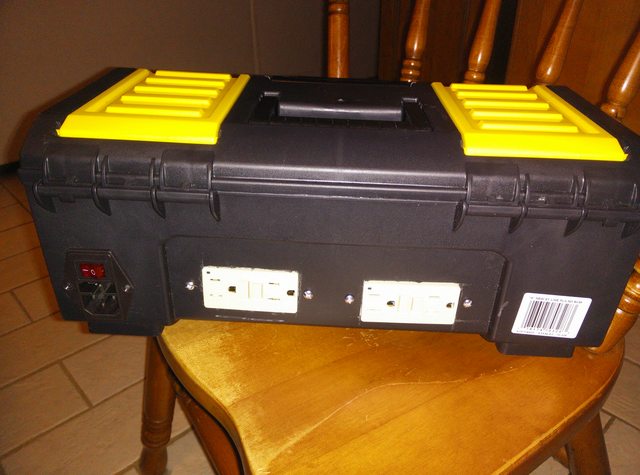
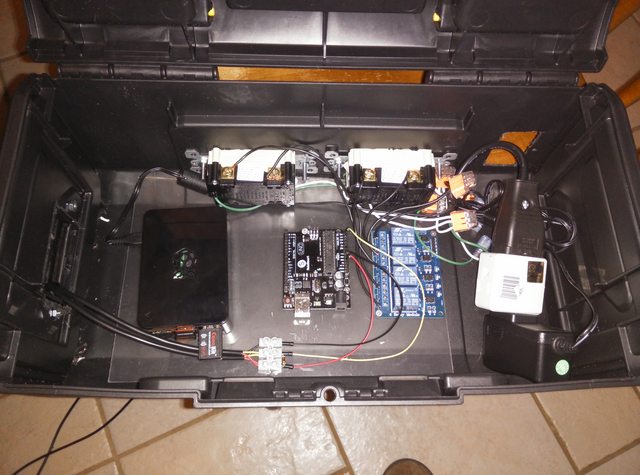
I tested it on the actual heater and chest freezer today to make sure everything was good to go before I started cutting in to my enclosure. The RPi 2 worked great as far as I can tell and I feel confident I can button her up as soon as I get my hands on a dremel or some such tool.

As for the one wire issue these temp sensors are my first dive into one wire communication. My understanding is that "1-wire" is proprietary to Dallas and that the drivers are free for those of us programming, but perhaps that the use of the protocol may not be allowed for other companies manufacturing competing devices. Perhaps another company has a protocol which requires the same amount of wires, but uses a different communication protocol. As for me my temperature sensors seem to be working great and I didn't have any difficulties getting them to sync up.

Sorry I couldn't be of more help, but I'm just not familiar enough with what exactly the issue is you're talking about since I haven't heard of it or personally had issues with it as of yet.
 
From what I can remember reading it's totally possible. I believe it requires adding like one extra line of code, but they opted to not go that route because they were limited on memory and needed every bit. As far as the temp sensors go anyway. There is code in there to run the ds2413 and that device only operates on parasitic power as far as I can tell. Perhaps the connection is more stable with the extra power line. But seeing as how some of their devices have a direct power leg and others like the ds2413 don't, kinda points to the fact that perhaps those devices actually have a legitimate need for the separate power leg.
 
huhmm Well I haven't really read through this whole forum so maybe I'm missing exactly what incompatibility your referring to since I'm running everything on a RPi2 and it's working just fine. […]

Whoops. My bad, wrong thread. I somehow conflated your post with the "cellar warden" thread where the author stated his project won't work on the RPi 2 and his humidity sensor needs its own 1-wire bus.

Carry on....

Cheers!
 
From what I can remember reading it's totally possible. I believe it requires adding like one extra line of code, but they opted to not go that route because they were limited on memory and needed every bit. As far as the temp sensors go anyway. There is code in there to run the ds2413 and that device only operates on parasitic power as far as I can tell. Perhaps the connection is more stable with the extra power line. But seeing as how some of their devices have a direct power leg and others like the ds2413 don't, kinda points to the fact that perhaps those devices actually have a legitimate need for the separate power leg.

From the DS18B20 datasheet:

In parasite power mode, the 1-Wire bus and CPP can provide sufficient current to the DS18B20 for most
operations as long as the specified timing and voltage requirements are met (see the DC Electrical
Characteristics and AC Electrical Characteristics). However, when the DS18B20 is performing
temperature conversions or copying data from the scratchpad memory to EEPROM, the operating current
can be as high as 1.5mA. This current can cause an unacceptable voltage drop across the weak 1-Wire
pullup resistor and is more current than can be supplied by CPP. To assure that the DS18B20 has sufficient
supply current, it is necessary to provide a strong pullup on the 1-Wire bus whenever temperature
conversions are taking place or data is being copied from the scratchpad to EEPROM. This can be
accomplished by using a MOSFET to pull the bus directly to the rail as shown in Figure 4. The 1-Wire
bus must be switched to the strong pullup within 10µs (max) after a Convert T [44h] or Copy Scratchpad
[48h] command is issued, and the bus must be held high by the pullup for the duration of the conversion
(tCONV) or data transfer (tWR = 10ms). No other activity can take place on the 1-Wire bus while the pullup
is enabled.
The DS18B20 can also be powered by the conventional method of connecting an external power supply
to the VDD pin, as shown in Figure 5. The advantage of this method is that the MOSFET pullup is not
required, and the 1-Wire bus is free to carry other traffic during the temperature conversion time.
The use of parasite power is not recommended for temperatures above +100°C since the DS18B20 may
not be able to sustain communications due to the higher leakage currents that can exist at these
temperatures. For applications in which such temperatures are likely, it is strongly recommended that the
DS18B20 be powered by an external power supply.


Summary: when doing a temperature conversion, the sensors are more power hungry. If you do not provide a strong pullup (mosfet), they will be unreliable. A 4k7 resistor is not a strong pullup, espescially with multiple sensors on the bus.

The result is that the sensors are found in a OneWire search and show in the device manager, but as soon as you do a temp conversion, they fail.
Also note that around boiling temperatures, the sensors are unreliable at parasite power.

For this reason, we detect when a sensor is on parasite power and decide not to show it in device manager. This is usually caused by a loose 5V line and not on purpose.

The sensors have 3 wires, why not just connect the third one to 5V for increased reliability?

We recently refactored the whole OneWire code to be faster and more reliable. This is running in the latest Spark release, but I still have to finish it for Arduino. A new Arduino release will come. We set up the new repository to compile for both the Spark and the Arduino.
 
[...]The sensors have 3 wires, why not just connect the third one to 5V for increased reliability?[...]

Never mind "increased" reliability. How about just "basic reliability".

I've never understood why there even is a parasitic mode. WTF, just to save one trace in a connection - at the expense of questionable functionality?

I'd certainly never use it, but I have a long history of going in the totally opposite direction...

Cheers!
 
Have had the electronics for a bit - except the temperature sensors. FYI - ordering the cheap ones from China - not worth the shipping delay to save $5.

Got the most of the rest of the parts for my build and started today but the wiring took a lot longer than I had hoped - it always does. I'm setting mine up so that its wired to take a second Arduino Uno and run a second set of outlets if I get the chance (in the winter I can run a heater/blanket with no cooler in the basement since it gets down to 40-45F down there.)

Still pissed that the R-Pi 2 was launched the day after my kit shipped. Anyone tried running Raspberry Pints and BrewPi on a B+?

Will post up when I'm done.
 
Never mind "increased" reliability. How about just "basic reliability".

I've never understood why there even is a parasitic mode. WTF, just to save one trace in a connection - at the expense of questionable functionality?

I'd certainly never use it, but I have a long history of going in the totally opposite direction...

Cheers!

I'd assume there is some industrial application that would want this, what it is i dont know but what we use the sensors for is nothing. Maxim IC's as you probably know are used in a lot of very advanced industrial automation.
 
Otoh, marketing can cause engineering to come up with dubious features.

There's no way I'd incorporate an access method that saved me five cents at any cost of dependability...

Cheers!
 
On the scale of industrial production 5 cents is a lot. I'd bet the difference is so marginal you'd need a microscope just to see the difference in the stack of money.
 
hey everyone! I've got everything all wired up and installed and I'm to the point of setup my sensors and relays up in "Device Configuration" it shows my devices and i can see were my probes are showing a temp. But when I go to apply the settings it won't send it to the "Installed Devices" part.

Any insight would be amazing!!
 
I've tried that a couple times and a no go. I've even tried redoing the UNO and still a no go.
 
I'm having the same problem. I can see the devices and their values, I can assign them and the LCD displays the temps after I hit apply, but when I refresh the devices it just blanks everything back to default and I dont show any installed devices.

Using a Pi 2 and sainsmart uno
 
I'm having the same problem. I can see the devices and their values, I can assign them and the LCD displays the temps after I hit apply, but when I refresh the devices it just blanks everything back to default and I dont show any installed devices.

Using a Pi 2 and sainsmart uno

I had the same issue and if I'm not mistaken my issue had to due with not properly assigning the sensor to a chamber or a beer. Make sure all your sensors are assigned to chamber 1, your beer temp sensor is assigned to beer 1, your chamber(fridge) and room sensor are assigned as a chamber device.
 
Yeah same here. It'll show probe temps in the LCD but I'll never show it under installed devices and when I refresh It goes back to the default setting.
 
Here are the settings that work on mine:

004BrewPi.JPG

006BrewPi.JPG

All the fields have to be set properly or they will not install.
 
Could you help me with my brewpi? For some reason today the graph decided to get all jacked up and I can't for the life of me figure out how to get it back to normal. It looks like it is logging from the day I setup my brewpi. I can zoom in and see today, but that's not right.

Thanks for taking the time any help is appreciated!

Bryan
View attachment ImageUploadedByHome Brew1426554910.170937.jpg
 
Thank you for the visual. I was assigning all temp sensors to Beer 1. I tried assigning all devices except Beer Temp to Chamber Device and still the same symptom.

I started over with a fresh SD image of Rasbian and reinstalled Brewpi from scratch, swapped USB cables, and cleared the EEPROM with the Arduino connected to my laptop. I noticed the following errors when flashing the Arduino through the Brewpi webpage, after those steps. I'm thinking that may be part of my problem? I don't know where to look to correct it though...

Capture.JPG
 
Despite the python error the last line does indicate that the Arduino was flashed with the hex file, you should be good to go on that front.
 
Alright, so I finished my box to about 90% completion this evening - went to turn it on annnndddd... my DPDT Power Entry Module Switch was broken - one of the poles doesn't contact when the switch is "On" Grrrrr... Opened an Amazon ticket to get a replacement.

So here is my box from the front. Yes, its ugly, but it was $10. Job boxes are expensive!

00O7KCal.jpg


Setup for two Arduino Uno's to control two GFCI outlets.

YMq4Cn6l.jpg


"Brushed" pass through panel that will allow me any number of temperature probes, an HDMI cable, and whatever else I need to stick in there.

qAObUuml.jpg


Internals. Need to tie down the Pi case. The four relay module was $1 more than the two relay module. Have plenty of space to put another Uno in there. In addition to running White/Ground off the Power Entry Module, I pushed the wires to a female outlet and a 3 outlet breakout - which I can use to power the Pi and Arduinos. Wiring is a little messy but I used 3 port In-Sure push in wire connectors, accommodating 12-20 gauge wires since I had so many AC connections, and I don't have much more patience to clean it up at this point in time.

4nXlZrRl.jpg


Still don't have it up and running with the temperature probes so I don't know if I have the wiring correct. Can't wait!
 
Thank you for the visual. I was assigning all temp sensors to Beer 1. I tried assigning all devices except Beer Temp to Chamber Device and still the same symptom.

I started over with a fresh SD image of Rasbian and reinstalled Brewpi from scratch, swapped USB cables, and cleared the EEPROM with the Arduino connected to my laptop. I noticed the following errors when flashing the Arduino through the Brewpi webpage, after those steps. I'm thinking that may be part of my problem? I don't know where to look to correct it though...

The errors may have resulted from trying to Restore Settings while not actually ever having a valid configuration to save. For now, I would not worry about this.

An aside, fwiw: some things that mysteriously don't work suddenly do after running the /home/brewpi/utils/fixPermissions.sh script. It should be run once after the package installs are completed, but it can be run any time, even if you just get the urge - it's non-disruptive.

Otherwise, I would assign one device to begin, then refresh the Device list and verify it "took".

- Start with the Beer temperature probe.
- Set its Device slot to 0.
- Set the Assigned to immediately to the right to Chamber 1.
- Set the other Assigned to to Beer 1.
- Set the Function to Beer Temp.
- Click Apply.

Now click Refresh device list. Device 0 should appear in the Installed Devices list with all other devices still in the Detected devices list.

If that took, repeat for the next device, etc...

Cheers!
 
Could you help me with my brewpi? For some reason today the graph decided to get all jacked up and I can't for the life of me figure out how to get it back to normal. It looks like it is logging from the day I setup my brewpi. I can zoom in and see today, but that's not right.

Thanks for taking the time any help is appreciated!

Bryan
View attachment 264199

Can I get some love, this is driving me nuts!

Thanks!
 
Can I get some love, this is driving me nuts!

Thanks!

At first glance it looks like your clocks messed up. Did your pi lose power or anything? I'd just stop logging on the Coastal Wheat and start a new one, maybe Coastal Wheat II.
 
Can I get some love, this is driving me nuts!

Thanks!

My guess is that you already did a Coastal Wheat beer back in July/August, so when you named your new beer file the same thing it is just appending to your old data logs.

I typically timestamp my beer names on the day they start like Homegrown IPA 031715 for example if i brewed today.
 
Can I get some love, this is driving me nuts!

Thanks!

As smart as some of these guys are, the image alone doesn't provide enough information. Have you taken a look at the error logs?

If you started a new brew with the same name as one you brewed last year it may cause problems. I would also start a new brew with a different name to see if it helps.
 
So I went back and tried some of the different tricks stated and still nothing. I even went back and reinstalled Rasbian and BrewPi as well and still nothing.

This is what I get when i try to install the device, I see that the probes have a value and even when I hit apply it'll show the temp in the LCD but just won't install once I refresh.

This is what it looks like and the code thats displayed...

Screen Shot 2015-03-17 at 5.55.09 PM.png


Screen Shot 2015-03-17 at 5.55.25 PM.png


Screen Shot 2015-03-17 at 5.55.39 PM.png
 
It would appear from that sequence that the Uno is dropping the configuration write transaction on the floor instead of updating its seeprom.

I don't think I've had that happen.

You might try uploading the rev C hex file again, only this time click off both of the "restore" functions. I think avrdude will wipe the serial rom...

Cheers!
 
My guess is that you already did a Coastal Wheat beer back in July/August, so when you named your new beer file the same thing it is just appending to your old data logs.


I typically timestamp my beer names on the day they start like Homegrown IPA 031715 for example if i brewed today.


10 thumbs up, that was it. Thanks so much!!!!!!!
 
when i uploaded the HEX file i had both restore functions checked for "NO". I've tried reloading it several times lol.
 
I'm having the same problem as Amartel916. I tried adding just the beer probe to Beer 1 as device 0 and had the same, non-save-after-refresh condition. The LCD displays the temp though.

Tonight I downloaded the Rasbian image from the raspberrypi site (I had used the included NOOBS before), checked the hash, reimaged my SD, patched with the apt-get update/upgrade, and rpi-update, left everything as default, including using wired network and not installing tightvnc. Then installed brewpi, including installing pip and upgrading pyserial and psutil in order to start the script. As part of the total reset process, I also plugged the arduino into my laptop, loaded the blink sketch, and then cleared EEPROM to ensure it was clear. I also took all my wiring apart and rewired. I loaded brewpi-uno-revC.hex from the brewpi page, and didn't restore settings or devices. I then added my devices, hit refresh and nothing saved. I then rebooted the Pi, reflashed the hex file, not restoring settings or devices, and added my devices again. This time I only clicked apply and not refresh. The LCD updated and I was able to successfully run a cooling and a heating cycle (including power to the outlets) based on a fridge constant profile. I went back to device configuration, hit refresh and had no installed devices, even while it continued to heat! After I saw I had no installed devices, I closed the settings, turned the profile to off and when I clicked apply, the relay clicked off. I don't get it.

Where can I find the logs?

heating.png


no devices.png
 
Status
Not open for further replies.
Back
Top