HOWTO - Make a BrewPi Fermentation Controller For Cheap

Homebrew Talk - Beer, Wine, Mead, & Cider Brewing Discussion Forum

Help Support Homebrew Talk - Beer, Wine, Mead, & Cider Brewing Discussion Forum:

This site may earn a commission from merchant affiliate links, including eBay, Amazon, and others.
Status
Not open for further replies.
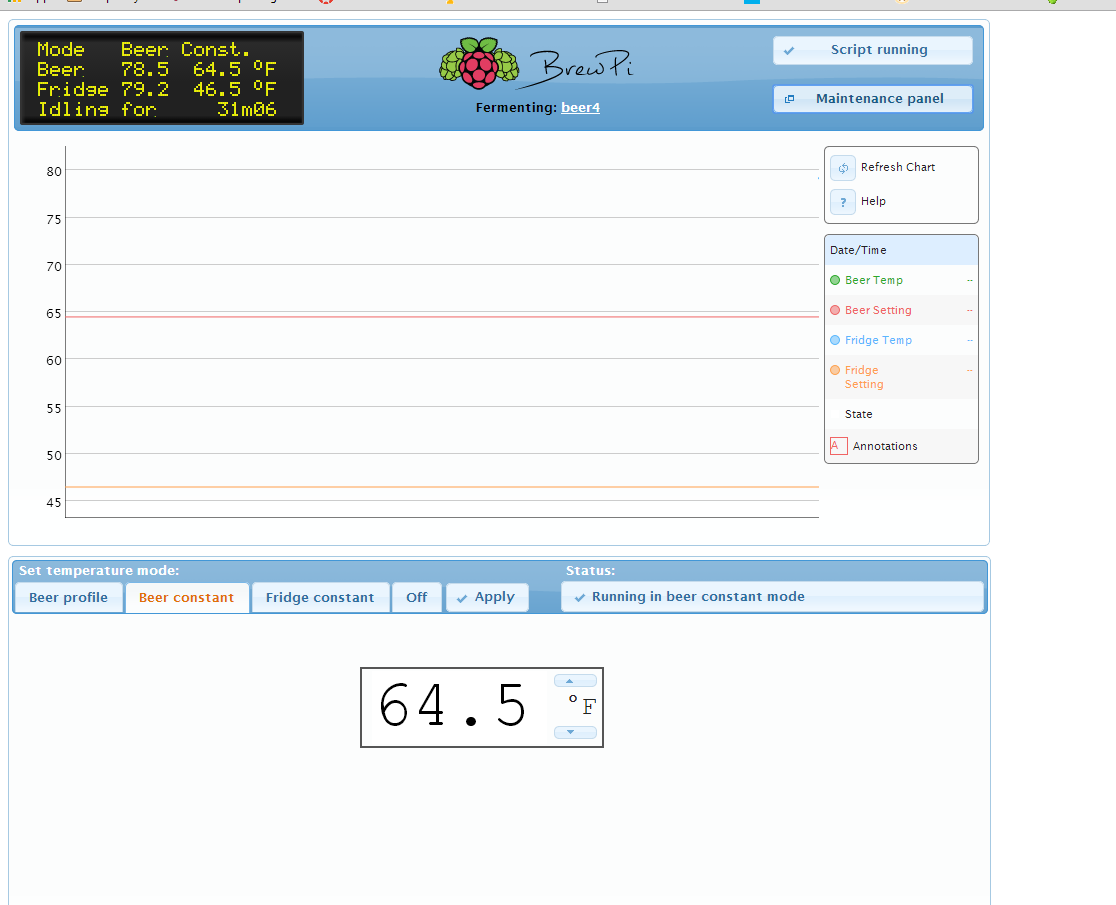
Don't panic, you're actually almost there.

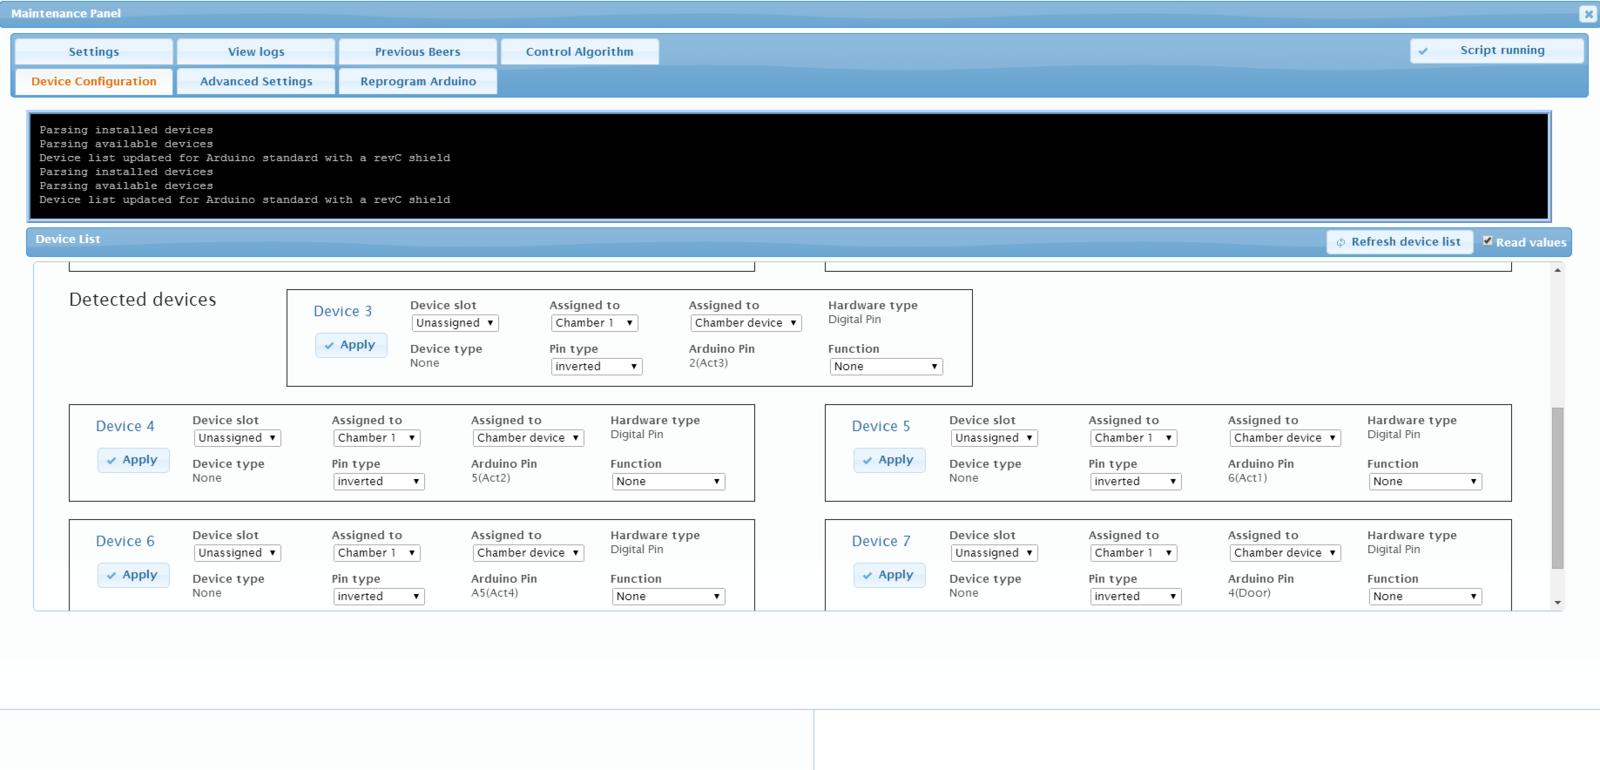
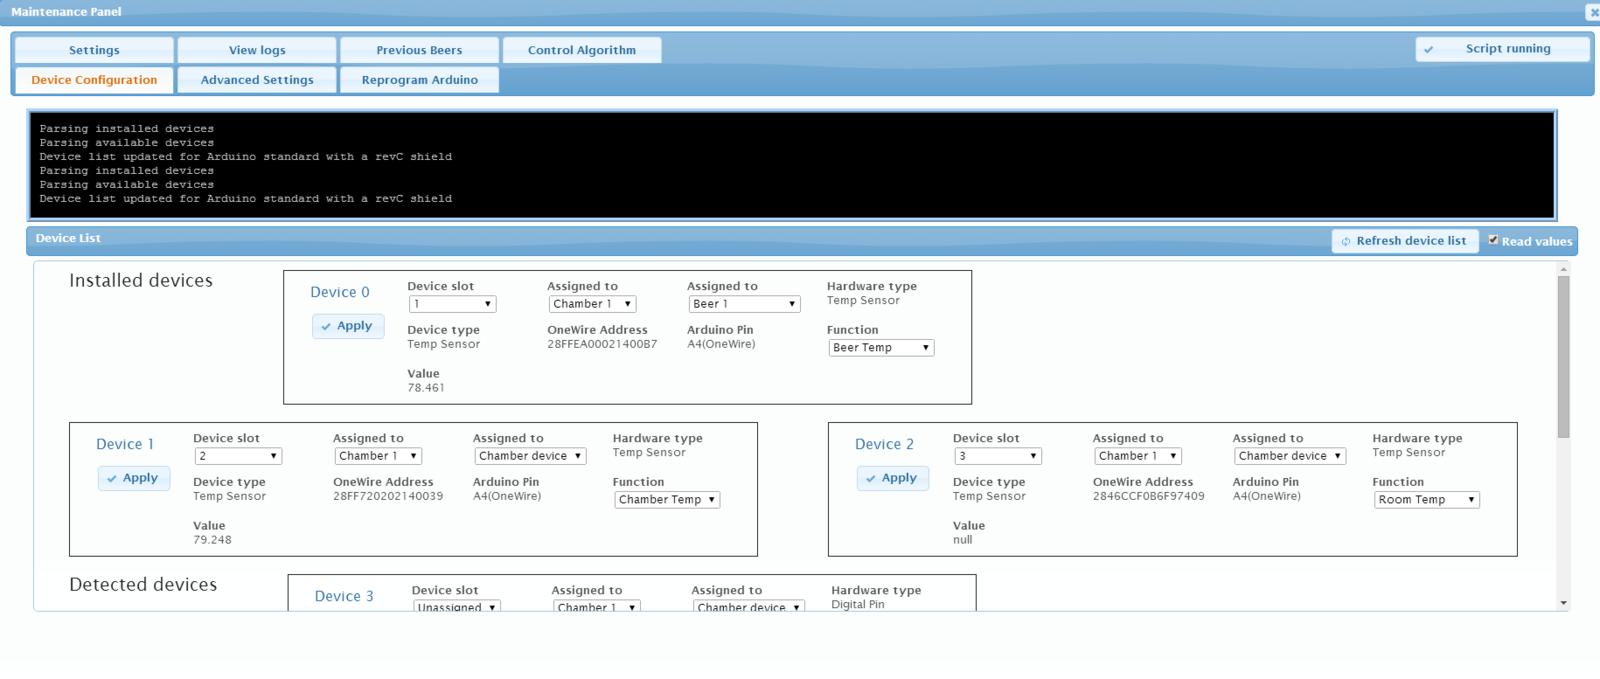
You're looking at Maintenance Panel - Device Configuration, and you see the Detected Devices. You can see two One-Wire devices, so BrewPi is seeing two temperature probes.

You just need to assign each real Detected Device to a Slot; for the probes, set the left "Assigned to" to the default Chamber (1); then if the probe is measuring the Beer temperature assign it to Beer 1, if it's for the air temperature inside the chamber assign it to Chamber device; then set the Function (Beer Temp vs Chamber Temp for probes).

Then hit Apply, click the Refresh Device list, then go to the next Detected Device, repeat...

Cheers!

Thanks I now have data. Now to get the power to turn on.
 
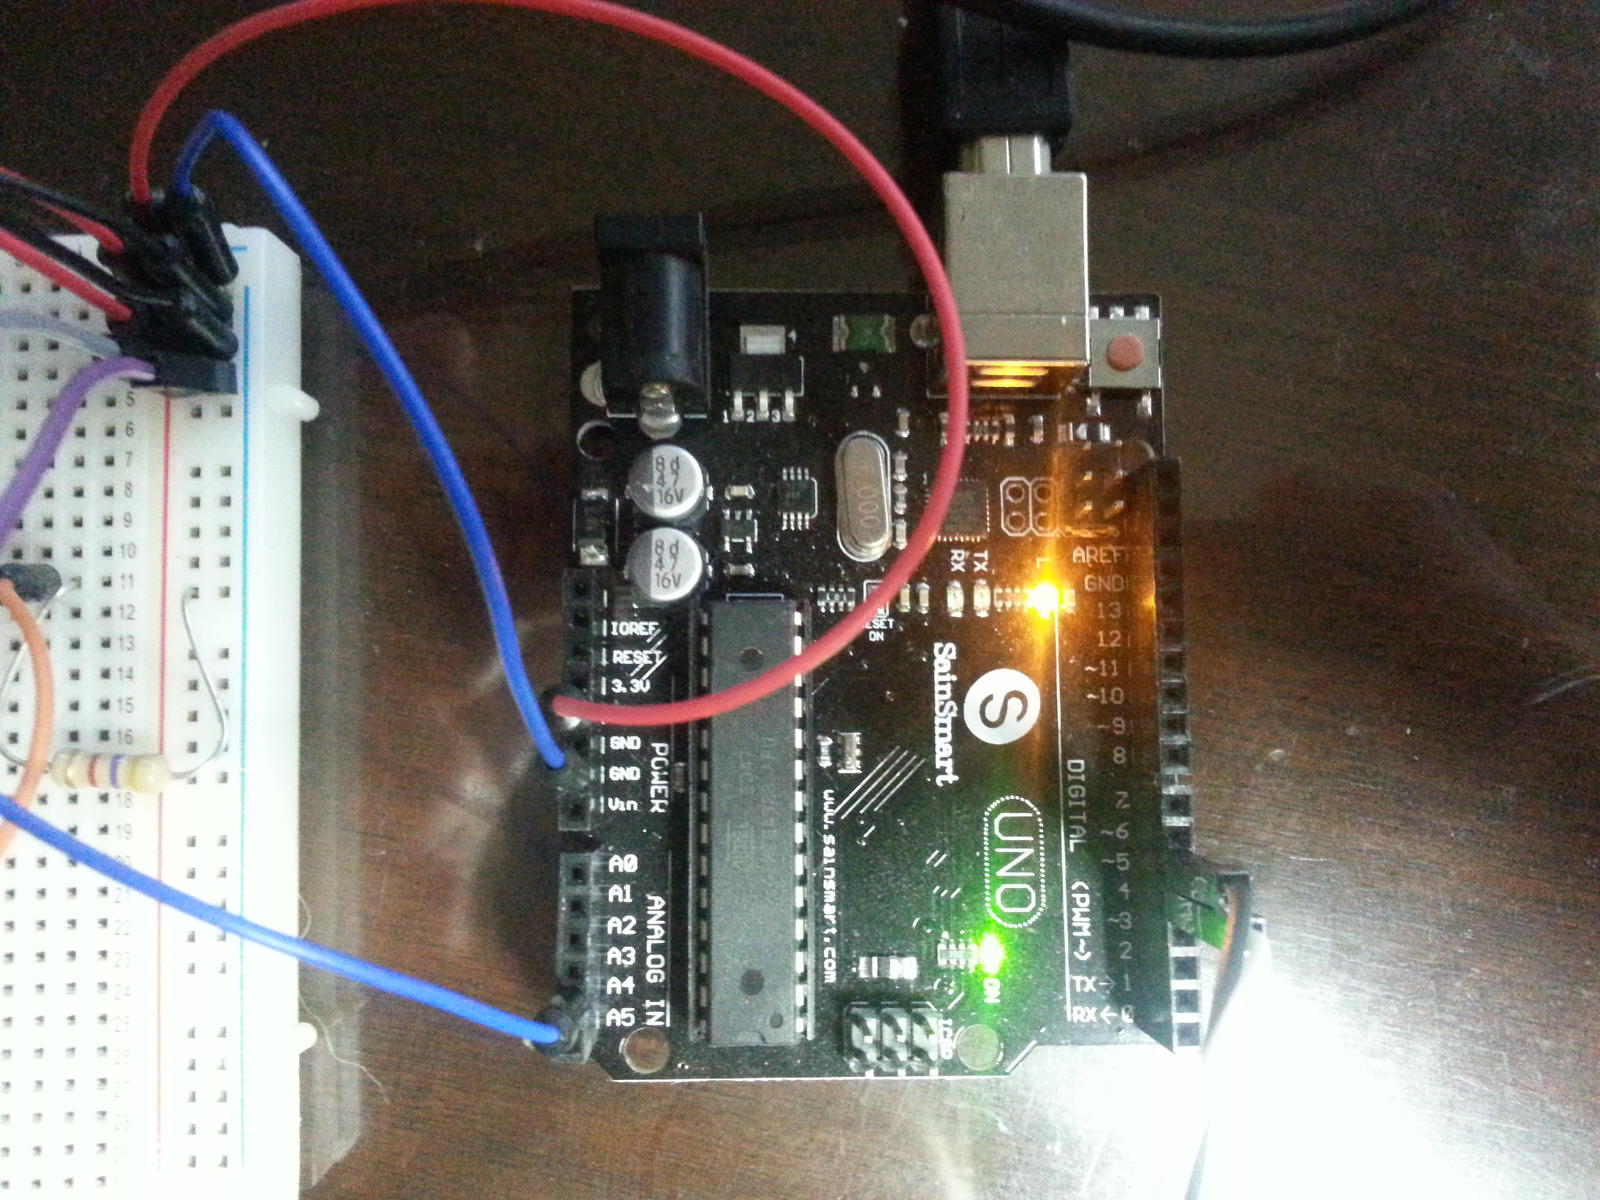
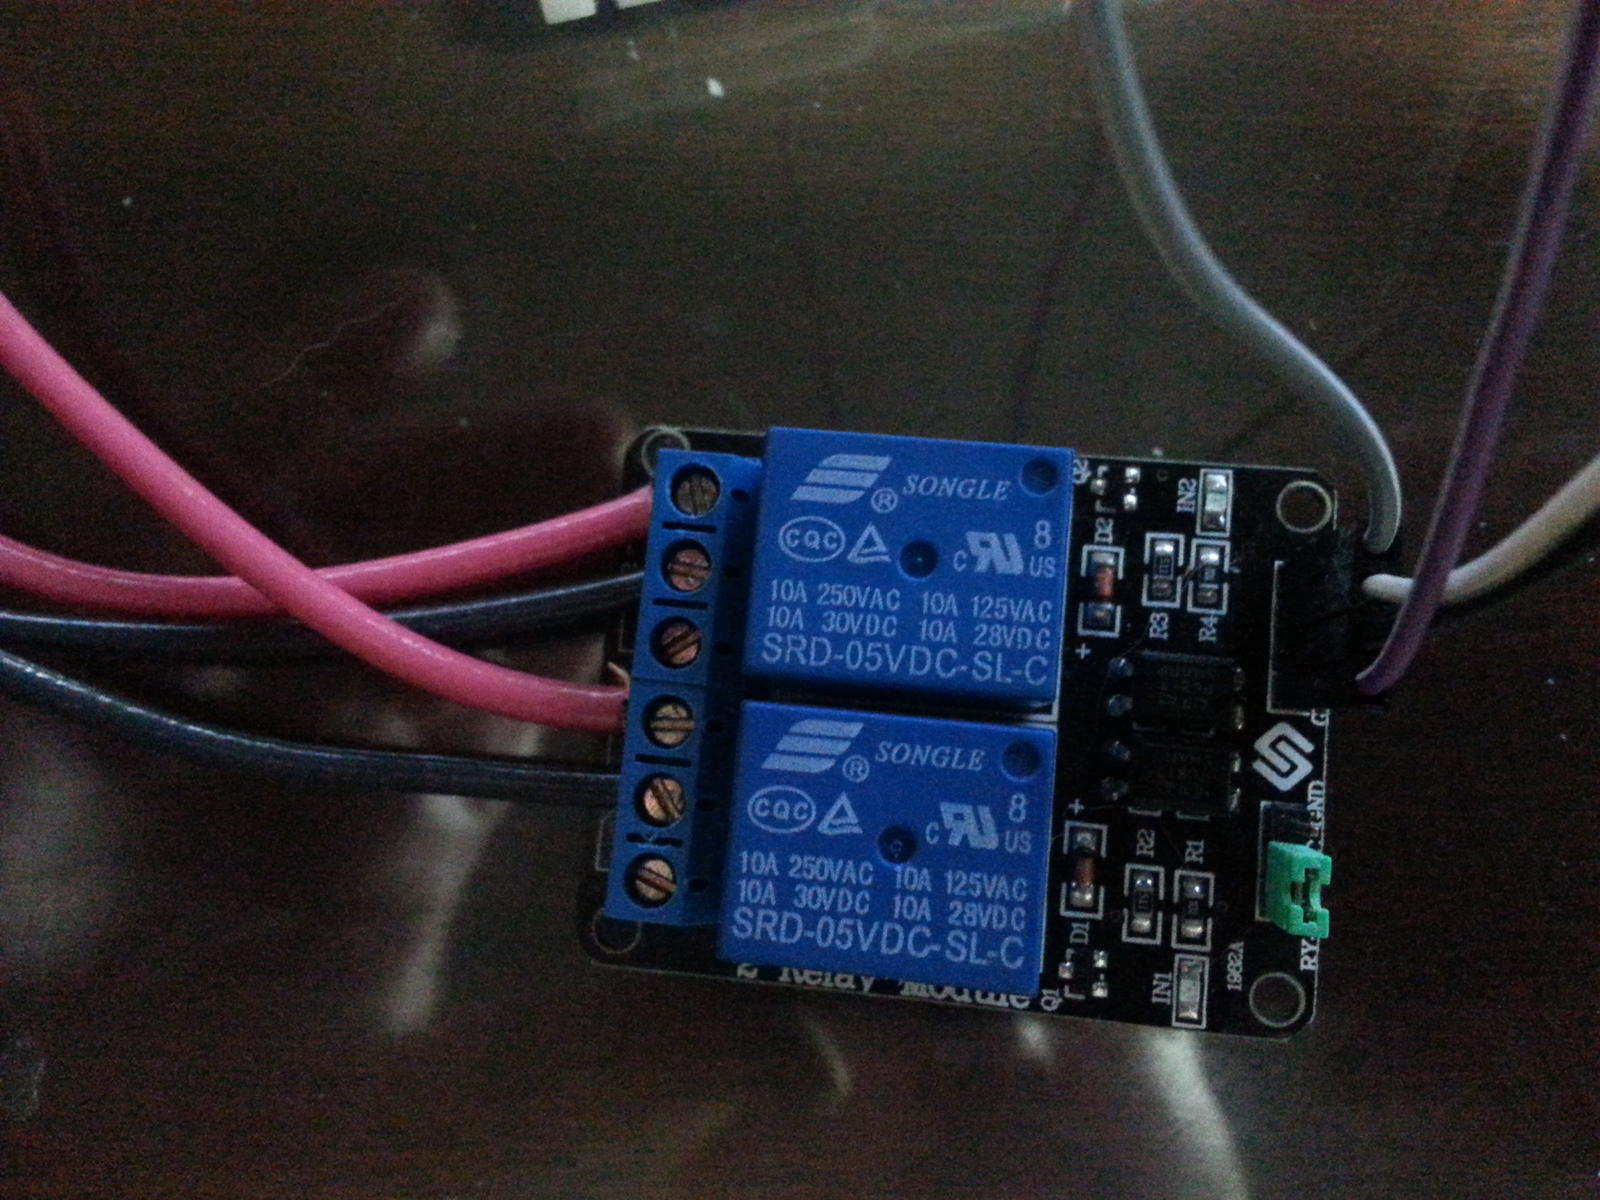
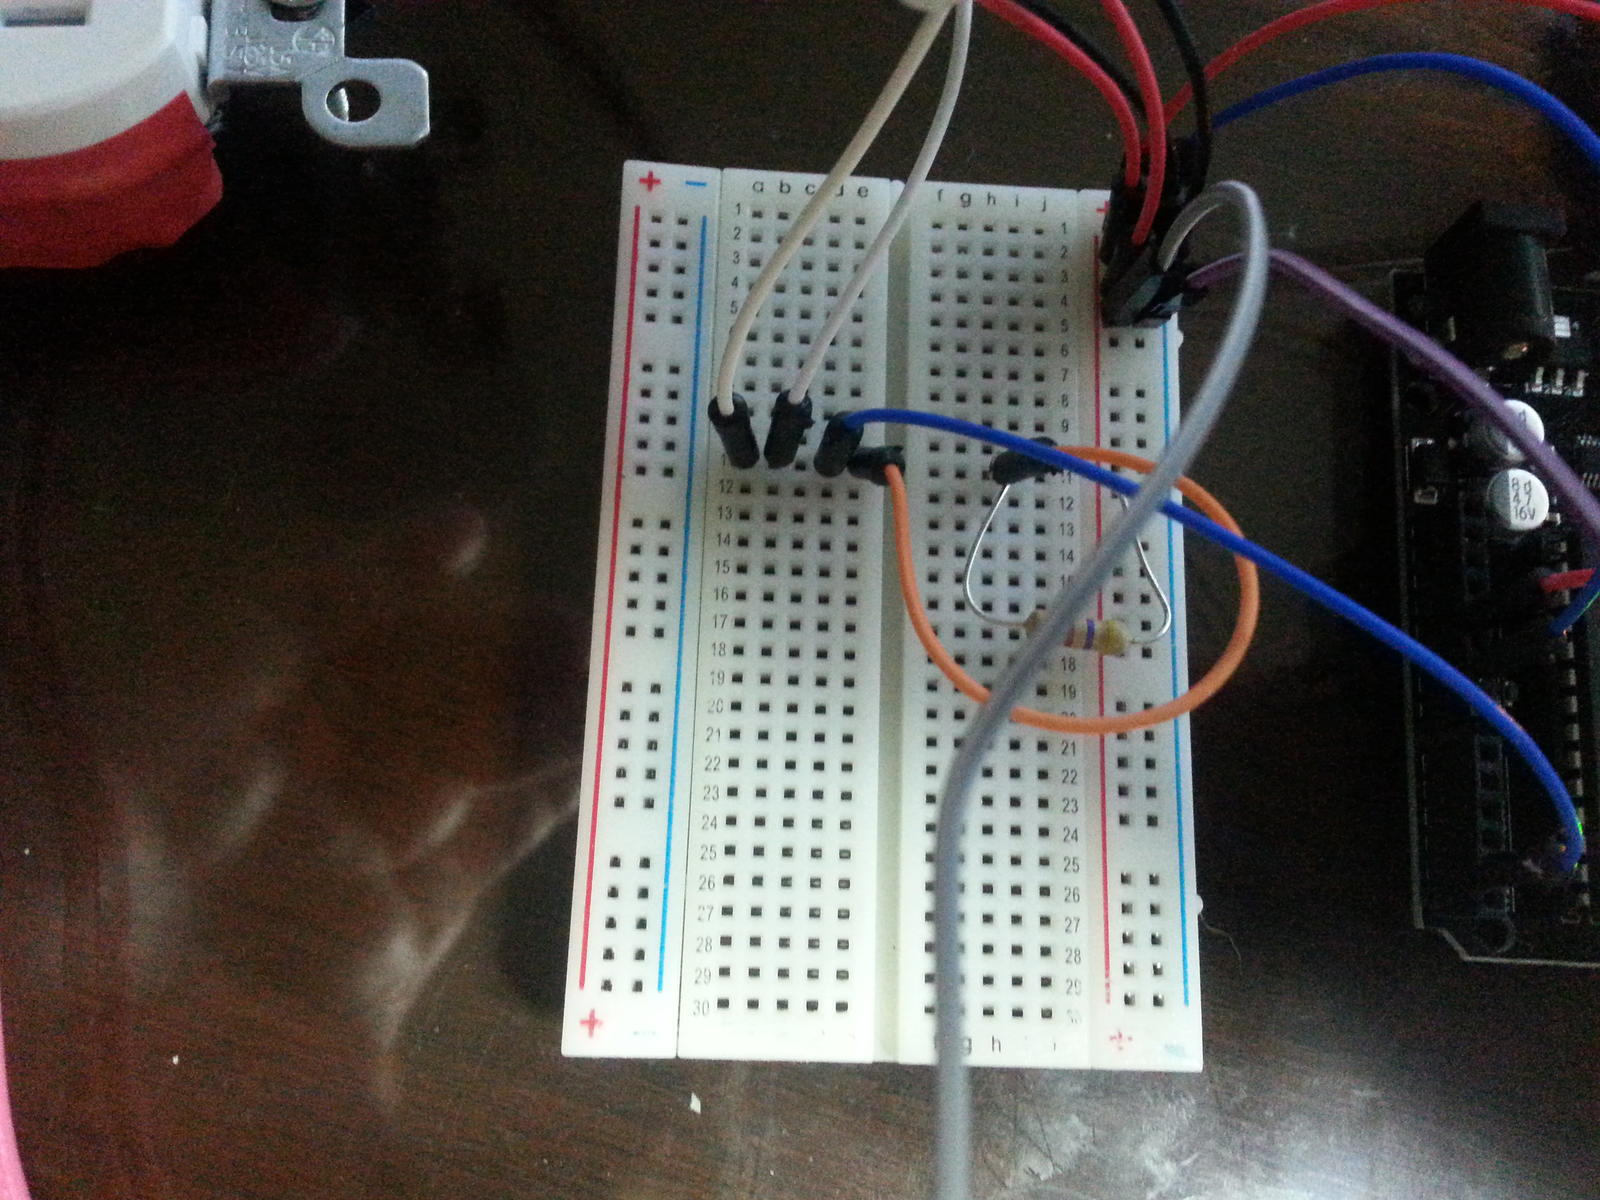
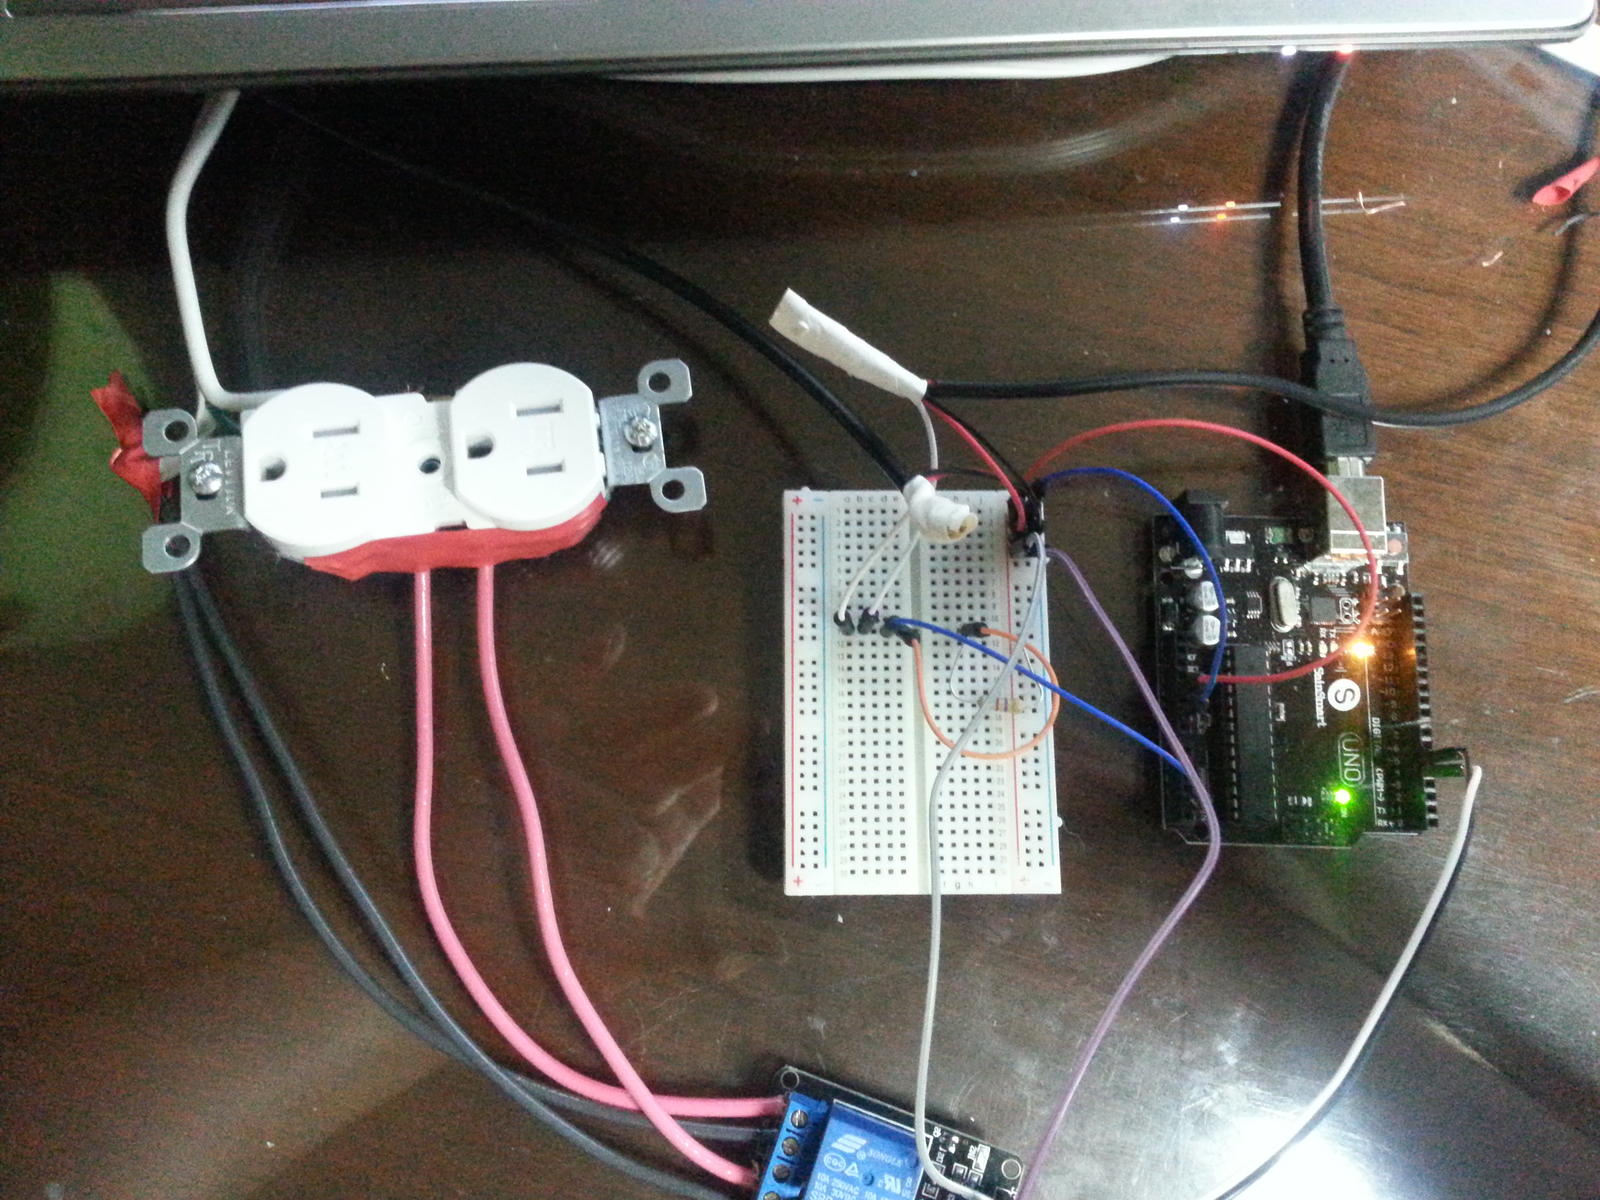
I now can tell you it is hot in the house. my next question is to ask if there is an easy way to tell if a relay is shot. I have it wired vcc to 5v on the breadboard ground to ground on breadboard in1 to 6 on the uno and in2 to 5 on the uno. should i be getting lights on the relay? also I am not seeing switch actuator in the settings on the device list.

20140825_190431.jpg


20140825_190424.jpg


20140825_190419.jpg


20140825_190411.jpg
 
Ok question one answered Thanks. Rules out one possibility. any idea what i may be doing wrong. Here is what I see in the control pannel Thank You

Capture3.PNG


Capture2.jpg


Capture1.jpg
 
can you confirm you are in 5 and 6 on the arduino? when i blow up the pic it looks as though you in 5 and 4 but it could be the angle.
 
damn i was hoping that after you made that switch that it would show up as two switch actuators. like i have pictured above. you may have to wait for a better trouble shooter to get on the forum. sorry
 
It bears repeating: none of the actuators in the Detected Devices list are actually "detected". They are hard-coded to appear in the Detected Devices list. The only devices that are actually "detected" are the One-Wire temperature probes - mostly because they're the only intelligent devices in the entire constellation. You can't detect the presence of the opto-couplers on relay boards, so the BrewPi folks didn't bother; they just hard-coded them.

You could connect a bare ass nekkid Uno and install BrewPi and the gui would still show every actuator available in the program in the Detected Devices list...

Cheers!
 
Where did you guys get your 4.7K resistors from? Got my amazon cart all together for this bad boy.

You answered your own question, sort of. :)
If you like doing these type of projects or you anticipate doing more like this in the future just add one of the many resistor kits sold on Amazon to your cart.
I purchased one of the Joe Knows Electronics resistor kits and I have enough resistors to last me the rest of my life.
There are a ton of different kits available of varying quantity and price.
 
Last edited by a moderator:
STC-1000 crapped out.

Hoping to build this over the weekend! :ban:

Looks like this would be a great introductory project toward automating an eBrewery.
 
Resistors don't matter. I bought the 5% ones when I started but then my ds2413's came with 20% ones and they were smaller so I just soldered them to the bottom of my arduinos
 
Ive seen the kits out there but is there specific specs for the 4.7K resistor we need to follow, aka wattage, etc?

I don't think it matters that much unless you are using the resistors at their max power rating. I plan to grab some 1/2 watt ones from radioshack for a buck on my way home from work.
 
Back of the envelope calculations:

V=IR (Voltage = Current * Resistance)

P = VI = V^2/R

If we assume that we're sinking the full 5 V over the resistor, the maximum power dissipated by the resistor is

P = V^2/R = 5^2/4,700 = 0.0053 W

The power ratings on the resistors are for the max power, so anything you buy will be fine.

Also, it's just a pull-up resistor to keep the data line from floating. 4.7K is the recommended size, but something close will work just fine as well. I haven't tested the limits but I'd guess anything from 4.5K to 5K wouldn't be a problem at all.
 
Yea power shouldnt matter, I only went with a higher wattage(1/2W) because thats what Radio shack near me had.
 
FuzzeWuzze said:
Here is an alternative Schematic that the awesome 100Amps here on HBT made up that he has given me permission to post here. Gives a good setup using the block connectors to hook everything together rather than twist caps. The only other real difference is a few extra ground connections to the outlet. Technically the relays are grounded through the Arduino to the RPI's ground which would be the same as the wall outlet, but if it makes you feel better its a good idea.


Blush. :eek:

Actually, I removed the additional ground connection from power ground to the relay board ground in that diagram so it's pretty much identical to your diagram. But I left the safety ground showing that would connect to any metal chassis areas. Mandatory in my book, but probably never needed 'cause plastic boxes make way more sense.
 
FuzzeWuzze,

Thanks for this thread. I built one of these last weekend based on the work done here and it was a fantastic and fun project.

I want to contribute by adding my stumbling blocks in case it can help anyone in the future. I was using a Windows machine, so I installed virtualbox and created a virtual Debian Wheezy install. Virtualbox refused to pass the USB through. Researching on the net I found that I could treat an Arduino as a serial device so I configured it that way, but I don't recommend this. After solving some access right issues that were required to allow the brewpi user to read and write the the serial device, I was able to flash the arduino and also see that the temp probes were reading temperatures. However after this none of the devices would move from detected to installed. The arduino would return an error everytime (based on the logs).

I installed the free Vmware player, re-installed Debian in the new VM. That passed the USB without any problems and all the issues vanished.

Once again, thank you for creating this thread. It made a project with a high difficulty rating simple and well explained!

Cheers!
 
I use oracle vm for my test system. Got Debian wheezy running under vm in windows. I have had no problems getting the USB to pass through. Sometimes I do have to disconnect and reconnect the USB devices manually after the vm is running. And I've got multiple arduino a hooked up to it. Are you sure your setting up the USB devices before you start the vm?
 
Yes I'm sure, and after looking into it, a lot of people seem to be having the same issue with Arduino's and Virtualbox USB passthrough. (Yes I installed the tools).

Glad it worked for you though.

Edit: Just wondering, have you tried it with an Arduino and if so what model? Mine was an Uno.
 
I've got 3 UNOs working in a vm. And I haven't installed the tools yet.
 
Well I moved one of the UNOs off the vm yesterday but I still have 2 hooked up. Here are some screenshots of my vm settings
ImageUploadedByHome Brew1409138214.569955.jpg
ImageUploadedByHome Brew1409138224.494259.jpg
ImageUploadedByHome Brew1409138234.356004.jpg
 
Just got mine up and running, but a question as it seems there is no user manual for BrewPi, just lots of instructions. I haven't read every post, but figured I'd ask while posting a pic of my build.

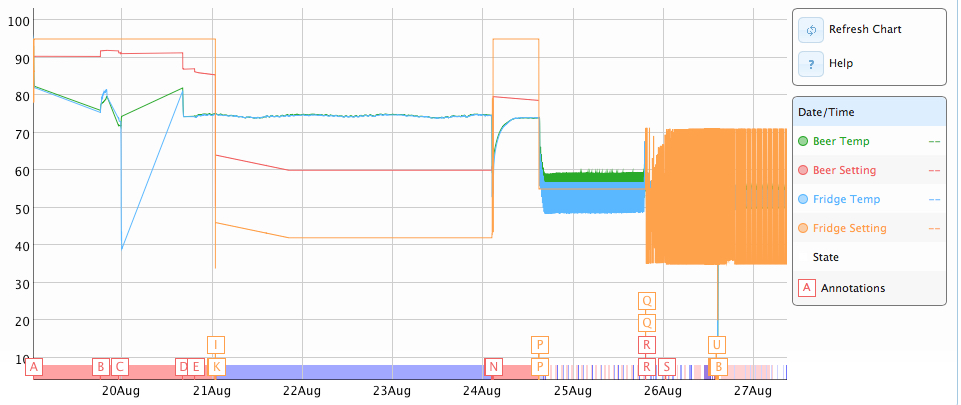
I assume the fridge swing in this chart from 70 to 35 is just to ensure on/off, and that there is nothing wrong at this point. I noticed the OP has the fridge setting turned off in his pic.
attachment.php


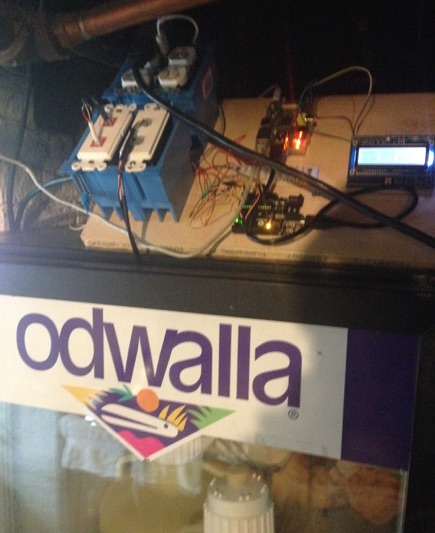
So here is my build. The electronics sit on top of the odwalla fridge and can accommodate (without heating element) four of my carboys for a 20g ferment. The switched outlets are accompanied by a second outlet that has built-in USB ports which power the Pi and will eventually power the Uno. Two additional temp sensors for ambient and outdoor temps are connected direct to the Pi. I had a 2x16 LCD from Adafruit kicking around so I wrote some python to grab the output from the Uno LCD and parse it into something useful on 2x16. A cron job runs every minute to update it. PM me if anyone wants the code.

attachment.php


fridgeswing.jpg


chamber.jpg
 
Are those graphs measuring an actual liquid or just the probes inside your fridge or just sitting outside?

Your fridge/heater seem to be cycling on way too often and your beer/fridge temps look like their fluctuating a ton. Thats why the fridge temp is banging up and down because its trying to figure out what temp to set your fridge to to keep the beer line flat, and 35F and 70F are just its lower and upper limits. The limits are set by the PID maximum and its default is 18F(I think) so if your beer setting is 60F, the warmest your fridge will ever try to get is 78F, and the coldest is 42F.

Keeping the PID Maximum small(like 10F) is good for keeping the fridge from overshooting, but it also restricts you if your trying to cold crash. When i want to chill something really fast i set it to something like 30F so when i set my beer to to stay at 33F it can get the fridge way down to 0F to speed up the chilling.
 
Thanks for the screen shots.

I have no idea what the source of the issues were. My settings were fine, but I would get a device is busy error when trying to pass it.

It doesn't really matter to me as I will be running it as a KVM based guest when it is actually in use. The Virtualbox/VMware setup was only for testing.
 
You might have memory issues. Too many proggys running at one time.
 
Hi

Firstly thanks for all the brilliant work with this. I've been looking at BrewPi for a while and collecting the various components but had been hanging out on the shield as it's the most expensive part and I'd enjoy seeing how it all works by putting it together myself.

I'm not sure if this has already been answered as this thread is so long but I have already purchased 2 fotek SSRs and am not quite sure how to wire them up instead of the 2 channel relay board. I know people have questioned the reliability of these devices but I'd like to try them as I have them in hand.

Also I presume it's possible to se up the system with the basic configuration on page 1 of this thread then add the LCD and rotary encoder as per the instructions on page 118 at a later time?
 
Yeah you can hook up the ssr in the same way. But id recommend using at least a diode to prevent any voltage from leaking. I have had a number of foteks fail in me in some weird ways and I just don't trust them.
 
Sorry to sound stupid but what do I connect to each SSR?

I can see the relay has a 5v, ground and 2 connections from the arduino. I presume I need one connection of the arduino to each SSR then the 5v? What about the ground?
 
Are those graphs measuring an actual liquid or just the probes inside your fridge or just sitting outside?

Your fridge/heater seem to be cycling on way too often and your beer/fridge temps look like their fluctuating a ton. Thats why the fridge temp is banging up and down because its trying to figure out what temp to set your fridge to to keep the beer line flat, and 35F and 70F are just its lower and upper limits. The limits are set by the PID maximum and its default is 18F(I think) so if your beer setting is 60F, the warmest your fridge will ever try to get is 78F, and the coldest is 42F.

Keeping the PID Maximum small(like 10F) is good for keeping the fridge from overshooting, but it also restricts you if your trying to cold crash. When i want to chill something really fast i set it to something like 30F so when i set my beer to to stay at 33F it can get the fridge way down to 0F to speed up the chilling.

Thanks - I hadn't yet got my thermo-well, but just did and got it installed.
 
All,

I installed everything per the guide and confirmed I am able to control the actuator by switching from inverted to not inverted on the PIN type.

However, when I do something as simple as set the fridge constant temp to 30 (currently at 55), nothing happens.

Thoughts?
 
The software won't let you go lower than 32f which is freezing. It's a safety measure to keep you from ruining your beer…
 
Status
Not open for further replies.
Back
Top